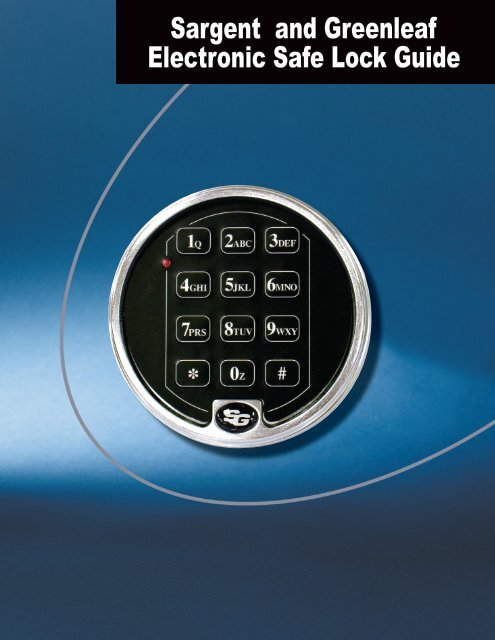
Sargent and Greenleaf Electronic Safe Lock Guide
Sargent and Greenleaf Electronic Safe Lock Guide
Sargent and Greenleaf Electronic Safe Lock Guide

Create successful ePaper yourself
Turn your PDF publications into a flip-book with our unique Google optimized e-Paper software.
<strong>Sargent</strong> <strong>and</strong> <strong>Greenleaf</strong><strong>Electronic</strong> <strong>Safe</strong> <strong>Lock</strong> <strong>Guide</strong>
<strong>Sargent</strong> <strong>and</strong> <strong>Greenleaf</strong> is a company dedicated to providing security. Not just a sense ofsecurity, but real security designed to meet real-world needs. We offer mechanical locks thatdeliver an unbeatable combination of quality <strong>and</strong> value. <strong>Electronic</strong> locks that take control to alevel never before possible. And exit devices that achieve the highest st<strong>and</strong>ard of safety. Since1857, <strong>Sargent</strong> <strong>and</strong> <strong>Greenleaf</strong> has provided innovative security solutions to financial institutions,businesses <strong>and</strong> governments across the globe. Today, we are a subsidiary of Stanley SecuritySolutions, a growing division of Stanley Black & Decker.ContentsProduct Overview . . . . . . . . . . . . . . . . . . . . . . . . . . . . . . . . . . . . . . 16120 / 6123 Installation Instructions. . . . . . . . . . . . . . . . . . . . . . . . . . . . . 36120 Operating Instructions . . . . . . . . . . . . . . . . . . . . . . . . . . . . . . . . . 86123 Operating Instructions . . . . . . . . . . . . . . . . . . . . . . . . . . . . . . . . . 126123 Quick Reference Programming <strong>Guide</strong> . . . . . . . . . . . . . . . . . . . . . . . . 206120 / 6123 Battery Changing Instructions—Two-Battery Keypad . . . . . . . . . . . . 226120 / 6123 Battery Changing Instructions—One-Battery Keypad . . . . . . . . . . . . 246120 / 6123 Troubleshooting <strong>Guide</strong> . . . . . . . . . . . . . . . . . . . . . . . . . . . . . 266120 / 6123 Troubleshooting Checklist . . . . . . . . . . . . . . . . . . . . . . . . . . . 316120 / 6123 Management Reset Code Technical Bulletin. . . . . . . . . . . . . . . . . 326120 / 6123 Commonly Asked Questions . . . . . . . . . . . . . . . . . . . . . . . . . 33A Brief History of <strong>Sargent</strong> & <strong>Greenleaf</strong> . . . . . . . . . . . . . . . . . . . . . . . . . . . 36
Installation InstructionsModels 6120 <strong>and</strong> 6123—Motorized <strong>Electronic</strong> Combination <strong>Lock</strong>s<strong>Sargent</strong> & <strong>Greenleaf</strong> 6120 series electronic locks combine easeof operation with security. Advanced electronic circuit designmakes them easy to install, easy to open, <strong>and</strong> easy to changecodes. Follow these instructions carefully to get the bestpossible performance from your lock.• Modifications to the lock (including lock bolt attachments)are not recommended, <strong>and</strong> will void the manufacturer’swarranty.Mounting Considerations• <strong>Sargent</strong> & <strong>Greenleaf</strong> 6120 series Motorized <strong>Electronic</strong>Combination <strong>Lock</strong>s have been designed to use the samemounting screw locations <strong>and</strong> occupy the same space as ast<strong>and</strong>ard S&G 6730 mechanical lock. The 6120 series usesst<strong>and</strong>ard mounting dimensions to simplify retrofit in safesoriginally equipped with mechanical locks.• The keypad base diameter is 4” (101,6 mm). This is slightlygreater than the diameter of st<strong>and</strong>ard S&G dial rings formechanical locks. The 6120 series keypad will cover anyscratches or paint blemishes left by the old lock.• A minimum distance of .150” (3,8 mm) is required betweenthe end of the lock case containing the bolt <strong>and</strong> the safe’sblocking bar or cam plate which is normally blocked by theextended lock bolt. This is because the lock bolt may not beretracted quite as far by older batteries as by fresh ones.• You should install fresh alkaline batteries in the keypad <strong>and</strong>connect the lock wiring cable to check the functions of thelock prior to installation. Follow the procedures given in theOperating Instructions. Avoid pressure to the end of thelock bolt during these checks.• Do not allow the safe’s blocking bar or cam plateto depress the electronic lock’s bolt farther than itretracts during normal motor operation. This can lead toinconsistent lock operation.© Copyright 2011, <strong>Sargent</strong> & <strong>Greenleaf</strong>, Inc.3
Installation InstructionsModels 6120 <strong>and</strong> 6123—Motorized <strong>Electronic</strong> Combination <strong>Lock</strong>sInstallation NotesAlthough the 6120 series is easy to install, we recommendthe following procedures be performed only by an experiencedlocksmith or safe technician. Your safe may incorporaterelocking devices that are attached to the combination lock.Misalignment or detachment of these devices can result in alockout—a condition that makes it unlikely that the safe can beopened without damage.Additional Items You Will NeedThe 6120 series requires two 9-volt alkaline batteries (notincluded). We recommend fresh Duracell ® batteries. Do not useold or partially drained batteries in your lock. New batteries willpower your lock for approximately 8,000 openings when usedwithout the time delay feature.Many installations can be performed with nothing more thata medium Phillips screwdriver. If the manufacturer of yoursafe has made external relock device attachments to the lock,specialized tools <strong>and</strong> knowledge may be required.Step 2Use a reamer or round file to remove any sharp edges from thewire channel (spindle hole) that might damage the wire cable.Run the connector through the wire channel. Gently pull theconnector <strong>and</strong> all excess cable to the outside of the safe. Makesure the cable is not crimped or stressed at any point.InstallationStep 1Remove the existing lock (if present). The mounting plate shouldbe smooth <strong>and</strong> flat, with 1 ⁄4-20 mounting screw holes. The wirechannel (spindle hole) must have a diameter of at least 5 ⁄16”.The 6120 series can be mounted right-h<strong>and</strong>, left-h<strong>and</strong>, verticalup,or vertical-down without any modifications or adjustments.Step 3Once you’ve made sure the wire cable is not crimped or incontact with any sharp surface, attach the lock to the safe’smounting plate. Use the four 1 ⁄4-20 (or metric M6) screwsprovided. Tighten securely, attaching the lock firmly to the plate.The lock incorporates a bolt-through cover that allows mountingwith the cover in place. Removing the cover voids the warranty.4© Copyright 2011, <strong>Sargent</strong> & <strong>Greenleaf</strong>, Inc.
Installation InstructionsModels 6120 <strong>and</strong> 6123—Motorized <strong>Electronic</strong> Combination <strong>Lock</strong>sStep 4 (FOR SAFES WITH RELOCK DEVICES)This is an installation that requires attachment of the safemanufacturer’s relock device plate to the lock cover using thecover screws. If your situation is similar, be sure the thicknessof the relock device plate(s) is not great enough to prevent thescrews from engaging the lock case by at least four threads. Ifnecessary, use longer 8-32 machine screws to insure proper fit.The photo also illustrates a required space of at least .150” (3,8mm) between the end of the lock body <strong>and</strong> the blocking bar ofthe safe’s boltwork.Step 6The boltwork bind has been relieved by removing a smallamount of material from the right side of the boltwork opening.When the safe’s boltwork is fully thrown to the locked position,there is air space on all sides of the electronic lock’s bolt.B I N DC L E A R A N C EStep 5Make sure that the lock bolt does not bind against the safe’sboltwork. 6120 series locks are sensitive to bolt end <strong>and</strong> sidepressure. The safe’s blocking bar or cam must not depress thelock’s bolt farther than it retracts under normal motor operation.Check to make sure this doesn’t happen when the safe h<strong>and</strong>leis moved to retract the door bolts (unlock the safe).This photograph shows boltwork in the locked position whichplaces pressure on the side of the lock bolt. This could preventthe lock from opening properly.Step 7Run the connector <strong>and</strong> wire cable through the center hole of themounting base. Then use the included 8-32 machine screwsto attach the base to the safe door. The attaching screw holeswill line up with those used for any st<strong>and</strong>ard S&G dial ring(excluding R132 key locking dial rings).© Copyright 2011, <strong>Sargent</strong> & <strong>Greenleaf</strong>, Inc.5
Installation InstructionsModels 6120 <strong>and</strong> 6123—Motorized <strong>Electronic</strong> Combination <strong>Lock</strong>sStep 8Install a new 9-volt alkaline battery in each of the keypad’sbattery holders (Duracell ® is recommended). Support the top ofeach holder as the battery is inserted. This will prevent bendingor breaking the holder.Step 10Make a loose coil of the excess wire cable. Hold the coilaway from the spring clips that will secure the keypad to themounting base.Step 9The wire cable connector is shaped so that it will fit into thecircuit board receptacle only when aligned correctly. Insert theconnector into its receptacle in the keypad housing. If it doesnot slide easily into place, do not force it. This means you needto turn it 180º before attempting to insert it again.ALIGN RIDGE WITH SLOT6© Copyright 2011, <strong>Sargent</strong> & <strong>Greenleaf</strong>, Inc.
Installation InstructionsModels 6120 <strong>and</strong> 6123—Motorized <strong>Electronic</strong> Combination <strong>Lock</strong>sStep 11Place the keypad over the base. Make sure the wire cable is stillclear of the spring clips, then push the keypad firmly onto thebase. It should snap into place.Step 12The installation is complete. Refer to your lock’s OperatingInstructions for opening, code changing, time delay, <strong>and</strong> batterychanging instructions.Make sure your lock is fully operational before closing the safedoor for the first time.Important Dimensions1.624" (41,2 mm)1.000" (25,4 mm)2.400" (61,0 mm)2.624" (66,6 mm)3.320" (84,3 mm).312"7,9 mm.281"7,1 mm1.165" (29,6 mm)© Copyright 2011, <strong>Sargent</strong> & <strong>Greenleaf</strong>, Inc.7
Operating InstructionsModel 6120 —Motorized <strong>Electronic</strong> Combination <strong>Lock</strong>The <strong>Sargent</strong> & <strong>Greenleaf</strong> Model 6120 combines ease ofoperation with security. Its advanced electronic circuitdesign makes it easy to open <strong>and</strong> easy to change codes.Follow these instructions carefully to get the bestpossible use from your lock.Introduction• The <strong>Sargent</strong> & <strong>Greenleaf</strong> Model 6120 Motorized <strong>Electronic</strong>Combination <strong>Lock</strong> is shipped from the factory with a factorymaster code only. It is 1 2 3 4 5 6 #. This code is used toopen the lock <strong>and</strong> set or change all of its codes. If the safemaker or your dealer sets a new master code, he will adviseyou of the change. You should set the lock to your own,unique master code immediately.• The Model 6120 will always open on the master code. At yourdiscretion, it can also be set to accept up to eight differentuser codes. The master code holder is responsible formaintaining the number of active users programmed intoeach lock. The master code is designated as code #1, <strong>and</strong>the user codes (if set) are designated by user I.D. number 2,3, 4, 5, 6, 7, 8, <strong>and</strong> 9. The user codes do not exist until theyare programmed into the lock.• Each time a button is pressed <strong>and</strong> the lock accepts theinput, it emits a “chirp,” <strong>and</strong> the LED on the keypad lightsmomentarily.• All codes must contain six digits or six letters. Any digit orletter can be used as many times as you wish. For instance,the following codes (while not recommended) will operate thelock: 5 5 5 5 5 5 # OR J J J J J J #• All codes end with #. This signals the lock that you havefinished entering all digits of the code.• If you pause more than ten seconds between button presseswhen entering a code, the lock will assume you do not wantto continue, <strong>and</strong> it will reset itself. To open the lock, beginthe code entry sequence again from the first step.• If you realize you have pressed an incorrect button whenentering a code, press or simply pause ten seconds or*more, then begin entering your code again.• If four incorrect codes are entered in a row, the Model 6120will shut down for a period of as long as fifteen minutes.*This is a security feature. Pressing any button anytime duringthe lockout period will reset the timer to its maximum penaltytime. Do not touch any keypad buttons for a period of fifteenminutes, then enter any valid code to open the lock.* <strong>Lock</strong>s produced before mid 1997 shut down for fifteen minutes. <strong>Lock</strong>sproduced after this shut down for five minutes.8© Copyright 2011, <strong>Sargent</strong> & <strong>Greenleaf</strong>, Inc.
Operating InstructionsModel 6123—Motorized <strong>Electronic</strong> Combination <strong>Lock</strong>To Open the <strong>Lock</strong>Press the code digits or letters in order, followed by #. The lockbolt will retract for six seconds, allowing you time to operate thesafe h<strong>and</strong>le <strong>and</strong> open the door. Do not put any pressure on thesafe h<strong>and</strong>le until after the code has been entered. The Model6123 will lock automatically when the safe door is closed <strong>and</strong>the h<strong>and</strong>le is turned to the locked position.Note: The Master Code Holder is responsible for maintainingthe number of active users programmed into each lock.this occurs, the lock will not operate properly. To relieve sidepressure on the lock bolt, move the safe’s h<strong>and</strong>le to the fullylocked position, then re-enter a working code. The lock shouldopen.2. If the lock “chirps” when keys are pressed, but it will notopen, the batteries may be drained to the point that they willnot operate the lock’s motor. Follow the battery replacementprocedure in this manual.3. If the lock makes no sound when any of the keys are pressed,dead batteries are likely to be the cause. Follow the batteryreplacement procedure in this manual.4. This item applies to the two-battery keypad only:In Case of TroubleIf your lock should fail to open when a valid code is entered,check for the following:1. The boltwork of a safe can, under certain conditions, placepressure on the side of the lock’s bolt. This is often causedby something inside the safe pressing against the door or bysomething caught between the safe door <strong>and</strong> its frame. WhenIf the lock makes no sound when any of the keys are pressed,but the batteries have been checked <strong>and</strong> found to be good,a loose keypad connector may be the cause. Pull the keypadaway from the base as described in the battery changingprocedure. Check to make sure the wire connector is firmlyseated into its receptacle on the keypad circuit board. Theconnector is designed so that it will only slide into thereceptacle when aligned correctly.ALIGN RIDGE WITH SLOTIf all of the preceding remedies have been exhausted<strong>and</strong> the lock still does not open, contact a qualified safetechnician in your area for professional service.© Copyright 2011, <strong>Sargent</strong> & <strong>Greenleaf</strong>, Inc.13
Operating InstructionsModel 6123—Motorized <strong>Electronic</strong> Combination <strong>Lock</strong>Decisions—MRC <strong>and</strong> TDOThe [01] or [03] pair of digits in your management reset code mustbe pressed at the same time. The lock will emit three rapid beepsMRC—Management Reset Codeafter the final # is pressed to acknowledge successful programmingBefore any buttons are pressed, you need to make some decisions. of the MRC. If you don’t hear those three beeps, the MRC has notThe first is whether or not your lock is to have a management reset been programmed. If you hear a long tone (called a “brap”) whilecode, also known as the MRC. This code must be programmed into trying to program the MRC, either you’ve made an error in the entrythe lock before the master code is changed for the first time. After sequence, the lock already has an MRC, or the master code hasthe master code is changed, the lock can never be programmed with been changed. Even if the master code is changed, then set back toan MRC. Conversely, when an MRC is programmed into a lock, it is 1 2 3 4 5 6 #, the management reset code cannot be set.always present. It cannot be deleted or changed.The procedure for using the management reset code to reset a lockSome 6123 locks have factory installed management reset codes, with a lost master code is found later in the manual.depending on how they were ordered by the safe maker or dealer. You TDO—Time Delay Overridecannot install a new MRC to replace an existing one.Note: Time delay override is not available if the lock is used inThe management reset code is used to regain control of a lock when supervisor/user mode.its master code is lost. When the MRC is employed, it deletes thesupervisor <strong>and</strong> all user codes present in the lock <strong>and</strong> changes theIf your 6123 will be using a time delay, you may also want to programmaster code to the factory default of 1 2 3 4 5 6 #. While this cana time delay override capability. Like the MRC, you’ve got to makebe a real time <strong>and</strong> money saving feature if a master code is lost,this decision <strong>and</strong> do the programming before the master code isthe presence of a management reset code in a lock could also bechanged for the first time.viewed as a security weakness under some circumstances. Carefully A time delay is used to deter armed robbery. Statistics showconsider whether or not you want to program an MRC into you lock. If that the longer an armed robber has to wait for a safe to open,you decide to use this feature, here’s what you need to know. the less likely he is to initiate the crime. The 6123‘s time delayImportant: All programming <strong>and</strong> code changing should befeature enforces a waiting time between the entry of the lockdone with the safe door open. Do not close the safe door untilcode <strong>and</strong> the opening of the safe.all programming <strong>and</strong>/or code changes are completed <strong>and</strong> triple Often a safe that requires a time delay lock is involved in a cashchecked to make sure everything is working correctly.carrier or armored car pickup process. Excess cash receiptsAn MRC consists of seven digits, including one [01] or [03] pairare picked up at various intervals by armored car services.that can appear once anywhere in the code. When entering theIn the interest of security <strong>and</strong> efficiency, it is important thatMRC, these two digits are pressed simultaneously. An example of anthese couriers do not spend any more time than is absolutelyacceptable management reset code is:necessary to access the safe, remove the excess valuables, <strong>and</strong>be on their way. This is where the time delay override code7 4 8 1 [1 0] 5comes into play. It allows one code to override the lock’s timeBefore programming the MRC into the lock, enter the master code delay <strong>and</strong> open the safe immediately.(123456#) to make sure the lock is functioning correctly on the Before the lock’s master code is changed for the first time,factory default master code. When the bolt extends, press:you should determine whether or not you will need a time delay* * # 1 2 3 4 5 6 # (______) # (______) # override code or not. If you will need a TDO, you must decidemanagement managementreset codereset codeif it will be a single user time delay override or a dual controltime delay override.14© Copyright 2011, <strong>Sargent</strong> & <strong>Greenleaf</strong>, Inc.
Operating InstructionsModel 6123—Motorized <strong>Electronic</strong> Combination <strong>Lock</strong>If you do not want your 6123 to have time delay override capability, The lock will emit three rapid beeps after the final # is pressed touse the following programming sequence to permanently remove it: acknowledge that the dual control time delay override capability8 3* 1 2 3 4 5 6 # 1 # 1 # has been set. If you don’t hear those three beeps, or if you hear along tone (called a “brap”) while following this procedure, eitherThe lock will emit three rapid beeps after the final # is pressed to you’ve made an error in the entry sequence, or the master code hasacknowledge that the time delay override capability has been already been changed.irrevocably removed. If you don’t hear those three beeps, orOnce you’ve successfully set a management reset code (ifif you hear a long tone (called a “brap”) while following thisdesired) <strong>and</strong> a time delay override method (or deleted theprocedure, either you’ve made an error in the entry sequence, orcapability permanently), you can perform any of the lock’s otherthe master code has already been changed.programming functions, including changing the master code.A single user time delay override code allows the holder ofAny programming you do from this point on can be changed.the code to enter it into the lock <strong>and</strong> immediately gain access to thesafe. He does not have to wait for the time delay, <strong>and</strong> there are no Either type of time delay override still requires you to select <strong>and</strong>other actions required.set the actual six-digit TDO code number that will be used to openthe safe. Even if the capability for TDO has been programmed, it isTo program the lock for single user time delay override, use theuseless until a code is programmed. The code can be set, changed,following procedure:or deleted at any time by the holder of the lock’s master code. It4 6* 1 2 3 4 5 6 # 2 # 2 # is easiest to set the time delay override code before a time delayperiod is programmed. To do so, press:The lock will emit three rapid beeps after the final # is pressed toacknowledge that the single user time delay override capability has Press SG* (_____) # 9 (____) # (____) # (7 4) existing master code * new TDO codenew TDO codebeen set. If you don’t hear those three beeps, or if you hear a longtone (called a “brap”) while following this procedure, either you’veIf a time delay period is already programmed into the lock, the timemade an error in the entry sequence, or the master code has alreadydelay override code can only be set, changed, or deleted during thebeen changed.opening window, which is explained later in the manual.A dual control time delay override is somewhat similar, withone restriction placed on it. The override code will only open the Access Methods—modes of operationsafe when it is entered within one minute of another code holderSingle User Modeentering his or her code to start the time delay. For example, whenthe armored car shows up at the safe, a store employee would enterOne person with a single, valid, six-digit code can open the lock. <strong>Lock</strong>the master code, the supervisor code, or any user code to startfeatures can include time delay <strong>and</strong> time delay override code, ifthe lock’s time delay. Within one minute, the armored car persondesired. The holder of the master code can perform all programmingwould enter his code. The safe would immediately open, rather thanfunctions. The holder of the supervisor code (if it’s set) can set,enforcing the entire time delay period.change, <strong>and</strong> delete user codes. He can also change <strong>and</strong> delete hisown code. User code holders can change their own codes. Your lockThe dual control time delay override is often preferred, because itleft S&G’s factory in single user mode (the default mode). If it’s inimposes a supervisory restriction on the only person who has a codeanother mode <strong>and</strong> you want to change it to single user mode, followthat will circumvent the time delay. To set the lock for dual controlthis programming sequence:time delay capability, press:4 6* 1 2 3 4 5 6 # 1 # 1 # 3 2 (_____) # 0 # 0 # * existing master code© Copyright 2011, <strong>Sargent</strong> & <strong>Greenleaf</strong>, Inc.15
Operating InstructionsModel 6123—Motorized <strong>Electronic</strong> Combination <strong>Lock</strong>Dual Control ModeThis is also referred to as dual user mode. It requires two differentvalid lock codes to be entered within one minute of each other forthe lock to open. The idea is that no one person has the ability toopen the safe alone. <strong>Lock</strong> features can include time delay <strong>and</strong> timedelay override code, if desired. The holder of the master code canperform all programming functions. The holder of the supervisorcode cannot perform any programming or code changes. He cannoteven change or delete his own code. User code holders can changetheir own codes. You should also be aware that a single user timedelay override code can open the lock immediately without entryof a second code. The dual control time delay override will requireanother code to start the time delay before it can be used to open thesafe. A time delay period of at least one minute must be programmedinto the lock for a time delay override code of either variety to work.It cannot open a lock that is not using the time delay feature.If your lock is in another mode <strong>and</strong> you want to change it to dualcontrol mode, follow this programming sequence:3 2 (_____) # 1 # 1 # * existing master codeSupervisor/User ModeThis is sometimes referred to as supervisor/subordinate mode. Inthis mode, the master code <strong>and</strong> the supervisor code cannot openthe lock. Instead, they are used to enable <strong>and</strong> disable the lock foropening by the user codes. When either the master code or thesupervisor code (if set) is entered, the lock will emit four short beepsor two long beeps. If it gives the four short beeps, any user codecan subsequently be used to open the lock. The next time the mastercode or supervisor code is entered, the lock will emit the two longbeeps. Now the user codes cannot open the lock. When the lock isdisabled <strong>and</strong> a user code is entered, it does not open, but emitstwo long beeps instead. The master code <strong>and</strong> supervisor code areeffectively used to toggle the lock back <strong>and</strong> forth between usable<strong>and</strong> non-usable states. <strong>Lock</strong> features can include time delay, but thetime delay override is not available in this mode. The holder of themaster code can perform all programming functions. The holder ofthe supervisor code (if it’s set) can set, change, <strong>and</strong> delete usercodes. He can also change <strong>and</strong> delete his own code. User codeholders can change their own codes <strong>and</strong> open the lock when it isenabled by the master code or supervisor code.To place your 6123 lock in supervisor/user mode, press:3 2 (_____) # 2 # 2 # * existing master codeSetting / Changing / Deleting CodesThe Master CodeAs mentioned previously, the master code can perform allprogramming functions for the 6123 lock. The master code canbe changed, but the lock will not allow you to delete it. The factorydefault master code is 1 2 3 4 5 6 #. We strongly suggest youchange it to a six-digit code of your own choosing before storinganything of value in your safe. Only the holder of the master codecan change the master code. The sequence is:Press SG* (___) # 1 (7 4) *(___) # (___) # If the long error tone (brap) sounds at any time during the mastercode changing procedure, you have made an error. The old mastercode is retained.The Supervisor Codeexisting master code new master code new master codeThe supervisor code can change <strong>and</strong> delete itself (once set). It canbe set, changed, <strong>and</strong> deleted by the holder of the master code. Theprocess for using the master code to set or change the supervisorcode is:Press SG* (___) # 2 (7 4) *(___) # (___) # existing master code new supervisor code new supervisor codeIf the long error tone (brap) sounds at any time during the supervisorcode changing procedure, you have made an error. The oldsupervisor code is retained.To delete the supervisor code, the master code holder enters:Press SG* (___) # 2 (7 4) existing master code *# # 16© Copyright 2011, <strong>Sargent</strong> & <strong>Greenleaf</strong>, Inc.
Operating InstructionsModel 6123—Motorized <strong>Electronic</strong> Combination <strong>Lock</strong>If the long error tone (brap) sounds at any time during the user codeIf the long error tone (brap) sounds at any time during the supervisorPress SG* (___) # 3 * (___) # (___) # code deletion procedure, you have made an error. The old supervisorcode is retained.Here is the sequence the supervisor code holder uses to change hisown six-digit code:setting or changing procedure, you have made an error. If a usercode already existed in this position, it will be retained.The holder of the master code or supervisor code can delete a usercode as follows:Press SG* (___) # 2 user code position number(___) # (___) # (7 4) existing * new supervisor code new supervisor codesupervisor codePress SG* (___) # 3 # # (7 4) existing master code *If the long error tone (brap) sounds at any time during the supervisoror supervisor codecode changing procedure, you have made an error. The oldIf the long error tone (brap) sounds at any time during the user codesupervisor code is retained.deletion procedure, you’ve made an error. The user code is retained.The supervisor code holder can delete his code completely from theTo set, change, or delete any user code, follow the two previouslock. This is the procedure he would use:programming sequences, changing the position number to point toPress SG* (___) # 2 # # (7 4) existing *the particular user code you want to affect.supervisor codeIf the long error tone (brap) sounds at any time during the supervisorcode deletion procedure, you have made an error. The old supervisorcode is retained.Press 3 3 (___) # (___) # (___) # * existing user code new user code new user codeThe User CodesNotice that you don’t have to put in a position number to identifyHolders of user codes can do two things—open the safe within thewhich user code position you’re changing. That’s because the lockrestrictions of the lock mode, <strong>and</strong> change their code numbers. Userfigures it out from the existing code that you enter.codes do not exist until set by the holder of the master code or thesupervisor code. As we discovered earlier, however, the supervisorcode holder cannot set, change, or delete any codes when the lock isin dual control mode.If the long error tone (brap) sounds at any time during the changingprocedure, you’ve made an error. The old user code is retained.The Time Delay Override CodeThere are provisions for five different user codes in the 6123. EachThis is a code we learned about earlier in the manual. It circumventsone is associated with a storage position number. The first userany time delay period programmed into the lock. A time delay periodcode is stored in position #3, the second in position #4, the thirdof at least one minute must be used for the time delay overridein position #5, the fourth in position #6, <strong>and</strong> the fifth user codecode to be valid. If there is no time delay in the lock, the overrideis stored in position #7. When we program a user code, we havecode will not work.to identify the particular code by its position number. For instance,here’s how the holder of the master code or supervisor code (exceptin dual control mode) sets or changes the user code found in theOnly the holder of the lock’s master code can set, change, or deletethe time delay override code. To set or change it:#3 position.Press SG* (___) # 9 user code position number(___) # (___) # (7 4) existing master code * new TDO code new TDO code(7 4)existing master codeor supervisor codenew user codenew user codeThe holder of a user code can change his own six-digit code to anew number. He cannot delete his own code, leaving his user positionempty. To make the change:© Copyright 2011, <strong>Sargent</strong> & <strong>Greenleaf</strong>, Inc.17
Operating InstructionsModel 6123—Motorized <strong>Electronic</strong> Combination <strong>Lock</strong>Important Note: If a time delay is already present in your 6123 when Changing or deleting an existing time delay period requiresyou want to set, change, or delete a time delay override code, theprogramming must be done during the time delay opening window.This is the period of time that the lock is normally able to be openedfollowing the countdown of the time delay period. For instance, ifyour lock is in single user mode, enabled for a time delay overridecode, <strong>and</strong> using a two-minute time delay, this is how you wouldprogram the TDO: Enter any valid operating code for the lock(master, supervisor, or any user code) to start the time delay. Thelock will beep once every ten seconds during the two minute timedelay period. At the end of two minutes, the lock will beep ten timesrapidly to signal the beginning of the opening window period. Insteadof entering a valid operating code to open the lock, you initiate theprogramming sequence to create a time delay override code.Press SG* (___) # 0 (___) # (___) # Press SG* (___) # 9 (7 4) existing master code * new time delay period new time delay period(___) # (___) # in minutes (1 - 99) in minutes (1 - 99)(7 4) existing master code * new TDO code new TDO codeIf you wished to delete an existing time delay override code, thesequence would be:Using the 6123 with a Time Delay PeriodPress SG* (___) # 9 # # (7 4) existing master code*If there is no time delay period programmed when you want to set,change, or delete a time delay override code, you obviously don’tneed to be concerned about performing the programming during theopening window.Time Delay FeaturesSetting / Changing / Deleting the Time Delay PeriodTime delay can be used with any of the 6123’s operating modes. Itcan only be programmed by the holder of the lock’s master code,<strong>and</strong> it can be set for any time between one <strong>and</strong> ninety-nine minutes,in single minute increments.To set a time delay when none exists:Press SG* (___) # 0 * (___) # (___) # (7 4) existing master codetime delay periodin minutes (1 - 99)time delay periodin minutes (1 - 99)programming to be done during the opening window period. Thisis the period of time that the lock is normally able to be openedfollowing the countdown of the time delay period. For instance, if yourlock is in single user mode <strong>and</strong> using a two-minute time delay, thisis how you would change the length of the time delay. Enter any validoperating code for the lock (master, supervisor, or any user code) tostart the time delay. The lock will beep once every ten seconds duringthe two minute time delay period. At the end of two minutes, the lockwill beep ten times rapidly to signal the beginning of the openingwindow period. Instead of entering a valid operating code to open thelock, you initiate the programming sequence to change the length ofthe time delay period.To delete the time delay altogether, you follow the same programmingsequence to set the time delay period to zero.Time delay can be used with any of the 6123’s operating modes. Itautomatically enforces a waiting period between the time a valid lockcode is first entered <strong>and</strong> when the safe can be opened.In single user mode, a 6123 with time delay is opened by firstentering any valid operating code (master, supervisor, or user) tobegin the time delay. At the end of the time delay period, the lockbeeps ten times rapidly. Now you have a period of time (the openingwindow) during which you enter any valid code for the lock. It can bethe same code used to start the time delay, or it can be another code.The lock will open.In dual control mode, a 6123 with time delay is opened by firstentering any valid operating code (master, supervisor, or user) tobegin the time delay. At the end of the time delay period, the lockbeeps ten times rapidly. During the opening window you must enterany two valid operating codes within sixty seconds of each other toopen the lock. One of these codes may be the same one used to beginthe time delay, but it may be two different codes for the lock.18© Copyright 2011, <strong>Sargent</strong> & <strong>Greenleaf</strong>, Inc.
Operating InstructionsModel 6123—Motorized <strong>Electronic</strong> Combination <strong>Lock</strong>Only the lock’s master code can be used to alter the opening windowIn supervisor/user mode, only user codes can open the lock, <strong>and</strong>Press SG* (___) # 8 * (___) # (___) # only when the lock has been enabled by the holder of the mastercode or supervisor code. Once the lock is enabled, any valid usercode is entered to begin the time delay. At the end of the time delayperiod, the lock beeps ten times rapidly. During the opening window,period. If the lock is using a time delay, the opening window can onlybe altered during the opening window. If you are programming a lockfrom scratch <strong>and</strong> you know you will be changing the opening windowvalue, it’s easiest to do it before you program the time delay period.any valid user code is entered to open the lock. It can be the sameWhenever a safe is secured with a time delay device, a signuser code that initiated the time delay, or it can be any other validshould be posted on the door of the container to indicate theuser code for the lock. The time delay override feature does notpresence of the device. Suggested wording is:work when the lock is used in supervisor/user mode. If a TDO codeis programmed into the lock when it is placed in supervisor/usermode, the TDO code simply ceases to function.The Opening WindowAn important part of the time delay feature is the opening window.This is the limited period of time immediately following the timedelay period during which a valid code (or codes) can be enteredto open the lock. If the opening window is allowed to expire after atime delay has elapsed, the lock cannot be opened without initiating“THIS EQUIPMENT IS PROTECTED AGAINST HOLD UPAND ROBBERY BY TIME DELAY LOCK.”This information should be clearly posted in every languagewhich is prevalent in the area where the safe is located.A self-adhesive label is available from <strong>Sargent</strong> & <strong>Greenleaf</strong>distributors or your local safe <strong>and</strong> lock retailer. The S&Gpart number for the label is 0000-636-152000. This label isavailable in English only.the time delay (by entering a valid lock code) all over again. In otherwords, if you don’t take advantage of the opportunity the opening 6123 Quick Reference <strong>Guide</strong>window provides for you to open the lock, you must start all overThe following two pages comprise the 6123 Quick Reference <strong>Guide</strong>.again.It contains the programming sequences we’ve already covered, <strong>and</strong>The factory default setting for the opening window is two minutes.You can easily change this to exp<strong>and</strong> the window up to nine minutes,presents them in a form that makes it easy to find <strong>and</strong> use theparticular feature you need to implement.in single minute increments. The process is:(7 4) existing master codenew openingnew openingwindow period in window period inminutes (1 - 9) minutes (1 - 9)© Copyright 2011, <strong>Sargent</strong> & <strong>Greenleaf</strong>, Inc.19
Set the Management Reset Code (before the Master Code is changed for the first time):Press** # ( 1 2 3 4 5 6 ) # ( _ _ _ _ _ _ _ ) # ( _ _ _ _ _ _ _ ) # Use the Management Reset CodePress* 6 # ( _ _ _ _ _ _ _ ) # (lock beeps once for each time the MRC has been used)Set or Change the Time Delay Override Code:Press 7 4* ( _ _ _ _ _ _ ) # 9 * ( _ _ _ _ _ _ ) # ( _ _ _ _ _ _ ) # Note: must be set or changed in the “opening window” if the time delay length is more than zeroSet or Change the Time Delay Length:Press 7 4* ( _ _ _ _ _ _ ) # 0 * (delay length) # (delay length) # Note: must be set or changed in the “opening window” if the time delay length is more than zeroSet or Change the Opening Window Length:Press 7 4* ( _ _ _ _ _ _ ) # 8 * (window length) # (window length) # Note: must be set or changed in the “opening window” if the time delay length is more than zeroChange the Master Code:6123 <strong>and</strong> Z 02 Quick Referencefactory master code MRC MRCMRCDisabling Time Delay Override Capability (before the Master Code is changed for the first time):Press 8 3* ( 1 2 3 4 5 6 ) # 1 # 1 # factory master codeSet a Time Delay Override Mode (before the Master Code is changed for the first time):Press 4 6* ( 1 2 3 4 5 6 ) # (☞) # (☞) # factory master code☞= 1 for dual control TDO☞= 2 for single control TDOmaster code TDO code TDO codemaster codemaster codePress 7 4* ( _ _ _ _ _ _ ) # 1 * ( _ _ _ _ _ _ ) # ( _ _ _ _ _ _ ) # Note: to delete a code, simply do not enter a new code number—just push the # keyNote: clears all codes except the Time Delay Override Codemaster code new master code new master codeSet, Change, Delete Supervisor <strong>and</strong> User Codes:Press 7 4* ( _ _ _ _ _ _ ) # ( ☞)* ( _ _ _ _ _ _ ) # ( _ _ _ _ _ _ ) # master orsupervisor codeNote: to delete a code, simply do not enter a new code number—just push the # key☞= 2 for Supervisor Code☞= 3 through 7 for User Codes20new codenew codeRevision 1/5/06© Copyright 2011, <strong>Sargent</strong> & <strong>Greenleaf</strong>, Inc.
6123 <strong>and</strong> Z 02 Quick ReferenceUser Changes His Own Code:Press 3 3* ( _ _ _ _ _ _ ) # ( _ _ _ _ _ _ ) # current usercodeNote: users cannot delete their own codesnew user code( _ _ _ _ _ _ ) # new user codeSetting the Access Mode:Press 3 2* ( _ _ _ _ _ _ ) # ( ☞) # (☞) # Notes:master code☞= 0 for Single User access☞= 1 for Dual User access☞= 2 for Supervisor/Subordinate accessNotes: 1time delay override does not work in S/S mode2a supervisor code must be set before changing to S/S mode• The Supervisor code cannot set, change, or delete any codes in Dual Control mode.• Time Delay Override (TDO) is not available in Supervisor/Subordinate mode.Recovering a 6123 with Unknown Programming:You will need the Management Reset Code (MRC) for the lock.1. Make sure there are good batteries in the keypad.2. The lock cable must be plugged into the keypad.3. DO NOT PRESS ANY BUTTONS FOR AT LEAST 15 MINUTES!4. Press* 6 # ( _ _ _ _ _ _ _ ) # (lock beeps once for each time the MRC has been used)MRC5. Press 3 2* 1 2 3 4 5 6 # 0 # 0 # The lock should now be in Single User Mode, <strong>and</strong> the Master Code is 1 2 3 4 5 6 .Repeat steps 1 through 5 if necessary.To make sure a Time Delay Override Code is not retained in the lock:Press 7 4* 1 2 3 4 5 6 # 9*# # © Copyright 2011, <strong>Sargent</strong> & <strong>Greenleaf</strong>, Inc.21
Battery Changing InstructionsModels 6120 <strong>and</strong> 6123 Using a Two-Battery KeypadLow Battery ConditionThese locks use two 9-volt alkaline batteries when equippedwith the st<strong>and</strong>ard keypad. We recommend Duracell ® br<strong>and</strong>.If the batteries in your lock need to be replaced, twentyconsecutive beeps will be heard after the last number of thecode <strong>and</strong> # have been pressed. The batteries must be replacedbefore the lock can open.Note: A low battery simulator is built into the 6120 <strong>and</strong> 6123so that you can familiarize yourself with how the lock soundsunder a low battery condition. To activate the low batterysimulator, depress the key for approximately three seconds,*until the lock emits three chirps. Immediately enter your code.Each time you press a key, the chirp will sound distinctlydifferent than it does during normal operation. Approximatelytwo seconds after you enter the code <strong>and</strong> open the lock, it willrevert to normal operation.Step 2—Turn the keypad over <strong>and</strong> remove both batteries. Thisis best done by grasping the bottom of a battery <strong>and</strong> pulling itgently away from the keypad circuit board. Do not use any typeof tool to pry a battery from its holder.Step 3—Install new batteries by pushing them directly intothe battery connectors attached to the keypad circuit board. It’simportant to support the connectors so they will not become bentduring battery insertion. The connectors are designed to make itvery difficult to install a battery incorrectly. Pay close attentionto battery polarity so as not to damage a connector by forcing abattery into it backwards.Battery Replacement ProcedureThe lock will NOT forget your code(s) during battery change.Codes are stored in non-volatile memory, which will retain datafor extended periods of time (about ten years) without power.Step 1 —Remove the keypad from its mounting base by pullingthe bottom of the keypad housing away from the base. Grip thekeypad housing as shown in the photograph for best results.Support the keypad housing so that the wires which areattached to its circuit board are not pulled or stressed. Do notlet the keypad hang from its wires.Step 4—Hold the keypad housing close to the mounting basewhile you coil excess wire inside the housing. Position the wireaway from the spring clips that hold the keypad housing to themounting base.22© Copyright 2011, <strong>Sargent</strong> & <strong>Greenleaf</strong>, Inc.
Battery Changing InstructionsModels 6120 <strong>and</strong> 6123 Using a Two-Battery KeypadStep 5—Align the spring clips with the receptacles in the base.Using steady pressure, push the keypad housing back ontoits mounting base. Don’t allow any wire(s) to be damaged bycontact with the spring clips. The keypad housing will snap intoplace on the base.Step 6—Check the master code <strong>and</strong> all user codes at leastthree times with the safe door open. Close the safe door onlyafter the lock has been thoroughly checked to make sure it’soperating properly.Note: The 6120 <strong>and</strong> 6123 will operate with just one 9-voltalkaline battery attached to either connector of the st<strong>and</strong>ard,two-battery keypad. This is only recommended underemergency conditions when a second replacement battery isnot available. Using a single battery will not harm the lock inany way.© Copyright 2011, <strong>Sargent</strong> & <strong>Greenleaf</strong>, Inc.23
Battery Changing InstructionsModels 6120 <strong>and</strong> 6123 Using a One-Battery KeypadRemove Changing the battery in this keypad is a simpleprocess. Always h<strong>and</strong>le components <strong>and</strong> connectors withcare to avoid damage. Battery changing should be performedwith the safe door open.Step 1 — Keypad disassembly is neither required nor advised.The removable battery holder is accessed from the bottom of thekeypad base. Pull it slightly toward the front of the keypad, thendownward to remove it.Step 2— As you remove the old battery, you will notice there isa spring at the bottom of the holder. The new battery will rest ontop of this spring to maintain good electrical contact.Step 3—Note that the battery is oriented so that the largercontact is in line with the larger opening in the top of thebattery holder. It’s important to orient the new battery this way.24© Copyright 2011, <strong>Sargent</strong> & <strong>Greenleaf</strong>, Inc.
Battery Changing InstructionsModels 6120 <strong>and</strong> 6123 Using a One-Battery KeypadStep 4 —With the new battery in the holder, slide the holder intothe base of the keypad until it clicks into place. If your lock doesnot operate properly, don’t press any buttons for five minutes,then try it again.© Copyright 2011, <strong>Sargent</strong> & <strong>Greenleaf</strong>, Inc.25
Troubleshooting <strong>Guide</strong>Models 6120 <strong>and</strong> 6123—Motorized <strong>Electronic</strong> Combination <strong>Lock</strong>sThis troubleshooting guide is designed to help you identify <strong>and</strong>solve problems you may encounter with a <strong>Sargent</strong> & <strong>Greenleaf</strong>electronic lock. It is not designed as a substitute for theinstructions that were shipped with your lock. If the instructionsare missing, you can obtain a replacement instantly on the S&Gwebsite (www.sargent<strong>and</strong>greenleaf.com). The direct addressof this booklet is http://www.sargent<strong>and</strong>greenleaf.com/pdf/book_elec_locks.pdf . Online versions of instruction documentsare always the most up to date.Some of the following troubleshooting procedures are intendedfor the consumer, <strong>and</strong> others require the skills of a qualifiedsafe technician. The <strong>Sargent</strong> & <strong>Greenleaf</strong> line of electroniccombination locks is not designed to be user serviceable. Wespecifically do not recommend any repairs beyond replacingeither the keypad or the lock body as a unit.All applicable troubleshooting procedures should be tried beforea safe is forcibly opened. Whenever a safe must be opened bydrilling, S&G recommends you contact the safe manufacturerfirst. The safe maker will supply appropriate procedures fordealing with his product.If you find it necessary to locate a competent safe technician inyour area, S&G suggests you call the <strong>Safe</strong> & Vault TechniciansAssociation, at 800-532-2562. Any work which you think may besubmitted to S&G as a warranty claim must be cleared by ourTechnical Services Department (phone 800-826-7652).Basic OperationThe <strong>Sargent</strong> & <strong>Greenleaf</strong> line of electronic locks is powered byeither one or two 9-volt alkaline batteries, depending on thestyle of keypad used. As the name implies, two-battery keypadsuse two alkaline batteries which are located under the keypadhousing. The single battery keypad houses one alkaline batteryin a compartment that is accessible from the bottom of thekeypad. In either case, batteries can be easily replaced byfollowing the instructions that originally came with your lock<strong>and</strong> keypad. The battery changing instructions are also includedin this manual.The lock can be ordered in two basic lock bolt configurations—atraditional square bolt for use with most safe designs, <strong>and</strong> abeveled spring bolt for direct locking applications on light safedoors <strong>and</strong> inner compartments of burglary safes.When the correct code is entered <strong>and</strong> followed by the # sign,a motor retracts the lock bolt. This allows the container to beopened. The bolt remains retracted for six seconds, then themotor extends the bolt again. S&G electronic locks are equippedwith a spring mechanism to automatically extend the bolt afterany obstruction, such as safe boltwork, is moved out of its path.Some safe manufacturers ship safes with the lock boltretracted. With the door open <strong>and</strong> the safe h<strong>and</strong>le turned fullyto the locked position, enter the code (followed by the # sign).Wait fifteen seconds, then repeat the procedure. The lock shouldnow cycle normally. Close your safe door only after checking forproper lock operation at least three times.26© Copyright 2011, <strong>Sargent</strong> & <strong>Greenleaf</strong>, Inc.
Troubleshooting <strong>Guide</strong>Models 6120 <strong>and</strong> 6123—Motorized <strong>Electronic</strong> Combination <strong>Lock</strong>sTest Procedures (cont.)2. <strong>Lock</strong>out Reset Procedure:Make sure the batteries are good <strong>and</strong> installed correctly in thekeypad. Make sure the lock cable is properly inserted into thekeypad receptacle. Don’t press any buttons for at least fifteenminutes, then enter a code, followed by the # sign. If the codeis valid, the lock should open. This procedure will work for anyvintage of 6120 or 6123 lock.3. Master Code Check Procedure:When the lock is not in lockout mode (see Procedure 1), thecorrect Master Code can be verified by attempting to enter theprogramming mode. Enter 74 followed by the Master Code <strong>and</strong>*# 1 * 1 2 3 4 5 6 #. Don’t press any more buttons. The lock willdo one of the following:A) Emit five short beeps after the first # <strong>and</strong> 3 short beepsafter the second #, indicating that the code entered is thecorrect Master Code.—OR—B) Emit a long, continuous tone (sometimes referred to asthe “raspberry” sound or a “brap”) at some point in theprocess, indicating that the entered code is not the correctMaster Code.4. Walk Back Procedure:This procedure is used to retract the bolt when there is toomuch side pressure on the lock bolt or when other factors mayprevent full bolt retraction. It involves repetitive retractions ofthe bolt without allowing it to extend again. The first step is tomake sure the safe bolt work is not binding on the lock bolt.This is accomplished by ensuring that the h<strong>and</strong>le is in the fullylocked position. If there is any travel in the h<strong>and</strong>le, place theh<strong>and</strong>le in the middle of the travel <strong>and</strong> enter a valid code intothe lock. This action alone may be enough to allow the lock toopen. The second step is to replace the batteries with a freshset of 9-volt alkaline batteries (“Extra Heavy Duty” batteries areNOT alkaline <strong>and</strong> will not work). S&G recommends Duracell ®br<strong>and</strong> batteries. Fresh batteries will often supply the extrapower necessary to open a lock which is experiencing bolt sidepressure. If neither one of the above tips works, perform thefollowing steps:A) If your lock uses the st<strong>and</strong>ard, two-battery keypad, removethe keypad from the door, but keep it plugged into the lock.Don’t attempt to remove a single-battery keypad.B) Enter a valid code, making sure the safe h<strong>and</strong>le is in thefully locked position.C) After you hear the motor finish its initial run (but beforeit extends the bolt again), unplug the wire connector fromthe underside of the keypad. If you have a single-batterykeypad, simply remove the battery compartment.D) See if the safe h<strong>and</strong>le can be turned to the unlockedposition. If not, move the h<strong>and</strong>le back to the fully lockposition <strong>and</strong> wait ten seconds before proceeding.E) Plug the wire connector back into the keypad receptacle orre-install the battery holder of a single-battery keypad, <strong>and</strong>repeat the process starting at Step B.If the safe does not open after ten tries, refer to the next stepin the chart. For spring bolt locks (used on inner compartments<strong>and</strong> lightweight safes without boltwork), pushing in on the doorwhen entering the code <strong>and</strong> # key may be sufficient to allow thedoor to open.5. Wire Check <strong>and</strong> Repair Procedure:The 6120 lock requires four wires from the connector on theunderside of the keypad to the lock for normal operation. Oneof the wires provides the signal back from the lock to the LED<strong>and</strong> sounder. The lock will operate with this wire broken, but itwill not beep or light the LED. If any other wire is broken, thelock will not operate until it is repaired. If a break is detected,or if a tear in the insulation is found, the wire should bespliced <strong>and</strong>/or insulated before proceeding. S&G recommends24-gauge str<strong>and</strong>ed copper wire for these repairs. After the safeis successfully opened, the lock should be replaced.© Copyright 2011, <strong>Sargent</strong> & <strong>Greenleaf</strong>, Inc.29
Troubleshooting <strong>Guide</strong>Models 6120 <strong>and</strong> 6123—Motorized <strong>Electronic</strong> Combination <strong>Lock</strong>s6. Battery Check Procedure:(voltmeter that can measure 9 v.d.c is required)Make sure the batteries being used with the lock are marked asalkaline. “Extra Heavy Duty” batteries are NOT alkaline. Use avoltmeter to check the voltage level of each battery. Each oneshould indicate at least 7.75 volts. If either battery is below thisvoltage, replace both with fresh batteries. Fresh batteries willindicate voltage levels of 9.2 volts or greater.7. Stop Pin Check <strong>and</strong> Opening Procedure:Check:The stop pin is the pin which holds the lock bolt inthe lock. On a few early models it could dislodge <strong>and</strong>prevent the drive mechanism from engaging. Themotor can be heard running, but the lock bolt doesnot retract. To verify this problem, make sure thesafe boltwork is not binding the lock bolt (see theinformation in Step 4). Enter a valid code <strong>and</strong> listento the sound the motor makes. If it makes no soundat all, the problem is not a dislodged stop pin. Ifthe motor seems to run normally, wait until it goesthrough its retraction <strong>and</strong> extension cycle (about 6seconds). Then enter a valid code while pulling thesafe h<strong>and</strong>le toward the unlocked position. If the motorsounds the same as it did during the previous cycle(free running), a dislodged stop pin is the most likelyproblem.Opening: If the safe can be moved, the most successful methodis to orient the safe so the lock is in a vertical-upposition (with the lock bolt pointing up). Gravity mayhelp the drive mechanism engage long enough tounlock the safe. The lock may need to be operatedtwo or three times with the safe in this position.The h<strong>and</strong>le should be tried after each attempt.If this technique is unsuccessful, drilling is theremaining option. Contact the safe manufacturer forrecommendations.8. Keypad Connector Check:Note: This technique is for st<strong>and</strong>ard, two-batterykeypads only.If the lock works intermittently, check for loose wires at thekeypad connector (underside of the keypad). It is a four-wireconnection. Inspect each wire while pushing it <strong>and</strong> attemptingto gently rotate the wire where it enters the connector. If anymotion is noted, try pushing in on the wire to attempt to tightenit. Operate the lock with a valid code. If the looseness is stillpresent, S&G recommends replacing the lock.10. Low Battery Warning Check Procedure:Your lock is equipped with a low battery warning feature that changesthe pitch of the sounder when the batteries need to be replaced. Italso incorporates a low battery tester <strong>and</strong> warning demonstrator thatsimulates the low battery warning signal for one lock cycle. To operatethe demonstrator, press <strong>and</strong> hold the * key until three beeps are heard.Now enter a valid code while listening to the sounder. If the sounderhas changed pitch, the batteries are okay (although it is always a goodidea to check them with a voltmeter). If the sounder does not changepitch, the lock was already in low battery mode when the demonstratorwas engaged, <strong>and</strong> the batteries should be changed before any furthertroubleshooting is attempted.11. <strong>Safe</strong> Relock Device Engaged Check Procedure:It is possible for the safe’s relock device(s) to activate during shipment. Ifthe safe has recently been serviced or h<strong>and</strong>led roughly during shipment,the relock device could be engaged. Use the following procedure to verifythis.A) With the lock in the locked condition, note the amount ofmotion in the safe h<strong>and</strong>leB) Locate the safe h<strong>and</strong>le in the middle of its travel range, <strong>and</strong>operate the lock with a valid codeC) As soon as the lock bolt retracts, again note the range ofmotion in the safe h<strong>and</strong>leIf the h<strong>and</strong>le moves farther when the lock bolt is retracted, but the safedoes not open, a relock device is probably the cause. The service of atrained <strong>and</strong> experienced safe technician should be employed. Contact thesafe manufacturer for recommendations.The <strong>Safe</strong> & Vault Technicians Association, based in Dallas,Texas, can refer you to a safe technician in your area. Theassociation’s number is (214) 827-7233.30© Copyright 2011, <strong>Sargent</strong> & <strong>Greenleaf</strong>, Inc.
6120/6123 Troubleshooting ChecklistModels 6120 <strong>and</strong> 6123—Motorized <strong>Electronic</strong> Combination <strong>Lock</strong>sUse this checklist to ensure you have covered all aspectsof 6120 troubleshooting before resorting to forced entry of acontainer. This checklist should be used in conjunction withS&G’s 6120 Troubleshooting <strong>Guide</strong> (document no. 630-325).Have batteries been replaced with fresh, 9-volt, alkaline(preferably Duracell ® ) batteries?Have you waited at least 15 minutes (without pressing anybuttons) to time out a lockout ?Is # being pressed after the code is entered?Do you get a beep <strong>and</strong> a light whenever a key is pressed?Has the Master Code been verified by attempting to changethe Master Code?Have you been able to successfully use the ManagementReset Code?Have you checked for free play in the safe door <strong>and</strong> h<strong>and</strong>leto relieve any possible side pressure on the lock bolt?Can you hear the motor run after an operating code isentered?Can you hear the motor relay click after an operatingcode is entered?Is the lock using a time delay?Can you remove the time delay by waiting until the startof the opening window, then entering 7 4 * (master code)(wait for 5 chirps) 0 * 0 # (wait for 3 chirps) 0 #(3 chirps)?Have you checked to make sure the wire connector thatis attached to the back of the keypad is making a goodconnection with its receptacle?Have you inspected the lock cable for breaks, kinks, orscraped insulation?Have you replaced the keypad with one known to be good<strong>and</strong> then entered an operating code?Have you checked to ensure the safe’s relock device isnot activated?Have you disconnected the batteries for one minute, thenreconnected <strong>and</strong> checked the lock?© Copyright 2011, <strong>Sargent</strong> & <strong>Greenleaf</strong>, Inc.31
Technical Bulletin—MRCManagement Reset Code Information for Models 6120 <strong>and</strong> 6123Subject: Management Reset Code (MRC)Models 6120 <strong>and</strong> 6123 can incorporate a ManagementReset Code if one is programmed before the Factory MasterCode is changed or reset. Once the Master Code changingprocedure is completed for the first time, a ManagementReset Code cannot be installed. Once programmed, theManagement Reset Code cannot be deleted or changed.<strong>Sargent</strong> & <strong>Greenleaf</strong> strongly recommends that a differentManagement Reset Code be used for each lock.The Management Reset Code consists of seven digits.For added security, two of the digits must be pressedsimultaneously. These digits must be either 0 <strong>and</strong> 1, or 0 <strong>and</strong>3. They may be used anywhere in the code. For instance, aManagement Reset Code could be 1 4 7 [01] 8 9 (0 <strong>and</strong> 1 arepressed simultaneously). To use the Management Reset Codein this example, press: 6 # 1 4 7 [0/1] 8 9 #. The lock’s*Master Code will revert to 1 2 3 4 5 6 #.Immediately after the Management Reset Code is entered,the lock will beep once for each time the MRC has been used,including the current usage. This simple device is provided tolet the safe operator know how many times the ManagementReset Code has been used to reset the lock. The Master Codeis now reset automatically to the original Factory Master Code(1 2 3 4 5 6 #). Any User Codes which were present in the lockwhen the Management Reset Code was entered will be erased.6120 <strong>Lock</strong>—If a time delay was being used, it is eliminated.6123 <strong>Lock</strong>—If a time delay was being used, it is stillpresent. The lock will also retain its mode of operation (single,dual user, or supervisor/subordinate mode), <strong>and</strong> the time delayoverride code if one was set. After using the MRC, it may benecessary to use the master code (123456) to create usercodes in order to operate the lock if it was set to dual user orsupervisor/user mode.To Program the Management Reset Code (MRC):(note that the Management Reset Code must be entered twice)Press#123456# (_______) # (_______) # **To Use the Management Reset Code:Press6# (_______) # (Master Code is now 123456#)*factory master code management reset code management reset codemanagement reset code(REMEMBER THAT ONE OF THE ENTRIES MUST BE EITHER 0 AND 1, OR 0AND 3 PRESSED SIMULTANEOUSLY)Note: The lock will not accept a Management Reset Codewhen it is in lockout mode. To be certain your lock is notin lockout, leave the keypad connected (with batteriesinstalled), <strong>and</strong> do not press any buttons for a minimumof 15 minutes. Then enter your Management Reset Code.32© Copyright 2011, <strong>Sargent</strong> & <strong>Greenleaf</strong>, Inc.
Commonly Asked Questions & AnswersModels 6120 <strong>and</strong> 6123—Motorized <strong>Electronic</strong> Combination <strong>Lock</strong>sWhat happens if the batteries go dead? Are the codes lost?How long will the electronics remember the codes?Codes will be retained in the lock’s electronic processor forup to 10 years, even if batteries are removed or go dead.Batteries are easily replaced by removing the keypad housing.What is the battery life in S&G’s 6120 <strong>and</strong> 6123?During S&G accelerated laboratory testing, which is moredem<strong>and</strong>ing on batteries than daily normal use, we routinelyexceeded 8,000 opening <strong>and</strong> closing cycles using Duracell ®9-volt alkaline batteries.What happens if carbon batteries are used rather than therecommended alkaline batteries?Carbon batteries do not allow as much current draw asalkaline batteries, <strong>and</strong> even new carbon batteries will notretract the bolt sufficiently for frequent openings. So, be sureto use alkaline batteries, preferably Duracell ® br<strong>and</strong>.Is there a recommended procedure for installing batteries inst<strong>and</strong>ard, two-battery keypads?Yes – install new batteries by pushing them directly into thebattery connectors attached to the keypad circuit board. It isimportant to support the connectors so they are not bent dueto excessive force.Does the lock function properly in high humidity conditions?Yes – S&G’s 6120 design protects the electronic boards with acoating that shields the lock’s electronic components from theeffects of humidity. <strong>Lock</strong>s have been tested in uncured firesafes for a 90-day period <strong>and</strong> shipped cross-country withoutincident, <strong>and</strong> they continued to function properly.Has the 6120 been tested for electromagnetic interference(EMI), <strong>and</strong> static electricity?Yes—under stun gun attacks, the 6120 fails secure. <strong>Lock</strong>sproduced after March, 1995 provide ground paths that allowstatic electricity to dissipate into the safe body, preventingcircuit damage. In the first quarter of 1996, a ground circuitwas also added to the keypad.What is the effect of magnetism on the product?None—magnetic fields cannot be used to compromise6120 or 6123 locks as they can with some locks that rely onsolenoid locking devices.What happens when the 6120 or 6123 lock is electronicallyattacked?If attacked with low voltage, the lock is not affected. If highvoltage is applied, the lock is designed to fail secure (the lockremains closed). Therefore, attempts to defeat the lock willbe unsuccessful. After an attack with high voltages, someelectrical components could be damaged <strong>and</strong> may require lockreplacement.What is the maximum distance the lock can be located fromthe keypad?The 6120 <strong>and</strong> 6123 can be supplied with wire lengths upto 10 feet, at an additional cost. Greater lengths are notrecommended.How can the 6120 or 6123 be used to retrofit a mechanicallock that incorporates a wingback cover?Using longer cover screws, the mechanical lock’s wingbackcover can be fastened directly on top of the 6120 or 6123 lockcover. Before doing this, use a file or grinder to remove anyprojections from the underside of the wingback cover.© Copyright 2011, <strong>Sargent</strong> & <strong>Greenleaf</strong>, Inc.33
Commonly Asked Questions & AnswersModels 6120 <strong>and</strong> 6123—Motorized <strong>Electronic</strong> Combination <strong>Lock</strong>sWhat resistance will the keypad have to wear or puncture?Can the keypad be punctured with a ballpoint pen orfingernail?Special care should always be used when entering your code.The keypad is protected with a tough polypropylene materialthat makes a puncture unlikely, <strong>and</strong> impossible for dust <strong>and</strong>debris to interfere with the operation of the push-button keys.The new plastic dome design is superior to metal domes <strong>and</strong>will continue to function even if the dome is damaged <strong>and</strong>collapsed. Our laboratory testing has surpassed 500,000code input cycles with no failures using a pointed input tool,similar to a ballpoint pen. Although wear was noticeableafter this extensive testing, the lock remained operational.In actual operation, changing codes periodically will preventnoticeable keypad wear.Can the audible beep, which confirms code input, be adjustedor mounted remotely to an external sounding device?Yes—a remote indicator became available in 1996 with acount-up or countdown display, LED, <strong>and</strong> a remote sounder.What is the warranty period <strong>and</strong> what does it cover?S&G warrants all Comptronic ® locks for two years from thedate of shipment from S&G’s factory. The locks shall be freefrom defects in materials <strong>and</strong> workmanship, provided they arenormally <strong>and</strong> properly used according to <strong>Sargent</strong> & <strong>Greenleaf</strong>’swritten instructions.What happens to the lock when there is a bolt side pressurefrom the safe’s boltwork?The boltwork of a safe, under certain conditions, can placeexcessive pressure on the side of any lock’s bolt. When thisoccurs, the lock’s bolt cannot retract properly. To relieve sidepressure on the lock bolt, jiggle the safe’s h<strong>and</strong>le. This actionwill remove the pressure on the lock’s bolt. Then re-enter avalid code to open the safe. No damage occurs to the lockunder these circumstances.Does the lock have a duress mode?For duress, use one of the following lock models: 6124, 6125,6126, 6127, 6128, 6129, or 6150.Can the lock replace a st<strong>and</strong>ard mechanical lock?The 6120 <strong>and</strong> 6123 mounting holes, bolt placement <strong>and</strong>throw are identical to a 6730 combination lock. The casedimensions are equal except for the thickness of the lockbody, which is .044” greater than the 6730.Are the 6120 <strong>and</strong> 6123 manipulation-resistant?Yes—traditionally manipulation techniques are ineffectiveon the 6120 <strong>and</strong> 6123 locks. They are also designed to resistr<strong>and</strong>om code input by locking out for up to 15 minutes afterincorrect codes are entered. Both the 6120 <strong>and</strong> 6123 are ULType 1 Listed.34© Copyright 2011, <strong>Sargent</strong> & <strong>Greenleaf</strong>, Inc.
Commonly Asked Questions & AnswersModels 6120 <strong>and</strong> 6123—Motorized <strong>Electronic</strong> Combination <strong>Lock</strong>sWhat are the service or maintenance requirementsfor the 6120 <strong>and</strong> 6123?Due to the design, substantiated by S&G testing, no serviceis needed, even in harsh environments. S&G laboratorytesting consistently exceeded 500,000 opening cycles withoutproblems. Changing the batteries is the only service required.How should the lock be mounted?Either lock can be mounted in any position, including thest<strong>and</strong>ard positions of right-h<strong>and</strong>, left-h<strong>and</strong>, vertical-up, <strong>and</strong>vertical-down.Is the 6120/6123 a unique S&G design?Yes—the electronics, motor, <strong>and</strong> all other component partsare unique S&G designs. S&G has a license arrangementwith another company to assure there are no infringements onexisting patents.How long does the bolt stay retracted after code entry?The bolt retracts for 6 seconds, allowing sufficient time toturn the safe’s h<strong>and</strong>le.How far does the lock bolt retract?Under normal operation, the bolt retracts at least .375”,leaving no more than .109” extended (our installationrequirements are .150”, case to boltwork). These arethe same dimensions as the st<strong>and</strong>ard bolt of the 6730mechanical combination lock. <strong>Lock</strong> bolt retraction isdependent on battery condition.If user codes <strong>and</strong> time delay are entered through a MasterCode, what happens to the user codes <strong>and</strong> time delay if theMaster Code is changed?Nothing, because a Master Code is only a means to implementthe change procedure for user codes or time delays. For the6123, it can also set the mode of lock operation, time delaywindow duration, <strong>and</strong> set the time delay override code.How do I change the Master Code?Press 74 . Press the six digits of your code, followed by #.*Wait for the lock to beep 5 times. Press 1 . Press the six*digits of your new code, followed by #. Wait for the lock tobeep 3 times. Again press the six digits of your new code,followed by #. The lock will again beep 3 times.How do I know that the code changed?If your lock emits a continuous tone for about one secondanytime during the code changing procedure, you have madean error. When this happens, the lock ignores your newcode <strong>and</strong> reverts to the old one. For more detailed changinginstructions, see the complete version of the operatinginstructions found earlier in this manual.What if the master code <strong>and</strong> user codes are forgotten?S&G recommends ordering locks with the management resetcode (MRC) option. This allows the lock to be reset to thefactory master code setting (1,2,3,4,5,6 #).What happens if someone takes my keypad. Can theydetermine my code(s):The keypad is a “dumb” input terminal. Your codes <strong>and</strong>security information are stored in the lock body, inside thesafe. No one can steal your codes by taking the keypad. Tooperate your lock, simply plug in a new keypad.If my keypad is taken <strong>and</strong> the lock cable cut, how canI get in my safe?A qualified safe technician can temporarily attach a newkeypad <strong>and</strong> cable section <strong>and</strong> use your code to open the safe.Once the safe is open, the lock body (<strong>and</strong> attached cable)should be replaced.© Copyright 2011, <strong>Sargent</strong> & <strong>Greenleaf</strong>, Inc.35
A Brief History of S>he <strong>Sargent</strong> & <strong>Greenleaf</strong> Story—Over a Century of Security<strong>Sargent</strong> & <strong>Greenleaf</strong> prides itself on a tradition of quality <strong>and</strong> innovation which stretches back to 1857. It was thenthat James <strong>Sargent</strong>, a bright <strong>and</strong> inventive young sales agent for Yale & <strong>Greenleaf</strong> <strong>Lock</strong> Manufacturers, made thedecision to build a lock that would offer security far surpassing that of any device available of the time. The resultof his resolve <strong>and</strong> genius was <strong>Sargent</strong>’s Magnetic Bank <strong>Lock</strong>, the first successful key changeable combination lock. The lock gainedalmost immediate acceptance from safe manufacturers <strong>and</strong> the United States Treasury Department, bringing financial stability <strong>and</strong>paving the way for James <strong>Sargent</strong> to continue bringing new ideas <strong>and</strong> products to the security industry.In 1865, one of Mr. <strong>Sargent</strong>’s former employers, Halbert <strong>Greenleaf</strong>, became his equal partner in the firm of <strong>Sargent</strong> &<strong>Greenleaf</strong>. A manufacturing facility was built in Rochester, New York, <strong>and</strong> the company remained in that city until 1975. James <strong>Sargent</strong>was never one to rest on the success of past achievements. In 1868, he invented <strong>Sargent</strong>’s Automatic <strong>Lock</strong>, bringing refinements to theoriginal <strong>Sargent</strong>’s Magnetic Bank <strong>Lock</strong>.Then, in 1873, using parts from locks <strong>and</strong> a pair of eight-day kitchen clocks, Mr. <strong>Sargent</strong> created the first time lock to beinstalled on a bank vault door. He personally connected the time lock to the vault door of the First National Bank in Morrison, Illinois,on May 26, 1874. This lock continued to secure the vault for nearly forty years until the bank was remodeled <strong>and</strong> a larger vault was built.In 1880, Mr. <strong>Sargent</strong> connected one of his combination locks to a delay timer, creating the first Time Combination <strong>Lock</strong>, alock that would remain locked for a predetermined amount of time after the combination was dialed. This was the forerunner of today’s<strong>Sargent</strong> & <strong>Greenleaf</strong> Timebination.These inventions are just a sampling of the numerous advancements <strong>and</strong> innovations in security hardware that can beattributed directly to James <strong>Sargent</strong>. His tireless efforts <strong>and</strong> clear vision of what comprises good security were responsible for thesuccess of his young company. These same qualities continue to drive <strong>Sargent</strong> & <strong>Greenleaf</strong> today.Times have changed since the early days in Rochester, New York. <strong>Sargent</strong> & <strong>Greenleaf</strong> now occupies 100,000 square feetof manufacturing space <strong>and</strong> 22,000 square feet of offices in Nicholasville, Kentucky. The company also serves European <strong>and</strong> otherinternational customers from a facility in Switzerl<strong>and</strong>. <strong>Safe</strong> manufacturers, independent safe technicians, <strong>and</strong> locksmiths throughout theUnited States <strong>and</strong> the world rely on the quality <strong>and</strong> value of S&G products.Today’s <strong>Sargent</strong> & <strong>Greenleaf</strong> offers a full line of mechanical <strong>and</strong> electronic locks for safes, vaults, <strong>and</strong> safe deposit boxes,as well as other specialty security devices. S&G makes locks that secure safes designed to store sensitive information. In addition,doors that secure special areas where classified information is developed <strong>and</strong> stored are protected by <strong>Sargent</strong> & <strong>Greenleaf</strong> combinationlockeddeadbolts. Special designs even combine a high degree of security for these rooms while providing easy, one motion exit for theroom’s occupants in case of a life threatening emergency.From combination locks in commercial <strong>and</strong> government service—from time locks to safe deposit locks—from high securityexit devices to special purpose padlocks—<strong>Sargent</strong> & <strong>Greenleaf</strong> remains committed to the ideals of its founder, James <strong>Sargent</strong>. That isto provide security, quality, <strong>and</strong> value by leading the security industry with innovative products <strong>and</strong> a thorough underst<strong>and</strong>ing of thesecurity needs of our customers.36© Copyright 2011, <strong>Sargent</strong> & <strong>Greenleaf</strong>, Inc.
Corporate HeadquartersOne Security DriveNicholasville, KY 40356Phone 859.885.9411FAX 859.885.3063European Headquarters9, chemin du Croset1024 EcublensSwitzerl<strong>and</strong>Phone 41 21 694 34 00FAX 41 21 694 34 09www.sargent<strong>and</strong>greenleaf.comrev. 3/2/2011Document 630-673