Cisco WAP200 Wireless-G Access Point with PoE and ...
Cisco WAP200 Wireless-G Access Point with PoE and ... Cisco WAP200 Wireless-G Access Point with PoE and ...
Wireless-G Access Point with Power Over Ethernet and RangeboosterThe Administration - Log TabOn this screen you can configure the log settings and alerts of particular events.LogYou can have logs that keep track of the Access Point’s activities.Email AlertE-Mail Alert. If you want the Access Point to send e-mail alerts in the event of certain attacks, select Enabled.The default is Disabled.E-Mail Address for Logs. Enter the e-mail address that will receive logs.Figure 6-23: Administration - LogNotification Queue LengthLog Queue Length. You can designate the length of the log that will be e-mailed to you. The default is 20 entries.Log Time Threshold. You can designate how often the log will be emailed to you. The default is 600 seconds (10minutes).Syslog NotificationSyslog is a standard protocol used to capture information about network activity. The Access Point supports thisprotocol and sends its activity logs to an external server. To enable Syslog, select Enabled. The default isDisabled.Syslog Server IP Address. Enter the IP address of the Syslog server. In addition to the standard event log, theAccess Point can send a detailed log to an external Syslog server. The Access Point’s Syslog captures all logactivities and includes this information about all data transmissions: every connection source and destination IPaddress, IP server, and number of bytes transferred.LogSelect the events that you want the Access Point to keep a log.Unauthorized Login Attempt. If you want to receive alert logs about any unauthorized login attempts, click thecheckbox.Authorized Login. If you want to log authorized logins, click the checkbox.Chapter 6: Configuring the Wireless-G Access PointThe Administration - Log Tab36
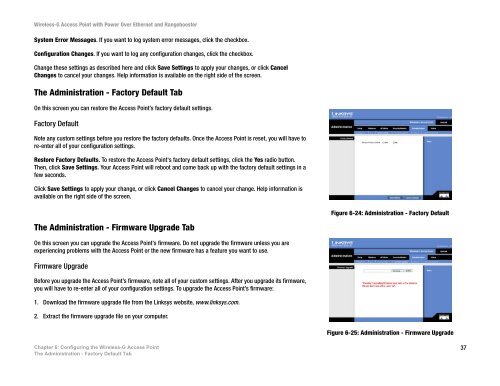
Wireless-G Access Point with Power Over Ethernet and RangeboosterSystem Error Messages. If you want to log system error messages, click the checkbox.Configuration Changes. If you want to log any configuration changes, click the checkbox.Change these settings as described here and click Save Settings to apply your changes, or click CancelChanges to cancel your changes. Help information is available on the right side of the screen.The Administration - Factory Default TabOn this screen you can restore the Access Point’s factory default settings.Factory DefaultNote any custom settings before you restore the factory defaults. Once the Access Point is reset, you will have tore-enter all of your configuration settings.Restore Factory Defaults. To restore the Access Point's factory default settings, click the Yes radio button.Then, click Save Settings. Your Access Point will reboot and come back up with the factory default settings in afew seconds.Click Save Settings to apply your change, or click Cancel Changes to cancel your change. Help information isavailable on the right side of the screen.Figure 6-24: Administration - Factory DefaultThe Administration - Firmware Upgrade TabOn this screen you can upgrade the Access Point’s firmware. Do not upgrade the firmware unless you areexperiencing problems with the Access Point or the new firmware has a feature you want to use.Firmware UpgradeBefore you upgrade the Access Point’s firmware, note all of your custom settings. After you upgrade its firmware,you will have to re-enter all of your configuration settings. To upgrade the Access Point’s firmware:1. Download the firmware upgrade file from the Linksys website, www.linksys.com.2. Extract the firmware upgrade file on your computer.Figure 6-25: Administration - Firmware UpgradeChapter 6: Configuring the Wireless-G Access PointThe Administration - Factory Default Tab37
- Page 1 and 2: Wireless-G Access Pointwith Power O
- Page 3 and 4: Wireless-G Access Point with Power
- Page 5 and 6: Wireless-G Access Point with Power
- Page 7 and 8: Wireless-G Access Point with Power
- Page 9 and 10: Wireless-G Access Point with Power
- Page 11 and 12: Wireless-G Access Point with Power
- Page 13 and 14: Wireless-G Access Point with Power
- Page 15 and 16: Wireless-G Access Point with Power
- Page 17 and 18: Wireless-G Access Point with Power
- Page 19 and 20: Wireless-G Access Point with Power
- Page 21 and 22: Wireless-G Access Point with Power
- Page 23 and 24: Wireless-G Access Point with Power
- Page 25 and 26: Wireless-G Access Point with Power
- Page 27 and 28: Wireless-G Access Point with Power
- Page 29 and 30: Wireless-G Access Point with Power
- Page 31 and 32: Wireless-G Access Point with Power
- Page 33 and 34: Wireless-G Access Point with Power
- Page 35 and 36: Wireless-G Access Point with Power
- Page 37 and 38: Wireless-G Access Point with Power
- Page 39 and 40: Wireless-G Access Point with Power
- Page 41: Wireless-G Access Point with Power
- Page 45 and 46: Wireless-G Access Point with Power
- Page 47 and 48: Wireless-G Access Point with Power
- Page 49 and 50: Wireless-G Access Point with Power
- Page 51 and 52: Wireless-G Access Point with Power
- Page 53 and 54: Wireless-G Access Point with Power
- Page 55 and 56: Wireless-G Access Point with Power
- Page 57 and 58: Wireless-G Access Point with Power
- Page 59 and 60: Wireless-G Access Point with Power
- Page 61 and 62: Wireless-G Access Point with Power
- Page 63 and 64: Wireless-G Access Point with Power
- Page 65 and 66: Wireless-G Access Point with Power
- Page 67 and 68: Wireless-G Access Point with Power
- Page 69 and 70: Wireless-G Access Point with Power
- Page 71 and 72: Wireless-G Access Point with Power
- Page 73 and 74: Wireless-G Access Point with Power
<strong>Wireless</strong>-G <strong>Access</strong> <strong>Point</strong> <strong>with</strong> Power Over Ethernet <strong>and</strong> RangeboosterSystem Error Messages. If you want to log system error messages, click the checkbox.Configuration Changes. If you want to log any configuration changes, click the checkbox.Change these settings as described here <strong>and</strong> click Save Settings to apply your changes, or click CancelChanges to cancel your changes. Help information is available on the right side of the screen.The Administration - Factory Default TabOn this screen you can restore the <strong>Access</strong> <strong>Point</strong>’s factory default settings.Factory DefaultNote any custom settings before you restore the factory defaults. Once the <strong>Access</strong> <strong>Point</strong> is reset, you will have tore-enter all of your configuration settings.Restore Factory Defaults. To restore the <strong>Access</strong> <strong>Point</strong>'s factory default settings, click the Yes radio button.Then, click Save Settings. Your <strong>Access</strong> <strong>Point</strong> will reboot <strong>and</strong> come back up <strong>with</strong> the factory default settings in afew seconds.Click Save Settings to apply your change, or click Cancel Changes to cancel your change. Help information isavailable on the right side of the screen.Figure 6-24: Administration - Factory DefaultThe Administration - Firmware Upgrade TabOn this screen you can upgrade the <strong>Access</strong> <strong>Point</strong>’s firmware. Do not upgrade the firmware unless you areexperiencing problems <strong>with</strong> the <strong>Access</strong> <strong>Point</strong> or the new firmware has a feature you want to use.Firmware UpgradeBefore you upgrade the <strong>Access</strong> <strong>Point</strong>’s firmware, note all of your custom settings. After you upgrade its firmware,you will have to re-enter all of your configuration settings. To upgrade the <strong>Access</strong> <strong>Point</strong>’s firmware:1. Download the firmware upgrade file from the Linksys website, www.linksys.com.2. Extract the firmware upgrade file on your computer.Figure 6-25: Administration - Firmware UpgradeChapter 6: Configuring the <strong>Wireless</strong>-G <strong>Access</strong> <strong>Point</strong>The Administration - Factory Default Tab37


