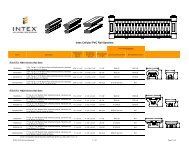
Railing Instructions RS40 - Intex Millwork Solutions
Railing Instructions RS40 - Intex Millwork Solutions
Railing Instructions RS40 - Intex Millwork Solutions
- No tags were found...

Create successful ePaper yourself
Turn your PDF publications into a flip-book with our unique Google optimized e-Paper software.
<strong>Intex</strong> <strong>RS40</strong> Hampton Rail System Installation <strong>Instructions</strong>Horizontal Rail Section Application (NOTE: for 3-Line Rail, read section 5 first beforestarting at Section 1)1. Measure to determine baluster layout, cut rail sections to length.a. Insure newels or columns to which rail will be mounted are plumb and sturdyenough to support rail. If newel/column covers are used, insure they have blocking at eachlocation where railing will be attached.b. Measure span at top and bottom rail locations.c. For standard baluster spacing (with the variable spaces at the ends of each railsection), use the pre-marked locations inside the bottom rail and baluster cap. Determinebest end spacing by either locating a baluster directly at the center of the rail section, or themid-point between two balusters as the center of the rail section. Once Baluster spacing isdetermined, insuring that spacing is the same on both, cut the end(s) of Baluster Cap andBottom Rail to length. Cut Rail Top Cap to required length.d. If equal spacing between all balusters and the newels/columns is desired,disregard section ‘c’ above and determine spacing based upon width and number ofbalusters (Note: check local building codes for maximum spacing allowed).2. Drill and assemble rail/baluster section.a. Using the decided upon spacing at the center of the location for each Baluster,drill a 1/8” hole through the Bottom Rail at the centerline. Repeat this for process for thebaluster cap, using the same spacing.b. Secure each Baluster with one #8 x 2-1/2” Square Drive T17 18-8SS screwthrough the Baluster Cap, and one through the Bottom Rail. Insure Balusters are straightand aligned and secure with one #8 x 1-1/2” Square Drive T17 18-8SS screw through theBottom Rail (offset from center) to preclude Baluster from rotating after installation.3. Prepare aluminum reinforcements.a. Cut aluminum rail reinforcements to length, 1/4” shorter than the vinyl rails.b. Attach mounting brackets to both ends of each aluminum rail reinforcement,using four #8 x 1-1/4” Square Drive T17 18-8SS screws supplied. Lubricate the threadswith oil or soap to avoid binding or stripping screws.c. Locate crush block(s) provided tothe bottom aluminum rail reinforcement,with spacing no greater than 36” from theend, or between Crush Blocks.d. Drill a 3/16” hole through thealuminum rail reinforcement, and secureeach crush block using one #8 x 2-1/2”Square Drive T17 18-8SS screw.<strong>RS40</strong>INST 9-1-13
e. Drill one additional 3/16” hole at each end of the bottom aluminum railreinforcement for drainage.4. Install raila. Position bottom aluminum rail reinforcement, with crush block(s) attached,between newels or columns, centered in newel or column face, and secure each end withtwo #10 x 3” Slot Hex Washer Head TA 18-8SS screws supplied.b. Position vinyl rail/baluster assembly between newels or columns and seat fullydown on bottom aluminum rail reinforcement.c. Seat remaining aluminum reinforcement into Baluster Cap.d. Insure rail is centered on face of newel or column and secure each end with two#10 x 3” Slot Hex Washer Head TA 18-8SS screws supplied.e. Drill a 3/16” hole through the aluminumreinforcement over every third baluster (note: offset toavoid the screw which attaches the Baluster to theBaluster Cap) and secure the aluminum reinforcement tothe rail/baluster assembly using #8 x 2-1/2” Square DriveT17 18-8SS screwsf. Drill a 3/16” hole down through the aluminumreinforcement and the Baluster Cap between the firstand second baluster at both ends and near the center ofthe span (all between balusters). Countersink holes fromunderside of baluster cap for a #8 Screw to ensure thatscrew seats flush with PVC and to prevent stripping.g. Apply a bead of latex caulk at the contact areas where the Rail Top Cap seatson the Baluster Cap. Seat the Rail Top Cap fully onto the Baluster Cap, and use the screwsprovided to attach Rail Cap, screwing up through the underside of the Baluster Cap, besure not to over-tighten screw to prevent stripping. Note: screws provided for <strong>RS40</strong> flat caprail are #8 x 1-3/4” Square Drive T17 18-8SS, and screws for <strong>RS40</strong> peaked cap rail are #8x 2-1/4” Square Drive T17 18-8SS.5. 3-Line Raila. Cut all balusters to height (24” for 36” finished rail height, 30” for 42” finished railheight). Cut the remaining short pieces of the balusters to 3-7/8”. These will be the spacerbalusters for the upper section, and can be aligned one over each longer baluster, orspaced as desired.b. Follow steps 1 through 4e above to install lower rail section.c. 3-Line rail sections use the ‘flat’ top rail cap as the bottom for the upper section.Determine the spacer baluster locations and mark this flat cap and the upper rail BalusterCap at the desired locations. Secure the 3-7/8” spacer balusters as in section 2 above.d. Install the lower rail section as described in Section 4b through 4f above.e. Install the upper rail section as described in Section 4b through 4f above.<strong>RS40</strong>INST 9-1-13