2 - The Dixons Stores Group Image Server
2 - The Dixons Stores Group Image Server
2 - The Dixons Stores Group Image Server

You also want an ePaper? Increase the reach of your titles
YUMPU automatically turns print PDFs into web optimized ePapers that Google loves.
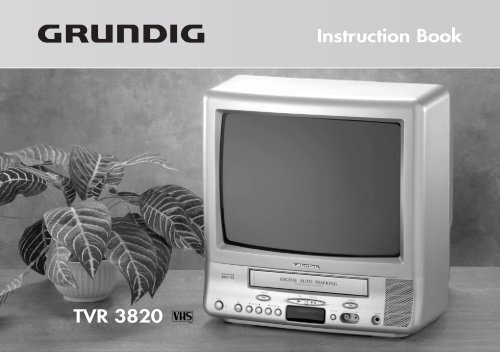
TVR 3820
Please read these instructions before attempting to use yourcombined television and video cassette recorder (TV/VCR)Never use your TV/VCR if itis damaged in any way.Always place your TV/VCR ona flat level surface avoidinganywhere which may besubject to strong vibration.Weather - It isadvisable to unplugthe aerial during anelectrical storm.Do not remove anyfixed covers as thismay exposedangerous voltages.Interference - Do not place your TV/VCRon or near appliances which may causeelectromagnetic interference (TV or HI-FIspeakers). If you do, it may adversely affectthe working of the unit, causing erraticplayback distorting picture or sound.Temperature - Avoid extremes oftemperature, either hot or cold, place yourTV/VCR well away from heat sources suchas radiators or gas/electric fires.Moisture - Do not allow your TV/VCR tobe exposed to rain, moisture or dust. If anyliquid is spilt into your TV/VCR it can causeserious damage. If you spill any liquid intoyour TV/VCR switch it off at the mainsimmediately. Contact your storeimmediately.Your TV/VCR issupplied with anapproved 13 ampfused mains plug.When replacing thefuse always use a 5amp (BS 1362)approved type.To obtain a replacementfuse contact your store.Never use this plug if the fuse cover is missing.To obtain a replacement fuse cover contactyour store.If the mains sockets in your home differ or arenot suitable for the type of plug supplied, thenthe plug should be cut from the mains lead anda suitable type fitted. You must use a 13 ampplug (BS 1363) and fit a 5 amp fuse (BS 1362).If any other type of plug is used a 5 amp fusemust be fitted, either in the plug, adaptor or atthe distribution board.Please refer to the wiring instructions atthe back of this book.Batteries are easilyswallowed by youngchildren. Do notallow young childrento play with theremote control unit.Ventilation - <strong>The</strong> ventilation holes on thetop and sides of your unit prevent it fromover heating. Do not block or cover theseholes - especially with cloth or paper.2
Features of your TV/VCRGet to know yourcombined 14"(34cm) colourtelevision and videocassette recorderwith on screenprogramming.Your TV/VCR marked"HQ" (high quality)incorporates VHS highquality technology.A built-in detailenhancer is used toboost the recordedsignal and providemaximum picture quality in playback.Your TV/VCR isdesigned to playbackNTSC colour tape.(<strong>The</strong> format usuallyused in Americaand Japan)Video index search systemautomatically records marks onthe tape whenever you start arecording.<strong>The</strong>se marks are located byyour TV/VCR so that you can gostraight to your desiredrecording without having tokeep stopping and viewing your tape.<strong>The</strong> on screen display allows preciseremote control adjustment of brightness,contrast, colour, andsharpness. When you select achannel or make other changes,your TV/VCR will show anindicator on the screen for a fewseconds.<strong>The</strong> built-in timer allowsautomatic unattended recordingof up to 8 TV programmeswithin 1 month. Using theserial facility you can easilyrecord a programme which isbroadcast at the same timeevery day or every week.Timer recordings can be programmed and confirmed onscreen.the magazine services operated bytelevision companies. A variety ofinformation is available including News,Weather, Financial and Travel information.In addition to Teletext your TV/VCR incorporatesFastext. Using the four coloured Fastext buttonson the remote control you may move aroundTeletext services with greater ease and speed.ABCYour TV allows you to access Teletext,200Your TV/VCR includes a SecurityPIN code feature that canprevent unauthorised use of yourTV/VCR after it has beendisconnected from the mains supplyfor 30 minutes or longer.Automatic repeat play system willautomatically play back the sametape repeatedly. Your TV/VCR ispre-set to standard play but you mayextend the recording time of your videotapes by using the long play feature.On screen programming allows easyevery day use of the functions you arelikely to use most often duringeveryday playback and recording.3
Useful background informationIf you have any difficulty inserting the batteries in the remote control please refer to your Quick Start guide.Remote control operation may becomeerratic: if direct sunlight, fluorescentlamp, standard household lamp(incandescent) or any other strong lightsource shines on the remote sensor.When there is an obstacle betweenyour TV/VCR and the remote control.If you try to operate your TV/VCR froma distance greater than 5 metres.If you try to operate your TV/VCR awayfrom the normal viewing angle (over 30 oeither side of the remote sensor).30 o 30 o5 metresHow to insert batteriesPush and slide the battery cover on the back of the remote control. Use two AAA / R03 / MN2400 size batteriesfor the remote control. Insert the batteries according to the polarity illustration inside the battery compartment.Make sure + matches + and – matches –.<strong>The</strong> batteries may last approximately one year depending on how much the remote control is used. For best performance it isrecommended that batteries are replaced on a yearly basis, or when remote control operation becomes erratic.Do not mix old and new batteries or different types.Weak batteries can leak and severely damage your remote control. Always remove batteries immediately when theybecome weak, or if your TV/VCR is not to be used for a long time.4
Your instruction book is divided into four sections.ContentsSetting up your combined Televisionand Video Cassette RecorderThis will explain how to set up your Television andVideo Cassette Recorder for all its uses.Television operationThis will explain how to use all the features of the Colour Television.Video Cassette Recorder operationThis will explain how to use all the features of theVideo Cassette Recorder.Fault findingIf you encounter difficulty using your Television and VideoCassette Recorder some of the most common problems areexplained.6Page13Page25Page40Page5
Installing your TV/VCRTo complete your installation you will need to connect your TV/VCR to an aerial (not supplied) .AERIALAV11Insert(not supplied)the aerial into the aerial socket of your TV/VCR.<strong>The</strong> type of aerial required depends on the position of your home, its distance from the transmitter and local interference. If you do not have an aerialand you are uncertain of what to buy, you should seek the advice of a local aerial contractor.2Plug your TV/VCR into a mains supply (AC).6
Connecting your TV/VCR to a Satellite system using a SCART leadDue to the wide variety of satellite receivers, decoders and systems available, the connection diagram given on thispage is only a basic guide. If you require a more detailed explanation please refer to your satellite system instructions.If you wish to view yoursatellite system using aSCART cable you must selectthe channel marked AV bypressing 0/AV button.Back view of your TV/VCRAERIAL(not supplied)Connection cableSatelliteAV1(not supplied)Satellite receiver/decoderOUTLNB ININin (LNB)(screw thread 'F'connector)All connections must be madewith both your TV/VCR andsatellite receiver unplugged fromthe mains supply.(not supplied)Aerial(not supplied)SCART lead(not supplied)Satellite dishYour TV/VCR is installed. Turn to the next page to see how to tune in TV stations.7
How to tune in television stationsBefore you can view a television station, it must be tuned into your TV/VCR's memory. This section will show youhow to achieve this. You cannot tune TV channels if an aerial (not supplied) is not connected.Selecting the languageONSLEEPRECMONITOREJECTPress MENU; the language screen will bedisplayed (This will only happen when you first use the menu; normally the maincontrol menu would be displayed).:Select your desired language using PLAY or STOP, then confirm it by pressing ENTER.LANGUAGE/SPRACHE/LANGUELINGUA/LENGUAENGLISHDEUTSCHFRANCAISITALIANOESPANOLSELECT :OK : ENTER81 2 34 5 67 8REWCALLSPEEDREC/OTRPROGRAMMENUREVEAL/ATR0AVHOLDENTERCOUNTERRESET9VOLUMEPLAYSTOPF / T / BCANCELZERORETURNCH/TRACKINGPAGEMUTEPAUSETIMER RECTEXTMIX / TVSUB PAGEINDEXF.FWD1Make sure that your TV/VCR is properly installed.Press the MAIN POWER switch on the front of yourTV/VCR to the on position.Press the ON button on the front of your TV/VCR orthe remote control.Proceed with CLOCK SET first. <strong>The</strong> CLOCKshould be set before you proceed with CHTUNING (see page 10).23Press MENU on your remote control until the mainmenu appears on your TV screen.Press PLAY or STOP on your remote control untilthe square next to “CH TUNING“ starts to flash.Please note that you cannot access CH TUNING if theAV channel is selected.Press ENTER on your remote control.Press F.FWD to search up the wavebandor REW to search down the waveband.Each time a station is found the searchwill stop.Press REW or F.FWD to continuesearching until the station you want isfound.REC/OTRREWPROGRAMMENUHOLDENTERPLAYSTOPF / T / BCANCELSwitch on your TV then press ON on the set or on the remote control.---- ------------------SEARCH:/ F. TUNE :EXIT : MENU :TIMER REC SETAUTO REPEATOFFCH TUNINGTV SETUPPIN CODE REGISTRATIONSYSTEM SETUPSELECT :ENTER : ENTEREXIT : MENUSelect CH TUNINGSearch for your required stationIf you do not press a key within 1 minute your TV/VCR will remove the tuning menu.PAUSETIMER RECF.FWDTEXTMIX / TVONSLEEP1 2 34 5 67 8REW0PROGRAMMENUHOLDENTERRECMONITOREJECTCH/TRACKINGPAGE9VOLUMESTOPREVEAL/ COUNTERF / T / BCANCELZEROTIMER RECF.FWDTEXTMIX / TVCH 1POWERONOFF------ ----------------=ONVOLUMEREWCH 1SEARCH:/ F. TUNE :OK : ENTER EXIT : MENUCHANNEL
How to tune in television stations4Should you need to make the picture even clearer andsharper, press PLAY or STOP.When you have a clear crisp picture store this settingby pressing ENTER.REWPROGRAMMENUHOLDENTERSTOPF / T / BCANCELTIMER RECF.FWDTEXTMIX / TV------ ----------------SEARCH:/ F. TUNE :EXIT : MENUCH 1Manually fine tune the pictureIt is highly recommended thatyou store the stations you tune inthe order shown in the table below.BBC 1 channel 1BBC2 channel 2ITV channel 3CHANNEL 4 channel 4CHANNEL 5 channel 5 (if receivable)SATELLITE channel 6 (if fitted)56Press7Press PLAY or STOP to select your requiredchannel number (1~80).Press ENTER to store the channel number.Use the channel guide on the left for guidance.Repeat stages 3 - 5 for tuning other channels.Press MENU to remove the tuning menu from thescreen.If at a later date you wish to skip an unwantedchannel when using CH/TRACKING up ( ) ordown ( ), press CANCEL on the remote control.<strong>The</strong> channel number will flash when skip is selected for thatchannel.To cancel the skip function, type in the channelnumber i.e. 2 and press CANCEL. <strong>The</strong> channelnumber will cease to flash.REWREWREWPROGRAMMENUPROGRAMMENUPROGRAMMENUHOLDENTERHOLDENTERHOLDENTERSTOPF / T / BCANCELSTOPF / T / BCANCELSTOPF / T / BCANCELTIMER RECF.FWDTEXTMIX / TVTIMER RECF.FWDTEXTMIX / TVTIMER RECF.FWDTEXTMIX / TV------ ----------------CHOK=CH 1: / 0–9: ENTER EXIT: MENUSelect required channel numberCH 1MENU to clear the displayCH 2Press CANCEL to skip the channelYour TV/VCR is now tuned in and ready to watch.9
How to set the clockYour TV/VCR is fitted with a 24 hour clock and a calendar. You will be unable to use your TV/VCR properly unless the timeand date are set and keeping time correctly. Please note that you will be unable to select TIMER REC SET or ON/OFFTIMER SET from the main menu until you have set the CLOCK.RECON SLEEP MONITOR EJECTCH/TRACKING1 2 31PAGE4 5 6Press MENU. <strong>The</strong> SYSTEM SETUP menu will appearon your TV screen.7 8 9VOLUMEIf the main menu appears instead, press PLAY orCALL 0 AVSTOP until the square next to the "SYSTEM SETUP"SPEEDMUTEstarts to flash, then press ENTER.REC/OTRPAUSEPLAY2REWF.FWDPress PLAY or STOP to select "CLOCK SET".Press ENTER, the "CLOCK SET" screen will appear.PROGRAMTIMER RECSTOPHOLD F / T / B TEXTMENU ENTER CANCEL MIX / TVREVEAL/ COUNTER ZERO3ATR RESET RETURNSUB PAGEINDEX<strong>The</strong> date digit will flash.Press REW or F.FWD until the current date isdisplayed.Store the date setting by pressing STOP.Please note that the day of the week setting will not be correctuntil you have finished setting the date, month and year.10REC/OTRREWPROGRAMMENUREC/OTRREWPROGRAMMENUREC/OTRREWPROGRAMMENUHOLDENTERHOLDENTERHOLDENTERPLAYSTOPF / T / BCANCELPLAYSTOPF / T / BCANCELPLAYSTOPF / T / BCANCELPAUSETIMER RECF.FWDTEXTMIX / TVPAUSETIMER RECF.FWDTEXTMIX / TVPAUSETIMER RECF.FWDTEXTMIX / TVSYSTEM SETUPCLOCK SETLANGUAGE/SPRACHE/LANGUELINGUA/LENGUASELECT :ENTER : ENTEREXIT : MENUSelect the SYSTEM SETUP screenSYSTEM SETUPCLOCK SETLANGUAGE/SPRACHE/LANGUELINGUA/LENGUASELECT :ENTER : ENTEREXIT : MENUSelect the CLOCK SET screenCLOCK SETDAY 26 WEDMONTH 1YEAR 2000TIME 0 : 00SELECT :SET : / 0–9OK : ENTEREXIT: MENUEnter the current date
Your TV/VCR will NOT timer record if the clock is not set. After a power failure or beingunplugged from the mains the clock and all programmed settings will continue to operatefor approximately 30 minutes. If the power failure lasts for more than 30 minutesall TIMER RECORD, TIMER and CLOCK settings will be lost.How to set the clock4<strong>The</strong> month digit will flash.Press REW or F.FWD until the current month isdisplayed.Store the month setting by pressing STOP.567<strong>The</strong> year digit will flash.Press REW or F.FWD until the current year isdisplayed.Store the year setting by pressing STOP.<strong>The</strong> hour digit will flash.Press REW or F.FWD until the current hour isdisplayed.(Your TV/VCR uses a 24hr clock)Store the hour setting by pressing STOP.<strong>The</strong> minute digit will flash.Press REW or F.FWD until the current minute isdisplayed.Store your setting by pressing ENTER.<strong>The</strong> CLOCK SET screen will disappear and the time anddate will be displayed for 5 seconds.<strong>The</strong> current date and time is now set in your TV/VCR's memory.REC/OTRREWPROGRAMMENUREC/OTRREWPROGRAMMENUREC/OTRREWPROGRAMMENUREC/OTRREWPROGRAMMENUHOLDENTERHOLDENTERHOLDENTERHOLDENTERPLAYSTOPPLAYSTOPF / T / BCANCELF / T / BCANCELPLAYSTOPF / T / BCANCELPLAYSTOPF / T / BCANCELPAUSETIMER RECF.FWDTEXTMIX / TVPAUSETIMER RECF.FWDTEXTMIX / TVPAUSETIMER RECF.FWDTEXTMIX / TVPAUSETIMER RECF.FWDTEXTMIX / TVCLOCK SETDAY 26 THUMONTH 10YEAR 2000TIME 0 : 00SELECT :SET : / 0–9OK : ENTER EXIT: MENUEnter the current monthCLOCK SETDAY 26 SATMONTH 10YEAR 2002TIME 0 : 00SELECT :SET : / 0–9OK : ENTER EXIT: MENUEnter the current yearCLOCK SETDAY 26 SATMONTH 10YEAR 2002TIME 11 : 00SELECT :SET : / 0–9OK : ENTER EXIT: MENUEnter the current hourCLOCK SETDAY 26 SATMONTH 10YEAR 2002TIME 11 : 30SELECT :SET : / 0–9OK : ENTER EXIT: MENUEnter the current minutes11
Get to know your TV/VCREach button listed in this section has the same function as its corresponding button on theremote control.Cassette compartmentPlayback buttonStop and tape eject buttonREW (Rewind) buttonREW PLAY STOP/EJECT F.FWDF.FWD (Fast Forward) buttonMAIN POWER switchPOWERONOFFONVOLUMECHANNELREC/OTR T.REC STAND BYREC/OTR VIDEO IN AUDIOPHONESHeadphone socketPower ON buttonVIDEO/AUDIO in socketVolume Up/Down buttonsRecord and One touch record (OTR) buttonChannel selection buttonsStand by indicatorREC/OTR indicatorT.REC indicator12
Basic TV operationSelecting a channel .............................................................. 14Adjusting the sound ............................................................ 15How to mute sound ........................................................... 15Call ......................................................................................... 15Headphone socket .............................................................. 15Advanced TV operationAdjusting the picture .......................................................... 16ON and OFF Timer............................................................ 18Sleep Timer .......................................................................... 20TeletextHow to use teletext ........................................................... 21TV operation...13 13
Adjusting the volume and call feature1 2 3CH/TRACKINGPAGERECON SLEEP MONITOR EJECT1 2 34 5 67 8REWCALLSPEEDREC/OTR0AVPLAYCH/TRACKINGPAGE9VOLUMEMUTEPAUSEF.FWD1Press VOLUME up ( ) or down ( ) to adjustthe sound level.2Press MUTE to switch off the sound.When the sound is switched off the mute symbol will appearon screen.Press MUTE a second time or press VOLUME up( ) or down ( ) to switch the sound back on.4 5 67 8CALLSPEEDREC/OTR0AVPLAYVOLUME<strong>The</strong> sound level can be adjusted by using VOLUME ( ) and ( )1 2 34 5 67 8CALLSPEEDREC/OTR0AV9VOLUMEPLAYMUTEPAUSECH/TRACKINGPAGE9VOLUMEMUTEPAUSE<strong>The</strong> sound can be temporarily switched off using MUTE17MUTEPROGRAMMENUREVEAL/ATRHOLDENTERCOUNTERRESETSTOPF / T / BCANCELTIMER RECTEXTMIX / TVZERORETURNSUB PAGEINDEXIf stereo headphones are used,sound may only be apparentthrough one speaker. If thishappens try a stereo/mono adaptor (notincluded) or check the operation of yourheadphones for independent volume orbalance control.3Press CALL on the remote control; the TV screen willdisplay the current time, channel and any otherinformation (e.g. tape counter, record sign).CALL<strong>The</strong> CALL display will not disappear unless you press CALL again.SPEEDREC/OTR4<strong>The</strong> socket will only accept a jack plug the size of thatfound on a normal pair of personal cassette playerheadphones (3.5mm).When used, the speaker of your TV/VCR will bedisconnected.Always remove the headphones after use for normal viewing.<strong>The</strong> next pages describe in greater detail how to operate your TV.1 2 34 5 67 80AVPLAYCH/TRACKINGPAGE9VOLUMEMUTEPAUSE11 : 30 SATPress CALL for channel informationREC/OTRF.FWDVIDEO IN AUDIOPlug your headphones into the headphone socketONOTR 5 : 00 CH 1CH 1–01 : 30 : 21 LPPHONES15
Adjusting the picture<strong>The</strong> picture settings have been adjusted by the factory under optimum signal reception conditions. However, conditions may not bethe same in your area. After turning on your television, allow it to warm up for a few minutes before making any adjustments. Shouldyou wish to reset picture controls back to factory settings press CANCEL (When picture adjustment bar is on the screen).RECON SLEEP MONITOR EJECT161 2 34 5 67 8REWCALLSPEEDREC/OTRMENU0PROGRAMREVEAL/ATRAVHOLDENTERCOUNTERRESET9VOLUMEPLAYSTOPF / T / BCANCELCH/TRACKINGPAGEMUTEPAUSETIMER RECTEXTMIX / TVF.FWDZERORETURNSUB PAGEINDEX123Press MENU on your remote control until the mainmenu appears on your TV screen.Press PLAY or STOP on your remote control tohighlight "TV SETUP".Press ENTER on your remote control.Press PLAY or STOP to highlight "PICTURE".Press ENTER to display the brightness bar;press REW or F.FWD to adjust the brightness of thepicture.REC/OTRREWPROGRAMMENUREC/OTRREWPROGRAMMENUREC/OTRREWPROGRAMMENUHOLDENTERHOLDENTERHOLDENTERPLAYSTOPF / T / BCANCELPLAYSTOPF / T / BCANCELPLAYSTOPF / T / BCANCELPAUSETIMER RECF.FWDTEXTMIX / TVPAUSETIMER RECF.FWDTEXTMIX / TVPAUSETIMER RECF.FWDTEXTMIX / TVTIMER REC SETAUTO REPEATOFFCH TUNINGTV SETUPPIN CODE REGISTRATIONSYSTEM SETUPSELECT :ENTER : ENTEREXIT : MENUPress MENU for the on screen displayTV SETUPON/OFF TIMERPICTURESELECT :ENTER : ENTEREXIT : MENUSelect the picture featuresSETRESETNEXTBRIGHTNESS 0ON:: CANCEL: ENTEREXIT : MENUPress the REW or F.FWD buttons to adjust the brightness of the picture
Adjusting the picture456Press ENTER to display the contrast bar; pressREW or F.FWD to adjust the contrast of the picture.Pictures appear sharpest in the daytime by increasing thecontrast. In the evening (when surroundings are darker) tryreducing the contrast to obtain the best picture.Press ENTER to display the colour bar; press REWor F.FWD to adjust the colour of the picture.Press ENTER to display the sharpness bar; pressREW or F.FWD to adjust the sharpness of thepicture.In weak reception areas, the picture may appear more pleasing whensharpness is set at a lower level.REC/OTRREWSETRESETNEXTCONTRAST 0ON:: CANCEL: ENTEREXIT : MENUPress the REW or F.FWD buttons to adjust the contrast of the pictureREC/OTRREWSETRESETNEXTCOLOUR 0ON:: CANCEL: ENTEREXIT : MENUPress the REW or F.FWD buttons to adjust the colour of the pictureREWPROGRAMMENUPROGRAMMENUREC/OTRPROGRAMMENUHOLDENTERHOLDENTERHOLDENTERPLAYSTOPPLAYSTOPF / T / BCANCELF / T / BCANCELPLAYSTOPF / T / BCANCELPAUSETIMER RECPAUSETIMER RECF.FWDTEXTMIX / TVF.FWDTEXTMIX / TVPAUSETIMER RECF.FWDTEXTMIX / TVSETRESETNEXTSHARPNESS 0ON:: CANCEL: ENTEREXIT : MENUPress the REW or F.FWD buttons to adjust the sharpness of the picture7Press MENU to clear the display.Memorised factory settings can be reset by pressing the CANCEL button whenany of the picture adjustment bars are on screen.<strong>The</strong>se methods of adjusting the picture are used for both TV and VCR operation.REC/OTRREWPROGRAMMENUHOLDENTERPLAYSTOPF / T / BCANCELPAUSETIMER RECF.FWDTEXTMIX / TVCH 117
Timer functions<strong>The</strong> on timer feature allows you to automatically turn on your TV/VCR at a set time. <strong>The</strong> on timer will turn onyour TV/VCR everyday at the same time and select the same channel.<strong>The</strong> off timer allows you to turn off your TV/VCR at a set time. You can set the off timer in conjunction with theon timer. Please note the on/off timer is NOT the same as the video timer record feature.REC/OTRPLAYPAUSEPress MENU on your remote control until the mainmenu on your TV screen.Press PLAY or STOP on your remote control tohighlight "TV SETUP".Press ENTER on your remote control.REWPROGRAMMENUHOLDENTERSTOPF / T / BCANCELTIMER RECF.FWDTEXTMIX / TVTIMER REC SETAUTO REPEATOFFCH TUNINGTV SETUPPIN CODE REGISTRATIONSYSTEM SETUPSELECT :ENTER : ENTEREXIT : MENUSelect the TV SETUP menuRECON SLEEP MONITOR EJECT1 2 34 5 67 8CALL0AVCH/TRACKINGPAGE9VOLUME1Press 2PLAY or STOP until the square next to "ON/OFF TIMER SET" starts to flash.Press ENTER to display the timer menu.REC/OTRREWPROGRAMMENUHOLDENTERPLAYSTOPF / T / BCANCELPAUSETIMER RECF.FWDTEXTMIX / TVTV SETUPON/OFF TIMER SETPICTURESELECT :ENTER : ENTEREXIT : MENUSPEEDMUTESelect the on/off timer menuREC/OTRREWPROGRAMMENUHOLDENTERPLAYSTOPF / T / BCANCELPAUSETIMER RECTEXTMIX / TVF.FWD3Remember your TV/VCR uses a 24 hour clock.<strong>The</strong> square next to "ON TIMER" will flash.Press ENTER to select the on timer. <strong>The</strong> hourdigit will flash.Press PLAY or STOP to enter the hour at whichyou want your TV/VCR to automatically switch on.REC/OTRREWPROGRAMMENUHOLDENTERPLAYSTOPF / T / BCANCELPAUSETIMER RECF.FWDTEXTMIX / TVON/OFF TIMER SETON TIMER7 : 00 CH 1SUN–SATOFF TIMER0 : 00SELECT :SET : / 0-9OK : ENTERCANCELCANCELEXIT : MENUEnter the hourREVEAL/ATRCOUNTERRESETZERORETURNSUB PAGEINDEX4Press F.FWD. <strong>The</strong> minute digit will flash.Press PLAY or STOP to enter the minute at whichyou want your TV/VCR to automatically switch on.Confirm your selection by pressing F.FWD.REC/OTRREWPROGRAMMENUHOLDENTERPLAYSTOPF / T / BCANCELPAUSETIMER RECF.FWDTEXTMIX / TVON/OFF TIMER SETON TIMER7 : 45 CH 1SUN–SATOFF TIMER0 : 00CANCELCANCELSELECT :SET : / 0-9OK : ENTER EXIT : MENUEnter the minutes18
Remember if you are to leave your TV/VCR unattended for a longperiod of time then for safety reasons you must unplug your unitfrom the mains supply.Timer functions56<strong>The</strong> channel digit will flash.Press PLAY or STOP to enter the channel you wish todisplay when your TV/VCR switches on.Confirm your selection by pressing F.FWD.<strong>The</strong> date digit will flash.Press PLAY or STOP to select either the every day orevery week options.Confirm your selection by pressing F.FWD.REC/OTRREWPROGRAMMENUREC/OTRREWPROGRAMMENUHOLDENTERHOLDENTERPLAYSTOPF / T / BCANCELPLAYSTOPF / T / BCANCELPAUSETIMER RECF.FWDTEXTMIX / TVPAUSETIMER RECF.FWDTEXTMIX / TVON/OFF TIMER SETON TIMER7:45 CH 2SUN–SATOFF TIMER0:00ON/OFF TIMER SETON TIMER7:45 CH 2MON–FRIOFF TIMER0:00CANCELCANCELSELECT :SET : / 0-9OK : ENTER EXIT : MENUEnter the channelCANCELCANCELSELECT :SETOK:: ENTER EXIT : MENUEnter the dateIf you make a mistake during settingthe on/off timer, press REW orF.FWD to select the information youwant to change and the press PLAYor STOP to change it.If no off time is set approximately 1hour after the timer turns on yourTV/VCR your unit will turn off again,this prevents your unit from playingcontinuously. If you wish to continueviewing after automatic switch on,press any button on the remotecontrol.7Press PLAY or STOP to activate your on timer.<strong>The</strong> word "CANCEL" will change to "SET" when thetimer is activated.If you wish to cancel the timer on function press PLAY or STOPagain until the word "CANCEL" is displayed.8<strong>The</strong> automatic switch on and off functions will only operate the TV .If you wish to set the off timer press ENTER andrepeat stages 3 - 7.Once you have set the timer(s) press MENU threetimes then switch your TV/VCR to standby bypressing the ON button on the remote control.REC/OTRREWPROGRAMMENUREC/OTRREWPROGRAMMENUHOLDENTERHOLDENTERPLAYSTOPF / T / BCANCELPLAYSTOPF / T / BCANCELPAUSETIMER RECF.FWDTEXTMIX / TVPAUSETIMER RECF.FWDTEXTMIX / TVON/OFF TIMER SETON TIMER7:45 CH 2MON–FRIOFF TIMER0:00SETCANCELSELECT :SETOK:: ENTER EXIT : MENUON/OFF TIMER SETON TIMER7:45 CH 2MON–FRIOFF TIMER11 : 30Set the on timerSETSETSELECT :SETOK:: ENTER EXIT : MENUYou may set the off timer19
Sleep function<strong>The</strong> sleep function allows you to automatically switch your television into standby after a preset amount of time (upto 120 minutes). In addition should you fall asleep or leave your TV/VCR unattended it will automatically switch intostandby 30 minutes after the end of transmissions.RECON SLEEP MONITOR EJECT201 2 34 5 67 8REWCALLSPEEDREC/OTRPROGRAMMENUREVEAL/ATR0AVHOLDENTERCOUNTERRESET9VOLUMEPLAYSTOPF / T / BCANCELCH/TRACKINGPAGEMUTEPAUSETIMER RECTEXTMIX / TVF.FWDZERORETURNSUB PAGEINDEX12Repeated presses of SLEEP will decrease the sleep timer in3To set the sleep timer press SLEEP."SLEEP 120" will appear on screen.<strong>The</strong> display will clear in five seconds and your TV/VCRwill switch off automatically after 120 minutes.10 minute intervals from 120 minutes to 10 minutes.1st press .......... 120 minutes.2nd press ......... 110 minutes.. . .etc. ............... . . . 100, 90, 80.When you have set the sleep timer your TV/VCR will returnto a normal picture and automatically switch off after thepreset sleep time.To cancel the sleep timer set the sleep timer to 0.<strong>The</strong> display will clear in five seconds and your TV/VCRwill not switch off automatically.<strong>The</strong> sleep function will not affect any TV/VCR record settings,only the picture will shut off after the sleep time passes.RECON SLEEP MONITOR EJECT1 2 34 5 6CH/TRACKINGPAGE7 8 9VOLUMERECON SLEEP MONITOR EJECT1 2 34 5 6CH/TRACKINGPAGE7 8 9VOLUMERECON SLEEP MONITOR EJECT1 2 34 5 6Press SLEEP to set the sleep timerEach press of SLEEP will decrease the sleep timerCH/TRACKINGPAGE7 8 9VOLUMEUse ON on the remote control to switch your TV/VCR on after sleep timer has switched it off.ONONONSLEEP120SLEEP110SLEEP0To cancel sleep timer press SLEEP until "SLEEP 0" is displayed
Teletext featureTeletext is the name given to the magazine services operated by television companies.A variety of information is available including News, Weather, Financial and Travel information. Teletext is normallytransmitted whenever a station is on air. In addition to Teletext your television also incorporates Fastext. Using thefour coloured Fastext keys you may move around Teletext services with greater ease and speed.RECON SLEEP MONITOR EJECT1 2 34 5 67 8CALLSPEEDREC/OTR0AV9VOLUMEPLAYCH/TRACKINGPAGEMUTEPAUSE1To view Teletext press TEXT/MIX/TV.P100 TELETEXT 100 JAN 1 12:00:00TEXT1st press .....Text onlyPROGRAMTIMER RECTEXT2nd press ....Text and TV pictureSTOPHOLD F / T / B TEXTTEXTMENU ENTER CANCEL MIX / TV3rd press .....TV pictureTEXTREVEAL/ COUNTER ZEROATR RESET RETURNSUB PAGETV GUIDE SPORT NEWS WEATHERINDEX2Select text, text and TV or TVAn index page will bedisplayed. <strong>The</strong> top andbottom lines of the pagemay look like thisexample:P100 TELETEXT 100 JAN 1 12 : 00 : 00REWF.FWDREWF.FWDPROGRAMTIMER RECSelected pagenumberTeletext service nameDateTimeMENUREVEAL/ATRHOLDENTERCOUNTERRESETSTOPF / T / BCANCELTEXTMIX / TVZERORETURNSUB PAGEABC200Displayed page number(scrolls when searching)INDEXPress the redkey to accessinformationPress the greenkey to accessinformationPress the yellowkey to accessinformationPress the bluekey to accessinformationTV GUIDESPORT NEWS WEATHER21
Teletext featureIn order to use Teletext the control codes must be transmitted by the broadcasting authorities - itsoperation is therefore dependent on these codes being transmitted.RECON SLEEP MONITOR EJECT1Select the TV channel for the desired Teletext service.To view Teletext press TEXT/MIX/TV.1st press ......Text only2nd press .....Text and TV picture3rd press ......TV pictureREWPROGRAMMENUREVEAL/ATRHOLDENTERCOUNTERRESETSTOPF / T / BCANCELTIMER RECF.FWDTEXTMIX / TVZERORETURNSUB PAGEP100 TELETEXT 100 JAN 1 12:00:00TEXTTEXTTEXTTEXTTV GUIDE SPORT NEWS WEATHER1 2 3CH/TRACKINGPAGEINDEXSelect text4 5 67 8CALLSPEED0AV9VOLUMEMUTE2All Teletext pages are three digit numbers e.g. to selectpage 100, press 1, then 0, then 0.If you accidentally press a wrong button, complete thesequence with any three numbers, then re-enter the correctnumber.1 2 34 5 67 8CALLSPEED0AVCH/TRACKINGPAGE9VOLUMEMUTEP100 TELETEXTTEXTTEXTREC/OTRPLAYPAUSEREC/OTRPLAYPAUSESelect the page you wish to viewREWF.FWDPress PAGE up (▲) or down (▼) to advance pagessequentially up or down.RECON SLEEP MONITOR EJECT1 2 3CH/TRACKINGPAGEP101 TELETEXTPROGRAMMENUREVEAL/ATRHOLDENTERCOUNTERRESETSTOPF / T / BCANCELTIMER RECTEXTMIX / TVZERORETURNSUB PAGE4 5 67 8CALLREW0AV9VOLUMEF.FWDTEXTTEXTYou may advance pagessequentially up or downINDEX3To switch from one Teletext service to another pressTEXT/MIX/TV until TV picture is displayed.Select another TV channel.PROGRAMMENUREVEAL/ATRHOLDENTERCOUNTERRESETSTOPF / T / BCANCELTIMER RECTEXTMIX / TVZERORETURNSUB PAGECH 2.Press TEXT/MIX/TV to revert to Teletext.INDEXSelect another TV channel to viewanother Teletext service22
Teletext featureSome Teletext pages contain too much information to be displayed on a single page, when this occurssub-pages are transmitted. Sub-pages are identified by an additional numbering sequence, e.g. 1/3, where thefirst number indicates the sub-page number and the second indicates the number of available sub-pages.REWF.FWDRECON SLEEP MONITOR EJECT1 2 3CH/TRACKINGPAGE1Press HOLD to freeze a page.<strong>The</strong> hold symbol will appear in the top left corner of the screen.Press HOLD a second time to release page.Pages and sub-pages are transmitted in sequence with an adequatepause for reading each page. You may freeze a page which is ofparticular interest and hold it on screen. Information can not beupdated when page/sub-page is held using HOLD.PROGRAMMENUREVEAL/ATRHOLDENTERCOUNTERRESETSTOPF / T / BCANCELTIMER RECTEXTMIX / TVZERORETURNSUB PAGETELETEXT 100 JAN 1 12:00:00TEXTTEXTTEXTTEXTTV GUIDE SPORT NEWS WEATHERYou may hold and view a selected page.(information can not be updated)4 5 67 8CALLSPEED0AV9VOLUMEMUTE2Press SUB PAGE to view a sub-page.4 dashes will appear; if you do not enter any numbers they mayonly be removed by pressing SUB PAGE.PROGRAMMENUREVEAL/ATRHOLDENTERCOUNTERRESETSTOPF / T / BCANCELTIMER RECTEXTMIX / TVZERORETURNSUB PAGE- - - - TELETEXT 100 JAN 1 12:00:00TEXTTEXTTEXTTEXTREC/OTRPLAYPAUSEINDEX<strong>The</strong> display will show 4 hyphens.Select your desired sub-pageREWPROGRAMMENUHOLDENTERSTOPF / T / BCANCELTIMER RECTEXTMIX / TVF.FWDSelect the desired sub-page number,e.g. sub page number 2 press 0 0 0 2 by pressing thedirect channel entry buttons.It is essential to enter four numbers.Using SUB PAGE you may view and hold a page or sub-page; asinformation is received from the transmitter the screen will beupdated, e.g. a page of share prices.RECON SLEEP MONITOR EJECT1 2 34 5 67 8CALL0AVCH/TRACKINGPAGE9VOLUMEREVEAL/ATRCOUNTERRESETZERORETURNSUB PAGESPEEDMUTEINDEX23
Teletext featureIn order to use Teletext the control codes must be transmitted by the broadcasting authorities -its operation is therefore dependent on these codes being transmitted.RECON SLEEP MONITOR EJECT1 2 3CH/TRACKINGPAGEREWF.FWD4 5 67 8CALLSPEEDREC/OTR0AV9VOLUMEPLAYMUTEPAUSE1Press F/T/B to increase the size of the characterson screen.1st press .....View the top of the page2nd press ....View the bottom of the page3rd press ......Return to full view of full page(text normal size)PROGRAMMENUREVEAL/ATRHOLDENTERCOUNTERRESETSTOPF / T / BCANCELTIMER RECTEXTMIX / TVZERORETURNSUB PAGEP100 TELETEXT 100 JAN 1 12:00:00TEXTTEXTTV GUIDE SPORT NEWS WEATHERYou may increase the size ofthe characters on screenREWPROGRAMMENUHOLDENTERSTOPF / T / BCANCELTIMER RECTEXTMIX / TVF.FWD2Press REVEAL to display hidden text.Some pages contain hidden text, e.g. a quiz page withconcealed answers.PROGRAMMENUREVEAL/ATRHOLDENTERCOUNTERRESETSTOPF / T / BCANCELTIMER RECTEXTMIX / TVZERORETURNSUB PAGEP100 TELETEXT 100 JAN 1 12:00:00QUESTION? ? ? ? ? ? ? ? ?TV GUIDE SPORT NEWS WEATHERP100 TELETEXT 100 JAN 1 12:00:00ANSWER! ! ! ! ! ! ! ! !TV GUIDE SPORT NEWS WEATHERREVEAL/ATRCOUNTERRESETZERORETURNSUB PAGEINDEXDisplay Teletext items whichcontain concealed answersINDEX24
Basic video operationHow to insert and play a tape.......................................... 26Visual rewind and fast forward ........................................ 27Rapid rewind and fast forward ........................................ 27How to stop and remove a tape ..................................... 27Pause ...................................................................................... 28Manual and automatic tracking ........................................ 28Clock/counter display with zero return ........................ 29How to record a TV programmeInstant record ...................................................................... 30Timer record ....................................................................... 32Checking and cancelling timer programmes ................. 34Video index search system ............................................... 35How to set the security protectionSetting the user registration ............................................. 36How to connect a video camera oranother VCR to your TV/VCRConnections ......................................................................... 38Help and SpecificationSCART socket information .............................................. 39Fault finding table ................................................................ 40Wiring instruction............................................................... Back cover pageSpecifications ........................................................................ Back cover pageVideo operation...2525
How to play a video cassetteOnly use VHS video cassette tapes.26RECON SLEEP MONITOR EJECT1 2 34 5 67 8REWCALLSPEEDREC/OTRPROGRAMMENUREVEAL/ATR0AVHOLDENTERCOUNTERRESET9VOLUMEPLAYSTOPF / T / BCANCELCH/TRACKINGPAGEMUTEPAUSETIMER RECTEXTMIX / TVF.FWDZERORETURNSUB PAGEINDEX123Make sure your TV/VCR is properly installed and switched on.Insert a pre-recorded cassette.When you insert a video cassette with the record protectiontab removed (for example a pre-recorded cassette from avideo hire shop) playback will start straight away.Press PLAY.<strong>The</strong> tape will start playing and the play symbol will appear onthe TV/VCR screen.If you wish to view the TV station you were watching before youstarted playing a tape press REC MONITOR. To return toviewing your tape press REC MONITOR again.If you wish your TV/VCR to rewind to the beginning of a tapeonce it has finished playing and start to play again.Press MENU to select the main menu. Press PLAY orSTOP until the square next to "AUTO REPEAT" startsto flash.Press ENTER to select "ON" or "OFF". Press MENU toclear the screen.PALYour VCR can playback video tapes recorded in the NTSC ColourSystem (TV system usually used in America and Japan) on PAL 60Hz TV(TV system used in the United Kingdom). To play the NTSC tape pressPLAY.Your VCR will playback video tapes recorded using NTSC Standardplay, Long play (LP) and Extended play (EP). However there will be adeterioration in sound quality in the Long play and Extended playmodes.REC/OTRREWPROGRAMMENUHOLDENTERPLAYSTOPREVEAL/ COUNTERREC/OTRREWPROGRAMMENUHOLDENTERF / T / BCANCELPLAYSTOPREVEAL/ COUNTERZEROF / T / BCANCELZEROPAUSETIMER RECF.FWDTEXTMIX / TVPAUSETIMER RECF.FWDTEXTMIX / TVTIMER REC SETAUTO REPEATONCH TUNINGTV SETUPPIN CODE REGISTRATIONSYSTEM SETUPSELECT : /ENTER : ENTEREXIT : MENU
If you do not press STOP the tape will continue until it reaches the end.<strong>The</strong> auto rewind facility will automatically rewind the tape to the beginning.Your TV/VCR will then automatically eject the cassette.How to play a video cassette4To visually rewind or fast forward the tape (picturesearch) the tape must be playing; press either REWor F.FWD during playback.<strong>The</strong> speed of the search time depends on the speed usedduring recording, either Standard play (SP) or Long play(LP).SPLP1st press .......... 5 times normal speed (NTSC 3 times)2nd press ......... 7 times normal speed (NTSC 5 times)1st press .......... 7 times normal speed2nd press ......... 13 times normal speedReturn to normal playback by pressing PLAY.REC/OTRREWPROGRAMMENUHOLDENTERPLAYSTOPREVEAL/ COUNTERF / T / BCANCELZEROPAUSETIMER RECF.FWDTEXTMIX / TVFF<strong>The</strong> sound is muted during picturesearch. During picture searchyou may see white lines across thescreen or a distorted picture. This isquite normal and does not meanthere is anything wrong with thetape or your TV/VCR.5To rapid rewind or fast forward the tape, pressSTOP; then press either REW or F.FWD.If you wish to see the tape programme during rewind or forwardmode, press and hold REW or F.FWD. <strong>The</strong> backward or theforward visual search picture will be seen on the screen. Releaseit to return to the rewind or forward mode.REC/OTRREWPROGRAMMENUHOLDENTERPLAYSTOPREVEAL/ COUNTERF / T / BCANCELZEROPAUSETIMER RECF.FWDTEXTMIX / TVYou will not be able to view the contents of the cassette during rapid rew or f.fwdPress STOP to stop playing your video cassette.REC/OTRREWPLAYPAUSEF.FWD<strong>The</strong> tape will stop and the TV channel you viewed via your TV/VCRbefore you started to play your video cassette will be displayed on theTV.Press EJECT on the front of your TV/VCR or onREVEAL/ COUNTER ZEROthe remote control and your tape will be ejected.Tape will stop and TV will revert to displaying a TV channel6<strong>The</strong> next page will explain some more useful features of your TV/VCR's operation.27PROGRAMMENUHOLDENTERSTOPF / T / BCANCELTIMER RECTEXTMIX / TV
VCR featuresYour TV/VCR is equipped with useful features to enhance your viewing.28RECON SLEEP MONITOR EJECT1 2 34 5 67 8REWCALLSPEEDREC/OTRPROGRAMMENUREVEAL/ATR0AVHOLDENTERCOUNTERRESET9VOLUMEPLAYSTOPF / T / BCANCELCH/TRACKINGPAGEMUTEPAUSETIMER RECTEXTMIX / TVF.FWDZERORETURNSUB PAGEINDEX1When playing a tape, press PAUSE to view a stillpicture.<strong>The</strong> still picture will advance by one frame each timeyou press the button.<strong>The</strong> sound is muted during pause.Pause is automatically changed to play after being held for 5minutes to prevent damaging the tape.234Press PLAY to resume playback.When a tape is played, the digital auto tracking systemautomatically adjusts the tracking to obtain the bestpossible picture.If white lines appear during playback or the picturestarts to shake you may adjust the tracking manually.Press the CH/TRACKING ▲ or ▼ buttons to obtainthe best possible picture.To resume automatic tracking, press the ATR buttonon the remote control.REWSPEEDREC/OTRREWPROGRAMREC/OTRPROGRAMMENU<strong>The</strong> picture may have white lines across it when paused<strong>The</strong> presence of white lines on the screen is an indication of poor trackingMANUAL TR.----- ----------------CH:=HOLDENTERPLAYSTOPREVEAL/ COUNTERPLAYSTOP/ /F / T / BCANCELZEROMUTEPAUSETIMER RECPAUSETIMER RECF.FWDTEXTMIX / TVF.FWDAUTO TR.<strong>The</strong> auto tracking indicator will appear onscreen then disappear after 5 seconds
Counter and Zero returnYour TV/VCR has a counter which can display the actual amount of time (in hours, minutes and seconds) a tape has beenplayed. <strong>The</strong> Zero return feature allows you to set the counter to 00:00:00 at any point in the tape and then rewind andstart playing from that point when you press the ZERO RETURN button.RECON SLEEP MONITOR EJECT1 2 34 5 67 8REWCALLSPEEDREC/OTRPROGRAMMENUREVEAL/ATR0AVHOLDENTERCOUNTERRESET9VOLUMEPLAYSTOPF / T / BCANCELCH/TRACKINGPAGEMUTEPAUSETIMER RECTEXTMIX / TVF.FWDZERORETURNSUB PAGEINDEX1While playing a tape press CALL to display thecounter.<strong>The</strong> counter displays how much time (in hours, minutesand seconds) has elapsed since the point at which youstarted playing a tape. <strong>The</strong> counter advances one secondat a time.2Press COUNTER RESET to reset the counter to00:00:00When you load a tape, the counter will reset.If you rewind the tape from 00:00:00 a minus sign - will bedisplayed in front of the counter.3When the VCR is not playing press ZERORETURN, the tape will rewind until the counterreaches 00:00:00 automatically.This feature is useful for returning to a point in a tapeyou wish to view again.4When you rewind, fast forward or play throughblank sections of tape, the counter will stopcounting.1 2 34 5 67 8REWCALLSPEEDREC/OTRPROGRAMMENUREVEAL/ATRPROGRAMMENUREVEAL/ATR0AVHOLDENTERCOUNTERRESETHOLDENTERCOUNTERRESETSTOPSTOP9VOLUMEF / T / BCANCELMUTETIMER RECTEXTMIX / TVZERORETURNSUB PAGEF / T / BCANCELCH/TRACKINGPAGEPAUSEINDEXTIMER RECF.FWDTEXTMIX / TVZERORETURNSUB PAGEINDEX11 :30 SATCH 101 : 03 : 21 LP<strong>The</strong> counter advances one second at a time11 :30 SAT11 :30 SATCH 100 : 00 : 00 LPReset the counter<strong>The</strong> tape will stop at 00:00:00 of the counter11 :30 SAT<strong>The</strong> counter will stop when blank sections of tape are detectedONCH 100 : 00 : 00 LPCH 101 : 03 : 21 LP29
How to record and view the same TV programme<strong>The</strong> one touch recording feature provides a simple and convenient way to make instant and timed recordings.RECON SLEEP MONITOR EJECT1 2 34 5 67 8CALLSPEEDREC/OTR0AVPLAYCH/TRACKINGPAGE9VOLUMEMUTEPAUSE1Make sure that your TV/VCR is properly installed.Press the MAIN POWER switch on the front of yourTV/VCR.<strong>The</strong>n press the ON button on the front of the TV/VCRor on the remote controlONSLEEP1 2 34 5 67 80RECMONITOREJECTCH/TRACKINGPAGE9VOLUMEPOWERPress the POWER ON buttons on the front of your TV/VCRONOFFONVOLUMEREWCHANNEREWF.FWDInsert a blank tape.PROGRAMMENUHOLDENTERSTOPF / T / BCANCELTIMER RECTEXTMIX / TVIf the erase protection tab has been removed fromthe tape, you will not be able to make a recording.INDEX2Press the numbered buttons or CH/TRACKING up( ) or down ( ) on the remote control to select thechannel to be recorded.When selecting channels, press the numbered buttons. For example, forchannel 3 press 3, for channel 25 press 2 then 5.RECON SLEEP MONITOR EJECT1 2 34 5 67 8CALL0AVCH/TRACKINGPAGE9VOLUMECH 1REVEAL/ATRCOUNTERRESETZERORETURNSUB PAGESPEEDMUTESelect the channel to be recorded30
How to record and view the same TV programmeIf the erase protection tab hasbeen removed, the tape will ejectwhen the REC/OTR button ispressed.When the tape speed LP isselected, the recording time canbe set up to 10 hours.Pause will operate duringcontinuous recording only.Pause will be released after 5minutes and continuous recordingwill stop to prevent damage tothe tape or the video head.While recording, press RECMONITOR to view a TVprogramme alternatively.4Press SPEED to select either standard play (SP) orlong play (LP).Press REC/OTR for continuous recording.Additional presses of the REC/OTR button willallow you to record in timed intervals (displayed onthe screen), up to a maximum of 5 hours, at the endof which your VCR will stop recording.1st press ........... continuous recording2nd press ......... 30 minutes3rd press ......... 1 hour4th press.......... 1 hour 30 minutes5th press.......... 2 hours6th press.......... 3 hours7th press.......... 4 hours8th press.......... 5 hours5Press STOP to end recording.Press PAUSE to avoid recordingunwanted material. REC/OTR indicatorwill flash in the pause mode.Press PAUSE again to continuerecording.RECORDING ONE PROGRAMMEWHILE WATCHING ANOTHERWhile the TV/VCR is recording theone programme, anotherprogramme can be seen on thisunit.After the recording, select the TVchannel you want to watch.REWREWSPEEDREC/OTRREWPROGRAMSPEEDREC/OTRPROGRAMREC/OTRPROGRAMMENUHOLDENTERPLAYSTOPPLAYSTOPPLAYSTOPF / T / BCANCELMUTEPAUSETIMER RECMUTEPAUSETIMER RECF.FWDINDEXStart recordingPause the tape to avoid recording unwanted materialPAUSETIMER RECF.FWDF.FWDTEXTMIX / TVONRecording (RED)Watching (GREEN)OTR 0 : 30 CH 1CH 1CH 1CH 3CH 1231
Timer recordingsTimer recordings allow you to programme your TV/VCR so that it will record at preset times. <strong>The</strong> built-in timerallows unattended recording of up to 8 programmes within 1 month.RECON SLEEP MONITOR EJECTMake sure that your TV/VCR is properlyinstalled and that you have successfully tuned inall your required TV stations and given themchannel numbers.e.g.BBC1 - CH 1BBC2 - CH 2ITV - CH 3Channel 4 - CH 4Channel 5 - CH 5(if you are in a channel 5 reception area)Satellite - CH 6SCART socket - CH AV321 2 34 5 67 8REWCALLSPEEDREC/OTRPROGRAMMENUREVEAL/ATR0AVHOLDENTERCOUNTERRESET9VOLUMEPLAYSTOPF / T / BCANCELCH/TRACKINGPAGEMUTEPAUSETIMER RECTEXTMIX / TVF.FWDZERORETURNSUB PAGEINDEX123Insert a blank tape.If the erase protection tab has been removed fromthe tape, you will not be able to make a recording.Make sure that the clock is showing the correctpresent time.Press MENU until the main menu appears on yourTV screen.Press PLAY or STOP to select the Timer rec setmenu.Press ENTER to select the timer screen.Select the next available timer position (blankdotted line) by pressing PLAY or STOP thenpress ENTER.You will not be able to select the TIMER REC SET menu until the clock has been set.REC/OTRREWREWPROGRAMMENUREC/OTRPROGRAMMENUHOLDENTERHOLDENTERPLAYSTOPPLAYSTOPF / T / BCANCELF / T / BCANCELPAUSETIMER RECPAUSETIMER RECF.FWDTEXTMIX / TVF.FWDTEXTMIX / TVTIMER REC SETAUTO REPEAT OFFCH TUNINGTV SETUPPIN CODE REGISTRATIONSYSTEM SETUPSELECT :ENTER : ENTEREXIT : MENU------ --:-- --:-- -- ------ --:-- --:-- -- ------ --:-- --:-- -- ------ --:-- --:-- -- ------ --:-- --:-- -- ------ --:-- --:-- -- ------ --:-- --:-- -- ------ --:-- --:-- -- -SELECT :EXIT : MENUSelect the timer screen/ ENTERSelect a recording position
Your TV/VCR's timer recordfeature includes a number ofweekly settings. eg. instead ofsetting a specific date you can setthe VCR to record MO-FR at thesame time every day - This canbe useful if you have a favouriteprogramme at a regular time.Please note your TV/VCR uses a24 hour clock.If you have a satellite connectedvia the Scart socket, and wishto record from it select channelAV in setting the channel.Your TV can be switched on or instandby during recording.4If you make a mistake during the setting procedure press PLAY or STOP to select theinformation you want to change and then press REW or F.FWD to change it.REC/OTRPAUSEPLAYREWF.FWDPress REW or F.FWD to select the desired day orevery day or every week setting.Confirm setting by pressing STOP.PROGRAMTIMER RECSTOPHOLD F / T / B TEXTMENU ENTER CANCEL MIX / TVSet the desired start hour and minutes, end hour andminutes, channel and tape speed as in step 4.REC/OTRPAUSE56When you have finished setting all your recordings pressENTER.Press MENU to clear the menu screen.If you wish to make more than one recording repeat steps 3 - 5.You may set up to 8 programmes in the same way.REWPROGRAMMENUHOLDENTERPLAYSTOPF / T / BCANCELTIMER RECF.FWDTEXTMIX / TVTimer recordingsTIMER REC SETDATESTART23 SAT11 : 30END 11 : 30CH1SPEED SPSELECT :SET : / 0–9EXIT : MENUTIMER REC SETDATESTART23 SAT20 : 00END 21 : 00CH1SPEED SPSELECT :SET : / 0–9EXIT : MENUSELECT : / ENTEREXIT : MENUOK: ENTERSelect the dateOK: ENTERSelect your settings23 SAT 20: 00 21:00 1 SP------ --:-- --:-- -- ------ --:-- --:-- -- ------ --:-- --:-- -- ------ --:-- --:-- -- ------ --:-- --:-- -- ------ --:-- --:-- -- ------ --:-- --:-- -- -Store your programme7Press TIMER REC to store your selection. <strong>The</strong> T.RECindicator will light. After completing all timer recordprogrammes your VCR will switch itself off.You will not be able to set further timer recordings after you have pressedTIMER REC. To set further timer recordings press TIMER REC (theindicator light will go out); make your selection; press TIMER REC (theindicator will light).If any timer record stage is not completed within 1 minute you will have to start again.STOP/EJECTREC/OTR T.REC STAND BYREC/OTRF.FWDVIDEO IN AUDIOPHONESStore your selection33
Checking and cancelling timer programmesYou can easily check the details and cancel or make corrections for timer programmes.RECON SLEEP MONITOR EJECT1 2 34 5 67 8REWCALLSPEEDREC/OTRPROGRAMMENUREVEAL/ATR0AVHOLDENTERCOUNTERRESET9VOLUMEPLAYSTOPF / T / BCANCELCH/TRACKINGPAGEMUTEPAUSETIMER RECTEXTMIX / TVF.FWDZERORETURNSUB PAGE1If the timer rec has been activated, now press TIMERREC to deactivate the timer. <strong>The</strong> TIMER REC indicatorwill disappear.Press PROGRAM twice, the timer program screenwill be displayed. All timer programme details will bedisplayed.2If you want to cancel or alter an existing timer programme,press PLAY or STOP to select the programme.Press CANCEL. <strong>The</strong> pre-set programme will be cancelled.ORPress ENTER. You may then adjust the contents of theselected timer programme.Press343Press PROGRAM again, the TV on/off timer setscreen will be displayed.If you wish to alter the programmed on/off timer set,select the on timer or off timer then adjust the contentsas described on pages 18-19.REC/OTRREWPROGRAMREW: :23 SAT 20 00 21 00 1 SP5 FRI 23: 30 2:30 5 LP7 00 7 30 2 LPSU-SA : :------ --:-- --:-- -- ------ --:-- --:-- -- ------ --:-- --:-- -- ------ --:-- --:-- -- ------ --:-- --:-- -- -SELECT : / ENTEREXIT : MENUBy pressing PROGRAM the timer programmes will be displayed: :23 SAT 20 00 21 00 1 SP5 FRI 23: 30 2:30 5 LP7 00 7 30 2 LPSU-SA : :------ --:-- --:-- -- ------ --:-- --:-- -- ------ --:-- --:-- -- ------ --:-- --:-- -- ------ --:-- --:-- -- -SELECT / ENTERCLEAR : CANCEL EXIT : MENUCANCEL to cancel a setting or ENTER to alter an existing oneREWMENUREC/OTRPROGRAMMENUREC/OTRPROGRAMMENUHOLDENTERHOLDENTERHOLDENTERPLAYSTOPF / T / BCANCELPLAYSTOPF / T / BCANCELPLAYSTOPF / T / BCANCELPAUSETIMER RECF.FWDTEXTMIX / TVPAUSETIMER RECPAUSEF.FWDTEXTMIX / TVTIMER RECF.FWDTEXTMIX / TVPress PROGRAM three times to display the on/off timer programmes:ON/OFF TIMER SETON TIMER7 : 45 CH 2MON–FRIOFF TIMER11 : 30SELECT :ENTER : ENTEREXIT : MENUSETSETINDEX4After checking timer details press PROGRAM to clear thescreen.If there are other timer record programmes remaining theTIMER REC button must be pressed to reactivate them.<strong>The</strong> T.REC indicator will light. If you do not resetthe timer rec facility the remaining timer record programmeswill be ignored and the recording will not take place.Your recordings will only work when timer record is switched ON.STOP/EJECTEC/OTR T.REC STAND BYF.FWDREC/OTR VIDEO IN AUDIOPHONESPress TIMER REC to reset the timer
Video index search system<strong>The</strong> video index search system enables you to locate the beginning of any recording made on your TV/VCR.Your TV/VCR automatically records index marks on the tape whenever a recording is started.RECON SLEEP MONITOR EJECT1 2 34 5 67 8REWCALLSPEEDREC/OTRPROGRAMMENUREVEAL/ATR0AVHOLDENTERCOUNTERRESET9VOLUMEPLAYSTOPF / T / BCANCELCH/TRACKINGPAGEMUTEPAUSETIMER RECTEXTMIX / TVF.FWDZERORETURNSUB PAGEINDEX123To search for an index mark; or skip over a number ofindex marks: Press INDEX during stop or playback.When you record an index mark at the very beginning of atape, the mark may not be found.During an index search, the tape may stop and begin to play ata slightly different location.Select the number of index marks to be skipped byusing the numbered buttons (1-9).Press F.FWD or REW.Your VCR will skip over the selected number of indexmarks and will start playback at the selected mark.NO. 1-9SEARCHEXIT : I NDEXPress indexSelect the number of index marks to be skippedPROGRAMTIMER RECPlease note the tape speed will NOT be as fast as normalNO. : 1-9STOPSEARCHrewind or fast forward speeds because your TV/VCR has toHOLD F / T / B TEXTMENU ENTER CANCEL MIX / TVEXIT : I NDEXlook for the index marks on the video tape.Your TV/VCR will attempt to playback from your selected index markYour TV/VCR may not be able to find index marks on old or worn out video tapes.35PROGRAMREWMENUREVEAL/ATR1 2 34 5 67 8CALLSPEEDREC/OTRREC/OTRHOLDENTER0COUNTERRESETAVSTOPF / T / BCANCELPLAYPLAYTIMER RECTEXTMIX / TVZERORETURNSUB PAGEINDEXCH/TRACKINGPAGE9VOLUMEMUTEPAUSEPAUSEF.FWDI NDEX 1NO. 1-9SEARCHEXIT : I NDEX:I NDEX 4:I NDEX 4
Setting the security protectionIn an effort to fight crime, we have equipped your TV/VCR with security protection. When activated your TV/VCRis protected against unauthorised use. You cannot operate the unit if you forget the PIN code. Pleaseensure that you keep a record of the PIN code in a safe place, in case you forget it.Make sure that your TV/VCR is properly installed.Press the MAIN POWER switch on the front of yourTV/VCR to the on position.POWERONOFFONVOLUMEREWCHANNELRECON SLEEP MONITOR EJECT1 2 34 5 67 8REWCALLSPEEDREC/OTRMENU0PROGRAMREVEAL/ATRAVHOLDENTERCOUNTERRESET9VOLUMEPLAYSTOPF / T / BCANCELCH/TRACKINGPAGEMUTEPAUSETIMER RECTEXTMIX / TVF.FWDZERORETURNSUB PAGEPress the ON button on the front of your TV/VCR orMENU until the main menu appears on your TVthe 1Press remote control.2screen.Press PLAY or STOP to select the "PIN CODEREGISTRATION" menu.Press ENTER to display the pin code registrationscreen.Press PLAY or STOP to select the "OWNER'SNAME".<strong>The</strong>n press ENTER.3Each press of PLAY or STOP changes the letter as follows;Press PLAY or STOP until the desired letter isdisplayed.A...Z0...REC/OTRREWREWPROGRAMMENUREC/OTRPROGRAMMENUPress the POWER ON buttons on the front of your TV/VCRHOLDENTERHOLDENTERPLAYSTOPPLAYSTOPREVEAL/ COUNTERF / T / BCANCELF / T / BCANCELZEROPAUSETIMER RECPAUSEF.FWDTEXTMIX / TVTIMER RECF.FWDTEXTMIX / TVTIMER REC SETAUTO REPEATOFFCH TUNINGTV SETUPPIN CODE REGISTRATIONSYSTEM SETUPSELECT :ENTER : ENTEREXIT : MENU<strong>The</strong> user registration screen will appearPIN CODE REGISTRATIONOWNER' S NAMEMARKPIN CODEPROTECTOFFSELECT :ENTER : ENTERCLEAR : CANCELEXIT : MENURegister your nameINDEX(space)-+/.9Store the letter by pressing REW or F.FWD.You can enter up to 20 letters.Press ENTER to register your name.36If you make a mistake in registering the owner's name and PIN code press CANCEL.
If the unit needs to be serviced, make sure that the security protectfunction is OFF, otherwise you will be charged for resetting this feature.Setting the security protectionWrite down your PINcode number on thecard provided andkeep it in a safe place.Please note: In the event oflosing your PIN code you willbe charged by Mastercare toreset your TV/VCR.To cancel the security protectfunction select protect "OFF".45Press PLAY or STOP to select the "PIN CODE".<strong>The</strong>n press ENTER.Press REW or F.FWD or numbered buttons (0-9) toenter the PIN code. (4 digits)Your PIN code can be a combination of any 4 numbers.Press ENTER to register the PIN code.Press PLAY or STOP to select the "PROTECT""ON" or "OFF".<strong>The</strong>n press ENTER.<strong>The</strong> security protect function will be activated.Press MENU to clear the display.REC/OTRREWPROGRAMREWMENUREVEAL/ATRREC/OTRPROGRAMMENUHOLDENTERCOUNTERRESETHOLDENTERPLAYSTOPPLAYSTOPREVEAL/ COUNTERF / T / BCANCELF / T / BCANCELZEROPAUSETIMER RECF.FWDTEXTMIX / TVZERORETURNSUB PAGEPAUSETIMER RECF.FWDTEXTMIX / TVPIN CODE REGISTRATIONOWNER' S NAMEMARK GREENPIN CODE 1234PROTECTOFFSELECT : / 0 - 9ENTERCLEAR: ENTER: CANCELEXIT : MENURegister the PIN codePIN CODE REGISTRATIONOWNER' S NAMEMARK GREENPIN CODE 1234PROTECTONSELECT : /ENTER : ENTER EXIT : MENUSelect protect "ON"<strong>The</strong> PIN code screenwill only appear on thescreen when the powerfailure lasts for more than 30minutes (approximate).6If you turn off the MAIN POWER switch on the front of theunit or unplugged from the mains supply for more than 30minutes, the PIN code screen will appear on the screen whenyou next turn on the unit.Enter your PIN code using the numbered buttons on theremote control.If you enter the correct PIN code, "PIN CODE OK" will bedisplayed on the screen. You can operate the unit.RECON SLEEP MONITOR EJECT1 2 34 5 6CH/TRACKINGPAGE7 8 9VOLUMEPIN CODESELECT : / 0 - 9CLEAR : CANCELENTER : ENTEREnter your PIN codeIf you enter the wrong PIN code, "PIN CODE ERROR" willbe displayed on the screen, and you can try again.If you enter the wrong PIN code more than 3 times, the unit will belocked and you cannot operate. To unlock the unit you must disconnectthe mains supply and wait for more than 30 minutes. Reconnecting themains supply after this time will allow you to enter the PIN code again.37
How to connect your TV/VCR to another VCR or a video cameraIf you connect your TV/VCR to another VCR or a video camera, it is possible to duplicate a pre-recorded tape. Pleasenote that the picture quality will not be as good as that on the original tape. Make sure all appliances are unpluggedfrom the mains supply and switched off before you attempt to connect the relevant connection cables.Please note that the SCARTsocket is intended to be anINPUT only, not an OUTPUT.Insert the tape you wish torecord ON into your TV/VCR.Select the AV2 channel by pressing the 0 buttonon your remote control.Insert the tape you wish to record FROM intothe second VCR. Press the play button on thesecond VCR.Press the REC/OTR button on your TV/VCR.Recording will start.Your TV/VCRSecond VCRTo AUDIO/VIDEO ININRFOUTTo AUDIO/VIDEO OUTLink your TV/VCR and second VCR(not supplied)with a AUDIO/VIDEO cordInsert the tape you wish torecord ON into your TV/VCR.Select the AV2 channel by pressing the 0 buttonon your remote control.Your TV/VCRInsert the tape you wish to record FROM intothe video camera.Press the REC/OTR button on your TV/VCR.Press the play button on the video camera;playback and recording will start.To AUDIO/VIDEO INAUDIO/VIDEO cord withappropriate connectors suitablefor your video camera (not supplied) .Playback froma video camera.38It is an infringement of the Copyright, Designs and Patents Act 1956, 1988 chapter 48 and the Performers Protection Act 1958-72 to copy Records, Pre-recorded Cassettes,Pre-recorded video tapes and compact discs or to re-record them in any form without permission of the Copyright owners.
SCART socket informationIf your TV/VCR is connected to a Satellite system using a full facility SCART lead it will automatically be displayed whenyour Satellite system is switched on. When using a SCART lead the Satellite station should automatically be displayedwithout you having to select the AV channel.If your Satellite system is not displayed when you switchit on you must select the channel labelled CH AV byrepeatedly pressing CH/TRACKING up (▲) or down(▼) or pressing 0 button.21 Pin SCART terminal20 18 16 14 12 10 8 6 4 2However if your Satellite system is constantly displayedand no matter what button you press you cannot viewanother channel you need to purchase an additionallead which will allow you to manually switch the signalon and off. . .Only use VHS video cassettes.When you insert a video cassette with the recordprotection tab removed (for example a pre-recordedtape from a video hire shop) playback will start straightaway.Video Head Cleaning<strong>The</strong> video heads are the means by which the TV/VCR readspictures from the tape during playback. In the unlikely event thatthey become dirty enough to be clogged, no picture will be playedback. This can easily be determined if during playback of a knowngood tape, there is good sound but no picture (picture is extremelysnowy). Manual cleaning may be necessary in some cases. If this isthe case, have the TV/VCR checked and cleaned by qualifiedservice personnel. Head cleaning cassettes are not recommendedbecause they can be abrasive to your video heads.PALTo prevent accidentalerasure of a specialrecording, break off thetab with a screwdriver.211. Audio output (right)2. Audio input (right)3. Audio output (left)4. Audio earth5. Blue earth6. Audio input (left)7. Blue In8. Switching voltage (input)19 17 15 13 11 9 7 5 3 19. Green earth10. Date line 211. Green In12. Date line 113. Red earth14. Reserved15. Red In16. Blanking signal17. Video earth18. Blanking signalearth19. Video output20. Video input21. Shield/earthTo record again coverhole with adhesive tape.To help prevent video head clogging, use only good quality VHS tapes. Discard worn out tapes.39
Before requesting service please check the following pointsSYMPTOMCAUSESOLUTIONNo standby light or power. Is your TV/VCR plugged in? Check fuses and plug into an AC outlet.Recorder does not work even whenstandby light is on.Have you pressed the power switch on the FRONTof your unit to ON?T.REC indicator is lit.Moisture condensation has formed inside your TV/VCR.Switch on main power at wall and all switcheson your unit.Set Timer rec to off.Press the Main Power switch on the frontof your unit and wait a few hours.Please note: If a Mastercareengineer is requested to inspectthis TV/VCR and if the product isfound not to be faulty, or theinstruction book has not beenfollowed, our product guarantee isnot applicable and a fee will becharged.No picture, no sound. Your TV/VCR is unplugged. Check fuses and plug into an AC outlet.Picture ok, poor sound.Poor reception; poor colour or nocolour.Aerial connection cable is broken or not connected.Have you pressed the power switch on the FRONTof your unit to ON?Possibly station trouble.Volume control set at minimum position or Mutebutton has been pressed.Aerial connection cable is broken or not connected.Possibly station trouble.Check aerial connections and replacebroken cables.Switch on main power at wall and all switcheson your unit.Try another channel or move aerial awayfrom source of interference.Increase the volume.Check aerial connections and replace anybroken cables.Try another channel or move aerial awayfrom source of interference.40Colour control is not adjusted. Adjust colour (see page 17).0870 9090 444All calls are charged at National RateWe hope you enjoy your new Grundig TVR3820. To help you get the mostfrom your new TVR, we recommend Partmaster Direct for accessories and sparesPartmaster Direct's range includes :SCART Leads, Remote Controls, Mains Leads, Mains Adaptors and much much moreavailable for delivery direct to your door.1
Before requesting service please check the following pointsSYMPTOMCAUSESOLUTIONRecording does not work.Timer recording does not work.No Teletext or strange characters andletters on screen.Remote control does not work.No tape in your recorder or protection tab hasbeen removed from video cassette.TV/VCR is switched off.Clock is not set properly or there has been apower failure.Start and end times not set correctly or TIMER REChas not been pressed.Aerial connection is poor or possibly station trouble.It is not pointing towards the remote controlsensor on your TV/VCR.You are trying to operate your unit from too faraway or there is very bright direct sunlight in roomfalling onto TV/VCR remote control sensor.Insert video tape. Place adhesive tape overrecord protection gap.Switch on main power at wall and both poweron switches on your unit.Set current time and date.Check the start and end times, look to see ifthe T.REC light is lit (see page 33).Check aerial connection for broken wires or tryanother channel.Aim remote control at your unit.Operate within 5 metres. Reduce light.Obstacle in path of beam.Clear path of beam.Batteries are inserted incorrectly; the + and -–polarities are the wrong way around.Batteries are weak.Insert batteries correctly.Replace batteries.NO colour or 'snow' in playback picture. Tape is worn or damaged. Try another tape.Tracking adjustments beyond the range ofautomatic tracking circuit.Adjust tracking manually using theCH/TRACKING buttons.41
Memo42
Memo43
Wiring instructionNominal specificationsBlue (Neutral)Warning: If the mains plug is cut from the mains lead of this appliance the plug must bedestroyed. A mains plug with bared wires is hazardous if engaged in a mains output socket.Brown (Live)Cord grip5 amp fuse<strong>The</strong> wires in your TV/VCR mains lead are coloured in accordance with the following:-<strong>The</strong> wire which is coloured Blue must beconnected to the terminal in the plug which is marked with the letter N or coloured Black.<strong>The</strong> wire which is coloured Brown must be connected to the terminal in the plug which ismarked with the letter L or coloured Red.No connection must be made to the earth terminal of the plug.You must use a 13 amp plug (BS 1363) , and fit a 5 amp fuse (BS 1362) .If any other type of plug is used a 5 amp fuse must be fitted, either in the plug, adaptor or at thedistribution board.TELEVISIONPicture Tube: ............................ 14" (34cm "V") measured diagonally, 90 degree deflectionTelevision System: ................... UK: 625 lines 50 fields PAL ITuner: ........................................ Electronic 2 TunersAudio Output Power: ............. 1.5WSpeaker: ..................................... 3.8cm x6.4cm 8 ohmVCRVideo recording system:......... VHS, 2 Rotary Heads Helical Scanning System............................................ Luminance: FM azimuth recordingHead: ......................................... Video: 2 Rotary Heads............................................ Audio/Control: 1 Stationary Head............................................ Erase: 1 Full Track EraseColour signal: ........................... Converted sub-carrier phase shift recordingAudio Track: ............................. 1 trackTape format: ............................. 12.65mm high density tapeTape speed: .............................. SP: 23.39 mm/s (NTSC 33.35 mm/s) LP: 11.69mm/sF.FWD/REW Time at 25˚C: ... 1' 48" with E-180 cassetteInput level:................................. Video: 1.0Vp-p, 75 ohm unbalanced............................................ Audio: 500mV, 50k ohm unbalancedOutput level:............................. Video: 1.0Vp-p, 75 ohm unbalanced............................................ Audio: 500mV, 1K ohm unbalancedGENERALPower supply: ........................... AC230-240V 50HzPower consumption: ............... 50WOperating Temperature: ........ 5˚C to 40˚CDimensions: .............................. 362mm (W) x 372mm (D) x 382mm (H)Weight: ...................................... 12.8kg5A81601A02.07 44K