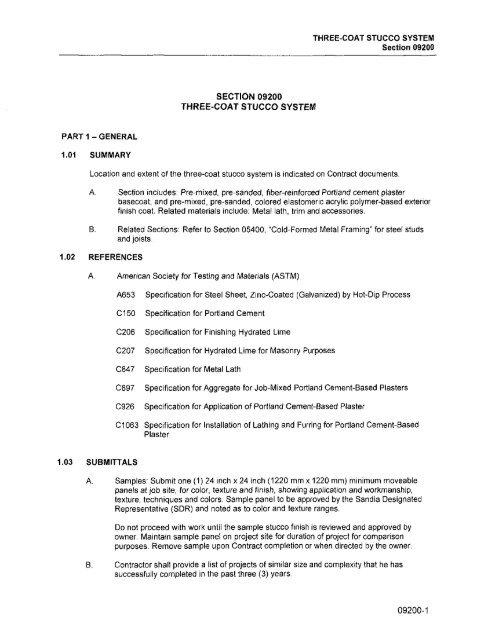
THREE-COAT STUCCO SYSTEM Section 09200 SECTION 09200 ...
THREE-COAT STUCCO SYSTEM Section 09200 SECTION 09200 ...
THREE-COAT STUCCO SYSTEM Section 09200 SECTION 09200 ...
You also want an ePaper? Increase the reach of your titles
YUMPU automatically turns print PDFs into web optimized ePapers that Google loves.
<strong>THREE</strong>-<strong>COAT</strong> <strong>STUCCO</strong> <strong>SYSTEM</strong><strong>Section</strong> <strong>09200</strong>5. Water: Potable, clean, fresh, and free from oil, acid, organic matter or otherdeleterious substances.B. Finish Coat: Factory pre-mixed, synthetic exterior elastomeric polymer-based wall finishsystem consisting of acrylic polymers, properly graded aggregate and colorant.1. Color: As selected at time of submittals for manufacturer's standard color chart.2. Finish Texture; As selected at time of submittals from the following list;Spray FinishSpray Finish KnockdownDeep & Shallow Groove SwellsLight Brocade TextureC. Bonding Agent: ASTM C932, Acrylic bonding agent as manufactured and asrecommended by basecoat system manufacturer.D. Admixture: Acrylic polymer additive as manufactured by and as recommended bybasecoat system manufacturer.E. Sealers: UV resistant, high vapor permeability, non-staining, non-yellowing, clear waterrepellent sealer.F. Metal Lath. ASTM C847.1. Diamond Mesh: Galvanized, 3.4lbs. per square yard (1.84 kg/m 2 ), self-furing lathor approved equal; to be used on horizontal surfaces and as reinforcing arounddoors and windows, where framing members are more than 16 inches (406 mm)o.c., and elsewhere as shown on Contract documents.2. Stucco Lath: Galvanized, minimum 17 gage (1.367 mm) self-furing stucconetting, or approved equal; to be used on framing at 16 inches (406 mm) o.c. orless and elsewhere as shown on Contract documents.G. Weather Resistive Barrier: Two (2) layers of Grade "D\ 15 pound (6.8 kg) building paperover wood substrates and one (1) layer over gypsum or fiber sheathing.2.02 METAL ACCESSORIESA. General: Manufacture's suggested steel products, unless otherwise indicated as zincalloy. Do not fill with plaster or cement.B. Corner Beads: 1/8 inch (3.18 mm) diameter bead with expanded flanges.C. Casing Beads: Expanded flange, J-shaped, square edge style, to suit application.D. Bull Nose Corner Bead: % inch (19.05 mm) radius with expanded flanges.E. Control Joints: M-shaped, with % inch (6.35 mm) slot and 1 inch (25 mm) grounds,removable tape to keep plaster out of groove, and with diamond mesh expanded flanges.<strong>09200</strong>-3
<strong>THREE</strong>-<strong>COAT</strong> <strong>STUCCO</strong> <strong>SYSTEM</strong><strong>Section</strong> <strong>09200</strong>B. Grounds and Screeds: Install grounds and screeds as indicated on Contract documents,but in no case shall grounds and screeds be installed further than 8 feet (2.44 m) oncenter to ensure accurate rodding of plaster to true surfaces.C. Install lath with long edges perpendicular to supports.D. Install lath continuously around internal corners, avoid separate lath reinforcementaccessories.E. Isolation: Make provisions for movement of building structure to prevent transfer ofstructural load or movement to the lath and plaster work. Wire tie all expansion joints.Rigid mechanical fastening of expansion joints is prohibited.3.05 INSTALLATION OF ACCESSORIES AND TRIMA. Comply with referenced installation standards for provision and location of plaster trimand accessories.1. Miter or cope trim and accessories at corners.2. Install trim and accessories in proper alignment and with tight joints betweenpieces.B. Install trim and accessories per following:1. Corner Beads: External corners.2. Casing Beads: At terminations of plaster which abuts windows, doors, walls, orother terminations.3. Control Joints: At locations indicated as recommended by plaster manufacturer,and at exterior work at spacing not to exceed 8 feet (2.44 m) on center wheresurface is continuous plane.4. Expansion Joints: At locations indicated, and as follows:a. Changes of substrate construction.b. Where control or movement joints occur in substrate construction.c. Where wings of L-, T- or U-shaped surfaces join.3.06 APPLICATIONA. General: Apply cement plaster in accordance with manufacturer's instructions andrecommendations, to comply with ASTM C926. The "double back" system is notacceptable.1. Monolithic Surface: Prepare monolithic surface to receive plaster using any of thefollowing methods:<strong>09200</strong>-6
<strong>THREE</strong>-<strong>COAT</strong> <strong>STUCCO</strong> <strong>SYSTEM</strong><strong>Section</strong> <strong>09200</strong>a. Sandblasting, wire-brushing, acid etching, or chipping.b. Application of metal lath.2 Allowable Tolerances: Maximum deviation from true plane 1/8 inch (3.18 mm) in8 feet (2.44 m) as measured by straight edge placed at any location on surface.3. Interrupt cement plaster only at junctions of plaster planes, at openings, or atcontrol joints.4. Apply each plaster coat to an entire wall or ceiling panel (control joint to controljoint) without interruption to avoid cold joints and abrupt changes in the uniformappearance of succeeding coats.5. Nominal Plaster Thickness:B. Scratch Coata. Vertical: 7/8 inch (22.2 mm)b. Horizontal: 5/8 inch (15.9 mm)1. Over Lathing Base: Apply scratch coat to a minimum thickness of 3/8 inch (9.53mm) on vertical surface, and Vi inch (6.35 mm) on horizontal surface, usingsufficient trowel pressure to key plaster into lath or to create bond to substratesas applicable. Prior to initial set, scratch horizontally to provide key for bond ofbrown coat.C. Brown Coat: Apply brown coat to a minimum thickness of 3/8 inch (9.53 mm) on verticalsurface, and % inch (6.35 mm) on horizontal surface, using sufficient trowel pressure toinsure tight contact with scratch coat.D. Bonding Agent: Apply bonding agent over brown coat with brush, roller or spray forcomplete coverage of area to receive elastomeric acrylic polymer-based finish.E. Finish Coat: Apply exterior wall finish coat to thickness recommended by manufacturer,but in no case less than 1/8 inch (3.18 mm) to achieve texture indicated, using sufficienttrowel pressure or spray velocity to bond finish coat to basecoat.1. No plasticizing agents shall be added to elastomeric acrylic polymer-based finish.2. Apply finish to match approved sample.F. Sealer: Apply sealer per manufacturer's instructions and recommendations, unless notedelsewhere in Contract documents.G. Workmanship shall be neat and in accordance with referenced standards ofworkmanship. Entire coated surfaces must appear to be evenly applied and colored,without excessive lumping or surface irregularities, to the satisfaction of the owner.H. Curing: Comply with the following for curing and time interval between coats.<strong>09200</strong>-7
<strong>THREE</strong>-<strong>COAT</strong> <strong>STUCCO</strong> <strong>SYSTEM</strong><strong>Section</strong> <strong>09200</strong>1. Maintain moist conditions by fogging mist. Do not saturate.2. Moist cure scratch and brown coats frequently to maintain uniform moisture perschedule below. If installer applies the base coats on Thursday or Fridays,provisions shall be made for adequate curing over the weekend.3. Moist cure brown coat continuously for a minimum of 10 days.4. Air cure polymer-based finish coat. Do not wet cure.FIRST SECOND THIRD<strong>COAT</strong> (SCRATCH) (BROWN) (FINISH)Minimum Period 48 Hours 10 days Air CureMoist CuringMinimum Interval 48 Hours 7 Days Protect from dustand water for a minimum of 12hrs. following application3.07 CUTTING AND PATCHINGCut, patch, point-up and repair stucco as necessary to accommodate other work and to repaircracks, dents and imperfections. Repair or replace work, at the owner's discretion, to eliminateblisters, buckles, excessive crazing and check cracking, dry-outs, efflorescence, sweat-outs andsimilar defects, and where bond to the substrate has failed.A. Point-up plaster around the trim and other locations where plaster meets dissimilarmaterial.B. Cut out and patch stained or discolored finished plaster not scheduled to be painted.C. Match patch of defective or damaged plaster to existing work in form, texture and color.3.08 CLEANING AND PROTECTIONA. Remove temporary protection and enclosure of other work. Promptly remove stucco fromdoor frames, windows, and other surfaces which are not to be stuccoed. Repair floors,walls and other surfaces which have been stained, marred or otherwise damaged duringthe stucco work. When stucco work is completed, remove unused materials, containersand equipment and clean grounds of stucco debris.B. Provide final protection and maintain conditions, in a manner suitable to Contractor thatensures that stucco work will be without damage or deterioration at time of SubstantialCompletion.** END OF <strong>SECTION</strong> <strong>09200</strong><strong>09200</strong>-8
GYPSUM DRYWALL<strong>Section</strong> 09250<strong>SECTION</strong> 09250GYPSUM DRYWALLPART 1 - GENERAL1.1 SUMMARYA. Provide gypsum drywall work including metal support systems:1. Interior walls, partitions, and ceilings.1.2 SUBMITTALSA. Submit product data.1.3 QUALITY ASSURANCEA. Comply with governing codes and regulations. Provide products of acceptable manufacturesthat have been in satisfactory use in similar service for three years. Use experiencedinstallers. Deliver, handle, and store materials in accordance with manufacturer's instructions.B. Tolerances: Not more than V^" difference in true plane at joints between adjacent boardsbefore finishing. After finishing, joints shall not be visible. Not more than 1/8" in 10' deviationfrom true plane, plumb, level and proper relation to adjacent surfaces in finished work.C. Fire resistance: Provide fire-rated assemblies with ratings as determined by ASTM E119.1.4 REFERENCESA. ASTM E119 - Test Methods for Fire Tests of Building Construction and Materials.B. ASTM C587 - Specification for Gypsum Veneer Plaster.C. ASTM C840 - Specification for Application and Finishing of Gypsum Board.D. GA-216 - Specification for Application and Finishing of Gypsum Panel Products.E. NFPA 80 - Standard for Fire Doors and Other Opening Protectives.PART 2 - PRODUCTS2.1 MATERIALSA. Gypsum board:1. Interior Use: 3/8" thick regular, water resistant, fire resistant, and foil-backedtypes as required; U.S. Gypsum, National Gypsum, Domtar Gypsum, orapproved equal.B. Fasteners: Provide Type S bugle head screws at interior, cadmium plated at humid andexterior areas. Provide all anchors and fasteners as required.09250-1 rev
GYPSUM DRYWALL<strong>Section</strong> 09250G. Joint reinforcement: ASTM C587 paper or fiberglass tape and ready; mix vinyl compound.H. Accessories: Galvanized steel corner bead, casing beads, control joints; U.S. Gypsum 800series as applicable.PART 3 -EXECUTION3.1 INSTALLATIONA. Comply with ASTM C840 and GA216 Application and Finishing of Gypsum panelProducts. Fill wall cavities with insulation. Except as otherwise indicated, extend fireratedpartitions to underside of deck above ceiling and extend other partitions at least 3"above ceilings. Include blocking for grab bars, accessories, and similar items.B. Provide fire-rated systems where indicated and where required by authorities havingjurisdiction.C. Install boards vertically. Do not allow butt-to-butt joints and joints that do not fall overframing members.D. Provide insulation full height and thickness in partitions at toilet rooms, between differentoccupancies, and where required.E. Provide acoustical sealant at both faces at top and bottom runner tracks, wall perimeters,all openings, expansion and control joints.F. Install trim and a 3-coat joint treatment in strict compliance with manufacturer'sinstructions and recommendations. Joint treatment is required at al fasteners and edgesbetween boards. Fill all surface defects. Sand between and after joint treatment coatingsand leave ready for finish painting or wall treatment per schedule in <strong>Section</strong> 09900.** END OF <strong>SECTION</strong> 0925009250-2rev
ACOUSTICAL CEILINGS<strong>Section</strong> 09510-removed not replaced<strong>SECTION</strong> 09510ACOUSTICAL CEILINGSPART 1 - GENERAL1.1 SUMMARYA. Provide acoustical ceiling system.B. Provide trim and metal suspension system.C. Provide acoustical ceiling panels.D. Provide wrapped and labeled maintenance stock of new material equal to 2 percent ofceiling panels.E. Ceiling units for mini-splits must be self supporting and not directly onto ceiling structure1.2 SUBMITTALSA. Submit for approval samples, product data, extra stock.1.3 QUALITY ASSURANCEA. Comply with governing codes and regulations. Provide products of acceptablemanufactures that have been in satisfactory use in similar service for three years. Useexperienced installers. Deliver, handle, and store materials in accordance withmanufacturer's instructions.1.4 REFERENCESA. ASTM C636 - Standard Practice for Installation of Metal Ceiling Suspension Systems forAcoustical Tile and Lay-In PanelsPART 2-PRODUCTS2.1 MATERIALSA. Acoustical panels, exposed suspension: 5/8" thick, molded, medium textured mineral tile;Armstrong® Minaboard, CertainTeed, U.S. Gypsum ClimaPlus, or approved equal.1. Panel size: 24" by 48" and 24" by 24".2. Panel edge: Square edge, flush mount with grid.B. Exposed grid suspension system: Intermediate duty painted steel; white color; T-grid.PART 3-EXECUTION3.1 INSTALLATIONA. Install materials and suspension system in accordance with manufacturer's instructionsand recommendations, and ASTM C636. Install materials and systems in proper relation09510-1
ACOUSTICAL CEILINGS<strong>Section</strong> 09510-removed not replacedwith adjacent construction and to achieve a uniform appearance. Coordinate with work ofothers as required, and in particular coordinate installation with location of mechanicaland electrical work to ensure proper locations.B. Level ceiling to within 1/8" in 10' in both directions. Scribe and cut panels to fitaccurately. Measure and layout to avoid less than half panel units. Align panel pattern.C. Adjust, clean, and touch-up all system components.END OF <strong>SECTION</strong> 0951009510-2
RESILIENT FLOORING<strong>Section</strong> 09650<strong>SECTION</strong> 09650RESILIENT FLOORINGPART 1 - GENERAL1.1 SUMMARYA. Provide resilient flooring and base.1.2 SUBMITTALSA. Submit for approval samples, product data, extra stock.1.3 QUALITY ASSURANCEA. Comply with governing codes and regulations. Provide products of acceptablemanufactures that have been in satisfactory use in similar service for three years. Useexperienced installers. Deliver, handle, and store materials in accordance withmanufacturer's instructions.PART 2-PRODUCTS2.1 MATERIALSA. Tile Flooring: Vinyl Composition Tile: 12" by 12" by 1/8"; Armstrong® Excelon ImperialTexture, or approved equal. Color as approved by Owner.B. Allowances: $2 per sq ft for 12" x 12" commercial vinyl tileC. Wall Base: Color-Integrated Vinyl Wall Base: 4" high, 1/8" thick, matte finish;Armstrong®, or approved equal. Color as approved by Owner.PART 3-EXECUTION3.1 INSTALLATIONA. Comply with manufacturer's instruction and recommendations. Install materials andsystems in proper relation with adjacent construction and to achieve a uniformappearance. Coordinate with work of others as required.B. Prepare surfaces by cleaning, leveling and priming as required. Test adhesive for bondbefore general installation. Level to 1/8" in 10' tolerance.C. Tile flooring: Install tile with tight joints and evenly and in accordance with patternselected by Owner. Layout to prevent cuts less than V£ tile units.D. Install base and accessories to minimize joints. Install base with joints as far fromcorners as practical.E. Clean, polish, and protect Work. Repair damage and correct non-conforming Work.** END OF <strong>SECTION</strong> 09650 **09650-1
<strong>SECTION</strong> 09686CARPET WITH SEPARATE CUSHIONPART 1 GENERAL1.1 <strong>SECTION</strong> INCLUDESA. Carpet with cushion underlay.B. Accessories.1.2 ALLOWANCESA. Cash Allowance: $25 per SQ YD maximum for Carpet.B. Allowance includes: $20 per SQ YD maximum for Cushion. Purchase and delivery ofcarpet and cushion; installation is included in this section and is part of the ContractSum/Price.1.3 REFERENCES (As Required Per IBC)A. ASTM D2859 - Test Method for Flammability of Finished Textile Floor Covering Materials.B. ASTM E84 - Surface Burning Characteristics of Building Materials.1.4 SUBMITTALSA. Product Data: Provide data on specified products, describing physical and performancecharacteristics; sizes, patterns, colors available, and method of installation.B. Samples: Submit two different samples [12x12] inch in size illustrating color and patternfor both the carpet and cushion to the owner.1.5 QUALIFICATIONSA. Manufacturer: Company specializing in manufacturing specified carpet with minimumthree years documented experience.B. Installer: Company specializing in installing carpet with minimum three years experience.1.6 REGULATORY REQUIREMENTSA. Conform to IBC 2009 code for flame/smoke rating requirements of each carpet andcushion in accordance with ASTM E84.
17 ENVIRONMENTAL REQUIREMENTSA. Store materials for one day prior to installation in area of installation to achieve temperaturestability.1.1 MATERIALS - CARPETA. Carpet, is to be low pile, of a neutral color, and commercial grade.B. Samples must be submitted to owner prior to installation.1.2 MATERIALS-CUSHIONA. Cushion, is to be 3/8" foam rubber.B. Samples must be submitted to owner prior to installation.1.8 ACCESSORIESA. Sub-Floor Filler: White premix latex; type recommended by flooring material manufacturer.B. Edge Strips: (As Required)C. Base Gripper: (As Required)D. Adhesive: Recommended by cushion manufacturer and meet IBC 2009 requirements.PART 2 EXECUTION2.1 EXAMINATIONA. Verify that surfaces are smooth and flat with maximum variation of (1/4) inch in 10 ft andare ready to receive work.2.2 PREPARATIONA. Remove floor ridges and bumps. Fill minor or local low spots, cracks, joints, holes, andother defects with floor filler.B. Apply, trowel, and float filler to achieve smooth, flat, hard surface. Prohibit traffic until filleris cured.C. Vacuum clean substrate.2.3 INSTALLATION - CUSHIONA. Install in accordance with manufacturer's instructions.B. Install cushion using one piece for entire room,
C. Secure by full adhesive to sub-floor.D. Install edge strips using maximum length pieces. Secure to sub-floor. (As Required)2.4 INSTALLATION - CARPETA. Install in accordance with manufacturer's instructions.B. Install carpet in one piece for entire room or with as few seams as possible.END OF <strong>SECTION</strong>
PAINTING<strong>Section</strong> 09900<strong>SECTION</strong> 09900PAINTINGPART 1 - GENERAL1.1 SUMMARYA. Provide surface preparation and painting for all unfinished interior and exterior surfaces,including electrical and mechanical equipment with shop-primed surfaces.B. Provide extra stock of paint for Owner touch-ups.1.2 SUBMITTALSA. Submit for approval samples, product data, 4' by 4' mock-ups, extra stock.1.3 QUALITY ASSURANCEA. Comply with governing codes and regulations. Provide products of acceptablemanufactures that have been in satisfactory use in similar service for three years. Useexperienced installers. Deliver, handle, and store materials in accordance withmanufacturer's instructions.PART 2 - PRODUCTS2.1 MATERIALSA. First-line standard products for all systems by Benjamin-Moore, Pratt and Lambert,Gildden®, Devoe®, Tnemec, or approved equal. Match color selected by Owner.B. Exterior paint systems (as required):1. Concrete, stucco and masonry: Primer, 1 coat; acrylic latex (flat finish), 2 coats.2. Concrete masonry units: Block filler, 1 coat; acrylic latex (flat finish), 2 coats.3. Wood for opaque finish (trim): Alkyd primer, 1 coat; alkyd enamel (gloss finish), 2coats.4. Ferrous metal: Zinc chromate primer, 1 coat; alkyd enamel (gloss finish), 2 coats.5. Galvanized metal: Galvanized metal primer, 1 coat; alkyd enamel (gloss finish), 2coats.C. Interior paint systems:1. Drywall and plaster: Latex primer, 1 coat; interior latex (flat finish), 2 coats.2. Wood for opaque finish (trim): Alkyd enamel undercoat, 1 coat; alkyd enamel(semi -gloss finish), 2 coats.3. Ferrous metal: Alkyd metal primer, 1 coat; alkyd enamel (semi-gloss finish), 2coats.09900-1
PAINTING<strong>Section</strong> 09900PART 3 - EXECUTION3.1 INSTALLATIONA. Inspect surfaces, report unsatisfactory conditions in writing; beginning work meansacceptance of substrate.B. Comply with manufacturer's instruction and recommendations for preparation, primingand coating work. Coordinate with work of other sections.C. Match approved mock-ups for color, texture, and pattern. Re-coat or remove and replacework that does not match or shows loss of adhesion.D. Clean up, touch up and protect. Repair damage and correct non-conforming Work.** END OF <strong>SECTION</strong> 0990009900-2


