Jungle Warfare - Department of Veterans' Affairs
Jungle Warfare - Department of Veterans' Affairs
Jungle Warfare - Department of Veterans' Affairs

Create successful ePaper yourself
Turn your PDF publications into a flip-book with our unique Google optimized e-Paper software.
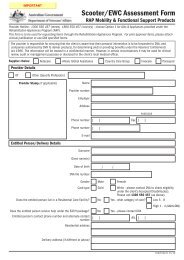
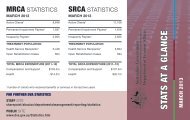
September 1942. Australian<br />
artillery being pulled through<br />
dense jungle near Uberi on<br />
the Kokoda Track.<br />
AWM 026854<br />
<strong>Jungle</strong> <strong>Warfare</strong> 4<br />
<strong>Jungle</strong> <strong>Warfare</strong><br />
KOKODA<br />
41
4 <strong>Jungle</strong><br />
›<br />
Key Concepts<br />
• Evidence<br />
• Analysis and<br />
Use <strong>of</strong> Primary<br />
Sources<br />
42 KOKODA<br />
<strong>Warfare</strong><br />
<strong>Jungle</strong> <strong>Warfare</strong><br />
ToPIC QUeSTIoN<br />
What were the fighting<br />
conditions like in jungle<br />
warfare?<br />
1<br />
Learning<br />
Outcomes<br />
2<br />
Learning<br />
Activities<br />
This topic focuses on the special problems presented<br />
by jungle fighting. Students explore evidence about the<br />
tactics <strong>of</strong> jungle war, including the devastating effect <strong>of</strong><br />
malaria and dysentery on the soldiers.<br />
1. Fighting conditions and personal challenges<br />
2. Malaria and dysentery research project
3<br />
Website and DVD Links<br />
kokoda.commemoration.gov.au/jungle-warfare/index.php<br />
kokoda.commemoration.gov.au/jungle-warfare/malaria-and-dysentery.php<br />
Kokoda DVD:<br />
Part 1: The Invasion is a helpful source <strong>of</strong> information for students to understand the jungle environment.<br />
(See Chapter 6 – <strong>Jungle</strong> <strong>Warfare</strong>)<br />
4<br />
Teacher Briefing<br />
This unit is designed to develop students’ knowledge and<br />
understanding <strong>of</strong> the features <strong>of</strong> jungle warfare and the special<br />
conditions experienced by soldiers in Papua New Guinea.<br />
By understanding fighting conditions, including terrain,<br />
weather, training, supplies and diseases, students gain a<br />
better appreciation and understanding <strong>of</strong> the difficulties<br />
faced by Australians along the Kokoda Track.<br />
About the Learning Activities<br />
activity 1: Fighting conditions and personal challenges<br />
Students are given a tactical jungle situation and asked to write to a friend about their<br />
experience <strong>of</strong> jungle warfare. This may be small group work or individual work where<br />
students consider the personal challenges faced by both Australian and Japanese soldiers.<br />
Class background material and instruction are on pages 44–46.<br />
activity 2: Malaria and dysentery research project<br />
Students answer nine questions in a report format on one tropical disease contracted by<br />
soldiers in Kokoda in 1942. Students research from the www.kokoda.commemoration.gov.au<br />
website or use other websites or resources from the school library.<br />
<strong>Jungle</strong> <strong>Warfare</strong> 4<br />
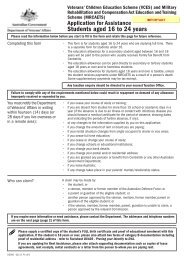
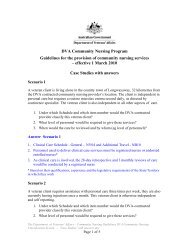
October 1942. Soldiers<br />
<strong>of</strong> the 2/31st Australian<br />
Infantry Battalion heat<br />
up their meal <strong>of</strong> bully<br />
beef and biscuits along<br />
the track over the Owen<br />
Stanley Ranges near<br />
Menari. AWM 027047<br />
KOKODA<br />
43
4<br />
44 KOKODA<br />
<strong>Jungle</strong> <strong>Warfare</strong><br />
overview: What were the fighting conditions like in jungle warfare?<br />
The men fighting on the Kokoda track faced thick jungle where the enemy was <strong>of</strong>ten not seen until he was a few metres away. In the<br />
Second World War in Europe and Africa, vast arrays <strong>of</strong> tanks, aircraft and artillery supported the infantryman. Little <strong>of</strong> this was available in<br />
Papua which made the fighting a foot soldier’s war. The tactics <strong>of</strong> infantry fighting are built upon fire and movement. When attacking, one<br />
group moves towards the enemy while the other fires to keep enemy heads down. The former was called the rifle group, armed with rifles,<br />
submachine guns and grenades. The latter was the gun group using at least one light machine gun.<br />
On more open battlefields, the gun group might be the size <strong>of</strong> a company (about 100 men) with mortars or medium machine guns. They<br />
would direct a large volume <strong>of</strong> fire towards the enemy while another company manoeuvred towards them. This was impossible in Papua<br />
because visibility in the jungle is poor, usually from ten to fifty metres, more <strong>of</strong>ten the former when fog and rain intervenes. This meant that the<br />
defender in his camouflaged fighting pit was not seen until the attacker’s lead scout was suddenly fired on by the hidden enemy. If the scout<br />
survived he may still not have been able to determine exactly where the fire was coming from unless he had seen a muzzle flash. The gun<br />
group, further back, was even worse <strong>of</strong>f as it could not determine where to direct fire to support the rifle group.<br />
Another challenge facing soldiers fighting in the jungle related to issuing and receiving orders. Steep slopes, few tracks, thick jungle and<br />
deep treacherous streams hindered communication. Typically the company commander could see few <strong>of</strong> his own men and his subordinates.<br />
The platoon commanders were <strong>of</strong>ten unsure where they were in relation to their own superior, other platoons and sometimes even their own<br />
sections.<br />
The typical tactical experience <strong>of</strong> the infantryman on the Kokoda Track was fighting in a section divided into two small groups, a six-man rifle<br />
group or a four-man gun group. After locating the enemy, the gun group brings fire to bear on them while, under cover <strong>of</strong> the fire, the rifle<br />
group crawls carefully closer to try to lob grenades into the enemy’s fighting pit. Suddenly, another enemy opens up and the whole movement<br />
halts while the problem is reassessed. The platoon leader commits another <strong>of</strong> his sections to tackle the new threat. Slowly, usually by<br />
crawling and using every scrap <strong>of</strong> cover, and with long periods where no one can see the enemy and the enemy cannot see them, the attack<br />
proceeds. This was how the campaign along the Kokoda Track was fought. The popular image <strong>of</strong> large formations sweeping the enemy aside<br />
with heroic bayonet charges was far from how it actually was for the average soldier.<br />
activity 1: Fighting conditions and personal challenges<br />
Teacher Briefing<br />
› Print <strong>of</strong>f the overview above, the student<br />
instructions and the letter exercise on pages<br />
45–46.<br />
› The first thirty minutes <strong>of</strong> the Kokoda DVD<br />
Part 1: The Invasion Chapters 1–6 are useful<br />
background for this exercise.<br />
The Task<br />
Introduce the topic by getting students to read the overview and use<br />
a highlighter to bold all the main ideas in the passage that talk about<br />
the conditions <strong>of</strong> jungle warfare. Discuss these with the whole class<br />
and discuss some <strong>of</strong> the environmental and personal challenges that<br />
soldiers may have encountered.<br />
Students are to imagine they are a soldier on the Kokoda Track.<br />
Ask them to write to a friend about their experience <strong>of</strong> jungle warfare.<br />
You may wish to use this exercise for individual assignment or<br />
group work. In the case <strong>of</strong> group work, one group could assume<br />
the perspective <strong>of</strong> an Australian soldier and the other could assume<br />
the role and perspective <strong>of</strong> a Japanese soldier.<br />
Use the student responses for a class discussion. Focus on the<br />
similarities and differences, if any, experienced by the Australian<br />
and Japanese troops in jungle warfare.
<strong>Jungle</strong> <strong>Warfare</strong> 4<br />
› Student Task<br />
activity 1: Fighting conditions and personal challenges<br />
Read the information provided below and consider the features <strong>of</strong> jungle warfare that impact on soldiers. Think about the terrain, the weather<br />
and psychological factors.<br />
Go to the Kokoda website www.kokoda.commemoration.gov.au/jungle-warfare/index.php for more information.<br />
Imagine that you are a soldier in your third week <strong>of</strong> fighting, locked in battle in the mountains. It is night time and raining. You are in a small<br />
patrol. You hear gunfire. You are hungry and wet. The rain is relentless and there are shadows moving in the night that might or might not be<br />
the enemy.<br />
Take the perspective <strong>of</strong> either a Japanese or an Australian soldier. In the following text box below, highlight the text that suggests something<br />
about the conditions in which the Australians and Japanese lived and fought in the jungle.<br />
Fighting in the jungle resembles night fighting<br />
The attacker, who is manoeuvring, <strong>of</strong>ten cannot find his way and becomes lost. His sub-units cannot see each other so cannot easily<br />
coordinate fire and movement. The defender, who is in his fighting pit, cannot direct his fire on targets hidden by thick foliage. His weapons,<br />
which in other circumstances can fire accurately for hundreds <strong>of</strong> metres, are much less useful when he can only see 20 metres. If the jungle<br />
is also mountainous with frequent mist and heavy rain, as it was on the Kokoda track, these problems are compounded as all movement is<br />
greatly slowed and visibility further restricted.<br />
The Japanese, it is said, were trained jungle fighters. This is not so, rather their advantage was that their doctrine and training stressed<br />
the importance <strong>of</strong> night fighting while the Australians in 1942 did not train to fight at night. Both sides were strangers to the jungle but the<br />
Japanese, owing to their night fighting training, found their feet first.<br />
A patrol is a small group who leave the main body to seek information on the enemy. If the fingers <strong>of</strong> a hand are spread wide then the finger<br />
tips represent patrols, while the palm is the main body <strong>of</strong> troops which waits behind to act on the information the patrols obtain. The peculiar<br />
aspect <strong>of</strong> patrolling the vast jungle covered and rugged mountains <strong>of</strong> the Owen Stanley Range was that these patrols rarely encountered one<br />
another. Most patrols returned with no contact nor any sign <strong>of</strong> the enemy. For all the efforts <strong>of</strong> 2/1 Pioneer Battalion in the last two weeks <strong>of</strong><br />
September their patrols encountered the Japanese just twice. On one <strong>of</strong> these occasions they clashed with the deepest known southward<br />
penetration <strong>of</strong> a Japanese patrol, on the Goldie River, well in the Australian rear and only 35 kilometres from Port Moresby.<br />
Write your notes in the table provided<br />
Aspect Notes on the <strong>Jungle</strong> <strong>Warfare</strong> Conditions<br />
Terrain and Environment<br />
Weather Conditions<br />
Equipment (including uniform and weapons)<br />
Psychological Factors<br />
Personal Health Factors<br />
KOKODA<br />
45
4<br />
46 KOKODA<br />
<strong>Jungle</strong> <strong>Warfare</strong><br />
Letter to a friend – What is jungle fighting like?<br />
Imagine you are a soldier, that it is the following day and you are safe. You are writing a letter to a friend, telling them about what jungle<br />
fighting is like. Describe in your own words what you thought and felt last night and how you feel now. There was no fighting but you were<br />
expecting there would be. Be honest with your friend. Were you scared? How do you feel now, particularly as there was no fighting?<br />
Use your answers in class discussion to talk about the similarities and differences, if any, that the Australian and Japanese soldiers faced in<br />
jungle warfare. Use a separate piece <strong>of</strong> paper if you need extra space.<br />
Dear
<strong>Jungle</strong> <strong>Warfare</strong> 4<br />
activity 2: Malaria and dysentery research project<br />
Teacher Briefing<br />
› This research project asks students to answer nine<br />
questions in a report format on either malaria, dysentery,<br />
scrub typhus or dengue fever contracted by soldiers.<br />
Students may research the Kokoda website or use other<br />
websites or resources in the school library.<br />
› Watch Chapter 6 the Kokoda DVD – Part 1:<br />
The Invasion, on <strong>Jungle</strong> <strong>Warfare</strong>.<br />
› Print <strong>of</strong>f the student sheet on page 48.<br />
Image courtesy Jason Daniels, DVA.<br />
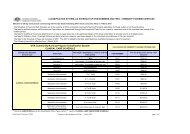
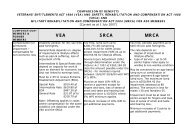
25 December 1942, Buna Papua. Private Goerge<br />
C. “Dick Whittington being helped along a track<br />
through the Kunai grass towards a field hospital<br />
by Papuan native Raphael Oimbari.<br />
AWM 014128<br />
KOKODA<br />
47
4<br />
48 KOKODA<br />
<strong>Jungle</strong> <strong>Warfare</strong><br />
› Student Task<br />
activity 2: Malaria and dysentery research project<br />
The dangers <strong>of</strong> jungle warfare were not only related to the enemy. In New Guinea, both the Australians and the Japanese lost more men to<br />
sickness than to battle.<br />
The two main problems were malaria and dysentery. Soldiers also suffered from dengue fever and scrub typhus. Choose one <strong>of</strong> these<br />
diseases to research. Use the Kokoda website or your school library to write a report entitled ‘(name <strong>of</strong> the disease) on the Kokoda track’.<br />
Divide your report into nine parts. The questions below are a guide to show you what to write about in each part. You don’t need to include<br />
the questions in the report but each part should have a heading.<br />
Search for your own images to add to your report.<br />
Include a chart or diagram that illustrates an aspect <strong>of</strong> your research.<br />
Research into a Kokoda Track tropical disease:<br />
Questions Notes<br />
Introduction. What is your report going to be about?<br />
What exactly is the disease?<br />
How is the disease transmitted to humans?<br />
What are the symptoms <strong>of</strong> the disease?<br />
What drugs can prevent or minimise the disease?<br />
Were these drugs available in 1942?<br />
How did the disease affect the soldiers on the Kokoda<br />
track?<br />
Is the disease still a problem in New Guinea today?<br />
Conclusion. What is the most important thing you have<br />
learned from this report?
October 1942. The party <strong>of</strong> the<br />
2/14th infantry battalion arriving at<br />
the United States base camp after<br />
42 days in the jungle. Kalikodobu,<br />
New Guinea. AWM 069249<br />
A Fighting Retreat 5<br />
a Fighting<br />
Retreat<br />
KOKODA<br />
49
5<br />
›<br />
Key Concepts<br />
• Evidence<br />
• Historical<br />
Questions<br />
and Research<br />
• Contestability<br />
50 KOKODA<br />
A Fighting Retreat<br />
a Fighting<br />
Retreat<br />
ToPIC QUeSTIoN<br />
What was the outcome<br />
<strong>of</strong> the second engagement<br />
at Kokoda: August –<br />
September 1942?<br />
1<br />
Learning<br />
Outcomes<br />
2<br />
Learning<br />
Activities<br />
Students develop knowledge and understanding about<br />
the special significance <strong>of</strong> the second engagement at<br />
Kokoda. Students explore the reality <strong>of</strong> walking the<br />
Kokoda Track.<br />
1. The second engagement at Kokoda<br />
2. Walking the Kokoda Track
3<br />
Website and DVD Links<br />
kokoda.commemoration.gov.au/fighting-retreat/second-engagement-kokoda.php<br />
kokoda.commemoration.gov.au/about-the-kokoda-track/kokoda-track-significance.php<br />
kokoda.commemoration.gov.au/about-the-kokoda-track/seeing-kokoda.php<br />
Kokoda DVD:<br />
Part 1: The Invasion.<br />
4<br />
Teacher Briefing<br />
A Fighting Retreat 5<br />
This unit provides the option to use one <strong>of</strong> the animated maps available on the Kokoda website. The unit is designed<br />
to develop students’ historical skills and interpretation. The second engagement at Kokoda was a small but<br />
complicated fight. It is an opportunity for students to understand:<br />
a) the mechanics <strong>of</strong> the battle and the reason why armies manoeuvre as they do; and<br />
b) the influence a small battle can have on larger events.<br />
About the Learning Activities<br />
activity 1: The second engagement at Kokoda<br />
The aim <strong>of</strong> this activity is to explore the concept <strong>of</strong> historical significance. The class is required to look at the<br />
animated map <strong>of</strong> the second engagement at Kokoda on the website at www.kokoda.commemoration.gov.au/fightingretreat/second-engagement-kokoda.php<br />
and closely read the text on pages 53–54. Students are required to work<br />
out the sequence <strong>of</strong> events represented on the website’s animated map on a separate piece <strong>of</strong> paper, using the text<br />
as a guide. This activity may conclude with a class discussion.<br />
activity 2: Walking the Kokoda Track<br />
This activity tests students’ knowledge about personal challenges faced by Australians on the track in 1942 and<br />
today. This may be developed through group or class discussion and draw on students’ personal bush walking and<br />
camping experiences. Kokoda terrain photographs are on page 55 and instructions to students are on pages 56–58.<br />
KOKODA<br />
51
5<br />
52 KOKODA<br />
A Fighting Retreat<br />
overview: What was the outcome <strong>of</strong> the second engagement at<br />
Kokoda: August – September 1942?<br />
The second Kokoda engagement had notable strategic consequences. Australian Major Allen Cameron’s bold attack on Kokoda came as a<br />
surprise, not just to Japanese Colonel Tsukamoto, but also to his Japanese superiors in Rabaul who did not anticipate there would be many<br />
Australians on the north side <strong>of</strong> the Owen Stanley Range.<br />
The 17th Army commander, Hyakutake reasoned that if the Australians were bold enough to retake Kokoda, even if only briefly, then they<br />
must have a large force, estimated to be 1,200 strong. This first prompted the Japanese to consider the idea <strong>of</strong> postponing the attack on Port<br />
Moresby until more troops arrived in Papua, more supplies were accumulated and Milne Bay was taken. This line <strong>of</strong> thinking was reinforced<br />
when news came in that the American landing at Guadalcanal, on 7 August, would be a greater problem for the Japanese than first thought.<br />
By 16 August, the decision to postpone the attempt to take Port Moresby was made in Rabaul. Senior Japanese <strong>of</strong>ficers interviewed after the<br />
war thought that the factor most influencing the postponement was not Guadalcanal but rather ‘stronger than anticipated Australian resistance<br />
at Kokoda.’<br />
activity 1: The second engagement at Kokoda<br />
Teacher Briefing<br />
› Print <strong>of</strong>f the overview above, the student<br />
task page 53–54<br />
The significance <strong>of</strong> the second engagement<br />
at Kokoda was that it had strategic<br />
consequences out <strong>of</strong> all proportion to the<br />
size <strong>of</strong> the force engaged. The second<br />
engagement led to the Japanese decision<br />
to postpone the Japanese attempt to take<br />
Port Moresby.<br />
25 Brigade advancing along Kokoda Trail near Templeton’s Crossing, George<br />
Browning, 1945. Oil on canvas on hardboard. 61 x 45.4 cm.<br />
AWM ART24074
› Student Task<br />
activity 1: The second engagement at Kokoda<br />
A Fighting Retreat 5<br />
Look at the animated map <strong>of</strong> the second engagement at Kokoda on the website at www.kokoda.commemoration.gov.au/fighting-retreat/<br />
second-engagement-kokoda.php and read the following text. Using the text as a guide, work out the sequence <strong>of</strong> events represented on the<br />
website’s animated map on a separate piece <strong>of</strong> paper. Work out the sequence <strong>of</strong> events. Discuss in class.<br />
Glossary<br />
Cameron Commander <strong>of</strong> the Australian Maroubra Force<br />
owen Previous Commander <strong>of</strong> Maroubra Force<br />
Bidstrup/Symington Company Commanders under Cameron<br />
Tsukamoto Japanese Commander <strong>of</strong> 1/144 Battalion<br />
Brigade A military force with 3 or 4 Battalions<br />
Battalion Maroubra Force or Japanese 1/144 were battalion size with 500 men<br />
Company Battalions are divided into companies <strong>of</strong> about 100 men<br />
Platoon Companies are divided into platoons <strong>of</strong> about 30 men<br />
Second engagement at Kokoda: 8 August 1942<br />
After the first Kokoda engagement on the night <strong>of</strong> 28/29 July, the Australians retreated to Deniki. Both sides awaited reinforcements.<br />
With the death <strong>of</strong> Owen at Kokoda, Major Allen Cameron arrived to take over Maroubra Force which, by the first week <strong>of</strong> August had grown<br />
to 550 men, mostly <strong>of</strong> 39th Battalion. Leaving a reserve at Deniki, Cameron now moved with 430 men to obey his orders to retake Kokoda.<br />
On 8 August, with his headquarters company and one other, he advanced directly down the track from Deniki towards Kokoda. A second<br />
force under Captain Bidstrup moved north-east to Pirivi to block the track by which Japanese reinforcements might come from the north<br />
coast to Kokoda. Between these two Australian forces was a third one, a company under Captain Symington. It marched along another<br />
track, unknown to the Japanese, that led from Deniki to Kokoda.<br />
Cameron’s force on the main track bumped into a Japanese battalion coming the other way. By coincidence the Japanese battalion<br />
commander, Colonel Tsukamoto, had begun his attack on Deniki, where he knew the Australians to be, on the same day Cameron<br />
commenced his own advance. Tsukamoto had 522 men <strong>of</strong> 1/144 Battalion. Japanese combat engineers and about 660 Japanese were<br />
engaged against 430 Australians.<br />
Soon realising he was considerably outnumbered on the main track, Cameron withdrew to Deniki. Tsukamoto, surprised to find the<br />
Australians had advanced on him when he expected to be the attacker, slowly and carefully followed Cameron’s withdrawal. On the<br />
central track, Symington found no Japanese at all until he entered Kokoda. There he encountered a platoon <strong>of</strong> Japanese engineers who<br />
did not stay to fight but retreated along the track to Pirivi. Symington’s men dug in on the ridge overlooking the Kokoda airstrip on the same<br />
ground Owen had defended nine days before.<br />
The Japanese planned to establish a supply dump at Kokoda. For this reason a company <strong>of</strong> Japanese engineers was in the area improving<br />
their supply line. One platoon was building a bridge near Pirivi when Bidstrup’s company, which was the eastern most <strong>of</strong> the three pronged<br />
Australian attack, ran into them. The Japanese were reinforced later by another engineer platoon, the one which Symington saw leaving<br />
Kokoda in the direction <strong>of</strong> Pirivi. Bidstrup fought the Japanese engineers until dark when he too withdrew to Deniki.<br />
KOKODA<br />
53
5<br />
54 KOKODA<br />
A Fighting Retreat<br />
By 9 August, both commanders’ plans had been confounded. Cameron, like Tsukamoto, had expected to be the attacker but then found<br />
himself under attack. His two outer prongs had been repulsed and the central one, under Symington, was holding Kokoda but cut <strong>of</strong>f from<br />
the rest <strong>of</strong> the Maroubra Force. Tsukamoto brought the main body <strong>of</strong> his battalion up to Deniki but was reluctant to make his attack until<br />
he was sure Kokoda was cleared <strong>of</strong> what he believed was a small force <strong>of</strong> Australians. He sent back just one company to retake it.<br />
This company proved insufficient, all its attacks over that day and the following night were repulsed.<br />
Because Cameron was unsure if Symington was even in Kokoda, no consideration was given to the possibility <strong>of</strong> flying reinforcements<br />
into Kokoda airstrip. On 10 August, Symington, having had no communication at all with Cameron and low on ammunition and food,<br />
decided to withdraw to Deniki. As the most direct routes were blocked his company eluded the Japanese by heading west across the<br />
airstrip then south towards Deniki.<br />
Total Japanese casualties for the three days fight were 21 killed and 44 wounded. The Australians lost 23 killed and 17 wounded.<br />
September 1942. Members <strong>of</strong> the 39th Battalion, AMF, parade after weeks <strong>of</strong> fighting in dense jungle during the Kokoda campaign.<br />
The <strong>of</strong>ficer in front is Lieutenant Johnson. Their bedraggled dress reflects the hard fighting <strong>of</strong> past weeks. AWM 013289
activity 2: Walking the Kokoda Track<br />
Teacher Briefing<br />
This task can be done by students individually<br />
or as group work. Students should first look at<br />
the Kokoda terrain photographs on this page and<br />
then make their own list <strong>of</strong> items to take on the<br />
Kokoda Track. Only after they have made their<br />
own list should you provide them with the list<br />
made by experienced Kokoda Trekkers found on<br />
the CD ROM under Unit 5 Activity 2 and students<br />
complete the worksheet questions on page 57–58.<br />
Alternatively, the questions on the worksheet can<br />
be used for class discussion.<br />
Walking the Kokoda Track. Courtesy Peter Williams<br />
A Fighting Retreat 5<br />
KOKODA<br />
55
5<br />
A Fighting Retreat<br />
› Student Task<br />
activity 2: Walking the Kokoda Track<br />
› Your Task<br />
Look at the photographs <strong>of</strong> the Kokoda Track on page 55. Make a list <strong>of</strong> at least 20 items you would need, and how many <strong>of</strong> each, for a ten<br />
day walk along the Kokoda Track.<br />
Remember that you have to carry everything yourself so keep it down to a bare minimum. The only things you don’t have to take with you are<br />
water and food. Water can be obtained from mountain streams and three basic meals a day will be provided by the tour company which will<br />
guide you along the Track.<br />
After you have completed your list, compare it with a classmate. Did you have a similar list? What items did you not have on the list?<br />
Look at the Kokoda Trekkers’ Equipment List on the CD ROM under Unit 5 Activity 2.<br />
Now answer the worksheet questions on page 57–58.<br />
› Hints<br />
You will need the following: clothing, footwear, toiletries and camping equipment. There are many other things that you will need. Some <strong>of</strong><br />
them will surprise you, so think carefully about what might be useful for a long walk in tropical mountains where there are no shops, hospitals<br />
or hotels.<br />
Image courtesy <strong>of</strong> Volker Scholz, <strong>Department</strong> <strong>of</strong> Environment.<br />
56 KOKODA
Answer each <strong>of</strong> the following questions:<br />
A Fighting Retreat 5<br />
1. Compare your own list to the Kokoda Trekkers’ Equipment List. What did you take too many <strong>of</strong> and why do you think this list<br />
recommends taking less?<br />
2. What was the most surprising item to find on this list and why did it surprise you?<br />
3. Why is it so important to keep your feet and your walking boots dry?<br />
KOKODA<br />
57
5<br />
58 KOKODA<br />
A Fighting Retreat<br />
4. Name as many items as you can that should be in the first aid kit?<br />
5. What does the list tell you about the dangers <strong>of</strong> walking the Kokoda Track?<br />
6. Did you have something on your list that is not on the Kokoda Trekkers’ Equipment List, but you think you should take<br />
it on the trek? Explain why.
1943. Papuan native carriers<br />
taking supplies on the Kokoda<br />
Track at Uberi. AWM 061856<br />
Into the Mountains 6<br />
Into the<br />
Mountains<br />
KOKODA<br />
59
6<br />
›<br />
Key Concepts<br />
• Evidence<br />
• Analysis and<br />
Use <strong>of</strong> Sources<br />
• Explanation and<br />
Communication<br />
60 KOKODA<br />
Into the Mountains<br />
Into the<br />
Mountains<br />
ToPIC QUeSTIoN<br />
What happened in the<br />
Australian retreat from<br />
Eora to Templeton’s<br />
Crossing: 31 August –<br />
5 September 1942?<br />
1<br />
Learning<br />
Outcomes<br />
2<br />
Learning<br />
Activities<br />
Students will investigate an Australian and Japanese<br />
account <strong>of</strong> the fighting. Students can also investigate the<br />
contestability <strong>of</strong> the reputation <strong>of</strong> one <strong>of</strong> the Australian<br />
fighting units, the 53rd Battalion.<br />
1. The engagement at Eora<br />
2. Was the reputation <strong>of</strong> the 53rd Battalion deserved?
3<br />
Website and DVD Links<br />
kokoda.commemoration.gov.au/into-the-mountains/index.php<br />
kokoda.commemoration.gov.au/into-the-mountains/stand-at-isurava.php<br />
kokoda.commemoration.gov.au/into-the-mountains/eora-templetons-crossing.php<br />
Into the Mountains 6<br />
Kokoda DVD:<br />
View Part 1: The Invasion, Chapter 9 – Attack on Isurava and Chapter – 12 Fighting Withdrawal.<br />
Part 2: The Counter Attack, Chapter 13–15 and particularly Chapter 14 – General Blamey’s Rabbit Speech.<br />
4<br />
Teacher Briefing<br />
This unit is designed to develop students’ knowledge and understanding <strong>of</strong> different points <strong>of</strong> view and to challenge<br />
the contestability <strong>of</strong> evidence. Students take on the Japanese perspective to analyse and interpret the event.<br />
The unit provides an empathy exercise from the Japanese perspective.<br />
About the Learning Activities<br />
activity 1: The engagement at eora<br />
Students have the opportunity to compare and contrast the Japanese and Australian accounts regarding the<br />
engagement at Eora, reproduced from the Kokoda website on pages 63–64. Class instructions are at page 63<br />
and questions are at page 65. The questions are designed to develop analysis and interpretation skills.<br />
activity 2: Was the reputation <strong>of</strong> the 53rd Battalian deserved?<br />
Students exercise interpretative skills and role play as members <strong>of</strong> the 53rd Battalion and read excerpts from<br />
3 texts on page 67.<br />
Prior to viewing the Kokoda DVD the class should brainstorm their existing impression <strong>of</strong> the Australian fighting<br />
force at Kokoda.<br />
The Kokoda DVD Chapter 9, Attack on Isurava and Part 2 The Counter Attack Chapter 19 Kododa Recaptured will<br />
assist students to understand the circumstances and later guide a class discussion about the behaviour <strong>of</strong> members<br />
<strong>of</strong> the 53rd Battalion.<br />
If computers are available, students can map the progress <strong>of</strong> the 53rd Battalion at the Stand.<br />
www.kokoda.commemoration.gov.au/into-the-mountains/stand-at-isurava.php.<br />
Open with a class discussion <strong>of</strong> the criticism <strong>of</strong> the 53rd Battalion and ask students to consider their defence.<br />
KOKODA<br />
61
6<br />
Into the Mountains<br />
overview: What happened in the Australian retreat from Eora to<br />
Templeton’s Crossing?<br />
Before Deniki the fighting took place in low lying country north <strong>of</strong> the Owen Stanley Range. Once the Japanese entered the mountains in<br />
pursuit <strong>of</strong> the Australians, two things changed.<br />
First, the rugged, jungled slopes on which the fighting took place altered the tactics used. In the low country it was easy to march around the<br />
enemy flank to threaten their rear. In the mountains, both sides were to find this was still possible, but extremely difficult and slow. The Kokoda<br />
Track became the major tactical feature and if the Australians could block it, and not be cut <strong>of</strong>f from supplies coming up the track, then they<br />
would stop the Japanese.<br />
Secondly, the Maroubra Force was strongly reinforced and, abandoning a delay and retire policy, the Australians made three determined but<br />
unsuccessful attempts to stop the Japanese at Isurava, Efogi and Ioribaiwa.<br />
27 August 1942, Kokoda track, Eora village during the action at Isurava. The Australians evacuated Eora four days later. Photo: Damien Parer AWM 013257<br />
62 KOKODA
› Student Task<br />
activity 1: The engagement at eora<br />
Into the Mountains 6<br />
› Your Task<br />
Major Koiwai Mitsuo (Japanese names have surname first) wrote an account <strong>of</strong> his participation in the engagement at Eora. Read this, and the<br />
Australian account <strong>of</strong> the engagement at Eora and answer the questions on page 65.<br />
The Japanese perspective<br />
Koiwai’s story begins on the morning <strong>of</strong> 2nd September, after the Australians had withdrawn from their position overlooking Eora village.<br />
‘I thought it unusual for the hard working Australians to give up a position so quickly. Anyhow it was good news and took a load <strong>of</strong>f my mind.<br />
Our loss since yesterday amounted to 17 dead and 27 wounded. This day we buried our dead in the mountains for the first time since landing<br />
in New Guinea. I issued an order to start the pursuit at 7am. Number 7 company, the most exhausted, was sent back. Numbers 5 and 6<br />
company rested where they were while 8 and 12 companies took up the pursuit.’<br />
Koiwai’s superior, Colonel Yazawa Kiyomi, arrived to rebuke Koiwai for advancing too slowly when, as Yazawa said, ‘There seemed to be no<br />
Australians about.’<br />
‘Since yesterday’s failed attack he had not liked my cautious approach. He seemed to be anxious for a quick victory but it was not easy to<br />
attack the enemy without knowing where they were. Being too eager for a victory could result in delaying the pursuit and increasing our<br />
losses. This is the last thing a commander should do.’<br />
The next day, 3rd September, Koiwai’s men caught up with the Australians.<br />
‘After considering all the options I decided to attack the enemy at night. I had 8 Company on hand but they had been worked very hard since<br />
1 September so I could not push that company too much. I was looking forward to the arrival <strong>of</strong> 7 Company because <strong>of</strong> the quality <strong>of</strong> the<br />
commanders. Lt Nakao had experience in China and his Warrant Officer, Kaneshige, was also a great fighter with lots <strong>of</strong> experience. I had one<br />
artillery piece. It is usually not done to fire artillery at night but human psychology is kind <strong>of</strong> beyond tactics. My plan was that after firing a<br />
few shells at the enemy position and terrifying them out <strong>of</strong> their senses we would charge with bayonets and they would be in fear <strong>of</strong> us in the<br />
darkness <strong>of</strong> the jungle.<br />
It all went as I had hoped. After hard fighting my men got in among the Australians. I then ordered them to hold their positions as I expected<br />
a counter attack. It never came and at dawn we were surprised to find that the Australians had again retreated.’<br />
Autographed good luck flag carried by a Japanese soldier. The signatures on the flag are from friends and family wishing a traditional<br />
long-lasting good fortune in war. AWM REL/18488<br />
KOKODA<br />
63
6<br />
64 KOKODA<br />
Into the Mountains<br />
The Allied perspective<br />
www.kokoda.commemoration.gov.au/into-the-mountains/eora-templetons-crossing.php<br />
As a result <strong>of</strong> the defeat at Isurava, the Australians withdrew rapidly<br />
south along the Kokoda track. Covering the withdrawal was a large<br />
rearguard composed <strong>of</strong> 2/16 and 2/14 Battalions. These battalions,<br />
especially the latter, had been dispersed as a result <strong>of</strong> the Isurava<br />
fighting and had only 700 men between them. The fighting done by<br />
2/16 and 2/14 as they covered the withdrawal <strong>of</strong> the Maroubra Force<br />
in the week after Isurava, is known as the first Eora-Templeton’s<br />
engagement. Colonel Key <strong>of</strong> 2/14 was among those missing after<br />
Isurava so Colonel Caro <strong>of</strong> 2/16 commanded the force.<br />
The first position the Australians held was just south <strong>of</strong> Alola on the<br />
night <strong>of</strong> 30 August. After dark they withdrew. It was well that they<br />
did as a fresh Japanese pursuit group, elements <strong>of</strong> 41 Regiment,<br />
none <strong>of</strong> which had participated at Isurava, was advancing rapidly<br />
after them. With 1305 men its aim was to overtake and destroy the<br />
Australian rearguard. When Yazawa, the regimental commander,<br />
saw the Australians drawn up south <strong>of</strong> Alola he thought the position<br />
too strong to attack frontally. At night he sent his main force into the<br />
jungle to the west, to circle around and attack the Australians from<br />
the rear. While this was in progress, the Australians withdrew and, for<br />
the third time in the campaign so far, a Japanese battalion wandered<br />
lost in the jungle unable to find its enemy.<br />
A day lost to the error, Yazawa’s pursuit group caught up with Caro’s<br />
force dug in on the southern heights above Eora village. The line<br />
was held by 2/16 while 2/14 was behind it ready to act as a reserve<br />
or respond to a Japanese flank attack. The Japanese placed their<br />
artillery and machine gun company on the same height to the<br />
north <strong>of</strong> the village that they were to use when they defended<br />
this area during their retreat in October. Five infantry companies<br />
were available to them. After an artillery<br />
bombardment <strong>of</strong> the Australians, they made<br />
a night attack. Two were held in reserve,<br />
one attacked the Australian frontally and<br />
two went around the Australian right flank.<br />
By early morning <strong>of</strong> 2nd September, the<br />
Japanese had penetrated the Australian<br />
position in several places. Caro decided<br />
he must withdraw. The Japanese followed<br />
cautiously and the following evening found<br />
the Australians further down the track at<br />
Templeton’s Crossing. This time Caro withdrew<br />
before the Japanese had time to develop their<br />
attack. On the following night, the Australians<br />
August 1942.Australian troops enjoy a respite<br />
from heavy fighting against the Japanese in the<br />
Kokoda area. Their rest camp consists <strong>of</strong> native<br />
huts. AWM 150656<br />
crossed Eora Creek onto heights south <strong>of</strong> it and here made another<br />
stand. The Japanese had only one gun forward to support their<br />
infantry which again made a frontal pinning attack combined<br />
with a sweep around a flank. Both attacks were successful and<br />
the Australians had either to withdraw or face destruction. This<br />
withdrawal uncovered Myola, the dry lake in the mountains from<br />
which the Australians were receiving their supplies by air. The<br />
Australian rearguard then fell back to Efogi where they rejoined the<br />
Maroubra Force.<br />
First, Eora-Templeton’s is rightfully regarded as a successful<br />
rearguard action on the part <strong>of</strong> the Australians. The Japanese were<br />
faced with the choice <strong>of</strong> a fast advance which would cost them more<br />
casualties or a less costly slow advance. In this phase <strong>of</strong> operations<br />
in the Owen Stanley Range, Yazawa opted for a slow advance in an<br />
attempt to keep casualties down. He failed as Eora-Templeton’s cost<br />
the Japanese 43 killed and 58 wounded against an Australian loss <strong>of</strong><br />
21 killed and 54 wounded. Horii, the Nankai Shitai commander, was<br />
highly dissatisfied and removed Yazawa’s regiment from the pursuit.<br />
He replaced it with a 144 Regiment which had been resting since<br />
Isurava. From an average advance <strong>of</strong> two kilometres per day under<br />
Yazawa, the speed <strong>of</strong> the pursuit increased to eight kilometres per<br />
day. From the Australian perspective, the slow Japanese advance in<br />
the week after Isurava gave them time to prepare to make another<br />
stand, this time at Efogi.
Answer the following questions about the Japanese and Australian accounts.<br />
1. How does Koiwai’s version <strong>of</strong> events differ from the Allied account?<br />
Into the Mountains 6<br />
2. Watch the animated battle <strong>of</strong> Eora 1 and 2 on the Kokoda website kokoda.commemoration.gov.au/battle-maps/. Is there<br />
anything in Koiwai’s version that you think might be incorrect?<br />
3. Considering both accounts, who would you say won the fight?<br />
4. What does Koiwai think <strong>of</strong> the Australians?<br />
KOKODA<br />
65
6<br />
66 KOKODA<br />
Into the Mountains<br />
5. Explain in your own words, the reason for the tension between Koiwai and Yazawa.<br />
6. What was Koiwai particularly worried about?<br />
7. What does Koiwai’s account tell you about the problems faced by the Japanese?<br />
8. What does the account tell you about Koiwai’s personality?
Into the Mountains 6<br />
› Student Task<br />
activity 2: Was the reputation <strong>of</strong> the 53rd Battalion<br />
deserved?<br />
Watch the Kokoda DVD Part 1 The Invasion, chapter 9 Attack on Isurava and Part 2 The Counter Attack, Chapter 19 Kokoda<br />
Recaptured.<br />
Imagine that you are a member <strong>of</strong> the 53rd Battalion.<br />
View the 53rd Battalion movements on the animated map <strong>of</strong> Isurava at www.kokoda.commemoration.gov.au/into-themountains/stand-at-isurava.php.<br />
Follow the four phases.<br />
Read the three secondary sources below and answer the following questions.<br />
Source 1: Extract from Kokoda, Paul Ham 2005<br />
The 53rd Battalion was not destined to share the glory <strong>of</strong> the 39th. The story <strong>of</strong> this unfortunate unit is one <strong>of</strong> the sadder<br />
episodes <strong>of</strong> Australian military history, and rarely told in the accounts <strong>of</strong> the Kokoda campaign. They were similar men<br />
<strong>of</strong> similar backgrounds as those in the 39th. And many were as brave and committed. But incompetent leadership and a<br />
splinter group <strong>of</strong> malcontents, fatally compromised them. (Ham, Kokoda, 2005 :29) Everyone criticised their (the 53rd)<br />
lack <strong>of</strong> training, but no one seemed prepared to do much about it, far less accept responsibility. It was always someone<br />
else’s job. This was a constant theme throughout this miserable war. (Ham, Kokoda, 2005 :486)<br />
Source 2: Extract from A Bastard <strong>of</strong> a Place, Peter Brune 2003<br />
In summary, it should be said that the formation <strong>of</strong> the 53rd Battalion, its deployment in Port Moresby, its subsequent<br />
treatment during its garrison days and, critically, the quality <strong>of</strong> its leadership in the collective sense – all <strong>of</strong> it is a national<br />
disgrace. And a further point should be noted. The notion that an Australian citizen need only enlist in his armed forces<br />
and almost immediately become the stuff <strong>of</strong> a new legend is quite simply nonsense. The citizen requires, and deserves,<br />
trained, dynamic leadership; he should have adequate equipment and the time to train and learn how to engender<br />
esprit de corps. The legends come later. In August 1942, all this was denied the young men <strong>of</strong> the 53rd Battalion.<br />
(Brune, A Bastard <strong>of</strong> a Place, 2003 :166)<br />
Source 3: From 53rd Battalion War Diary, AWM Collection 52 8/3/91 War Diaries<br />
27 August 1942 – Attacks were not successful due to… lack <strong>of</strong> <strong>of</strong>fensive spirit and general physical<br />
condition <strong>of</strong> troops. Runner returned with message Commanding Officer Lieutenant Colonel Ward…<br />
had been killed.<br />
30 August 1942 – Dysentery cases increasing….morale not good.<br />
31 August 1942 – Major Spring reported his Company dispersed during an attack while he was absent…..<br />
The company could not be located.<br />
1 September 1942 – Companies appeared to lose control and [there was] far too much straggling.<br />
2 September 1942 – 53 Battalion to be relieved <strong>of</strong> all automatic weapons, rifles and equipment and<br />
the Battalion less one company to move back to Port Moresby.<br />
KOKODA<br />
67
6<br />
68 KOKODA<br />
Into the Mountains<br />
Look for evidence that supports the three sources and the Kokoda DVD’s views about the 53rd Battalion. Write down a list <strong>of</strong> evidence and<br />
where the evidence comes from that supports those views.<br />
Was the reputation <strong>of</strong> the 53rd Battalion deserved?<br />
Notes on evidence found in the sources Notes on evidence found in the Kokoda DVD<br />
Source 1<br />
Source 2<br />
Source 3<br />
Answer the following questions:<br />
1. What did the 53rd Battalion do wrong?<br />
2. Do you think that criticism <strong>of</strong> the 53rd Battalion was fair?<br />
3. Do you think that the whole 53rd Battalion should be criticised?<br />
4. If you were a member <strong>of</strong> the 53rd Battalion what would you say in your defence?
September 1942. Milne Bay.<br />
AWM 026620<br />
Milne Bay 7<br />
Milne Bay<br />
KOKODA<br />
69
7<br />
70 KOKODA<br />
Milne Bay<br />
›<br />
Key Concepts<br />
• Chronology<br />
• Contestability<br />
• Analysis and<br />
Use <strong>of</strong> Sources<br />
Milne Bay<br />
ToPIC QUeSTIoN<br />
What led to the Japanese<br />
defeat at Milne Bay?<br />
1<br />
Learning<br />
Outcomes<br />
2<br />
Learning<br />
Activities<br />
Students learn <strong>of</strong> the first Japanese defeat in New<br />
Guinea. This unit identifies the events, causes, outcomes<br />
and broader impact <strong>of</strong> the campaign. It also invites<br />
interpretation <strong>of</strong> different media to draw conclusions<br />
about the motivations and intentions <strong>of</strong> the participants.<br />
The unit also examines heroism and the life and story<br />
<strong>of</strong> Corporal John Alexander French VC who won his<br />
Victoria Cross at Milne Bay.<br />
1. The Japanese landing and defeat at Milne Bay<br />
2. Milne Bay – veteran account<br />
3. Depth study: Corporal John Alexander French VC
3<br />
Website and DVD Links<br />
kokoda.commemoration.gov.au/milne-bay/index.php<br />
www.ww2australia.gov.au/asfaras/<br />
www.ww2australia.gov.au/<br />
www.awm.gov.au/people/8254.asp<br />
www.awm.gov.au/encyclopedia/vic_cross.asp<br />
Kokoda DVD:<br />
Part 2: The Counter Attack, Chapters 15-23<br />
4<br />
Teacher Briefing<br />
About the Learning Activities<br />
Milne Bay 7<br />
Small metal bottle <strong>of</strong> anti-freeze used by the Imperial Japanese<br />
Army, c 1942 Recovered from an abandoned Japanese camp at<br />
Efogi on the Kokoda Track. Probably used with gun sights and<br />
mortar equipment. AWM REL34277<br />
activity 1: The Japanese landing and defeat at Milne Bay<br />
An exercise designed to develop knowledge and understanding <strong>of</strong> the Japanese perspective and the turning<br />
point in the fighting. Class instruction and questions are on page 73. Guide the students through the text and<br />
questions. Direct class discussion about the influence <strong>of</strong> weather and terrain on the war in New Guinea. You may<br />
alternatively set this as a research assignment.<br />
activity 2: Milne Bay – veteran account<br />
Explain personal narrative as a source <strong>of</strong> historical evidence and ask the students to imagine the perspective <strong>of</strong> a<br />
veteran <strong>of</strong> Milne Bay.<br />
Students are asked to give a short talk (3-5 minutes) to the class, imagining that they are a 90 year old veteran <strong>of</strong> the<br />
Battle <strong>of</strong> Milne Bay. The students can use their imagination to tell the group about their experiences. Students acting<br />
the part <strong>of</strong> the veteran may use the opportunity to create or bring mementoes to explain their story. Mementoes<br />
could include medals, a diary from 1942, an old photograph <strong>of</strong> his best mate, a mud stained map, a letter from<br />
his mother, a bullet, or a button from his uniform. Students can make the mementoes, at least five <strong>of</strong> them, with<br />
cardboard, paper, coloured pencils, glue and whatever else they can find. Provide coloured pencils, cardboard and<br />
other materials or set the making <strong>of</strong> mementoes as a homework assignment. Some examples are included with the<br />
student instructions are on page 74.<br />
activity 3: depth study: Corporal John alexander French VC<br />
In this activity students gain knowledge about definitions <strong>of</strong> a hero and explore the story <strong>of</strong> Corporal John Alexander<br />
French VC. The Victoria Cross, is the highest military decoration awarded for valor in the face <strong>of</strong> the enemy to armed<br />
forces in the Commonwealth. The Australian War Memorial website www.awm.gov.au/people/ has a list <strong>of</strong> Australian<br />
Victoria Cross recipients that you may wish to use for broader discussion about the award <strong>of</strong> a VC. Information on<br />
the only other VC Recipient at the Kokoda Track is available on the CD ROM under Unit 7 Activity 3. Instructions and<br />
materials to distribute to students are on pages 76–78.<br />
Provide students with a copy <strong>of</strong> the definitions <strong>of</strong> a hero found on the CD ROM under Unit 7 Activity 3.<br />
KOKODA<br />
71
7<br />
Milne Bay<br />
overview: What led to the Japanese defeat at Milne Bay<br />
Milne Bay is on the eastern tail <strong>of</strong> New Guinea. In 1942, aircraft based there could project air power towards a number <strong>of</strong> vital strategic<br />
locations: Port Moresby, Sanananda, Lae, Far North Queensland and across the Coral Sea.<br />
Both sides were well aware <strong>of</strong> the advantages <strong>of</strong> controlling Milne Bay. The Allies made the first move. They began construction <strong>of</strong> an air base<br />
at the western end <strong>of</strong> the bay in June 1942. The Japanese intended to build an airfield at nearby Samarai Island but when they discovered the<br />
Allied airfield at Milne Bay, they decided to attack and take that instead. The moment seemed right as it could be timed to coincide with the<br />
Japanese attack at Isurava. More importantly, two weeks earlier, the Imperial Japanese Navy sank an Allied cruiser group, including the HMAS<br />
Canberra, near Guadalcanal. Admiral Mikawa deduced, correctly, that the American carriers would be unlikely to intervene in a Japanese<br />
naval operation to take Milne Bay, now that the carrier’s cruiser escort had been sunk.<br />
The Japanese landed on the beaches <strong>of</strong> Milne Bay on 26 August 1942 to seize the Allied airfield. They were comprehensively defeated by the<br />
Australians who thus became the first to obtain a victory over the Japanese since the Pacific war began.<br />
› Student Task<br />
activity 1: The Japanese landing and defeat<br />
at Milne Bay<br />
Poor weather and bad terrain can influence the outcome <strong>of</strong> a battle. Read the text below carefully and answer the following<br />
questions. Use a highlighter to mark the problems that led to the failure <strong>of</strong> the Japanese advance.<br />
The Japanese landing at Milne Bay<br />
With an escort <strong>of</strong> cruisers and destroyers, the first Japanese landing <strong>of</strong> 1178 troops, took place between Waga Waga and Wandula on the<br />
northern coast <strong>of</strong> Milne Bay on the night <strong>of</strong> 25 August 1942. This was seven kilometres east <strong>of</strong> where they intended to land, a fact that<br />
had important consequences. To understand the effect <strong>of</strong> this error on the course <strong>of</strong> events it is vital to take into account the weather<br />
and terrain.<br />
Where the Japanese landed was a narrow coastal strip between the bay and rugged<br />
mountains. There were tracks in the mountains but they ran from north to south, as did the<br />
ridges leading down from the mountains, while the Japanese wanted to advance from east<br />
to west. The Australians were able to block Japanese access to the airfields along the<br />
coastal flats.<br />
Secondly, almost constant rain throughout the operation turned all tracks into mud<br />
wallows and much <strong>of</strong> the area into a swamp, slowing troop movement. The third effect<br />
<strong>of</strong> heavy rain and banks <strong>of</strong> low cloud was on air power. The Royal Australian Air<br />
Force, with an airstrip only minutes away, could quickly attack Japanese ground<br />
troops when any break in the weather was observed.<br />
Japanese aircraft, in contrast, had to come from Buna, Lae and Rabaul.<br />
Communications with their own troops at Milne Bay <strong>of</strong>ten failed so they had no<br />
way <strong>of</strong> knowing when breaks in the cloud might occur. Perhaps three quarters<br />
<strong>of</strong> all Imperial Japanese Navy air raids over Milne Bay failed to find any<br />
targets.<br />
October 1942. Leather wallet with a woven cloth cover. This wallet<br />
was picked up by an Australian soldier at Templeton’s Crossing. More<br />
information about this artefact can be found on the AWM collection<br />
database. AWM REL33902<br />
72 KOKODA
Questions<br />
1. List the factors that led to the defeat <strong>of</strong> the<br />
Japanese at Milne Bay.<br />
2. What, in your opinion, was the most important<br />
factor and why?<br />
September 1942, Milne Bay. AWM 026620<br />
3. What could the Japanese have done to minimise the effects <strong>of</strong> the weather and terrain?<br />
Milne Bay 7<br />
KOKODA<br />
73
7<br />
74 KOKODA<br />
Milne Bay<br />
› Student Task<br />
activity 2: Milne Bay – veteran account<br />
RAAF Kittyhawk Squadron at Milne Bay, August – September 1942, William Dargie, 1969, oil on canvas, 154 x 275.3 cm. AWM ART27628<br />
Look at the artwork above and identify the tasks being done and the setting. Imagine that you are a veteran <strong>of</strong> this battle. You are now<br />
90 years old. You have been asked to talk <strong>of</strong> your experiences at a local school. You decide to bring some <strong>of</strong> your personal mementoes.<br />
Mementoes are a reminder <strong>of</strong> the past; a keepsake. You will show them to the students and tell them something about each one.<br />
Use your imagination. Think about what things an old soldier would keep in his box <strong>of</strong> souvenirs from the war. Which ones would he think the<br />
students would be interested in? He might bring his medals, a diary from the war, an old photograph <strong>of</strong> his best mate, a mud stained map, a<br />
letter from his mother, a bullet, or a button from his uniform.<br />
You can make the mementoes, with cardboard, paper, coloured pencils, glue and whatever else you can find. You should talk to the class for<br />
three minutes. Think about how a 90 year old veteran might talk. Start by telling the students who you are and where you come from, and<br />
what your strongest memory <strong>of</strong> the Battle <strong>of</strong> Milne Bay is. Then show the class your mementoes one at a time. Make up a very short story<br />
about each one. After you have finished, ask if the students have any questions and try to answer them as the veteran might.<br />
You may wish to use the Australian War Memorial collection search function on their website to find other artefacts or objects from the Second<br />
World War. Some examples are provided below for you.<br />
A typical medal set <strong>of</strong> an Australian<br />
soldier who served on the Kokoda<br />
Track. From left to right they are<br />
the Pacific Star, the Defence Medal,<br />
the War Medal 1939-1945 and the<br />
Australia Service Medal 1939-1945.<br />
AWM REL/14920.006<br />
Cigarette lighter. AWM REL38128
Use this table to assist you to structure the content <strong>of</strong> your talk.<br />
Memento Notes<br />
Why did you choose it?<br />
What is the relevance <strong>of</strong> your memento?<br />
How does it add to your veteran’s story?<br />
Is it an artefact?<br />
Is it a primary or a secondary source?<br />
Milne Bay 7<br />
KOKODA<br />
75
7<br />
76 KOKODA<br />
Milne Bay<br />
› Student Task<br />
activity 3: depth study: Corporal John alexander<br />
French VC<br />
The Qualities <strong>of</strong> Heroes<br />
1. Write a list <strong>of</strong> people who you think are heroes.<br />
2. Use the “Definitions <strong>of</strong> a hero” sheet located on the CD ROM to inform your discussion on the qualities <strong>of</strong> a hero. From this<br />
discussion construct a list <strong>of</strong> four or five essential qualities <strong>of</strong> a hero.<br />
Heroic qualities<br />
3. Go back to your original list <strong>of</strong> heroes. Do they have the qualities you have described in your list?<br />
Discuss in class why you originally considered these people as heroes.<br />
What is a Victoria Cross?<br />
1. Read the following information about the Victoria Cross.<br />
The Victoria Cross<br />
The Victoria Cross is the highest award for acts <strong>of</strong> bravery in wartime. It was instituted in 1856<br />
by Queen Victoria and made retrospective to 1854 to cover the period <strong>of</strong> the Crimean War. It is<br />
possible for any serving member <strong>of</strong> the armed forces to obtain this award. The Victoria Cross<br />
is designed in the form <strong>of</strong> the Maltese Cross and in the centre <strong>of</strong> the medal is a lion guardant<br />
standing upon the Royal Crown. The words “For valour” are inscribed below. The Victoria Cross<br />
is suspended from a crimson ribbon. On the reverse <strong>of</strong> the cross, the date <strong>of</strong> the act <strong>of</strong> bravery is<br />
inscribed, along with the name, rank and unit <strong>of</strong> the recipient.<br />
Source www.awm.gov.au Victoria Cross<br />
AWM PAIU1994/157.12
Milne Bay 7<br />
2. Only one other Victoria Cross was awarded at the Kokoda Track to an Australian <strong>of</strong> 2/14 Battalion. Go to the Australian War<br />
Memorial website at www.awm.gov.au/people/ and find out who gained the award, the location <strong>of</strong> the action and the date.<br />
The answer can be found on the CD ROM under Unit 7: Activity 3 or your teacher can provide the answer from the CD.<br />
3. Examine the following three sources about the VC awarded to Corporal John Alexander French who was killed at Milne Bay.<br />
Studio portrait <strong>of</strong> Corporal John Alexander French, VC. AWM 100643<br />
Source 1<br />
CORPORAL JOHN ALEXANDER FRENCH VC<br />
Date <strong>of</strong> birth: 15 July 1914<br />
Place <strong>of</strong> birth: Crows Nest, near Toowoomba, QLD<br />
Date <strong>of</strong> death: 4 September 1942<br />
Place <strong>of</strong> death: Milne Bay, Papua New Guinea<br />
Service Number: QX1071<br />
John French was typical <strong>of</strong> many single young men who had<br />
enlisted early in the war. He went on to serve in Britain, Egypt,<br />
and Libya. By the time that he was sent to Papua with the 2/9th<br />
Battalion, in August 1942, he was an experienced infantry noncommissioned<br />
<strong>of</strong>ficer.<br />
In early September, French’s company came across Japanese<br />
positions near Goroni and was held up by intense fire from three<br />
machine-gun posts. Ordering his own section to take cover,<br />
French successfully assaulted two positions with grenades.<br />
He then attacked the third with a sub-machine gun but finally<br />
fell dead in front <strong>of</strong> the enemy gun pit. He is buried in the Port<br />
Moresby (Bomana) War Cemetery.<br />
Source: www.awm.gov.au<br />
Source 2<br />
Go to www.naa.gov.au and conduct a record search for John French. Under his service number view a digital copy <strong>of</strong> his records.<br />
Digital copies <strong>of</strong> his service records are also provided on the CD ROM under Unit 7, Activity 3.<br />
KOKODA<br />
77
7<br />
78 KOKODA<br />
Milne Bay<br />
Source 3<br />
The London Gazette records French’s VC Citation.<br />
QX 1071 Corporal John Alexander FRENCH<br />
2/9th Australian Infantry Battalion, AIF<br />
4th September 1942, at Milne Bay, New Guinea<br />
At Milne Bay on the afternoon<br />
<strong>of</strong> the 4th September 1942,<br />
a company <strong>of</strong> an Australian<br />
infantry battalion attacked<br />
the Japanese position East<br />
<strong>of</strong> the K.B. Mission where<br />
it encountered terrific rifle<br />
and machine gun fire. The<br />
advance <strong>of</strong> the section <strong>of</strong><br />
which Corporal French was in<br />
command was held up by fire<br />
from three enemy machine gun<br />
posts, whereupon, Corporal<br />
French, ordering his section<br />
to take cover, advanced and<br />
silenced one <strong>of</strong> the posts with<br />
grenades. He returned to his<br />
section for more grenades and<br />
again advanced and silenced<br />
the second post. Armed with a<br />
Thompson sub-machine gun,<br />
he then attacked the third<br />
post, firing from the hip as he<br />
went forward. He was seen to<br />
be badly hit by the fire from<br />
this post, but he continued to<br />
advance. The enemy gun then<br />
ceased to fire and his section<br />
pushed on to find that all<br />
members <strong>of</strong> the three enemy<br />
gun crews had been killed and<br />
that Corporal French had died<br />
in front <strong>of</strong> the third gun pit. By<br />
his cool courage and disregard<br />
<strong>of</strong> his own personal safety,<br />
this non-commissioned <strong>of</strong>ficer<br />
saved the members <strong>of</strong> his<br />
section from heavy casualties<br />
and was responsible for the<br />
successful conclusion <strong>of</strong> the<br />
attack.<br />
London Gazette:<br />
14th January, 1943.<br />
1. Discuss why VC recipients are considered to be heroes. Do you agree that Corporal John French deserved this award? Why?
October 1942. Japanese prisoner<br />
captured near Nauro. Australian<br />
stretcher bearers care for him.<br />
AWM 026826<br />
The Tide Turns 8<br />
The Tide Turns<br />
KOKODA<br />
79
8<br />
80 KOKODA<br />
The Tide Turns<br />
›<br />
Key Concepts<br />
• Evidence<br />
• Perspective and<br />
Interpretation<br />
The Tide Turns<br />
ToPIC QUeSTIoN<br />
Did General Blamey mean<br />
to insult the troops in his<br />
‘rabbit speech’?<br />
1<br />
Learning<br />
Outcomes<br />
2<br />
Learning<br />
Activities<br />
3 November 1942, Papua.<br />
The Australian flag is<br />
raised over Kokoda,<br />
watched by soldiers <strong>of</strong><br />
25th Australian Infantry<br />
Brigade.<br />
Photo: John McNeil<br />
AWM 013572<br />
Students test evidence regarding the perspectives <strong>of</strong> the<br />
Australians and develop skills <strong>of</strong> interpretation, analysis<br />
and synthesis. An exercise on General Sir Thomas<br />
Blamey draws on material in the Kokoda DVD and<br />
explores the controversial ‘Rabbit Speech’. An empathy<br />
exercise from the perspective <strong>of</strong> a war bride is also<br />
included.<br />
1. Esma Myer’s story<br />
2. General Blamey and the ‘rabbit speech’<br />
3. Perspectives <strong>of</strong> war by analysing historical sources
3<br />
Website and DVD Links<br />
www.awm.gov.au/journal/j34/bridgerev.asp<br />
www.awm.gov.au/research/peo www.ww2australia.gov.au<br />
www.awm.gov.au<br />
www.kokoda.commemoration.gov.au<br />
Kokoda DVD:<br />
Part 2: The Counter Attack, Chapters 13–15, particularly Chapter 14. General Blamey’s Rabbit Speech<br />
4<br />
Teacher Briefing<br />
About the Learning Activities<br />
The Tide Turns 8<br />
activity 1: esma Myer’s story<br />
This is an exercise designed to develop students’ understanding <strong>of</strong>, and empathy for the impact <strong>of</strong> war at home.<br />
The story is about Esma, a young bride whose husband, Herbert Warne, was killed at Templeton’s Crossing<br />
(Eora region) in October 1942.<br />
Students answer the questions using Esma’s wedding photograph as the source. Esma’s photograph and class<br />
instructions are on page 82 and 83. Esma’s husband’s Roll <strong>of</strong> Honour information is included to give further depth<br />
for class discussion.<br />
activity 2: General Blamey and the ‘rabbit speech’<br />
This activity explores historical contestability and how history can be perceived differently by those there and those<br />
interpreting it later. On 9 November 1942, General Sir Thomas Blamey came to New Guinea and gave an address<br />
to the exhausted troops <strong>of</strong> the 21st Brigade at the Koitaki Cricket Pitch. The text <strong>of</strong> the speech was never kept but<br />
reactions to the speech are found in personal records and other historical accounts. This speech is referred to as<br />
the ‘Rabbit Speech’ and was perceived very differently by those present. Most <strong>of</strong> the evidence indicates that the<br />
men were expecting praise but were largely insulted by what General Blamey had to say. Other evidence indicates<br />
Blamey did not intend to criticise the troops but was widely held in contempt for this misinterpretation by the 21st<br />
Brigade.<br />
View the Kokoda DVD: Part 2: The Counter Attack – Chapters 13–15 to establish the story. Then print out the portrait<br />
<strong>of</strong> General Blamey and the two reactions to the speech on pages 84–85. Guide a class discussion on whether<br />
General Blamey meant <strong>of</strong>fence by asking ‘Did Blamey mean to insult the troops? What is the evidence? Can we<br />
ever know the truth?’ You may wish to raise concepts <strong>of</strong> interpretation, perspective, bias and personality.<br />
activity 3: Perspectives <strong>of</strong> war by analysing historical sources<br />
This exercise aims to develop critical appraisal using different primary and secondary evidence for historical inquiry.<br />
Historical inquiry yields knowledge that is based on the available evidence, but remains open to further debate and<br />
future reinterpretation. Students develop the ability to recognise varying interpretations <strong>of</strong> history and to determine<br />
the difference between fact, opinion and bias.<br />
Give the students the instructions, which contain the eight sources <strong>of</strong> evidence and ask them to complete the table<br />
on pages 86–89. Students need to use research skills to find out further information about the sources and develop<br />
skills to draw different interpretations <strong>of</strong> evidence.<br />
KOKODA<br />
81
8<br />
82 KOKODA<br />
The Tide Turns<br />
overview: Did General Blamey mean to insult the troops in his<br />
‘rabbit speech’?<br />
This Unit relates to events during the fighting from September to December in 1942. At the end <strong>of</strong> September 1942 the Japanese retreated<br />
from their southernmost point <strong>of</strong> advance, just 40 kilometres from Port Moresby. The reason for the Japanese retreat was that the campaign<br />
on Guadalcanal was going badly for them and Imperial Headquarters in Japan deemed it wise not to over stretch their position in Papua New<br />
Guinea until the Guadalcanal problem was resolved. They did not however abandon hope <strong>of</strong> making another attack on Port Moresby in the<br />
future, so they only retreated as far as the Templeton’s Crossing – Eora region. It was there that the Australians attacked and defeated them<br />
in October 1942. The Japanese fell back to Oivi-Gorari but in November were again defeated, this time decisively. The remnant <strong>of</strong> the Nankai<br />
Shitai now had no choice but to retreat to Sanananda to try to hold their base.<br />
› Student Task<br />
activity 1: esma Myer’s Story<br />
This is a formal wedding portrait taken<br />
on the day <strong>of</strong> the wedding <strong>of</strong> Lieutenant<br />
Herbert Warne and Esma Myers. They<br />
had met before Herbert first went<br />
overseas with the army, to the Middle<br />
East. On his return they were married<br />
and they moved to their new home at<br />
9 Francis Street, Richmond, a suburb <strong>of</strong><br />
Sydney. Within a few weeks, Herbert’s<br />
Battalion, the 2/33rd, was once again<br />
sent into battle and on 14 October 1942<br />
he was killed in action on the Kokoda<br />
Track. He is buried at Bomana Cemetery<br />
near Port Moresby.<br />
Studio wedding portrait <strong>of</strong> Herbert<br />
Warne and his bride Esma, 1941.<br />
AWM P05703.001
The Tide Turns 8<br />
Imagine that you are Esma. Look closely at the wedding photograph and decide what kind <strong>of</strong> person you are. You were 22 years old when the<br />
photograph was taken and now you are nearly 90.<br />
Writing as if you are Esma, tell her story in one page as a diary, letter or photo essay.<br />
The following questions may assist you to write your piece.<br />
Where was she born and what did she do before she met Herbert?<br />
Was it a happy marriage?<br />
Were they rich or poor?<br />
How did she cope when he went <strong>of</strong>f to the war?<br />
Did she ever go to see his grave?<br />
Did she keep a memento <strong>of</strong> her short time with Herbert?<br />
What happened to her after the war?<br />
Did she re-marry?<br />
Does she have children, grand children, or even great grand children about your age?<br />
Does she still think <strong>of</strong> Herbert sometimes?<br />
Studio Portrait <strong>of</strong> Herbert Arthur Warne, 1941.<br />
AWM P05703.002<br />
Roll <strong>of</strong> Honour – Herbert Arthur Warne<br />
Service number: NX59611<br />
Rank: Lieutenant<br />
Unit: 2/33rd Battalion (Infantry)<br />
Service: Australian Army<br />
Conflict: 1939-1945<br />
Date <strong>of</strong> death: 14 October 1942<br />
Place <strong>of</strong> death: Papua New Guinea<br />
Cause <strong>of</strong> death: Killed in action<br />
Source: AWM147 Roll <strong>of</strong> Honour cards, 1939-1945 War, 2nd AIF (Australian Imperial<br />
Force) and CMF (Citizen Military Force)<br />
Go to www.naa.gov.au and conduct a record rearch for<br />
Herbert Warne. Under his service number view a digital<br />
copy <strong>of</strong> his records. Print these out.<br />
What information would this have provided to Esma?<br />
KOKODA<br />
83
8<br />
84 KOKODA<br />
The Tide Turns<br />
› Student Task<br />
activity 2: General Blamey and the ‘rabbit speech’<br />
General Sir Thomas Blamey<br />
Blamey was a former school teacher who turned to the Army and rose to become Australia’s only Field Marshal.<br />
During the Second World War, Blamey was appointed to command the 6th Division. Returning to Australia in 1942<br />
he became Commander-in-Chief, Australian Military Forces and Commander Allied Land Forces in the South<br />
West Pacific. Blamey retired in 1945 but in May 1951, shortly before his death, was recalled to the active list and<br />
promoted to Field Marshal.<br />
Field Marshal Sir Thomas<br />
Blamey, William Dargie,<br />
1969, oil on canvas,<br />
102.1 cm x 76.7 cm.<br />
AWM ART27646
The Tide Turns 8<br />
› Your Task<br />
Watch the Kokoda DVD, Part 2 The Counter Attack Chapters 13-15 particularly Chapter 14. There is no written version <strong>of</strong> Blamey’s speech.<br />
All we know is what witnesses said (primary sources) and historians argue (secondary sources). Look at General Blamey’s portrait and consider<br />
the two sources with conflicting interpretations and answer the following questions.<br />
Source 1: Extract from That Bastard Blamey, Horner 1998.<br />
On 9 November 1942, Blamey addressed the men <strong>of</strong> the 21st Infantry Brigade on a parade ground. Maroubra Force expected<br />
congratulations for their efforts in holding back the Japanese. However, instead <strong>of</strong> praising them, Blamey told the brigade that they had<br />
been “beaten” by inferior forces, and that “no soldier should be afraid to die”. “Remember,” Blamey was reported as saying, “it’s the rabbit<br />
who runs who gets shot, not the man holding the gun.” In a later letter to his wife, an enraged Brigadier Potts swore to “fry his [Blamey’s]<br />
soul in the afterlife” over this incident. According to witnesses, when Blamey subsequently visited Australian wounded in the camp hospital,<br />
inmates nibbled lettuce, while wrinkling their noses and whispering “run, rabbit, run” (the chorus <strong>of</strong> a popular song during the war) (Brune, P.<br />
2003 :257-258).<br />
Thereafter, “he was almost invariably” referred to as “that bastard Blamey”. (Horner, D. 1998)<br />
Even Blamey’s war-long and closest colleague, Lieutenant Colonel Norman Carlyon OBE wrote that he was amazed that Blamey could deal<br />
so insensitively with the men <strong>of</strong> such a well proven Brigade. The regimental medical <strong>of</strong>ficer <strong>of</strong> the 2/16th Battalion, Major General Henry<br />
Steward, who was also present at the parade, wrote that he was shocked that Blamey could talk to the men the way he did:<br />
“The entire parade, men and <strong>of</strong>ficers, were almost molten with rage” James, 2006, The Kokoda Track: 134<br />
Source 2: Extract from South West Pacific Area – First Year Kokoda to Wau, McCarthy.<br />
On 9 November General Blamey addressed a parade <strong>of</strong> the 21 st Brigade at the Koitaki cricket ground. During the course <strong>of</strong> his speech, he<br />
said that ‘the Jap was like a gorilla: he would get into a hole and he would not surrender: while in his hole and protected by it he would kill;<br />
to be dealt with he had to be got out <strong>of</strong> his holes and put on the run’. Blamey added that it was ‘like shooting rabbits: while the rabbits were<br />
in their burrows they could not get shot; they had to be got on the run and then the man with the gun could get them’.<br />
‘It never entered my head as I stood there on parade that the general had any idea he was being <strong>of</strong>fensive, or that he intended to be so’<br />
wrote Brigade Commander Dougherty (then a newcomer to the brigade) afterwards. ‘But the Brigade gave to what he said the interpretation<br />
that ‘they ran like rabbits’. This interpretation <strong>of</strong> what he said spread through New Guinea and indeed back home and resulted in bitter<br />
feelings. Following his address to the whole brigade, General Blamey addressed the <strong>of</strong>ficers separately. He was direct with them and said<br />
that a few <strong>of</strong>ficers had failed. This caused bitterness. But after both addresses, Blamey told me that he thought highly <strong>of</strong> the brigade and<br />
repeated to me what he would have told the whole brigade, ‘that I, as their new brigade commander, would be very proud <strong>of</strong> them’.<br />
When the brigade was reorganised at Ravenshoe in 1943, Blamey’s PA one day asked me if he could speak to my <strong>of</strong>ficers. He had been<br />
genuinely upset at having hurt my brigade when he addressed them at Koitaki, as he had not intended to do so. When speaking to the<br />
<strong>of</strong>ficers on this occasion he referred to the Koitaki incident. He said that he had said certain things to the <strong>of</strong>ficers, and he had meant all<br />
that he had said. He endeavoured to explain the meaning <strong>of</strong> what he had said then, and to put his remarks into their correct perspective.<br />
His comments on this occasion, frank and sincere, were well received.’ McCarthy, D. South West Pacific Area – First Year Kokoda to Wau.<br />
Canberra AWM, Series 1 Army, Volume 5 footnote: 334<br />
Do you think that Blamey meant <strong>of</strong>fence?<br />
Can we ever know the truth?<br />
KOKODA<br />
85
8<br />
86 KOKODA<br />
The Tide Turns<br />
› Student Task<br />
activity 3: Perspectives <strong>of</strong> war by analysing<br />
historical sources<br />
› Your Task<br />
Look at the eight source images provided and complete the table on page 90.<br />
Use the web addresses provided with each source as a starting point to find out more about the source and the people and events it depicts.<br />
To complete the table you will need to research:<br />
1. The type <strong>of</strong> source: It may be a photograph, painting, eyewitness account, diary etc.<br />
2. Description <strong>of</strong> contents: This will be what the source shows and how it is depicted.<br />
3. Perspective: You need to identify the person or organisation that produced the source. For example, a soldier, artist or war photographer.<br />
4. Main idea or message conveyed: This information needs to include who produced the source, their purpose and their target audience.<br />
Is the main idea to try to persuade the viewer about a particular point <strong>of</strong> view?<br />
Source 1<br />
7 May 1942. Battle <strong>of</strong> the Coral Sea. Imperial Japanese Navy Torpedo Bombers,<br />
Mitsubishi G4M ‘Betty’, attack HMAS Australia. AWM P02497.048<br />
See AWM website Collections and other websites for more information about<br />
the Coral Sea and HMAS Australia.<br />
Source 2<br />
Sergeant Katue, Papua Infantry Battalion, William Dargie,<br />
charcoal and coloured conte crayon on paper, October 1942.<br />
AWM ART25017.<br />
See Kokoda website Four Peoples at War for more<br />
information about Sergeant Katue.
Source 4<br />
Trooper Ben Love’s diary. Trooper Benjamin (Ben) Love<br />
was 34 when he fought at Sanananda. His diary recorded<br />
the ordeal. Born in England, Ben enlisted in the Australian<br />
Imperial Force (AIF) in July 1940.<br />
See www.ww2australia.gov.au/beachheads/benlove.<br />
html for more information about Ben Love’s diary.<br />
Also a copy <strong>of</strong> the diary can be found on the CD ROM.<br />
The Tide Turns 8<br />
Source 3<br />
October 1942, Papua.<br />
A Japanese prisoner with<br />
malaria captured near Nauro,<br />
being cared for by Australian<br />
stretcher bearers.<br />
AWM 026826<br />
See www.ww2australia.gov.<br />
au/beachheads/thin.html for<br />
more information on Japanese<br />
starvation or the AWM<br />
Collections website.<br />
KOKODA<br />
87
8<br />
Source 6<br />
88 KOKODA<br />
The Tide Turns<br />
Source 5<br />
‘The crab’s claw’ cartoon [The Argus, 9 January 1942].<br />
See www.ww2australia.gov.au/japadvance/explore.html for<br />
more information. Search for other political cartoons on the<br />
ww2australia website.<br />
3 October 1942. Papua. Pictured, left to right: US General Douglas MacArthur, Supreme Commander, South West Pacific Area; Sir Thomas<br />
Blamey, Commander Allied Land Forces, and Major General G. S. Allen, Commander 7th Division AIF, at Owers’ Corner during General<br />
MacArthur’s first visit to New Guinea. This photograph became the basis <strong>of</strong> a portrait <strong>of</strong> MacArthur and Allen painted by Australian artist<br />
Alan Moore in 1972. Blamey was not included in the portrait. AWM 150818<br />
See the AWM Collections website, Kokoda DVD and Kokoda website for more information.
Source 7<br />
Australian Action at Buna, Ge<strong>of</strong>frey Mainwaring, 1962,<br />
oil on canvas, 274 x 137 cm. AWM ART27547<br />
18th Australian Infantry Brigade, 2/6th Australian<br />
Armoured Regiment; Australian infantrymen attacking<br />
Japanese positions, supported by tanks.<br />
See AWM Collection website and Kokoda website for<br />
more information on this attack.<br />
Source 8<br />
In 1942-43 Australians were deluged with posters<br />
and advertisements representing invasion as likely.<br />
The most infamous was “He’s coming south”, which<br />
was so alarmist that the Queensland government<br />
and the Town Clerk <strong>of</strong> Melbourne refused its release.<br />
He’s coming south, Lithography on paper,<br />
75.9 x 50.4 cm. AWM ART09225<br />
See www.awm.gov.au/atwar/remembering1942/midget_submarine/submarine_article2.asp<br />
The Tide Turns 8<br />
KOKODA<br />
89
8<br />
90 KOKODA<br />
The Tide Turns<br />
Analysing Historical Sources<br />
Source Type <strong>of</strong> Source Brief description <strong>of</strong> contents Perspective Main idea conveyed<br />
1.<br />
2.<br />
3.<br />
4.<br />
5.<br />
6.<br />
7.<br />
8.