
You also want an ePaper? Increase the reach of your titles
YUMPU automatically turns print PDFs into web optimized ePapers that Google loves.
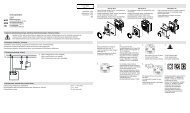
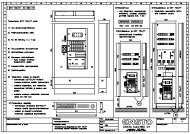
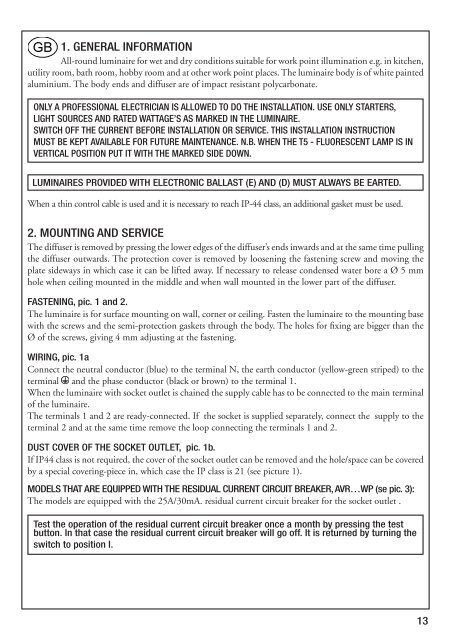
1. GENERAL INFORMATIONAll-round luminaire for wet and dry conditions suitable for work point illumination e.g. in kitchen,utility room, bath room, hobby room and at other work point places. The luminaire body is of white paintedaluminium. The body ends and diffuser are of impact resistant polycarbonate.ONLY A PROFESSIONAL ELECTRICIAN IS ALLOWED TO DO THE INSTALLATION. USE ONLY STARTERS,LIGHT SOURCES AND RATED WATTAGE’S AS MARKED IN THE LUMINAIRE.SWITCH OFF THE CURRENT BEFORE INSTALLATION OR SERVICE. THIS INSTALLATION INSTRUCTIONMUST BE KEPT AVAILABLE FOR FUTURE MAINTENANCE. N.B. WHEN THE T5 - FLUORESCENT LAMP IS INVERTICAL POSITION PUT IT WITH THE MARKED SIDE DOWN.LUMINAIRES PROVIDED WITH ELECTRONIC BALLAST (E) AND (D) MUST ALWAYS BE EARTED.When a thin control cable is used and it is necessary to reach IP-44 class, an additional gasket must be used.2. MOUNTING AND SERVICEThe diffuser is removed by pressing the lower edges of the diffuser’s ends inwards and at the same time pullingthe diffuser outwards. The protection cover is removed by loosening the fastening screw and moving theplate sideways in which case it can be lifted away. If necessary to release condensed water bore a Ø 5 mmhole when ceiling mounted in the middle and when wall mounted in the lower part of the diffuser.FASTENING, pic. 1 and 2.The luminaire is for surface mounting on wall, corner or ceiling. Fasten the luminaire to the mounting basewith the screws and the semi-protection gaskets through the body. The holes for fixing are bigger than theØ of the screws, giving 4 mm adjusting at the fastening.WIRING, pic. 1aConnect the neutral conductor (blue) to the terminal N, the earth conductor (yellow-green striped) to theterminal and the phase conductor (black or brown) to the terminal 1.When the luminaire with socket outlet is chained the supply cable has to be connected to the main terminalof the luminaire.The terminals 1 and 2 are ready-connected. If the socket is supplied separately, connect the supply to theterminal 2 and at the same time remove the loop connecting the terminals 1 and 2.DUST COVER OF THE SOCKET OUTLET, pic. 1b.If IP44 class is not required, the cover of the socket outlet can be removed and the hole/space can be coveredby a special covering-piece in, which case the IP class is 21 (see picture 1).MODELS THAT ARE EQUIPPED WITH THE RESIDUAL CURRENT CIRCUIT BREAKER, AVR…WP (se pic. 3):The models are equipped with the 25A/30mA. residual current circuit breaker for the socket outlet .Test the operation of the residual current circuit breaker once a month by pressing the testbutton. In that case the residual current circuit breaker will go off. It is returned by turning theswitch to position I.13AVR66_PEM134_26022009.indd Sec113 26.2.2009 12:37:33