For Designer Supreme Fans Ceiling Fan Installation Instructions
For Designer Supreme Fans Ceiling Fan Installation Instructions
For Designer Supreme Fans Ceiling Fan Installation Instructions
Create successful ePaper yourself
Turn your PDF publications into a flip-book with our unique Google optimized e-Paper software.
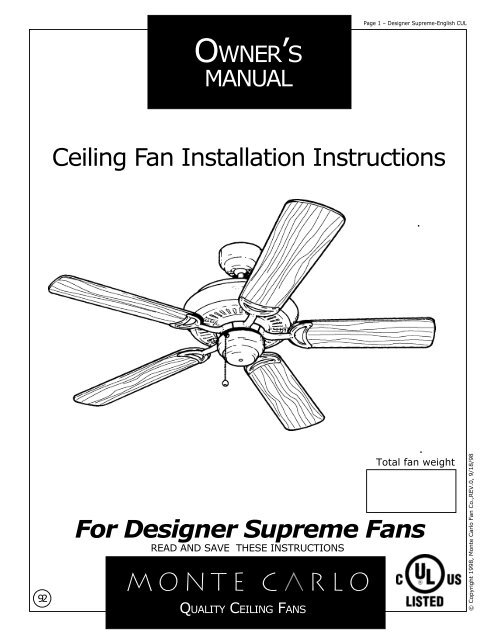
Page 1 – <strong>Designer</strong> <strong>Supreme</strong>-English CULOWNER’SMANUAL<strong>Ceiling</strong> <strong>Fan</strong> <strong>Installation</strong> <strong>Instructions</strong>92<strong>For</strong> <strong>Designer</strong> <strong>Supreme</strong> <strong><strong>Fan</strong>s</strong>READ AND SAVE THESE INSTRUCTIONSQUALITY CEILING FANSTotal fan weight© Copyright 1998, Monte Carlo <strong>Fan</strong> Co.,REV.0, 9/18/98
Page 3 – <strong>Designer</strong> <strong>Supreme</strong>-English CULCanadian Mounting System InsertCotterPinsafety cableClevisPinSetScrewsmountingbracketSetscrew3" lagscrewsafety cableplainwasher1Feed motor lead wires through downrod/canopy assembly and insert downrod intomotor yoke. Next, insert clevis pin throughyoke and downrod and secure with cotterpin. (see inset) Tighten both yoke setscrews to further secure downrod.2While the fan assembly is still on theground thread the safety cable throughthe mounting bracket.Lift fan assembly and install the safety cabledirectly to the building structure using the 3" lagscrew and plain washer provided. Beforeproceeding to the next step make sure that thecable is properly installed and will supportthe fan weight. Make sure the screwwasher and safety cable are installed usingthe order pictured above.3BallNotchARidge4Install mounting bracket to outlet box inceiling using the screws provided with theoutlet box and washers.5A. Carefully lift fan assembly onto mountingbracket. Rotate fan so that the notch onthe ball engages the ridge in themounting bracket. This will allow handsfreewiring. <strong>For</strong> wiring instructions pleaserefer to page 4 step #7.Canadian Safety TipsWARNING: MOUNT ONLY TO AN OUTLET BOX MARKEDACCEPTABLE FOR FAN SUPPORTAll set screws must be checked and retightened wherenecessary before installation.© Copyright 1998, Monte Carlo <strong>Fan</strong> Co.,REV.0, 9/18/98
INSTALLATIONPage 4 – <strong>Designer</strong> <strong>Supreme</strong>-English CULNote:After installation, please refer to operation, maintenance and troubleshooting sections in this manual.If your fan is packaged with a light kit or if you wish to install a separately purchased light kit,please refer to the insert sheet titled: LIGHT KIT INSTALLATIONSTANDARD WIRING OPTIONWIRING OPTION WITH WALL SPEED CONTROL**ATTACH BLUE WIREONLY IF ATTACHINGLIGHT KIT WITH FANSecure withtwist-lockwireconnectors(included)Light Switch<strong>Fan</strong> Switch<strong>For</strong> pullchain controls, follow diagram above. Makesure that all exposed wiring is secured inside wirenuts. Note: Wires from house may vary in color andmay not include ground wire. After wiring isconplete, gently push wires into junction boxwith wire nuts pointing upward. Refer to point73 of safety tips.8Wallcontrol<strong>For</strong> control of fan and optional light fromwall location, follow diagram above.NOTE: A professional electrician isrecommended for this type of installation.9Raise the canopy up and align the twoholes in the canopy with the two holes inthe hanger bracket. Secure with two 5/32 x 1/2" screws provided.COMBO-BLADEFiberWashers10Combo-Blades feature two high qualityfinishes on one blade. Select the one thatAttach blade brackets to blades usingbest complements your decor, or changethe blade bracket screws and washers11the style with just a flip of the blade.provided.To gain access to the blade bracketattachment holes remove the switchhousing cover by unscrewing the three12 13screws. Gently slide the cover off .ShippingStabilizerTabRemove plastic shipping stabilizer tabs,ifpresent.The screws,washers and motor pads arepre-installed to the blade holders.Attach bladeassembly to motor by tightening first screwone turn,then tighten second screwsecurely.Then,go back and tighten firstscrew securely.14After attaching blade; reinstall theswitch housing using the three screwspreviously removed.© Copyright 1998, Monte Carlo <strong>Fan</strong> Co.,REV.0, 9/18/98
TROUBLESHOOTING GUIDEPage 5 – <strong>Designer</strong> <strong>Supreme</strong>-English CULIf you have difficulty operating your new ceiling fan, it may be the result of incorrect assembly, installation, orwiring. In some cases, these installation errors may be mistaken for defects. If you experience any faults, pleasecheck this Trouble Shooting Chart. If a problem cannot be remedied, or you are experiencing difficulty in installation,please call our Customer Service Center at the number printed on your parts list insert sheet.Warning: Before servicing or cleaning unit, Switch power off at Service panel and lock service disconnecting meansto prevent power from being switched on accidentally. When the service disconnecting means cannot be locked,securely fasten a prominent warning device, such as a tag, to the service panel.TROUBLESUGGESTED REMEDY1. If fan does not start:1. Check main and branch circuit fuses or circuit breakers.2. Check line wire connections to fan and switch wire connections in switch housing.CAUTION: Make sure main power is turned off.3. Make sure forward/reverse switch is firmly in up or down position. <strong>Fan</strong> will not operate when switch is in the middle.4. Make sure that shipping stabilizer tabs have been removed from motor (see installation step #13).2. If fan sounds noisy:1. Check to make sure all screws in motor housing are snug (not over tightened).2. Check to make sure the screws which attach the fan blade holder to the motor are tight.3. Check to make sure wire nut connectors in switch housing are not rattling against each other or against the interior wall ofthe switch housing.CAUTION: Make sure main power is turned off before entering switch housing.4. If using an optional <strong>Ceiling</strong> <strong>Fan</strong> Light Kit, check to be sure the screws securing the glassware are finger tight. Check to besure light bulb is tight in socket and not touching glass shade(s). If vibration persists from glass, remove glass and install a1/4" wide rubber band on glass neck to act as an insulator. Replace glass and tighten screws against rubber band.5. Some fan motors are sensitive to signals from Solid State variable speed controls. DO NOT USE a Solid State variable speedcontrol.6. Allow "break-in" period of 24 hours. Most noises associated with a new fan will disappear after this period.3. If fan wobbles:Touching<strong>Ceiling</strong>1. Make sure that the ridge of the canopy engages the notch in the downrod ball. (See illustration in Step #6 of DownrodMount installation).2. Check that all blades are screwed firmly into blade holders.3. Check that all blade holders are tightened securely to motor.Figure 1Blade Tip Down:<strong>Fan</strong> BladeBlade BracketsBlade Tip Up:<strong>Fan</strong> BladeFigure 24. Make sure that canopy and mounting bracket are tightened securely to ceiling junction box and junction box is mountedfirmly to ceiling joist.5. Most fan wobble problems are caused when blade levels are unequal. Check this level by selecting a point on the ceilingabove the tip of one of the blades. Measure this distance as shown in Figure 1. Keeping measure within 1/8", rotate the fanuntil the next blade is positioned for measurement. Repeat for each blade. If all blade levels are not equal, you can adjustblade levels by the following procedure. To adjust a blade tip down, insert a washer (not supplied) between the blade andblade holder at the screw closest to the motor (Figure 2). To adjust a blade tip up, insert washer (not supplied) between theblade and blade holder at the two screws farthest from the motor (Figure 2).6. If blade wobble is still noticeable, interchanging two adjacent (side by side) blades can redistribute the weight and possiblyresult in smoother operation.4. If light does not work:1. Check blue wire from fan to make sure it is connected to hot wire from house.2. Check for loose or disconnected wires in fan switch housing.3. Check for loose or disconnected wires in light kit.4. Check for faulty light bulbs.CAUTION: Make sure main power is turned off before entering switch housing.CUSTOMER SERVICE CENTER:2900 WEST SEMINARY DR.FORT WORTH, TEXAS 761331-800-519-4092© Copyright 1998, Monte Carlo <strong>Fan</strong> Co.,REV.0, 9/18/98


