

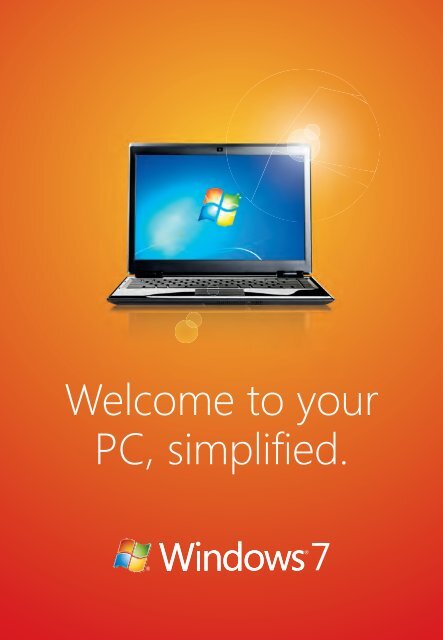
Welcome to your PC, simplified.
Welcome to your PC, simplified.
Welcome to your PC, simplified.

Create successful ePaper yourself
Turn your PDF publications into a flip-book with our unique Google optimized e-Paper software.
<strong>Welcome</strong> <strong>to</strong> <strong>your</strong><strong>PC</strong>, simplifi ed.X156048403mnl.indd 16/12/09 11:33:58 AM
X156048403mnl.indd 26/12/09 11:33:59 AM
Thank you for choosing Windows® 7. We listened closely <strong>to</strong>what you wanted—a simpler <strong>PC</strong> with less waiting, less clicks,less hassles connecting, and less complexity.With less of what you don’t need, that means <strong>your</strong> <strong>PC</strong> withWindows 7 can help you do more of what you want. Morework, more play, and more of everything in between.<strong>Welcome</strong> <strong>to</strong> Windows 7X156048403mnl.indd 16/12/09 11:33:59 AM
X156048403mnl.indd 36/12/09 11:34:01 AM
Let’s get started.A quick checklist <strong>to</strong> get<strong>your</strong> <strong>PC</strong> ready.Before you install Windows 7, there are a fewthings <strong>to</strong> do first.Back up <strong>your</strong> files <strong>to</strong> an external hard disk, DVD, CD, orUSB flash drive. For assistance in backing up <strong>your</strong> files,please visit windows.microsoft.com/upgrade-windows-xp.Make sure <strong>your</strong> <strong>PC</strong> is connected <strong>to</strong> the Internet, so youcan get installation updates. (If you don’t have an Internetconnection, you can still install Windows 7).Check the Windows 7 package <strong>to</strong> make sure <strong>your</strong> <strong>PC</strong>meets the system requirements.If you have Windows XP on <strong>your</strong> computer, you will have<strong>to</strong> completely replace Windows XP with Windows 7. Beforeyou begin, make sure you have the original installationdisks for <strong>your</strong> programs. After you install Windows 7, youwill need <strong>to</strong> manually reinstall <strong>your</strong> programs and res<strong>to</strong>re<strong>your</strong> files and settings.X156048403mnl.indd 46/12/09 11:34:02 AM
If <strong>your</strong> <strong>PC</strong> is currently running a 64-bit version ofWindows, use the 64-bit disc. To find out which version<strong>your</strong> <strong>PC</strong> is running:1 Click the Start but<strong>to</strong>n .2 Right-click Computer or My Computer.3 Click Properties. You’ll see the version listed next <strong>to</strong>System type.Find <strong>your</strong> 25-character Windows product key. It’s inside<strong>your</strong> Windows package.If needed, first update <strong>your</strong> antivirus program, thenfollow these steps:1 Run <strong>your</strong> antivirus program.2 Turn it off by choosing <strong>to</strong> disable it.3 After you install Windows 7, remember <strong>to</strong> turn i<strong>to</strong>n again by choosing <strong>to</strong> enable it. Or, install newantivirus software that works with Windows 7.X156048403mnl.indd 56/12/09 11:34:04 AM
6Get up and runningwith Windows 7.Follow these six steps <strong>to</strong> get set up:1 Turn on <strong>your</strong> <strong>PC</strong>.*2 When you get <strong>to</strong> the Windows desk<strong>to</strong>p, insert theWindows 7 installation disc. Setup should launchau<strong>to</strong>matically. If it doesn’t, just:1 Click the Start but<strong>to</strong>n .2 Click Computer or My Computer.3 Open the Windows 7 installation disc on <strong>your</strong>DVD drive.4 Double-click setup.exe.3 On the Install Windows page, click Install nowand follow the instructions.* Note: If <strong>your</strong> <strong>PC</strong> doesn’t have an operating system currently installed, insert the Windows 7 installation discbefore turning on <strong>your</strong> computer. Setup should start au<strong>to</strong>matically. If it doesn’t, visit windows.microsoft.com andsearch for “Start Windows from a CD or DVD”. If you install Windows 7 this way, you can only perform a cus<strong>to</strong>m(clean) installation.X156048403mnl.indd 66/12/09 11:34:04 AM
7456When you’re asked Which type of installation do youwant?, choose one of the following:•Click Upgrade if you are running Windows Vista <strong>to</strong>keep <strong>your</strong> files, programs, and settings and installWindows 7.•Click Cus<strong>to</strong>m if you are running Windows XP orwant <strong>to</strong> completely replace <strong>your</strong> current version ofWindows with Windows 7. You will need <strong>to</strong> manuallyreinstall <strong>your</strong> programs and res<strong>to</strong>re <strong>your</strong> backed upfiles after installation. Visit windows.microsoft.com/upgrade-windows-xp for details.Continue <strong>to</strong> follow the instructions <strong>to</strong> complete thesetup.When you’re finished, you’ll see the Windows desk<strong>to</strong>p.That’s it. Now, you’re running Windows 7.Get <strong>to</strong> know Windows 7.windows.microsoft.com/windows-7-get-startedX156048403mnl.indd 76/12/09 11:34:05 AM
8Three easy ways <strong>to</strong> gethelp if you need it:1 ClickClick the Start but<strong>to</strong>n. Then click Help and Support.2 VisitVisit windows.microsoft.com/windows-7-get-started for helpgetting started.Visit windows.microsoft.com/windows-7-support for generalhelp questions.Visit www.microsoft.com/upgrade-windows-xp for moreinformation.3 CallCall for telephone support.In the United States: (866) 234-6020In Canada: (800) 668-7975Call for TTY/TDD.In the United States: (800) 892-5234In Canada: (866) 857-9850Microsoft support services are free for 90 days. Support services are subject <strong>to</strong> current prices, terms, andconditions, which are subject <strong>to</strong> change without notice. Toll charges may apply.Support options, hours, and cost in <strong>your</strong> country or region may differ from U.S. For details, go <strong>to</strong>windows.microsoft.com/windows-7-support. If there is no Microsoft subsidiary in <strong>your</strong> country or region,please contact the distribu<strong>to</strong>r of <strong>your</strong> Microsoft product.X156048403mnl.indd 86/12/09 11:34:05 AM
Now <strong>to</strong> the fun stuff...Make Windows 7 lookand sound the wayyou want..............................10Ten cool things you canuse every day.....................12Five ways <strong>to</strong> get morefrom <strong>your</strong> <strong>PC</strong>......................22X156048403mnl.indd 96/12/09 11:34:05 AM
Let’s get personal.Make Windows 7 look andsound the way you want.Match <strong>your</strong> personality» ThemesYou can tailor the look and sounds of <strong>your</strong> desk<strong>to</strong>p by choosingdifferent themes.1 Right–click on <strong>your</strong> Windows 7 desk<strong>to</strong>p.2 Click Personalize.3 Select <strong>your</strong> favorite theme.Check out themes if you are looking for something unique.X156048403mnl.indd 106/12/09 11:34:06 AM
11Make it truly <strong>your</strong> own» Aero® BackgroundYou can easily turn <strong>your</strong> desk<strong>to</strong>p in<strong>to</strong> a slideshow of <strong>your</strong> favorite pho<strong>to</strong>s.1 From the Personalization window, click Desk<strong>to</strong>p Background.2 Choose the images you want <strong>to</strong> cycle and display.Show off <strong>your</strong> pho<strong>to</strong>s with a cus<strong>to</strong>m slideshow.Make it reflect <strong>your</strong> eye for style» Glass ColorYou can make <strong>your</strong> windows look the way you like with <strong>your</strong> favoriteglass color.1 From the Personalization window, click Window Color.2 Choose the color you want.Set <strong>your</strong> glass color if you want <strong>to</strong> give <strong>your</strong> desk<strong>to</strong>p a finishing <strong>to</strong>uch.Have fun with it. After all, it’s <strong>your</strong>s.X156048403mnl.indd 116/12/09 11:34:07 AM
12Let’s get <strong>to</strong> it.Ten cool things youcan use every day.The simple things that make everyday tasksfaster, easier, and a lot more fun.X156048403mnl.indd 126/12/09 11:34:07 AM
Start menuWindows taskbarPinningThumbnail PreviewsJump ListsSnapAero PeekAero ShakeWindows SearchWindows TouchX156048403mnl.indd 136/12/09 11:34:08 AM
1 | Get <strong>to</strong> just about everything on<strong>your</strong> <strong>PC</strong>, from one place» Start menuInstantly find programs, files, and shortcuts <strong>to</strong> Libraries and destinationswith the Start menu. Go there and go anywhere you want.1 Just click the Start but<strong>to</strong>n .X156048403mnl.indd 146/12/09 11:34:09 AM
152 | Do what you want <strong>to</strong> do in just one click» Windows TaskbarThe taskbar puts what you want <strong>to</strong> do at <strong>your</strong> fi ngertips. You can move it <strong>to</strong>the <strong>to</strong>p or side of <strong>your</strong> desk<strong>to</strong>p.1 Click any icon <strong>to</strong> launch a program.Place the taskbar so it’s right where you need it, when you need it.3 | Put <strong>your</strong> favorite programs right whereyou want them» PinningYou can decide what’s on <strong>your</strong> taskbar with pinning. Just add the programsand fi les you use most often.1 Open the Start menu.2 Right click any program.3 Select Pin <strong>to</strong> Taskbar.Try Pinning for quick access <strong>to</strong> the stuff you need every day.PinningTaskbarX156048403mnl.indd 156/12/09 11:34:09 AM
164 | See everything you’ve got open, with aquick preview» Thumbnail PreviewsGet thumbnail views of <strong>your</strong> open windows <strong>to</strong> easily keep track of the fi les andprograms you’re using. Here’s an example:1 Click the Internet Explorer® icon on <strong>your</strong> taskbar.2 Open up a few of <strong>your</strong> favorite websites.3 Hover over the Internet Explorer icon, and you will see thumbnailpreviews of <strong>your</strong> open windows.4 Just click a thumbnail <strong>to</strong> open the full window, or click the red ‘x’ <strong>to</strong>close it.Check out thumbnail previews <strong>to</strong> find what you want in clear sight.X156048403mnl.indd 166/12/09 11:34:10 AM
5 | Cut through the clutter and quicklyget <strong>to</strong> <strong>your</strong> files» Jump ListsKeep desk<strong>to</strong>p clutter <strong>to</strong> a minimum and easily find the files you usemost often. Try it.1 Right-click an icon in <strong>your</strong> taskbar <strong>to</strong> see a Jump List.Use Jump Lists <strong>to</strong> take you right <strong>to</strong> what you want <strong>to</strong> do next.X156048403mnl.indd 176/12/09 11:34:11 AM
6 | No more clicking back and forth <strong>to</strong>compare windows» SnapYou can easily view one window or look at two side-by-side. For example:•To maximize a window, drag the <strong>to</strong>p of the window <strong>to</strong> the <strong>to</strong>p of•<strong>your</strong> screen.Return the window <strong>to</strong> its original size by dragging the <strong>to</strong>p of thewindow away from the <strong>to</strong>p of <strong>your</strong> screen.•To expand a window vertically, just drag the bot<strong>to</strong>m down.To compare two windows, drag one <strong>to</strong> the side of <strong>your</strong> screen.Now drag the second <strong>to</strong> the opposite side of the screen.Try Snap and instantly resize windows for better viewing.7 | Clear the way so you can focusin one simple move» Aero ShakeJust shake the window you want <strong>to</strong> focus on and all of <strong>your</strong> other openwindows will instantly minimize.1 Grab the <strong>to</strong>p of an open window and shake it. All others willminimize <strong>to</strong> the taskbar.Use Aero Shake every day <strong>to</strong> quickly simplify <strong>your</strong> desk<strong>to</strong>p.X156048403mnl.indd 186/12/09 11:34:12 AM
8 | Get an open view of <strong>your</strong> desk<strong>to</strong>p,in an instant» Aero PeekYou can get a quick look at <strong>your</strong> desk<strong>to</strong>p behind all of <strong>your</strong> openwindows with Aero Peek. Try it.1 Just hover <strong>your</strong> cursor over the small rectangle in the far rightcorner of <strong>your</strong> taskbar.Use Aero Peek <strong>to</strong> see behind transparent windows.X156048403mnl.indd 196/12/09 11:34:14 AM
9 | Find anything on <strong>your</strong> <strong>PC</strong> no matterwhere it is» Windows SearchThere’s no need <strong>to</strong> remember where things are or where they’re s<strong>to</strong>red.Just start typing in the Windows Search box for fast and easy access <strong>to</strong> allof <strong>your</strong> programs and files. Try this example:1 Click the Start but<strong>to</strong>n .2 Begin typing any word in the Windows Search box.3 Use the search results <strong>to</strong> find items that match the letters you typed.Type a few letters or words <strong>to</strong> quickly see <strong>your</strong> options.X156048403mnl.indd 206/12/09 11:34:14 AM
2110 | Get hands on with <strong>your</strong> <strong>PC</strong>and get more control» Windows TouchYou’re naturally in control of what <strong>your</strong> <strong>PC</strong> does next with Windows Touch anda <strong>to</strong>uch-enabled display. The Start menu, taskbar, and Windows Explorer are<strong>to</strong>uch friendly (additional hardware may be required). Try these moves:•Open Windows Explorer menu by tapping the Windows Explorer iconin the taskbar.•Open a web page with Internet Explorer 8 and use <strong>your</strong> finger <strong>to</strong> scrolldown or browse links.Zoom in on an image by moving two fingers apart.Zoom out again by simply moving two fingers closer <strong>to</strong>gether.•Right-click by holding one finger on the file you want <strong>to</strong> open andtapping the screen with another.Use <strong>your</strong> fingers <strong>to</strong> control what happens on <strong>your</strong> screen.X156048403mnl.indd 216/12/09 11:34:15 AM
22Let’s get more.Five ways <strong>to</strong> get morefrom <strong>your</strong> <strong>PC</strong>.The features that help you do evenmore of what you want every day.X156048403mnl.indd 226/12/09 11:34:15 AM
Windows®Media CenterWatch TV onYour <strong>PC</strong>Play ToHomeGroupResume fromStandbyX156048403mnl.indd 236/12/09 11:34:16 AM
1 | Watch TV, Movies, Videos,and more on <strong>your</strong> <strong>PC</strong>» Windows Media CenterIt’s easier than ever <strong>to</strong> watch TV and movies, play music, view pho<strong>to</strong>s, andkeep it all organized on <strong>your</strong> <strong>PC</strong> with Windows Media Center.X156048403mnl.indd 246/12/09 11:34:17 AM
252 | Watch <strong>your</strong> favorite programs on <strong>your</strong> <strong>PC</strong>» Watch TV on Your <strong>PC</strong>In some places around the world, you can now get many of <strong>your</strong> favorite TVshows and movies online. All you need <strong>to</strong> start watching is Windows MediaCenter and an Internet connection.1 Click the Start but<strong>to</strong>n .2 Click Windows Media Center.3 Click the right arrow <strong>to</strong> explore Windows Media Center.4 Click Continue, and then click Cus<strong>to</strong>m or Express <strong>to</strong> set upWindows Media Center.5 If Internet TV is available where you live, you’ll see Guide show up onthe TV menu after a few minutes. Just click it <strong>to</strong> browse online TV showsand movies.*6 If you do not see the guide, you may still be able <strong>to</strong> turn <strong>your</strong> <strong>PC</strong> in<strong>to</strong> adigital video recorder by connecting a supported broadcast TV tuner.**Watch the entertainment you want, when and where you want.* Note: Internet access required. Free Internet TV content varies by geography. Some content may requireadditional fees. To check availability, visit WindowsMediaCenter.com.** Additional hardware may be required. Not available in all countries.X156048403mnl.indd 256/12/09 11:34:20 AM
3 | Stream media <strong>to</strong> <strong>your</strong> homeentertainment system *» Play ToIt’s simple <strong>to</strong> use <strong>your</strong> home networked audio/video system <strong>to</strong> play music,watch videos, and view pho<strong>to</strong>s s<strong>to</strong>red on <strong>your</strong> <strong>PC</strong>. For example, let’s sayyou’re in <strong>your</strong> living room and reading e-mail on <strong>your</strong> lap<strong>to</strong>p, and youwant <strong>to</strong> play music through <strong>your</strong> home speakers. Here’s how:1 Open Windows Media® Player.2 Right-click on the music you’d like <strong>to</strong> hear.3 Select Play To.4 Select a supported device <strong>to</strong> play <strong>your</strong> music.Check out Play To and amplify <strong>your</strong> media experience.* Requires a networked media device that features the Compatible with Windows 7 logo or is an Extender forWindows Media Center.X156048403mnl.indd 266/12/09 11:34:21 AM
274 | Simply create a home network andshare files» HomeGroupYou can easily connect <strong>your</strong> <strong>PC</strong>s running Windows 7 and devices in <strong>your</strong> homeand share fi les between them. For example, you can fi nd and view a pho<strong>to</strong>of <strong>your</strong> kids that is s<strong>to</strong>red on the upstairs <strong>PC</strong> from <strong>your</strong> lap<strong>to</strong>p in the livingroom – no need <strong>to</strong> get up. You can even print a fi le from <strong>your</strong> bedroom <strong>PC</strong> <strong>to</strong>the printer in <strong>your</strong> home offi ce.Try HomeGroup and start sharing anywhere in <strong>your</strong> home.5 | Wake up and resume <strong>your</strong> <strong>PC</strong> in seconds» Resume from StandbyYou don’t like <strong>to</strong> wait for <strong>your</strong> <strong>PC</strong> <strong>to</strong> wake up. Now, it only takes a few seconds<strong>to</strong> Resume and reconnect <strong>to</strong> <strong>your</strong> wireless network. If you use the Sleep modewhile you’re away, <strong>your</strong> <strong>PC</strong> will wake up and be ready <strong>to</strong> use even faster.Wait less and do even more of what you want with Windows 7.X156048403mnl.indd 276/12/09 11:34:21 AM
Windows 7Your <strong>PC</strong>, Simplified.Thank you.X156048403mnl.indd 286/12/09 11:34:21 AM
29Product activation is required for certain components of the product and may be done by Internet or telephone.Instructions and Microsoft’s privacy policy will be detailed <strong>to</strong> the user during launch of the product.Information in this document, including URLs and other Internet Web site references, is subject <strong>to</strong> change withoutnotice. Unless otherwise noted, the companies, organizations, products, domain names, e-mail addresses, logos,people, places, and events depicted in examples herein are fictitious. No association with any real company,organization, product, domain name, e-mail address, logo, person, place, or event is intended or should beinferred. Complying with all applicable copyright laws is the responsibility of the user. Without limiting the rightsunder copyright, no part of this document may be reproduced, s<strong>to</strong>red in or introduced in<strong>to</strong> a retrieval system, ortransmitted in any form or by any means (electronic, mechanical, pho<strong>to</strong>copying, recording, or otherwise), or forany purpose, without the express written permission of Microsoft Corporation.Microsoft may have patents, patent applications, trademarks, copyrights, or other intellectual property rightscovering subject matter in this document. Except as expressly provided in any written license agreement fromMicrosoft, the furnishing of this document does not give you any license <strong>to</strong> these patents, trademarks, copyrights,or other intellectual property.© 2009 Microsoft Corporation.Microsoft, Aero, Internet Explorer, the Internet Explorer logo, Windows, the Windows logo, Windows Media, theWindows Start but<strong>to</strong>n, and Windows Vista are trademarks of the Microsoft group of companies.X156048403mnl.indd 296/12/09 11:34:21 AM
New shortcuts <strong>to</strong>simplify every dayWindows Key Shortcuts+Up Arrow+Down Arrow+Left Arrow+Right Arrow+Home+T+Space (hold keys)MaximizeRes<strong>to</strong>re or minimizeSnap <strong>to</strong> leftSnap <strong>to</strong> rightRes<strong>to</strong>re or minimize all other windowsPress once: focus the first taskbar entryPress again: cycle through taskbar entriesPeek at the desk<strong>to</strong>p+G Bring gadgets forward <strong>to</strong> the <strong>to</strong>p+ any number key (1–9)+ + Zoom in+ - Zoom outTaskbar ShortcutsShift + Click on iconMiddle-click on iconShift + Right-click on iconDrag up from a taskbar iconOpen a program on the taskbar. Example: Win+1 launchesthe first pinned program.Open a programOpen a programShow window menu (res<strong>to</strong>re, minimize, move, etc)Opens Jump ListmX15-60484-03X156048403mnl.indd 306/12/09 11:34:23 AM


