TruVision DVR 60 User Manual - Interlogix
TruVision DVR 60 User Manual - Interlogix TruVision DVR 60 User Manual - Interlogix
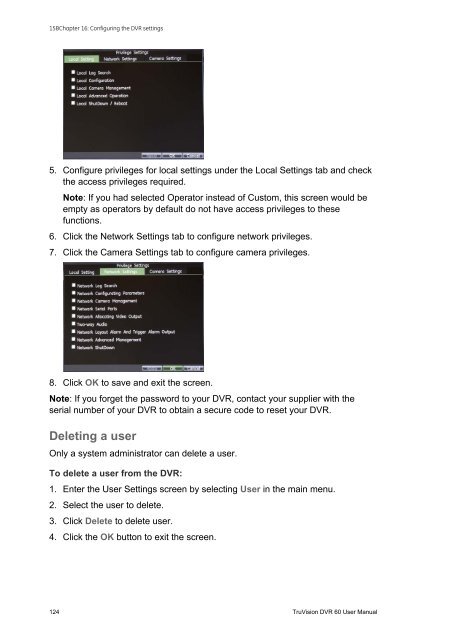
15BChapter 16: Configuring the DVR settings5. Configure privileges for local settings under the Local Settings tab and checkthe access privileges required.Note: If you had selected Operator instead of Custom, this screen would beempty as operators by default do not have access privileges to thesefunctions.6. Click the Network Settings tab to configure network privileges.7. Click the Camera Settings tab to configure camera privileges.8. Click OK to save and exit the screen.Note: If you forget the password to your DVR, contact your supplier with theserial number of your DVR to obtain a secure code to reset your DVR.Deleting a userOnly a system administrator can delete a user.To delete a user from the DVR:1. Enter the User Settings screen by selecting User in the main menu.2. Select the user to delete.3. Click Delete to delete user.4. Click the OK button to exit the screen.124 TruVision DVR 60 User Manual
15BChapter 16: Configuring the DVR settingsModifying a userOnly a system administrator can modify a user.To modify a user:1. Enter the User Settings screen by selecting User in the main menu.Note: Only Custom level users can have their access privileges modified.2. Select the user to modify.3. Click Edit to enter the Edit screen.4. Edit the user information.5. To modify user permissions, click Privileges. Privileges settings are defined in“Customizing a user’s access” on page 121.6. Click the OK button to exit the screen.Updating system firmwareThe firmware on the DVR can be updated using four methods:• Via an USB device• Over the network via an FTP server• Via the DVR Web browser• Using TruVision Navigator. For further information, refer to the TruVisionNavigator user manual.The firmware upgrade file is labeled TVR60.dav.To update the system firmware using a USB device:1. Download on to a USB the latest firmware from our web site at:www.gesecurityproducts.eu/videoupgradesTruVision DVR 60 User Manual 125
- Page 80 and 81: 9BChapter 10: Using the Web browser
- Page 82 and 83: 9BChapter 10: Using the Web browser
- Page 84 and 85: 9BChapter 10: Using the Web browser
- Page 86 and 87: 10BChapter 11: Configuring recordin
- Page 88 and 89: 10BChapter 11: Configuring recordin
- Page 90 and 91: 10BChapter 11: Configuring recordin
- Page 92 and 93: 10BChapter 11: Configuring recordin
- Page 94 and 95: 11BChapter 12: Configuring alarm se
- Page 96 and 97: 11BChapter 12: Configuring alarm se
- Page 98 and 99: 11BChapter 12: Configuring alarm se
- Page 100 and 101: 11BChapter 12: Configuring alarm se
- Page 102 and 103: 11BChapter 12: Configuring alarm se
- Page 104 and 105: 11BChapter 12: Configuring alarm se
- Page 106 and 107: 12BChapter 13: Configuring network
- Page 108 and 109: 12BChapter 13: Configuring network
- Page 110 and 111: 12BChapter 13: Configuring network
- Page 112 and 113: 13BChapter 14: Camera managementFig
- Page 114 and 115: 13BChapter 14: Camera managementEnt
- Page 116 and 117: 13BChapter 14: Camera management5.
- Page 118 and 119: 13BChapter 14: Camera management112
- Page 120 and 121: 14BChapter 15: HDD managementTo set
- Page 122 and 123: 14BChapter 15: HDD managementChecki
- Page 124 and 125: 14BChapter 15: HDD management118 Tr
- Page 126 and 127: 15BChapter 16: Configuring the DVR
- Page 128 and 129: 15BChapter 16: Configuring the DVR
- Page 132 and 133: 15BChapter 16: Configuring the DVR
- Page 134 and 135: 15BChapter 16: Configuring the DVR
- Page 136 and 137: 16BAppendix A: TroubleshootingFailu
- Page 138 and 139: 17BAppendix B: SpecificationsLangua
- Page 140 and 141: 17BAppendix B: Specifications134 Tr
- Page 142 and 143: 18BAppendix C: PTZ protocols136 Tru
- Page 144 and 145: 19BAppendix D: PTZ protocolsNavigat
- Page 146 and 147: 20BAppendix E: PTZ protocolsFigure
- Page 148 and 149: 20BAppendix E: PTZ protocolsFigure
- Page 150 and 151: 20BAppendix E: PTZ protocolsTVR 60
- Page 152 and 153: 20BAppendix E: PTZ protocols7. Pres
- Page 154 and 155: 20BAppendix E: PTZ protocols148 Tru
- Page 156 and 157: 21BAppendix F: PTZ protocolsAnalog(
- Page 158 and 159: 21BAppendix F: PTZ protocolsAnalog(
- Page 160 and 161: 22BAppendix G: GlossaryTermPTZUSBDe
- Page 162 and 163: IndexKKeypadaccess PTZ dome camera
- Page 164: Menu mapDisplayMonitor settingsTime
15BChapter 16: Configuring the <strong>DVR</strong> settings5. Configure privileges for local settings under the Local Settings tab and checkthe access privileges required.Note: If you had selected Operator instead of Custom, this screen would beempty as operators by default do not have access privileges to thesefunctions.6. Click the Network Settings tab to configure network privileges.7. Click the Camera Settings tab to configure camera privileges.8. Click OK to save and exit the screen.Note: If you forget the password to your <strong>DVR</strong>, contact your supplier with theserial number of your <strong>DVR</strong> to obtain a secure code to reset your <strong>DVR</strong>.Deleting a userOnly a system administrator can delete a user.To delete a user from the <strong>DVR</strong>:1. Enter the <strong>User</strong> Settings screen by selecting <strong>User</strong> in the main menu.2. Select the user to delete.3. Click Delete to delete user.4. Click the OK button to exit the screen.124 <strong>TruVision</strong> <strong>DVR</strong> <strong>60</strong> <strong>User</strong> <strong>Manual</strong>


