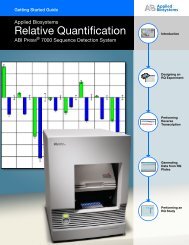
ABI PRISM 7000 Sequence Detection System
ABI PRISM 7000 Sequence Detection System
ABI PRISM 7000 Sequence Detection System
- No tags were found...

Create successful ePaper yourself
Turn your PDF publications into a flip-book with our unique Google optimized e-Paper software.
QUICK REFERENCE CARD<strong>ABI</strong> <strong>PRISM</strong> ® <strong>7000</strong> <strong>Sequence</strong> <strong>Detection</strong> <strong>System</strong><strong>ABI</strong> <strong>PRISM</strong> <strong>7000</strong><strong>Sequence</strong> <strong>Detection</strong> <strong>System</strong>The <strong>ABI</strong> <strong>PRISM</strong> <strong>7000</strong> <strong>Sequence</strong> <strong>Detection</strong> <strong>System</strong> can be usedto determine the absolute quantity of a target nucleic acidsequence in a test sample by analyzing the cycle-to-cyclechange in fluorescence signal as a result of amplification duringPCR.SafetyFor safety guidelines, please refer to the “Safety” section in the<strong>ABI</strong> <strong>PRISM</strong> ® <strong>7000</strong> <strong>Sequence</strong> <strong>Detection</strong> <strong>System</strong> User Guide,P/N 4330228. Follow specific safety practices when using thisinstrument.Correct Door HandlingClosing the <strong>7000</strong> <strong>System</strong> Door! CAUTION Do not pull the door handle to move thecarriage forward. This may cause serious damage to the dooror the door mechanism.To close the door:1. Gently push the carriage back once and release to unlatch it.The carriage will automatically slide forward into position overthe sample plate.2. When the door has moved to the front, pull the handle downinto place to close the cover.Do not pull the door forward by the handle.Opening the <strong>7000</strong> <strong>System</strong> Door! CAUTION Do not push the top of the door to open itwithout lifting the handle first. This will cause serious damageto the door or the door mechanism and may cause the doorto break or fall off.To open the door:1. Lift the handle at the bottom of the door on the front of theinstrument until the door has raised completely.2. Gently push the carriage back until it stops and locks intoplace. Refer to the graphic below.Do not push the door here to open itwithout lifting the handle first.HandleCarriage! CAUTION Do not open the door once the run hasstarted. Your data will be destroyed or inaccurate.HandlePower ButtonDRAFTFebruary 5, 2002 10:04 am,QUICK REFERENCE CARD
ProceduresStarting the Instrument1. Turn on the computer.2. Turn on the <strong>7000</strong> instrument.3. Launch the software by double-clicking the <strong>ABI</strong> <strong>PRISM</strong> <strong>7000</strong>SDS Software shortcut on the desktop.Creating a New Plate Document1. Select FileNew.2. When the New Document window opens, select the assaytype or accept the defaults.Note: To learn about different assay types, refer to the onlinehelp Contents and Index or the <strong>ABI</strong> <strong>PRISM</strong> ® <strong>7000</strong> <strong>Sequence</strong><strong>Detection</strong> <strong>System</strong> User Guide.3. Click OK.When the instrument is ready, the status bar will show Ready inthe lower left and Connected in the lower right of the window,and a new plate document window will open.e. Select sample types from the Task menu in the WellInspector: Unknown, Standard, or NTC.f. To change a detector being used, highlight the wells andclick the Use check box to remove the check mark, thenrepeat steps a through e.7. To set up the standards:a. Highlight the standard wells on the plate document.b. In the Well Inspector, select Task menuStandard.c. Click the Quantity field for the standard, and enter theknown quantity for the wells. To enter a quantity, thestandard wells must be labeled with an appropriatedetector.d. Click the Use check box.e. Repeat this for each standard set of wells by highlightingthem in the plate document and typing a different quantity.8. Apply the rest of the detectors from the Well Inspector.a. Highlight the non-standard wells.b. Select the appropriate detectors and click the Use box.Setting Up the Plate Document1. Select the Setup/Plate tab, if it is not already selected, to setup the plate document.2. To add detectors, select View Well Inspector.a. Click Add Detector to open the Detector Manager.b. To use a detector, highlight it in the Detector Manager.c. Click Add To Plate Document.3. To create a new detector:a. Select FileNew.b. Type a name for the detector.c. Select the reporter dye and quencher dye.d. Click the Color button and select a color from the palette.e. Click OK in the Color palette, and click OK in the NewDetector window.4. Highlight the new detector in the Detector Manager, then clickthe Add To Plate Document button.5. Click Done.IMPORTANT: You must click Done to save the detectors.Clicking the X in the upper-right corner of the windowcancels any selections or changes in the Detector Manager.6. To modify the sample types in the Well Inspector:a. Highlight the samples in the Setup/Plate window.b. Highlight the detector in the Well Inspector.c. Click the Use check box.d. Type a sample name.Page 2DRAFTFebruary 5, 2002 10:04 am,Editing the Thermal ProfileThe thermal cycling conditions are automatically set for the run.Note: 9600 Emulation is set as a factory default. It isrecommended that it be checked when assays are transferredfrom a 9600-based thermal cycling instrument.1. If it is necessary to change the Thermal Cycler Profile, selectthe Instrument tab to edit it.2. To change the duration, temperature, number of steps, orrepetitions:a. Select the Thermal Profile tab.b. Click the text box of the value you want to change, type thenew value, and press Enter.3. To add a cycle, hold, or step:a. Click on the left side of the Stage to add a cycle, hold, orstep to the left.b. Click on the right side of the Stage to add a cycle, hold, orstep to the right.4. To delete a step:a. Click in the step you want to delete.b. Hold down the Shift key and click in the step again tohighlight it.c. Press the Delete key or the Backspace key. If all steps ofa Stage are deleted, the Stage is deleted.5. To include a dissociation thermal protocol, make sure theDissociation Protocol check box is selected.Note: When a dissociation protocol is run, the system will force9600 emulation to generate the appropriate ramping profile fordissociation.6. To remove 9600 emulation, uncheck the box.www.appliedbiosystems.com
Saving the Plate Document’s Sample Setup1. To save your plate setup as a plate document:a. Select FileSave.b. Choose an appropriate directory and type a file name.c. In the Save as type menu, select SDS Document (*.sds).d. Click Save.e. Use the new file to run the experiment.2. To save your plate setup as a plate template:a. Select FileSave As.b. Type another name in the File name field.c. In the Save as type menu, select SDS Templates (*.sdt).IMPORTANT: Use Save As instead of Save if you wish touse a plate document’s sample setup in a subsequent run.Starting the RunWhen all conditions are set up and the plate document is saved,start the run.1. Select the Instrument tab.2. Click Start.! CAUTION Do not open the door once the run has started.The data will be destroyed or inaccurate.Setting the Analysis Options and Analyzing the DataOnce the run has finished, check the results.1. To set the baseline:a. Select the Results tabAmplification Plot tab.b. Highlight the wells containing the data you are interested inanalyzing.c. In the Baseline box, highlight the current Start (cycle) andStop (cycle) values and type new values.d. Click Analyze.2. To set a manual threshold:a. Select the Results tab.b. Click the Amplification Plot tab.c. Select the Data menuDelta Rn vs Cycle to determineyour threshold.d. Under Analysis Settings, enter the value for Threshold youdetermined above, or move the threshold by clicking anddragging the green bar.e. Select Analyze.2. Select the Results tabAmplification Plot tab, then:a. Select the wells you want to view.b. Use the Data and Detector menus to choose a data type ordetector.c. Double-click the Y-axis to open the Graph Settings dialogbox and change the settings for the Y-axis.3. Select Results tabStandard Curve tab. Choose adetector from the Detectors menu.4. Select Results tabDissociation tab.a. Select the wells you want to view.b. Select the Data Type menu and choose Derivative orRaw.c. Drag the green bar on the left of the first derivativedissociation graph to the peak for which the T m is beingmeasured.5. Select Results tabReport tab to view the report of the run.a. In the lower pane, select the wells you want to view.b. Select ToolsReport Settings to customize your report.Exporting the Data1. To export data shown on the Results tab:a. Select FileExportResults.b. In the Save As dialog box, choose a directory and type a filename. The appropriate Save as type file should be shown.c. Click Save.Note: Individual results can also be saved by selecting Spectra,Component, Delta Rn, Ct, or Dissociation.2. To export data shown on the Setup tab:a. Select FileExportSample Setup.b. Save the file in the appropriate directory.Shutting Down the <strong>System</strong>To shut down the system:1. Click the close button ( ) on the upper-right corner on any ofthe documents that are open and save them, if necessary.2. Select FileExit in the <strong>7000</strong> software window.3. Click Start located on the taskbar, and select Shut Down.4. Select Shut down again in the Shut Down Windows dialogbox and click OK.5. Press the power button on the front of the instrument to turn itoff.Viewing the DataYou can view your data in several ways:1. Select the Analysis menuDisplay and choose the desiredviewing options: Quantity, Delta Rn, or Ct.Additional InformationFor information on setting up allelic discrimination and plus/minus assays, refer to the <strong>ABI</strong> <strong>PRISM</strong> <strong>7000</strong> <strong>Sequence</strong> <strong>Detection</strong><strong>System</strong> User Guide, P/N 4330228.DRAFTwww.appliedbiosystems.com February 5, 2002 10:04 am,Page 3
Menu CommandsTools Menu Command DescriptionFile Menu Command DescriptionNewOpenCloseSaveOpens a blank plate document sothat you can create a new samplesetup.Opens a list of saved platedocuments.Closes an active plate document.Saves changes made to an activeplate document.DetectorManagerMarkerManagerDye ManagerReport SettingsWindow to set up detectors for theplate document.Window to set up markers for allelicdiscrimination.List of system dyes and created dyesto add to the detectors.Shows the parameters to print on areport.Save AsImportSampleSetupExportAllows you to save changes madeto an active plate document as anew file or a template by typing anew name.Imports a plate document samplesetup from a text file into the<strong>7000</strong> SDS software.Exports a plate document samplesetup of an SDS file into a textformat. The selections of theExport menu are shown below.Instrument Menu Command DescriptionStartStopDisconnectCalibrateFunction-TestBegins the run.Ends the run before it has completed.Disconnects the software from theinstrument.Opens the ROI Inspector to calibratethe camera. This window is used forinstrument diagnostics and calibration.Tests the hardware on the <strong>7000</strong> systembefore a run starts.Analysis Menu Command DescriptionAnalyzePerforms an analysis of the run.AnalysisSettingsOpens the settings for the detectors, tochange the threshold, baseline cycles,and to use the system calibration.Page SetupPrint PreviewPrintThese are standard Microsoft ®Windows ® commands and arenot described here.DisplayOmit WellOpens the following Display options:Quantity, Delta Rn, or Ct.Use Omit Well in the Well Inspector.Listed FilesExitView Menu Command DescriptionToolbarStatus BarWellInspectorShows the name of the last fourdocuments opened.Exits the <strong>7000</strong> SDS software.These are standard Windowsoperating system commands andare not described here.Opens the Well Inspector whichlists the detectors for the platedocument. Use the WellInspector to apply detectors to aselected well or group of wells.Window Menu Command DescriptionCascadeTile HorizontalTile VerticalArrange IconsNames of filesThese are standard Microsoft Windowscommands and are not described here.Lists names of open files. The checkmark indicates the top file. Clickanother file on the list to make it active.Help Menu Command DescriptionContents andIndexOpens the online helpfor the <strong>7000</strong> system.Select a topic to viewinformation on it.About <strong>ABI</strong>Prism <strong>7000</strong>SDS SoftwareOpens the <strong>7000</strong>copyright window.DRAFTFebruary 5, 2002 10:04 am,© Copyright 2002, Applied Biosystems. All rights reserved. P/N 4330352 Rev. A