Robinair RA16900 - Advanced Engineering
Robinair RA16900 - Advanced Engineering
Robinair RA16900 - Advanced Engineering

You also want an ePaper? Increase the reach of your titles
YUMPU automatically turns print PDFs into web optimized ePapers that Google loves.
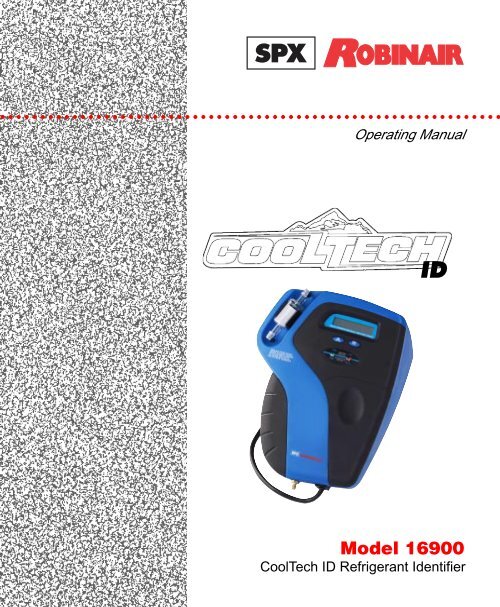
○ ○ ○ ○ ○ ○ ○ ○ ○ ○ ○ ○ ○ ○ ○ ○ ○ ○ ○ ○ ○ ○ ○ ○ ○ ○ ○ ○ ○ ○ ○ ○ ○ ○ ○ ○ ○ ○ ○ ○ ○ ○ ○ ○ ○ ○ ○ ○ ○ ○ ○ ○ ○ ○ ○ ○ ○ ○ ○ ○ ○ ○ ○Operating ManualIDModel 16900CoolTech ID Refrigerant Identifier
Table of ContentsSafety Precautions . . . . . . . . . . . . . . . . . . . . . . . . . . . . . . . 2Overview . . . . . . . . . . . . . . . . . . . . . . . . . . . . . . . . . . . . . . . 4Hardware Descriptions . . . . . . . . . . . . . . . . . . . . . . . . . . . . 6Hardware . . . . . . . . . . . . . . . . . . . . . . . . . . . . . . . . . . . . . 6Sample Hoses . . . . . . . . . . . . . . . . . . . . . . . . . . . . . . . . . 7Power Harnesses . . . . . . . . . . . . . . . . . . . . . . . . . . . . . . 8R-134a Tank Adapter Fitting . . . . . . . . . . . . . . . . . . . . . . 8Storage Case . . . . . . . . . . . . . . . . . . . . . . . . . . . . . . . . . 8Operating Procedure . . . . . . . . . . . . . . . . . . . . . . . . . . . . . . 9Pre-Operation Inspection . . . . . . . . . . . . . . . . . . . . . . . . 9Operating Procedure . . . . . . . . . . . . . . . . . . . . . . . . . . . . 9Post-Operation Procedure . . . . . . . . . . . . . . . . . . . . . . . 13Error Codes . . . . . . . . . . . . . . . . . . . . . . . . . . . . . . . . . . . . 14Error Codes and Corrective Actions . . . . . . . . . . . . . . . 14Maintenance . . . . . . . . . . . . . . . . . . . . . . . . . . . . . . . . . . . . 17Sample Filter Replacement . . . . . . . . . . . . . . . . . . . . . . 17Sample Hose Inspection and Cleaning . . . . . . . . . . . . . 18Air Detection Sensor Replacement . . . . . . . . . . . . . . . . 19Replacement Parts . . . . . . . . . . . . . . . . . . . . . . . . . . . . . . 20Specifications . . . . . . . . . . . . . . . . . . . . . . . . . . . . . . . . . . 21Warranty . . . . . . . . . . . . . . . . . . . . . . . . . . . inside back cover16900 CoolTech ID Refrigerant Identifier 1
Safety PrecautionsWARNING : To prevent personal injury:• Study, understand, and follow all warnings in this manual before operating thisunit. If the operator cannot read these instructions, operating instructions andsafety precautions must be read and discussed in the operator’s native language.—Si el operador no puede leer las instrucciones, las instrucciones de operación ylas precauciones de seguridad deberán leerse y comentarse en el idioma nativodel operador.—Si l’utilisateur ne peut lire les instructions, les instructions et les consignes desécurité doivent lui être expliquées dans sa langue maternelle.• The Identifier is not capable of direct detection and indication of the presence ofhydrocarbon compounds, which present a flammability hazard when present insufficient concentrations. Whenever the identifier indicates unknown contaminantsare present, the potential exists for a hydrocarbon flammability hazard.• Operate this unit with either R-12 or R-134a refrigerant. Cross-contaminationwith other refrigerant types causes severe damage to the A/C system, to servicetools, and equipment. Do NOT attempt to adapt the unit for another refrigerant.Do NOT mix refrigerant types through a system or in the same container.• DO NOT breathe refrigerant and lubricant vapor or mist. Exposure may irritateeyes, nose, and throat. Use recycling equipment certified to meet therequirements of SAE J2210 to remove refrigerant from the A/C system. Ifaccidental system discharge occurs, immediately ventilate the work area. Theremust be adequate ventilation in the vehicle servicing area.• When testing vehicle air conditioning systems, the vehicle ignition must beturned OFF. This action prevents EMI/RFI problems as well as eliminatespotential user hazards from moving parts of the vehicle.• The air detection sensor is a chemical fuel cell sensor that will eventually expire.The user must replace the air detection sensor whenever the instrumentindicates as such. Failure to replace the air detection sensor will result in nonfunctionalityof the instrument.• Wear eye and skin protection when working with refrigerants. Escapingrefrigerant vapors can freeze upon contact. Do NOT direct refrigerant escapingfrom the sample hose toward exposed skin or toward the face.• Connection to power sources greater than 14V DC could cause “out of warranty”damage. Connection to a battery which is not fully charged, or is smallerthan a typical vehicle battery, may cause errors in reading.• If using the wall power adapter, the adapter's voltage rating must match the ACpower source. Do NOT use a wall power adapter in areas where it could get wet.• To reduce the risk of battery explosion due to spark generation : First connectthe RED clip to the positive 12-volt battery terminal; then connect the BLACKclip to a metal ground location away from the battery.2© 2000 <strong>Robinair</strong>, SPX Corporation
Safety PrecautionsCAUTION: To prevent equipment damage,• Sample Filter: Inspect the outside diameter of the white sample filter element before and aftereach use of this instrument. As soon as red spots begin to appear on any portion of thewhite element outside diameter, the filter requires replacement. Failure to replace the filterwhen so indicated may result in “out of warranty” damage to the instrument.•Sample Input: This instrument requires connection of the sample hose to the low, or vapor,side port of the source vehicle or refrigerant cylinder. Connection of the sample hose to thehigh, or liquid, port of the source vehicle or refrigerant cylinder will result in “out of warranty”damage to the instrument. Additionally, the low side or vapor port shall not emitsample gas in excess of 300 psig or sample gas that contains oil or liquids.• Sample Hose: Inspect the sample hose before and after each use of the instrument. Immediatelyreplace the hose if it appears cracked, obstructed, or fouled with oil.•Never use a sample hose other than those approved for use with the Identifier. The use ofother hose types may introduce errors and excessive refrigerant loss.• Verify the refrigerant source to be tested will not emit oil or liquid refrigerant before connectingthe Identifier sample hose.• Never connect the Identifier to any refrigerant source that exceeds 300 psi pressure.•Do not use the coupling supplied on the Identifier R-134a sample hose for any purposeother than Identifier sampling. The coupler supplied on the R-134a hose does not containcheck valves and will continually vent refrigerant.• Never obstruct the sample exhaust or air intakes—located on the front and top of theinstrument—during use of this tool.• Do not throw, drop, immerse in liquid, or mistreat the instrument.• Store the instrument in its storage case when not in use.•Maintain the cleanliness of the instrument to prevent contamination and prolong its life.16900 CoolTech ID Refrigerant Identifier 3
OverviewDESCRIPTION OF THE 16900 IDENTIFIERContamination of refrigerant in air conditioning systems or storagecylinders can lead to component corrosion, component destruction,elevated system head pressure, and system failures when used byunsuspecting technicians. The ability of a technician to determinerefrigerant type and purity is severely hampered by the presence of airwhen attempting to use pressure-temperature relationships. Thedevelopment of substitute refrigerants further complicates refrigerantidentification and purity determination based on pressure-temperaturerelationships.The CoolTech ID Refrigerant Identifier provides a fast, easy, andaccurate means to determine refrigerant type and purity in refrigerationsystems and refrigerant storage cylinders. The instrument utilizes acombination of infrared and chemical fuel cell technologies todetermine purity and contamination levels of refrigerant R-12 andR-134a, as well as air concentrations in both refrigerant types.The instrument is supplied in a rugged, hand-held, injection-molded,nylon case housed in a corrugated storage case. The storage case willalso house all accessories supplied with the instrument: R-12 samplehose, R-134a sample hose, R-134a tank adapter fitting, battery poweradapter, and wall power adapter.4© 2000 <strong>Robinair</strong>, SPX Corporation
OverviewSample gas is admitted into the instrument through the suppliedsample hose and presented to the sensing devices. The instrumentprovides a digital readout of refrigerant purity, a pass or fail condition,and the amount of contamination.A sample is considered to be pure, or passed, if the concentration hasbeen determined to be 98% or greater by weight of a single refrigerant(R-134a or R-12). The instrument also provides an indication ofunknown compounds that may be R-22, hydrocarbons, or otherrefrigerants commonly used in blended refrigerant types.Operating instructions are provided to the user through displayprompts to avoid mistakes and erroneous readings.The Identifier provides the refrigerant technician with knowledge ofrefrigerant purity and protection against equipment and airconditioning system damage resulting from contamination.16900 CoolTech ID Refrigerant Identifier 5
Hardware DescriptionsHARDWAREThe instrument houses the following basic components required tooperate the Identifier:1. Case: An injection molded plastic housing that contains all internalcomponents.2. Hanger: Connects into the top of the case and provides the user ameans to hang the instrument above the working area for handsfreeoperation.3. Sample Filter: Filters oil mists and particulate from the samplegas admitted into the instrument to provide trouble-free function ofthe detection and sampling components.4. Control Panel: Consists of a two-line, 16-character, digital displayand two pushbutton switches. The display conveys analysis resultsand instructions to the user. The switches provide a means bywhich the user can communicate with the instrument microprocessorduring use.5. Air Intake Port: Admits fresh air into the sampling system topermit calibration of the infrared and chemical fuel cell detectiondevices. Do NOT block or restrict the port hole during use of theinstrument.6. Sample Exhaust Port: Emits sample gas that has been analyzedby the instrument. Do NOT block or restrict this port during use ofthe instrument.7. Sample Inlet Port: Permits the connection of either an R-12 orR-134a sample hose to the instrument.6© 2000 <strong>Robinair</strong>, SPX Corporation
Hardware Descriptions8. Air Detection Sensor: A chemical fuel cell that detects the amountof air contained within a refrigerant sample.9. Control Circuit Board: Directs all activities of the instrumentthrough the embedded microprocessor. The infrared detectiondevice is also contained on this circuit board and provides alldetection of refrigerant components of the sample gas.10. Purge Pump: Draws ambient air through the air intake port for thepurpose of detection device calibration and instrument samplesystem purging.11. Power Connector: Accepts installation of either the standard 12VDC vehicle battery adapter, or the wall power adapter, to provideoperating power.SAMPLE HOSES1. R-12 Sample Hose: This is a 6-foot hose made of a nylon innertube surrounded by a polyurethane outer tube. The hose containsthe instrument connection fitting on one end and a 1/4" SAEfemale flare nut on the other end. This hose is used when samplingfrom an R-12 vehicle system or storage cylinder.2. R-134a Sample Hose: This is a 6-foot hose made of a nylon innertube surrounded by a polyurethane outer tube. The hose containsthe instrument connection fitting on one end and an R-134a lowsidecoupler on the other end. This hose is used when samplingfrom R-134a vehicle systems or storage cylinders.16900 CoolTech ID Refrigerant Identifier 7
Hardware DescriptionsPOWER HARNESSES1. Vehicle Battery Adapter: This is a 6-foot power cable that hasan instrument mating connector on one end and vehicle batteryconnection clips on the other end. This harness is used to connectpower from the vehicle battery to operate the instrument andavoid the use of extension cords.2. Wall Power Adapter: This is a 6-foot power cable that has aninstrument mating connector on one end and a plug-in powertransformer on the other end. This harness is used to connectpower from a standard 120 wall power outlet to provide operatingpower to the instrument.WARNINGVerify the wall power adapter AC inlet voltage is either 115 or230 so that it matches the AC power available.R-134A TANK ADAPTER FITTING1. This adapter provides a conversion of standard R-134a cylinderACME threaded ports to a R-134a low-side coupler stub. Thisconversion permits the use of the instrument R-134a sample hoseduring refrigerant cylinder sampling.STORAGE CASE1. The storage case is a corrugated case that will house the instrumentand all accessories, including sample hoses, adapter fitting, poweradapters, and the operating manual.8© 2000 <strong>Robinair</strong>, SPX Corporation
Operating ProcedurePRE-OPERATION INSPECTION1. Inspect the outside diameter of the white element contained withinthe sample filter for any signs of red spots. The appearance of redspots anywhere on the outside diameter of the element indicates thefilter requires replacement to avoid fouling the instrument.2. Select the R-12 or R-134a sample hose as dictated by the application.Inspect the hose for cracks, signs of wear, obstruction, orfouling. Do NOT use a hose that has any signs of wear. Install thesample hose onto the sample inlet port of the instrument by handthreadingthe hose end onto the connector.3. Inspect the air intake port hole, located on the top of the instrument,and the sample exhaust port, located on the center bottomedge of the instrument, to verify they are not clogged or obstructed.4. Inspect the port of the air conditioning system or storage vesselfrom which the sample will be taken. Verify the port will emitvapor only and will not emit liquids or oil.5. Install the vehicle battery adapter or the wall power adapter harnessinto the power connector of the instrument.OPERATING PROCEDURE1. Power the instrument by connecting the power harness to thevehicle battery or by plugging the wall power adapter transformerinto an appropriate wall outlet.2. Allow the instrument to warm up for two minutes.16900 CoolTech ID Refrigerant Identifier 9
Operating Procedure3. During the warm-up period, enter your local elevation above sealevel into the instrument memory. The instrument is sensitive toelevation changes of 500 feet (152 meters), and the local elevationmust be entered into the instrument memory upon initial use.Normal barometric variations do not affect the performance of theinstrument. Once the elevation has been entered, it does not requireentry again unless the instrument is moved to a new elevation.To locate your local elevation, call your area airport, library, or usethe internet address of www.topozone.com and follow the onscreenprompts.The screen USAGE ELEVATION is displayedduring warm-up if the elevation has not been set. Set theelevation as follows:A. During the warm-up period, depress and hold the B pushbuttonuntil the display reads USAGE ELEVATION, 400 FEET.This is the factory default of 400 feet (122 meters).B. Use the A and B pushbuttons to adjust the elevation reading, tothe nearest 100-foot (30-meter) increment, to the local elevation.The A button increases the elevation setting in 100-foot(30-meter) increments. The B pushbutton decreases the elevationsetting in 100-foot (30-meter) increments. The elevationsetting is adjustable from 0-9000 feet (0-273 meters) and isdisplayed during adjustment.C. When the correct setting is reached, allow the instrument to sitfor approximately 20 seconds. Do not push either of the buttons.The setting is automatically stored into the instrumentmemory.NOTE: Failure to correctly enter the local elevation may result indetection errors.10© 2000 <strong>Robinair</strong>, SPX Corporation
Operating Procedure4. The instrument draws in ambient air through the air intake port forapproximately one minute. Ambient air is used to calibrate thedetection devices and purges the instrument plumbing of residuerefrigerant vapors.NOTE: For a correct calibration, the surrounding ambient air must beclear of refrigerant vapors, hydrocarbons, and oxygen-depletingcompounds such as carbon dioxide or carbon monoxide.5. When prompted by the instrument, connect the free end of thesample hose to the vehicle air conditioning system or refrigerantstorage cylinder port. Press the A pushbutton. Sample gas immediatelybegins to flow into the instrument. The instrument requiresapproximately one minute to complete the sample gas analysis.6. When the analysis is complete, immediately disconnect the samplehose from the refrigerant source.NOTE: The instrument does not contain automatic shut-off, andrefrigerant vapors continue to flow out of the source as long as thehose is connected. To conserve refrigerant stores and prevent excessrefrigerant venting, do NOT leave the instrument unattended duringanalysis cycles. Disconnect the sample hose from the source immediatelyafter being prompted by the instrument.16900 CoolTech ID Refrigerant Identifier 11
Operating Procedure7. The results of the analysis are now presented to the user on theinstrument display.PASS: Displayed when a sample is detected to have 98% orgreater of R-12 or R-134a by weight. The refrigerant type and airconcentration are also displayed.FAIL: Displayed when a sample is detected to be a blend ofR-12 and R-134a refrigerants with neither R-12 or R-134a having98% or greater concentration. The weight percentages of R-12,R-134a, and air are displayed.FAIL CONTAMINATED: Displayed when unknown refrigeranttypes, such as R-22 or hydrocarbons, have been detected in concentrationsof 4% or greater by weight. No weight concentrations ofrefrigerants or air are provided in this mode.NO REFRIGERANT—CHK HOSE CONN: Displayed when asample is detected containing 90% or greater air by weight. Thiscondition usually occurs when the R-134a sample hose coupler hasnot been opened, the sample hose has not been connected to thesample source, or if there is no refrigerant present in the samplesource.8. The instrument keeps the analysis results on the display until theuser presses the A button. Once the A button is pressed, follow thedirections on the screen.9. If another sample run is desired, follow instructions from Step 5.If another sample run is not desired, disconnect the power harnessfrom the vehicle or wall outlet to the end the routine.12© 2000 <strong>Robinair</strong>, SPX Corporation
Operating ProcedurePOST-OPERATION PROCEDURE1. Disconnect the sample hose from the instrument sample inlet port.Inspect the hose for signs of wear, cracking, oil fouling, or obstruction,and replace if necessary. Clean the outside of the hose, andcoil and stow it in the storage case.2. Inspect the sample filter white element outside diameter for thepresence of red spots. If any red spots are found, replace the samplefilter, as directed in the Maintenance Procedures on page 17.3. Disconnect the power harness from the instrument, clean, coil, andstow it in the storage case.4. Clean any dirt, grime, oil, etc., from the outside of the instrumentwith a moist rag. Do not use cleaning solutions or water on theinstrument. Stow the instrument in the storage case.16900 CoolTech ID Refrigerant Identifier 13
Error CodesMaintenanceERROR CODES AND CORRECTIVE ACTIONSThe instrument is supplied with self-diagnostic software to aid indetermining problems. The software will supply error messages thatdirect the user toward specific corrective actions in the event of systemfailure. Should corrective measures not correct the problem, the user isadvised to contact <strong>Robinair</strong> at 1-800-822-5561 for assistance.SAMPLE FAULT: Signifies unstable infrared readings due to inconsistentsample gas supply or interference from strong electrical fields.Corrective Actions:1. If the error code occurs during a sample cycle, verify the samplehose is receiving sample gas from the source connection of at least5 psig. Also verify the instrument sample exhaust port and airintake port are not clogged or restricted.2. If the error code occurs during a calibration cycle, verify the airintake port and sample exhaust port of the instrument are notclogged or obstructed.3. Keep the unit away from sources of strong electrical fields, such aslarge compressors, running vehicles, etc. Move the instrument 3–5feet away from the electrical field source, and try again.4. If the instrument is being used outside of the operating temperaturerange of 39–122°F (4–50°C), allow the instrument to warm or coolto the operating temperature range, and try again. The instrumentmay require additional warm-up time after “power up” before use.5. To clear the error code, power down the instrument. The error codeautomatically clears.14© 2000 <strong>Robinair</strong>, SPX Corporation
MaintenanceError CodesDETECTOR FAULT: Signifies internal infrared sensor failure due totemperature extremes.Corrective Actions:1. Allow the instrument to stabilize at room temperature for at least30 minutes before attempting use.2. To clear the error code, power down the instrument. The error codeautomatically clears.CALIBRATION FAULT: Signifies an infrared calibration fault.Corrective Actions:1. Verify the air intake port and sample exhaust port of the instrumentare not clogged or obstructed.2. If the instrument is being used in an enclosed area, refrigerantvapors may build up in the surrounding atmosphere and be drawninto the intake port during calibration. Move the instrument to alocation with fresh ambient air, free of refrigerant vapors.Use the instrument in locations that provide adequate ventilation toprevent the accumulation of refrigerant vapors in the surroundingatmosphere.3. Hang the unit so there is a flow of fresh air around it.4. To clear the error code, power down the instrument. The error codeautomatically clears.16900 CoolTech ID Refrigerant Identifier 15
Error CodesMaintenanceAIR SENSOR FAULT: Signifies an air detection sensor calibration fault.Corrective Action:1. Verify the air intake port and sample exhaust port of the instrumentare not clogged or obstructed.2. If the instrument is being used in an enclosed area, oxygen depletingcompounds, such as carbon dioxide or carbon monoxide, mayaccumulate in the surrounding atmosphere and be drawn into theintake port during calibration. Move the instrument to a locationwith fresh ambient air, free of oxygen depleting compounds.Use the instrument in locations that provide adequate ventilation toprevent the accumulation of oxygen depleting compounds in thesurrounding atmosphere.WARNINGIf error codes indicate that oxygen depleting compounds are inthe surrounding atmosphere, take immediate action to rid thearea of these compounds, and provide adequate ventilation toprevent such accumulations. The accumulation of oxygendepletingcompounds in the surrounding atmosphere present ahazard to human health.3. To clear the error code, power down the instrument. The error codeautomatically clears.RECALIBRATION REQUIRED: The prior calibration is too old andrequires refreshing. This message appears whenever a 3-minute periodelapses from the prior calibration.Corrective Action:1. Remove the sample hose connection from the refrigerant source ifso connected. Depress the A button to initiate a new calibration.16© 2000 <strong>Robinair</strong>, SPX Corporation
MaintenanceMAINTENANCE PROCEDURESSAMPLE FILTER REPLACEMENTInspection Frequency: Inspect the sample filter before and after eachuse of the instrument. Failure to replace the sample filter when soindicated may result in out-of-warranty damage to the instrument.What To Look For: Inspect the outside diameter of the white elementfor the appearance of red spots or discoloration, which indicate thesample filter requires replacement. Note: Inspect only the outsidediameter. It is normal to see red indicating dye at the ends of the filterelement.Replacement Procedure:1. Power down the instrument, and disconnect the sample hose.2. Obtain replacement filter, <strong>Robinair</strong> part no. 16912.3. Remove existing filter by pulling it straight up and out of the retainingclip, and disconnecting the tube connections. Do not allow thefree tube ends to slip back into the instrument.4. Discard the existing filter.5. Install the free ends of the instrument tube onto the ends of thereplacement filter, aligning the filter flow arrow with the arrow onthe instrument case.6. Carefully slide the tubes back into the instrument case, and positionthe filter into its retaining clip on the instrument case.7. Inspect the sample hoses for signs of oil entrapment. The need toreplace the sample filter may indicate oil contamination in thesample hoses. Replace or flush the sample hose(s) if oil entrapmentis found.16900 CoolTech ID Refrigerant Identifier 17
MaintenanceMaintenanceSAMPLE HOSE INSPECTION AND CLEANINGInspection Frequency: Inspect sample hose(s) before and after eachuse of the instrument and after every replacement of the sample filter.What To Look For: Inspect the inside diameter of the inner tube forsigns of cracking, fouling, oil entrapment, kinks, or other signs ofwear. Oil contamination is cleansed by flushing the hose(s) as describedbelow. Immediately replace hoses that show signs of wear.Sample Hose Flushing Procedure:1. Remove the hose from the instrument; flush it with isopropyl alcohol.WARNINGTo prevent personal injury, flush hoses away from sparks,open flames, or any other ignition source and in an area withappropriate ventilation.2. Dry the hose by blowing clean, dry, oil-free nitrogen or shop airthrough the inner tube, or allow the hose to air-dry for several hours.Do NOT dry the hose with lubricated shop air.3. When the hose is completely dry, inspect for signs of wear.18© 2000 <strong>Robinair</strong>, SPX Corporation
MaintenanceMaintenanceAIR DETECTION SENSOR REPLACEMENTInspection Frequency: The Identifier informs the user of possible airdetection replacement requirements by displaying AIR SENSOR FAULT.Air Detection Sensor Replacement Procedure:Refer to Error Codes and Corrective Actions, and try each suggestedaction. If the instrument still shows the error code, the air detectionsensor needs to be replaced.1. Power down the instrument, and remove the sample hose from theinstrument sample inlet port.2. Remove the sample filter, and unthread the two screws located onthe filter retainer clip.3. Turn the instrument onto its face, and remove the four large Phillipshead screws from the rear countersunk holes around the outer edgeof the instrument.4. Remove the instrument case front to expose the internal components.5. Disconnect the air sensor harness (from circuit board located in fronthalf of instrument case) by pulling it straight out of the connector.6. Unthread the air detector sensor from its housing. Discard the spent sensor.7. Obtain a replacement air detection sensor, <strong>Robinair</strong> part no. 19712,and thread it into the housing hand-tight. Verify the o-ring is seatedaround the threaded end of the air detector sensor.8. Route the sensor harness to the circuit board, and plug it into thesensor harness header of the circuit by pressing it straight in. Theharness is keyed and fits securely in one direction only.9. Verify the circuit board is correctly positioned onto the mountingstuds of the instrument case.10.Position the housing halves together, and secure with two smallscrews located under the filter location and four large rear screws.Replace the sample filter onto the instrument.16900 CoolTech ID Refrigerant Identifier 19
Replacement PartsReplacement PartsREPLACEMENT PARTSReplacement parts are available directly from <strong>Robinair</strong> distributors. Tofind the nearest distributor, visit the website at www.robinair.com orcall 1-800-822-5561.Part DescriptionPart No.Sample Filter (pkg. of two) 16912R-12 Sample Hose 19713R-134a Sample Hose 19716R-134a Tank Adapter Fitting 19714R-134a Sample Hose Coupling 19715Air Detection Sensor 19712Vehicle Battery Power Adapter 19718Wall Power Adapter, 120 V AC 1971920© 2000 <strong>Robinair</strong>, SPX Corporation
SpecificationsSpecificationsSPECIFICATIONSSample Parameters: Vapor only, oil and liquid free, 300 psig (2 MPa)maximum.Detected Compounds: R-12, R-134a, air, and unknown compounds.Sensor Technologies: Non-dispersive infrared and chemical fuel cell.Refrigerant Sample Size: 0.12 ounces (3.5 grams) per typicalsample—weight of vapor loss.Power (standard or optional): Powered by vehicle battery throughclip-on adapter harness (10–14V DC), or powered by line powerthrough plug-in wall adapter harness (120V AC, 60 Hz).Operational Temperature Range: 39–122°F (4–50°C)Instrument Weight: 2.8 lbs. (1278 grams)R-12 / R-134a Purity Setpoint: PASS if a single refrigerant, R-12 orR-134a, is detected in concentrations equal to or greater than 98% by weight.Unknown Refrigerant Purity Setpoint: In the presence of detectedunknown refrigerant types, R-12 or R-134a are considered pure ifdetected in concentrations equal to or greater than 96% by weight.Effect of Air Concentrations: Air is not considered a contaminateand will be removed from the weight concentration determination ofrefrigerants. Air concentrations are reported only for blends of R-12and R-134a refrigerants.SAE1771: If the refrigerant being tested is identified as contaminated,any visual percentages displayed of CFC-12 (R-12) or HFC-134a(R-134a) outside the design certified value is informational and maynot be accurate.SAE CERTIFICATION NOTE: This equipment has not been designcertifiedfor contaminate detection of R-124 or R142B.16900 CoolTech ID Refrigerant Identifier 21
Notes22© 2000 <strong>Robinair</strong>, SPX Corporation
Notes16900 CoolTech ID Refrigerant Identifier 23
Notes24© 2000 <strong>Robinair</strong>, SPX Corporation
WarrantyThis product is warranted to be free from defects in materialand workmanship under normal use and service for a periodof one year after the sale of the product. Exceptions to thispolicy will be individually identified. Sole obligation underthis Warrantly shall be to repair or replace any defectiveproduct or parts thereof, which are returned to Seller’s factory,transportation charges prepaid within the period mentionedabove, and which upon examination are provided to Seller’ssatisfaction to be defective.The warranty shall not apply to any product or part which hasbeen subject to misuse, negligence, or accident. The Sellershall not be responsible for any special or consequentialdamages, and the Warranty as set forth is in lieu of all otherwarranties either expressed or implied. However, Seller makesno warranty of merchantability in respect to any products forany particular purpose other than that stated in this literature,and any applicable manufacturer’s shop or service manualsreferred to therein, including any subsequent service bulletins.
Visit our web site%atwww.robinair.comorcall our Toll-FreeTechnical Support Line at800-822-5561in the continental U.S. or Canada.In all other locations, contact your local distributor. To helpus serve you better, be prepared to provide the modelnumber, serial number, and date of purchase.To validate the warranty, complete the warranty cardattached to the unit, and return it within ten days from dateof purchase.Due to ongoing product improvements, we reserve the rightto change design, specifications, and materials without notice.SPX Corporation655 Eisenhower DriveOwatonna, MN 55060-0995 USATechnical Services: 1-800-822-5561Fax: 1-412-690-2001Customer Service: 1-800-533-6127Fax: 1-800-322-2890Website: www.robinair. com122726 Rev. C January 11, 2006 © 2000 SPX Corporation