- Page 4 and 5:
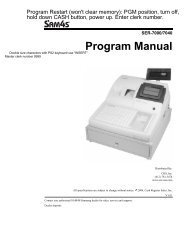
1-2 Servicing PrecautionsWARNING: F
- Page 6 and 7:
Modifier Key ......................
- Page 9 and 10:
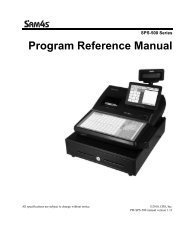
Preamble...........................
- Page 11 and 12:
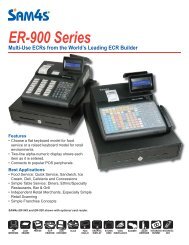
IntroductionAbout the SPS-300 Serie
- Page 13 and 14:
Identifying Components & Connection
- Page 15 and 16:
DisplayThe SPS-300 features an eigh
- Page 17 and 18:
Press PAGE DOWN to view the remaind
- Page 19 and 20:
Printer/PrintersThe SPS-320 feature
- Page 21 and 22:
KeyboardsSPS-320/SPS-340 Flat Keybo
- Page 24 and 25:
Initial ClearCAUTION: Do not share
- Page 26 and 27:
Installing the Paper1. Remove the p
- Page 29 and 30:
7. If you wish to use the printer t
- Page 31 and 32:
8. The display now reads: “Press
- Page 34 and 35:
34 • Getting Started SAM4s SPS-30
- Page 36 and 37:
Operator Display ExampleUp to six i
- Page 38 and 39:
Clerk Sign On InstructionsWhen a cl
- Page 40 and 41:
4. Enter the secret code of the cle
- Page 42 and 43:
Open Keyboard PLU Entry1. Enter an
- Page 44 and 45:
Keyboard PLU Multiplication with De
- Page 46 and 47:
Preset Price Code Entry PLU1. Enter
- Page 48 and 49:
Modifier KeyPressing a modifier key
- Page 50 and 51:
PromoThe PROMO key allows you to ac
- Page 52 and 53:
Exempting TaxOccasionally, you may
- Page 54 and 55:
Percent Key OperationsA total of fi
- Page 56 and 57:
Coupon on Item (Store Coupon)When p
- Page 58 and 59:
Voids and CorrectionsError Correcti
- Page 60 and 61:
No Sale OperationsOpen DrawerThe #/
- Page 62 and 63:
Paid Out OperationsYou can use the
- Page 64 and 65:
Tendering a Cash Sale1. Register th
- Page 66 and 67:
Tendering a Charge SaleTendering a
- Page 68 and 69:
Post TenderPost tendering means com
- Page 70 and 71:
Currency ConversionIf you normally
- Page 72 and 73:
Function KeysAlthough none of the f
- Page 74 and 75:
Paying a Manual Balance1. Enter the
- Page 76 and 77:
Adding to a Soft Check1. Enter the
- Page 78 and 79:
Hard CheckOpening a Hard Check1. En
- Page 80 and 81:
Fast Food Drive ThruFor fast food d
- Page 82 and 83:
Charge Posting Function KeysCHECK #
- Page 84 and 85:
Scale OperationsThe SPS-300 can be
- Page 86 and 87:
Tare Weight Entry1. Place an item o
- Page 88 and 89: Manual Weight EntryNote: Manual wei
- Page 90 and 91: Detail Entry Method1. Scan an item
- Page 92 and 93: 92 • Operations SAM4s SPS-300 Ope
- Page 94 and 95: Manager OperationChoose Manager Ope
- Page 96 and 97: 5. If IRC is SELECT, then the regis
- Page 98 and 99: Register Print FormatYou can design
- Page 100 and 101: Electronic Journal 0perationAn elec
- Page 102 and 103: 102 • Management Functions SAM4s
- Page 104 and 105: Z Reports1. From the RESET REPORT M
- Page 106 and 107: Reset Electronic JournalAn electron
- Page 108 and 109: PLU Lookup ProgramYou can assign up
- Page 110 and 111: DataTran Operation Menus1. From the
- Page 112 and 113: Turn the key to the S position (one
- Page 114 and 115: TESTRS-232MCRDALLASSDPRINTINGPATTER
- Page 116 and 117: Flash ROM InformationThis selection
- Page 118 and 119: Function Key AssignmentAny programm
- Page 120 and 121: Function Key CodesCode Function Cod
- Page 122 and 123: RS232C Port Options1. At the S cont
- Page 124 and 125: 9. Press PAGE DOWN to view page 7 o
- Page 126 and 127: SD Card OperationUtilities in this
- Page 128 and 129: Program Backup and LoadYou can use
- Page 130 and 131: Load/Save Receipt ImagesYou can loa
- Page 132: Load the Images by SD Card1. Insert
- Page 135 and 136: uttons.8. Click SEL. find the folde
- Page 137: Program Mode ProgrammingDescriptor
- Page 143 and 144: DescriptorType the descriptorusing
- Page 145: Option Entry DescriptionPRICE/HALO1
- Page 148 and 149: Delete PLU RangeNote: To delete PLU
- Page 150 and 151: Group ProgrammingUp to 99 groups (t
- Page 152 and 153: Option Entry DescriptionGIFT CARD 0
- Page 154 and 155: 4. Enter 0 for an ADD-ON tax with a
- Page 156 and 157: 7. Because this tax table has more
- Page 158 and 159: Programming a VAT (Value Added Tax)
- Page 160 and 161: System Option ProgrammingThe 1st Sy
- Page 162 and 163: PressPAGE DOWNto view the 10 thSyst
- Page 164 and 165: PressPAGE DOWNto view the 20 thSyst
- Page 166 and 167: Option Entry DescriptionMODIFIER:0:
- Page 168 and 169: Option Entry DescriptionDIRECT MULT
- Page 170 and 171: Print Option ProgrammingThe 1st Pri
- Page 172 and 173: PressPAGE DOWNto view the 9 thPrint
- Page 174 and 175: Print Options - Reference Informati
- Page 176 and 177: Option Entry DescriptionCURRENCY SY
- Page 178 and 179: Clerk Programming1. At the PGM cont
- Page 180 and 181: #/NS1. Press the #/NS key to view t
- Page 182 and 183: %1 -%51. Press the one of the % key
- Page 184 and 185: POS.:Y NEG.:N Y or N Select Y if yo
- Page 186 and 187: CANCEL1. Press the CANCEL key to vi
- Page 188 and 189:
CHARGE 1-81. Press one of the CHARG
- Page 190 and 191:
CHECK CASHING1. Press the CHECK CAS
- Page 192 and 193:
CHECK1. Press the CHECK key to view
- Page 194 and 195:
CHECK #1. Press the CHECK TRACK # k
- Page 196 and 197:
CURRENCY CONVERSION 1-41. Press one
- Page 198 and 199:
ERROR CORRECT1. Press the ERROR COR
- Page 200 and 201:
F/S TEND1. Press the F/S TEND key t
- Page 202 and 203:
3. Enter the number of the menu pos
- Page 204 and 205:
LEVEL 1-5 (Price Level 1-5)1. Press
- Page 206 and 207:
MODIFIER 1-51. Press one of the MOD
- Page 208 and 209:
PBAL1. Press the PBAL key to view t
- Page 210 and 211:
PRINT CHECK1. Press the PRINT CHECK
- Page 212 and 213:
RECD ON ACCT 1-31. Press one of the
- Page 214 and 215:
SERVICE1. Press the SERVICE key to
- Page 216 and 217:
TARE1. Press the TARE key to view t
- Page 218 and 219:
TIME IN/OUT1. Press the TIME IN/OUT
- Page 220 and 221:
VALIDATE1. Press the VALIDATE key t
- Page 222 and 223:
WASTE1. Press the WASTE key to view
- Page 224 and 225:
3. Using the same procedure, contin
- Page 226 and 227:
Endorsement MessageThe Endorsement
- Page 228 and 229:
Clerk ReportThe Clerk Report select
- Page 230 and 231:
DataTranWhen a DataTran integrated
- Page 232 and 233:
Download ProgramsWhen multiple regi
- Page 234 and 235:
Clerk In/OutThe Clerk In/Out progra
- Page 236 and 237:
4. Type the new or additional stock
- Page 238 and 239:
Time & DateUse this program to set
- Page 240 and 241:
MacroMacro keys may be programmed t
- Page 242 and 243:
4. Continue to enter keystrokes unt
- Page 244 and 245:
Program ScansYou can make a printed
- Page 246 and 247:
246 • Program Mode Programming SA
- Page 248 and 249:
Total and count foreach % function
- Page 250 and 251:
Total for eachForeign currency indr
- Page 252 and 253:
PLUDATE 11/10/2011 WED TIME 15:33PL
- Page 254 and 255:
Individual ClerkDATE 11/10/2011 WED
- Page 256 and 257:
Clerk Time ReportDATE 11/10/2011 WE
- Page 258 and 259:
Balancing Formulas+/- Net Sales $ E
- Page 260 and 261:
3. If necessary, press PAGE DOWN to
- Page 262 and 263:
Sample Draft - With GratuityTo prin
- Page 264 and 265:
Merchandise ReturnComplete the merc
- Page 266 and 267:
Local Total ReportRun an Issue Loca
- Page 268 and 269:
Close BatchSee ExplanationsDATE 5/2
- Page 270 and 271:
Change Batch NumberThe change batch
- Page 272 and 273:
Local Transaction Report KeyA B C D
- Page 274 and 275:
X. Authorization Response Code: Whe
- Page 276 and 277:
IRC FunctionsReportsUsing IRC, you
- Page 278 and 279:
The communications cable contractor
- Page 280 and 281:
Ethernet Cable Termination Instruct
- Page 283 and 284:
GlossaryActivity CountCancelCash De
- Page 285 and 286:
Electronic JournalError ConditionEr
- Page 287 and 288:
Mix & MatchMultiple ReceiptsNegativ
- Page 289 and 290:
Register NumberSingle ItemSplit Pri
- Page 291:
Manual Revision RecordEdition Date