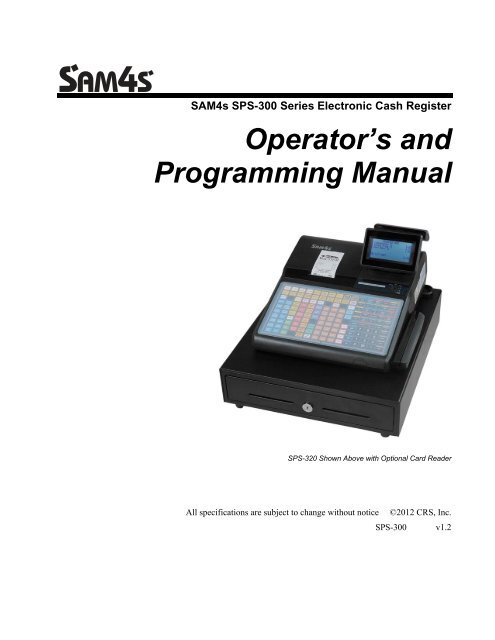
SAM4s SPS-300 Series Operators Manual.pdf
SAM4s SPS-300 Series Operators Manual.pdf
SAM4s SPS-300 Series Operators Manual.pdf

Create successful ePaper yourself
Turn your PDF publications into a flip-book with our unique Google optimized e-Paper software.
1-2 Servicing PrecautionsWARNING: First read the-Safety Precautions-section of this manual. If some unforeseen circumstance creates aconflict between the servicing and safety precautions, always follow the safety precautions.WARNING:An electrolytic capacitor installed with the wrong polarity might explode.1. Servicing precautions are printed on the cabinet.Follow them.2. Always unplug the units AC power cord from theAC power source before attempting to:(a) Remove or reinstall any component orassembly(b) Disconnect an electrical plug or connector(c) Connect a test component in parallel with anelectrolytic capacitor3. Some components are raised above the printedcircuit board for safety. An insulation tube or tapeis sometimes used. The internal wiring issometimes clamped to prevent contact withthermally hot components. Reinstall all suchelements to their original position.4. After servicing, always check that the screws,components and wiring have been correctlyreinstalled. Make sure that the portion around theserviced part has not been damaged.5. Check the insulation between the blades of the ACplug and accessible conductive parts (examples :metal panels and input terminals).6. Insulation Checking Procedure: Disconnect thepower cord from the AC source and turn the powerswitch ON. Connect an insulation resistance meter(500V) to the blades of AC plug.The insulation resistance between each blade of theAC plug and accessible conductive parts (seeabove) should be greater than 1 megohm.7. Never defeat any of the B+ voltage interlocks. Donot apply AC power to the unit (or any of itsassemblies) unless all solid-state heat sinks arecorrectly installed.8. Always connect an instrument’s ground lead to theinstrument chassis ground before connecting thepositive lead ; always remove the instrument’sground lead last.1-3 Precautions for Electrostatically Sensitive Devices (ESDs)1. Some semiconductor (solid state) devices are easilydamaged by static electricity. Such componentsare called Electrostatically Sensitive Devices(ESDs); examples include integrated circuits andsome field-effect transistors. The followingtechniques will reduce the occurrence ofcomponent damage caused by static electricity.2. Immediately before handling any semiconductorcomponents or assemblies, drain the electrostaticcharge from your body by touching a known earthground. Alternatively, wear a discharging wriststrapdevice. (Be sure to remove it prior toapplying power - this is an electric shockprecaution.)3. After removing an ESD-equipped assembly, placeit on a conductive surface such as aluminum foil toprevent accumulation of electrostatic charge.4. Do not use freon-propelled chemicals. These cangenerate electrical charges that damage ESDs.5. Use only a grounded-tip soldering iron whensoldering or unsoldering ESDs.6. Use only an anti-static solder removal device.Many solder removal devices are not rated as antistatic;these can accumulate sufficient electricalcharge to damage ESDs.7. Do not remove a replacement ESD from itsprotective package until you are ready to install it.Most replacement ESDs are packaged with leadsthat are electrically shorted together by conductivefoam, aluminum foil or other conductive materials.8. Immediately before removing the protectivematerial from the leads of a replacement ESD,touch the protective material to the chassis orcircuit assembly into which the device will beinstalled.9. Minimize body motions when handlingunpackaged replacement ESDs. Motions such asbrushing clothes together, or lifting a foot from acarpeted floor can generate enough staticelectricity to damage an ESD.4
ContentsIntroduction 11About the <strong>SPS</strong>-<strong>300</strong> <strong>Series</strong>........................................................................................................11Using This <strong>Manual</strong> ..................................................................................................................12Using Flowcharts.......................................................................................................12Identifying Components & Connections .................................................................................13Programmable Features.............................................................................................14Display ......................................................................................................................15Printer/Printers ..........................................................................................................19Control Lock .............................................................................................................20Keyboards..................................................................................................................21Initial Clear................................................................................................................24Getting Started 25Quick Start Steps .....................................................................................................................25Unpacking................................................................................................................................25Installing the Paper....................................................................................................26Models with Two Printer Stations.............................................................................27Clearing Memory.....................................................................................................................30<strong>SPS</strong>-320/<strong>SPS</strong>-340 Memory All Clear .......................................................................30<strong>SPS</strong>-345 Memory All Clear.......................................................................................32Operations 35Operator Display Screen..........................................................................................................35Operator Display Example ........................................................................................36Clerk Operations......................................................................................................................37Clerk Sign On Instructions........................................................................................38Clerk Sign Off Instructions .......................................................................................38Clerk Time Keeping ..................................................................................................39Item Registrations....................................................................................................................41Open Keyboard PLU Entry .......................................................................................42Preset Price Keyboard PLU.......................................................................................42Gallonage PLU Entry ................................................................................................42Keyboard PLU Repeat Entry.....................................................................................43Keyboard PLU Multiplication...................................................................................43Keyboard PLU Multiplication with Decimal Point...................................................44Split Pricing (Keyboard PLU)...................................................................................44Single Item Keyboard PLU .......................................................................................45Open Code Entry PLU ..............................................................................................45Preset Price Code Entry PLU ....................................................................................46Code Entry PLU Multiplication ................................................................................46Code Entry PLU Multiplication with Decimal Point ................................................46Split Pricing Code Entry PLU ...................................................................................47PLU Price Inquiry .....................................................................................................47<strong>SAM4s</strong> <strong>SPS</strong>-<strong>300</strong> Operator's & Programming <strong>Manual</strong> v1.2 Contents • 5
Modifier Key .............................................................................................................48Price Level Key .........................................................................................................49Promo ........................................................................................................................50Waste.........................................................................................................................50Shifting or Exempting Tax ......................................................................................................51Shifting Tax...............................................................................................................51Exempting Tax ..........................................................................................................52Percent Key Operations ...........................................................................................................54Preset Percent Discount on an Item...........................................................................54Enter a Percent Discount on an Item .........................................................................54Percent on Sale Total.................................................................................................55Coupon on Sale (Vendor Coupon) ............................................................................55Coupon on Item (Store Coupon) ...............................................................................56Return Merchandise Registrations...........................................................................................57Voids and Corrections .............................................................................................................58Error Correction (Void Last Item).............................................................................58Void Previous Item....................................................................................................58Cancel........................................................................................................................59Void Position Operations ..........................................................................................59No Sale Operations ..................................................................................................................60Open Drawer .............................................................................................................60Non Add Number ......................................................................................................60Received On Account Operations............................................................................................61Paid Out Operations.................................................................................................................62Subtotaling a Sale ....................................................................................................................62Eat In/Take Out/Drive Thru Sales ...........................................................................................63Totaling and Tendering............................................................................................................63Totaling a Cash Sale..................................................................................................63Totaling a Check Sale................................................................................................63Tendering a Cash Sale...............................................................................................64Tendering a Check Sale.............................................................................................64Totaling a Charge Sale ..............................................................................................65Tendering a Charge Sale ...........................................................................................66Check Cashing...........................................................................................................67Split Tender ...............................................................................................................67Post Tender................................................................................................................68Receipt On/Off and Receipt on Request....................................................................68Food Stamp Sales ......................................................................................................69Currency Conversion.................................................................................................70Check Tracking Operations .....................................................................................................71Overview ...................................................................................................................71Posting Balances <strong>Manual</strong>ly .......................................................................................73Soft Check .................................................................................................................75Hard Check................................................................................................................78Fast Food Drive Thru ................................................................................................80Charge Posting Operations ......................................................................................................81Scale Operations ......................................................................................................................84Direct Scale Entry......................................................................................................85Automatic Scale Entry...............................................................................................85Tare Weight Entry .....................................................................................................86<strong>Manual</strong> Tare Weight Entry........................................................................................87<strong>Manual</strong> Weight Entry ................................................................................................88Quick Journal Review..............................................................................................................88Integrated Payment Operations................................................................................................88Not Found PLU........................................................................................................................896 • Contents <strong>SAM4s</strong> <strong>SPS</strong>-<strong>300</strong> Operator's & Programming <strong>Manual</strong> v1.2
Quick Entry Method..................................................................................................89Detail Entry Method..................................................................................................90Not Found PLU Report .............................................................................................91Management Functions 93Introduction .............................................................................................................................93Manager Mode.........................................................................................................................93Manager Operation ..................................................................................................................94X Reports.................................................................................................................................94Declaration...............................................................................................................................97Register Print Format...............................................................................................................98Stop Register Printing..............................................................................................................98Training Mode .........................................................................................................................99Electronic Journal 0peration..................................................................................................100Open Check (IRC).................................................................................................................101Z Mode 103Reset Report Mode ................................................................................................................103Z Reports ...............................................................................................................................104Reset Electronic Journal ........................................................................................................106Mix & Match Program...........................................................................................................106Mix & Match Scan ................................................................................................................107PLU Lookup Program ...........................................................................................................108Age Verification ....................................................................................................................109DataTran Operation Menus ...................................................................................................110S-Mode Programming 111Overview ...............................................................................................................................111Hardware Test........................................................................................................................113Hardware Test Table ...............................................................................................113Memory All Clear..................................................................................................................114Clear All Totals .....................................................................................................................114Clear Grand Total ..................................................................................................................115Clear PLU File.......................................................................................................................115Flash ROM Information ........................................................................................................116Memory Allocation................................................................................................................116Function Key Assignment .....................................................................................................118Function Key Codes ................................................................................................120IRC Options...........................................................................................................................121RS232C Port Options ............................................................................................................122RS232C Settings Screen Program Notes.................................................................125SD Card Operation ................................................................................................................126Program Backup and Load......................................................................................128Load/Save Receipt Images ......................................................................................130Flash ROM Updates ................................................................................................133Flash ROM Update by PC Utility ...........................................................................134Update Program Area..............................................................................................135Clear Current Batch ...............................................................................................................136Program Mode Programming 137Descriptor Programming Methods.........................................................................................137Program Overlay Method........................................................................................137<strong>SAM4s</strong> <strong>SPS</strong>-<strong>300</strong> Operator's & Programming <strong>Manual</strong> v1.2 Contents • 7
Preamble..................................................................................................................223Postamble ................................................................................................................224Endorsement Message.............................................................................................226Financial Report ......................................................................................................227Clerk Report ............................................................................................................228Mix & Match Name ................................................................................................229DataTran..................................................................................................................230NLU Code Number ...............................................................................................................231Download Programs ..............................................................................................................232Clerk In/Out...........................................................................................................................234PLU Stock .............................................................................................................................235Drawer Limit .........................................................................................................................236Check Change Limit..............................................................................................................237Time & Date ..........................................................................................................................238Tare Weight ...........................................................................................................................239Macro.....................................................................................................................................240Programming a New Macro ....................................................................................241Editing an Existing Macro.......................................................................................242Machine No. ..........................................................................................................................243Training Mode Password.......................................................................................................243Program Scans .......................................................................................................................244Sample Reports 247Financial ................................................................................................................................247Time.......................................................................................................................................251PLU........................................................................................................................................252Clerk ......................................................................................................................................253Individual Clerk.....................................................................................................................254Groups ...................................................................................................................................254Day ........................................................................................................................................255Stock ......................................................................................................................................255Clerk Time Report .................................................................................................................256Check File..............................................................................................................................257PLU Zero Sale .......................................................................................................................257Balancing Formulas...............................................................................................................258Integrated Payment Appendix 259One Day Example of Credit Authorization ...........................................................................259Open Batch..............................................................................................................259Sample Transaction .................................................................................................261<strong>Manual</strong> Card Entry ..................................................................................................263Merchandise Return ................................................................................................264Void Transaction .....................................................................................................265Local Total Report...................................................................................................266Tip (Gratuity) Entry.................................................................................................266Close Batch .............................................................................................................267Integrated Payment Program Requirements ..........................................................................268DataTran Operation Menu.....................................................................................................269Initialize EFT...........................................................................................................269Change Batch Number ............................................................................................270Issue Local Total .....................................................................................................270Issue Transaction.....................................................................................................270Issue Batch Status....................................................................................................270<strong>SAM4s</strong> <strong>SPS</strong>-<strong>300</strong> Operator's & Programming <strong>Manual</strong> v1.2 Contents • 9
Dial In Load/Dial Out Load ....................................................................................271Tip Operation ..........................................................................................................271Local Transaction Report Key...............................................................................................272IRC (Inter-Register Communications) Appendix 275Overview................................................................................................................................275IRC Functions........................................................................................................................276Reports.....................................................................................................................276Device Sharing ........................................................................................................276IRC Programming & Setup....................................................................................................277Communication Cable Specifications....................................................................................277Communication Conduit Size..................................................................................277Communication Cable Termination.........................................................................278Routing Communication Cable ...............................................................................280Glossary 283<strong>Manual</strong> Revision Record 29110 • Contents <strong>SAM4s</strong> <strong>SPS</strong>-<strong>300</strong> Operator's & Programming <strong>Manual</strong> v1.2
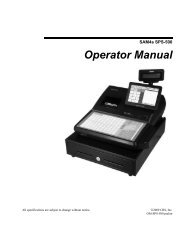
IntroductionAbout the <strong>SPS</strong>-<strong>300</strong> <strong>Series</strong>The <strong>SPS</strong>-<strong>300</strong> <strong>Series</strong> is offered in three configurations. There are two flat keyboard modelsthat work well for restaurants, food service shops, or convenience stores and a raisedkeyboardmodel for retail applications.This manual includes instructions for all models. The keyboard and printer configurationdefines the model. All other features are the same, unless otherwise noted.The <strong>SAM4s</strong> <strong>SPS</strong>-320 features aflat 150-position keyboardand a receipt printer.The <strong>SAM4s</strong> SP-340 features aflat 150-position keyboardand receipt/journal printers.The <strong>SAM4s</strong> <strong>SPS</strong>-345 features araised-key keyboard andreceipt/journal printers.(The expanded keyboard version of the<strong>SPS</strong>-345 is shown here.)Photos show <strong>SPS</strong>-<strong>300</strong> series ECRs with optional card readers.<strong>SAM4s</strong> <strong>SPS</strong>-<strong>300</strong> Operator's & Programming <strong>Manual</strong> v1.2 Introduction • 11
Using This <strong>Manual</strong>This manual provides you with a means to use your <strong>SAM4s</strong> cash register to its fullestpotential. It is divided into eight sections:1. "Getting Started" on page 17 provides quick start steps to help you get up and running forbasic applications.2. "Operations" on page 35 guides you through basic operation sequences.3. "Management Functions" on page 93 explains manager controlled functions, along withX reports and balancing information.4. “Z Mode” on page 103 explains how to reset register reports as well as other functionsperformed in this mode: mix & match discounts, PLU lookups and DataTran operations.5. "S-Mode Programming" on page 111 provides instructions for secure programming –usually done by the installing dealer prior to installation.6. “Program Mode Programming” on page 137 provides complete programminginstructions, including PLU, function key programs, and system options. This section isrecommended for use by storeowners and managers. Call your <strong>SAM4s</strong> dealer if you findyou need programming assistance.7. “Sample Reports” on page 247 provides a sample of each register report.8. The “Integrated Payment Appendix” on page 259 provides important operationinformation for users where optional integrated electronic payments are done using aDatacap appliance.9. The “IRC (Inter-Register Communications) Appendix” on page 275 provides notes forIRC installations.The <strong>SAM4s</strong> <strong>SPS</strong>-<strong>300</strong> allows many different user applications. This manual was written withthis in mind. Although we have tried to touch on all available options, your specificapplication may differ.If you have questions concerning the configuration of your <strong>SPS</strong>-<strong>300</strong>, contact your authorized<strong>SAM4s</strong> dealer.Using FlowchartsFlowcharts are used to supplement step-by-step instructions throughout this manual. Forexample, the following flowchart describes how to register $1.00 into the PLU1 key:1 0 0 PLU #1This flowchart means:Press numeric key 1.Press numeric key 0.Press numeric key 0.Press PLU #1.Follow the flowchart from left to right, pressing the keys in the order they are shown.Numeric keypad entries are shown as square keys. PLU and function keys are shown asrectangular keys.12 • Introduction <strong>SAM4s</strong> <strong>SPS</strong>-<strong>300</strong> Operator's & Programming <strong>Manual</strong> v1.2
Identifying Components & ConnectionsStandard Customer RearDisplayPrinter(s)<strong>SPS</strong>-320: 58mm Receipt Printer<strong>SPS</strong>-340/<strong>SPS</strong>-345: 58mm Receiptand Journal PrintersOperator DisplayAdjustable 8-line, 32-characterBacklit Liquid Crystal DisplayPower On/Off SwitchCash DrawerSturdy Metal CashDrawer with mediaslots and removable5 Bill/5 Coin DrawerInsert7-Position Control LockOptional Card ReaderKeyboards<strong>SPS</strong>-320/<strong>SPS</strong>-340: Flat spillresistant150 position keyboard<strong>SPS</strong>-345: Raised keyboard with21 PLU keys expandable to amaximum of 63 PLU key locationsCommunication Ports2-Standard RS-232C ports expandable to 4-portsprovide support for these options: Load cell scale Kitchen printer Bar code scanner Coin changer Pole Display Liquor dispensing system DataTran Integrated Payment Appliance Remote Journal or Video Surveillance System <strong>SPS</strong>-<strong>300</strong> PC Utility SAM<strong>300</strong> Polling SoftwarePower Switch Cover Options Use pointed object to toggle on/off Pop-out to remove the switch cover Insert shows optional full switchcover that is provided withaccessories<strong>SAM4s</strong> <strong>SPS</strong>-<strong>300</strong> Operator's & Programming <strong>Manual</strong> v1.2 Introduction • 13
Programmable FeaturesMemory Allocation System Supports: Over 19,000 Price Look Ups (PLUs) are available Up to 5 menu levels for each PLU Up to 99 PLU Group totals Up to 99 clerks with separate report totals Electronic Journal Hard or Soft Guest ChecksUp to 5 PLU modifier keys (i.e. small, medium, and large)18 character programmable descriptors for PLUs and functionsEmployee time keeping functions for each clerk with optional employee cardslogin/sign onFour tax rates with value added tax (VAT) capability.Programmable functionality for each key location24-hour real-time clock with automatic day and date changeCheck, Cash, and up to 8 charge tender functionsCurrency conversion capability for up to 4 foreign currenciesTraining modeFood stamp sorting and tenderingProgrammable discount/surcharge/coupon keysError Correct, Void, Cancel and Void Transaction functionsFunction keys for posting charges and payments to accounts or guest checksMacro, Function Look-up, Price Inquiry, Promo and Waste functionsManagement reports, with the capability to view most reports on the register displayElectronic Journal capability6-line programmable preamble and postamble messages10-line programmable check endorsement messageProgrammable descriptors for financial and clerk reportsUp to 15 PLU look-up keysAge verification feature forces date of birth entryUp to 99 Mix & Match discounts14 • Introduction <strong>SAM4s</strong> <strong>SPS</strong>-<strong>300</strong> Operator's & Programming <strong>Manual</strong> v1.2
DisplayThe <strong>SPS</strong>-<strong>300</strong> features an eight line backlit LCD display. Press PAGE DOWN in REG mode to increase the intensity of the back light. Press PAGE UP in REG mode to decrease the intensity of the back light. The color of the backlight can be changed through system option program settings.As items are registered, they will be listed on the next available line. The quantityinformation will update when multiples of the same item are entered. Additional informationand error messages will display as appropriate, and may be accompanied by an error tone.Programming options also display. In most cases you can make changes to your programwithout consulting this manual by simply following the program menus.REGNote: The “CLOSED” message will display if a clerk is not signed on.REGISTER MODE███████████ CLOSED ███████████<strong>SAM4s</strong> <strong>SPS</strong>-<strong>300</strong> Operator's & Programming <strong>Manual</strong> v1.2 Introduction • 15
VOIDNote: The “CLOSED” message will display if a clerk is not signed on.VOID MODE███████████ CLOSED ███████████X (Manager Mode)MANAGER MODE0.MANAGER OPERATION1.X REPORTS2.DECLARATION3.REG. PRINT FORMAT4.STOP RECEIPT PRINTING5.STOP JOURNAL PRINTING6.TRAIN MODE Press PAGE DOWN to view the remainder of the X MODE menu:PROGRAM MODE7.E.J. OPERATION8.NOT FOUND PLU9.OPEN CHECK(IRC)Z (Reset Report Mode)RESET REPORT MODE0.Z REPORTS1.RESET E.J.2.PC COMMUNICATION3.MIX & MATCH PROGRAM4.MIX & MATCH SCAN5.PLU LOOKUP PROGRAM6.AGE VERIFICATION16 • Introduction <strong>SAM4s</strong> <strong>SPS</strong>-<strong>300</strong> Operator's & Programming <strong>Manual</strong> v1.2
Press PAGE DOWN to view the remainder of the Z MODE menu:PROGRAM MODE7.RESET NOT FOUND PLU9.DATATRAN(DEBIT)00.DATATRANPGM (Program Mode)PROGRAM MODE0.PLU1.GROUP2.SALES TAX3.SYSTEM OPTION4.PRINT OPTION5.FUNCTION KEYS6.CLERK Press PAGE DOWN to view the remainder of the PROGRAM MODE menu:PROGRAM MODE7.LOGO DESCRIPTOR8.NLU CODE# PROGRAM9.DOWNLOAD PROGRAMS00.MORE Press 00 to view the MORE PROGRAMS menu:PROGRAM MODE0.CLERK I/O1.PLU STOCK2.DRAWER LIMIT3.CHECK CHANGE LIMIT4.TIME & DATE5.TARE WEIGHT6.MACROP1 <strong>SAM4s</strong> <strong>SPS</strong>-<strong>300</strong> Operator's & Programming <strong>Manual</strong> v1.2 Introduction • 17
Press PAGE DOWN to view the remainder of the PROGRAM MODE page 2menu:PROGRAM MODE7.MACHINE NO.8.PC SCHEDULE TIME9.TRAINING MODE P/W00.SCANP2 SM (Service Mode)SERVICE MODE0. HW TEST1. CLEAR ALL TOTALS2. CLEAR GRAND TOTAL3. CLEAR PLU FILE4. FLASHROM INFORMATION5. MEMORY ALLOCATION6. KEY ASSIGNMENT Press PAGE DOWN to view the remainder of the SERVICE MODE menu:SERVICE MODE7. IRC OPTIONS8. RS232C PORT9. SD CARD OPERATION00.CLEAR CURR.BATCH18 • Introduction <strong>SAM4s</strong> <strong>SPS</strong>-<strong>300</strong> Operator's & Programming <strong>Manual</strong> v1.2
Printer/PrintersThe <strong>SPS</strong>-320 features a single receipt printer:Access to SDCard Slot<strong>SPS</strong>-340 and <strong>SPS</strong>-345 Models feature separate receipt and journal printers:Access to SDCard SlotPrinter SpecificationsPaper:2 ¼” (58mm) Thermal PaperPaper Loading:Print Speed:Drop-in Loading22 Lines per second<strong>SAM4s</strong> <strong>SPS</strong>-<strong>300</strong> Operator's & Programming <strong>Manual</strong> v1.2 Introduction • 19
Control LockThe control lock has 7 positions, accessed with 5 keys. Each ECR is shipped with two fullsets of keys.VOID Use to void (correct) items outside of a sale.VOIDOFFSREGPXZOFFREGXZPThe register is inoperable.Use for normal registrations.Use to read register reports.Use to read register reports and reset totals to zero.Use to program the register.S The S position is a hidden position reserved fordealer access.Before performing any operations in Register Mode a clerk must be signed on. See “ClerkSign-On/Sign-Off” for a description of clerk operations.Control KeysAll <strong>SPS</strong>-<strong>300</strong> series models include two sets of keys that may be used to access the followingcontrol lock positions.Key Positions AccessibleREG OFF , REGVDVOID, OFF, REG, XZVOID, OFF, REG, X, ZPVOID, OFF, REG, X, Z, PC ALL POSITIONSNote: Keys may be removed from the control lock in the OFF or REG positions.20 • Introduction <strong>SAM4s</strong> <strong>SPS</strong>-<strong>300</strong> Operator's & Programming <strong>Manual</strong> v1.2
Keyboards<strong>SPS</strong>-320/<strong>SPS</strong>-340 Flat Keyboard VersionFlat keyboard models have 150 key positions with the default legends and key assignments asshown below. The keyboard legend sheet can be replaced by lifting the protective rubbercover.Shaded key locations are fixed and cannot be changed.1 11 21 31 41 51 61 71 81 91FEEDJOURNALFEEDERRORCORRVOIDCLERK2 12 22 32 42 52 62 72 82 92%1 RA PO #/NSRETURN3 13 23 33 43 53 63 73 83 93%2TAKEOUTEATINDRIVETHRUTAX 14 14 24 34 44 54 64 74 84 945 15 25 35 45 55 65 75 85 956 16 26 36 46 56 66 76 86 967 17 27 37 47 57 67 77 87 978 18 28 38 48 58 68 78 88 989 19 29 39 49 59 69 79 89 9910 20 30 40 50 60 70 80 90 100%3FUNCLOOKUPFUNCLOOKUPCHECK#PAGEUPSERVICEYES/NOTABLE#PAGEDOWNCLEAR PLU X/TIMEMACRO1 7 8 9PRINTCHECKCONV1ADDCHECKCHARGE1MACRO2 4 5 6 CHECKMACRO3 1 2 3 SUBTLMACRO4 0 00 . CASH<strong>SPS</strong>-345 Raised Keyboard Version-DefaultThe <strong>SPS</strong>-345 keyboard includes 21 keyboard PLU locations and functions with the defaultlegends and key assignments as shown below. The keyboard can be expanded to 63 PLU keylocations.Shaded key locations are fixed and cannot be changed.1 8 152 9 163 10 174 11 18FEEDPAGEUPJOURNALFEEDYES/NO#/NSPAGEDOWNERRORCORRVOIDCLEAR PLU X/TIME TAX 1CLERKFUNCLOOKUP1FUNCLOOKUP27 8 8 CHECK CHARGE15 12 194 5 5 SUBTOTAL6 13 201 2 27 14 210 00 .CASHTEND<strong>SAM4s</strong> <strong>SPS</strong>-<strong>300</strong> Operator's & Programming <strong>Manual</strong> v1.2 Introduction • 21
<strong>SPS</strong>-345 Raised Keyboard Version-ExpandedYour authorized dealer can expand the keyboard to 63 PLU key locations as shown below.Shaded key locations are fixed and cannot be changed.1 8 15 22 29 36 43 50 572 9 16 23 30 37 44 51 583 10 17 24 31 38 45 52 594 11 18 25 32 39 46 53 60FEEDPAGEUPJOURNALFEEDYES/NO#/NSPAGEDOWNERRORCORRVOIDCLEAR PLU X/TIME TAX 1CLERKFUNCLOOKUP1FUNCLOOKUP27 8 8 CHECK CHARGE15 12 19 26 33 40 47 54 614 5 5 SUBTOTAL6 13 20 27 34 41 48 55 627 14 21 28 35 42 49 56 631 2 20 00 .CASHTEND<strong>SPS</strong>-345 Alpha Keyboard Overlay - ExpandedNote: There is no alpha overlay option for the default 21-PLU Location version of the<strong>SPS</strong>-<strong>300</strong> <strong>Series</strong>. You must use the descriptor code entry method for programmingdescriptors with the 21-key configuration.A H O V # ) " SPACE FEEDJOURNALFEEDB I P W $ - , SPACEC J Q X % + . CAP CLEAR PLU X/TIMED K R Y ^ = /DOUBLE 7 8 8E L S Z & ; < BACK 4 5 5 SUBTOTALF M T ! * : > 1 2 2G N U @ ( ' ? 0 00 .CASHTEND22 • Introduction <strong>SAM4s</strong> <strong>SPS</strong>-<strong>300</strong> Operator's & Programming <strong>Manual</strong> v1.2
Initial ClearCAUTION: Do not share this information with unauthorized users. Distribute thePGM Mode key only to those you may want to perform this function.The initial clear function allows you to exit any register activity and return to a beginning orcleared state. Any transaction that is in progress will be exited and totals for that transactionwill not be updated.Here are some reasons you may want to perform an initial clear:The register is in an unknown state, and you wish to exit the current program ortransaction without following normal procedures.You have performed a function that includes a compulsory activity and you wish tobypass the compulsion.An initial clear may be necessary as part of servicing, or troubleshooting.Perform this procedure only as necessary. Contact your <strong>SAM4s</strong> dealer first if you havequestions about operating or programming your <strong>SAM4s</strong> <strong>SPS</strong>-<strong>300</strong>.To Perform an Initial Clear:1. Turn the power switch located on the right side of the register to the OFF position.2. Turn the control lock to the PGM position.3. Press and hold the key position where the SUBTOTAL key is located on the defaultkeyboard layout.4. While continuing to hold the SUBTOTAL key, turn the power switch to the ONposition. When the “Initial Clear Service” message displays release the SUBTOTALkey.5. The message "INITIAL CLEAR OK!” prints when the initial clear is complete. Toresume operations, you will need to sign on a clerk.<strong>SPS</strong>-320 and <strong>SPS</strong>-340Press and hold theSUBTL key positionduring power-up inPGM mode.<strong>SPS</strong>-345Press and hold theSUBTOTAL keyposition duringpower-up in PGMmode.24 • Introduction <strong>SAM4s</strong> <strong>SPS</strong>-<strong>300</strong> Operator's & Programming <strong>Manual</strong> v1.2
Getting StartedQuick Start StepsUnpacking<strong>SAM4s</strong> ECRs are designed to work out-of-the-box. You can sign on a clerk, enter amountsand finalize a sale. Most functions are active and ready to use.Use the Quick Start Instructions provided here to prepare your <strong>SPS</strong>-<strong>300</strong> series ECR forentering a program. Because the <strong>SPS</strong>-<strong>300</strong> features on-screen programming, the dealer or usercan simply follow the menus presented when the key is turned to the PGM (program)position. Detailed programming steps and reference information is found in the Programsection of this manual.Steps In this chapter:1. Unpacking2. Installing the Paper3. Clearing All Memory1. Unpack and unwrap the cash register.2. Locate in the packing the following items: Paper roll(s) 1 rewind spindle (<strong>SPS</strong>-340 and <strong>SPS</strong>-345) 2 sets of control keys3. Remove the cardboard protectors from the cash drawer.4. Plug the register into a grounded outlet (three-prong), turn the power switch on (note thepower switch cover), insert a control key and turn the key to the REG control lockposition.<strong>SAM4s</strong> <strong>SPS</strong>-<strong>300</strong> Operator's & Programming <strong>Manual</strong> v1.2 Getting Started • 25
Installing the Paper1. Remove the printer cover.2. Push the blue cap lever and then lift up to open the paper cover.3. Ensure that the paper is being fed from the bottom of the roll and then close the papercover slowly until it locks firmly.26 • Getting Started <strong>SAM4s</strong> <strong>SPS</strong>-<strong>300</strong> Operator's & Programming <strong>Manual</strong> v1.2
4. Pass the leading edge of the paper through the tear-bar slot. Tear off the excess paper.Replace the printer cover.Models with Two Printer StationsThe <strong>SPS</strong>-340 and PS-345 models are equipped with separate printers for receipt and journal.Paper loading for these models is shown below:1. Remove the printer cover.2. Push the green cap lever and then lift up to open the paper cover.<strong>SAM4s</strong> <strong>SPS</strong>-<strong>300</strong> Operator's & Programming <strong>Manual</strong> v1.2 Getting Started • 27
7. If you wish to use the printer to print a sales journal, insert the paper into the paper takeupspool. Wind the paper two or three turns around the spool shaft and install the spool inthe mount. Insure that the paper is being fed from the bottom of the roll.<strong>SAM4s</strong> <strong>SPS</strong>-<strong>300</strong> Operator's & Programming <strong>Manual</strong> v1.2 Getting Started • 29
Clearing MemoryBefore you use your <strong>SPS</strong>-<strong>300</strong> <strong>Series</strong> ECR for the first time, you must perform a memory allclear to insure that all totals and counters are cleared and that the default program is installed.CAUTION: The procedures described in this area are security sensitive. Clearing the<strong>SPS</strong>-<strong>300</strong> <strong>Series</strong> memory after the register is put into service will erase all programmingas well as totals and counters. Do not share this information with unauthorized usersand distribute the key marked “C” only to those you may want to perform thesefunctions.<strong>SPS</strong>-320/<strong>SPS</strong>-340 Memory All Clear1. Turn the power switch located on the right side of the register to the OFF position.2. Turn the control lock to the S position.3. Press and hold the key position where the CHECK key is located on the defaultkeyboard layout.<strong>SPS</strong>-320 and <strong>SPS</strong>-340Press and hold theCHECK key positionduring power-up in Smode.4. Continue to hold the appropriate key while turning the power switch to the ONposition. The message “RAM ALL CLEAR" displays.5. Press the upper left key of the keyboard, then the lower left key, then the upper rightkey, and finally press the lower right key.1 3<strong>SPS</strong>-320<strong>SPS</strong>-3402 46. The display reads: RAM (16M). After a short delay, the message: "OK” will displayif the RAM check is good. Memory is cleared, the default program is installed andthe RAM CLEAR receipt is printed. The display now reads:2-STATION PRINTER : ‘CASH’ Key1-STATION PRINTER : ‘CLEAR’ Key7. If you have an ER-320 (one printer station), press CLEAR.If you have an ER-340 (two printer stations), press CASH.30 • Getting Started <strong>SAM4s</strong> <strong>SPS</strong>-<strong>300</strong> Operator's & Programming <strong>Manual</strong> v1.2
8. The display now reads: “Press CLEAR..AUTO CUT : ‘CASH’ KeyNO CUT : ‘CLEAR’ Key9. The SERVICE MODE menu displays. The RAM Clear procedure is complete andthe receipt prints“ETHERNET LINK FAIL!!!” if the register is not connected to another register inthe network.The receipt will print the message: “ETHERET LINK SUCCESS!!!” if the register isconnected to another network register.DATE 07/01/2011 FRI TIME 08:37================================RAM ALL CLEAR OK !================================RAM (16M) OKFLASHROM INFORMATIONVERSION : USA 01.024CHECKSUM :B401BOOT/APP :F40B/BFF6APR. 06 2012CLERK 00 000001 00000<strong>SAM4s</strong> <strong>SPS</strong>-<strong>300</strong> Operator's & Programming <strong>Manual</strong> v1.2 Getting Started • 31
<strong>SPS</strong>-345 Memory All Clear1. Turn the power switch located on the right side of the register to the OFF position.2. Turn the control lock to the S position.3. Press and hold the key position where the SUBTOTAL key is located on the defaultkeyboard layout.<strong>SPS</strong>-345Press and hold theSUBTOTAL key positionduring power-up in S mode.4. Continue to hold the appropriate key while turning the power switch to the ONposition. The message “RAM ALL CLEAR" displays.5. Press the upper left key of the keyboard, then the lower left key, then the upper rightkey, and finally press the lower right key.1243<strong>SPS</strong>-345DefaultConfiguration(21 PLU Keys)13<strong>SPS</strong>-345Expanded(63 PLU keys)24Note: In the default configuration, there are 21 double-width PLU keys. Under eachkey, the left-most key is inactive and the right-most key is active. The four-key sequenceshown with the default configuration will set the keyboard in the default 21-PLU keyconfiguration. When the keyboard is expanded, the four-key sequence shown will setthe keyboard in the expanded configuration.If you wish to build a custom configuration, you will want to perform a memory clearfor the expanded configuration, and then assign each key position individually.32 • Getting Started <strong>SAM4s</strong> <strong>SPS</strong>-<strong>300</strong> Operator's & Programming <strong>Manual</strong> v1.2
34 • Getting Started <strong>SAM4s</strong> <strong>SPS</strong>-<strong>300</strong> Operator's & Programming <strong>Manual</strong> v1.2
OperationsOperator Display ScreenThe <strong>SPS</strong>-<strong>300</strong> Electronic Cash Register has a liquid crystal display screen, providing up to 8lines of information with up to 32 characters per line. The display is backlit to provideexcellent visibility, regardless of lighting conditions (the color of the backlight can bechanged through system option programming.) Display screen contrast may be adjusted (thetransaction must be finalized):Press PAGE DOWN in REG mode to increase the intensity of the back light.Press PAGE UP in REG mode to decrease the intensity of the back light.The multiple-line screen lets you keep track of each item, as it is registered. For example:When you are operating the register (in the REG or VOID control lockpositions), you can view a list of items that have been registered, as well asupdated tax and sale subtotals.If an item is multiplied, or repeated, the display lists the quantity of the item sold.(Note: Only quantities up to 99 are displayed in the quantity field.)Up to six items can be displayed simultaneously. When more than six items areregistered, the display lists the last six items sold.You can scroll through long transactions with the PAGE UP and PAGE DOWNkeys. When more than six items have been registered, you can press the PAGEUP key to view items registered earlier in the sale. Press the PAGE DOWN keyto return to a view of the items registered later in the transaction.If you make an error, the screen specifies the type of error.<strong>SAM4s</strong> <strong>SPS</strong>-<strong>300</strong> Operator's & Programming <strong>Manual</strong> v1.2 Operations • 35
Operator Display ExampleUp to six itemscan be displayedsimultaneously.If an item ismultiplied, orrepeated, thedisplay lists thequantity of itemshere.Tax and salesubtotals areupdated witheach newitem entered.REGISTER MODE1 PLU1 T1 1.001 PLU2 2.001 PLU3 3.001 PLU4 4.003 PLU5 15.00TAX 0.06 SBTL 25.061 PLU3 3.001 PLU4 4.001 PLU5 15.001 PLU6 6.001 PLU7 7.001 PLU8 8.00TAX 0.06 SBTL 46.06When more thansix items havebeen registered,you can pressthe PAGE UPkey to view theitems registeredearlier in thesale.When more thansix items areregistered, thedisplay lists thelast six itemssold.36 • Operations <strong>SAM4s</strong> <strong>SPS</strong>-<strong>300</strong> Operator's & Programming <strong>Manual</strong> v1.2
Clerk OperationsThe number of clerks available is determined by memory allocation. (The defaultconfiguration provides 10 clerks.) See "Memory Allocation" in the "Service ModeProgramming" chapter to set the number of clerks as well as other memory variables.You can choose a push button or code entry clerk system:The simplest clerk system is the push button system. This is also the defaultsystem; the register will operate this way unless it is programmed otherwise.You simply press the CLERK key to sign on the clerk. You can operate onlyone clerk per register when you choose this method.You can provide maximum security in a multiple clerk system with the codeentry system. Enter the clerk secret code, and then press the CLERK key tosign on the register.You can sign off a clerk by entering 0, then pressing the CLERK key.Using an optional card reader, you can use employee cards to log on or off.You can also select stay down or pop-up mode for clerk operation:Stay down means that once a clerk is signed on, the same clerk will remainsigned on until the clerk signs off. A stay down clerk system might be usedwhen only one operator uses the register at a time and a different operatorbegins when a work shift is changed.Pop-up means that the clerk is automatically signed off at the end of eachtransaction. To begin a transaction, you must first sign a clerk on. A pop-upclerk system might be used in a department store, where several clerks usethe register during the same shift and clerk sales information is required.See "System Options" in the "Program Mode Programming" chapter to set clerk options.<strong>SAM4s</strong> <strong>SPS</strong>-<strong>300</strong> Operator's & Programming <strong>Manual</strong> v1.2 Operations • 37
Clerk Sign On InstructionsWhen a clerk is not signed on, the message "CLOSED" is shown on the display. Note thatthe current clerk must be signed off before a new clerk can be signed on.Push ButtonCLERK #Code EntryCLERK #Secretclerk #Clerk Sign Off Instructions0CLERK #38 • Operations <strong>SAM4s</strong> <strong>SPS</strong>-<strong>300</strong> Operator's & Programming <strong>Manual</strong> v1.2
Clerk Time KeepingClerk time keeping is a standard feature of the <strong>SPS</strong>-<strong>300</strong>. Clerks can clock in and clock outregardless of whether they are signed on to operate the register. (Clocking in and clockingout are separate functions from signing on or signing off to operate the register.) You mustassign secret clerk codes to clock in or clock out. See "System Options" in the "ProgramMode Programming" chapter to set up your clerk system and see "Clerk Programming" toassign a secret code.In addition:A maximum of 10 clock in/out records are kept for each clerk. It isrecommended that users clear time records on a daily basis.If a clerk forgets to clock in or clock out, or if in or out records need to bemodified, these corrections can be made in the program mode. See "ClerkIn/Out" in the in the "Program Mode Programming" chapter.Clerk times can be read in the X control lock position or reset in the Zcontrol lock position. See the "X-Mode" and/or "Z-Mode” chapters.Using an optional card reader, you can use employee cards to clock in or out.Note: When a function is located on a function look up menu key, you access thefunction by pressing the appropriate function look up key, then pressing the numericdigit corresponding to the function you wish to select. On the default keyboard, theTIME IN/OUT function is function #8 on the function look up 1 menu, so to use theTIME IN/OUT function, you would first press FUNCTION LOOK#1, and then pressthe numeric 8 key.To Clock In/Out:1. Turn the control lock to the REG position.2. Any current transaction must be finalized before clocking in or out.3. Press the TIME IN/OUT key (or, select the TIME IN/OUT function from one ofthe function look up keys.)TIME CLOCK IN/OUTENTER SECRET CODEAND PRESS CASH<strong>SAM4s</strong> <strong>SPS</strong>-<strong>300</strong> Operator's & Programming <strong>Manual</strong> v1.2 Operations • 39
4. Enter the secret code of the clerk that is to clock in, press CASH. The displaywill show the 3 most recent in and out records for the clerk, and the total timeworked.TIME CLERK IN/OUTI 01/15/2011 08:00O 01/15/2011 05:00I 00/00/0000 00:00O 00/00/0000 00:00I 00/00/0000 00:00O 00/00/0000 00:00TIME WORKED: 09:005. Repeat the procedure from step 1 to clock out.6. The printer will print Time In and Time Out records as in the examples below:THANK-YOUCALL AGAINDATE 06/05/2011 SUN TIME 08:33================================CLERK TIME IN================================CLERK 1 01IN : 11/09/2011 08:33CLERK 1 No.000011 00001THANK-YOUCALL AGAINDATE 06/05/2011 SUN TIME 08:33================================CLERK TIME OUT================================CLERK 1 01OUT : 11/09/2011 08:33CLERK 1 No.000011 0000140 • Operations <strong>SAM4s</strong> <strong>SPS</strong>-<strong>300</strong> Operator's & Programming <strong>Manual</strong> v1.2
Item RegistrationsAll registrations are accumulated into PLUs. Keyboard PLUs are fixed keys on the keyboard(like traditional department keys) that access specific PLUs.Depending upon the specific model and the program installed, there will bedifferent number of keyboard PLU keys. Flat keyboard models (<strong>SPS</strong>-320 and<strong>SPS</strong>-340) provide 100 PLUs on the default keyboard. The raised key model(<strong>SPS</strong>-345) provides 21 PLUs keys in the standard configuration. This can beexpanded by your dealer to 63 PLUs. Your specific program may have a more orless PLU keys depending upon how key locations are set.Traditional code-entry PLUs can also be registered by entering the PLU numberand pressing the PLU key.If optional scanning is implemented, the PLU number corresponds to the UPCnumber and a PLU is registered when an item is scanned.As you make item registrations, you can follow your entries by viewing the display.Remember that the sale and tax totals are updated automatically with each entry.Using Function Look-Up KeysBecause the <strong>SPS</strong>-<strong>300</strong> keyboard is programmable, both the selection and location of functionkeys may vary from one register to another.You must pay particular attention to the two function look-up keys, FUNCTION LOOK-UP#1 and FUNCTION LOOK-UP #2. Each of these keys can contain a list of up to 8functions that can be used as if they were located on separate keys. For example: If a function, such as CHARGE1, is located on a function look-up key, as it is onthe default keyboard, then you must access it by pressing the appropriate functionlook-up key, then pressing the digit that represents the function, instead ofpressing a key on the keyboard.If you need to make a numeric entry before a function that is located on afunction look-up key, first press the numeric key or keys, then press the functionlook-up key and press the digit that represents the function you wish to select.<strong>SAM4s</strong> <strong>SPS</strong>-<strong>300</strong> Operator's & Programming <strong>Manual</strong> v1.2 Operations • 41
Open Keyboard PLU Entry1. Enter an amount on the ten-key pad. Donot use the decimal key. For example,for $2.99, enter:2 9 92. Press a PLU key. For example, pressPLU 1:THANK-YOUCALL AGAINDATE 06/05/2011 SUN TIME 08:33PLU1 T1 $2.99TAX1 $0.18TOTAL $3.17CASH $3.17CLERK 1 No.000011 000011Preset Price Keyboard PLUA preset PLU registers the price that was previously programmed for the PLU. See "PLUProgramming" in the "Program Mode Programming" chapter to program preset prices.1. Press a preset PLU key. For example,press PLU 5:THANK-YOUCALL AGAIN5DATE 06/05/2011 SUN TIME 08:33PLU5 $1.29TOTAL $1.29CASH $1.29CLERK 1 No.000011 00001Gallonage PLU Entry1. Enter the total fuel purchase on the tenkeypad. Do not use the decimal key.For example, for $20.00, enter:2 0 0 02. Press a PLU key set to gallonagefunction. For example, press PLU 7:7THANK-YOUCALL AGAINDATE 06/05/2011 SUN TIME 08:33GAL CNT #5.26GAL AMT @ 3.799PLU7 $20.00TOTAL $20.00CASH $20.00CLERK 1 No.000011 0000142 • Operations <strong>SAM4s</strong> <strong>SPS</strong>-<strong>300</strong> Operator's & Programming <strong>Manual</strong> v1.2
Keyboard PLU Repeat EntryOpen or preset price PLUs can be repeated as many times as necessary by pressing the samePLU again. The number of times the item is repeated is shown on the display.1. Enter an amount on the ten-key pad. Donot use the decimal key. For example,for $2.99, enter:2 9 92. Press a PLU key. For example, pressPLU 1:1THANK-YOUCALL AGAINDATE 06/05/2011 SUN TIME 08:33PLU1 T1 $2.99PLU1 T1 $2.99TAX1 $0.36TOTAL $6.34CASH $6.34CLERK 1 No.000011 000013. To register a second item exactly as thefirst, press the PLU key a second time.For example, press PLU 1:1Keyboard PLU MultiplicationWhen several of the same items are to be entered into the same PLU, you can usemultiplication. You can enter a quantity (1 to 999.999) using the X/TIME key. You canmultiply open or preset PLUs.1. Enter the quantity of items beingpurchased; press the X/TIME key. Forexample, enter 4 on the numeric key padand press the X/TIME key:4 X/TIME2. Enter an amount on the ten-key pad. Donot use the decimal key. For example,for $1.99, enter:THANK-YOUCALL AGAINDATE 06/05/2011 SUN TIME 08:334X@1.99PLU1 T1 $7.96TAX1 $0.48TOTAL $8.44CASH $8.44CLERK 1 No.000011 000011 9 93. Press a PLU key. For example, pressPLU 1:1<strong>SAM4s</strong> <strong>SPS</strong>-<strong>300</strong> Operator's & Programming <strong>Manual</strong> v1.2 Operations • 43
Keyboard PLU Multiplication with Decimal PointIf you are selling items by weight, or if you are selling yard goods, you can multiply afraction of a unit.1. Enter the amount with the decimal point;press the X/TIME key. For example, for3.75 pounds of produce, enter:3 . 75 X/TIME2. Enter an amount on the ten-key pad. Donot use the decimal key. For example, ifthe price is $.99 per pound, enter:9 9THANK-YOUCALL AGAINDATE 06/05/2011 SUN TIME 08:333.75X @0.99PLU1 T1 $3.71TAX1 $0.22TOTAL $3.93CASH $3.93CLERK 1 No.000011 000013. Press a PLU key. For example, pressPLU 1:1Split Pricing (Keyboard PLU)When items are priced in groups, i.e. 3 for $1.00, you can enter the quantity purchased and letthe register calculate the correct price.1. Enter the quantity purchased; press theX/TIME key. For example, enter:THANK-YOUCALL AGAIN2 X/TIME2. Enter the quantity of the group price;press the X/TIME key. For example, ifthe items are priced 3 for $1.00, enter:3 X/TIMEDATE 06/05/2011 SUN TIME 08:332@3FOR@1.00PLU1 T1 $0.67TAX1 $0.04TOTAL $0.71CASH $0.71CLERK 1 No.000011 000013. Enter an amount on the ten-key pad. Forexample, if the items are priced 3 for$1.00, enter:1 0 04. Press a PLU key. For example, pressPLU 1:144 • Operations <strong>SAM4s</strong> <strong>SPS</strong>-<strong>300</strong> Operator's & Programming <strong>Manual</strong> v1.2
Single Item Keyboard PLUSingle item PLUs automatically total as a cash sale immediately after registration. Use singleitem PLUs for speedy one item sales. For example if you are selling admission tickets, andall ticket sales are one item sales, you can use an open or preset PLU. After each registration,the drawer will immediately open, and a separate transaction receipt is printed. See "PLUProgramming" in the "Program Mode Programming" chapter to program a single item PLU.1. Press a single item preset PLU key (orenter a price and press a single item openPLU key.) For example, press PLU 6:THANK-YOUCALL AGAINDATE 06/05/2011 SUN TIME 08:336PLU6 $1.29TOTAL $1.29CASH $1.29CLERK 1 No.000011 00001Open Code Entry PLUIf the PRESET status of a PLU is set to N (no), the PLU will operate as an open PLU. See"PLU Programming" in the "Program Mode Programming" chapter to program PLUdescriptors and options.1. Enter the PLU number; press the PLUkey. For example, enter:THANK-YOUCALL AGAIN2 PLU2. The display will prompt "ENTERPRICE". Enter an amount on the ten-keypad. Do not use the decimal key. Forexample, for $2.99, enter:DATE 06/05/2011 SUN TIME 08:33PLU2 T1 $2.99TAX1 $0.18TOTAL $3.17CASH $3.17CLERK 1 No.000011 000012 9 93. Press the PLU key again.PLU<strong>SAM4s</strong> <strong>SPS</strong>-<strong>300</strong> Operator's & Programming <strong>Manual</strong> v1.2 Operations • 45
Preset Price Code Entry PLU1. Enter the PLU number; press the PLUkey. For example, enter:THANK-YOUCALL AGAIN1 PLUDATE 06/05/2011 SUN TIME 08:33PLU1 $1.29TOTAL $1.29CASH $1.29CLERK 1 No.000011 00001Code Entry PLU MultiplicationWhen several of the same items are to be entered into the same PLU, you can usemultiplication. You can enter a quantity (1 to 999.999) using the X/TIME key. You canmultiply open or preset PLUs.1. Enter the quantity of items beingpurchased; press the X/TIME key. Forexample, enter 4 on the numeric key padand press the X/TIME key:4 X/TIME2. Enter the PLU number; press the PLUkey. For example, enter:1 PLUTHANK-YOUCALL AGAINDATE 06/05/2011 SUN TIME 08:334X@1.99PLU1 T1 $7.96TAX1 $0.48TOTAL $8.44CASH $8.44CLERK 1 No.000011 00001Code Entry PLU Multiplication with Decimal PointIf you are selling items by weight, or if you are selling yard goods, you can multiply afraction of a unit.1. Enter the quantity with the decimal point;press the X/TIME key. For example, for3.75 pounds of produce, enter:3 . 75 X/TIME2. Enter the PLU number; press the PLUkey. For example, enter:3 PLUTHANK-YOUCALL AGAINDATE 06/05/2011 SUN TIME 08:333.75X @2.99PLU3 T1 $11.21TAX1 $0.67TOTAL $11.88CASH $11.88CLERK 1 No.000011 0000146 • Operations <strong>SAM4s</strong> <strong>SPS</strong>-<strong>300</strong> Operator's & Programming <strong>Manual</strong> v1.2
Split Pricing Code Entry PLUWhen items are priced in groups, i.e. 3 for $1.00, you can enter the quantity purchased and letthe register calculate the correct price.1. Enter the quantity purchased, press theX/TIME key. For example, enter:THANK-YOUCALL AGAIN2 X/TIME2. Enter the quantity of the group price,press the X/TIME key. For example, ifthe items are priced 3 for $1.00, enter:3 X/TIMEDATE 06/05/2011 SUN TIME 08:332@3FOR@2.99PLU3 T1 $1.99TAX1 $0.12TOTAL $2.11CASH $2.11CLERK 1 No.000011 000013. Enter the PLU number; press the PLUkey. For example, enter:3 PLUPLU Price InquiryYou can check the price of a PLU without registering the PLU by placing a price inquiryfunction key on the keyboard.1. Press the PRICE INQ key. The message"PRICEINQ" displays:PRICEINQScreen Example:HAMBURGER1 : 1.252 : 1.752. Press a preset PLU key, or enter a PLUnumber and press the PLU key:1001 PLU3. The PLU descriptor and price display onthe screen. If the PLU has prices at morethan one price level, all prices will beshown.4. Press CLEAR to remove the priceinformation from the screen, or enter thePLU again to register the item.<strong>SAM4s</strong> <strong>SPS</strong>-<strong>300</strong> Operator's & Programming <strong>Manual</strong> v1.2 Operations • 47
Modifier KeyPressing a modifier key alters the next PLU registered, either by changing the code number ofthe PLU so that a different item is registered, or by just adding the modifier descriptor andregistering the same PLU. See "Modifier 1-5" in the "Program Mode Programming" chapterin order to determine how the modifier key will affect the PLU entry.Modifiers can be:stay down so that registrations will be modified by the same modifier untilanother modifier is selected,pop-up after each item to register, for example large, medium or small softdrink, or pop-up after each transaction to register the same modification for the itemuntil the transaction is finalized.See "System Options" in the "Program Mode Programming" chapter to select stay down/popupstatus.Pop-Up Modifier Key Affecting PLU Code1. Press a preset PLU key. For example,press PLU 1 with a price of $1.00.THANK-YOUCALL AGAIN12. Press the MOD 1 key. The message"MOD1" displays.MOD13. Press the same PLU key. In this examplethe modifier 1 will add the digit 1 to thefourth PLU # position, resulting in theregistration of PLU #1001.DATE 06/05/2011 SUN TIME 08:33PLU1 $1.00MOD1#1001 $1.25PLU2 $1.50TOTAL $3.75CASH $3.75CLERK 1 No.000011 0000114. Press another PLU key. In this examplepress PLU 2 with a price of $1.50.48 • Operations <strong>SAM4s</strong> <strong>SPS</strong>-<strong>300</strong> Operator's & Programming <strong>Manual</strong> v1.2
Price Level KeyIf you choose to use the price level feature, you must allocate memory for each level. See"Memory Allocation" in the "Service Mode Programming" chapter. Note that the defaultprogram selects one price level. You must also place price level keys on the keyboard. See"Function Key Assignment" in the "Program Mode Programming" chapter.If you use this feature, the same PLU can be given up to 5 different preset prices. Price Levelkeys shift the price that is being registered. Levels can be:stay down so that registrations will stay in the selected level until anotherlevel is selected,pop-up after each item to register, for example large, medium or small softdrink,pop-up after each transaction to register the same level until the transactionis finalized.See "System Options" in the "Program Mode Programming" chapter to set how the pricelevel keys operate.Pop-Up Price Level Keys1. Press a preset PLU key. For example,press PLU 1 programmed with a price of$1.00 for price level 1.THANK-YOUCALL AGAINDATE 06/05/2011 SUN TIME 08:3312. Press the LEVEL 2 key. The message"LEVEL 2" displays.LEVEL2PLU1 $1.00PLU1 $2.00PLU2 $1.50TOTAL $4.50CASH $4.50CLERK 1 No.000011 000013. Press the same PLU key. In this examplethe PLU 1 key is programmed with aprice of $2.00 for price level 2.14. Press another PLU key. In this examplepress PLU 2 programmed to registerPLU #2 with price level 1. Note that thelevel 1 price is registered.<strong>SAM4s</strong> <strong>SPS</strong>-<strong>300</strong> Operator's & Programming <strong>Manual</strong> v1.2 Operations • 49
PromoThe PROMO key allows you to account for promotional items, as in "buy two, and get onefree". Pressing this key will remove an item's cost from the sale, and the promo item will not beadded to the PLU sales total, but it is added to the item sales counter. If stock (inventory)reporting is used, the item will be subtracted from inventory.1. Register an item. For example, pressPLU 1 programmed with a price of $1.00for price level 1.THANK-YOUCALL AGAINDATE 06/05/2011 SUN TIME 08:3312. Press the PROMO key. The message"PROMO" displays.PROMOPLU1 $1.00***PROMO***PLU1TOTAL $0.00CASH $0.00CLERK 1 No.000011 000013. Enter the item to be promo'd. You cannot enter an item that has not beenalready registered in this transaction.1WasteThe WASTE key allows control of inventory by accounting for items that must be removed fromstock due to spoilage, breakage or mistakes. Press the WASTE key before entering wasted items,and then press the WASTE key again to finalize. The WASTE key may be under managercontrol, requiring the control lock to be in the X position. The WASTE key is not allowed withina sale.1. Press the WASTE key. The message"WASTE" displays at the top of thescreen.WASTE2. Enter the item or items that are wasted.3. Press the WASTE key again to total thewasted items:THANK-YOUCALL AGAINDATE 06/05/2011 SUN TIME 08:33***WASTE***PLU1 $1.25PLU2 $1.50***WASTE***TOTAL $2.75CLERK 1 No.000011 00001WASTE50 • Operations <strong>SAM4s</strong> <strong>SPS</strong>-<strong>300</strong> Operator's & Programming <strong>Manual</strong> v1.2
Shifting or Exempting TaxShifting TaxPLUs can be programmed to automatically add the appropriate tax or taxes. Occasionally,you may need to sell a normally taxable item without tax, or a normally non-taxable itemwith tax. You can perform this tax shifting with one of the four tax shift keys.1. Press the tax shift for the tax you wish toshift. For example, Press TAX SHIFT1:TAX 1SHIFT2. Enter an amount on the ten-key pad. Donot use the decimal key. For example,for $2.99, enter:THANK-YOUCALL AGAINDATE 06/05/2011 SUN TIME 08:33PLU1 $2.99TOTAL $2.99CASH $2.99CLERK 1 No.000011 000012 9 93. Press a PLU key. For example, pressPLU 1. If PLU 1 is normally taxable bytax 1, the registration will be nontaxable.1<strong>SAM4s</strong> <strong>SPS</strong>-<strong>300</strong> Operator's & Programming <strong>Manual</strong> v1.2 Operations • 51
Exempting TaxOccasionally, you may need to exempt tax from an entire sale. For example, you mightremove all state and local taxes when you sell merchandise to a church or charitableinstitution.You can exempt tax by using the tax shift keys and the SUBTOTAL key, or you can use theTAX EXMT (tax exempt) function key.Exempting Tax with Tax Shift Keys1. Enter an amount on the ten-key pad. Donot use the decimal key. For example,for $2.99, enter:2 9 92. Press a taxable PLU key. For example,press PLU 1:THANK-YOUCALL AGAINDATE 06/05/2011 SUN TIME 08:33PLU1 T1 $2.99TOTAL $2.99CASH $2.99CLERK 1 No.000011 0000113. Press SUBTL:SBTL4. Press the tax shift key (or keys) thatrepresents the tax you wish to shift. Forexample, to exempt tax 1 pressTAX SHIFT 1, then press SUBTL:TAX 1SHIFTSBTL5. The display reflects the transactionwithout added taxes. Total the sale withCASH, CHECK , or a CHARGEfunction. The sale will not include tax 1.52 • Operations <strong>SAM4s</strong> <strong>SPS</strong>-<strong>300</strong> Operator's & Programming <strong>Manual</strong> v1.2
Exempting Tax with the Tax Exempt KeyYou can program the TAX EXMT function to remove all or selected taxes.Note: When a function is located on a function look up menu key, you access thefunction by pressing the appropriate function look up key, then pressing the numericdigit corresponding to the function you wish to select. On the default keyboard, theTAX EXMT function is function #6 on the function look up 1 menu, so to use the TAXEXMT function, you would first press FUNCTION LOOK#1, then press the numeric 6key.1. Enter an amount on the ten-key-pad. Donot use the decimal key. For example,for $2.99, enter:2 9 92. Press a taxable PLU key. For example,press PLU 1:THANK-YOUCALL AGAINDATE 06/05/2011 SUN TIME 08:33PLU1 T1 $2.99TOTAL $2.99CASH $2.99CLERK 1 No.000011 0000113. Press SUBTL:SBTL4. Press the TAX EXMT key (or access theTAX EXMT function from a functionlook up menu key):TAXEXMT5. The display reflects the transactionwithout added taxes. Total the sale withCASH, CHECK, or a CHARGEfunction. The sale will not include tax 1.<strong>SAM4s</strong> <strong>SPS</strong>-<strong>300</strong> Operator's & Programming <strong>Manual</strong> v1.2 Operations • 53
Percent Key OperationsA total of five % functions are available. (%1, %2 & %3) are located on the defaultkeyboard of the <strong>SPS</strong>-320/340. Your keyboard may be different. More or less % keys may belocated on the keyboard, or they may be located on one of the function look up menu keys.)Each function is individually programmable to add or subtract, from an individual item orfrom a sale total, amounts (coupons) or percentages. You can also program the percentagekey taxable or non-taxable, so that sales taxes are calculated on the net, or the gross amountof the item or sale. You can also program preset prices or percentages.The operation examples in this section show the percentage key in a variety ofconfigurations. See "Function Key Programming" in the "Program Mode Programming"chapter to assign a specific function to each percentage key.Preset Percent Discount on an ItemIn this example the%1 function is preset with a rate of 10 %.1. Register the item.2. Press the %1 key:% 13. The discount is automatically subtracted.THANK-YOUCALL AGAINDATE 06/05/2011 SUN TIME 08:33PLU2 $10.00% 1 -10.000%AMOUNT -1.00TOTAL $9.00CASH $9.00CLERK 1 No.000011 00001Enter a Percent Discount on an ItemYou can also operate the percentage functions by entering the percentage of the discount orsurcharge. If necessary, you can enter a fractional percentage up two 3 digits beyond thedecimal (i.e. 99.999%).1. Register the discounted item.2. Enter the percentage. If you are enteringa fraction of a percent, you must use thedecimal key. For example, for one thirdoff enter:3 3 . 3 3 33. Press the %1 key:THANK-YOUCALL AGAINDATE 06/05/2011 SUN TIME 08:33PLU2 $10.00% 1 -33.333%AMOUNT -3.33TOTAL $6.67CASH $6.67CLERK 1 No.000011 00001% 14. The discount is automatically subtracted.54 • Operations <strong>SAM4s</strong> <strong>SPS</strong>-<strong>300</strong> Operator's & Programming <strong>Manual</strong> v1.2
Percent on Sale TotalThe percent can be an open or preset amount. In this example an open percentage surchargeof 15% is applied.1. Register the items you wish to sell.2. Press the SUBTL key:SBTL3. Enter the percentage, press theappropriate discount key. For example,for 15% enter:1 5 %1THANK-YOUCALL AGAINDATE 06/05/2011 SUN TIME 08:33PLU2 $10.00% 1 15.000%AMOUNT $1.50TOTAL $11.50CASH $11.50CLERK 1 No.000011 000014. The surcharge is automatically added.Coupon on Sale (Vendor Coupon)When programmed as "amount", "sale", "open" and "negative", a % key will perform acoupon against a sale (or vendor coupon.) Also, depending upon programming:You may be allowed to enter only one coupon in a sale, after the SUBTL key ispressed,You may be allowed to enter multiple coupons, but you must press the SUBTL keybefore each coupon entry, orYou may be allowed to enter multiple coupons, without first pressing SUBTL.In this example, a coupon may be entered only once, and you must first press SUBTL.1. Register the items you wish to sell.2. Press the SUBTL key:SUBTL3. Enter the amount of the coupon, press theappropriate % key. For example:2 0 0 % 1THANK-YOUCALL AGAINDATE 06/05/2011 SUN TIME 08:33PLU2 $10.00%1 -2.00TOTAL $8.00CASH $8.00CLERK 1 No.000011 000014. The coupon is subtracted.<strong>SAM4s</strong> <strong>SPS</strong>-<strong>300</strong> Operator's & Programming <strong>Manual</strong> v1.2 Operations • 55
Coupon on Item (Store Coupon)When programmed as "amount", "item", "open" and "negative", a % key will perform acoupon against an item (or store coupon.) In this case, you must press the PLU (or enter thePLU number) of the PLU you wish the coupon to be subtracted from.1. Register the items you wish to sell.2. Enter the amount of the coupon, press theappropriate % key. For example:THANK-YOUCALL AGAINDATE 06/05/2011 SUN TIME 08:332 0 0 % 13. Press the PLU key you wish to subtractthe coupon from (or enter the PLUnumber of the PLU you wish to subtractthe coupon from and press PLU.)PLU1 $10.00PLU1 C -2.00TOTAL $8.00CASH $8.00CLERK 1 No.000011 0000114. The coupon is automatically subtracted.56 • Operations <strong>SAM4s</strong> <strong>SPS</strong>-<strong>300</strong> Operator's & Programming <strong>Manual</strong> v1.2
Return Merchandise RegistrationsIf you wish to return or refund an item, press MDSE RETURN, then re-enter any item. Youcan return merchandise as part of a sale, or you can return merchandise as a separatetransaction and return cash to the customer.Note: When a function is located on a function look up menu key, you access thefunction by pressing the appropriate function look up key, then pressing the numericdigit corresponding to the function you wish to select. On the default keyboard, theRETURN function is function #2 on the function look up 1 menu, so to use theRETURN function you would first press FUNCTION LOOK#1, then press the numeric2 key.1. Press RETURN:RETURN2. Enter the price of the item you wish toreturn, then press the PLU key where itwas registered originally.29 93. Total the sale with CASH, CHECK, or aCHARGE function.2THANK-YOUCALL AGAINDATE 06/05/2011 SUN TIME 08:33RETURN *************************PLU2 T1 -2.99TAX1 AMT -0.18TOTAL -3.17CASH -3.17CLERK 1 No.000011 00001<strong>SAM4s</strong> <strong>SPS</strong>-<strong>300</strong> Operator's & Programming <strong>Manual</strong> v1.2 Operations • 57
Voids and CorrectionsError Correction (Void Last Item)This function corrects the last item entered.1. Register the item you wish to sell.2. Press the ERROR CORR key:ERRORCORRTHANK-YOUCALL AGAINDATE 06/05/2011 SUN TIME 08:33PLU1 T1 $2 29PLU2 $1.29ERR CORR -----------------------PLU2 -1.29TAX1 AMT $0.14TOTAL $2.43CASH $2.43CLERK 1 No.000011 00001Void Previous ItemThis function allows you to correct an item registered previously in a transaction.1. Register an item. Then register a seconditem.2. To correct the first item, pressVOID:VOID3. Enter the price of the first item; thenpress the PLU key where it wasregistered originally.12 92THANK-YOUCALL AGAINDATE 06/05/2011 SUN TIME 08:33PLU2 $1.29PLU1 T1 $2.29VOID ---------------------------PLU2 -1.29TAX1 AMT $0.14TOTAL $2.43CASH $2.43CLERK 1 No.000011 0000158 • Operations <strong>SAM4s</strong> <strong>SPS</strong>-<strong>300</strong> Operator's & Programming <strong>Manual</strong> v1.2
CancelThe CANCEL key allows you to stop any transaction. Anything registered within thetransaction before the CANCEL key is pressed is automatically corrected. The CANCELkey can be inactivated through programming, see "Function Key Programming" in the"Program Mode Programming" chapter, or the key can be programmed to require managercontrol.Note: When a function is located on a function look up menu key, you access thefunction by pressing the appropriate function look up key, then pressing the numericdigit corresponding to the function you wish to select. On the default keyboard, theCANCEL function is function #1 on the function look up 1 menu, so to use the CANCELfunction you would first press FUNCTION LOOK#1, then press the numeric 1 key.1. Register the items you wish to sell.2. Press the CANCEL key (or access theCANCEL function from the functionlook up menu.)CANCELTHANK-YOUCALL AGAINDATE 06/05/2011 SUN TIME 08:33PLU1 T1 $2.29PLU2 -0.50CANCEL *************************CLERK 1 No.000011 00001Void Position OperationsYou can use the VOID control lock position to correct any complete transaction. To correctany transaction:1. Turn the control lock to the VOIDposition.2. Enter the transaction you wish to correctexactly as it was entered originally in theREG control lock position. You canenter discounts, voids, returns, taxexemptions or any other function.3. All totals and counters are corrected as ifthe original transaction did not takeplace.THANK-YOUCALL AGAINDATE 06/05/2011 SUN TIME 08:33VOID MODE **********************PLU1 T1 -2.29PLU2 -1.00TAX1 AMT -0.14TOTAL -3.43CASH -3.43CLERK 1 No.000011 00001<strong>SAM4s</strong> <strong>SPS</strong>-<strong>300</strong> Operator's & Programming <strong>Manual</strong> v1.2 Operations • 59
No Sale OperationsOpen DrawerThe #/NO SALE key will open the cash drawer when you have not already started atransaction. The no sale function can be disabled or placed under manager control throughprogramming, see "Function Key Programming" in the "Program Mode Programming"chapter.1. Press #/NS:#/NS2. The drawer will open and the receipt willprint as in the example on the right.THANK-YOUCALL AGAINDATE 06/05/2011 SUN TIME 08:33NO SALE ------------------------CLERK 1 No.000011 00001Non Add NumberYou can also use the #/NO SALE key to print any number (up to 9 digits) on the printerpaper. You can enter the number any time during a transaction. For example, if you wish torecord a checking account number, enter the number and press the #/NO SALE key beforetotaling the sale with the CHECK key.1. Register the items you wish to sell.2. Enter the number you wish to record, forexample enter:THANK-YOUCALL AGAINDATE 06/05/2011 SUN TIME 08:331 2 3 43. Press #/NS:#/NSPLU1 T1 $2.99NON-ADD# 1234TAX1 AMT $0.18TOTAL $3.17CHECK $3.17CLERK 1 No.000011 000014. Press CHECK:CHECK60 • Operations <strong>SAM4s</strong> <strong>SPS</strong>-<strong>300</strong> Operator's & Programming <strong>Manual</strong> v1.2
Received On Account OperationsYou can use one of the received on account functions (RA1-RA3) to accept cash or checksinto the cash drawer when you are not actually selling merchandise. For example, usereceived on account to accept payments for previously sold merchandise or record loans tothe cash drawer.Note: When a function is located on a function look up menu key, you access thefunction by pressing the appropriate function look up key, then pressing the numericdigit corresponding to the function you wish to select. On the default keyboard, theRA1 function is function #3 on the function look up 1 menu, so to use the RA1 function,you would first press FUNCTION LOOK#1, then press the numeric 3 key.1. Press one of the received on accountkeys (RA1-RA3) or select one of thereceived on account functions from afunction look up menu:RA2. Enter the amount of cash received, pressCASH.100 0CASHTHANK-YOUCALL AGAINDATE 06/05/2011 SUN TIME 08:33RA1CASH $10.00CHECK $10.00CHARGE1 $10.00RA1 $30.00CLERK 1 No.000011 000013. Enter the check amount received, pressCHECK.100 0CHECK4. Enter the charge amount received, pressCHARGE1, (or press the FUNCTIONLOOKUP key and press the numerickey representing the appropriate chargefunction.)100 0CHARGE15. You can continue to itemize receipts, oryou can finalize by pressing or selectingthe same received on account key.RA<strong>SAM4s</strong> <strong>SPS</strong>-<strong>300</strong> Operator's & Programming <strong>Manual</strong> v1.2 Operations • 61
Paid Out OperationsYou can use the PAID OUT function to track cash or checks paid out or to record loans fromthe cash drawer.Note: When a function is located on a function look up menu key, you access thefunction by pressing the appropriate function look up key, then pressing the numericdigit corresponding to the function you wish to select. On the default keyboard, thePO1 function is function #4 on the function look up 1 menu, so to use the PO1 function,you would first press FUNCTION LOOK#1, then press the numeric 4 key.1. Press one of the paid out keys (PO1-PO3) or select one of the paid outfunctions from a function look up menu:PO2. Enter the amount of cash paid out, pressCASH.100 0CASHTHANK-YOUCALL AGAINDATE 06/05/2011 SUN TIME 08:33PO1CASH -10.00CHECK -10.00PO1 -20.00CLERK 1 No.000011 000013. Enter the check amount paid out, pressCHECK.100 0CHECK4. You can continue to itemize paid outs, oryou can finalize by pressing or selectingthe same paid out key.POSubtotaling a Sale1. Register the items you wish to sell.2. Press SUBTL. The subtotal will displaywith the message "Sub" indicated on therear display.SUBTLThe subtotal can be printed if the systemoption is set. See "Print OptionProgramming" in the "Program ModeProgramming" chapter.62 • Operations <strong>SAM4s</strong> <strong>SPS</strong>-<strong>300</strong> Operator's & Programming <strong>Manual</strong> v1.2
Eat In/Take Out/Drive Thru SalesDifferent types of sales, such as "Eat In", "Take Out" and "Drive Thru" can be categorized byplacing separate keys on the keyboard. EAT IN, TAKE OUT, and DRIVE THRU keysfunction as subtotal keys. You can force the operator to press one of the keys beforetendering. See "System Option Programming" in the "Program Mode Programming" chapter.Separate totals will be maintained on the financial report to detail sales counts and amountsfor each key.Note: EAT IN, TAKE OUT, and DRIVE THRU can be programmed to exempt taxes toaccommodate area where food is taxed differently.Totaling and TenderingThere are ten tender functions available to categorize sales. CASH and CHECK areindividual keys on the keyboard. The eight charge functions CHARGE 1 - CHARGE 8 areavailable on the FUNCTION LOOK#2 key on the default keyboard.Depending upon how your register is programmed you might find charge keys as individualfunction keys on the keyboard, or listed on one of the function look up keys.Totaling a Cash Sale1. Register the items you wish to sell.2. To total a cash sale, press CASH:CASH3. The display will indicate the total amountof the cash sale.THANK-YOUCALL AGAINDATE 06/05/2011 SUN TIME 08:33PLU2 $7.96TOTAL $7.96CASH $7.96CLERK 1 No.000011 00001Totaling a Check Sale1. Register the items you wish to sell.2. To total a cash sale, press CHECK:CHECK3. The display will indicate the total amountof the cash sale.THANK-YOUCALL AGAINDATE 06/05/2011 SUN TIME 08:33PLU2 $7.96TOTAL $7.96CHECK $7.96CLERK 1 No.000011 00001<strong>SAM4s</strong> <strong>SPS</strong>-<strong>300</strong> Operator's & Programming <strong>Manual</strong> v1.2 Operations • 63
Tendering a Cash Sale1. Register the items you wish to sell.2. Enter the amount tendered by thecustomer. For example, for $20.00 enter:THANK-YOUCALL AGAINDATE 06/05/2011 SUN TIME 08:3323. Press CASH:CASH0 0 04. The display will indicate the total amountof the cash tendered and the change due,if any.PLU1 T1 $2.99PLU1 T1 $2.994X $1.99PLU2 $7.96TAX1 $0.36TOTAL $14.30CASH $20.00CHANGE $5.70CLERK 1 No.000011 00001Tendering a Check Sale1. Register the items you wish to sell.2. Enter the amount tendered by thecustomer. For example, for $20.00 enter:THANK-YOUCALL AGAINDATE 06/05/2011 SUN TIME 08:3320 0 03. Press CHECK:CHECK4. The display will indicate the total amountof the check tendered and the changedue, if any.PLU1 T1 $2.99PLU1 T1 $2.994X $1.99PLU2 $7.96TAX1 $0.36TOTAL $14.30CHECK $20.00CHANGE $5.70CLERK 1 No.000011 0000164 • Operations <strong>SAM4s</strong> <strong>SPS</strong>-<strong>300</strong> Operator's & Programming <strong>Manual</strong> v1.2
Totaling a Charge SaleUse the charge keys to track charge or credit card sales. See "Function Key Programming" inthe "Program Mode Programming" chapter to change the descriptors for the charge tenderfunctions. For example, you can use CHARGE 1 to track Visa card sales. The descriptor"VISA" will display on the function look up menu and print on the printer. You can also settendering options for the charge keys, i.e. whether to allow over tendering or to enforcetendering.Note: When a function is located on a function look up menu key, you access thefunction by pressing the appropriate function look up key, then pressing the numericdigit corresponding to the function you wish to select. On the default keyboard, theCHARGE 1 function is function #1 on the function look up 2 menu, so to use theCHARGE 1 function, you would first press FUNCTION LOOK#2, then press thenumeric 1 key.1. Register the items you wish to sell.2. Press one of the charge key if it is locatedon the keyboard:CHARGE1or, if the charge function is located on afunction look up key pressFUNCTION LOOK2, then press thedigit representing the charge functionyou are using:THANK-YOUCALL AGAINDATE 06/05/2011 SUN TIME 08:33PLU1 T1 $2.99PLU1 T1 $2.994X $1.99PLU2 $7.96TAX1 $0.36TOTAL $14.30CHARGE1 $14.30CLERK 1 No.000011 00001FUNCLOOK#21<strong>SAM4s</strong> <strong>SPS</strong>-<strong>300</strong> Operator's & Programming <strong>Manual</strong> v1.2 Operations • 65
Tendering a Charge SaleTendering a charge sale may or may not be allowed. See "Function Key Programming" in the"Program Mode Programming" chapter to set tendering options for the charge keys, i.e.whether to allow over tendering or to enforce tendering.1. Register the items you wish to sell.2. Enter the amount of the charge and pressone of the charge keys if it is located onthe keyboard:2 0 0 0 CHARGE1or, if the charge function is located on afunction look up key, enter the amount ofthe charge:200 0THANK-YOUCALL AGAINDATE 06/05/2011 SUN TIME 08:33PLU1 T1 $2.99PLU1 T1 $2.994X $1.99PLU2 $7.96TAX1 $0.36TOTAL $14.30CHARGE1 $20.00CHANGE $5.70CLERK 1 No.000011 00001Press FUNCTION LOOK2, then pressthe digit representing the charge functionyou are using:FUNCLOOK#2166 • Operations <strong>SAM4s</strong> <strong>SPS</strong>-<strong>300</strong> Operator's & Programming <strong>Manual</strong> v1.2
Check CashingCheck cashing means exchanging cash for a check. If you wish to cash checks, you mustplace a CHKCASH key on the keyboard. See "Function Key Assignment" in the "ProgramMode Programming" chapter.1. Enter the amount of the check tenderedby the customer. For example, for$20.00 enter:THANK-YOUCALL AGAINDATE 06/05/2011 SUN TIME 08:3320 0 02. Press CHKCASH:CHKCASH***CHKCASH***CHECK $20.00CASH -20.00CLERK 1 No.000011 000013. The display will indicate the amount ofthe check and the cash change.Split TenderSplit tendering is paying for one transaction by more than one payment method. Forexample, a $20.00 sale could be split so $10.00 is paid in cash, and the remaining $10.00 ispaid by a check. If necessary, you can make several different payments.Note: By default, CASH and/or CHECK under tenders are allowed. This can bechanged through function key programming.1. Register the items you wish to sell.2. Enter the amount of cash tendered by thecustomer. For example, enter $10.00 andpress CASH:1 00 0CASH3. The display will indicate the $10.00 cashtender and the $10.00 total still due.4. Enter the amount of check tendered bythe customer. For example, enter $10.00and press CHECK:THANK-YOUCALL AGAINDATE 06/05/2011 SUN TIME 08:33PLU2 $20 00TOTAL $20.00CASH $10.00TOTAL $10.00CHECK $10.00CLERK 1 No.000011 000011 00 0CHECK5. When the total tendered equals orexceeds the total due, the receipt willprint and the transaction is complete.<strong>SAM4s</strong> <strong>SPS</strong>-<strong>300</strong> Operator's & Programming <strong>Manual</strong> v1.2 Operations • 67
Post TenderPost tendering means computing change after the sale has been totaled and the drawer isopen. This feature is useful when a customer changes the amount of the tender or when a"quick change artist" confuses a clerk. Normally, this function is not allowed. If you wish toallow post tendering, you must set the appropriate system option. See "System OptionProgramming" in the "Program Mode Programming" chapter. (A separate system optiondetermines whether the drawer opens on the post tender.)1. Register the items you wish to sell.2. Press CASH:CASH3. The display will indicate the total of thecash sale.4. Enter the amount of the new tender, PressCASH:THANK-YOUCALL AGAINDATE 06/05/2011 SUN TIME 08:33PLU1 T1 $2.00TAX1 $0.12CASH $2.12CLERK 1 No.000011 000012 00 0CASH5. The display will indicate the change due.Receipt On/Off and Receipt on RequestWhen a receipt is not normally issued, you can turn the receipt function off. See "StopRegister Printing" in the "X-Mode" chapter.If the receipt is off, you can still issue a receipt after the sale has been completed.Printing a Receipt after the Sale After the sale has been totaled, but before the next transaction is started, pressCASH:CASH68 • Operations <strong>SAM4s</strong> <strong>SPS</strong>-<strong>300</strong> Operator's & Programming <strong>Manual</strong> v1.2
Food Stamp SalesThe <strong>SPS</strong>-<strong>300</strong> is capable of sorting food stamp and non-food stamp eligible items. If acustomer chooses to pay by food stamps, the eligible total can be subtotaled and food stamppayments accepted. NOTE: Although integrated electronic payments can be deployed forcredit, debit and gift transactions, integrated EBT transactions cannot be processed by the<strong>SPS</strong>-<strong>300</strong> at this time. Consult with your CRS representative for more information.If you choose to use this feature, you must:Locate the appropriate function keys on the keyboard, F/S SHIFT, F/S SUB,and F/S TEND, and then set the appropriate options for the F/S TEND key. Determine and set the food stamp status for each PLU item or category.Refer to the "Service Mode Programming" and the "Program Mode Programming" chaptersto make the appropriate settings.1. Register the items you wish to sell. Youdo not need to sort food stamp eligible ornon-eligible items. The <strong>SPS</strong>-<strong>300</strong> willmaintain a subtotal of eligible itemsbased upon the pre-programmed statusfor each PLU.If you wish to register a normally foodstamp eligible item into a PLUprogrammed as non-food stamp eligible,press the F/S SHIFT key beforeregistering the item. In the same manner,you can register non-food stamp itemsinto food stamp eligible PLUs.2. If a customer wishes to pay with foodstamps, press the F/S SUB key to displaythe food stamp eligible total:THANK-YOUCALL AGAINDATE 06/05/2011 SUN TIME 08:33PLU1 F $1.29PLU2 $4.29TOTAL $5.58F/S TOTAL $1.29F/S TEND $20.00F/S CRT AMT $0.71TOTAL $3.58CASH $5.00CHANGE $1.42F/S/ CHANGE $18.00CLERK 1 No.000011 00001F/S SUB3. Enter the amount of food stampstendered by the customer. For example,for $20.00 enter:2 0 0 0 F/STEND4. The remaining amount due displays.(Note, depending upon programming,change less than $1 can be applied to thebalance.)5. Total or tender the remaining balance.<strong>SAM4s</strong> <strong>SPS</strong>-<strong>300</strong> Operator's & Programming <strong>Manual</strong> v1.2 Operations • 69
Currency ConversionIf you normally accept currency from neighboring nations, you can program the <strong>SPS</strong>-<strong>300</strong> toconvert the subtotal of a sale to the equivalent cost in the foreign currency. You can set up tofour separate conversion functions for different foreign currencies. To do this, you need toprogram the conversion factor. For example, if the US dollar (home currency) is worth1.3720 Canadian dollars (foreign currency), the conversion factor is 1.3720. See "FunctionKey Programming" in the "Program Mode Programming" chapter to set a conversion factor.Note: When a function is located on a function look up menu key, you access thefunction by pressing the appropriate function look up key, then pressing the numericdigit corresponding to the function you wish to select. On the default keyboard, theCONV1 function is function #7 on the function look up 1 menu, so to use the CONV1function, you would first press FUNCTION LOOK#1, then press the numeric 7 key.1. Register the items you wish to sell.2. Press the CONV1 key if it is located onthe keyboard:THANK-YOUCALL AGAINDATE 06/05/2011 SUN TIME 08:33CONV1or, if the conversion is located on afunction look up key press FUNCTIONLOOK2, then press the digitrepresenting the CONV1 function:FUNCLOOK#273. The amount due in foreign currency isdisplayed.4. Enter the amount of the foreign currencytender, Press CASH:PLU1 T1 $2.00TAX1 $0.12TOTAL $2.12CONV 1 ¥2.90CHANGE RATE@1.3720HOME AMT. $10.00CHANGE $5.17CLERK 1 No.000011 00001The currency symbol youprogram will display here. See"Print Option Programming" inthe "Program ModeProgramming" chapter.1 00 0CASH5. The display will indicate the amount offoreign currency tendered and display$5.17 change due. The change due iscomputed in home currency!70 • Operations <strong>SAM4s</strong> <strong>SPS</strong>-<strong>300</strong> Operator's & Programming <strong>Manual</strong> v1.2
Check Tracking OperationsImportant Note: Check tracking operations must take place on the same register. If anIRC register system is implemented, you cannot access the same checks from anyregister within the system. You must open, add to, and/or pay the check at the sameregister.OverviewThe <strong>SPS</strong>-<strong>300</strong> can employ a manual previous balance, hard check, or soft check system. (Youmust select hard or soft check posting in memory allocation programming - the defaultselection is soft.)OptionsIf manual previous balance is selected, the check balance is not saved in memoryand is input manually by the operator (use the PBAL key).If a hard check system is selected, only the previous balance is maintained inmemory.If a soft check system is selected, the check detail is kept in memory until thecheck is paid. (The maximum size of the soft check is set in memory allocationprogramming.)For hard or soft check operations, the following tracking options are available:Tracking by manually entering the check number. (The number of digits in thecheck number may be set from 0-9, with zero meaning no fixed length.)Tracking by automatically assigning a check number. The starting check isalways #1.Enforcing entry of a table number, where a check number is also assigned, allowsthe check balance to be recalled by either the check or table number. Multiplechecks may be assigned at the same table. (If there are multiple checks assignedto the same table, an attempt to recall by table number will recall the check withthe lowest number.)The check number can be scanned from a printed bar code. For example, a barcode can be printed on a customer identification badge.For soft check operations, the following option is available:Consolidation of like items can be selected for guest check printing. Forexample, if three rounds of drinks are served, the check will print "3 TAPBEER" rather than "1 TAP BEER" three times.<strong>SAM4s</strong> <strong>SPS</strong>-<strong>300</strong> Operator's & Programming <strong>Manual</strong> v1.2 Operations • 71
Function KeysAlthough none of the functions necessary for check tracking operations appear on the defaultkeyboard, any or all of the following functions can be located on the keyboard:CHECK #GUESTP/BALSERVICETABLEPRINT CHECKTIPThe CHECK # key is used to begin a new, or access an existingbalance (hard check) or itemized bill (soft check.)Check track numbers that are entered manually may be set at a fixedlength of one to nine digits. Check track numbers assignedautomatically will begin with #1.Existing checks are accessed by entering the check track number andpressing the CHECK# key. In a drive thru system, simply pressingthe PBAL key will recall the oldest open balance (lowest check track#).Use to enter the count of guests served as part of a guest check. Theentry of a guest count can be enforced when opening a guest check, orfor all transactions.Use to enter the amount of an outstanding balance. The P/BAL keywill take the recall function if the drive thru feature is enabled inCHECK # key programming.Use to temporarily finalize Previous Balance or check trackingtransactions. (If you are using a hard check system, you must programthe SERVICE key for the port where the slip printer is connected.)You can enforce the entry of a table number for guest checktransactions, or for all transactions. If you are tracking guest checkbalances, the balance can be recalled either by entering the checknumber or the table number.Use to print a guest check. The check can be printed on an optional(RS-232C) printer, or can be printed on the receipt printer. The PRINTCHECK key can be set to automatically service the check.The TIP key allows a gratuity to be added to a guest check beforepayment. The tip amount is deducted from the Cash-in-Draweramount for the Clerk/Cashier closing the guest check.The TIP key may be programmed as either a percentage or amount.If programmed as a percentage, tax programming defines whetherthe percentage is calculated on the net (taxable = no) amount, or theamount after taxes.See "Function Key Assignment" in the "Service Mode Programming" chapter to place thefunctions necessary for your application. See "Function Key Programming" in the "ProgramMode Programming" chapter to set the options for each function.72 • Operations <strong>SAM4s</strong> <strong>SPS</strong>-<strong>300</strong> Operator's & Programming <strong>Manual</strong> v1.2
Posting Balances <strong>Manual</strong>lyOpening a Check1. Enter the previous balance (if this is thefirst posting, enter 0) press the PBALkey:0PBAL2. Register the items you wish to sell.3. To total the posting, press SERVICE:THANK-YOUCALL AGAINDATE 06/05/2011 SUN TIME 08:33PBAL $0.00PLU2 $1.00SERVICE $1.00BFWD $1.00CLERK 1 No.000011 00001SERVICE4. Place a slip in an optional slip printer,press the PRINT CHECK key.Adding to a Check1. Enter the previous balance, press thePBAL key:THANK-YOUCALL AGAIN1 00PBALDATE 06/05/2011 SUN TIME 08:332. Register the next items you wish to sell.3. To total the posting, press SERVICE:SERVICEPBAL $1.00PLU3 $2.00SERVICE $2.00BFWD $3.00CLERK 1 No.000012 000014. Place a slip in an optional slip printer,press the PRINT CHECK key.<strong>SAM4s</strong> <strong>SPS</strong>-<strong>300</strong> Operator's & Programming <strong>Manual</strong> v1.2 Operations • 73
Paying a <strong>Manual</strong> Balance1. Enter the previous balance, press thePBAL key:THANK-YOUCALL AGAIN3 00PBALDATE 06/05/2011 SUN TIME 08:332. If necessary, add additional items. If youwish to add a tip, press SUBTL, thenenter the tip amount and press the TIPkey:SBTLPBAL $3.00TIP $0.50CHECKS PAID $3.50CASH $10.00CHANGE $6.50CLERK 1 No.000013 0000150TIP3. Pay the balance as you would normallytender a transaction, with CASH,CHECK, or one of the CHARGEfunctions. If the tender is greater thanthe balance due, change is displayed:1 00 0CASH4. Place a slip in an optional slip printer,press the PRINT CHECK key.74 • Operations <strong>SAM4s</strong> <strong>SPS</strong>-<strong>300</strong> Operator's & Programming <strong>Manual</strong> v1.2
Soft CheckOpening a Soft Check1. Enter the number of the guest check,press the CHECK # key:Receipt Example:THANK-YOUCALL AGAIN1 23CHECK#DATE 06/05/2011 SUN TIME 08:33or, press the CHECK # key toautomatically assign a check:CHECK#2. If required, enter the table number andpress the TABLE key:CHECK # #123PBAL $0.00TABLE #3GUEST #2CHICKEN $7.00STEAK $10.00SERVICE $17.00BFWD $17.00CLERK 1 No.000011 000013TABLE3. If required, enter the number of guestsand press the GUEST key:2GUEST4. Register the items you wish to sell.5. To total the posting, press SERVICE:SERVICENote: If a table number entry is required for all guest checks, and checks are assignedby register, the check will be assigned by the register when the table # is entered.<strong>SAM4s</strong> <strong>SPS</strong>-<strong>300</strong> Operator's & Programming <strong>Manual</strong> v1.2 Operations • 75
Adding to a Soft Check1. Enter the number of the guest check,press the CHECK # key:Receipt Example:THANK-YOUCALL AGAIN1 23CHECK#DATE 06/05/2011 SUN TIME 08:33or, if you entered a table number, enterthe table number and press the TABLEkey:3TABLE2. Register the next items you wish to sell.3. To total the posting, press SERVICE:CHECK # #123PBAL $17.00TABLE #3GARLIC BREAD $2.00SERVICE $2.00BFWD $19.00CLERK 1 No.000012 00001SERVICEPrinting a Soft Check1. Enter the number of the guest check,press the CHECK # key:Sample of soft check printed on thereceipt:1 23CHECK#THANK-YOUCALL AGAINor, if you entered a table number, enterthe table number and press the TABLEkey:3TABLE2. Press PRINT CHECK to print thecomplete check. If programmed to do so,the PRINT CHECK key willautomatically service the check:PRINTCHECKDATE 06/05/2011 SUN TIME 08:33CHECK # #123PBAL $19.00TABLE #3CHICKEN $7.00STEAK $10.00GARLIC BREAD $2.00SERVICE $0.00BFWD $19.00CHK # : 1CLERK 1 No.000012 00001The number oftimes each checkhas been printedis counted andprinted on thecheck76 • Operations <strong>SAM4s</strong> <strong>SPS</strong>-<strong>300</strong> Operator's & Programming <strong>Manual</strong> v1.2
Paying a Soft Check1. Enter the number of the guest check,press the CHECK # key:1 23CHECK#or, if you entered a table number, enterthe table number and press the TABLEkey:3TABLE2. If necessary, add additional items. If youwish to add a tip, press SUBTL, thenenter the tip amount and press the TIPkey:Sample of soft check printed on thereceipt:THANK-YOUCALL AGAINDATE 06/05/2011 SUN TIME 08:33CHECK # #123PBAL $19.00TABLE #3TIP $3.00CHECKS PAID $22.00CASH $25.00CHANGE $3.00CHK # : 2CLERK 1 No.000013 00001SBTL<strong>300</strong>TIP3. Pay the balance as you would normallytender a transaction, with CASH,CHECK, or one of the CHARGEfunctions. If the tender is greater thanthe balance due, change is displayed.2 50 0CASH<strong>SAM4s</strong> <strong>SPS</strong>-<strong>300</strong> Operator's & Programming <strong>Manual</strong> v1.2 Operations • 77
Hard CheckOpening a Hard Check1. Enter the number of the guest check,press the CHECK # key:Receipt Example:THANK-YOUCALL AGAIN1 23CHECK#DATE 06/05/2011 SUN TIME 08:33or, press the CHECK # key toautomatically assign a check:CHECK#2. If required, enter the table number andpress the TABLE key:CHECK # #123PBAL $0.00TABLE #3GUEST #2CHICKEN $7.00STEAK $10.00SERVICE $17.00BFWD $17.00CLERK 1 No.000011 000013TABLE3. If required, enter the number of guestsand press the GUEST key:2GUEST4. Register the items you wish to sell.5. Place a slip in an optional slip printer, thecheck will print automatically when youpress SERVICE:SERVICE78 • Operations <strong>SAM4s</strong> <strong>SPS</strong>-<strong>300</strong> Operator's & Programming <strong>Manual</strong> v1.2
Adding to a Hard Check1. Enter the number of the guest check,press the CHECK # key:Receipt Example:THANK-YOUCALL AGAIN1 23CHECK#DATE 06/05/2011 SUN TIME 08:33or, if you entered a table number, enterthe table number and press the TABLEkey:3TABLE2. Register the next items you wish to sell.3. To total the posting, press SERVICE:CHECK # #123PBAL $17.00TABLE #3GARLIC BREAD $2.00SERVICE $2.00BFWD $19.00CLERK 1 No.000012 00001SERVICEPaying a Hard Check1. Enter the number of the guest check,press the CHECK # key:1 23CHECK#or, if you entered a table number, enterthe table number and press the TABLEkey:3TABLE2. If necessary, add additional items. If youwish to add a tip, press SUBTL, thenenter the tip amount and press the TIPkey:SBTL<strong>300</strong>TIP3. Pay the balance as you would normallytender a transaction, with CASH,CHECK, or one of the CHARGEfunctions. If the tender is greater thanthe balance due, change is displayed.Sample of Hard Check postings printed on anoptional printer:DATE 12/01/2011 WEDCHECK # #4PBAL $0.00STEAK T1 $15.50LOBSTER T1 $19.50WINE T1 $2.50WINE T1 $2.50TAX1 $3.60SERVICE $43.60BFWD 43.60No.000017 REG 01 KELLY TIME 09:15PBAL $43.602X@2.50WINE T1 $5.00TAX1 $4.05SERVICE $5.45BFWD 49.05No.000019 REG 01 KELLY TIME 09:47PBAL $49.052X@2.50WINE T1 $5.00TAX1 $4.50CHECKS PAID $54.50TOTAL $54.50CASH $54.50No.000021 REG 01 KELLY TIME 10:162 50 0CASH<strong>SAM4s</strong> <strong>SPS</strong>-<strong>300</strong> Operator's & Programming <strong>Manual</strong> v1.2 Operations • 79
Fast Food Drive ThruFor fast food drive thru windows, the <strong>SPS</strong>-<strong>300</strong> has the capability of storing orders when theyare taken, and then recalling the next order automatically at the payment window. (Note:Drive thru storing & recalling must be done at the same register.)The PBAL function becomes a recall function when the drive thru feature isenabled in the CHECK # function key program. Press the PBAL key to recallthe lowest tracking number balance.Orders are stored by first pressing the CHECK # key to automatically assign thenext tracking number, then pressing SERVICE. (A macro sequence key couldbe created to execute both functions sequentially by pressing the MACRO key.)See "Function Key Programming" in the "Program Mode Programming" chapter.Taking a Drive Thru Order1. Register the items you wish to sell.2. Press the CHECK # key to begin anautomatically assigned check:CHECK#3. To store the posting, press SERVICE:SERVICEReceipt Example:THANK-YOUCALL AGAINDATE 06/05/2011 SUN TIME 08:33HAMBURGER $2.00FRIES $1.00CHECK # #3PBAL $0.00SERVICE $3.00BFWD $3.00CLERK 1 No.000011 00001Paying a Drive Thru Order1. Press the PBAL key:PBAL2. If necessary, add additional items,register discounts or coupons.3. Pay the balance as you would normallytender a transaction, with CASH,CHECK, or one of the CHARGEfunctions. If the tender is greater thanthe balance due, change is displayed.Receipt Example:THANK-YOUCALL AGAINDATE 06/05/2011 SUN TIME 08:33CHECK # #3PBAL $3.00CHECKS PAID $3.00TOTAL $3.00CASH $5.00CHANGE $2.00CLERK 1 No.000012 0000150 0CASH80 • Operations <strong>SAM4s</strong> <strong>SPS</strong>-<strong>300</strong> Operator's & Programming <strong>Manual</strong> v1.2
Charge Posting OperationsThe <strong>SPS</strong>-<strong>300</strong> <strong>Series</strong> check tracking system can be used to post charges and payments to houseaccounts. This posting system is ideal for small resorts, camgrounds, motels/hotels or retailstores that accept house charges.Charge posting features include:<strong>Manual</strong> balance posting, soft check posting, or hard check posting. For houseaccount posting, the hard check posting method with an optional slip printer isrecommended. (Because house accounts are usually maintained over a period oftime, the soft check system may not have the memory capacity to track the ongoingaccount activity.)Payments can be posted before charges are posted and credit balances can be carriedforward.Overpayments can be issued as change or carried forward.Managers can control access to new account numbers or closing accounts.Zero balance accounts can remain active.The total of outstanding accounts prints at the end of the open check report and alsoon the Financial report. (The total is not reset when the financial report is cleared.)The total of house account charges (Service Total) and payments are reported tofacilitate accounts receivable balancing.In order to implement this system, you must enable the charge posting features. The flag toenable charge posting is located in the function key options for the FINALIZE key. See“FINALIZE” on page 199.) You must also assign the necessary function keys for yourapplication.<strong>SAM4s</strong> <strong>SPS</strong>-<strong>300</strong> Operator's & Programming <strong>Manual</strong> v1.2 Operations • 81
Charge Posting Function KeysCHECK #(ACCT #)P/BALSERVICE(HOUSE CHRG)PAYMENTPRINT CHECKFINALIZEThe CHECK # key is used to begin a new, or access an existingbalance (hard check) or itemized bill (soft check.) Existing checksare accessed by entering the check track number and pressing theCHECK# key. You may wish to reprogram the descriptor of theCHECK # key to ACCT#.Use to manually enter the amount of an outstanding balance. TheP/BAL key is not used when hard or soft check posting is used.Use to temporarily finalize Previous Balance or house accounttransactions. (If you are using a hard check system, you must programthe SERVICE key for the port where the slip printer is connected.)You may wish to reprogram the descriptor of the SERVICE key toHOUSE CHRG.Press to make a payment, partial payment, or pre-payment whileposting to a check (account). If the payment amount exceeds the checkbalance, the screen will display the option to apply the change to theaccount or to issue the overpayment as change.Use to print a check. The check can be printed on an optional (RS-232C) printer, or can be printed on the receipt printer. The PRINTCHECK key can be set to automatically service the check.Pressing the FINALIZE key before closing a check will close theaccount and the account number will no longer be reported on the opencheck report.82 • Operations <strong>SAM4s</strong> <strong>SPS</strong>-<strong>300</strong> Operator's & Programming <strong>Manual</strong> v1.2
Opening an Account1. Enter the number of the account and pressthe CHECK # key. You may be requiredto turn the key lock to the MGR position.1 2Accepting an Advance Payment2. Press the PAYMENT key.PAYMENT3. Enter the amount of the payment andpress the appropriate tender key; cash,check or charge.54. Press the SERVICE key to finalize andstore the balance.SERVICEPosting New Charges5. Enter the number of the account and pressthe CHECK # key.6. Enter items purchased.3CHECK#0 0 0 CHECK7. Press the SERVICE key to finalize andstore the balance.Sample of Hard Check postings printed on an optionalprinter:DATE 12/01/2012 WEDCHECK # #123PBAL $0.00PAYMENT $50.00CHECK $50.00SERVICE $0.00BFWD -50.00No.000017 REG 01 ETHAN TIME 09:15DATE 12/01/2012 WEDPBAL $50.00ROOM $75.00SERVICE $75.00BFWD 25.00No.000019 REG 01 ETHAN TIME 09:47DATE 12/01/2012 WEDPBAL $25.00CHANGE $5.00TENDER $30.00CASH $25.00SERVICE $0.00BFWD $0.00No.000021 REG 01 ETHAN TIME 10:16Accepting an Overpayment andIssuing Change8. Enter the number of the account and pressthe CHECK # key.9. Press the PAYMENT key.10. Enter the amount of the payment andpress the appropriate tender key; cash,check or charge.11. If the payment exceeds the balance, thedisplay will read: “0:APPLY TOACCOUNT BALANCE, 1:RETURN ASCHANGE. Press “1”. After completingthe payment, the cash drawer opens.12. Close the cash drawer and press theSERVICE key to finalize and store thebalance.<strong>SAM4s</strong> <strong>SPS</strong>-<strong>300</strong> Operator's & Programming <strong>Manual</strong> v1.2 Operations • 83
Scale OperationsThe <strong>SPS</strong>-<strong>300</strong> can be interfaced to an optional load-cell scale. The scale interface allowsdirect entry of an item's weight using the SCALE function. You can also choose "manualentry" scale operation if you are working with a standalone scale that is not interfaced to thecash register.PLUs must be set to "scaleable" status to allow scale multiplication. If youattempt an entry into a PLU that has been programmed "scaleable", an error tonewill sound and the message “REQ. SCALE ENTRY” will display.PLUs can be set to "auto scale" status to speed up scale entries by automaticallyretrieving the weight on the scale and multiplying it times the amount entered.A tare is the amount of weight accounted for by the container or packaging. By entering atare weight (as required by law in some areas) the weight of the container is subtracted andonly the true weight of the product is measured on the scale. By entering the tare number (1-5) the operator can automatically subtract the predetermined container weight when a productis on the scale.PLUs can be set to "auto tare" status to automatically subtract one of thepreprogrammed tare weights when the PLU is registered.Refer to the "Service Mode Programming" and "Program Mode Programming" chapters to setyour scale options. See:"Function Key Assignment" to place SCALE and TARE keys on the keyboard."RS232C Port Options" to attach a scale to one of the ports."Function Key Programming" to set options for the SCALE and TARE keys."PLU Programming" to set scaleable, auto scale, or auto tare status.84 • Operations <strong>SAM4s</strong> <strong>SPS</strong>-<strong>300</strong> Operator's & Programming <strong>Manual</strong> v1.2
Direct Scale EntryPlace a product on the scale and access the SCALE function to display the weight on the cashregister. Then make the appropriate entry; the PLU must have "scaleable" status.1. Place an item on the scale.2. Press the SCALE key.SCALE3. Note that the weight is displayed on thescreen. Enter the price per pound on theten-key pad. Do not use the decimal key.For example, for $3.00, enter:THANK-YOUCALL AGAINDATE 06/05/2011 SUN TIME 08:331.50 lb @3.00/lbPLU1 $4.50TAX1 $0.27TOTAL $4.77CASH $4.77CLERK 1 No.000011 000013 0 04. Press a PLU key. For example, pressPLU 1:1Automatic Scale EntryPlace a product on the scale and make the appropriate PLU entry. The PLU must be set with"auto scale status".1. Place an item on the scale.2. Press a PLU key, if the item is a presetitem, or enter the price per pound on theten-key pad. Do not use the decimal key.For example, for $3.00, enter:3 0 03. Press a PLU key. For example, pressPLU 1:THANK-YOUCALL AGAINDATE 06/05/2011 SUN TIME 08:331.50 lb @3.00/lbPLU1 $4.50TAX1 $0.27TOTAL $4.77CASH $4.77CLERK 1 No.000011 000011<strong>SAM4s</strong> <strong>SPS</strong>-<strong>300</strong> Operator's & Programming <strong>Manual</strong> v1.2 Operations • 85
Tare Weight Entry1. Place an item on the scale.2. Enter the preprogrammed tare number.Press the TARE key.1 TARE3. Press the SCALE key.SCALETHANK-YOUCALL AGAINDATE 06/05/2011 SUN TIME 08:331.50 lb @3.00/lbPLU1 $4.50TAX1 $0.27TOTAL $4.77CASH $4.77CLERK 1 No.000011 000014. Note that the weight, less the tare weight,is displayed on the screen. Enter theprice per pound on the ten-key pad. Donot use the decimal key. For example,for $3.00, enter:3 0 05. Press a PLU key. For example, pressPLU 1:186 • Operations <strong>SAM4s</strong> <strong>SPS</strong>-<strong>300</strong> Operator's & Programming <strong>Manual</strong> v1.2
<strong>Manual</strong> Tare Weight Entry1. Place an item on the scale.2. Enter the manual tare number, 5. Pressthe TARE key:THANK-YOUCALL AGAINDATE 06/05/2011 SUN TIME 08:335 TARE3. Enter the weight of the tare, for example,enter .01, press the tare key:. 0 1 TARE1.50 lb @3.00/lbPLU1 $4.50TAX1 $0.27TOTAL $4.77CASH $4.77CLERK 1 No.000011 000014. Press the SCALE key.SCALE5. Note that the weight, less the tare weight,is displayed on the screen. Enter theprice per pound on the ten-key pad. Donot use the decimal key. For example,for $3.00, enter:3 0 06. Press a PLU key. For example, pressPLU 1:1<strong>SAM4s</strong> <strong>SPS</strong>-<strong>300</strong> Operator's & Programming <strong>Manual</strong> v1.2 Operations • 87
<strong>Manual</strong> Weight EntryNote: <strong>Manual</strong> weight entry is allowed only when a scale is not connected and the RS-232Cport is not set to the scale function. <strong>Manual</strong> Weight is also used when voiding or returning ascale item without using the scale.<strong>Operators</strong> can make manual weight entries if the item has been programmed to accept them.You must use the decimal key to enter fractional manual weights.1. Place an item on the scale.2. Enter the weight using the decimal keyfor fractional weights. Press the SCALEkey:1 . 5 SCALE3. Enter the price per pound on the ten-keypad. Do not use the decimal key. Forexample, for $3.00, enter:THANK-YOUCALL AGAINDATE 06/05/2011 SUN TIME 08:331.50 lb MANUAL WT. @ @3.00PLU1 $4.50TAX1 $0.27TOTAL $4.77CASH $4.77CLERK 1 No.000011 000013 0 04. Press a PLU key. For example, pressPLU 1:1Quick Journal ReviewThis feature was designed for use with the <strong>SPS</strong>-320, where a separate journal printer is notprovided. It allows the operator to quickly print out the details of the last transaction ortransactions for review. Quick Journal Review is available if set in Print OptionProgramming (see Print Option page 16.)In the REG key lock position (outside of a transaction) enter 1 0 and press the SUBTL key.Recent journal entries are printed. (The last XX lines of the electronic journal are printed,where XX is set in Print Option programming.)Integrated Payment OperationsSee “Integrated Payment Appendix” on page 259 for electronic payment operationinformation.88 • Operations <strong>SAM4s</strong> <strong>SPS</strong>-<strong>300</strong> Operator's & Programming <strong>Manual</strong> v1.2
Not Found PLUNote: The System Option “DISABLE NOT FOUND PLU” must be set to N(o) to allowthis function.The “Not Found PLU” feature is available for use when an optional scanner is used to inputPLUs. If an item is scanned that is not programmed in the PLU file, the operator has theoption to input the price of the item and assign it the same descriptor and properties ofanother PLU, or enter the descriptor and tax status independently. This provides a simplemechanism for quickly building an item file for a simple scanning installation.Quick Entry Method1. Scan an item or input a PLU number. If the item is in the PLU file, it willregister, if an item is not in the PLU file, the NOT FOUND PLU screen willdisplay:NOT FOUND PLU PROGRAM ?0 : NO 1 : YES2. Press the numeric “1” key to allow the registration of the PLU. The cursor willpoint at the SELECT COPY PLU field.NOT FOUND PLU PROGRAM ?SELECT COPY PLU0PRICE: 03. The not found PLU will assume the same attributes of the PLU selected here.For example, if the item scanned is a “liquor” item, then press another PLU in theliquor category, or press a PLU designated to accept open liquor entries.Press a PLU on the keyboard, or enter a PLU number and press the PLU key.The cursor will advance to the price field.4. Enter the PLU price and press CASH. The PLU will register using the descriptorand tax status of the copied PLU.<strong>SAM4s</strong> <strong>SPS</strong>-<strong>300</strong> Operator's & Programming <strong>Manual</strong> v1.2 Operations • 89
Detail Entry Method1. Scan an item or input a PLU number. If the item is in the PLU file, it willregister, if an item is not in the PLU file, the NOT FOUND PLU screen willdisplay:NOT FOUND PLU PROGRAM ?0 : NO 1 : YES2. Press the numeric “1” key to allow the registration of the PLU. The cursor willpoint at the SELECT COPY PLU field.NOT FOUND PLU PROGRAM ?SELECT COPY PLU0PRICE: 03. Enter “0” and press the PLU key. The cursor will advance to the price field andadditional fields will display to allow entry of a unique descriptor and PLU taxstatus.NOT FOUND PLU PROGRAM ?SELECT COPY PLUPRICE:DESC :TAX : 1N 2N 3N 4N004. Enter the PLU price and press CASH. The cursor will advance to the descriptorfield.5. Enter a descriptor using the descriptor method set up on your register (keyboardoverlay or descriptor code. See “Descriptor Programming Methods” on page137.) After the descriptor entry, press CASH. The cursor will advance to theTAX (1) field.90 • Operations <strong>SAM4s</strong> <strong>SPS</strong>-<strong>300</strong> Operator's & Programming <strong>Manual</strong> v1.2
6. Press the YES/NO key to toggle the tax status from N(o) to Y(es). Set the statusfor the four possible tax rates and press CASH. The PLU entry is completed.Not Found PLU ReportManagers will typically use the “Not Found PLU Report” as a tool to update the PLU file. Alist of up to 50 not found PLU items can be retained in the report. When capacity is reached,you must clear (Z) the Not Found PLU report. To run an X Report of not found PLUs, choose NOT FOUND PLU (selection #8)from the Manager Mode menu To run an Z Report of not found PLUs, choose RESET NOT FOUND PLU(selection #7) from the R Mode menu.<strong>SAM4s</strong> <strong>SPS</strong>-<strong>300</strong> Operator's & Programming <strong>Manual</strong> v1.2 Operations • 91
92 • Operations <strong>SAM4s</strong> <strong>SPS</strong>-<strong>300</strong> Operator's & Programming <strong>Manual</strong> v1.2
Management FunctionsIntroductionManager ModeAll Management Functions take place with the control lock in the X position. In this wayonly those with the correct key will have access to these functions. Some register operationsmay be programmed to require the control lock in the X position in order to operate. Allreports require a key that will access the X or Z position. Turn the control lock to the X position to display the MANAGER MODE menu:MANAGER MODE0.MANAGER OPERATION1.X REPORTS2.DECLARATION3.REG. PRINT FORMAT4.STOP RECEIPT PRINTING5.STOP JOURNAL PRINTING6.TRAIN MODE Press PAGE DOWN to display the second page of MANAGER MODE options:MANAGER MODE7.E.J. OPERATION8.NOT FOUND PLU9.OPEN CHECK(IRC)<strong>SAM4s</strong> <strong>SPS</strong>-<strong>300</strong> Operator's & Programming <strong>Manual</strong> v1.2 Management Functions • 93
Manager OperationChoose Manager Operation to access the Manager Mode screen, where operations allowedonly with manager control can be performed.1. From the MANAGER MODE menu press 0 to enter manager mode:MANAGER MODEX Reports2. The MANAGER MODE screen displays.3. Complete the operation requiring manager control.X reports read, but do not reset, totals and counters within a report.1. From the MANAGER MODE menu press 1 to select X Reports:MANAGER MODE* ENTER REPORT# TO ISSUEX REPORT* PRESS CASH TO VIEW REPORT LIST* PRESS CLEAR TO RETURNTO MANAGER MODE MENU94 • Management Functions <strong>SAM4s</strong> <strong>SPS</strong>-<strong>300</strong> Operator's & Programming <strong>Manual</strong> v1.2
2. If you know the number of the report you wish to generate, enter the number andpress CASH. If you wish to look up the report number, press CASH to view theX Report List, then press the number of the report you wish to generate.X REPORT LIST0.FINANCIAL1.TIME2.PLU3.CLERK4.GROUPS5.DAY6.STOCKP1PressPAGE DOWN to view the second page of reports:X REPORT LIST7.CLERK TIME8.OPEN CHECK9.DRAWER TOTALS00.PLU ZERO SALEDEC. MIX & MATCHP23. When a report is selected, the X REPORT OPTIONS screen displays:X REPORT OPTIONSRPT# :FINANCIAL1. TYPE 00:DAILY 1:PERIOD2. 0:PRINT 1:DISPLAY 03. IRC 00:STANDALONE1:ALL 2:SELECT4. Select the TYPE (DAILY or PERIOD), PRINT or DISPLAY, and the IRCconfiguration. Refer to the explanations in the table below. Press CASH aftereach selection. After the last selection, the report will start.<strong>SAM4s</strong> <strong>SPS</strong>-<strong>300</strong> Operator's & Programming <strong>Manual</strong> v1.2 Management Functions • 95
5. If IRC is SELECT, then the register selection displays:X REPORT OPTIONSRPT# :FINANCIAL1. TYPE 00:DAILY 1:PERIOD2. 0:PRINT 1:DISPLAY 03. IRC 20:STANDALONE# 1Y2N 3N 4N 5N 6N 7N 8N6. Press the YES/NO key at each register # to select whether you wish to includeeach register in the consolidated report. Press CASH after each selection. Afterthe last selection, the report will start.FieldTYPEIRCDescriptionSelect X1 or X2 if available for the selected report.Select STANDALONE, ALL, or SELECT if availablefor the selected report. If SELECT, the screen willprompt for selection of registers - the screen willinitially show the registers available from the from/toIRC register programming, for example if the IRCrange is from 1 to 3, then the selection will default to:1 2 3 4 5 6 7 8Y Y Y N N N N NOUTPUTSelect PRINT or DISPLAY output.96 • Management Functions <strong>SAM4s</strong> <strong>SPS</strong>-<strong>300</strong> Operator's & Programming <strong>Manual</strong> v1.2
DeclarationCash declaration is the process of counting and reporting media in drawer before a report istaken. "Enforce cash declaration" is an option that requires to the operator to declareamounts of media in the drawer before a financial, clerk, or cash in drawer report can begenerated. The purpose of this feature is to insure accurate reporting, even in case of anoverage. You can enforce declaration by setting the appropriate system option. See "SystemOption Programming" in the "Program Mode Programming" chapter.1. From the MANAGER MODE menu press 2 to display the DELCARATIONSCREEN. The cash drawer opens.DECLARATION SCREENCASH 0.00CHECK 0.00CHARGE1 0.00F/S TEND 0.00TOTAL 0.002. At the DECLARATION SCREEN, enter cash amounts, press the CASH key.Enter checks individually, or enter a check total, press the CHECK key. EnterFood Stamps, press the F/S TEND key. You can make as many entries as youwish, the screen will keep running totals. You may wish to use the X/TIME keyto multiply. For example if you are declaring 37 quarters, you can enter 37, pressX/TIME, enter 25, and then press CASH. The result is added to the cashdeclared running total on the screen.3. When you have completed declaration entries, press the CASH key again tofinalize and total your declaration. The screen will display the total declaredinput, the drawer total and the difference (over/short).DELCARATION SCREENINPUT AMT 31.00DRAWER TTL 17.00DIFFERENCE -14.00<strong>SAM4s</strong> <strong>SPS</strong>-<strong>300</strong> Operator's & Programming <strong>Manual</strong> v1.2 Management Functions • 97
Register Print FormatYou can designate the <strong>SPS</strong>-320 printer to print either a receipt, or a sales journal. If youselect journal format, the preamble/postamble will not print. If you select receipt format, thepreamble/postamble will print and the receipt will feed sufficiently for paper tear-off.1. From the MANAGER MODE menu press 3 to set the receipt format:REG. PRINTING FORMATREGISTER PRINTING ISCURRENTLY RECEIPTTO SET TO JOURNALPRESS YES AND ENTERStop Register Printing2. The REG. PRINTING FORMAT screen displays. Press the YES/NO key totoggle from receipt to journal format. The screen will display the current status.Press CASH to set the new format.You can turn the register printer to an on or off condition. In the off condition transactionswill not be printed, but reports will continue to print, if requested.1. From the MANAGER MODE menu press 4 to set receipt printing on or off, or 5to set journal printing to on or off (<strong>SPS</strong>340/345 only):REG. PRINTING ON/OFFREGISTER PRINTINGIS CURRENTLY ONTO TURN OFFPRESS YES AND CASH2. The REG. PRINTING ON/OFF or JOURNAL PRINTING ON/OFF screendisplays. Press the YES/NO key to toggle from receipt on to receipt off. Thescreen will display the current status. Press CASH to set the new format.Note: When the receipt is off, a receipt may be printed after the sale by pressing CASHafter the transaction is complete.98 • Management Functions <strong>SAM4s</strong> <strong>SPS</strong>-<strong>300</strong> Operator's & Programming <strong>Manual</strong> v1.2
Training ModeA training mode is available so that the register can be operated (to practice registrations)without updating totals and counters. If you choose to use training mode, you must set atraining mode password (see "Training Mode Password" in the "Program ModeProgramming" chapter.)Note: If you make registrations to check tracking numbers in training mode, rememberthat the check tracking total will be updated. Remember to pay, or clear the check file(Reset Mode Menu/Z/Open Checks) before resuming normal operations. You mustclose all open checks prior to entering training mode.1. From the MANAGER MODE menu press 6 to enter or exit training mode:ENTER/EXIT TRAININGREGIST. IS CURRENTLYNOT IN TRAININGTO ENTER TRAININGENTER 4 DIGIT PASSWDAND PRESS ENTER2. The ENTER/EXIT TRAINING screen displays. The screen will display thecurrent status. To enter training mode, type your four digit password (you mustenter preceding zeros) and press CASH. To exit training mode, type 0000 andpress CASH.<strong>SAM4s</strong> <strong>SPS</strong>-<strong>300</strong> Operator's & Programming <strong>Manual</strong> v1.2 Management Functions • 99
Electronic Journal 0perationAn electronic journal feature is available on the <strong>SPS</strong>-<strong>300</strong>. The electronic journal captures thesales journal in the register memory. If you intend to use the electronic journal, you mustallocate sufficient memory (see "Memory Allocation" in the "Service Mode Programming"chapter) and activate the journal and set related journal capture options (see "System OptionProgramming" in the "Program Mode Programming" chapter.)Use this program to print all or selected parts of the journal memory. Note: this program willnot clear the electronic journal. See "Reset Electronic Journal" in the "Z-Mode" chapter toclear the E.J.1. From the MANAGER MODE menu press 7 to display the electronic journalmenu:ELECTRONIC JOURNAL0.PRT ALL EJ1.PRT ONLY CASH2.PRT ONLY CHECK3.PRT ONLY MISC/TEND4.PRT ONLY %5.PRT ONLY RA/PO6.PRT ONLY RETURN2. Press PAGE DOWN to view the remaining electronic journal options:ELECTRONIC JOURNAL7.PRT ONLY ERR.CORR/VOID8.PRT ONLY NOSALE9.PRT ONLY CANCEL00.PRT BY CLERKDEC.PRINT ALL EJ (BY IRC)3. Type the digit that represents the portion of the electronic journal you wish toprint. If you select 00 for print by clerk, you will be prompted to enter theappropriate clerk number.Note: If you select “PRINT ALL EJ (BY IRC)”, you will presented with the option toprint or save the report to SD. If you choose print, the EJ will print sequentially foreach ECR in the system. If you choose SD, you will save a file for each register that canbe viewed by the PC Utility.100 • Management Functions <strong>SAM4s</strong> <strong>SPS</strong>-<strong>300</strong> Operator's & Programming <strong>Manual</strong> v1.2
Open Check (IRC)CAUTION: <strong>SPS</strong>-<strong>300</strong> <strong>Series</strong> ECRs do not share access to a common check file.This operation allows access to the individual check files that are located in separate <strong>SPS</strong>-<strong>300</strong>ECRs. This information is not consolidated, but rather reported separately for each register.1. From the MANAGER MODE menu press 9 to report open check by IRC. Thedisplay returns the message shown below:MANAGER MODE7.E.J. OPERATION8.NOT FOUND PLU9.OPE████████████████████████ SD : 0 / PRINT : 1 ████████████████████████3. Press 1 to print the report. The check file will print sequentially for each ECR inthe system, orPress 0 to save the reports to SD. A file will be saved for each register. Use thePC Utility to view the file.<strong>SAM4s</strong> <strong>SPS</strong>-<strong>300</strong> Operator's & Programming <strong>Manual</strong> v1.2 Management Functions • 101
102 • Management Functions <strong>SAM4s</strong> <strong>SPS</strong>-<strong>300</strong> Operator's & Programming <strong>Manual</strong> v1.2
Z ModeReset Report Mode1. Turn the control lock to the Clear Totals position to display the RESETREPORT MODE menu:RESET REPORT MODE0.Z REPORTS1.RESET E.J.2.PC COMMUNICATION3.MIX & MATCH PROGRAM4.MIX & MATCH SCAN5.PLU LOOKUP PROGRAM6.AGE VERIFICATION2. Press PAGE DOWN to view the remaining Reset Mode options:RESET REPORT MODE7.RESET NOT FOUND PLU9.DATATRAN(DEBIT)00.DATATRAN<strong>SAM4s</strong> <strong>SPS</strong>-<strong>300</strong> Operator's & Programming <strong>Manual</strong> v1.2 Z Mode • 103
Z Reports1. From the RESET REPORT MODE menu press 1 to select Z Reports:RESET REPORT MODE* ENTER REPORT# TO ISSUEZ REPORT* PRESS CASH TO VIEW REPORT LIST* PRESS CLEAR TO RETURN TORESET REPORT MODE MENU2. If you know the number of the report you wish to generate, enter the number andpress CASH. If you wish to look up the number, press CASH to view the ZReport List, then press the number of the report you wish to generate.Z REPORT LIST0.FINANCIAL1.TIME2.PLU3.CLERK4.GROUPS5.DAY6.STOCKP1PressPAGE DOWN to view the second page of reports:Z REPORT LIST7.CLERK TIME8.OPEN CHECK00.TRAIN FINANCIALDEC. MIX & MATCHP2104 • Z Mode <strong>SAM4s</strong> <strong>SPS</strong>-<strong>300</strong> Operator's & Programming <strong>Manual</strong> v1.2
3. When a report is selected, the Z REPORT OPTIONS screen displays:Z REPORT OPTIONSRPT# :FINANCIAL1. TYPE 00:DAILY 1:PERIOD2. 0:PRINT 03. IRC 00:STANDALONE1:ALL 2:SELECT4. Select the TYPE (DAILY or PERIOD and the IRC configuration. Refer to theexplanations in the table below. Press CASH after each selection. After the lastselection, the report will start.5. If IRC is SELECT, then the register selection displays:Z REPORT OPTIONSRPT# :FINANCIAL1. TYPE : 00:DAILY 1:PERIOD2. 0:PRINT 03. IRC 20:STANDALONE# 1Y2N 3N 4N 5N 6N 7N 8N6. Press the YES/NO key at each register # to select whether you wish to includeeach register in the consolidated report. Press CASH after each selection. Afterthe last selection, the report will start.FieldTYPEIRCDescriptionSelect Z1 or Z2 if available for the selected report.Select STANDALONE, ALL, or SELECT if availablefor the selected report. If SELECT, the screen promptsfor selection of registers - the screen will initially showthe registers available from the from/to IRC registerprogramming, for example if the IRC range is from 1to 3, then the selection will default to:1Y 2N 3N 4N 5N 6N 7N 8N<strong>SAM4s</strong> <strong>SPS</strong>-<strong>300</strong> Operator's & Programming <strong>Manual</strong> v1.2 Z Mode • 105
Reset Electronic JournalAn electronic journal feature is available on the <strong>SPS</strong>-<strong>300</strong>. The electronic journal captures thesales journal in the register memory. If you intend to use the electronic journal, you mustallocate sufficient memory (see "Memory Allocation" in the "Service Mode Programming"chapter) and activate the journal and set related journal capture options (see "System OptionProgramming" in the "Program Mode Programming" chapter.)Use this to clear the journal memory. The journal will not be printed. To read all or selectedparts of the E.J., see "E.J. 0peration" in the "X-Mode" chapter.1. From the RESET REPORT MODE menu press 2 to clear the electronic journal:RESET ELECT.JOURNALARE YOU SURE ?NO2. The screen asks: ARE YOU SURE ? Press the YES/NO key to toggle to yesand then press CASH to clear the report.Mix & Match ProgramRetailers often offer discounts when multiples of different items are purchased. For example,the offer: “save $5 on any three bottles of wine” can be handled by a mix and match discount.The <strong>SPS</strong>-<strong>300</strong> series can accommodate up to 99 different mix and match discounts.This program sets the number of items that must be purchased to receive the discount and theamount of the discount. You must also set the following additional Mix & Match Tableoptions that are set through separate programs:From Logo Descriptor programming in P Mode, you can set a 12 characterdescriptor for the discount.You must link eligible items to the appropriate mix and match table. See PLUProgramming in P Mode and go to Page 6 of the PLU options.The mix & match discount can be set to be taxable (tax the net amount) or nontaxable(tax the gross amount). See Page 18 of P Mode System Options to makethis selection.106 • Z Mode <strong>SAM4s</strong> <strong>SPS</strong>-<strong>300</strong> Operator's & Programming <strong>Manual</strong> v1.2
Mix & Match Price & Quantity Settings1. Select Mix & Match Program from the Z Mode Menu to display the options:MIX & MATCHENTER MIX & MATCHNUMBER (1-99)02. Enter the number of the mix & match table you wish to program and pressCASH.MIX & MATCHM & M 1COUNT :AMOUNT : 0.000Mix & Match Scan3. At the COUNT field, enter the number of items that need to be purchased toqualify for the discount. At the AMOUNT field, enter the amount of thediscount.4. Press CASH to advance to the next Mix & Match or press CLEAR to exit.You can print out the options for each mix & match discount table. Select Mix & Match Scanfrom the Z Mode Menu to print the scan.<strong>SAM4s</strong> <strong>SPS</strong>-<strong>300</strong> Operator's & Programming <strong>Manual</strong> v1.2 Z Mode • 107
PLU Lookup ProgramYou can assign up to fifteen PLU LOOK UP keys on the keyboard. (See “Function KeyAssignment” in the “Service Mode Programming” chapter.) Each of the PLU LOOK UPkeys can be programmed here to list specific PLUs.1. From the RESET REPORT MODE menu press 5 to select PLU LOOKUPPGM. The PLU LOOKUP PGM screen displays:PLU LOOKUP PROGRAMPUSH LOOKUP NUMBERTO BE PROGRAMMEDAND PRESS CASH(1-15) 02. Enter the number of the PLU LOOKUP key you wish to program, press CASH.1. 02. 03. 04. 05. 06. 07. 08. 03. With the cursor pointed at the first position of the PLU LOOKUP screen, selecta PLU by typing the PLU number and pressing CASH. The descriptor for thePLU will display, and the cursor will advance to the next position.1. PLU1232. 03. 04. 05. 06. 07. 08. 0108 • Z Mode <strong>SAM4s</strong> <strong>SPS</strong>-<strong>300</strong> Operator's & Programming <strong>Manual</strong> v1.2
Age Verification4. Continue to select PLUs for the PLU LOOKUP key as necessary. If you areediting an existing PLU LOOK UP key, press CASH to advance the cursorwithout changing the current line.5. If you wish to remove an item from the PLU LOOKUP key, place the cursor onthe line to be removed, press the VOID key.6. Press CLEAR to return to the RESET REPORT MODE menu and savechanges.In most areas, the sale of tobacco and/or alcoholic beverages to minors is prohibited. The<strong>SPS</strong>-<strong>300</strong> series offers an age verification feature that helps control the sale of restricted itemsby forcing the operator to enter a birth date before a controlled item can be registered. If thedate entered shows that the customer has not yet reached the appropriate age, the item cannotbe registered. This feature serves as a reminder to check the customer’s identification.Because different categories of items might require different ages (for example, alcohol mightrequire age 21, while tobacco might require age 18) up to five different age categories can bedefined.This program allows you to set the required age for each of the five available age categories.See “Group Programming” in the “Program Mode Programming” chapter to link an agecategory to groups of PLU items.Note: When age verification is implemented, an age entry is required only for the firstcontrolled item from each age category.1. From the RESET REPORT MODE menu press 6 to select AGEVERIFICATION. The AGE VERIFICATION screen displays:AGE VERIFICATION1. 02. 03. 04. 05. 02. Enter the age required for the first group of age-restricted items, press CASH.(For example, enter 21 if the sale of liquor requires an age of 21. You must alsoprogram the age verification category of “1” for all groups of liquor items.)3. If other items are to be restricted by a different age, program additional ageverification groups as necessary.4. Press CLEAR to return to the RESET REPORT MODE menu and savechanges<strong>SAM4s</strong> <strong>SPS</strong>-<strong>300</strong> Operator's & Programming <strong>Manual</strong> v1.2 Z Mode • 109
DataTran Operation Menus1. From the RESET REPORT MODE menu press 9 to display the DATATRAN(DEBIT) Operation menu:DATATRAN OPERATION.0.PIN PAD INITIALIZE1.CLOSE BATCH(DEBIT)2. From the DATATRAN OPERATION (DEBIT) menu:Press 0 to initialize the Pin Pad.Press 1 to close the debit batch. You will be prompted “Are you sure?”Press the YES/NO key to toggle to “YES” and press “CASH” to continue.3. From the RESET REPORT MODE menu press 00 to display the DataTranOperation menu:DATATRAN OPERATION0.INITIALIZE EFT1.OPEN BATCH2.CLOSE CURR. BATCH4.CHG. BATCH NUMBER5.ISSUE LOCAL TOTAL6.ISSUE TRANSACTION4. If necessary, press PAGE DOWN to display the second page of the DataTranOperation menu:DATATRAN OPERATION7.ISSUE BATCH STATUS8.DIAL IN LOAD9.DIAL OUT LOAD00.TIP OPERATION5. See “Integrated Payment Appendix” on page 259 for detailed DataTran operationinstructions.110 • Z Mode <strong>SAM4s</strong> <strong>SPS</strong>-<strong>300</strong> Operator's & Programming <strong>Manual</strong> v1.2
S-Mode ProgrammingOverviewThe following procedures are done from the Service Mode menu: Hardware Tests Clear all totals Clear grand total Clear PLU file FLASH ROM Information Memory Allocation Assignment of functions to keyboard locations IRC Options RS232C Port Options SD Card Operations, including Program Backup and Loading Clear Current Batch (Integrated Payment Applications only)<strong>SAM4s</strong> <strong>SPS</strong>-<strong>300</strong> Operator's & Programming <strong>Manual</strong> v1.2 S-Mode Programming • 111
Turn the key to the S position (one position clockwise from the PGM position) todisplay the SERVICE MODE menu:SERVICE MODE0. HW TEST1. CLEAR ALL TOTALS2. CLEAR GRAND TOTAL3. CLEAR PLU FILE4. FLASHROM INFORMATION5. MEMORY ALLOCATION6. KEY ASSIGNMENT Press PAGE DOWN to view the remainder of the SERVICE MODE menu:SERVICE MODE7. IRC OPTIONS8. RS232C PORT9. SD CARD OPERATION00.CLEAR CURR.BATCH112 • S-Mode Programming <strong>SAM4s</strong> <strong>SPS</strong>-<strong>300</strong> Operator's & Programming <strong>Manual</strong> v1.2
Hardware TestVarious components of the <strong>SPS</strong>-<strong>300</strong> are tested by using this program.1. From SERVICE MODE menu press 0 to display the H/W TEST menu:H/W TEST0. TEST PRINTER1. TEST DISPLAY2. TEST KEYBOARD3. TEST MODE4. TEST RS-2325. TEST MCR6. TEST DALLAS2. From SERVICE MODE menu press PAGE DOWN to display the H/W TESTmenu:H/W TEST7. TEST SD CARD8. PRINTING PATTERN3. Press the digit representing the test you wish to perform. See the table thatfollows for notes about each test.Hardware Test TableTESTPRINTERDISPLAYKEYBOARDMODENOTESA printer test pattern is printed. The H/W TEST menu automaticallyreturns when the test is complete.A display test is initiated. The H/W TEST menu automaticallyreturns when the test is complete.The display indicates: "KEYBOARD TEST". Press any key locationto display its' position. Turn the key lock to end the test.Check the mode lock and/or the optional “real” clerk key lock withthis test. As you turn the key lock, the display will show the currentposition. The display will also indicate the “real” key that isinserted. Return the key to the SERVICE position to end the test.<strong>SAM4s</strong> <strong>SPS</strong>-<strong>300</strong> Operator's & Programming <strong>Manual</strong> v1.2 S-Mode Programming • 113
TESTRS-232MCRDALLASSDPRINTINGPATTERNNOTESSelect LOOP TEST PORT 1, LOOP TEST PORT 2, or LOOP TESTIRC. (to loop test port 1 or 2 , a loop back connector must be inplace.) Then after a moment, the display indicates NG (not good) orOK.Select to test read a magnetic card.Option not availableInsert an SD card and select to run a read/write test. The results willprint. Press CLEAR to exit the test.ENDLESS PRINTING and LIFE TEST PRINT are factory tests.Toggle the power switch on and off to end the test.Memory All ClearBefore you use your <strong>SPS</strong>-<strong>300</strong> <strong>Series</strong> ECR for the first time, you must perform a memory allclear to insure that all totals and counters are cleared and that the default program is installed.Go to “Clearing Memory” on page 30 to complete this procedure.Clear All TotalsThis selection clears all totals and counters, including the grand total.1. From SERVICE MODE menu press 1 to display the CLEAR ALL TOTALSscreen:CLEAR ALL TOTALSARE YOU SURE ?N2. Press the YES/NO key to display Y at the "ARE YOU SURE ?" question. PressCASH.3. The display reads: "PLEASE WAIT". The message "ALL TOTAL CLEAR" isprinted and the screen returns to the SERVICE MODE menu.114 • S-Mode Programming <strong>SAM4s</strong> <strong>SPS</strong>-<strong>300</strong> Operator's & Programming <strong>Manual</strong> v1.2
Clear Grand TotalThis selection clears only the grand total.1. From SERVICE MODE menu press 2 to display CLEAR GRAND TOTALSscreen:CLEAR GRAND TOTALSARE YOU SURE ?NClear PLU File2. Press the YES/NO key to display Y at the "ARE YOU SURE ?" question. PressCASH.3. The message "GRAND TOTAL CLEAR" is printed and the screen returns to theSERVICE MODE menu.This selection clears the entire PLU file, including totals, counters and programming.1. From SERVICE MODE menu press 3 to display the CLEAR PLU FILE screen:CLEAR PLU FILEARE YOU SURE ?N2. Press the YES/NO key to display Y at the "ARE YOU SURE ?" question. PressCASH.3. The message "PLU FILE CLEAR" is printed and the screen returns to theSERVICE MODE menu.<strong>SAM4s</strong> <strong>SPS</strong>-<strong>300</strong> Operator's & Programming <strong>Manual</strong> v1.2 S-Mode Programming • 115
Flash ROM InformationThis selection displays the version, check sum and date of the Flash ROM. You may beasked to check your Flash ROM version if you contact your dealer for assistance. You shouldalso verify that all registers in an IRC configuration have the same version Flash ROM.Memory Allocation1. From SERVICE MODE menu press 4. The "PLEASE WAIT" message displaysmomentarily until the <strong>SPS</strong>-<strong>300</strong> FLASHROM INFORMATION screen displays:FLASHROM INFORMATION.VERSION : USA 01.024CHECKSUM :B401BOOT/APP :F40B/BFF6PLUS USED: <strong>300</strong>/2000EFT VER. : DTRAN 01.000APR.06 2012PRESS CLEAR KEY2. Press CLEAR to return to the SERVICE MODE menu.Note: You must step through every memory allocation field to implement new memoryallocation. If you press CLEAR, at any field you will abort memory allocation processeswithout making changes. Changes to Memory Allocation will clear all program data.1. At the SM control lock position menu, press 5 for Memory Allocationprogramming. The MEMORY ALLOCATION screen displays:MEMORY ALLOCATION.TTL AVAIL : 1855488TTL USED : 314865# PLUS 2000# LEVELS (1-5) 1# CLERKS 10# GROUP TOTALS 20116 • S-Mode Programming <strong>SAM4s</strong> <strong>SPS</strong>-<strong>300</strong> Operator's & Programming <strong>Manual</strong> v1.2
2. The total available memory is displayed on the first line of the screen (TTLAVAIL). The total memory currently allocated is displayed on the second line ofthe screen (TTL USED). The TTL USED field is updated when you complete achange and press CASH.Starting at the PLUs field, enter the quantity of each memory field. Press CASHafter each entry, and the cursor will move to the next field. Page 2 of MemoryAllocation will display after the # OF GROUP TOTALS field is set:MEMORY ALLOCATIONTTL AVAIL : 1855488TTL USED : 314865# EJ LINES 1000# CHECKS 10Y=HARD/N=SOFT CHKN# LINES/SFT CHK 503. Continue filling each field until complete. Press CASH after setting the lastfield, "# LINES/SOFT CH". The screen will display "ARE YOU SURE ?". N(No) will display as the default answer to the question. If you wish to implementthe new allocation you have entered, press the YES/NO key, and then pressCASH.4. The message "PLEASE WAIT . . . . " displays until the printer prints either:"MEMORY ALLOCATION OK !" or "MEMORY ALLOCATION SIZE OVER"if you attempt to allocate features requiring more memory than is available.5. The SERVICE MODE menu screen displays when memory allocationprogramming is completed.<strong>SAM4s</strong> <strong>SPS</strong>-<strong>300</strong> Operator's & Programming <strong>Manual</strong> v1.2 S-Mode Programming • 117
Function Key AssignmentAny programmable key location may be reprogrammed with a function from the list ofavailable functions on page 110 of this manual. The default program installs the functions asthey are shown with the standard key legends.To change the function on a specific key:1. At the SM control lock position menu, press 6 for Key Assignmentprogramming. The KEY ASSIGNMENT screen displays:PUSH KEY TO BEPROGRAMMEDKEY ASSIGNMENT2. Press any key location. The current key assignment is displayed:0KEY ASSIGNMENTKEY NUMBER : 322CURRENT ASSIGNMENTCASHENTER NEW CODE,PRESS CASH03. Enter a new key code from the list of "Function Key Codes" on page 110 andpress CASH, or press PAGE DOWN to display a list of key codes on the screen.FUNCTIONKEYCODE--------------------------------NLU#1 - NLU#150(1-150)ONE 301TWO 302THREE 303FOUR 304FIVE 305118 • S-Mode Programming <strong>SAM4s</strong> <strong>SPS</strong>-<strong>300</strong> Operator's & Programming <strong>Manual</strong> v1.2
4. With the key code list displayed, you can press PAGE DOWN repeatedly, orPAGE UP until you find the key code you wish to use. Type the key codenumber you wish to place and press CASH. The KEY ASSIGNMENT screendisplays again:PUSH KEY TO BEPROGRAMMEDKEY ASSIGNMENTPRESS CASH TO EXIT05. Continue to program function key locations as necessary. When you havecompleted function key programming, press the CASH key to finalize. Thescreen displays:KEY ASSIGNMENTPRESS ENTER TO SAVE CHANGESORPRESS CLEAR TO EXITWITHOUT SAVING6. Press CASH to save the changes you have made, or press CLEAR to exitwithout saving changes.7. The printer will print out a receipt showing all the changes made to the keyboard.Notes:1. Numeric keys (0-9), CLEAR, and CASH cannot be removed from the keyboardunless they have been assigned to a new keyboard location. This protects theprogrammer from accidentally removing keys that are required for registerprogramming and operations.2. If you wish to program the CASH key, select it immediately after selecting KEYASSIGNMENT from the SERVICE MODE menu. After the initial key isprogrammed, the CASH key is used to finalize the program.<strong>SAM4s</strong> <strong>SPS</strong>-<strong>300</strong> Operator's & Programming <strong>Manual</strong> v1.2 S-Mode Programming • 119
Function Key CodesCode Function Code Function Code Function1 NLU 1 337 CURRENCY CONV. 1 376 PAID OUT 2through 338 CURRENCY CONV. 2 377 PAID OUT 3150 NLU 150 339 CURRENCY CONV. 3 378 PAPER FEED301 Numeric 1 340 CURRENCY CONV. 4 379 PLU PRICE INQ302 Numeric 2 341 DRIVE THRU 380 PRINT CHECK303 Numeric 3 342 EAT-IN 381 PROMO304 Numeric 4 343 ERROR CORRECT 382 RECD ON ACCT 1305 Numeric 5 344 F/S SHIFT 383 RECD ON ACCT 2306 Numeric 6 345 F/S SUB 384 RECD ON ACCT 3307 Numeric 7 346 F/S TEND 385 SUBTL(SUBTOTAL308 Numeric 8 347 Function lookup #1 386 SCALE309 Numeric 9 348 Function lookup #2 387 SERVICE310 Numeric 0 349 GUEST # 388 TABLE #311 Numeric 00 350 PLU (CODE ENTRY) 389 TARE312 Decimal 351 PRICE LEVEL 1 390 TAKE OUT313 #/NS 352 PRICE LEVEL 2 391 TAX EXEMPT314 %1 353 PRICE LEVEL 3 392 TAX SHIFT 1315 %2 354 PRICE LEVEL 4 393 TAX SHIFT 2316 %3 355 PRICE LEVEL 5 394 TAX SHIFT 3317 %4 356 MACRO 1 395 TAX SHIFT 4318 %5 357 MACRO 2 396 TIME IN/OUT319 X/TIME 358 MACRO 3 397 TIP320 ADD CHECK 359 MACRO 4 398 VOID ITEM321 CANCEL 360 MACRO 5 399 WASTE322 CASH 361 MACRO 6 400 YES/NO323 CHARGE 1 362 MACRO 7 401 VALIDATION324 CHARGE 2 363 MACRO 8325 CHARGE 3 364 MACRO 9402 -416PLU LOOKUP1 -PLU LOOKUP15326 CHARGE 4 365 MACRO 10 442 PAYMENT327 CHARGE 5 366 MDSE RETURN 443 FINALIZE328 CHARGE 6 367 MODIFIER 1 444 JFEED329 CHARGE 7 368 MODIFIER 2 445 INACTIVE330 CHARGE 8 369 MODIFIER 3 446 NON ADD#331 CHECK CASHING 370 MODIFIER 4332 CHECK ENDORSE 371 MODIFIER 5333 CHECK 372 P/BAL334 CHECK TRACK # 373 PAGE DOWN335 CLEAR 374 PAGE UP336 CLERK # 375 PAID OUT 1120 • S-Mode Programming <strong>SAM4s</strong> <strong>SPS</strong>-<strong>300</strong> Operator's & Programming <strong>Manual</strong> v1.2
IRC Options1. At the S control lock position menu, press 7 for IRC Option programming. TheIRC OPTIONS screen displays.IRC OPTIONSREG# (1-8)STORE# 000000FROM REG# 1TO REG# 1IRC RETRIES(0-99) 3#SHARE KP REG#(1-8) 012. .Page 2 of IRC Options will display after the #SHARE KP REG# field is set:IRC OPTIONS#SHARE DATATRAN REG#(1-8)03. Refer to the table below to fill the fields on the IRC OPTIONS screen.4. Press the CLEAR key to finalize and return to the SERVICE MODE screen.Option Entry DescriptionREG# 1-8 Enter the sequential number of the register in the IRCSystem. Use “1” for a standalone register.STORE# 6-digits Enter the store numberFROM REG# 1-16 Enter the number of the first register in the IRC range.TO REG# 1-16 Enter the number of the last register in the IRC range.IRC RETRIES 0-99 Enter the number of IRC retries. “3” is recommended#SHARE KPREG##SHAREDATATRANREG#1-16 Enter the number of the register where the sharedkitchen printer is connected.1-16 Enter the number of the register where the sharedDATATRAN is connected.<strong>SAM4s</strong> <strong>SPS</strong>-<strong>300</strong> Operator's & Programming <strong>Manual</strong> v1.2 S-Mode Programming • 121
RS232C Port Options1. At the S control lock position menu, press 8 for RS232C programming. The portselection screen displays:1. RS232 PORT 12. RS232 PORT 23. RS232 PORT 34. RS232 PORT 4RS232 PORT2. Enter the digit (1-4) corresponding to the port you wish to program. Theappropriate PORT PROGRAM screen displays:PORT 1 PROGRAM PG1BAUD RATE0:9600 1:1200 2:24003:4800 4:19200 5:384006:57600 7:115200PARITY CHECK 00:NONE 1:ODD 2:EVENDATA BITS(0:8 1:7) 003. At each field, press CASH to view the selections. Enter the digit representingyour selection.4. Press PAGE DOWN to view page 2 of the RS232C port program:PORT 1 PROGRAM PG2STOP BITS(0:1 1:2)0DEVICE FUNCTION 0-------------------------------0:NONE 1:PC 2:SCL3:RJ 4:RP 5:LIQUOR6:SCAN 7:COIN 8:RESERVED9:POLE 10:EFT 11:PDC122 • S-Mode Programming <strong>SAM4s</strong> <strong>SPS</strong>-<strong>300</strong> Operator's & Programming <strong>Manual</strong> v1.2
5. Press PAGE DOWN to view page 3 of the RS232C port program:PORT 1 PROGRAM PG3INITIAL FEEDING LINE ON KP(0-20) 0ENDING FEEDING LINE ON KP(0-20) 0INITIAL FEEDING LINE ON SLIP(0-20) 06. Press PAGE DOWN to view page 4 of the RS232C port program:PORT 1 PROGRAM PG4PRINT LINE ON GUEST CHECK(0-50) 0SCALE TYPE 00:NCI 1:CAS 2:OZPRINTER TYPE 00:NONE1:SAM4S ELLIX 107. Press PAGE DOWN to view page 5 of the RS232C port program:PORT 1 PROGRAM PG5PRINTER TYPE2:SAM4S ELLIX 203:SAM SRP-2504:SAM SRP-3505:CITIZEN 3550/35516:CITIZEN 8107:CITIZEN 2<strong>300</strong>8. Press PAGE DOWN to view page 6 of the RS232C port program:PORT 1 PROGRAM PG6PRINTER TYPE8:EPSON TM-T88-29:EPSON U20010:EPSON U29511:EPSON U<strong>300</strong>12:EPSON U32513:EPSON U3750<strong>SAM4s</strong> <strong>SPS</strong>-<strong>300</strong> Operator's & Programming <strong>Manual</strong> v1.2 S-Mode Programming • 123
9. Press PAGE DOWN to view page 7 of the RS232C port program:PORT 1 PROGRAM PG7PRINTER TYPE14:STAR SP-20015:STAR SP-29816:STAR SP-<strong>300</strong>17:STAR TSP-200010. Press PAGE DOWN to view page 8 of the RS232C port program:PORT 1 PROGRAM PG8POLE DISLAY TYPE0:EPSON1:ICDRESERVED011. Refer to "RS232C Settings Screen Program Notes" on the next page to fill thefields for each port.12. Press the CLEAR key to finalize and return to the SERVICE MODE screen.124 • S-Mode Programming <strong>SAM4s</strong> <strong>SPS</strong>-<strong>300</strong> Operator's & Programming <strong>Manual</strong> v1.2
RS232C Settings Screen Program NotesOptionDescriptionBAUD RATE Select 9600, 1200, 2400, 4800, 9600, 19200, 38,400,57,600, or 115,200 from the pop-up window; 9600 isdefault.PARITYSelect NONE, EVEN, or ODD from the pop-upwindow; NONE is default.DATA BITSSelect 8 or 7 from the pop-up window; 8 is default.STOP BITSDEVICE FUNCTIONSelect 1 or 2 from the pop-up window; 1 is default.Enter the code number for the device you wish toattach to this port from the code numbers displayed.The device function codes are:PRINT LINE ON GUESTCHECK (0-50)SCALE TYPEPRINTER TYPEPOLE DISPLAY TYPERS232C RETRY TIMES1: PC Communications2: Scale3: Remote Journal Printer4: Remote Printer5: Liquor6: Scanner7: Coin Dispenser8: Reserved9: Remote Pole Display10: EFT (i.e.DataTran)11: PDCEnter the number of lines that represent the maximumthat can be printed on a single guest check.Select the digit that represents the scale type connectedto this port.Select the digit that represents the printer typeconnected to this port.Select the digit that represents the pole display typeconnected to this port.Set the number of retries for RS232C communication(about 0.5 seconds each.)<strong>SAM4s</strong> <strong>SPS</strong>-<strong>300</strong> Operator's & Programming <strong>Manual</strong> v1.2 S-Mode Programming • 125
SD Card OperationUtilities in this program include:Program Backup & LoadingReport BackupPre-Image Logo Loading & BackupPost-Image Logo Loading & BackupFlash ROM update can also be done by SD card or through a serial connection to a PC.Note: Note: The SD slot is located in the printer compartment. On the <strong>SPS</strong>-320, the SDslot is located to the right of the printer mechanism; on the <strong>SPS</strong>-340 and 345, the SD slotis located to the rear of the receipt printer.) Remove the security screw to access theslot. See page 19 for detail.1. At the S control lock position menu, press 9 for SD Card Operation. The SDCARD OPERATION screen displays:SD CARD OPERATION1. PROGRAM BACKUP2. PROGRAM LOAD3. REPORT BACKUP4. PRE-IMAGE LOGO LOAD5. PRE-IMAGE LOGO BACKKUP6. POST-IMAGE LOGO LOAD7. POST-IMAGE LOGO BACKKUP2. Insert the SD card in the register’s SD slot.3. Enter the digit (1-7) corresponding to the function you wish to access. Acomplete explanation of each function follows.126 • S-Mode Programming <strong>SAM4s</strong> <strong>SPS</strong>-<strong>300</strong> Operator's & Programming <strong>Manual</strong> v1.2
Note: If you are Using an SD Card for the First Time . . .NOTE: You must a use an SD card with a capacity of 1GB or smaller. SD cards must beformatted as FAT 32.CAUTION: Formatting the SD card will clear all data on the SD card and prepare it for use.1. Start Windows Explorer.2. Select the SD card drive, right click and select Format. (Win XP screen shown; slightlydifferent procedures are used with different operating systems.)Select“Format…”3. From the Format dialog you must select theFile System: FAT32.<strong>SAM4s</strong> <strong>SPS</strong>-<strong>300</strong> Operator's & Programming <strong>Manual</strong> v1.2 S-Mode Programming • 127
Program Backup and LoadYou can use an SD flash memory card to backup and load (restore) the full program.CAUTION: The program data is saved in a separate folder on the SD card named withthe store name that is set on page 18 of system options. When backing up and restoringdata, the store name must be programmed. Note that the default store name is“STORE_A”.Backing Up the Program to an SD Card1. Insert the SD card in the register’s SD slot.2. Turn the control lock to the S position.3. From the second page of the Service Mode menu, select “9 SD CardOperation”.4. From the SD Card Operation menu select “1 Program Backup”. The <strong>SPS</strong>-<strong>300</strong>will write the program files to the folder: <strong>SPS</strong><strong>300</strong>/PRGBACK/STORENAME(where store name is the name programmed on page 18 of system options.) Inthe example below, the store name is “1719”.5. After a short pause, the register will print confirmation of the successful uploadwith the message “UPLOAD PASS” for each program segment. Below is anExplorer view of the backed up files.Restore Program from the SD CardCAUTION: Memory allocation must be set the same as the saved program. Be sure toprint out the memory allocation so that it can be re-entered before restoring the program.1. Set the store name to match the name of the store folder you wish to restore.2. Insert the SD card in the register’s SD slot.3. Turn the control lock to the S position.4. From the second page of the Service Mode menu, select “9 SD CardOperation”.5. From the SD Card Operation menu select “2 Program Load”.6. The register will print confirmation of the successful upload with the message“DOWNLOAD PASS” for each program segment.128 • S-Mode Programming <strong>SAM4s</strong> <strong>SPS</strong>-<strong>300</strong> Operator's & Programming <strong>Manual</strong> v1.2
Saving Reports to an SD CardThe SD card can also be used to save reports. Reports saved are the current X1 readings.SD Report Notes When backing up and restoring data, the store name must be programmed on page 18of system options. The default store name is “STORE_A”.The <strong>SPS</strong>-<strong>300</strong> will write the program files to different folders depending whether REPor CSV format is selected. For example:oo<strong>SPS</strong><strong>300</strong>/REPBACK/STORENAME/DATE (for REP format)<strong>SPS</strong><strong>300</strong>/CSVBACK/STORENAME/DATE (for CSV format) The date folder is in YYYYMMDD format (for example 20111116 is November 16,2011.)Each individual report is named with the time of the report. For example“CLK2332” represents a Clerk report taken at 23:32 (in a 24-hour time format.) Inthis manner, multiple reports backed up at different times in the same day will collectin the same “date” folder.To Save Reports1. Turn the control lock to the S position.2. From the second page of the Service Mode menu, select “9 SD CardOperation”.3. From the SD Card Operation menu select “3 Report Backup”. The displayoffers two format choices: Press 0 to save in REP format. REP format is proprietary and can beviewed using the <strong>SAM4s</strong> PC Utility Press 1 to save in CSV format. This format can be read without conversionby many PC applications, including Microsoft Excel.4. The register will print confirmation of the successful report upload with thename of the report “UPLOAD” for each report. If the save is unsuccessful, theregister will print an error message.<strong>SAM4s</strong> <strong>SPS</strong>-<strong>300</strong> Operator's & Programming <strong>Manual</strong> v1.2 S-Mode Programming • 129
Load/Save Receipt ImagesYou can load a preamble and postamble image for your receipt or soft guest check. Beforeloading, the images must be converted by the PC Utility to .img format. After conversion,they can be loaded directly by connecting a PC to the <strong>SPS</strong>-<strong>300</strong> or by copying the images to aSD card and loading (or saving the image) using the SD utility program described here.Note that after loading the images, you must set Print Options on page 14 of the PrintOptions program to activate the image printing.Preparing a Graphic Logo Bitmap for an <strong>SPS</strong>-<strong>300</strong> <strong>Series</strong>The image must be black/white, 384 x 192 pixels, and 10 Kbytes or less in size.1. Open MS Paint.2. Open the image file you wish to use.3. Choose Attributes from the Image menu. The Attributes dialog box displays.4. The image dimensions must be no larger than 384 pixels wide by 192 pixels high. Ifthe image size in pixels is greater than the maximum, you must resize your image.a. Click OK to exit the Attributes dialog.b. Select your image. (Choose Select All from the Edit menu.)c. Using the handles of the selected image, resize the image. Keep the image in theupper left corner of the screen.d. Choose Attributes from the Image menu. The Attributes dialog box displaysagain. Enter 384 in the Width field; enter 192 in the Height field; select Pixelsas the unit. Click OK to exit the dialog box.e. Your image will be cropped to the 384 x 192 pixel size. If you cropped part ofthe image you wish to keep, you can undo (Ctrl + Z) and try again. You mayhave to experiment a bit to resize the image inside the 384 x 192 pixel limit.5. After the image is sized, select Black and white in the Attributes dialog.6. Save your image as type “Monochrome Bitmap (*.bmp,*.dib)” and confirm that thesize is 10k or less. If you resized your original image, you may wish to rename whenyou save, so that you preserve a copy of the original image.130 • S-Mode Programming <strong>SAM4s</strong> <strong>SPS</strong>-<strong>300</strong> Operator's & Programming <strong>Manual</strong> v1.2
Use the PC Utility to Convert the Image1. Install the <strong>SPS</strong>-<strong>300</strong> PC Utility on your PC.2. At your PC, start the <strong>SPS</strong><strong>300</strong> PC Utility. (Select Start, Programs, SHC PCUTILITY, <strong>SPS</strong><strong>300</strong> PC UTILITY.) The Store Setting dialog box displays.3. If you are starting the <strong>SPS</strong><strong>300</strong> PC Utility for the first time, you must define a storename, or if a store is already defined, you can select the store from the drop downlist. After the store is defined or selected, click Close. The PC Utility programstarts.4. Move the bitmap (.bmp) logos you wish to use into the store directory(i.e. C:\<strong>SPS</strong>-<strong>300</strong>PC\storename.)5. At the PC Utility, choose Convert Logo Image from the Utility menu. The Bmpdialog box displays.6. Click FILE OPEN. Select the bitmap image you wish to use from the Opendialog and click the Open command button.7. Click the SAVE AS PRE IMG or SAVE AS POST IMG button.8. When the image is selected, click OK. Verify that the message “Save AsUserPre.Img” or “Save As UserPost.Img” displays. If the file is too large, andcannot be loaded, the message “File Size Error” displays.Copy the Images to an SD CardThe PC Utility will create two image files:USERPRE.IMGUSERPOST.IMGThey will be located in your PC at:C:\<strong>SPS</strong>-<strong>300</strong>PC\S tore NameCopy the mages to the following path on your SD card:SD\\<strong>SPS</strong><strong>300</strong>\Pgm Back\Store NameImportant: In the path: C:\<strong>SPS</strong>-<strong>300</strong>PC\Store Name, the store name is the name youhave defined as the store in the PC Utility. Note: You must use the same store name inthe <strong>SPS</strong>-<strong>300</strong> <strong>Series</strong> ECR at System Options page 18. Note that the default store name is“STORE_A”.<strong>SAM4s</strong> <strong>SPS</strong>-<strong>300</strong> Operator's & Programming <strong>Manual</strong> v1.2 S-Mode Programming • 131
Load the Images by SD Card1. Insert the SD card in the register’s SD slot.2. Turn the control lock to the S position.3. From the second page of the Service Mode menu, select “9 SD Card Operation”.4. From the SD Card Operation menu select “4 PRE_IMAGE LOGO LOAD”.5. The message “PREAMBLE LOGO LOADED!” will print on the receipt printer.Saving Images from an <strong>SPS</strong>-<strong>300</strong> to an SD Card1. Insert the SD card in the register’s SD slot.2. Turn the control lock to the S position.3. From the second page of the Service Mode menu, select “9 SD Card Operation”.4. From the SD Card Operation menu select “5 PRE_IMAGE LOGO BACKUP”.5. The message “PREAMBLE LOGO BACKUP!” will print on the receipt printer.132 • S-Mode Programming <strong>SAM4s</strong> <strong>SPS</strong>-<strong>300</strong> Operator's & Programming <strong>Manual</strong> v1.2
apid beep-beep-beep will be heard again the display will stop flashing anddisplay a green color to confirm update completion.14. Power the register OFF. The FLASH ROM update is complete.15. Remove the SD card from the register.16. Perform a memory all clear on the ECR. The ECR is now ready to program or toload a previously saved end-user program.Flash ROM Update by PC UtilityUpdate FilesTo complete the firmware update, you will be supplied with the following files:NEWNET_DOWN.exe (The update utility program)<strong>SPS</strong><strong>300</strong>.binPC Connection CableYOU MUST USE Port #1. Use the following cable:CRS Part # 522120 (Register DB-9MF COM 1 to PC DB-9F)Update Boot Area1. Connect the Serial Cable From ECR to PC.2. At the register, turn the control lock to the S position.3. Turn the power switch to the OFF position.4. Press and hold the CASH and CLERK keys. (Use the keys in their defaultlocations, the upper-right and lower-right keys on the keyboard.)5. While continuing to hold the CASH and CLERK keys, turn the powerswitch to the ON position. (The display will illuminate and the error tonewill sound beep-beep-beep in quick succession.) Release the keys.6. At the PC, execute the program “NEWNET_DOWN.exe”. The Downloaddialog box displays.7. Select the appropriate com port connection at your PC at the PORT# option134 • S-Mode Programming <strong>SAM4s</strong> <strong>SPS</strong>-<strong>300</strong> Operator's & Programming <strong>Manual</strong> v1.2
uttons.8. Click SEL. find the folder where the update files are located and select<strong>SPS</strong><strong>300</strong>.bin.9. Select Boot Area Only in the Select One option buttons.10. Press OK Button. The download takes about 30 seconds; the scroll bar willtrack the progress of the download. At the ECR, the display will flash slowlywhile the update is taking place.11. When complete, the message Completed displays on the PC. Click OK andthe Download program will close. At the ECR, the display will change to agreen color indicating the update is complete. Turn the power switch to theOFF.Update Program Area1. Connect the Serial Cable From ECR to PC.2. At the register, turn the control lock to the S position.3. Turn the power switch to the OFF position.4. Press and hold the CASH and CLERK keys. (Use the keys in their defaultlocations, the upper-right and lower-right keys on the keyboard.)5. While continuing to hold the CASH and CLERK keys, turn the powerswitch to the ON position. (The display will illuminate and the error tonewill sound beep-beep-beep in quick succession.) Release the keys.6. At the PC, execute the program “Download.exe”. The Download dialog boxdisplays.7. Select the appropriate com port connection at your PC at the PORT# optionbuttons.8. Click SEL. find the folder where the update files are located and select<strong>SPS</strong><strong>300</strong>.bin.9. Select Program code + Font in the Select One option buttons.<strong>SAM4s</strong> <strong>SPS</strong>-<strong>300</strong> Operator's & Programming <strong>Manual</strong> v1.2 S-Mode Programming • 135
10. Press OK Button. The download takes about 3 minutes. At the PC, thescroll bar will track the progress of the download. At the ECR, The displaywill flash (Current program is being erased), after a few seconds, the displaywill continue to flash, but at a slower rate. This continues for about 3minutes while the new program is being loaded.Clear Current Batch11. When complete, the message Completed displays at thePC. Click OK andthe Download program will close. At the ECR, when the load is complete, arapid beep-beep-beep will be heard, and the display will flash rapidly. Turnthe power switch to OFF, the program update is complete.12. Disconnect the PC cable.13. Perform a memory all clear on the ECR. The ECR is now ready to programor to load a previously saved end-user program.The clear batch command erases all the current batch transactions from the DataTran memoryeven if they have not been settled. A LOCAL TRANSACTION INQUIRY should be printedprior to clearing the batch. This will ensure that the operator has the transaction detail to reenterif required.This operation should only be done under the direction of DATACAP.136 • S-Mode Programming <strong>SAM4s</strong> <strong>SPS</strong>-<strong>300</strong> Operator's & Programming <strong>Manual</strong> v1.2
Program Mode ProgrammingDescriptor Programming MethodsDescriptors are programmable for PLUs, function keys, groups, clerks and the logo/messages.There are two methods available to program descriptors, the Program Overlay Method andthe Descriptor Code Method. This chapter describes both methods. Refer to each programarea for specific steps for programming PLUs, groups, function keys, etc.Program Overlay Method<strong>SPS</strong>-320/<strong>SPS</strong>-340This method is the default descriptor program method for the flat keyboard models: <strong>SPS</strong>-320and <strong>SPS</strong>-340. When the descriptor field is selected on the program screen, you can simplytype the descriptor placing a copy of the overlay over the keyboard. Press enter to finalizeyour descriptor.1 11 21 31 41 51 61 71 81 91FEEDJOURNALFEED2 12 22 32 42 52 62 72 82 92' " < > - + = : ?! @ # $ % ^ & * ( )q w e r t y u i o pa s d f g h j k l ; CLEAR PLU X/TIMEz x c v b n m , . / 7 8 9CAPDOUBLESPACE SPACE SPACE SPACE SPACE CAPDOUBLEBACK 4 5 69 19 29 39 49 59 69 79 89 991 2 3 SUBTL10 20 30 40 50 60 70 80 90 1000 00 . CASHNOTE: Use the CAPS key to toggle between upper and lower case descriptor options.<strong>SAM4s</strong> <strong>SPS</strong>-<strong>300</strong> Operator's & Programming <strong>Manual</strong> v1.2 Program Mode Programming • 137
Program Mode Menu Turn the control lock to the PGM position. The first page of the PROGRAMMODE menu displays:PROGRAM MODE0.PLU1.GROUP2.SALES TAX3.SYSTEM OPTION4.PRINT OPTION5.FUNCTION KEYS6.CLERK Press PAGE DOWN to view the remainder of the PROGRAM MODE menu:PROGRAM MODE7.LOGO DESCRIPTOR8.NLU CODE# PROGRAM9.DOWNLOAD PROGRAMS00.MORE140 • Program Mode Programming <strong>SAM4s</strong> <strong>SPS</strong>-<strong>300</strong> Operator's & Programming <strong>Manual</strong> v1.2
PLU ProgrammingTo accommodate UPC scanning, each PLU can be given an identifying number up to 14digits in length.1. At the PGM control lock position menu, press 0 for PLU Programming. ThePLU PROGRAMMING screen displays:PLU PROGRAMMING0.ADD/MODIFY PLU1.DELETE PLUAdd/Modify PLU1. Press 0 to add or modify a PLU. The PLU NUMBER screen displays:PLU NUMBER* ENTER PLU NUMBERAND PUSH PLU, OR* PRESS A PLU KEY ONTHE KEYBOARD02. To view the PLU # PROGRAMMING screen, enter the number of the PLU youwish to program, or press a PLU key on the keyboard, or press a modifier keyfollowed by a the PLU key on the keyboard, or scan the barcode on an item.3. Refer to "PLU Options - Reference Information" on page 144 to make programentries or changes, press the CLEAR key to finalize and return to thePROGRAM MODE screen.142 • Program Mode Programming <strong>SAM4s</strong> <strong>SPS</strong>-<strong>300</strong> Operator's & Programming <strong>Manual</strong> v1.2
DescriptorType the descriptorusing the ProgramOverlay, or by usingthe descriptor codemethod (see page117.) The overlayis automaticallyactivated when thecursor is pointing atthe DESC field.# ofPRICE/HALOfields displayedis determined bymemoryallocation.PLU#1 P1DESC: PLU1PRESETYPRICE/HALO1 0.00PLU#1 P2PRESET OVERRIDEYTAXable BY: 1 2 3 4N N N NFOOD STMP ELIGIBLENGROUP #1 (1-20) 1GROUP #2 (1-20) 0GROUP #3 (1-20) 0Press ENTER toadvance thearrow to the nextoption.Press YES/NOto toggle from''Y' to 'N' foryes or nodecisions.PressPAGE DOWN toview the secondPLUProgrammingscreen.Press PAGE UPonce to return tothe first option ona screen. PressPAGE UP againto return to theprevious screen.PLU#NEGATIVE ITEMHASHSINGLE ITEMNON-ADD # COMP.GALLONAGE ITEMINVENTORY ITEMDISABLE1 P3NNNNNNNPressPAGE DOWNto view the thirdPLUProgrammingscreen.PLU#1 P4SCALABLENAUTO SCALENAUTO TARE (1-5) 0CONDIMENTNCOMP. CONDIMENTNPRINT ON RECEIPTYPRINT ON DISPLAYYPressPAGE DOWNto view thefourth PLUProgrammingscreen.<strong>SAM4s</strong> <strong>SPS</strong>-<strong>300</strong> Operator's & Programming <strong>Manual</strong> v1.2 Program Mode Programming • 143
If you wish theregistration ofthis PLU toautomaticallycause theregistration ofanother PLU,Enter the PLU #you wish to linkwith the 10-keypad. Enter '0'for no link.PLU#PRINT ON CHECKPRINT PRICE ON RECEIPTPRINT PRICE ON CHECKDISABLE PROMOCOUNTER NOT RESETPRESET OVERRIDEIN MGR CONTROL1 P5YPLU#1 P6LINK PLU:0MIX&MATCH (1-99) 0DISABLE VOID MODE & RETURN NYYNNNPressPAGE DOWNto view the 5 thPLUProgrammingscreen.PressPAGE DOWNto view the 6 thand last PLUProgrammingscreen.PLU Options - Reference InformationOption Entry DescriptionDESC Alphanumeric12 characterYou can program a descriptor for each PLU. Type thedescriptor using the Program Overlay, or by using thedescriptor code method (see page 117.) The overlay isautomatically activated when the cursor is pointing at theDESC field. The default descriptors are PLU #1, PLU #2,etc.PRESET Y or N Choose Y for a preset PLU. Choose N for an open PLU.Open PLUs accept amount entries. Use open PLUs to enterdifferent priced items into the same PLU. Preset PLUsautomatically register a preprogrammed price when the PLUis entered. Use preset PLUs to register an individual itemquickly and accurately. For example, cigarette packs or fooditems can be assigned to PLUs.144 • Program Mode Programming <strong>SAM4s</strong> <strong>SPS</strong>-<strong>300</strong> Operator's & Programming <strong>Manual</strong> v1.2
Option Entry DescriptionPRICE/HALO1PRICE/HALO2PRICE/HALO3PRICE/HALO4PRICE/HALO5PRESETOVERRIDETAXable BY TAX1TAXable BY TAX2TAXable BY TAX3TAXable BY TAX4FOOD STMPELIGIBLEGROUP #1GROUP #2GROUP #37 digitamountY or NY or NUp to five price levels are available. (Note that price levelfields 2-5 will display only if you allocate memory foradditional price levels.) If the PLU is open, the amountentered here is the high amount lock out (HALO). You canlimit errors by setting the maximum amount that can beentered into a PLU. If the PLU is preset, the amount enteredhere is the amount that is registered automatically when thePLU is entered.If Y, you can enter a price to override the preset price.Select N for non taxable items. Select Y to apply theappropriate tax automatically for this PLU.Y or N Select Y to accumulate a total of food stamp eligible items inthe current sale. The total can be viewed by pressing the F/SSUB key and food stamps can be tendered with the F/STEND key.0-99 For each of three group assignments, enter a group wherethis PLU's sales will accumulate. The number of groupsavailable is determined by memory allocation.NEGATIVE ITEM Y or N Select Y to register items that subtract, rather than add to thesale total.HASH Y or N Items designated with HASH status add to the current sale,but do not add to the registers grand total. HASH items mayor may not add to the net sales total - see system optionprogramming. Use hash for lottery sales or bottle deposits.SINGLE ITEM Y or N Select Y for a single item PLU. Single item PLUsautomatically total as a cash sale immediately after the PLUentry. Single item PLUs are used to speed up one item sales.NON-ADD #COMPGALLONAGEITEMINVENTORYITEMY or NY or NY or NSelect Y to enforce the entry of a non-add number before aregistration can be made.Select Y to compute gallons sold. The gallons sold will printalong with the price entry on the receipt. The total gallonssold will accumulate in the PLU counter. You must programthe price per gallon (in tenths of a cent, i.e. $1.299 for $1.29and 9/10) in the PRICE/HALO field.Select Y if you wish to track the number of items remainingin inventory using the Stock report.DISABLE Y or N Select Y to disable the PLU. Entries can not be made intodisabled PLUs.<strong>SAM4s</strong> <strong>SPS</strong>-<strong>300</strong> Operator's & Programming <strong>Manual</strong> v1.2 Program Mode Programming • 145
Delete PLUNote: To delete a PLU, all totals for the PLU must be cleared from Z1, Z2, Stock andPLU reports.1. From the PLU PROGRAMMING screen, press 1 to display the DELETE PLUscreen:DELETE PLU0.DELETE ONE PLU1.DELETE PLU RANGE2. Press 0 to delete an individual PLU. The PLU NUMBER screen displays:PLU NUMBER* ENTER PLU NUMBERAND PUSH PLU, OR* PRESS A PLU KEY ONTHE KEYBOARD03. Enter the number of the PLU you wish to delete, or press a PLU key on thekeyboard, or press modifier key followed by a the PLU key on the keyboard.The CONFIRM DELETE screen displays:CONFIRM DELETEARE YOU SURE YOUWISH TO DELETE PLU#CASH=DELETECLEAR=ABORT4. Press CASH to delete the PLU; press CLEAR to return to the PLU DELETEscreen without deleting the PLU.<strong>SAM4s</strong> <strong>SPS</strong>-<strong>300</strong> Operator's & Programming <strong>Manual</strong> v1.2 Program Mode Programming • 147
Delete PLU RangeNote: To delete PLUs, all totals for the PLUs must be cleared from Z reports (includingStock and PLU reports.)1. From the PLU PROGRAMMING screen, press 1 for to display the DELETEPLU screen:DELETE PLU0.DELETE ONE PLU1.DELETE PLU RANGE2. Press 1 to delete a range of PLUs. The PLU NUMBER screen displays:PLU NUMBER* ENTER NUMBER OFTHE FIRST PLU IN THE RANGEAND PUSH PLU03. Enter the number of the first PLU in the range you wish to delete and press PLU.The screen prompts for the last PLU in the range:PLU NUMBER* ENTER NUMBER OFTHE LAST PLU IN THE RANGEAND PUSH PLU0148 • Program Mode Programming <strong>SAM4s</strong> <strong>SPS</strong>-<strong>300</strong> Operator's & Programming <strong>Manual</strong> v1.2
4. Enter the number of the last PLU in the range you wish to delete and press PLU.The CONFIRM DELETE screen displays:CONFIRM DELETEARE YOU SURE YOUWISH TO DELETE PLU#CASH=DELETECLEAR=ABORT1234 TO12405. Press CASH to delete the PLU; press CLEAR to return to the PLU DELETEscreen without deleting the PLU.Note: Before a PLU can be deleted, all report information must be cleared. It may benecessary to run a Z1 and Z2 PLU Report, and if the PLU is an inventory item, youmust change the stock to zero.<strong>SAM4s</strong> <strong>SPS</strong>-<strong>300</strong> Operator's & Programming <strong>Manual</strong> v1.2 Program Mode Programming • 149
Group ProgrammingUp to 99 groups (the exact number is determined by memory allocation) are available tosummarize PLU sales. Group totals appear on reports, so that you can track sales of differenttypes of items. The group descriptors programmed here will replace the default descriptorsGROUP 1 through GROUP 99 that appear on reports. Each PLU can report totals to one, two or three different groups. If a PLU sendstotals to more than one group, the group total that appears on the Group reportwill not represent PLU sales. Therefore, you also have the option of decidingwhether each group's total will add to the group total on the Group report.To Program Groups1. At the PGM control lock position menu, press 1 for GROUP. The GROUPPROGRAMMING screen displays: (The maximum group number is set bymemory allocation.)GROUP PROGRAMMINGGROUP NO? (1-20)02. Enter the number of the group to be programmed, press CASH. The GROUP#PROGRAMMING screen displays:GROUP #1 PROGRAMMINGDESC : GROUP 1ADD TO GROUP TTLYSEND TO KPNKP PORT# :1 2 3 4 RSAT.N N N N YSER.N N N NPRINT RED ON KPN150 • Program Mode Programming <strong>SAM4s</strong> <strong>SPS</strong>-<strong>300</strong> Operator's & Programming <strong>Manual</strong> v1.2
3. Press PAGE DOWN to view the second page of group programming:GROUP #1 PROGRAMMINGRESERVEDRESERVEDRESERVEDGIFT CARD(1-2)1:ACTIVATE 2:ADDAGE VERIFICATION (0-5) 004. Refer to the table below to fill the fields of the GROUP PROGRAMMINGscreens.5. Press CASH to return to the GROUP PROGRAMMING screen. Continue toprogram groups as necessary. Press CLEAR to return to the PROGRAMMODE screen.Group Programming - Reference InformationOption Entry DescriptionDESC Alphanumeric12 characterYou can program a descriptor for each group. Type thedescriptor using the Program Overlay or by using thedescriptor code method (see page 117.). The overlay isautomatically activated when the cursor is pointing atthe DESC field. The default descriptors are GROUP 1,GROUP 2, etc.ADD TO GROUP TOTAL Y or N Select N if you do not wish this groups total to beadded to the total of all groups on the Group report.SEND TO KP Y or N Select Y if you wish to send PLUs reporting to thisgroup to a kitchen printer.KP PORT # Y or N For SAT: Select Y or N to direct items to the deviceattached to port 1-4 of the server register. Use the Roption (Y or N) to print a kitchen requisition at theregister.For SER: Select Y or N to direct items to the deviceattached to port 1-4 of a satellite register. (You mustset the register number where the KP is attached at IRCprogramming, see page 121.) Use the R option (Y orN) to print a kitchen requisition at the register.PRINT RED ON KP Y or N Select Y if you wish items reporting to this group toprint in red on the kitchen printer. (Note, the kitchenprinter must have red/black printing capability, and thisoption does not apply to the register receipt printer.)<strong>SAM4s</strong> <strong>SPS</strong>-<strong>300</strong> Operator's & Programming <strong>Manual</strong> v1.2 Program Mode Programming • 151
Option Entry DescriptionGIFT CARD 0, 1 or 2 If a PLU in this group is used to register a new giftcard, select 1 for “activate”. If a PLU is this group issued to add a value to an existing gift card, select 2 for“add”. For normal PLU registrations use the defaultvalue of “0”.AGE VERIF. 0-5 When an item in this group is registered (first time in atransaction only), the register will prompt the operatorto enter the customer’s date of birth. The sale of theitem will be registered only if the customer has reachedthe appropriate age.Set “0”for no age requirement.Set “1” to “5” to check the date of birth against the agerequirement group set in Z Mode.152 • Program Mode Programming <strong>SAM4s</strong> <strong>SPS</strong>-<strong>300</strong> Operator's & Programming <strong>Manual</strong> v1.2
Sales Tax ProgrammingThe <strong>SPS</strong>-<strong>300</strong> allows three calculation options for each of the four possible taxes.Add-On - most sales taxes can be programmed by entering an add-on taxpercentage rate.Tax Table - if a tax entered as an add-on tax percentage does not followexactly the tax chart follow that apply in your area, tax table programmingwill match tax collection exactly to the break points of your tax table. (Taxtable programming allows up to 75 breakpoints.)VAT - if tax is included in the cost of the item, you can use value added tax(VAT) to calculate the tax share of each sale.A fourth tax programming option, for the Canadian Goods and Services tax(GST) can be set using tax rate 4.Important Note: After you have entered your tax program, test for accuracy byentering several transactions of different dollar amounts. Carefully check to make surethe tax charged by the cash register matches the tax amounts on the printed tax chartfor your area. As a merchant, you are responsible for accurate tax collection. If thecash register is not calculating tax accurately, or if you cannot program your taxproperly from the information in this manual, contact your Dealer for assistance.Programming an Add-On Tax Rate PercentageWhen tax requirements can be met using a straight percentage rate, use the following methodto program a tax as a straight percentage.1. Turn the control lock to the PGM position.2. From the PROGRAM MODE menu, press 2 to view the TAXPROGRAMMING screen:TAX PROGRAMMINGTAX NUMBER (1-4)DESC : TAX1TAX TYPE (0-2) 00 : ADD-ON1 : TAX TABLE2 : VAT13. When the arrow is pointed at the TAX NUMBER field, enter the number of thetax you wish to program. (There are four taxes available, enter 1, 2, 3, or 4.) Thearrow will move to the TAX TYPE field.<strong>SAM4s</strong> <strong>SPS</strong>-<strong>300</strong> Operator's & Programming <strong>Manual</strong> v1.2 Program Mode Programming • 153
4. Enter 0 for an ADD-ON tax with a straight percentage rate. The appropriateTAX # PROGRAMMING screen displays:TAX #1 PROGRAMMINGTAX RATE 0.0005. When the arrow is pointed at the TAX RATE field, enter the percentage rate forthe sales tax. For example if the tax is 6 percent, enter 6.000 or 6.0. If the tax is7.5 percent, enter 7.500 or 7.5 using the decimal key. If the tax is 10 percent,enter 10.000 or 10.0. Press CASH to set the rate.6. The TAX PROG. screen will return prompting you to enter the next tax, ifnecessary. Continue to program additional taxes or press CLEAR to return tothe PROGRAM MODE screen.Programming a Tax TableIn some cases, a tax that is entered as a percentage does not exactly follow the tax charts thatapply in your area (even if the tax chart is based on a percentage). In these cases, werecommend that you enter your tax using tax table programming. This method will match taxcollection exactly to the break points of your tax table.Before programming, obtain a copy of the tax table you wish to program. You will need theprinted tax table if you wish to determine the break point entries yourself. The "Tax TableProgramming Example - Illinois 6% Tax Table" on page 157 is used as an example in thesteps that follow.Note: You can enter up to 75 break points.1. Turn the control lock to the PGM position.2. From the PROGRAM MODE menu, press 2 to view the TAX PROG. screen:TAX PROGRAMMINGTAX NUMBER (1-4)DESC : TAX1TAX TYPE (0-2) 10 : ADD-ON1 : TAX TABLE2 : VAT1154 • Program Mode Programming <strong>SAM4s</strong> <strong>SPS</strong>-<strong>300</strong> Operator's & Programming <strong>Manual</strong> v1.2
3. When the arrow is pointed at the TAX NUMBER field, enter the number of thetax you wish to program. (There are four taxes available, enter 1, 2, 3, or 4.)The arrow will move to the TAX TYPE field.4. Enter 1 for TAX TABLE programming. The appropriate TAX #PROGRAMMING screen displays:TAX #1 PROGRAMMINGFIRST TAX AMOUNT0.01NON-TAXABLE AMOUNT0.10# OF NON-REPEATBREAK 5# OF REPEAT BRK 35. Use the table below as a guide in filling the fields on this screen. Aftercompleting these entries, your screen should look like the screen that follows.FieldDescriptionFIRST TAX AMOUNT Enter the first tax amount that is charged.For this example the entry is 0.01.NON-TAXable AMOUNT Enter the highest amount where no tax ischarged. For this example the entry is0.10.# OF NON-REPEAT BRK Enter the number of Non-repeat breaks.For this example the entry is 5.# OF REPEAT BREAK Enter the number of repeat breaks. Forthis example the entry is 3.6. After entering the # OF REPEAT BRK field, the next TAX TABLE PROG.screen will display. Using the printed copy of your tax table, enter information inthe SALE AMOUNT RANGE fields. Enter the information as it appears onyour tax table. Enter the high amount of the first range where you are prompted.The low amount of the next range will be computed automatically. Aftercompleting the tax range entries, your screen should look like the followingscreen. Note that this screen should look exactly like the corresponding part ofthe printed tax table.TAX TABLE PROGRAMMINGTAX SALE AMT RANGE0.00 0.00 0.100.01 0.11 0.210.02 0.22 0.380.03 0.39 0.560.04 0.57 0.730.05 0.74 0.91<strong>SAM4s</strong> <strong>SPS</strong>-<strong>300</strong> Operator's & Programming <strong>Manual</strong> v1.2 Program Mode Programming • 155
7. Because this tax table has more than 5 break points (the number of break pointsthat can be displayed on the first screen), you must continue to enter SALE AMTRANGE information on the additional screens until information has been enteredfor each break point. After completing the tax range entries, your screen shouldlook like the following screen. Note that this screen should look exactly like thecorresponding part of the printed tax table.TAX TABLE PROGRAMMINGTAX SALE AMT RANGE0.06 0.92 1.080.07 1.09 1.240.08 1.25 1.418. After you have completed entering the SALES AMOUNT RANGE information,the TAX PROG. screen will return, prompting you to enter the next tax, ifnecessary. Continue to program additional taxes or press CLEAR to return tothe PROGRAM MODE screen.Note: Some tax tables are very complex. Contact your Dealer for assistance should youhave difficulty entering your Tax Table.156 • Program Mode Programming <strong>SAM4s</strong> <strong>SPS</strong>-<strong>300</strong> Operator's & Programming <strong>Manual</strong> v1.2
Tax Table Programming Example - Illinois 6% Tax Table1. Examine the printed tax table for the tax you are programming.2. Calculate the break point differences by subtracting the high side of the previousrange from the high side of the sale amount range.3. Examine the pattern of break point differences to determine when the breakpoints begin to repeat. Mark the beginning break points that do not fit a patternas “non-repeat breaks.” Mark the break points that are repeating in a pattern as“repeat breaks.” Count the number of repeat and non-repeat breaks.Tax ChargedSale AmountRangeBreak pointDifferences$0.00 $0.00 - $0.10$0.01 $0.11 - $0.21 11$0.02 $0.22 - $0.38 17$0.03 $0.39 - $0.56 18 Non-Repeat$0.04 $0.57 - $0.73 17$0.05 $0.74 - $0.91 18$0.06 $0.92 - $1.08 17$0.07 $1.09 - $1.24 16 Repeat$0.08 $1.25 - $1.41 17$0.09 $1.42 - $1.58 17$0.10 $1.59 - $1.74 16$0.11 $1.75 - $1.91 17$0.12 $1.92 - $2.08 17$0.13 $2.09 - $2.24 16$0.14 $2.25 - $2.41 17<strong>SAM4s</strong> <strong>SPS</strong>-<strong>300</strong> Operator's & Programming <strong>Manual</strong> v1.2 Program Mode Programming • 157
Programming a VAT (Value Added Tax)When a tax is included in the cost of the item, you can use the value added tax (VAT) programto calculate the tax share of each sale.1. Turn the control lock to the PGM position.2. From the PROGRAM MODE menu, press 2 to view the TAX PROG. screen:TAX PROGRAMMINGTAX NUMBER (1-4)DESC : TAX1TAX TYPE (0-2) 00 : ADD-ON1 : TAX TABLE2 : VAT13. When the arrow is pointed at the TAX NUMBER field, enter the number of thetax you wish to program. (There are four taxes available, enter 1, 2, 3, or 4.) Thearrow will move to the TAX TYPE field.4. Enter 2 for VAT. The appropriate TAX # PROGRAMMING screen displays:TAX #1 PROGRAMMINGTAX RATE 0.0005. When the arrow is pointed at the TAX RATE field, enter the VAT rate. Forexample if the tax is 6 percent, enter 6.000 or 6.0. If the tax is 7.5 percent, enter7.500 or 7.5 using the decimal key. If the tax is 10 percent, enter 10.000 or 10.Press CASH to set the rate.6. The TAX PROG. screen will return, prompting you to enter the next tax, ifnecessary. Continue to program additional taxes or press CLEAR to return tothe PROGRAM MODE screen.158 • Program Mode Programming <strong>SAM4s</strong> <strong>SPS</strong>-<strong>300</strong> Operator's & Programming <strong>Manual</strong> v1.2
Programming a Canadian GSTTax 4 can be programmed to accommodate the Canadian Goods and Services tax (GST).1. Turn the control lock to the PGM position.2. From the PROGRAM MODE menu, press 2 to view the TAX PROG. screen:TAX PROGRAMMINGTAX NUMBER (1-4)DESC : TAX4TAX TYPE (0-2) 00 : ADD-ON1 : TAX TABLE2 : VAT43. When the arrow is pointed at the TAX NUMBER field, enter 4, press CASH(CASH). The arrow will move to the TAX TYPE field.4. Press CASH. The TAX #4 PROGRAMMING screen displays:TAX #4 PROGRAMMINGTAX RATE 0.000GST IS TAXABLE BYRATE 1NRATE 2NRATE 3N5. When the arrow is pointed at the TAX RATE field, enter the GST rate. Forexample if the tax is 6 percent, enter 6.000 or 6.0. If the tax is 7.5 percent, enter7.500 or 7.5 using the decimal key. If the tax is 10 percent, enter 10.000 or 10.0.Press CASH to set the rate.6. At the RATE 1 field, indicate if the GST is taxable by rate 1 (tax on tax) bypressing the YES/NO key, then pressing the CASH key. The arrow advances tothe RATE 2 field. Enter taxable status for RATE 2 and RATE 3. ThePROGRAM MODE screen returns.<strong>SAM4s</strong> <strong>SPS</strong>-<strong>300</strong> Operator's & Programming <strong>Manual</strong> v1.2 Program Mode Programming • 159
System Option ProgrammingThe 1st SystemOption screen.PressPAGE DOWNto view the 2 ndSystem Optionscreen.PressPAGE DOWNto view the 3 rdSystem Optionscreen.1. At the PGM control lock position menu, press 3 for SYSTEM OPTIONProgramming. The SYSTEM OPTION pg 1 screen displays:2. Refer to “System Options - Reference Information" on page 164 to make programentries or changes, press the CASH key to finalize.SYSTEM OPTION P1BEEPER ACTIVEYRESERVEDCLERK ENTRY 00:PUSH 1:CODECLERK ASSIGNED WHEN CLERK KEY ISPUSHED (1-00) 1SYSTEM OPTIONCLERK IS Y:POP-UPN:STAY-DOWNDRAWER NEEDS TO BE SHUT TOOPERATEACTIVATE OPEN DRAWER ALARMP2NSYSTEM OPTION P3SECONDS TO ALLOW DRAWER OPEN 30(0-99)ALLOW POST TENDERNOPEN DRAWER ON POST TENDERYALLOW MULTIPLE RECEIPTNYNPress ENTERafter making achange, or pressENTER toadvance thearrow to the nextoption withoutmaking achange.Press PAGE UPto return to theprevious screen.NOTE:Be sure to pressENTER afterchanging aselection. If youdo not pressENTER, thechange will notbe accepted.PressPAGE DOWNto view the 4 thSystem Optionscreen.SYSTEM OPTION P4CASH DECLARATION REQBEFORE REPORTSMGR CONTROL TO TEND.NEGATIVE BALANCENZERO BALANCENRESET TRANSACTION NO.ON Z RPT NNPress YES/NOto toggle from'Y' to 'N' for yesor no decisions.160 • Program Mode Programming <strong>SAM4s</strong> <strong>SPS</strong>-<strong>300</strong> Operator's & Programming <strong>Manual</strong> v1.2
PressPAGE DOWNto view the 5 thSystem Optionscreen.PressPAGE DOWNto view the 6 thSystem Optionscreen.PressPAGE DOWNto view the 7 thSystem Optionscreen.PressPAGE DOWNto view the 8 thSystem Optionscreen.PressPAGE DOWNto view the 9 thSystem Optionscreen.SYSTEM OPTIONP5RESET GRAND TOTAL AFTERZ REPORTOPEN DRAWER WHEN REPORTSARE RUNYOPEN DRAWER DURING TRAIN MODE YDECIMAL PLACE (0-3) 2SYSTEM OPTIONP6DATE FORMAT IS0:MDY 1:DMY 2:YMDMODIFIER 00:POP UP AFTER ITEM1:POP UP AFTER SALE2:STAYDOWNN0SYSTEM OPTIONP7% AND TAX CALCULATION 0SPLIT PRICE CALCULATION 0CALCULATION CHART0:ROUND UP AT 0.501:ROUND UP2:ROUND DOWNSYSTEM OPTIONP8COMPULSORY EAT-IN T-OUT D-THRUBEFORE TENDERINGNHASH ISY:NORMAL N:NON-ADDALLOW PRINT SCREEN ONX/TIMESYSTEM OPTIONP9RESET Z COUNTER AFTER Z1 REPORTFINANCIAL REPORTTIME REPORTNPLU REPORTNCLERK REPORTNGROUP REPORTNYNNPress ENTERafter making achange, or pressENTER toadvance thearrow to the nextoption withoutmaking achange.Press PAGE UPto return to theprevious screen.NOTE:Be sure to pressENTER afterchanging aselection. If youdo not pressENTER, thechange will notbe accepted.Press YES/NOto toggle from'Y' to 'N' for yesor no decisions.<strong>SAM4s</strong> <strong>SPS</strong>-<strong>300</strong> Operator's & Programming <strong>Manual</strong> v1.2 Program Mode Programming • 161
PressPAGE DOWNto view the 10 thSystem Optionscreen.PressPAGE DOWNto view the 11 thSystem Optionscreen.PressPAGE DOWNto view the 12 thSystem Optionscreen.SYSTEM OPTION P10RESET Z COUNTER AFTER Z2 REPORTDAILY SALES RPTNPRINTER PAPER SENSOR ACTIVEDEACTIVATE SPLIT PRICINGSYSTEM OPTION P11ALLOW DIRECT MULTIPLICATIONINVENTORY CNT PGMNY:ADD CURRENT LVLN:COUNTER REPLACE CURRENTLEVELGLOBAL ENTRY LIMIT (0-14) 0SYSTEM OPTIONDISABLE PRICE LEVEL KEYLEVEL 1:LEVEL 2:LEVEL 3:LEVEL 4:LEVEL 5:P12YNNNNNNNPress ENTERafter making achange, or pressENTER toadvance thearrow to the nextoption withoutmaking achange.Press PAGE UPto return to theprevious screen.NOTE:Be sure to pressENTER afterchanging aselection. If youdo not pressENTER, thechange will notbe accepted.PressPAGE DOWNto view the 13 thSystem Optionscreen.SYSTEM OPTIONPRICE LEVEL IS0:POP UP AFTER ITEM1:POP UP AFTER SALE2:STAYDOWNELECTRONIC JOURNALP130NPressPAGE DOWNto view the 14 thSystem Optionscreen.SYSTEM OPTION P14PROMPT OPERATOR WHEN EJ BUFFERIS FULLSTOP OPERATIONS WHEN EJ BUFFERIS FULLNSEND ONLY NEGATIVE ENTRIESTO EJNX REPORT & DECLARATION TO EJ NN162 • Program Mode Programming <strong>SAM4s</strong> <strong>SPS</strong>-<strong>300</strong> Operator's & Programming <strong>Manual</strong> v1.2
PressPAGE DOWNto view the 15 thSystem Optionscreen.PressPAGE DOWNto view the 16 thSystem Optionscreen.PressPAGE DOWNto view the 17 thSystem Optionscreen.PressPAGE DOWNto view the 18 thSystem Optionscreen.PressPAGE DOWNto view the 19 thSystem Optionscreen.SYSTEM OPTIONSEND RESET REPORT TO EJDIRECT MULTIPLICATION MORETHAN ONE DIGITTENDER VALIDATIONY:AMOUNT TENDEREDN:AMOUNT OF SALEP15SYSTEM OPTION P16EUROPEAN ROUNDING# START END VALUE1 00 – 00 02 00 – 00 03 00 – 00 04 00 – 00 05 00 – 00 0SYSTEM OPTION P17DISABLE NOT FOUND PLUEMBEDED PRICE BAR CODETYPE 01/3/4/7CLERK INTERRUPTNPROGRAM DESC BY CODENAUTO CUTTERNUSE SPOOLNSYSTEM OPTION P18MCR CLERK SIGN ONUSE TRACK 1&2 : 0 0TRACK 2&3 : 1RESERVEDSTORE NAME:STORE_AMIX & MATCH IS TAXABLENSYSTEM OPTION P19BACK LIGHT COLOR (0-7)0:ON 1:RED 2:GREEN 3:BLUE4:RED+GREEN 5:GREEN + BLUE6:RED+BLUE 7:0FFSELECT LANGUAGE 00:ENGLISH 1:SPANISH 2:FRENCHNNNNNN0Press ENTERafter making achange, or pressENTER toadvance thearrow to the nextoption withoutmaking achange.Press PAGE UPto return to theprevious screen.NOTE:Be sure to pressENTER afterchanging aselection. If youdo not pressENTER, thechange will notbe accepted.<strong>SAM4s</strong> <strong>SPS</strong>-<strong>300</strong> Operator's & Programming <strong>Manual</strong> v1.2 Program Mode Programming • 163
PressPAGE DOWNto view the 20 thSystem Optionscreen.SYSTEM OPTIONALLOW PRICE LEVELONLY MGR MODEDISPLAY ADD PRICEOF LINKED ITEMSALLOW SALE WITH 0 STOCKALLOW Z STOCK RPTP20NNYYPress ENTERafter making achange, or pressENTER toadvance thearrow to the nextoption withoutmaking achange.PressPAGE DOWNto view the 21 thSystem Optionscreen.PressPAGE DOWNto view the 22 ndSystem Optionscreen.SYSTEM OPTION P21EFT DRAFT ISY:DATATRAN N:FINE DININGMSR CONNECTED 20:DATATRAN 1:PDC 2:REGISTERPIN PAD TYPEYY:DUKPT N:ROTATPIN PAD (0-4) 0YSYSTEM OPTION P22NO SIGN IF TRANSACTION 0.00TTL LESS THANDATATRAN WAIT VALUE 2ON REMOTE REGISTERPress PAGE UPto return to theprevious screen.NOTE:Be sure to pressENTER afterchanging aselection. If youdo not pressENTER, thechange will notbe accepted.MGR REQUIRED TO OPEN CHECKSNSystem Options - Reference InformationOption Entry DescriptionBEEPER ACTIVE Y or N Select N for a silent keyboard.RESERVED NCLERK ENTRY0:PUSH 1:CODECLERK ASSIGNEDWHEN CLERK KEY ISPUSHED (1-10)0 or 1 Select PUSH for a push button clerk, select CODE fora code entry clerk system (number - clerk or clerk -number - clerk) sequence.1-10 If PUSH system is selected, you can select the clerkthat is signed on when the CLERK # key is pressed.Note that the maximum clerk number you can enterhere is determined by how many clerks are allocated inmemory.164 • Program Mode Programming <strong>SAM4s</strong> <strong>SPS</strong>-<strong>300</strong> Operator's & Programming <strong>Manual</strong> v1.2
Option Entry DescriptionCLERK IS Y:POP-UPN:STAY-DOWNDRAWER NEEDS TO BESHUT TO OPERATEACTIVATE OPENDRAWER ALARMSECONDS TO ALLOWDRAWER OPENY or N Select Y for pop-up clerks, select N for stay downclerks. With pop-up clerks, you must sign on for eachtransaction. With stay down clerks, the same clerkremains signed on until sign off.Y or N Select Y to enforce closed drawer for registeroperations.Y or N Select Y if you want the error tone to automaticallysound when the drawer stays open longer than the timeset in the following field.1-99 If you enable the open drawer alarm above, you can setthe length of time (1-99 seconds) before the alarmsounds.ALLOW POST TENDER Y or N Select Y to allow re-tendering should a second changecalculation be necessary. Re-enter the tendered amountand press the CASH key to show the new changecomputation.OPEN DRAWER ONPOST TENDERALLOW MULPTIPLERECEIPTCASH DECLARATIONREQ BEFORE REPORTSMGR CONTROL TOTEND.NEGATIVE BALANCEZERO BALANCERESET TRANSACTION #ON Z REPORTRESET GRAND TOTALAFTER Z REPORTOPEN DRAWER WHENREPORTS ARE RUNOPEN DRAWERDURING TRAIN MODEY or NY or NY or NY or NY or NY or NY or NY or NIf you enable post tendering, select N to not open thecash drawer after the second tender.Set to Y if you wish to issue more than one copy of atransaction receipt.Select Y to enforce a cash declaration function before afinancial, clerk, or cash in drawer report can begenerated.Select Y if you wish to control negative transactions(when cash is removed from the drawer). Whenselected the control lock must be in the X position tofinalize the transaction.Select Y if you wish to reset the transaction number(often called the receipt counter) to zero after thefinancial report is reset.Select Y if you wish to reset the grand total to zeroafter the financial report is reset.Select N to stop the drawer from opening when reportsare run.Select N if you do not want the cash drawer to openduring training mode operations.DECIMAL PLACE 0-3 Enter a digit to place the decimal point the selectednumber of positions from the right.DATE FORMAT IS0:MDY 1:DMY 2:YMD0, 1, or 2 Select 0 for MMDDYY, select 1 for DDMMYY, orselect 2 for YYMMDD date printing format.<strong>SAM4s</strong> <strong>SPS</strong>-<strong>300</strong> Operator's & Programming <strong>Manual</strong> v1.2 Program Mode Programming • 165
Option Entry DescriptionMODIFIER:0:POP UP AFTER ITEM1:POP UP AFTER SALE2:STAYDOWN0, 1, or 2 A MODIFIER key alters the next PLU registered,either by changing the code number of the PLU so thata different item is registered, or by adding the modifierdescriptor and not changing the code of the subsequentPLU. If you press a modifier key, you have the optionof the modifier applying only to the next item (0),having the same modifier apply to any subsequent itemregistered in the same transaction (1), or having thesame modifier apply to any subsequent item on anysubsequent transaction (2).% AND TAX CAL. 0, 1, or 2 Select the digit that represents the appropriate roundingmethod for tax and discount calculations: 0 for roundup at 0.5 of a penny (0.005), 1 for always round up or 2for always round down.SPLIT PRICE CAL. 0, 1, or 2 Select the digit that represents the appropriate roundingmethod for split pricing (i.e. 2 at 3 for $1.00)calculations: 0 for round up at 0.5 of a penny (0.005), 1for always round up or 2 for always round down.COMPULSORY EAT-INT-OUT D-THRUBEFORETENDERINGHASH ISY:NORMAL N:NON-ADDALLOW PRINT SCREENON X/TIME KEYRESET Z COUNTERAFTER Z1 REPORTFINANCIAL REPORTTIME REPORTPLU REPORTCLERK REPORTGROUP REPORTRESET Z COUNTERAFTER Z2 REPORTDAILY SALES RPTPRINTER PAPERSENSOR ACTIVEY or NY or NY or NY or NY or NY or NChoose Y if you wish to enforce use of one of thedestination keys (EAT-IN, TAKE OUT, or DRIVETHRU) before the sale is finalized.Y: Hash adds to all totals except the gross and netsales totals on the financial report.N: Hash does not add to any totals, except the HASHtotal on the financial report.Choose N if you wish to disable the print screenfunction of the X/TIME key.Choose Y or N to determine if you wish to reset the Zcounter after a Z1 of each report listed.Choose Y or N to determine if you wish to reset the Zcounter after a Z2 of the daily sales report.A built in paper sensor determines whether paper iscurrently loaded in the printer. If Y, operations are notallowed without paper loaded. If N, operations areallowed when paper is out.166 • Program Mode Programming <strong>SAM4s</strong> <strong>SPS</strong>-<strong>300</strong> Operator's & Programming <strong>Manual</strong> v1.2
Option Entry DescriptionDEACTIVATE SPLITPRICINGY or NIf N, both multiplication and split pricing calculationscan be done with the X/TIME key. If Y, onlymultiplication can be done with the X/TIME key.ALLOW DIRECT MULT Y or N If Y, you can multiply preset items by simply enteringthe quantity, then pressing the preset PLU key.INVENTORY CNT PGMY:ADD CURR. LVLN:COUNTER REPLACECURR LEVELGLOBAL ENTRY LIMIT(0-14)DISABLE PRICE LEVELKEYLEVEL 1:LEVEL 2:LEVEL 3:LEVEL 4:LEVEL 5:PRICE LEVEL IS0:POP UP AFTER ITEM1:POP UP AFTER SALE2:STAYDOWNY or N Choose Y or N to determine whether the quantity ofinventory you enter in the PLU stock program adds toexisting inventory quantity, or whether it replaces thecurrent inventory quantity.0-14 Enter a digit to determine the number of numeric digitsthat can be entered for any register function. Enter 0for no limit.Y or N You can choose to disable any of the price level keyshere.0, 1, or 2 If you press a price level key, you have the option ofthe level key applying only to the next item (0), havingthe same level key apply to any subsequent itemregistered in the same transaction (1), or having thesame level key apply to any subsequent item on anysubsequent transaction (2).ELEC. JOURNAL Y or N Select Y to enable the electronic journal. Theelectronic journal captures in memory what you wouldprint line by line on a traditional journal. The fouroptions that follow control the electronic journalfeature. The electronic journal can be read and printedin the X control lock position or reset and printed in theZ control lock position.PROMPT OPERATORWHEN E.J. IS FULLSTOP OPERATIONSWHEN E.J. IS FULLSEND ONLY NEGATIVEENTRIES TO E.J.X REPORT &DECLARATION TO E.JY or NY or NY or NY or NIf the electronic journal is enabled above, select Y ifyou wish to display a message to notify the operatorwhen the journal memory is full.If the electronic journal is enabled above, select Y ifyou wish to stop operations when the journal memoryis full.If the electronic journal is enabled above, select Y ifyou wish to capture only transactions with negativeentries.If the electronic journal is enabled above, select Y ifyou wish to capture reset reports.<strong>SAM4s</strong> <strong>SPS</strong>-<strong>300</strong> Operator's & Programming <strong>Manual</strong> v1.2 Program Mode Programming • 167
Option Entry DescriptionDIRECT MULT MORETHAN ONE DIGITTENDER VALIDATIONY:AMT TENDEREDN:AMT OF SALEY or NY or NIf you allow direct multiplication of a preset PLU, youcan allow only single digit multiplication ormultiplication by more than one digit.Validation is allowed if an appropriate optional printeris connected to an RS-232C port. Here you can choosethe content of single line validationEUROPEAN ROUNDING Y or N Select Y to implement the rounding system that youenter on this page. For example, enter a range such as“.00 - .05” and then select the rounding value for therange.DISABLE NOT FOUNDPLUEMBEDED PRICE BARCODE TYPE 1/3/7CLERK INTERRUPTY or N Select N to allow the operator to enter PLU prices andother data when the entered PLU number is not foundin the PLU file.1, 3, or 7 Enables price embedded bar codes:1 = Type 1 embedded bar codes with a price checksum.3 = Type 3 embedded bar codes without a check sum.7 = Choose 7 if you are embedding a weight, ratherthan a price. Use weight when different items are soldin bulk, such as nut/bolts in a hardware store. When aweight embedded bar code is scanned the weight isdisplayed and must be extended by a price at the cashregister.Y or NPRG DESC BY CODE Y or N When N, program descriptors by pressing theappropriate key on the program overlay. When Y,program descriptors by typing the code for eachdescriptor character.AUTO CUTTER Y or N NOT USED.USE SPOOL Y or N Choose Y if the paper take-up spool is being used(single printer models only.)MCR CLERK SIGN ON Y or N Choose Y to activate the optional card reader for clerkoperations.USE TRACK 1&2USE TRACK 3&4RESERVED0 or 1 Select the tracks read by the card reader: 1 and 2 or 3and 4.STORE NAME 8 characters Stored files will be saved on SD/USB under a folderwith the store name. The default store name is“STORE_A”.MIX & MATCH ISTAXABLEY or NIf Y, mix and match discounts are taxable, resulting intax being applied to the net sale amount, rather than thegross amount.168 • Program Mode Programming <strong>SAM4s</strong> <strong>SPS</strong>-<strong>300</strong> Operator's & Programming <strong>Manual</strong> v1.2
Option Entry DescriptionBACK LIGHT COLOR 0-7 0=ON (standard light blue backlight)1=RED; 2=GREEN; 3= BLUE; 4=RED+GREEN;5=GREEN+BLUE; 6=RED+BLUE7=OFF (no backlight)SELECT LANGUAGE 0, 1, 2 Converts system descriptors to selected languageALLOW PRICE LEVELONLY MGR MODEDISPLAY ADD PRICE OFLINKED ITEMSALLOW SALE WITH 0STOCKY or NY or NY or NChoose Y to require the X Mode key to operate thePrice Level keys.When Y, the customer display shows a total of the itemand linked item. For example, if PLU is $1.00 and islinked to PLU2 which is $0.25, the customer displaywill show $1.25.When N, inventory PLUs cannot be sold when stockreaches "0".ALLOW Z STOCK RPT Y or N When N, the operator is not allowed to clear (Z) stock.EFT DRAFT IS Y or N Set EFT DRAFT to Y (DATATRAN) for a normaldraft. Set EFT DRAFT to N (FINE DINING) for adraft with a tip entry line.MSR CONNECTED 0, 1, or 2 Set MSR CONNECTED to 0 if the MSR is connectedto the DATATRAN. Set to 1 if the MSR is connectedto the PDC. Set to 2 if connected to the register.PIN PAD TYPE Y or N Choose Y. (DUKPT is only type supported.)PIN PAD (0-4) 0-4 Indicate port where PIN PAD is connected.NO SIGN IF TRANSANC-TTL LESS THAN 0.00DATATRAN WAITVALUE ON REMOTEREGISTERMGR REQUIRED TOOPEN CHECKS00.00 No signature requires if EFT transaction is underamount set here. (i.e. if 20.00 is set here, no signatureis required on transactions under $20.00.)0 A setting at this field may be required in IRC system oftwo or more <strong>SPS</strong>-<strong>300</strong> registers where a DialTran(telephone line authorization) and other peripherals areshared. If an “INVALID ENTRY—TIME OVER”message is displayed at a remote register, contact CRSTechnical Support for assistance is setting this field.Y or N Set this field to Y in a charge posting environment.New checks can be assigned in manager mode.<strong>SAM4s</strong> <strong>SPS</strong>-<strong>300</strong> Operator's & Programming <strong>Manual</strong> v1.2 Program Mode Programming • 169
Print Option ProgrammingThe 1st PrintOption screen.PressPAGE DOWNto view the 2 ndPrint Optionscreen.PressPAGE DOWNto view the 3 rdPrint Optionscreen.1. At the PGM control lock position menu, press 4 for PRINT OPTIONProgramming. The PRINT OPTION pg 1 displays:2. Refer to "Print Options - Reference Information" on page 174 to make programentries or changes, press the CASH key to finalize.PRINT OPTIONPRINT MEDIA TOTALSON CLERK REPORTPRINT TAX SYMBOLPRINT VD MODE AND RETURNON REPORTPRINT AUDACTION ON REPORTPRINT OPTIONSKIP ZERO TOTALS ONFINANCIAL REPORTSKIP ZERO TOTALS ONCLERK REPORTPRINT CLERK REPORT AFTERFINANCIAL REPORTPRINT SALE ITEM NO.P1P2PRINT OPTIONP3PRINT PLU WITH ZERO TOTALSON REPORTPRINT SUBTOTAL WHEN PRESSEDNPRINT % OF SALES ON PLU REPORTNPRINT CONSECUTIVE NO.YNYYNYYNNNPress ENTERafter making achange, or pressENTER toadvance thearrow to the nextoption withoutmaking achange.Press PAGE UPto return to theprevious screen.NOTE:Be sure to pressENTER afterchanging aselection. If youdo not pressENTER, thechange will notbe accepted.PressPAGE DOWNto view the 4 thPrint Optionscreen.PRINT OPTIONPRINT DATEPRINT TIMEPRINT MACHINE NO.PRINT CLERK NAMEHOME CURRENCY SYMBOL IS $P4YYYYPress YES/NOto toggle from'Y' to 'N' for yesor no decisions.PRINT Z COUNTERY170 • Program Mode Programming <strong>SAM4s</strong> <strong>SPS</strong>-<strong>300</strong> Operator's & Programming <strong>Manual</strong> v1.2
PressPAGE DOWNto view the 5 thPrint Optionscreen.PressPAGE DOWNto view the 6 thPrint Optionscreen.PressPAGE DOWNto view the 7 thPrint Optionscreen.PressPAGE DOWNto view the 8 thPrint Optionscreen.PRINT OPTIONP5PRINT RECEIPT WHEN SIGN ON/OFFYPRINT GRAND TOTALON X REPORTYON Z REPORTYPRINT OPTIONPRINT GROSS TOTALON X REPORTON Z REPORTPRINT SUBTOTAL W/O TAXTAX AMOUNT ISY:COMBINE N:ITEMIZEPRINT OPTIONPRINT TAX AMOUNTPRT TAXABLE TOTALPRINT TAX % RATEVAT BREAKDOWNPRINT TRAIN MODE TITLEIN TRAINING MODEP6P7YYNNYPRINT OPTIONP8CURRENCY SYMBOLCONV#1 . CONV#2 .CONV#3 .CONV#4 .E.J. PORT (0-4) 0REPORT PORT(0-4) 0NNNYPress ENTERafter making achange, or pressENTER toadvance thearrow to the nextoption withoutmaking achange.Press PAGE UPto return to theprevious screen.NOTE:Be sure to pressENTER afterchanging aselection. If youdo not pressENTER, thechange will notbe accepted.Press YES/NOto toggle from'Y' to 'N' for yesor no decisions.<strong>SAM4s</strong> <strong>SPS</strong>-<strong>300</strong> Operator's & Programming <strong>Manual</strong> v1.2 Program Mode Programming • 171
PressPAGE DOWNto view the 9 thPrint Optionscreen.PressPAGE DOWNto view the 10 thPrint Optionscreen.PRINT OPTIONPRT KP ORDER # ON RECEIPTPRINT PRICE ON KPSEND TO KP IN VOID MODESEND TO KP IN TRAIN MODEPRINT OPTIONCOMBINE LIKE ITEMS ON KPP9P10CONSOLIDATION ON CHECK TRACKNVOLUME UNIT 00:GAL 1:LTRYNYNNPress ENTERafter making achange, or pressENTER toadvance thearrow to the nextoption withoutmaking achange.Press PAGE UPto return to theprevious screen.PressPAGE DOWNto view the 11 thPrint Optionscreen.PRINT OPTIONPRINT PREAMBLEPRINT POSTAMBLEMESSAGE ON RECEIPTPRINT PREAMBLEPRINT POSTAMBLEON THE GUEST CHECKP11YYNNPressPAGE DOWNto view the 12 thPrint Optionscreen.PRINT OPTIONPRINT ON FINANCIAL REPORTAVG ITEM/CUSTAVG $/CUSTBUFFER RECEIPT ISSUE WHENRECEIPT IS ONPRIORITY PRINT BY GROUPON KP/KVP12YYNNPressPAGE DOWNto view the 13 thPrint Optionscreen.PRINT OPTIONP13GRAND TOTAL ISY: NET N: GROSSPRINT E.J FROMNY:OLDEST N:NEWESTPRINT JOURNAL IS SMALLNSEND ORDER TO KP AT SUBTOTAL NPRINT PLU# ON REPORTNN172 • Program Mode Programming <strong>SAM4s</strong> <strong>SPS</strong>-<strong>300</strong> Operator's & Programming <strong>Manual</strong> v1.2
PressPAGE DOWNto view the 14 thPrint Optionscreen.PressPAGE DOWNto view the 15 thPrint Optionscreen.PRINT OPTIONP14PRINT PLU# ON RECEIPTNPRE-PRN GRAPHIC LOGONPOST-PRN GRAPHIC LOGONON RECEIPTPRE-PRN GRAPHIC LOGONPOST-PRN GRAPHIC LOGONON GUEST CHECKPRINT OPTIONP15PRE-FEED LINE# RECEIPT (0-5) 0POST-FEED LINE# RECEIPT (0-5) 0PRINT IN HIGH DENSITYNPRINT DATE ON SERVICENON HARD CHECKPRINT TAX CHARGEDNFOR LAST SERVICED ITEMSPress ENTERafter making achange, or pressENTER toadvance thearrow to the nextoption withoutmaking achange.Press PAGE UPto return to theprevious screen.PressPAGE DOWNto view the 16 thPrint Optionscreen.PRINT OPTIONP16NOT PRINT WHEN POLLING REPORT NPRINT WHEN PROGRAM UP/DOWN NADJUSTABLE CUT (0-70) 40COPY OF DATATRAN RECPT.(0-99) 1PRINT WHOLE CARD NO.NPRINT EXP. DATENPRINT LAST LINE OF EJ 0<strong>SAM4s</strong> <strong>SPS</strong>-<strong>300</strong> Operator's & Programming <strong>Manual</strong> v1.2 Program Mode Programming • 173
Print Options - Reference InformationOption Entry DescriptionPRINT MEDIA TOTALSON CLERK REPORTY or NSelect Y to print media totals for each clerk, thusallowing clerk cash drawer accountability.PRINT TAX SYMBOL Y or N Select N to remove the tax symbol (i.e."T1") from theprint and display.PRINT VD MODE ANDRETURN ON REPORTPRINT AUDACTION ONREPORTSKIP ZERO TOTALS ONFINANCIAL REPORTSKIP ZERO TOTALS ONCLERK REPORTPRT CLERK REPORTAFT FINANCIAL RPTPRINT PLU WITH ZEROTOTALS ON REPORTPRINT SUBTOTALWHEN PRESSEDPRINT % OF SALES ONPLU REPORTY or NY or NY or NY or NY or NY or NY or NY or NSelect N to remove the VOID MODE and RETURNtotals from the financial and clerk reports.Select N to remove the AUDACTION total from thefinancial and clerk reports.By default, the register prints only totals withinformation other than zero. Select N, if you wish toprint the contents of all the financial report totals, evenif the total is zero.By default, the register prints only totals withinformation other than zero. Select N, if you wish toprint the contents of all the clerk report totals, even ifthe total is zero.Select Y if you wish to include the clerk reportinformation at the end of the financial report.By default, the register prints only totals withinformation other than zero. Select Y, if you wish toprint the contents of all the PLUs, even if the total iszero.Select Y if you wish the subtotal to print when theSUBTL key is pressed.The register can calculate the percentage of salesrepresented by each PLU. Select Y if you wish to printthis percentage on the PLU report. Note: thepercentage will print only on standalone registerreports, not IRC report.PRINT CONS. NO. Y or N The consecutive number (also referred to as thetransaction counter, or receipt counter) normally printson each receipt. Select N if you do not wish to printthis counter.PRINT DATE Y or N Select N if you wish to delete the printing of the date.PRINT TIME Y or N Select N if you wish to delete the printing of the time.PRINT MACHINE NO. Y or N If you are using more than one cash register, you canidentify the specific register where a receipt wasprinted. Enter Y if you wish to print the registernumber on the receipt.174 • Program Mode Programming <strong>SAM4s</strong> <strong>SPS</strong>-<strong>300</strong> Operator's & Programming <strong>Manual</strong> v1.2
Option Entry DescriptionPRINT CLERK NAME Y or N Select N if you wish to delete the printing of the clerkname on the receipt.HOME CURRENCY SYM $ Users outside of the USA can designate a differentcurrency symbol. To select a different symbol, pressthe symbol you wish to use on the Alpha Keyboardoverlay. When this field is selected, press 00 to displaya list of optional symbols.PRINT Z COUNTER Y or N Select N if you wish to delete the printing of the resetcounter on Z reports.PRINT RECEIPT WHENSIGN ON/OFFPRINT GRAND TOTALON X REPORTON Z REPORTPRINT GROSS TOTALON X REPORTON Z REPORTPRINT SUBTOTAL W/OTAXTAX AMOUNT ISY:COMBINE N:ITEMIZEY or NY or NY or NY or NY or NSelect N if you do not wish to print a receipt whensigning on or off a clerk.Select N if you wish to delete the printing of the grandtotal on the financial report reading (X report) orfinancial report resetting (Z report).Select N if you wish to delete the printing of the grosssales total on the financial report reading (X report) orfinancial report resetting (Z report).If you hand-write credit card slips, you may find ituseful to print the merchandise subtotal. Select Y ifyou wish to print the subtotal without tax on thereceipt.Select Y if you are calculating and reporting more thatone sales tax rate separately and you wish to print justthe total of multiple taxes rather than itemize each taxon the receipt.PRINT TAX AMOUNT Y or N Select Y if you wish to delete the printing of the taxamount on the receipt.PRINT TAXABLE TOTAL Y or N Select Y if you wish to print the total of merchandiseeligible for each tax on the receipt.PRINT TAX % RATE Y or N If you are calculating a tax percentage (add-on orVAT), select Y if you wish to print the tax rate on eachreceipt.VAT BREAKDOWN Y or N If Y, a breakdown of the VAT eligible sale will print,the net amount and the VAT amount.INCLUDE VAT TAXIN TAX AMTPRINT TRAIN MODETITLE IN TRAIN MODEY or NY or NChoose Y to print the VAT tax amount on the receipt,and include the VAT tax amount with other taxes, ifapplicable.When in training mode, the message "TRAIN MODE"normally prints on each receipt. Select N if you wishto delete this message.<strong>SAM4s</strong> <strong>SPS</strong>-<strong>300</strong> Operator's & Programming <strong>Manual</strong> v1.2 Program Mode Programming • 175
Option Entry DescriptionCURRENCY SYMBOLCONV.#1CONV.#2CONV.#3CONV.#4PRINT KP ORDER # ONRECEIPTY or NY or NIf you are using the currency conversion feature, youcan select the appropriate symbol for each foreigncurrency you are accepting. To select a differentsymbol, press the symbol you wish to use on the AlphaKeyboard overlay. When one of these fields areselected, press 00 to display a list of optional symbols.A system wide counter creates an order number foreach kitchen requisition. Choose Y or N to print theorder number on the kitchen printer requisition.PRINT PRICE ON KP Y or N You can choose to print the item with or without its'price on the kitchen requisition.SEND TO KP INVOID MODESEND TO KP INTRAIN MODECOMBINE LIKE ITEMSON KPCONSOLIDATION ONCHECK TRACKVOLUME UNIT0:GAL 1:LTRY or N You can choose whether to print or not printregistrations in void mode on kitchen requisitions.Y or N You can choose whether to print or not printregistrations in training mode on kitchen requisitions.Y or N If two of the same items are registered in the sametransaction, you can choose the format on the kitchenrequisition. For example, if Y, "2 HAMBURGERS; ifN, "1 HAMBURGER" and "1 HAMBURGER".Y or N Consolidation of like items can be selected for softguest check printing. For example, if three rounds ofdrinks are served, the check will print "3 TAP BEER"rather than "1 TAP BEER" three times.0 or 1 If gallonage is selected in PLU programming, choosegallons or liters here.PRINT PREAMBLE Y or N Choose whether to print the PREAMBLE on thereceipt.PRINT POSTAMBLEMESG ON RECEIPTY or NChoose whether to print the POSTAMBLE on thereceipt.PRINT PREAMBLE Y or N Choose whether to print the PREAMBLE on the guestcheck.PRINT POSTAMBLEON THE GUEST CHECKPRINT ON FIN RPTAVG ITEM/CUSTAVG $/CUSTBUFFER RECEIPT ISSUEWHEN REC IN ONPRIORITY PRINT BYGROUP ON KP/KVY or NY or NY or NY or NChoose whether to print the POSTAMBLE on the guestcheck.Choose whether to print the average items per customer(PLU sales counter/Net sales counter) or the averagesales per customer (Net Sales/Net Sales counter).Determine whether you can issue a second receipt forthe same transaction with the CASH keyIf Y, the order in which items appear on a kitchenrequisition is determined by the group to which theitem is assigned, i.e. items reported to group 1 willprint before items reported to group 2.176 • Program Mode Programming <strong>SAM4s</strong> <strong>SPS</strong>-<strong>300</strong> Operator's & Programming <strong>Manual</strong> v1.2
Option Entry DescriptionPRINT PLU # ONRECEIPTY or N If Y, the PLU number and descriptor will print. If N,only the PLU number will print.E.J. PORT 0, 1, or 2 Choose a port for a remote printer to print electronicjournal reports instead of the register printer.REPORT PORT 0, 1, or 2 Choose a port for a remote printer to print reportsinstead of the register printer.PRINT E.J FROMY:OLDEST N:NEWESTNOT PRINT WHENPOLLING REPORTSPRINT PLU #ON PLU REPORTGRAND TOTAL ISY:NET N:GROSSSEND ORDER TO KPAT SUBTOTALPRINT DATE ONSERV ON HARD CHECKCOPY OF DATATRANRECEIPT (0-99)Y or NY or NY or NY: Prints electronic journal from lowest consecutivenumber to highest.N: Prints electronic journal from highest consecutivenumber to lowest.Choose Y if you would like to suppress registerprinting when reports are polled.Determines whether PLU# is displayed on the report.Y or N Choose Y if you wish the grand total to accumulatedaily net sales totals. Choose N if you wish the grandtotal to accumulate daily gross sales totals.Y or N Choose Y to print orders on the KP when theSUBTOTAL key is pressed. Choose N to print orderson the KP when the order is finalized.Y or N If Y, the posting date will print at every posting on thehard check.0-99 Enter the number of copies of the DataTran (integratedcredit) receipts.PRT WHOLE CARD NO. Y or N If N, only the last four digits of the credit/debit cardwill print.PRT EXP. DATE Y or N If N, the credit card expiration date will not print on theDataTran (integrated credit) receipt.PRINT LAST LINE OF EJ 00 Quick journal review (R-Mode/10 Subtotal) prints lastxx lines of electronic journal. (Where xx is 0-99.)<strong>SAM4s</strong> <strong>SPS</strong>-<strong>300</strong> Operator's & Programming <strong>Manual</strong> v1.2 Program Mode Programming • 177
Clerk Programming1. At the PGM control lock position menu, press 6 for CLERK. The CLERKNUMBER screen displays:CLERK NUMBERCLERK NO? (1-99)02. Enter the clerk number 1-99, (the actual number of clerks is set in memoryallocation). Press the CASH key to display the CLERK # programming screen:DescriptorType the descriptor usingthe Program Overlay or byusing the descriptor codemethod (see page 117.).The overlay isautomatically activatedwhen the cursor ispointing at the DESCfield.CLERK #1 PROGRAMMINGNAME : CLERK 1PASSWORD 0DRAWER ASSIGN(0-2) 1PressENTER toadvancethe arrowto the nextoption.3. Refer to "Clerk Programming - Reference Information" to make choices orchanges on the screens provided.4. After making new entries or changes for a function key, press the CLEAR key tofinalize and return to the PROGRAM MODE screen.Clerk Programming - Reference InformationOption Entry DescriptionNAME AlphaPASSWORD 10DRAWER 0-2numeric12 characterdigitnumberYou can program a descriptor for each clerk. The name youprogram will print on the receipt in place of the defaultCLERK #1-99. Type the descriptor using the ProgramOverlay or by using the descriptor code method (see page117.) The overlay is automatically activated when the cursoris pointing at the DESC field.If you are using a direct or code entry clerk system. Thenumber you set here is the number you must use to sign onor clock in/out. If using an optional card reader, you mustswipe the employee card at this field.Enter 0 to allow check track operations only. (No cash sales.)Enter 1 or 2 (with the multiple drawer option) to selectwhich drawer the clerk will open.178 • Program Mode Programming <strong>SAM4s</strong> <strong>SPS</strong>-<strong>300</strong> Operator's & Programming <strong>Manual</strong> v1.2
Function Key Programming1. From the PGM control lock position menu, press 5 for FUNCTION KEY. TheFUNCTION KEY PROGRAM screen displays:FUNCTION KEY PROGRAMPUSH FUNCTION KEY TOBE PROGRAMMED2. Press the function key you wish to program.If the function you wish to program is located on a function look-up key, press theappropriate function look-up key, then press 1 to select STATUS PROGRAM (meaningyou wish to program the status of the function not the menu assignment of the functionlook-up key) then press the digit corresponding to the function you wish to program.<strong>SAM4s</strong> <strong>SPS</strong>-<strong>300</strong> Operator's & Programming <strong>Manual</strong> v1.2 Program Mode Programming • 179
#/NS1. Press the #/NS key to view the #/NS function key options:#/NS KEY PROG.DESC1: NOSALEDESC2: NON ADD #NO SALE KEY DISABLEUNDER MGR CONTROLINHIBIT NO SALEAFTER NON-ADD #NNN2. Press CASH from the last field or press PAGE DOWN to view the second pageof #/NS function key options:#/NS KEY PROG.ENFORCE# ENTRY ATSTART OF SALEPRINT ON N/SYNON-ADD# PROHIBITNCOMP. NON-ADD# MUSTMATCH MAX DIGITNMAX DIGIT(0-8) 0N3. Press CASH from the last field to return to the FUNCTION KEY PROGRAMscreen, or press CLEAR at any time to return to the FUNCTION KEYPROGRAM screen without saving changes.180 • Program Mode Programming <strong>SAM4s</strong> <strong>SPS</strong>-<strong>300</strong> Operator's & Programming <strong>Manual</strong> v1.2
#/NO SALE Function OptionsOption Entry DescriptionDESC1 AlphaDESC2 AlphaNO SALE KEYDISABLEUNDER MGRCONTROLINHIBIT NO SALEAFTER NON-ADD#ENFORCE #ENTRY AT STARTOF SALEnumeric12 characternumeric12 characterY or NY or NY or NY or NYou can program a unique descriptor for the no salefunction. The default descriptor is NOSALE.You can program a unique descriptor for the non add #function. The default descriptor is NON ADD #.Select Y to disable the no sale function (non-add entries areallowed).Select Y to allow operation only in manager operation mode.Select Y if you want disable the NO SALE function after anon-add number is entered.Select Y if you wish to enforce the entry of a non-addnumber at the beginning of each transaction. (For example,to track the number of customers in each sale, or to identify acustomer number with each sale.)PRINT ON N/S Y or N Select N to stop printing when a NO SALE is performed.NON-ADD # Y or N Select Y to disable the non-add # function.PROHIBITCOMP NON-ADD# MUST MATCHMAX DIGITY or N Select Y if you wish all non-add number entries to have theexact number of digits selected in the MAX DIGIT flagbelow.MAX DIGIT (0-8) 0-8 Enter the maximum number of digits for non-add numberentry. Zero (0) means no limit.<strong>SAM4s</strong> <strong>SPS</strong>-<strong>300</strong> Operator's & Programming <strong>Manual</strong> v1.2 Program Mode Programming • 181
%1 -%51. Press the one of the % keys to view the appropriate % function key options:%1 PROGRAMMING DESC : %1AMOUNT:Y %:NNRATE 0.000KEY DISABLENUNDER MGR CONTROLNOPEN:Y PRESET:NNSALE:Y ITEM:N N2. Press CASH from the last field or press PAGE DOWN to view the second pageof % function key options:%1 PROGRAMMING OVERRRIDEABLENPOS.:Y NEG.:NNTAXABLE BY TAX1NTAXABLE BY TAX2NTAXABLE BY TAX3NTAXABLE BY TAX4NF/S ELIGIBLEN3. Press CASH from the last field or press PAGE DOWN to view the next page of% function key options:%1 PROGRAMMING ALLOW ONLY ONE TIMESUBTOTAL ENTRYNALLOW MULTIPLE AMTDISCOUNT(COUPON)WITHOUT SUBTOTALNPRESET OVERIDE INMGR ONLYN182 • Program Mode Programming <strong>SAM4s</strong> <strong>SPS</strong>-<strong>300</strong> Operator's & Programming <strong>Manual</strong> v1.2
4. Press CASH from the last field or press PAGE DOWN to view the last page of% function key options:%1 PROGRAMMING COMPULSORY VALIDN5. Press CASH from the last field to return to the FUNCTION KEY PROGRAMscreen, or press CLEAR at any time to return to the FUNCTION KEYPROGRAM screen without saving changes.%1 -%5 Function OptionsOption Entry DescriptionDESC Alphanumeric12 characterYou can program a unique descriptor. The defaultdescriptors are % 1-4.AMOUNT:Y %:N Y or N Select Y if you wish this key to apply an amount (as in acoupon). Select N if you wish this key to apply apercentage (as in a discount or surcharge).RATE 5 digit If the function is an amount, enter an amount from 0 to999.99. If not zero, the amount will be the preset couponamount. If the function is a percentage, enter a percentagefrom 0 to 99.999%. If not zero, the percentage will be thepreset percentageKEY DISABLE Y or N Select Y to disable this function.UNDER MGRCONTROLY or NSelect Y if you do not want the operator use this functionin REGISTER mode. When selected, the function isallowed only in the X control lock position.OPEN:Y PRESET:N Y or N Select Y if you with the amount or percentage to be enteredby the operator; select N if you with the amount orpercentage to be preset.SALE:Y ITEM:N Y or N Select Y if you wish the amount or percentage to apply tothe sale total. Select N if you wish the amount orpercentage to apply to an item.OVERRIDEABLE Y or N Select Y if you wish to enter a percentage or amount tooverride the preset percentage or amount set in the RATEfield.<strong>SAM4s</strong> <strong>SPS</strong>-<strong>300</strong> Operator's & Programming <strong>Manual</strong> v1.2 Program Mode Programming • 183
POS.:Y NEG.:N Y or N Select Y if you wish the amount or percentage to add to thesale total. Select N if you wish the amount or percentageto subtract from the sale.TAXable BY TAX1 Y or N Select N to tax any taxable items before the discount orTAXable BY TAX2surcharge is applied (tax the gross amount). Select Y to taxany taxable items after the discount or surcharge is appliedTAXable BY TAX3(tax the net amount).TAXable BY TAX4F/S ELIGIBLE Y or N Select Y to reduce (increase) the food stamp subtotal by theamount of % entry.ALLOW ONLY ONETIME SUBTOTALENTRYALLOW MULTIPLEAMOUNTDISCOUNT(COUPON)WITHOUTSUBTOTAL ENTRYPRESET OVERRIDEIN MGR ONLYCOMPULSORYVALIDATIONY or NY or NY or NY or NIf Y, you can enter only a single coupon and you mustpress the SUBTL key before the coupon entry.If you set a % key to be used for vendor coupons (i.e.amount, negative and sale status) then choose Y to allowthe function to be operated multiple times, withoutrequiring the SUBTL key to be pressed prior to the couponentry.Select Y to allow preset override only in manageroperation mode.Choose Y to enforce validation if an optional printer withvalidation capability is connected to an RS-232C port.184 • Program Mode Programming <strong>SAM4s</strong> <strong>SPS</strong>-<strong>300</strong> Operator's & Programming <strong>Manual</strong> v1.2
ADD CHECK1. Press the ADD CHECK key to view the add check function key options:ADD CHECK PROG.DESC : ADDCHKKEY DISABLECOMPULSORY BEFORE TENDERINGCONSECUTIVE NUMBER ADVANCEDRECEIPT CONDENCING2. Press CASH from the last field or press PAGE DOWN to view the second pageof add check function key options:ADD CHECK PROG.EXEMPT TAX 1EXEMPT TAX 2EXEMPT TAX 3EXEMPT TAX 4COMPULSORY VALIDNNYNNNNNNADD CHECK Key Program Notes3. Press CASH from the last field to return to the FUNCTION KEY PROGRAMscreen, or press CLEAR at any time to return to the FUNCTION KEYPROGRAM screen without saving changes.Option Entry DescriptionDESC Alphanumeric12 characterYou can program a unique descriptor. The default descriptoris ADD CHECK.KEY DISABLE Y or N Select Y to disable this function.COMPULSORYBEFORETENDERINGY or N Select Y if you want to force the operator to use the ADDCHECK function before tendering.CONSECUTIVENUMBER ADVANCEDRCPTCONDENCINGY or NY or NSelect Y if you want to advance the consecutive number eachtime the ADD CHECK key is used.Select Y if you want to delete the preamble and postambleeach time the ADD CHECK key is used.EXEMPT TAX 1-4 Y or N Select Y to exempt the appropriate tax automatically whenfinalized with this key.COMPULSORYVALIDATIONY or NChoose Y to enforce validation if an optional printer withvalidation capability is connected to an RS-232C port.<strong>SAM4s</strong> <strong>SPS</strong>-<strong>300</strong> Operator's & Programming <strong>Manual</strong> v1.2 Program Mode Programming • 185
CANCEL1. Press the CANCEL key to view the cancel function key options:CANCEL KEY PROG.DESC : CANCELKEY HALO 0.00(0 : NO LIMIT)KEY DISABLENUNDER MGR CONTROLN2. Press CASH from the last field to return to the FUNCTION KEY PROGRAMscreen, or press CLEAR at any time to return to the FUNCTION KEYPROGRAM screen without saving changes.CANCEL Key Program NotesOption Entry DescriptionDESC AlphaHALO 7numeric12 characterdigitamountYou can program a unique descriptor. The default descriptoris CANCEL.You can limit errors by setting the maximum amount that canbe used with this function. "0" means that there is no entrylimit.KEY DISABLE Y or N Select Y to disable this function.UNDER MGRCONTROLY or N Select Y if you do not want the operator use this function inREGISTER mode. When selected, the function is allowedonly in the X control lock position.186 • Program Mode Programming <strong>SAM4s</strong> <strong>SPS</strong>-<strong>300</strong> Operator's & Programming <strong>Manual</strong> v1.2
CASH1. Press the CASH key to view the cash function key options:CASH KEY PROG.DESC : CASHHALO 0.00(0 : NO LIMIT)AMOUNT TEND COMPULSORY NOVER/UNDER TENDERIN MGR CONTROLNDISABLE UNDER TND.N2. Press CASH from the last field or press PAGE DOWN to view the second pageof cash function key options:CASH KEY PROG.DOES DRAWER OPENEXEMPT TAX 1EXEMPT TAX 2EXEMPT TAX 3EXEMPT TAX 4COMPULSORY VALIDYNNNNNCASH Key Program Notes3. Press CASH from the last field to return to the FUNCTION KEY PROGRAMscreen, or press CLEAR at any time to return to the FUNCTION KEYPROGRAM screen without saving changes.Option Entry DescriptionDESC AlphaHALO 7AMOUNT TENDCOMP.OVER/UNDERTENDER IN MGRCONTROLDISABLE UNDERTEND.DOES DRAWEROPENnumeric12 characterdigitamountY or NY or NY or NY or NYou can program a unique descriptor. The default descriptoris CASH.You can limit errors by setting the maximum amount that canbe tendered. "0" means that there is no entry limit.Select Y if you want to force the operator to enter thetendered amount and let the register calculate the change.Select Y if you do not want the operator to tender more thanthe amount of the sale and issue change. When selected,over and under tendering is allowed only in the X position.Select Y if you do not want the operator to tender less thanthe amount of the sale.Select N if you do not want the drawer to opened with thiskey.EXEMPT TAX 1-4 Y or N Select Y to exempt the appropriate tax automatically whenfinalized with this key.COMPULSORYVALIDATIONY or NChoose Y to enforce validation if an optional printer withvalidation capability is connected to an RS-232C port.<strong>SAM4s</strong> <strong>SPS</strong>-<strong>300</strong> Operator's & Programming <strong>Manual</strong> v1.2 Program Mode Programming • 187
CHARGE 1-81. Press one of the CHARGE key to view the appropriate charge function keyoptions:CHARGE 1 PROG.DESC : CHARGE1KEY HALO 0.00(0 : NO LIMIT)AMOUNT TEND COMPPULSORY NOVER/UNDER TENDERIN MGR CONTROLNDISABLE UNDER TND.N2. Press CASH from the last field or press PAGE DOWN to view the second pageof charge function key options:CHARGE 1 PROG.DOES DRAWER OPENALLOW OVER TENDNON-ADD # COMPULSORYEXEMPT TAX 1EXEMPT TAX 2EXEMPT TAX 3EXEMPT TAX 4NNNNNNN3. Press CASH from the last field or press PAGE DOWN to view the last page ofcharge function key options:CHARGE 1 PROG.COMPULSORY VALIDSEND TO EFTNSELECT (1:CREDIT, 2:DEBIT,3:GIFT, 4:GIFT-NO NSF) 0N4. Press CASH from the last field to return to the FUNCTION KEY PROGRAMscreen, or press CLEAR at any time to return to the FUNCTION KEYPROGRAM screen without saving changes.188 • Program Mode Programming <strong>SAM4s</strong> <strong>SPS</strong>-<strong>300</strong> Operator's & Programming <strong>Manual</strong> v1.2
CHARGE 1-8 Key Program NotesOption Entry DescriptionDESC AlphaHALO 7AMOUNT TENDCOMP.OVER/UNDERTENDER IN MGRCONTROLDISABLE UNDERTEND.DOES DRAWEROPENALLOW OVERTEND.NON-ADD #COMP.EXEMPT TAX 1EXEMPT TAX 2EXEMPT TAX 3EXEMPT TAX 4COMPULSORYVALIDATIONnumeric12 characterdigitamountY or NY or NY or NY or NY or NY or NY or NY or NYou can program a unique descriptor. The defaultdescriptors are CHARGE 1-8.You can limit errors by setting the maximum amount that canbe tendered. "0" means that there is no entry limit.Select Y if you want to force the operator to enter thetendered amount and let the register calculate the change.Select Y if you do not want the operator to tender more thanthe amount of the sale and issue change. When selected,over tendering is allowed only in the X control lock position.Select Y if you do not want the operator to tender less thanthe amount of the sale.Select N if you do not want the drawer to opened with thiskey.Select Y if you wish to allow tender greater than the amountof the sale.Select Y if you wish to enforce the entry of a non-addnumber prior to tendering.Select Y to exempt the appropriate tax automatically whenfinalized with this key.Choose Y to enforce validation if an optional printer withvalidation capability is connected to an RS-232C port.CONNECT EFT Y or N Select Y if the DataTran is connected.SELECT(1:CREDIT2:DEBIT, 3:GIFT,4: GIFT NSF)1, 2, 3, 4 Gift NSF indicates that a Gift card with a value less than theamount of the sale will be accepted as an under tender.(Applies to DataTran operations only.)<strong>SAM4s</strong> <strong>SPS</strong>-<strong>300</strong> Operator's & Programming <strong>Manual</strong> v1.2 Program Mode Programming • 189
CHECK CASHING1. Press the CHECK CASHING key to view the check cashing function keyoptions:CHECK CASH PROGRAMMINGDESC : CHKCASHKEY HALO 0.00(0 : NO LIMIT)KEY DISABLENUNDER MGR CONTROLNCOMPULSORY VALIDNCOMPULSORY CHECK ENDORSEMENT N2. Press CASH from the last field to return to the FUNCTION KEY PROGRAMscreen, or press CLEAR at any time to return to the FUNCTION KEYPROGRAM screen without saving changes.CHECK CASHING Key Program NotesOption Entry DescriptionDESC AlphaHALO 7numeric12 characterdigitamountYou can program a unique descriptor. The default descriptoris CHKCASH.You can limit errors by setting the maximum amount that canbe used with this function. "0" means that there is no entrylimit.KEY DISABLE Y or N Select Y to disable this function.UNDER MGRCONTROLY or N Select Y if you do not want the operator use this function inREGISTER mode. When selected, the function is allowedonly in the X control lock position.COMPULSORYVALIDATIONCOMPULSORYCHECKENDORSEMENTY or NY or NChoose Y to enforce validation if an optional printer withvalidation capability is connected to an RS-232C port.Choose Y to enforce check endorsement if an optional printerwith validation capability is connected to an RS-232C port.190 • Program Mode Programming <strong>SAM4s</strong> <strong>SPS</strong>-<strong>300</strong> Operator's & Programming <strong>Manual</strong> v1.2
CHECK ENDORSEMENT1. Press the CHECK ENDORSEMENT key to view the check endorsementfunction key options:CHECK ENDORSEMENTDESC : CHKENDORKEY DISABLEPRINT CHECK AMT INN2. Press CASH from the last field to return to the FUNCTION KEY PROGRAMscreen, or press CLEAR at any time to return to the FUNCTION KEYPROGRAM screen without saving changes.CHECK ENDORSEMENT Key Program NotesOption Entry DescriptionDESC Alphanumeric12 characterYou can program a unique descriptor. The default descriptoris CHKENDOR.KEY DISABLE Y or N Select Y to disable this function.PRINT CHECKAMT IN THEENDORSEMENTY or N Choose Y to print the amount of the check as well as theendorsement message. Choose N to print only theendorsement message.Note: A 10 line check endorsement message may beprogrammed. See "Endorsement Message" on page 226 formore information.<strong>SAM4s</strong> <strong>SPS</strong>-<strong>300</strong> Operator's & Programming <strong>Manual</strong> v1.2 Program Mode Programming • 191
CHECK1. Press the CHECK key to view the check function key options:CHECK KEY PROG.DESC : CHECKHALO 0.00(0 : NO LIMIT)AMOUNT TEND COMPULSORY NOVER/UNDER TENDERIN MGR CONTROLNDISABLE UNDER TENDERN2. Press CASH from the last field or press PAGE DOWN to view the second pageof check function key options:CHECK KEY PROG.DOES DRAWER OPENEXEMPT TAX 1EXEMPT TAX 2EXEMPT TAX 3EXEMPT TAX 4COMPULSORY CHECK ENDORSEMENTNNNNNN3. Press CASH from the last field or press PAGE DOWN to view the third page ofcheck function key options:CHECK KEY PROG.COMPULSORY VALIDN4. Press CASH from the last field to return to the FUNCTION KEY PROGRAMscreen, or press CLEAR at any time to return to the FUNCTION KEYPROGRAM screen without saving changes.192 • Program Mode Programming <strong>SAM4s</strong> <strong>SPS</strong>-<strong>300</strong> Operator's & Programming <strong>Manual</strong> v1.2
CHECK Key Program NotesOption Entry DescriptionDESC AlphaHALO 7AMOUNT TENDCOMP.OVER/UNDERTENDER IN MGRCONTROLDISABLE UNDERTEND.DOES DRAWEROPENEXEMPT TAX 1EXEMPT TAX 2EXEMPT TAX 3EXEMPT TAX 4COMPULSORYCHECKENDORSEMENTCOMPULSORYVALIDATIONnumeric12 characterdigitamountY or NY or NY or NY or NY or NY or NY or NYou can program a unique descriptor. The default descriptoris CHECK.You can limit errors by setting the maximum amount that canbe tendered. "0" means that there is no entry limit.Select Y if you want to force the operator to enter thetendered amount and let the register calculate the change.Select Y if you do not want the operator to tender more thanthe amount of the sale and issue change. When selected,over tendering is allowed only in the X control lock position.Select Y if you do not want the operator to tender less thanthe amount of the sale.Select N if you do not want the drawer to open with this key.Select Y to exempt the appropriate tax automatically whenfinalized with this key.Choose Y to enforce check endorsement if an optionalprinter with endorsement capability is connected to an RS-232C port.Choose Y to enforce validation if an optional printer withvalidation capability is connected to an RS-232C port.<strong>SAM4s</strong> <strong>SPS</strong>-<strong>300</strong> Operator's & Programming <strong>Manual</strong> v1.2 Program Mode Programming • 193
CHECK #1. Press the CHECK TRACK # key to view the check track function key options:CHECK TRACK PROGRAMMINGDESC : CHECK #KEY DISABLECOMPULSORY FOR ALLSALESOPENING CLERK HASEXCLUSIVE ACCESSPRINT ON RECEIPTNNNY2. Press CASH from the last field or press PAGE DOWN to view the second pageof check track function key options:CHECK TRACK PROGRAMMINGPRINT CHKS ON RPALLOW ONLY ONE CHKPER TABLECHECK # ASSIGNEDBY REGISTERDRIVE THRU FEATUREENABLEDYNNN3. Press CASH from the last field or press PAGE DOWN to view the second pageof check track function key options:CHECK TRACK PROG.LENGTH OF CHECK (0-9)SCAN CHECK #0N4. Press CASH from the last field to return to the FUNCTION KEY PROGRAMscreen, or press CLEAR at any time to return to the FUNCTION KEYPROGRAM screen without saving changes.194 • Program Mode Programming <strong>SAM4s</strong> <strong>SPS</strong>-<strong>300</strong> Operator's & Programming <strong>Manual</strong> v1.2
CHECK # Key Program NotesOption Entry DescriptionDESC Alphanumeric12 characterYou can program a unique descriptor. The default descriptoris CHKTRACK.KEY DISABLE Y or N Select Y to disable this function.COMPULSORY Y or N Select Y you must begin a new, or recall an existing trackingFOR ALL SALESnumber before registering items.OPENING CLERKHAS EXCLUSIVEACCESSPRINT ONRECEIPTPRINT ONREMOTEALLOW ONLYONE CHK PERTABLECHECK #ASSIGNED BYREGISTERDRIVE THRUFEATUREENABLEDLENGTH OFCHECK (0-9)Y or NIf Y, the clerk that begins a tracking number is the only clerkwho can recall a check. If N, any clerk can recall any check.Y or N If N, the check track number and balance will not print on thereceipt.Y or N If N, the check track number and balance will not print on theremote.Y or N If Y, you can begin only one check with the same table #.Y or N If Y, press the CHECK. # key to automatically assign thenext sequential check. Check numbers will begin with #1 andcontinue until the open check report is reset, at which pointthe check number will be reset and start at #1 again.Y or N If you wish to implement a drive thru recall key, this settingchanges the function of the PBAL key to that of a recall key.Press the PBAL key directly to automatically recall the opencheck with the lowest tracking numberY or N Set the length of check in number of digits. For example, if 4,then checks must be used in the range from 1000, to 9999.This setting applies only to check numbers input by theoperator, not to check numbers assigned by the register.SCAN CHECK # Y or N Choose Y to allow the check number to be input by a scanner(must be nine digits or less).<strong>SAM4s</strong> <strong>SPS</strong>-<strong>300</strong> Operator's & Programming <strong>Manual</strong> v1.2 Program Mode Programming • 195
CURRENCY CONVERSION 1-41. Press one of the CURRENCY CONVERSION keys to view the appropriatecurrency conversion function key options:CONVERSION #1 PROG.DESC : CONV1RATE 0NUMBER OF DECIMAL 02. Press CASH from the last field to return to the FUNCTION KEY PROGRAMscreen, or press CLEAR at any time to return to the FUNCTION KEYPROGRAM screen without saving changes.CURRENCY CONVERSION 1-4 Program NotesDESC Alphanumeric12 characterYou can program a unique descriptor for each foreigncurrency. The default descriptors are CONV 1-4.RATE 5 digits Enter the exchange rate of up to 5 digits (do not enter thedecimal point). See the examples on the next page.NUMBER OFDEC.1 - 6 Enter a number from 0 to 6 to indicate the decimal positionof the exchange rate. Count the decimal position from theright. See the examples below.Currency Exchange Rate Programming ExamplesNote: Foreign currency exchange rates can be stated as “foreign currency in dollars”,or “dollars in foreign currency”. Use the rate stated in “dollars in foreign currency”when you are programming this section.The US dollar (home currency) is worth 1.3720 Canadian dollars (foreign currency).RATE: 13720NUMBER OF DEC.: 5The US dollar (home currency) is worth 110.24 Japanese Yen (foreign currency).RATE: 11024NUMBER OF DEC.: 2196 • Program Mode Programming <strong>SAM4s</strong> <strong>SPS</strong>-<strong>300</strong> Operator's & Programming <strong>Manual</strong> v1.2
EAT-INTAKE OUTDRIVE THRU1. Press the EAT-IN, TAKE OUT, or DRIVE THRU key to view the appropriatefunction key options:EAT-IN PROGRAMMINGDESC : EATINEXEMPT TAX 1EXEMPT TAX 2EXEMPT TAX 3EXEMPT TAX 4COMPULSORY VALIDNNNNN2. Press CASH from the last field to return to the FUNCTION KEY PROGRAMscreen, or press CLEAR at any time to return to the FUNCTION KEYPROGRAM screen without saving changes.EAT-IN/TAKE OUT/DRIVE THRU Key Program NotesOption Entry DescriptionDESC AlphaEXEMPT TAX 1EXEMPT TAX 2EXEMPT TAX 3EXEMPT TAX 4COMPULSORYVALIDATIONnumeric12 characterY or NYou can program a unique descriptor. The default descriptorsare EATIN, TAKE OUT and DRIVE THRU.If you wish to automatically exempt a tax for a particular typeof sale, select Y for the appropriate tax. For example, if itemsare non-taxable for take out, but taxable for eat-in, set thisprogram to exempt tax on take out sales.Choose Y to enforce validation if an optional printer withvalidation capability is connected to an RS-232C port.<strong>SAM4s</strong> <strong>SPS</strong>-<strong>300</strong> Operator's & Programming <strong>Manual</strong> v1.2 Program Mode Programming • 197
ERROR CORRECT1. Press the ERROR CORRECT key to view the error correct function keyoptions:ERR CORRECT PROGRAMMINGDESC : ERRCORRKEY HALO 0.00(0 : NO LIMIT)KEY DISABLENUNDER MGR CONTROLN2. Press CASH from the last field to return to the FUNCTION KEY PROGRAMscreen, or press CLEAR at any time to return to the FUNCTION KEYPROGRAM screen without saving changes.ERROR CORRECT Key Program NotesOption Entry DescriptionDESC AlphaHALO 7numeric12 characterdigitamountYou can program a unique descriptor. The default descriptoris ERRCORR.You can limit errors by setting the maximum amount that canbe used with this function. "0" means that there is no entrylimit.KEY DISABLE Y or N Select Y to disable this function.UNDER MGRCONTROLY or N Select Y if you do not want the operator use this function inREGISTER mode. When selected, the function is allowedonly in the X control lock position.198 • Program Mode Programming <strong>SAM4s</strong> <strong>SPS</strong>-<strong>300</strong> Operator's & Programming <strong>Manual</strong> v1.2
FINALIZE1. Press the FINALIZE key to view the error correct function key options:ERR CORRECT PROGRAMMINGDESC : FINALIZECHARGE POSTINGN2. Press CASH from the last field to return to the FUNCTION KEY PROGRAMscreen, or press CLEAR at any time to return to the FUNCTION KEYPROGRAM screen without saving changes.FINALIZE Key Program NotesOption Entry DescriptionDESC AlphaCHARGEPOSTINGnumeric12 characterY or NYou can program a unique descriptor. The default descriptoris FINALIZE.Choose Y to enable charge posting functions.<strong>SAM4s</strong> <strong>SPS</strong>-<strong>300</strong> Operator's & Programming <strong>Manual</strong> v1.2 Program Mode Programming • 199
F/S TEND1. Press the F/S TEND key to view the food stamp tender function key options:FOOD STAMP PROGRAMMINGDESC : F/S TENDHALO 0.00EXEMPT TAX 1NEXEMPT TAX 2NEXEMPT TAX 3NEXEMPT TAX 4NALLOW DECIMALN2. Press CASH from the last field or press PAGE DOWN to view the second pageof food stamp tender function key options:FOOD STAMP PROGRAMMINGCHANGE IS ISSUED IN CASHDOES DRAWER OPENCOMPULSORY VALIDALLOW OVER TEND.NYNN3. Press CASH from the last field to return to the FUNCTION KEY PROGRAMscreen, or press CLEAR at any time to return to the FUNCTION KEYPROGRAM screen without saving changes.F/S TEND Key Program NotesOption Entry DescriptionDESC AlphaHALO 7numeric12 characterdigitamountYou can program a unique descriptor. The default descriptoris F/S TEND.You can limit errors by setting the maximum amount that canbe used with this function. "0" means that there is no entrylimit.EXEMPT TAX 1-4 Y or N If taxes are exempted automatically on food stamp sales (as ismost often the case) select Y for each tax that is actively usedand needs to be exempted.ALLOW DECIMAL Y or N If N, food stamp tender must be in whole dollar amounts, i.e.$1, $5, or $10. If Y, the tender is allowed in any amount.CHANGE ISISSUED IN CASHY or N If Y, food stamp change less than $1 will be issued in cash.DOES DRAWEROPENCOMPULSORYVALIDATIONY or NY or NSelect N if you do not want the drawer to opened with thiskey.Choose Y to enforce validation if an optional printer withvalidation capability is connected to an RS-232C port.ALLOW OVER TEND Y o r N Choose Y to allow tendering over the food stamp subtotal.200 • Program Mode Programming <strong>SAM4s</strong> <strong>SPS</strong>-<strong>300</strong> Operator's & Programming <strong>Manual</strong> v1.2
FUNCTION LOOK UP (1-2)Two function keys (FUNCTION LOOK 1and FUNCTION LOOK 2) are available toaccess up to eight functions each. You can use function look up keys to locate functions thatare necessary for your application, but may not fit on the keyboard layout, or to locatefunctions that are used only occasionally.With this program, you can determine which functions are located on each function look upkey, and you can also access these functions for option programming.1. Press the FUNCTION LOOK UP 1 or FUNCTION LOOK UP 2 key to viewthe appropriate function program menu screen:FUNC #1 PROGRAM0. MENU ASSIGNMENT1. STATUS PROGRAM2. Press 0 to select the menu assignment on the function look-up key or press 1 toprogram the options for a function on the function look-up key. If you areprogramming function key options, refer to each function separately in thischapter to set function options. If you chose 0 to program menu assignment, theFUNC. # MENU ASSIGN screen displays:FUNC #1 MENU ASSIGN.PUSH MENU NUMBER TOBE PROGRAMMED (1-8)0<strong>SAM4s</strong> <strong>SPS</strong>-<strong>300</strong> Operator's & Programming <strong>Manual</strong> v1.2 Program Mode Programming • 201
3. Enter the number of the menu position (there are eight functions listed on eachfunction look up menu) that you wish to edit, press CASH.FUNC #1 MENU ASSIGN.MENU NUMBER : 1CURRENT ASSIGNMENTCANCELENTER NEW FUNC CODE,PRESS CASH04. Type the code for the function you wish to place on the function look up keymenu, press CASH. See "Function Key Codes" in the "Service ModeProgramming" chapter, or press PAGE DOWN to view a list of functions andcodes.5. Go to step 2 above and continue to program menu numbers for the function lookup key, or press CLEAR to return to the PROGRAM MODE menu.202 • Program Mode Programming <strong>SAM4s</strong> <strong>SPS</strong>-<strong>300</strong> Operator's & Programming <strong>Manual</strong> v1.2
GUEST #1. Press the GUEST key to view the guest function key options:GUEST # PROGRAMMINGDESC : GUESTCOMPULSORY FORGUEST CHECKCOMPULSORY FOR ALL SALESPRINT AT REMOTE PRINTERNNN2. Press CASH from the last field to return to the FUNCTION KEY PROGRAMscreen, or press CLEAR at any time to return to the FUNCTION KEYPROGRAM screen without saving changes.GUEST Key Program NotesOption Entry DescriptionDESC AlphaCOMPULSORYFOR GUESTCHECKCOMPULSORYFOR ALL SALESPRINT ATREMOTEPRINTERnumeric12 characterY or NY or NY or NYou can program a unique descriptor. The default descriptoris GUEST.Select Y to enforce an entry into the GUEST # key before atracking number can be accessed for the first time.Select Y to enforce an entry into the GUEST # key before anitem can be registered on any sale.Select N if you do not want GUEST # entry to print at thekitchen printer if items from the same transaction are sent tothe KP.<strong>SAM4s</strong> <strong>SPS</strong>-<strong>300</strong> Operator's & Programming <strong>Manual</strong> v1.2 Program Mode Programming • 203
LEVEL 1-5 (Price Level 1-5)1. Press one of the LEVEL keys to view the level function key options:LEVEL 1 PROG.DESC : LEVEL1SEND DESCRIPTION TO KPN2. Press CASH from the last field to return to the FUNCTION KEY PROGRAMscreen, or press CLEAR at any time to return to the FUNCTION KEYPROGRAM screen without saving changes.LEVEL 1-5 Key Program NotesOption Entry DescriptionDESC AlphaSENDDESCRIPTION TOKPnumeric12 characterY or NYou can program a unique descriptor. The default descriptorsare LEVEL1, LEVEL2, etc.Determines whether the level descriptor prints with the itemat the KP.204 • Program Mode Programming <strong>SAM4s</strong> <strong>SPS</strong>-<strong>300</strong> Operator's & Programming <strong>Manual</strong> v1.2
RETURN1. Press the RETURN key to view the merchandise return function key options:RETURN KEY PROGAMMINGDESC : MDSE RETURNKEY HALO 0.00(0 : NO LIMIT)KEY DISABLENUNDER MGR CONTROLN2. Press CASH from the last field to return to the FUNCTION KEY PROGRAMscreen, or press CLEAR at any time to return to the FUNCTION KEYPROGRAM screen without saving changes.RETURN Key Program NotesOption Entry DescriptionDESC AlphaHALO 7numeric12 characterdigitamountYou can program a unique descriptor. The default descriptoris MDSE RETURN.You can limit errors by setting the maximum amount that canbe used with this function. "0" means that there is no entrylimit.KEY DISABLE Y or N Select Y to disable this function.UNDER MGRCONTROLY or N Select Y if you do not want the operator use this function inREGISTER mode. When selected, the function is allowedonly in the X control lock position.<strong>SAM4s</strong> <strong>SPS</strong>-<strong>300</strong> Operator's & Programming <strong>Manual</strong> v1.2 Program Mode Programming • 205
MODIFIER 1-51. Press one of the MODIFIER keys to view the appropriate modifier function keyoptions:MOD 1 PROGAMMINGDESC : MOD1UNDER MGR CONTROLNAFFECT PLU #NPRINT ON CHECKNPRINT ON RECEIPTNAFFECT DIGIT 1-14OF PLU# 02. Press CASH from the last field or press PAGE DOWN to view the second pageof modifier function key options:MOD 1 PROGAMMINGVALUE OF AFFECTED DIGIT(0-9) 03. Press CASH from the last field to return to the FUNCTION KEY PROGRAMscreen, or press CLEAR at any time to return to the FUNCTION KEYPROGRAM screen without saving changes.206 • Program Mode Programming <strong>SAM4s</strong> <strong>SPS</strong>-<strong>300</strong> Operator's & Programming <strong>Manual</strong> v1.2
MODIFIER 1-5 Key Program NotesOption Entry DescriptionDESC AlphaUNDER MGRCONTROLnumeric12 characterY or NYou can program a unique descriptor. The default descriptorsare MOD1 - MOD5.Select Y if you do not want the operator use this function inREGISTER mode. When selected, the function is allowedonly in the X control lock position.AFFECT PLU # Y or N Select Y, if you wish the modifier entry to modify the PLUand cause a different item/price to be registered. Select N toonly add the modifier descriptor.PRINT ON CHECK Y or N Select N to suppress printing of the modifier descriptor on theguest check.PRINT ONRECEIPTAFFECT DIGIT 1-14VALUE OFAFFECTED DIGIT(0-9)SENDDESCRIPTION TOKPY or N Select N to suppress printing of the modifier descriptor on thereceipt.1-14 Preceding a PLU with a Size and/or Modifier key manipulatesthe PLU code assigned to the PLU key, causing a differentPLU to be registered when the PLU key is pressed. Enter thedigit of the PLU number you wish to be changed when usingthis key. (Digit #1 is the rightmost digit; digit #14 is theleftmost digit.)0-9 Enter the value you wish to be added in the digit positionselected. For example, if you wish to affect PLU digit #4with a value of 1, then pressing this modifier key prior to theregistration of PLU #17 will result in the registration of PLU#1017.Y or N Determines whether the modifier descriptor prints with theitem at the KP. (The modifier descriptor will printimmediately above the item.)<strong>SAM4s</strong> <strong>SPS</strong>-<strong>300</strong> Operator's & Programming <strong>Manual</strong> v1.2 Program Mode Programming • 207
PBAL1. Press the PBAL key to view the previous balance function key options:PREVIOUS BAL. PROGRAMMINGDESC : PBALENTER ANY TIMENREQUIRE AT STARTOF SALEN2. Press CASH from the last field to return to the FUNCTION KEY PROGRAMscreen, or press CLEAR at any time to return to the FUNCTION KEYPROGRAM screen without saving changes.PBAL Key Program NotesOption Entry DescriptionDESC Alphanumeric12 characterYou can program a unique descriptor. The default descriptoris PBAL.ENTER ANY TIME Y or N Select Y to allow the PBAL entry at any time. Select N toallow a PBAL entry only at the start of a sale.REQUIRE ATSTART OF SALEY or NSelect Y to require an entry into the PBAL key at the start ofevery transaction.208 • Program Mode Programming <strong>SAM4s</strong> <strong>SPS</strong>-<strong>300</strong> Operator's & Programming <strong>Manual</strong> v1.2
PAID OUT 1-31. Press one of the PAID OUT keys to view the paid out function key options:PO #1 KEY PROGRAMMINGDESC : PO1KEY HALO 0.00(0 : NO LIMIT)KEY DISABLENUNDER MGR CONTROLNCOMPULSORY VALIDN2. Press CASH from the last field to return to the FUNCTION KEY PROGRAMscreen, or press CLEAR at any time to return to the FUNCTION KEYPROGRAM screen without saving changes.PAID OUT 1-3 Key Program NotesOption Entry DescriptionDESC AlphaHALO 7numeric12 characterdigitamountYou can program a unique descriptor. The default descriptorsare PO 1-3.You can limit errors by setting the maximum amount that canbe used with this function. "0" means that there is no entrylimit.KEY DISABLE Y or N Select Y to disable this function.UNDER MGRCONTROLY or N Select Y if you do not want the operator use this function inREGISTER mode. When selected, the function is allowedonly in the X control lock position.COMPULSORYVALIDATIONY or NChoose Y to enforce validation if an optional printer withvalidation capability is connected to an RS-232C port.<strong>SAM4s</strong> <strong>SPS</strong>-<strong>300</strong> Operator's & Programming <strong>Manual</strong> v1.2 Program Mode Programming • 209
PRINT CHECK1. Press the PRINT CHECK key to view the print check function key options:PRINT CHECK PROGRAMMINGDESC : PRINT CHECKCHECK PRINTCOM PORT #(0-4) 0AUTO SERVICE CHKNPRT CHECK ON RECPNSKIP PRT OF CONSEC#ON CHECKN2. Press CASH from the last field to return to the FUNCTION KEY PROGRAMscreen, or press CLEAR at any time to return to the FUNCTION KEYPROGRAM screen without saving changes.PRINT CHECK Key Program NotesOption Entry DescriptionDESC AlphaCHECK PRINTCOMM PORT # (0-2)AUTO SERVICECHKPRT CHECK ONRECPSKIP PRT OFCONSEC# ONCHECKnumeric12 characterYou can program a unique descriptor. The default descriptoris PRINT CHECK.0-2 Select the port (1 or 2) where the check print printer isattached. If 0 is selected, the check will print on the receiptprinter.Y or N Select Y if you want the Check Print function toautomatically service the check.Y or N Select Y if you want the Check Print function to print on thereceipt printer.Y or N Select Y if you wish to delete the printing of the consecutive# on the guest check.210 • Program Mode Programming <strong>SAM4s</strong> <strong>SPS</strong>-<strong>300</strong> Operator's & Programming <strong>Manual</strong> v1.2
PROMO1. Press the PROMO key to view the promotion function key options:PROMO PROGRAMMINGDESC : PROMOKEY DISABLEUNDER MGR CONTROLTAXABLE BY TAX1TAXABLE BY TAX2TAXABLE BY TAX3TAXABLE BY TAX4NNNNNN2. Press CASH from the last field to return to the FUNCTION KEY PROGRAMscreen, or press CLEAR at any time to return to the FUNCTION KEYPROGRAM screen without saving changes.PROMO Key Program NotesOption Entry DescriptionDESC Alphanumeric12 characterYou can program a unique descriptor. The default descriptoris PROMO.KEY DISABLE Y or N Select Y to disable this function.UNDER MGRCONTROLY or N Select Y if you do not want the operator use this function inREGISTER mode. When selected, the function is allowedonly in the X control lock position.TAXABLE BYTAX1TAXABLE BYTAX2TAXABLE BYTAX3TAXABLE BYTAX4Y or NIf an item is taxable, and you wish to remove taxes and anitem's cost when using the PROMO key, set the taxable statusfor the appropriate tax to Y.<strong>SAM4s</strong> <strong>SPS</strong>-<strong>300</strong> Operator's & Programming <strong>Manual</strong> v1.2 Program Mode Programming • 211
RECD ON ACCT 1-31. Press one of the RECD ON ACCT keys to view the received on accountfunction key options:RA #1 KEY PROGRAMMINGDESC : RA1KEY HALO 0.00(0 : NO LIMIT)KEY DISABLENUNDER MGR CONTROLNCOMPULSORY VALIDN2. Press CASH from the last field to return to the FUNCTION KEY PROGRAMscreen, or press CLEAR at any time to return to the FUNCTION KEYPROGRAM screen without saving changes.RECD ON ACCT 1-3 Key Program NotesOption Entry DescriptionDESC AlphaHALO 7numeric12 characterdigitamountYou can program a unique descriptor. The default descriptorsare RA 1-3.You can limit errors by setting the maximum amount that canbe used with this function. "0" means that there is no entrylimit.KEY DISABLE Y or N Select Y to disable this function.UNDER MGRCONTROLY or N Select Y if you do not want the operator use this function inREGISTER mode. When selected, the function is allowedonly in the X control lock position.COMPULSORYVALIDATIONY or NChoose Y to enforce validation if an optional printer withvalidation capability is connected to an RS-232C port.212 • Program Mode Programming <strong>SAM4s</strong> <strong>SPS</strong>-<strong>300</strong> Operator's & Programming <strong>Manual</strong> v1.2
SCALE1. Press the SCALE key to view the scale function key options:SCALE KEY PROGRAMMINGDESC : SCALEKEY DISABLENUNDER MGR CONTROLNKEY IS MAN. ENTRYNTARE-WEIGHT COMP.NWEIGHT SYM FOR MAN.(0:LB 1:KG 2:OZ) 02. Press CASH from the last field or press PAGE DOWN to view the second pageof scale function key options:SCALE KEY PROG.ALLOW DOLLAR ENTRYW/O SCALE ONSCALEABLE ITEMNSCALE Key Program Notes3. Press CASH from the last field to return to the FUNCTION KEY PROGRAMscreen, or press CLEAR at any time to return to the FUNCTION KEYPROGRAM screen without saving changes.Option Entry DescriptionDESC Alphanumeric12 characterYou can program a unique descriptor. The default descriptoris SCALE.KEY DISABLE Y or N Select Y to disable this function.UNDER MGRCONTROLY or N Select Y if you do not want the operator use this function inREGISTER mode. When selected, the function is allowedonly in the X control lock position.KEY IS MAN. ENTRY Y or N Select Y if you wish to scale key to enter a manual weight.Select N if you wish to automatically recall the weight fromthe attached scale.TARE-WEIGHTCOMP.WEIGHT SYMBOLFOR MANALLOW DOLLARENTRY W/O SCALEON SCALEABLE ITEMY or NY or NY or NSelect Y if you wish to enforce the subtraction of a tareweight on the scale entry.Select Y if you wish to use the weight symbol Kg (kilogram)for weights entered manually or OZ for ounce measurements.If N, you must use the scale to register scaleable PLU items.If Y, you can either register scaleable items by weightextension, or by price entry.<strong>SAM4s</strong> <strong>SPS</strong>-<strong>300</strong> Operator's & Programming <strong>Manual</strong> v1.2 Program Mode Programming • 213
SERVICE1. Press the SERVICE key to view the service function key options:SERVICE KEY PROGRAMMINGDESC : SERVICENON-ADD # COMPPRINT ON RECEIPTNEGATIVE BALANCEIN MGR CONTROLCALCULATE TAX1CALCULATE TAX22. Press CASH from the last field or press PAGE DOWN to view the second pageof service function key options:SERVICE KEY PROGRAMMINGCALCULATE TAX3CALCULATE TAX4YCOMPULSORY VALIDNHARD CHECK PRINTERPORT(0-4) 0NYNYYYSERVICE Key Program Notes3. Press CASH from the last field to return to the FUNCTION KEY PROGRAMscreen, or press CLEAR at any time to return to the FUNCTION KEYPROGRAM screen without saving changes.Option Entry DescriptionDESC AlphaNON-ADD #COMPPRINT ONRECEIPTNEGATIVEBALANCE INMGR CONTROLnumeric12 characterY or NY or NY or NYou can program a unique descriptor. The default descriptoris SERVICE.Select Y if you wish to force the entry of a non-add number(i.e. a tax exempt #) before the key is usedSelect N to not print on the receipt.Select Y if you do not want the operator use this function inREGISTER mode. When selected, the function is allowedonly in the X control lock position.CALCULATE TAX1-4 Y or N Select Y to calculate and add the appropriate taxautomatically when finalized with this key.COMPULSORYVALIDATIONHARD CHECKPRINTER PORT(0-4)Y or N Choose Y to enforce validation if an optional printer withvalidation capability is connected to an RS-232C port.0-2 If you are using a hard check system, enter the RS232C portnumber (1 or 2) where the optional guest check printer isattached.214 • Program Mode Programming <strong>SAM4s</strong> <strong>SPS</strong>-<strong>300</strong> Operator's & Programming <strong>Manual</strong> v1.2
TABLE1. Press the TABLE key to view the table # function key options:TABLE # PROGRAMMINGDESC : TABLEENFORCE ON CHECKTRACKENFORCE ON ALLSALESPRINT AT REMOTEPRINTERNNN2. Press CASH from the last field to return to the FUNCTION KEY PROGRAMscreen, or press CLEAR at any time to return to the FUNCTION KEYPROGRAM screen without saving changes.TABLE Key Program NotesOption Entry DescriptionDESC AlphaENFORCE ONCHECK TRACKENFORCE ONALL SALESPRINT ATREMOTEPRINTERnumeric12 characterY or NY or NY or NYou can program a unique descriptor. The default descriptoris TABLE.If Y, you must enter the table number before opening a newcheck track #.If Y, you must enter the table number before beginning anytransaction.Choose Y to print the table number at the remote printer.<strong>SAM4s</strong> <strong>SPS</strong>-<strong>300</strong> Operator's & Programming <strong>Manual</strong> v1.2 Program Mode Programming • 215
TARE1. Press the TARE key to view the Tare function key options:TARE KEY PROGRAMMINGDESC : TAREKEY DISABLENUNDER MGR CONTROLN#5 IS MANUAL TARE N2. Press CASH from the last field to return to the FUNCTION KEY PROGRAMscreen, or press CLEAR at any time to return to the FUNCTION KEYPROGRAM screen without saving changes.TARE Key Program NotesOption Entry DescriptionDESC Alphanumeric12 characterYou can program a unique descriptor. The default descriptoris TARE.KEY DISABLE Y or N Select Y to disable this function.UNDER MGRCONTROLY or N Select Y if you do not want the operator use this function inREGISTER mode. When selected, the function is allowedonly in the X control lock position.#5 IS MANUALTAREY or NChoose Y to use tare number five to manually enter a tareweight.216 • Program Mode Programming <strong>SAM4s</strong> <strong>SPS</strong>-<strong>300</strong> Operator's & Programming <strong>Manual</strong> v1.2
TAX EXEMPT1. Press the TAX EXEMPT key to view the tax exempt function key options:TAX EXEMPT PROGRAMMINGDESC : TAXEXMTEXEMPT TAX 1EXEMPT TAX 2EXEMPT TAX 3EXEMPT TAX 4NON-ADD# COMPCOMPULSORY VALIDNNNNNN2. Press CASH from the last field to return to the FUNCTION KEY PROGRAMscreen, or press CLEAR at any time to return to the FUNCTION KEYPROGRAM screen without saving changes.TAX EXEMPT Key Program NotesOption Entry DescriptionDESC AlphaEXEMPT TAX 1EXEMPT TAX 2EXEMPT TAX 3EXEMPT TAX 4NON-ADD #COMPCOMPULSORYVALIDATIONnumeric12 characterY or NY or NY or NYou can program a unique descriptor. The default descriptoris TAXEXMT.Select Y or N for each tax to determine which tax or taxes areexempted when this key is used.Select Y if you wish to force the entry of a non-add number(i.e. a tax exempt #) before the key is used.Choose Y to enforce validation if an optional printer withvalidation capability is connected to an RS-232C port.<strong>SAM4s</strong> <strong>SPS</strong>-<strong>300</strong> Operator's & Programming <strong>Manual</strong> v1.2 Program Mode Programming • 217
TIME IN/OUT1. Press the TIME IN/OUT key to view the time in/out function key options:TIME IN/OUT PROGRAMMINGDESC : TIME IN/OUTKEY DISABLEUNDER MGR CONTROLCOMPULSORY VALIDNNN2. Press CASH from the last field to return to the FUNCTION KEY PROGRAMscreen, or press CLEAR at any time to return to the FUNCTION KEYPROGRAM screen without saving changes.TIME IN/OUT Key Program NotesOption Entry DescriptionDESC Alphanumeric12 characterYou can program a unique descriptor. The default descriptorisTIME IN/OUT.KEY DISABLE Y or N Select Y to disable this function.UNDER MGRCONTROLY or N Select Y if you do not want the operator use this function inREGISTER mode. When selected, the function is allowedonly in the X control lock position.COMPULSORYVALIDATIONY or NChoose Y to enforce validation if an optional printer withvalidation capability is connected to an RS-232C port.218 • Program Mode Programming <strong>SAM4s</strong> <strong>SPS</strong>-<strong>300</strong> Operator's & Programming <strong>Manual</strong> v1.2
TIP1. Press the TIP key to view the tip function key options:TIP KEY PROGRAMMINGDESC : TIPKEY DISABLENUNDER MGR CONTROLNTYPE IS 0%:1 AMOUNT:0ADD TAX RATE 1NADD TAX RATE 2N2. Press CASH from the last field or press PAGE DOWN to view the second pageof tip function key options:TIP KEY PROG.ADD TAX RATE 3ADD TAX RATE 4AMT ADDED TONET & GROSS TOTNNNTIP Key Program Notes3. Press CASH from the last field to return to the FUNCTION KEY PROGRAMscreen, or press CLEAR at any time to return to the FUNCTION KEYPROGRAM screen without saving changes.Option Entry DescriptionDESC Alphanumeric12 characterYou can program a unique descriptor. The default descriptoris TIP.KEY DISABLE Y or N Select Y to disable this function.TYPE IS%:1 AMOUNT:0ADD TAX RATE 1ADD TAX RATE 2ADD TAX RATE 3ADD TAX RATE 4AMT ADDED TONET AND GROSSTOT0 or 1 Select 0 if the tip is to be a calculated percentage based on apercentage entry. Select 1 if the TIP is to be an amount entry.Y or N Choose Y to if tax is calculated and added on the tip amount.Y or NChoose Y if you wish to add the TIP total to the NET andGROSS sales totals on the financial report.<strong>SAM4s</strong> <strong>SPS</strong>-<strong>300</strong> Operator's & Programming <strong>Manual</strong> v1.2 Program Mode Programming • 219
VALIDATE1. Press the VALIDATE key to view the validate function key options:VALID KEY PROGRAMMINGDESC : VALIDATIONSLIP OUTPUTCOM PORT #(0-4) 0KEY DISABLEN2. Press CASH from the last field to return to the FUNCTION KEY PROGRAMscreen, or press CLEAR at any time to return to the FUNCTION KEYPROGRAM screen without saving changes.VALIDATE Key Program NotesOption Entry DescriptionDESC AlphaSLIP OUTPUTCOMM PORT #(0-4)numeric12 characterYou can program a unique descriptor. The default descriptoris VALIDATION.0-4 If validation is used, identify the communications port (1-4)where the validating printer is attached. Enter 0 if validationis not used.KEY DISABLE Y or N Select Y to disable this function.ALLOWMULTIPLEVA LID?Y or N Select Y to allow multiple validations of the same transaction.220 • Program Mode Programming <strong>SAM4s</strong> <strong>SPS</strong>-<strong>300</strong> Operator's & Programming <strong>Manual</strong> v1.2
VOID ITEM1. Press the VOID ITEM key to view the void item function key options:VOID KEY PROGRAMMINGDESC : VOIDKEY HALO 0.00(0 : NO LIMIT)KEY DISABLENUNDER MGR CONTROLN2. Press CASH from the last field to return to the FUNCTION KEY PROGRAMscreen, or press CLEAR at any time to return to the FUNCTION KEYPROGRAM screen without saving changes.VOID ITEM Key Program NotesOption Entry DescriptionDESC AlphaHALO 7numeric12 characterdigitamountYou can program a unique descriptor. The default descriptoris VOID.You can limit errors by setting the maximum amount that canbe used with this function. "0" means that there is no entrylimit.KEY DISABLE Y or N Select Y to disable this function.UNDER MGRCONTROLY or N Select Y if you do not want the operator use this function inREGISTER mode. When selected, the function is allowedonly in the X control lock position.<strong>SAM4s</strong> <strong>SPS</strong>-<strong>300</strong> Operator's & Programming <strong>Manual</strong> v1.2 Program Mode Programming • 221
WASTE1. Press the WASTE key to view the waste function key options:WASTE PROGRAMMINGDESC : WASTEKEY HALO 0.00(0 : NO LIMIT)KEY DISABLENUNDER MGR CONTROLNCOMPULSORY VALIDN2. Press CASH from the last field to return to the FUNCTION KEY PROGRAMscreen, or press CLEAR at any time to return to the FUNCTION KEYPROGRAM screen without saving changes.WASTE Key Program NotesOption Entry DescriptionDESC Alphanumeric12 characterYou can program a unique descriptor. The default descriptoris WASTE.HALO 7digitamountYou can limit errors by setting the maximum amount that canbe used with this function. "0" means that there is no entrylimit.KEY DISABLE Y or N Select Y to disable this function.UNDER MGRCONTROLY or N Select Y if you do not want the operator use this function inREGISTER mode. When selected, the function is allowedonly in the X control lock position.COMPULSORYVALIDATIONY or NChoose Y to enforce validation if an optional printer withvalidation capability is connected to an RS-232C port.222 • Program Mode Programming <strong>SAM4s</strong> <strong>SPS</strong>-<strong>300</strong> Operator's & Programming <strong>Manual</strong> v1.2
Logo DescriptorPreamble From the PGM control lock position menu, press 7 for LOGO DESC. TheLOGO DESC. PROGRAM screen displays:LOGO DESC. PROGRAM0.PREAMBLE1.POSTAMBLE2.ENDORSEMENT MESSAGE3.FINANCIAL REPORT4.CLERK REPORT5.MIX & MATCH NAME6.DATATRANThe preamble is a programming message of up to six lines of 32 characters that appears at thetop of each receipt and/or guest check.1. From the LOGO DESC. PROGRAM screen, press 0 to display thePREAMBLE screen:LINE 1 :LINE 2 :LINE 3 :PREAMBLE2. Using the alpha numeric keyboard overlay (<strong>SPS</strong>-320/<strong>SPS</strong>-340, type thedescriptor. For the <strong>SPS</strong>-345 use the descriptor code method (see page 117.)Each line can be up to 32 characters. If you make a mistake, press theBACKSPACE key (on the alpha overlay or enter the backspace code 97 if youare using the descriptor code method) to erase the previous character. After youhave completed typing the first line, press CASH to accept the new line andadvance to the second line, or press CLEAR to return to the LOGO DESC.PROGRAM screen without making any changes.<strong>SAM4s</strong> <strong>SPS</strong>-<strong>300</strong> Operator's & Programming <strong>Manual</strong> v1.2 Program Mode Programming • 223
3. Using the same procedure, continue programming each line as necessary. PressCLEAR at any time to exit. After programming the third line, the fourth, fifth,and sixth lines display:LINE 4 :LINE 5 :LINE 6 :PREAMBLEPostamble4. When the last line has been entered, press CASH to accept the line and return tothe LOGO DESC. PROGRAM screen.The postamble is a programming message of up to six lines of 32 characters that appears atthe bottom of each receipt and/or guest check.1. From the LOGO DESC. PROGRAM screen, press 0 to display thePOSTAMBLE screen:LINE 1 :LINE 2 :LINE 3 :POSTAMBLE2. Using the alpha numeric keyboard overlay (<strong>SPS</strong>-320/<strong>SPS</strong>-340, type thedescriptor. For the <strong>SPS</strong>-345 use the descriptor code method (see page 117.)Each line can be up to 32 characters. If you make a mistake, press theBACKSPACE key (on the alpha overlay or enter the backspace code 97 if youare using the descriptor code method) to erase the previous character. After youhave completed typing the first line, press CASH to accept the new line andadvance to the second line, or press CLEAR to return to the LOGO DESC.PROGRAM screen without making any changes.224 • Program Mode Programming <strong>SAM4s</strong> <strong>SPS</strong>-<strong>300</strong> Operator's & Programming <strong>Manual</strong> v1.2
3. Using the same procedure, continue programming each line as necessary. PressCLEAR at any time to exit. After programming the third line, the fourth, fifthand sixth lines display:LINE 4 :LINE 5 :LINE 6 :POSTAMBLE4. When the last line has been entered, press CASH to accept the line and return tothe LOGO DESC. PROGRAM screen.<strong>SAM4s</strong> <strong>SPS</strong>-<strong>300</strong> Operator's & Programming <strong>Manual</strong> v1.2 Program Mode Programming • 225
Endorsement MessageThe Endorsement Message is a programming message of up to ten lines of 32 characters thatprints when a check is endorsed on an optional slip printer.1. From the LOGO DESC. PROGRAM screen, press 2 to display theENDORSEMENT MESG. Screen:ENDORSEMENT MESSAGELINE 1 :LINE 2 :LINE 3 :2. Using the alpha numeric keyboard overlay (<strong>SPS</strong>-320/<strong>SPS</strong>-340, type thedescriptor. For the <strong>SPS</strong>-345 use the descriptor code method (see page 117.)Each line can be up to 32 characters. If you make a mistake, press theBACKSPACE key (on the alpha overlay or enter the backspace code 97 if youare using the descriptor code method) to erase the previous character. After youhave completed typing the first line, press CASH to accept the new message andadvance to the second line, or press CLEAR to return to the LOGO DESC.PROGRAM screen without making any changes.3. Using the same procedure, continue programming each line as necessary. PressCLEAR at any time to exit. After programming the third line, the next threelines display:ENDORSEMENT MESSAGELINE 4 :LINE 5 :LINE 6 :4. Continue programming all ten lines if necessary. When the last line has beenentered, press CASH to accept the message and return to the LOGO DESC.PROGRAM screen.226 • Program Mode Programming <strong>SAM4s</strong> <strong>SPS</strong>-<strong>300</strong> Operator's & Programming <strong>Manual</strong> v1.2
Financial ReportThe Financial Report selection allows you to reprogram the descriptors that appear with theFinancial Report totals and counters. For example, the first total on the financial report"+PLU TTL" represents the total of all positive PLU entries. You might wish to re-label thistotal to say "FOOD SALES". You can reprogram any of the Financial Report totals listedhere with any 12-character descriptor.1. From the LOGO DESC. PROGRAM screen, press 3 to display theFINANCIAL REP MESG. Screen:FINANCIAL REP MESSAGETTL 1 :+PLU TTLTTL 2 :-PLU TTLTTL 3 :ADJST TTL2. The first 3 report descriptors (TTLs 1-3) display with the cursor arrow pointing atthe first descriptor. Using the alpha numeric keyboard overlay (<strong>SPS</strong>-320/<strong>SPS</strong>-340, type the descriptor. For the <strong>SPS</strong>-345 use the descriptor code method (seepage 117.) Each descriptor can be up to 12 characters. If you make a mistake,press the BACKSPACE key (on the alpha overlay or enter the backspace code97 if you are using the descriptor code method) to erase the previous character.After you have completed typing the first descriptor, press CASH to accept thenew message and advance to the next descriptor, or press CLEAR to return tothe LOGO DESC. PROGRAM screen without making any changes.3. Press CASH repeatedly, or press PAGE UP and/or PAGE DOWN to locate thedescriptor you wish to program. After the last item on each screen, the screenshifts to display the next 3 descriptors. (There are 73 Financial Reportdescriptors that you may program.) Using the same procedure, continueprogramming each line as necessary. Press CLEAR at any time to exit andreturn to the LOGO DESC. PROGRAM screen.<strong>SAM4s</strong> <strong>SPS</strong>-<strong>300</strong> Operator's & Programming <strong>Manual</strong> v1.2 Program Mode Programming • 227
Clerk ReportThe Clerk Report selection allows you to reprogram the descriptors that appear with the ClerkReport totals and counters. For example, the first total on the clerk report "NET SALES"might be re-labeled to say "GROSS SALES". You can reprogram any of the Financial Reporttotals listed here with any 12-character descriptor.1. From the LOGO DESC. PROGRAM screen, press 4 to display the CLERKREP MESG. Screen:CLERK REP MESSAGETTL 1 :NET SALETTL 2 :NONTAXTTL 3 :TAX1 SALES2. The first 3 report descriptors (TTLs 1-3) display with the cursor arrow pointing atthe first descriptor. Using the alpha numeric keyboard overlay (<strong>SPS</strong>-320/<strong>SPS</strong>-340, type the descriptor. For the <strong>SPS</strong>-345 use the descriptor code method (seepage 117.) Each descriptor can be up to 12 characters. If you make a mistake,press the BACKSPACE key (on the alpha overlay or enter the backspace code97 if you are using the descriptor code method) to erase the previous character.After you have completed typing the first descriptor, press CASH to accept thenew message and advance to the next descriptor, or press CLEAR to return tothe LOGO DESC. PROGRAM screen without making any changes.3. Press CASH repeatedly, or press PAGE UP and/or PAGE DOWN to locate thedescriptor you wish to program. After the last item on each screen, the screenshifts to display the next 3 descriptors. (There are 52 Clerk Report descriptorsthat you can program.) Using the same procedure, continue programming eachdescriptor as necessary. Press CLEAR at any time to exit and return to theLOGO DESC. PROGRAM screen.228 • Program Mode Programming <strong>SAM4s</strong> <strong>SPS</strong>-<strong>300</strong> Operator's & Programming <strong>Manual</strong> v1.2
Mix & Match NameEach Mix & Match discount function can be programmed with a unique 12-characterdescriptor. The number of Mix & Match discounts is set in memory allocation. See “Mix &Match Program” on page 106 for more information.1. From the LOGO DESC. PROGRAM screen, press 5 to display the MIX &MATCH DESC. Screen:MIX & MATCH DESC.M & M 1 :M & M 1M & M 2 :M & M 2M & M 3 :M & M 32. Using the alpha numeric keyboard overlay (<strong>SPS</strong>-320/<strong>SPS</strong>-340, type thedescriptor. For the <strong>SPS</strong>-345 use the descriptor code method (see page 117.)Each descriptor can be up to 12 characters. If you make a mistake, press theBACKSPACE key (on the alpha overlay or enter the backspace code 97 if youare using the descriptor code method) to erase the previous character. After youhave completed typing the first descriptor, press CASH to accept the newmessage and advance to the next descriptor or press CLEAR to return to theLOGO DESC. PROGRAM screen without making any changes.3. Press CASH repeatedly, or press PAGE UP and/or PAGE DOWN to locate thenext mix & match descriptor you wish to program. After the last item on eachscreen, the screen shifts to display the next 3 mix & match descriptors. Using thesame procedure, continue programming each line as necessary. Press CLEAR atany time to exit and return to the LOGO DESC. PROGRAM screen.<strong>SAM4s</strong> <strong>SPS</strong>-<strong>300</strong> Operator's & Programming <strong>Manual</strong> v1.2 Program Mode Programming • 229
DataTranWhen a DataTran integrated payment appliance is connected, you can print a message of upto four lines on the electronic payment draft receipt.1. From the LOGO DESC. PROGRAM screen, press 6 to display theDATATRAN MESSAGE screen:DATATRAN MESSAGELINE 1 :LINE 2 :LINE 3 :2. Using the alpha numeric keyboard overlay (<strong>SPS</strong>-320/<strong>SPS</strong>-340, type thedescriptor. For the <strong>SPS</strong>-345 use the descriptor code method (see page 117.)Each line can contain up to 32 characters. If you make a mistake, press theBACKSPACE key (on the alpha overlay or enter the backspace code 97 if youare using the descriptor code method) to erase the previous character. After youhave completed typing the first line, press CASH to accept the new message andadvance to the next line, or press CLEAR to return to the LOGO DESC.PROGRAM screen without making any changes.3. Press CASH repeatedly, or press PAGE UP and/or PAGE DOWN to locate thenext line of the message you wish to program. After the last line on the firstpage, the screen shifts to display line #4 of the message. Using the sameprocedure, continue programming each line as necessary. Press CLEAR at anytime to exit and return to the LOGO DESC. PROGRAM screen.230 • Program Mode Programming <strong>SAM4s</strong> <strong>SPS</strong>-<strong>300</strong> Operator's & Programming <strong>Manual</strong> v1.2
NLU Code NumberNLUs are fixed keys on the keyboard (like traditional department keys) that access specificPLUs.On the default keyboard the PLU# assigned to the NLU key is the same, i.e. NLU keynumber one is PLU #1. However, with this program, you can assign any PLU number youwish to any one of the NLU keys.1. From the PGM control lock position menu, press 8 for NLU CODE# PGM.The NLU CODE PROGRAM screen displays:NLU CODE PROGRAMPRESS THE NLU KEY ON THEKEYBOARD YOU WISH TO PROGRAMPRESS CLEAR TO EXIT2. Press the NLU key on the keyboard you wish to program, or press CLEAR toexit.NLU CODE PROGRAMCURRENT PLU CODE#ENTERNEW PLU CODE#103. The current PLU code number displays. Type the new PLU code number youwish to use for this NLU key, press CASH.4. The NLU CODE PROGRAM screen returns. Continue from step 2 to programadditional NLU keys, or press CLEAR to exit.<strong>SAM4s</strong> <strong>SPS</strong>-<strong>300</strong> Operator's & Programming <strong>Manual</strong> v1.2 Program Mode Programming • 231
Download ProgramsWhen multiple registers are connected in an IRC network, you can download programs fromone register to any or all of the remaining registers.1. From the PGM control lock position menu, press 9 for DOWNLOADPROGRAMS. The PROGRAM DOWN screen displays:PROGRAM DOWN0. IRC ALL1. IRC SELECT2. From the PROGRAM DOWN screen, press 0 if you with to download programsto all of the registers, then go to step 4. If you wish to download only to selectedregisters, press 1:PROGRAM DOWN0.IRC ALL1.IRC SELECT# 1Y2N 3N 4N 5N 6N 7N 8N3. If you pressed 1 to download to selected registers, the PROGRAM DOWNscreen now displays Y or N for each of the eight possible registers in an IRCsystem. For example, if your IRC system consists of 3 registers, the default Ywill display for register 1, 2, and 3. The cursor arrow points at the first register.Press the YES/NO key to toggle the selection for register #1 to Y or N. PressCASH. The cursor arrow moves to #2. Select Y or N for second register. In thismanner you can determine which registers you wish to download programs to.When you have selected Y or N for the last register, the PROGRAM DOWNscreen appears.232 • Program Mode Programming <strong>SAM4s</strong> <strong>SPS</strong>-<strong>300</strong> Operator's & Programming <strong>Manual</strong> v1.2
PROGRAM DOWN0.PLU1.GROUP2.SALES TAX3.SYSTEM OPTION4.PRINT OPTION5.FUNCTION KEYS6.CLERK4. From the PROGRAM DOWN screen, find the digit that represents the programyou wish to download. Press PAGE DOWN to view the second page of thePROGRAM DOWN options. Note that 00 downloads all programs.PROGRAM DOWN7.LOGO DESC.8.NLU CODE# PGM.9.TIME & DATE/MISC00.ALL5. Press the digit that represents your selection. This display will indicate thenumber of the machine that the program is downloading to. The printer at thereceiving register will indicate "PROGRAM DOWN" and "PASS" or "FAIL" toindicate if the download is successful.Note: If there is a failure in IRC communication, the register that programs are beingsent from will display "IRC NOT READY" and the register number indicating nocommunication is possible.<strong>SAM4s</strong> <strong>SPS</strong>-<strong>300</strong> Operator's & Programming <strong>Manual</strong> v1.2 Program Mode Programming • 233
Clerk In/OutThe Clerk In/Out program allows you to edit actual punch in/out times for the day.1. From the PGM control lock position menu, press 00 for MORE. ThePROGRAM MODE page 2 screen displays.2. From the PROGRAM MODE page 2 screen, press 0 for CLERK I/O. TheCLERK NUMBER screen displays:CLERK NUMBERCLERK NO? (1-10)03. Type the number of the clerk you wish to edit and press CASH to display theCLERK I/O PROG. screen:CLERK I/O PROG.IN 00.00.00 00:00OUT 00.00.00 00:00IN 00.00.00 00:00OUT 00.00.00 00:00IN 00.00.00 00:00OUT 00.00.00 00:00TIME WORKED: 00:004. The cursor will point at the date for the first time punch. Press CASH until thecursor points at the field you wish to edit. Note that you can edit the last 20 timepunches, although only 6 dates/times display on the screen at one time. Whenyou leave the last field displayed on the current screen, your view will shift to thenext 6 dates/times If you wish to edit a date, type a new date and press CASH. Be sure to enterthe date in a six digit format, i.e. enter July 8 th , 2011 as 070811. If you wish to edit a time field, type the new time in a 24 hour (military)format, i.e. enter 7:00 PM as 1900.5. Note that when you edit time information, the TIME WORKED field is updatedwith a new total. When you have completed editing, press CLEAR to return tothe CLERK NUMBER selection screen.234 • Program Mode Programming <strong>SAM4s</strong> <strong>SPS</strong>-<strong>300</strong> Operator's & Programming <strong>Manual</strong> v1.2
PLU StockIf you designate a PLU as an inventory item (see PLU programming) then a special PLUstock counter keeps a running inventory count. This program is where you can set the currentinventory level.Refer to "System Option Programming" on page 160 to determine whether thequantity of inventory you enter in this program adds to existing inventoryquantity, or whether it replaces the current inventory quantity.Inventory is kept in decimal units two digits beyond the decimal. For example,if 1.75 pounds are multiplied times the PLU with the preset price per pound ofapples, 1.75 is subtracted from the PLU representing apples.To Program Inventory1. From the PGM control lock position menu, press 00 for MORE. ThePROGRAM MODE page 2 screen displays.2. From the PROGRAM MODE page 2 screen, press 1 for PLU STOCK. ThePLU NUMBER screen displays:PLU NUMBER ENTER PLU NUMBERAND PUSH PLU, OR PRESS A PLU KEY ONTHE KEYBOARD03. Enter the PLU number and press the PLU key, or press an PLU key on thekeyboard. The stock quantity for the selected PLU displays:PLU#STOCK QUANTITY1 P10.00<strong>SAM4s</strong> <strong>SPS</strong>-<strong>300</strong> Operator's & Programming <strong>Manual</strong> v1.2 Program Mode Programming • 235
4. Type the new or additional stock quantity and press CASH. Note that stock iskept in decimal units and you must enter new or additional stock to two digitsbeyond the decimal. For example, type 1 0 0 0 to enter ten units of inventory.5. Return to step 2 to continue recording inventory, or press CLEAR to return tothe PROGRAM MODE menu.Drawer LimitYou can set a limit for the drawer total. When cash in drawer exceeds the limit you programhere, a warning will display on the screen. You must press CLEAR to remove the warningand continue operations. The warning will continue to appear at the completion of everytransaction with the limit exceeded, until you use the PAID OUT function to remove cashfrom the drawer.Set the drawer limit to 0 to disable the drawer limit warning.1. From the PGM control lock position menu, press 00 for MORE. ThePROGRAM MODE page 2 screen displays.2. From the PROGRAM MODE page 2 screen, press 2 for DRAWER LIMIT.The LIMIT PROGRAM screen displays:LIMIT PROGRAMDRAWER LIMIT0.003. Type the amount you wish to use for a limit (or type 0 for no limit.) PressCASH.236 • Program Mode Programming <strong>SAM4s</strong> <strong>SPS</strong>-<strong>300</strong> Operator's & Programming <strong>Manual</strong> v1.2
Check Change LimitUse this program to set the maximum amount of cash that can be returned when a check istendered for an amount greater than the amount of the sale. For example, if the check changelimit is $10.00 the maximum amount that can be tendered into the check key on a $5.00 saleis $15.00.1. From the PGM control lock position menu, press 00 for MORE. ThePROGRAM MODE page 2 screen displays.2. From the PROGRAM MODE page 2 screen, press 3 for CHECK CHANGELIMIT. The CHECK LIMIT PGM. screen displays:CHECK LIMIT PROGRAMCHECK CHANGE LIMIT0.003. Type the amount for the check change limit. Press CASH.<strong>SAM4s</strong> <strong>SPS</strong>-<strong>300</strong> Operator's & Programming <strong>Manual</strong> v1.2 Program Mode Programming • 237
Time & DateUse this program to set the clock and calendar on your <strong>SPS</strong>-<strong>300</strong>. The date changesautomatically. After initial setting, time changing will probably be required only forbeginning and ending daylight savings time.1. From the PGM control lock position menu, press 00 for MORE. ThePROGRAM MODE page 2 screen displays.2. From the PROGRAM MODE page 2 screen, press 4 for TIME & DATE. TheSET DATE & TIME screen displays:SET DATE & TIMESET TIME :HH:MM(MILITARY) 09:01SET DATE :MM.DD.YY09.21.113. Type the current time in 24-hour format (i.e. military time, where 13:00 is 1:00PM.) Press CASH.4. Type the current date in MM (month) DD (day) and YY (year) format. PressCASH.238 • Program Mode Programming <strong>SAM4s</strong> <strong>SPS</strong>-<strong>300</strong> Operator's & Programming <strong>Manual</strong> v1.2
Tare WeightA tare is the amount of weight representing the container, or package when items are sold byweight. You can pre-program five tare weights, representing the weight of differentcontainers. When you place an item and a container on an optional scale, you can enter thetare number to automatically subtract the pre-programmed tare weight.If you choose to use tare #5 for manual tare weight entry, do not enter a weight for tare #5.(See TARE on page 216.)1. From the PGM control lock position menu, press 00 for MORE. ThePROGRAM MODE page 2 screen displays.2. From the PROGRAM MODE page 2 screen, press 5 for TARE WEIGHT.The TARE WEIGHT PROG. screen displays with the cursor arrow pointed atthe weight for tare #1:TARE WEIGHT PROGRAMTARE 1 : 0.000TARE 2 : 0.000TARE 3 : 0.000TARE 4 : 0.000TARE 5 : 0.0003. Type the weight for the first tare, press CASH. The cursor advances to TARE 2.Type the weight for the second tare and press CASH. Continue until all 5 taresare programmed, or press CLEAR to exit.<strong>SAM4s</strong> <strong>SPS</strong>-<strong>300</strong> Operator's & Programming <strong>Manual</strong> v1.2 Program Mode Programming • 239
MacroMacro keys may be programmed to record, and then later perform, up to 50 keystrokes. Forexample, a macro key could be set to tender (preset tender) a common currency, such as $5 intothe cash key. Use this program to record keystrokes for each of the 10 possible macro keys.Note: You can also program macros in function key programming.1. From the PGM control lock position menu, press 00 for MORE. ThePROGRAM MODE page 2 screen displays.2. From the PROGRAM MODE page 2 screen, press 6 for MACRO. TheMACRO PROGRAM screen displays:MACRO PROGRAM0. MACRO #11. MACRO #22. MACRO #33. MACRO #44. MACRO #55. MACRO #66. MACRO #7 3. Press the digit that represents the macro you wish to program. Press PAGEDOWN to view the remainder of the list:MACRO PROGRAM7. MACRO #88. MACRO #99. MACRO #10240 • Program Mode Programming <strong>SAM4s</strong> <strong>SPS</strong>-<strong>300</strong> Operator's & Programming <strong>Manual</strong> v1.2
Programming a New Macro1. After selecting a new macro to program, the screens displays with the arrowpointing at the first macro line:1. 2.3.4.5.6.7.8.2. Press the first key of the macro sequence, for example, press 1 (numeric one):1. ONE2. 3.4.5.6.7.8.3. The keystroke is recorded on the screen and the cursor moves to the nextkeystroke.<strong>SAM4s</strong> <strong>SPS</strong>-<strong>300</strong> Operator's & Programming <strong>Manual</strong> v1.2 Program Mode Programming • 241
4. Continue to enter keystrokes until the macro is complete. Press CLEAR to endthe macro recording and return to the MACRO PROGRAM screen. If you wishto add a function to a macro that is not located on the keyboard, or if you wish toinclude the CLEAR, Y/N, PAGE UP, or PAGE DOWN function to a macrostring (these keys are used for editing purposes inside this program), press PAGEDOWN to display a key code list:FUNCTIONKEYCODE-------------------------------NLU#1 - NLU#150(1-150)ONE 301TWO 302THREE 303FOUR 304FIVE 3055. With the key code list displayed, press PAGE DOWN and PAGE UP to find thefunction you wish to add to the macro. Type the numeric code number pressCASH. The function is added to the macro.Editing an Existing Macro1. After selecting a macro to program the screen displays the keystrokes currentlyprogrammed.1. ONE 2. TWO3. THREE4. FOUR5.6.7.8.2. Press the YES/NO key to advance the cursor to the line you wish to edit.3. With the cursor pointing at a line, press (or select) the new function you wish toplace in the macro sequence.4. If you wish to remove a key stroke from a macro, replace the current functionwith the INACTIVE function by pressing the PAGE DOWN to display a keycode list, then enter4 4 5.242 • Program Mode Programming <strong>SAM4s</strong> <strong>SPS</strong>-<strong>300</strong> Operator's & Programming <strong>Manual</strong> v1.2
Machine No.The machine number is printed on the register receipt. Program a machine number so thatany receipt can be identified with the store or register where the transaction took place. Themachine number may be a different number than the IRC register number programmed inIRC programming (see "IRC Options" in the "Service Mode Programming" chapter.)1. From the PGM control lock position menu, press 00 for MORE. ThePROGRAM MODE page 2 screen displays. Press PAGE DOWN to view theremainder of the page 2 program options.2. From the PROGRAM MODE page 2 screen, press 7 for MACHINE NO. TheMACHINE # PROG. screen displays:MACHINE # PROGRAMMACHINE #0Training Mode Password3. Type the machine number, up to 5 digits, press CASH.If you wish to use training mode, you must program a password that you will use to entertraining mode. The password may be up to 4 digits long, however, if you choose to use apassword less that for digits, you must enter preceding zeros to complete a 4 digit entry. Forexample, if you program the password to be "77", you must type "0077" when enteringtraining.1. From the PGM control lock position menu, press 00 for MORE. ThePROGRAM MODE page 2 screen displays. Press PAGE DOWN to view theremainder of the page 2 program options.2. From the PROGRAM MODE page 2 screen, press 9 for TRAINING MODEP/W. The TRAINING MODE P/W screen displays:TRAINING MODE PASSWORDPASSWORD :03. Type the password, up to 4 digits, press CASH.<strong>SAM4s</strong> <strong>SPS</strong>-<strong>300</strong> Operator's & Programming <strong>Manual</strong> v1.2 Program Mode Programming • 243
Program ScansYou can make a printed record of your <strong>SPS</strong>-<strong>300</strong> program.1. From the PGM control lock position menu, press 00 for MORE. ThePROGRAM MODE page 2 screen displays. Press PAGE DOWN to view theremainder of the page 2 program options.2. From the PROGRAM MODE page 2 screen, press 00 for SCAN. ThePROGRAM SCAN screen displays:PROGRAM SCAN0. PROGRAM SCAN1. ALL PROGRAM SCAN3. Press 1 to initiate a printout of all programs. Press 0 to select the program youwish to print from the PROGRAM SCAN screen.PROGRAM SCAN0.PLU1.GROUP2.SALES TAX3.SYSTEM OPTION4.PRINT OPTION5.FUNCTION KEYS6.CLERKP14. Press PAGE DOWN to view the remainder of the program scan selections. Ifyou see the program you wish to print, press the digit representing that program.PROGRAM SCAN7.LOGO DESC.8.NLU CODE# PROGRAMP200.MORE SCAN244 • Program Mode Programming <strong>SAM4s</strong> <strong>SPS</strong>-<strong>300</strong> Operator's & Programming <strong>Manual</strong> v1.2
5. Press 00 to view the PROGRAM SCAN page 2 screen:PROGRAM SCAN0.CLERK I/O1.PLU STOCK2.DRAWER LIMIT3.CHECK CHANGE LIMIT4.TIME & DATE5.TARE WEIGHT6.MACROP16. Press PAGE DOWN to view the remainder of the program scan selections.When you see the program you wish to print, press the digit representing thatprogram.PROGRAM MODE7.MACHINE NO.8.PC SCHEDULE9.TRAINING MODE P/WP2<strong>SAM4s</strong> <strong>SPS</strong>-<strong>300</strong> Operator's & Programming <strong>Manual</strong> v1.2 Program Mode Programming • 245
246 • Program Mode Programming <strong>SAM4s</strong> <strong>SPS</strong>-<strong>300</strong> Operator's & Programming <strong>Manual</strong> v1.2
Sample ReportsFinancialDATE 11/10/2011 WED TIME 13:32Total and count ofall positive PLUsTotal and count ofall Negative PLUsTotal of +PLU and–PLU salesTotal of NontaxablesalesTotal of tax eligiblesales for each saletaxTotal of taxcollected for eachtaxTotal exemptedsales for each taxTotal sales for eachtype of destinationTotal and count foreach % function key(i.e. discounts &coupons)X 1 REPORT 00001--------------------------------FINANCIAL+PLU TTL 179.56$288.60-PLU TTL 10-20.00ADJST TTL 189.56$268.60--------------------------------NONTAX $30.47TAX1 SALES $153.60TAX2 SALES $11.92TAX3 SALES $16.77TAX4 SALES $31.89TAX1 $10.00TAX2 $1.21TAX3 $1.18TAX4 $2.18XMPT1 SALES $7.00XMPT2 SALES $1.50XMPT3 SALES $7.95XMPT4 SALES $7.50EATIN TTL 1$10.12TAKEOUT TTL 2$40.77DRTHRU TTL 1$3.04ITEM DISC. 3-0.48continued . . .<strong>SAM4s</strong> <strong>SPS</strong>-<strong>300</strong> Operator's & Programming <strong>Manual</strong> v1.2 Sample Reports • 247
Total and count foreach % function key(i.e. discounts &coupons)Net SalesCredited tax foreach tax. (Tax iscredited for negativetaxable sales, i.e.mdse returntransactions.)Food stamp changecredited to salesTotal and count foreach type oftransactioncorrection.Gross SalesTotals and countersfor CASH andCHECK salesTotal and count foreach type R/A(received onaccount) and P/O(paid out) key.continued from previous pageSALE DISC. 2-5.22SALE SURCH. 3$3.23% 4 0$0.00% 5 0$0.00NET SALE 26$281.18CREDIT TAX1 4-1.11CREDIT TAX2 1-0.23CREDIT TAX3 2-0.89CREDIT TAX4 1-0.39FD/S CREDIT 0$0.23RETURN 33-59.73ERROR CORR 2-4.00PREVIOUS VD 1-1.50MODE VOID -2-6.40CANCEL 2$16.00GROSS SALES $375.63CASH SALES 13$133.49CHECK SALES 1$23.05R/A 1 1$145.00R/A 2 0$0.00R/A 3 0$0.00P/O 1 1-140.00P/O 2 0$0.00P/O 3 0$0.00continued . . .248 • Sample Reports <strong>SAM4s</strong> <strong>SPS</strong>-<strong>300</strong> Operator's & Programming <strong>Manual</strong> v1.2
Total and count ofitems sold withHASH status.Count of No Sales.Total of numbersentered into the nonaddkeyTotal and count ofexpected CASH,CHECK in drawer.Declaration amountsand over/shortcalculations.Total and count ofexpected in drawerfor each chargefunction. (Chargein drawer will differfrom charge sales ifthe charge is overtenderedTotal and count foreach CHARGE key.continued from previous pageHASH TTL 0$0.00NOSALE 4NON ADD # 547CASH-IN-D 14$269.99CASH DEC AMT 269.99OVER/SHORT $0.00CHECK-IN-D 3-108.45CHECK DEC AMT $0.00OVER/SHORT -108.45FD/S-IN-D 2$21.00FOOD DEC AMT $0.00OVER/SHORT $21.00CHG1-IN-D 0$0.00CHG2-IN-D 1$8.43CHG3-IN-D 1$8.52CHG4-IN-D 2-1.60CHG5-IN-D 1$2.67CHG6-IN-D 2$13.09CHG7-IN-D 0$0.00CHG8-IN-D 1$3.04CHG1 SALES 0$0.00CHG2 SALES 1$8.43CHG3 SALES 1$8.52CHG4 SALES 2-1.60CHG5 SALES 1$2.67CHG6 SALES 2$13.09CHG7 SALES 0$0.00CHG8 SALES 1$3.04continued . . .<strong>SAM4s</strong> <strong>SPS</strong>-<strong>300</strong> Operator's & Programming <strong>Manual</strong> v1.2 Sample Reports • 249
Total for eachForeign currency indrawer.Total of CASH,CHECKS andCHARGES indrawer.Mix & MatchDiscounts appliedTotal and count forPROMO andWASTE.Number oftransactions andtotal activity inTraining ModeTotal and count ofbalances enteredinto PBAL keyTotal and count ofbalances paidTotal and count ofitems servicedAverage number ifitems per customer,and average dollarsales per customercontinued from previous pageFOREIGN 1 0.00FOREIGN 2 0.00FOREIGN 3 0.00FOREIGN 4 0.00DRWR TTL $216.69MIX & MATCH 0$0.00PROMO 1$1.50WASTE 8$12.50TRAIN TTL 5$62.59BAL FORWARD 4$88.13GUESTS 5P/BAL 4$0.00CHECKS PAID 2$18.64SERVICE 4$88.13AVG ITEM/CUST 7.29AVG $/CUST $10.81OPEN CHECK TOTAL $26.02********************************GRAND $375.63KELLY No.000209 00000Total number ofguests servedTotal and count ofall balances servicedGrand totalTotal of openchecks (trackingtotals) from opencheck report. Willnot reset withfinancial Z report.250 • Sample Reports <strong>SAM4s</strong> <strong>SPS</strong>-<strong>300</strong> Operator's & Programming <strong>Manual</strong> v1.2
TimeDATE 11/10/2011 WED TIME 15:48Time PeriodNumber ofTransactionsNet sales in thisperiod.Percentage of totalsalesNumber ofTransactions allperiodsNet sales in allperiods.X 1 REPORT 00001--------------------------------TIME13:00-14:00CNT 17SALES AMT $183.85SALES RATE 65.39%14:00-15:00CNT 9SALES AMT $97.33SALES RATE 34.61%********************************TOTAL CNT 26TOTAL AMT $281.18KELLY No.000236 00000<strong>SAM4s</strong> <strong>SPS</strong>-<strong>300</strong> Operator's & Programming <strong>Manual</strong> v1.2 Sample Reports • 251
PLUDATE 11/10/2011 WED TIME 15:33PLU numberPLU DescriptorCount and salestotal.Percentage of totalsalesTotal activity for allPLUsTotal sales for allPLUs.X 1 REPORT 00001--------------------------------ALL PLUPLU#1HAMBURGERCNT 28 $42.00SALES RATE 15.64%PLU#2DBL BURGERCNT 40 $99.75SALES RATE 37.14%PLU#4COKECNT 26 $38.85SALES RATE 14.46%PLU#5SPRITECNT 18 $13.42SALES RATE 5.00%PLU#7ROASTCNT 19.16 $30.47SALES RATE 11.34%PLU#28UNLEADEDCNT 32.85 $39.39SALES RATE 14.66%PLU#29RETURNSCNT 10 -20.00SALES RATE -7.44%PLU#33NAILSCNT 15.55 $24.72SALES RATE 9.20%********************************TOTAL CNT 189.56TOTAL AMT $268.60KELLY No.000213 00000252 • Sample Reports <strong>SAM4s</strong> <strong>SPS</strong>-<strong>300</strong> Operator's & Programming <strong>Manual</strong> v1.2
ClerkNote: Media totals can be printed for each clerk, if selected in System OptionProgramming.DATE 11/10/2011 WED TIME 15:36Clerk NameNumber ofTransactionsNet sales for thisclerkDrawer total for thisclerkX 1 REPORT 00001--------------------------------ALL CLERKKELLYNET SALE 10$155.23DRWR TTL $109.81--------------------------------ZACHNET SALE 5$45.14DRWR TTL $43.22--------------------------------ANNANET SALE 4$78.75DRWR TTL $67.03--------------------------------LAURANET SALE 2$0.00DRWR TTL $18.64--------------------------------PEGGY--------------------------------MOLLYNET SALE 5$2.06DRWR TTL -22.01--------------------------------KELLY No.000218 00000<strong>SAM4s</strong> <strong>SPS</strong>-<strong>300</strong> Operator's & Programming <strong>Manual</strong> v1.2 Sample Reports • 253
Individual ClerkDATE 11/10/2011 WED TIME 15:36Clerk NameNumber ofTransactionsNet sales for thisclerkDrawer total for thisclerkX 1 REPORT 00001--------------------------------INDIVIDUAL CLERKKELLYNET SALE 10$155.23DRWR TTL $109.81--------------------------------KELLY No.000218 00000GroupsDATE 11/10/2011 WED TIME 15:34Group DescriptorNumber of itemssold in this groupNet sales for thisgroupNumber of itemssold in all groups.Net sales for allgroups.X 1 REPORT 00001--------------------------------GROUPGROUP : 1 FOODCNT 68SALES AMT $141.75GROUP : 2 DRINKCNT 44SALES AMT $52.27GROUP : 3 REST.CNT 112SALES AMT $194.02GROUP : 5 STORECNT 19.16SALES AMT $30.47GROUP : 8 MDSECNT 58.40SALES AMT $44.11GROUP : 9 STORE MDSECNT 77.56SALES AMT $74.58********************************TOTAL CNT 189.56TOTAL AMT $268.60KELLY No.000237 00000254 • Sample Reports <strong>SAM4s</strong> <strong>SPS</strong>-<strong>300</strong> Operator's & Programming <strong>Manual</strong> v1.2
DayThe Day (Daily Sales) report lists net sales for each day of the month.DATE 11/10/2011 WED TIME 15:47CountNet SalesPercentage of totalX 2 REPORT 00001--------------------------------DAYDAY : 12CNT 2SALES AMT $6.00SALES RATE 50.00%DAY : 12CNT 2SALES AMT $6.00SALES RATE 50.00%********************************TOTAL CNT 4TOTAL AMT $12.00CLERK 1 No.00047 0000StockDATE 11/10/2011 WED TIME 15:47PLU numberPLU DescriptorCurrent inventorycountX 1 REPORT 00001--------------------------------ALL PLU STOCKPLU#1HAMBURGERCNT 26PLU#2DBL BURGERCNT 15PLU#7ROASTCNT 25.96PLU#28UNLEADEDCNT 1488.47PLU#33NAILSCNT 161.25KELLY No.000228 00000DATE 11/10/2011 WED TIME 15:47<strong>SAM4s</strong> <strong>SPS</strong>-<strong>300</strong> Operator's & Programming <strong>Manual</strong> v1.2 Sample Reports • 255
Clerk Time ReportDATE 11/10/2011 WED TIME 15:36Clerk NameDate and time forthe last ten timeclock punches (in &out)Total time for clerkTotal time for allclerksX 1 REPORT 00001--------------------------------INDIVI. CLERK TIMEKELLYTIME IN : 11/09/2011 07:52TIME OUT: 11/09/2011 15:44TIME IN : 11/10/2011 07:52TIME OUT: 11/10/2011 13:50TIME WORKED : 0013:50ZACHTIME IN : 11/09/2011 07:26TIME OUT: 11/09/2011 14:55TIME IN : 11/10/2011 07:26TIME OUT: 11/10/2011 14:22TIME IN : 11/11/2011 06:58TIME WORKED : 0014:25ANNATIME IN : 11/09/2011 12:52TIME OUT: 11/09/2011 15:42TIME IN : 11/10/2011 06:44TIME OUT: 11/10/2011 14:55TIME WORKED : 0011:01LAURATIME IN : 11/09/2011 02:33TIME OUT: 11/09/2011 07:55TIME IN : 11/09/2011 12:44TIME OUT: 11/09/2011 18:44TIME IN : 11/10/2011 09:55TIME WORKED : 0011:22PEGGYTIME IN : 11/10/2011 13:52TIME WORKED : 0000:00MOLLYTIME IN : 11/09/2011 01:05TIME OUT: 11/09/2011 09:55TIME IN : 11/10/2011 07:44TIME WORKED : 0008:50--------------------------------TOTAL WORKED : 0059:28KELLY No.000217 00000256 • Sample Reports <strong>SAM4s</strong> <strong>SPS</strong>-<strong>300</strong> Operator's & Programming <strong>Manual</strong> v1.2
Check FileDATE 11/10/2011 WED TIME 15:59Open check numberand balance.Clerk responsiblefor the check.X 1 REPORT 00001--------------------------------OPEN CHECKCHECK : 3 $24.07MOLLYCHECK : 4 $45.42KELLYCHECK : 5 $24.50KELLYCHECK : 6 $28.33KELLYKELLY No.000243 00000PLU Zero SalePLU DescriptorDATE 11/10/1999 WED TIME 15:59X 1 REPORT 00001--------------------------------PLU ZERO SALEITEMPLU#--------------------------------PLU11 #11PLU14 #14PLU15 #15PLU16 #16PLU19 #19PLU20 #20CLERK 1 No.000243 00000PLU Number<strong>SAM4s</strong> <strong>SPS</strong>-<strong>300</strong> Operator's & Programming <strong>Manual</strong> v1.2 Sample Reports • 257
Balancing Formulas+/- Net Sales $ Example= PLU Sales Total $+ T ax 1 $+ T ax 2 $+ T ax 3 $+ T ax 4 $+ Sale Coupon Amounts $+ Sale Percent Discounts $+ Sale SurchargeAmounts= Net Sales $$+/- Gross Sales $ Example= Net Sales $+ Negative PLU Total $+ Item Coupon Total $+ Item Percent Discount $+ Sale Coupon Amounts $+ Sale Percent Discounts $+ Credit Tax 1 $+ Credit Tax 2 $+ Credit Tax 3 $+ Credit Tax 4 $+ Merchandise Return $+ V oid Position Total $= Gross Sales $258 • Sample Reports <strong>SAM4s</strong> <strong>SPS</strong>-<strong>300</strong> Operator's & Programming <strong>Manual</strong> v1.2
Integrated Payment AppendixOne Day Example of Credit AuthorizationOpen BatchNOTE: To present things in a logical order, OPEN BATCH is shown at the beginning of theday, but in practical day-to-day operation it is recommended to open a new batch right afterclosing today’s batch, so it is ready to go for the next day.1. Turn the control lock to the Clear Totals position to display the RESETREPORT MODE menu:RESET REPORT MODE0.Z REPORTS1.RESET E.J.2.PC COMMUNICATION3.PLU LOOKUP PGM4.AGE VERIFICATION5.KP STARTING NO.00.DATATRAN2. Press 00 to display the DataTran Operation menu:DATATRAN OPERATION0.INITIALIZE EFT1.OPEN BATCH2.CLOSE CURR. BATCH4.CHG. BATCH NUMBER5.ISSUE LOCAL TOTAL6.ISSUE TRANSACTION<strong>SAM4s</strong> <strong>SPS</strong>-<strong>300</strong> Operator's & Programming <strong>Manual</strong> v1.2 Integrated Payment Appendix • 259
3. If necessary, press PAGE DOWN to display the second page of the DataTranOperation menu:DATATRAN OPERATION7.ISSUE BATCH STATUS8.DIAL IN LOAD9.DIAL OUT LOAD4. Press 1 to open the batch. The message “WAITING RESP” displays. Noprinting takes place.260 • Integrated Payment Appendix <strong>SAM4s</strong> <strong>SPS</strong>-<strong>300</strong> Operator's & Programming <strong>Manual</strong> v1.2
Sample Transaction1. Register a normal transaction. Press the appropriate CHARGE key. Themessage ‘SLIDE CARD” displays:REGISTER MODE2 PLU1 T1 2.00███████████████ SLIDE CARD ███████████████TAX 0.00 SUBT 2.002. Swipe the card. The message “WAITING RESP.” displays until the cardverification is complete. :REGISTER MODE2 PLU1 T1 2.00███████████████ WORKING ███████████████TAX 0.00 SUBT 2.003. When verification is complete, the draft is printed.Note: If multiple documents are to be printed, the message “PRESS CASH TOCONTINUE” displays. Tear off the printer paper, and press CASH to resume printing.Sample Draft5/26/04 10:10 00001SALE $2.00************6301APP: VITAL8REF: 41415013334REC NO : 1X___________________________I AGREE TO PAY ABOVETOTAL AMOUNT ACCORDINGTO CARD ISSUER AGREEMENT<strong>SAM4s</strong> <strong>SPS</strong>-<strong>300</strong> Operator's & Programming <strong>Manual</strong> v1.2 Integrated Payment Appendix • 261
Sample Draft – With GratuityTo print the tip entry line, see System Option programming page 18 and select the option“EFT DRAFT IS” to “N” (no).5/26/04 10:10 00001SALE $2.00************6301APP: VITAL8REF: 41415013334REC NO : 1TIP_____________________________TOTAL___________________________X___________________________I AGREE TO PAY ABOVETOTAL AMOUNT ACCORDINGTO CARD ISSUER AGREEMENT262 • Integrated Payment Appendix <strong>SAM4s</strong> <strong>SPS</strong>-<strong>300</strong> Operator's & Programming <strong>Manual</strong> v1.2
<strong>Manual</strong> Card Entry1. Register a normal transaction. Press the appropriate CHARGE key. Themessage ‘SLIDE CARD” displays:REGISTER MODE2 PLU1 T1 2.00███████████████ SLIDE CARD ███████████████TAX 0.00 SUBT 2.002. If card will not read, press Clear once, the message “ENTER ACCT NO”displays.REGISTER MODE2 PLU1 T1 2.00██████████████████ ENTER ACCT NO ██████████████████TAX 0.00 SUBT 2.003. Enter the account number and press CASH (or press Clear twice to abort thetransaction.)REGISTER MODE2 PLU1 T1 2.00██████████████████ ENTER EXP DATE██████████████████TAX 0.00 SUBT 2.004. When verification is complete, the draft is printed.Note: If multiple documents are to be printed, the message “PRESS CASH TOCONTINUE” displays. Tear off the printer paper, and press CASH to resume printing.<strong>SAM4s</strong> <strong>SPS</strong>-<strong>300</strong> Operator's & Programming <strong>Manual</strong> v1.2 Integrated Payment Appendix • 263
Merchandise ReturnComplete the merchandise return transaction as you would a normal transaction. PressMDSE RTRN prior to entering each returned item.1. Register a normal transaction. Press the appropriate CHARGE key. Themessage ‘SLIDE CARD” displays:REGISTER MODE1 PLU1 T1 -1.001 PLU1 T1 -1.00███████████████ SLIDE CARD ███████████████TAX 0.00 SUBT 12.002. Swipe the card. The message “WAITING RESP.” displays until the cardverification is complete.REGISTER MODE1 PLU1 T1 -1.001 PLU1 T1 -1.00███████████████WAITING RESP███████████████TAX 0.00 SUBT 2.003. When verification is complete, the draft is printed.Note: If multiple documents are to be printed, the message “PRESS CASH TOCONTINUE” displays. Tear off the printer paper, and press CASH to resume printing.Sample Draft5/26/04 10:42 1SALE -2.00************6301APP: *7REF: 00003REC NO : 3X___________________________I AGREE TO PAY ABOVETOTAL AMOUNT ACCORDINGTO CARD ISSUER AGREEMENT264 • Integrated Payment Appendix <strong>SAM4s</strong> <strong>SPS</strong>-<strong>300</strong> Operator's & Programming <strong>Manual</strong> v1.2
Void TransactionTransaction Void allows a transaction to be removed from the batch and not reported to thecardholder statement.1. Turn the key lock to the VOID position.2. Register a normal transaction.3. Press the appropriate CHARGE key. The message “SLIDE CARD” displays4. Swipe the card. The message “ENTER APP CODE” displays:VOID MODE2 PLU1 T1 -2.00███████████████████ ENTER APP CODE ███████████████████TAX 0.00 SUBT 12.005. Enter the authorization code printed for the transaction to be voided, pressCASH. The message “ENTER REF NO” displays:VOID MODE2 PLU1 T1 -2.00█████████████████ ENTER REF NO █████████████████TAX 0.00 SUBT 12.006. Enter the Reference number from the transaction to be voided; press CASH. Themessage “WAITING RESP.” displays until the transaction is found and theoriginal record removed.<strong>SAM4s</strong> <strong>SPS</strong>-<strong>300</strong> Operator's & Programming <strong>Manual</strong> v1.2 Integrated Payment Appendix • 265
Local Total ReportRun an Issue Local Total report to confirm that credit totals match the financial report beforeclosing the batch.Tip (Gratuity) EntryGratuities (tips) indicated by the customer on the payment draft must be entered into the ECRbefore the batch is closed.1. Turn the control lock to the Clear Totals position to display the RESETREPORT MODE menu.2. Press 00 to display the DataTran Operation menu.3. Press Page Down to view the second page of the DataTran Operation menu4. Press 00 (Tip Operation) to enter tips.TIP OPERATIONENTER REC NO.ORIG TRAN AMOUNTTIP AMOUNT5. Enter the record number of the transaction and press CASH.6. Enter the original transaction amount and press CASH.7. Enter the tip amount and press CASH.8. If the record number and transaction number are valid, the tip amount is enteredin the batch and a tip entry chit prints as shown below.Sample Tip ChitDATE 09/27/2011 MON TIME 10:41SALE AMOUNT: $426TIP AMOUNT: $1.50REF: *REC: 2EMPLOYEE1 NO.000023 REG 01266 • Integrated Payment Appendix <strong>SAM4s</strong> <strong>SPS</strong>-<strong>300</strong> Operator's & Programming <strong>Manual</strong> v1.2
Close BatchNOTE: To present things in a logical order, OPEN BATCH is shown at the beginning of theday, but in practical day-to-day operation it is recommended to open a new batch right afterclosing today’s batch, so it is ready to go for the next day.1. Turn the control lock to the Clear Totals position to display the RESETREPORT MODE menu:RESET REPORT MODE0.Z REPORTS1.RESET E.J.2.PC COMMUNICATION3.MIX & MATCH PROGRAM4.MIX & MATCH SCAN5.PLU LOOKKUP PROGRAM6.AGE VERIFICATION2. Press PAGE DOWN to view the next page of the RESET REPORT MENU.RESET REPORT MODE9.DATATRAN(DEBIT)00.DATATRAN3. Press 00 to display the DataTran Operation menu, or if the application is usingdebit, press 9.DATATRAN OPERATION0.INITIALIZE EFT1.OPEN BATCH2.CLOSE CURR. BATCH4.CHG. BATCH NUMBER5.ISSUE LOCAL TOTAL6.ISSUE TRANSACTION4. Press 2 to close the current batch. The message “WAITING RESP” displays.When communication is complete, the Local Batch Status prints and the batch isclosed.<strong>SAM4s</strong> <strong>SPS</strong>-<strong>300</strong> Operator's & Programming <strong>Manual</strong> v1.2 Integrated Payment Appendix • 267
Close BatchSee ExplanationsDATE 5/24/2011 WED TIME 10:34**** LOCAL BATCH STATUS ****O 4 3 3 2.00 0 .00CLERK 1 000065 00000Local Batch Status Explanations:(From Left to Right)O Batch Status C=Closed/O=Open/X=Incomplete4 Batch Number3 Batch Transaction Count3 Batch Item Count2.00 Batch Balance0 Batch Forwarded Transaction Count.00 Batch Forwarded BalanceIntegrated Payment Program Requirements1. See RS232 Options on page 122 and set the port options for the serial port where theDataTran is connected. Set the BAUD to 2400 and the device field to EFT (option 10)and leave the remaining fields at the default settings.2. See System Option Programming on page 160. Press PAGE DOWN until SYSTEMOPTION pg 21 displays.Set EFT DRAFT to Y (DATATRAN) for a normal draft. Set EFT DRAFT to N (FINEDINING) for a draft with a tip entry line.Set MSR CONNECTED to 0 if the MSR is connected to the DATATRAN. SET to 1 ifthe MSR is connected to the PDC; or set to 2 if the card reader is internal.3. See Print Option Programming on page 170. Press PAGE DOWN until PRINT OPTIONpg 16 displays. Set the number of DataTran receipt copies you wish printed.4. See CHARGE 1-8 on page 188 to set the options for integrated payment chargefunctions. From the appropriate charge program screen, select Y (yes) at the CONNECTEFT field. Select CREDIT, DEBIT, GIFT or GIFT NSF at the SELECT field. Checkwith your CRS representative to verify availability of different payment methods.268 • Integrated Payment Appendix <strong>SAM4s</strong> <strong>SPS</strong>-<strong>300</strong> Operator's & Programming <strong>Manual</strong> v1.2
DataTran Operation Menu1. Turn the control lock to the Clear Totals position to display the RESETREPORT MODE menu.2. Press 00 to display the DataTran Operation menu:DATATRAN OPERATION0.INITIALIZE EFT1.OPEN BATCH2.CLOSE CURR. BATCH4.CHG. BATCH NUMBER5.ISSUE LOCAL TOTAL6.ISSUE TRANSACTION3. If necessary, press PAGE DOWN to display the second page of the DataTranOperation menu:DATATRAN OPERATION7.ISSUE BATCH STATUS8.DIAL IN LOAD9.DIAL OUT LOAD00.TIP OPERATION4. Review the explanations that follow and select the appropriate operation.Initialize EFTSelect Initialize EFT to verify communications, software versions and installed networks.List of Installed NetworksStatus of InstalledDATE 5/24/2011 THU TIME 16:15** LIST INSTALLED NETWORRKS **CHK DEN --- --- VER:3.89OFF ON OFF OFFEMPLOYEE1 NO.000019 REG 01Software Version<strong>SAM4s</strong> <strong>SPS</strong>-<strong>300</strong> Operator's & Programming <strong>Manual</strong> v1.2 Integrated Payment Appendix • 269
Change Batch NumberThe change batch number command is used to assign a new batch number to an existingbatch. It is used with certain credit card processors to rectify settlement problems. It is usedinfrequently. (Attempt to change batch number will be denied if bank does not allow thefeature.)Issue Local TotalThis report is added for ease of customer balancing actual totals in the DataTran to the systemwide reports. A summary of each kind of credit card and a batch total should match the totalswithin the ER-650/ER-600 system-wide report before the Settle Batch is attempted.DATE 5/24/2011 WED TIME 10:55****LOCAL TOTAL REPORT ****AMEX .00 0VISA 120.32 5MASTER .00 0DISCOVER .00 0PRIVATE LABEL .00 0DINERS .00 0JCB .00 0DEBIT .00 0TOTAL 120.32 5CLERK 1 000069 00000Issue TransactionThe Local Transaction Report contains details of each transaction in the current batch.Example(See Appendix for report key.)DATE 5/24/2011 WED TIME 10:59*** LOCAL TRANSACTION REPORT ***1 A 54 ************6301 0501 1 VITAL6 * 100.00 * * * * * 4 * 052604 113803 5 @ NY * * 00 * * D 100 00 * * * 00001 * * * * * 052404 113803 * * * * 00 *CLERK 1 000070 00000Issue Batch StatusThe Local Batch Status Report also prints when a batch is closed.See ExplanationsDATE 5/24/2011 WED TIME 10:34**** LOCAL BATCH STATUS ****0 4 3 3 2.00 0 .00CLERK 1 000065 00000270 • Integrated Payment Appendix <strong>SAM4s</strong> <strong>SPS</strong>-<strong>300</strong> Operator's & Programming <strong>Manual</strong> v1.2
Local Batch Status Explanations:(From Left to Right)o Batch Status C=Closed/O=Open/X=Incomplete4 Batch Number3 Batch Transaction Count3 Batch Item Count2.00 Batch Balance0 Batch Forwarded Transaction Count.00 Batch Forwarded BalanceDial In Load/Dial Out LoadFor Legacy DataTran equipment:If instructed by Datacap support, you can use these options to update DataTran software.Choose Enable Dial In Load to allow Datacap to call the DataTran and send updates. ChooseEnable Dial Out Load to call Datacap to connect. You will be required to enter the phonenumber and terminal I.D. (password) which will be given to you by Datacap.For TwinTran:When a TwinTran is first installed, the dealer must do a Dial Out Load through the IPconnection. If, for any reason, the internet is not available, the device cannot be loaded. If itis being installed at a location where the Internet is not currently operational and the customerwants to use the dial out method for approvals, the procedure below must be done at alocation where the internet is working.To load a TwinTran using a Sam4s register;With the TwinTran connected to the register and an active Ethernet line, enter into the DialOut mode. At the Phone number field enter the number “1”. If the register uses the codeentry method for alpha characters enter the 3 digit code (049). At the Enter ID prompt, enterthe serial number of the TwinTran. Select Tone phone connection. The TwinTran will callDatacap’s host PC and load itself. This takes approximately 20 seconds. After the TwinTran isloaded, one successful credit transaction must be done. After that the unit can be connected asthe customer wishes.Tip OperationFollow the prompts to enter the record number, original transaction amount and tip amount.If the record number and transaction number are valid, the tip amount is entered in the batchand a tip entry chit prints.<strong>SAM4s</strong> <strong>SPS</strong>-<strong>300</strong> Operator's & Programming <strong>Manual</strong> v1.2 Integrated Payment Appendix • 271
Local Transaction Report KeyA B C D E F G H I J K H I J K L M N O P Q R S T [U V WX Y Z AA BB]Field Description Min Max TypeA Transaction Sequence Number 1 5 NumericB Transaction Status 1 1 AlphanumericC Network Transaction Code 1 3 AlphanumericD Credit Card Account Number 1 38 AlphanumericE Expiration Date 4 4 NumericF Card Reader Flag 1 1 NumericG Approval Code 1 16 AlphanumericH Reference Number 1 16 AlphanumericI Transaction Amount 3 11 NumericJ Operator ID 1 10 AlphanumericK AMEX Category or Product Code 1 10 AlphanumericL Arrival Date 3 6 NumericM Departure Date 3 6 NumericN Gratuity Amount 3 11 NumericO Media Type 1 2 NumericP Special Program Code 1 1 NumericQ Transaction Date 3 6 NumericR Transaction Time 4 4 NumericS Authorization Source Code 1 1 NumericT Card Holder ID 1 1 NumericU PS2000 or MIC Payment Service Indicator 1 1 AlphanumericV PS2000 Transaction ID or 15 15 AlphanumericMIC Banknet Reference Number 9 9 AlphanumericMIC Banknet Authorization Date 4 4 NumericMIC POS Entry Mode 1 1 AlphanumericMIC Mag Stripe Error Code 1 1 AlphanumericW PS2000 Validation Code 4 4 AlphanumericX Authorization Response Code 2 2 AlphanumericY PS2000 Authorization Currency Code or 3 3 AlphanumericMIC Entry Mode Change Indicator 1 1 AlphanumericMIC Track Data - CVC Error 1 1 AlphanumericMIC Track Data - Error Code 1 1 AlphanumericZMerchant Category Code 2 2 AlphanumericAAEntry Mode 2 2 AlphanumericBBOriginal Authorized Amount 3 11 NumericLocal Transaction Report Field DefinitionsA. Transaction Sequence Number: The DataTran will use this field to return the internal sequencenumber assigned to each accessed transaction.B. Transaction Status: The DataTran will use this field to return the current status of each accessedtransaction.Allowed values: “A” = Authorized but not captured, “C” = Captured, “F” = Forced Entry,or “V” = Void.C. Network Transaction Code: When available, the DataTran will use this field to return the serviceprovider’s code assigned to each accessed transaction.272 • Integrated Payment Appendix <strong>SAM4s</strong> <strong>SPS</strong>-<strong>300</strong> Operator's & Programming <strong>Manual</strong> v1.2
D. Credit Card Account Number: The DataTran will use this field to return the card account numberused in each accessed transaction .E. Expiration Date: The DataTran will use this field to return the expiration date of the credit cardused in each accessed transaction.Format: “YYMM” or “MMYY” (“YY” = year and “MM” = month).F. Card Reader Flag: The DataTran will use this field to return the type of account number entryused in each accessed transaction.Allowed values: 0 = Hand entered account number, or 1 = Entered by card reader.G. Approval Code: The DataTran will use this field to return the approval code of each accessedtransaction.H. Reference Number: When available, the DataTran will use this field to return the referencenumber of each accessed transaction.I. Transaction Amount: The DataTran will use this field to return the sales amount of each accessedtransaction.Format: -9999999.99 (decimal point required).J. Operator ID: When available, the DataTran will use this field to return the cashier or operator IDnumber entered in each accessed transaction.K. AMEX Category or Product Code: When available, the DataTran will use this field to return theAmerican Express product or category code of each accessed transaction.L. Arrival Date: When available, the DataTran will use this field to return the customer’s arrival dateentered in each accessed transaction.Formats: “MMDDYY” (“MM” = month, “DD” = day, and “YY” = year).M. Departure Date: When available, the DataTran will use this field to return the customer’sdeparture date entered in each accessed transaction.Formats: “MMDDYY” (“MM” = month, “DD” = day, and “YY” = year).N. Gratuity Amount: When available, the DataTran will use this field to return the gratuity amountentered in each accessed transaction.Format: -9999999.99 (decimal point required).O. Media Type: The DataTran will use this field to return the media type used in each accessedtransaction:2 = American Express 6 = Private Label3 = Visa 7 = Diner’s Club or Carte Blanche4 = MasterCard 8 = JCB5 = Discover 9 = DebitP. Special Program Code: When available, the DataTran will use this field to return the specialprogram code entered for each accessed transaction.Q. Transaction Date: The DataTran will use this field to return the date of each accessed transaction.Formats: “MMDDYY” (“MM” = month, “DD” = day, and “YY” = year).R. Transaction Time: The DataTran will use this field to return the time of each accessed transaction.Format: “HHMM” (“HH” = military hours and “MM” minutes).S. Authorization Source Code: When available, the DataTran will use this field to return theAuthorization Source Code of each accessed transaction.T. Card Holder ID: When available, the DataTran will use this field to return the Card Holder IDtype of each accessed transaction.U. Payment Service Indicator: When available, the DataTran will use this field to return the PaymentService Indicator (also referred to as the ACI field) of each accessed transaction.V. Transaction ID: When available, the DataTran will use this field to return either the PS2000Transaction ID number or MIC data of each accessed transaction.W. Validation Code: When available, the DataTran will use this field (also known as the ACI field) toreturn the validation code of each accessed transaction.<strong>SAM4s</strong> <strong>SPS</strong>-<strong>300</strong> Operator's & Programming <strong>Manual</strong> v1.2 Integrated Payment Appendix • 273
X. Authorization Response Code: When available, the DataTran will use this field to return theauthorization response code of each accessed transaction.Y. Authorization Currency Code: When available, the DataTran will use this field to return theauthorization currency code of each accessed transaction.Z. Merchant Category Code: When available, the DataTran will use this field to return the merchantcategory code of each accessed transaction.AA. Entry Mode: When available, the DataTran will use this field to return the entry mode of eachaccessed transaction.BB. Original Authorization Amount: When available, the DataTran will use this field to return theoriginal authorization amount of each accessed transaction.Format: -9999999.99 (decimal point required).274 • Integrated Payment Appendix <strong>SAM4s</strong> <strong>SPS</strong>-<strong>300</strong> Operator's & Programming <strong>Manual</strong> v1.2
IRC (Inter-RegisterCommunications) AppendixOverviewIRC is standard feature of the <strong>SPS</strong>-<strong>300</strong>. Each register is equipped with a standard Ethernetstylenetwork connector. Up to eight registers can be connected to an Ethernet switch in asimple “star topology” configuration.Optionally, in a 2-unit installation (shown below), ECRs can be connected with acrossover cable, eliminating the need for the Ethernet switch.CRS supplies 5-port (p/n 140114) and 8-port (p/n 140115) switches.EthernetSwitchCrossover Cable<strong>SAM4s</strong> <strong>SPS</strong>-<strong>300</strong> Operator's & Programming <strong>Manual</strong> v1.2 IRC (Inter-Register Communications) Appendix • 275
IRC FunctionsReportsUsing IRC, you can generate consolidated X (read) or Z (reset) reports from any register inthe system. The report option screen allows you to select “All” or specify individualregister(s) for consolidation. See “X Reports” on page 94 or “Z Reports” on page 104 fordetailed report-taking instructions.Busy RegistersReports cannot be taken from registers that are busy (inside a transaction) or powered “OFF”.The message “IRC NOT READY” will display if an attempt is made to communicate with aregister that is not available. The register number of the unavailable register will also display.Best Practice: In IRC systems it is recommended to use only the key lock to turn theregister to “OFF”. You may wish to leave the power switch in the “ON” positon and usethe Power Switch cover (see page 13) to prevent the register from being turned offinadvertently (and therefore not available for IRC functions.) With the power switch“ON” you can turn the key to “OFF” so that reports and polling function will remainavailable.Device SharingLimited device sharing is available for remote printers and Datatran integrated paymentappliances and polling. Through IRC, traffic from satellite registers is sent to the Datatran orprinter that is attached to one of the registers in the network. In the case of polling, the PCcan access satellite registers through the connection to one of the registers.Notes:Caution: The register where the shared device is connected will be momentarily busy whentraffic from a satellite register is communicated. The message “WORKING” will displaymomentarily on the register that is connected to the shared device until the communication iscomplete.Best Practice: In an IRC System where both a Datatran and remote printer are shared, it isrecommended that both devices be connected to the same register to reduce the amount ofcross-traffic between registers.Feature Notes:The Tracking File (Check File) cannot be shared through IRC. If check tracking is used, eachregister will maintain its own file. Separate check files on individual registers can be polledthrough IRC.Other optional RS-232 devices, such as scales, scanners, pole displays, and coin dispensersoperate exclusively with the register to which they are connected, and cannot be shared.276 • IRC (Inter-Register Communications) Appendix <strong>SAM4s</strong> <strong>SPS</strong>-<strong>300</strong> Operator's & Programming <strong>Manual</strong> v1.2
IRC Programming & SetupThe only IRC settings are made by selecting IRC OPTIONS from the S-Mode menu. See.“IRC Options” on page 121 to make these settings. If a kitchen printer or Datatran is used asa shared device, you must identify the register where the device is connected at the program.Note: If a new register is added to an existing IRC network, you must power on/off allregisters so the the new register will be recognized.Communication Cable SpecificationsAt minimum, CRS recommends Shielded Category 5e STP , 4 twisted pair cable, for use ascommunication wiring for <strong>SPS</strong>-2000/<strong>SPS</strong>-5X0 system.NOTE: Higher rated cables, such as Cat 6 are also acceptable.CAT 5e STP (Shielded Twisted Pair) cable is a high quality general purpose datacommunications cable that supports standard transmission protocols such as 232, 422, 485,and 10/100 Base-T Ethernet communications. CAT 5e STP cable consists of 4 pairs ofstranded, twisted pair wire, with an overall shield foil.Note: CRS supplies different modular connectors for use with stranded or solid cable.Use P/N 202896 with stranded cable; use P/N 202994 with solid cable.Do not use unshielded CAT 5e, unless run alone inside conduit.Shielded CAT5e CableCommunication Conduit SizeTable 1-3 is a guide to the conduit size needed to fit certain numbers of communicationcables:Table 1-3: Cable/Conduit SizeNumber ofCategory 5 Cables1 0.5”2 0.75”4 1.0”6 1.25”12 1.5”Conduit Size(InsideDiameter)<strong>SAM4s</strong> <strong>SPS</strong>-<strong>300</strong> Operator's & Programming <strong>Manual</strong> v1.2 IRC (Inter-Register Communications) Appendix • 277
The communications cable contractors should ensure that the Communication cable is pulledand the Termination Block mounted as close as possible to the <strong>SPS</strong>-2000/<strong>SPS</strong>-500 devices. Ifit is not their responsibility to terminate the cable, then they must ensure that there is 3 feet(1m) of cable left for this purpose.If the CAT 5 communications cabling system is to be terminated by a cabling specialist, thenthe cabling companies must conform to the EIA/TIA 568B termination standard.Communication Cable TerminationStraight Thru Cable - Color Coding and Terminal ConnectionPin # Color Pin # Color1 Orange/White 1 Orange/White2 Orange 2 Orange3 Green/White 3 Green/White4 Blue 4 Blue5 Blue/White 5 Blue/White6 Green 6 Green7 Brown/White 7 Brown/White8 Brown 8 Brown278 • IRC (Inter-Register Communications) Appendix <strong>SAM4s</strong> <strong>SPS</strong>-<strong>300</strong> Operator's & Programming <strong>Manual</strong> v1.2
Crossover Cable - Color Coding and Terminal ConnectionPin # Color Pin # Color1 Green/White 1 Orange/White2 Green 2 Orange3 Orange/White 3 Green/White4 Blue 4 Blue5 Blue/White 5 Blue/White6 Orange 6 Green7 Brown/White 7 Brown/White8 Brown 8 Brown<strong>SAM4s</strong> <strong>SPS</strong>-<strong>300</strong> Operator's & Programming <strong>Manual</strong> v1.2 IRC (Inter-Register Communications) Appendix • 279
Ethernet Cable Termination Instructions1. Pull the cable off the reel to the desired length and cut. If you are pulling cablesthrough holes, it is easier to attach the RJ-45 plugs after the cable is pulled. The totallength of wire segments between an <strong>SPS</strong>-2000/<strong>SPS</strong>-5X0 and a switch or between twoECRs cannot exceed 100 Meters (328 feet).2. Start on one end and strip the cable jacket off (about 1") using a stripper or a knife.Be extra careful not to nick the wires, otherwise you will need to start over.3. Spread, untwist the pairs, and arrange the wires in the order of the desired cable end.Flatten the end between your thumb and forefinger. Trim the ends of the wires sothey are even with one another, leaving only 1/2" in wire length. If it is longer than1/2" it will be out-of-spec and susceptible to crosstalk. Flatten and insure there are nospaces between wires.4. Hold the RJ-45 plug with the clip facing down or away from you. Push the wiresfirmly into the plug. Inspect each wire is flat even at the front of the plug. Check theorder of the wires. Double check again. Check that the jacket is fitted right againstthe stop of the plug. Carefully hold the wire and firmly crimp the RJ-45 with thecrimper.5. Check the color orientation. Check that the crimped connection is not about to comeapart, and check to see if the wires are flat against the front of the plug. If even one ofthese is incorrect, you will have to start over. Test the Ethernet cable.Ethernet Cable TipsA crossover is used to connect two Ethernet devices without a switch.A crossover has one end with the Orange set of wires switched with the Green set.Odd numbered pins are always striped, even numbered pins are always solid colored.Looking at the RJ-45 with the clip facing away from you, Brown is always on theright, and pin 1 is on the left.No more than 1/2" of the Ethernet cable should be untwisted otherwise it will besusceptible to crosstalk.Do not deform, do not bend, do not stretch, do not staple, do not run parallel withpower cables, and do not run Ethernet cables near noise inducing components.NOTENOTENOTERouting Communication CableCommunication cable must be kept a minimum of one (1) foot away from AC wiring orfluorescent lighting and at least five (5) feet away from large transformers or motors. Ifthe communication cable must cross AC wiring, it must cross at a 90 angle to the ACwiring.Metal Conduit should be used wherever there is a chance of damage to the wireincluding telephone rooms and basements (where rodents could pose a problem). Thisconduit should be attached to the building ground not the isolated ground.Communications cable must NOT be placed alongside or in the same conduit as ACpower or telephone signals.The bending radius on CAT 5e UTP or STP cable is to be a minimum of 1 inch.280 • IRC (Inter-Register Communications) Appendix <strong>SAM4s</strong> <strong>SPS</strong>-<strong>300</strong> Operator's & Programming <strong>Manual</strong> v1.2
Plenum CeilingsThe Plenum rated Category 5, has a durable Teflon coating and is safety rated for airplenums. Conduit is only needed when the communication cable is exposed in areas of hightraffic or harsh conditions (exterior mounted cables, Terminal and Printer locations in kitchenand bar areas etc.).Direct Burial CableFor exterior use, Category 5 direct burial cable is specially designed for direct burial with adurable covering for protection.<strong>SAM4s</strong> <strong>SPS</strong>-<strong>300</strong> Operator's & Programming <strong>Manual</strong> v1.2 IRC (Inter-Register Communications) Appendix • 281
GlossaryActivity CountCancelCash DeclarationClerkCompulsoryThe activity counter increments each time an entry is made on a particular PLU, or functionkey. The counter prints on the appropriate reports.Press the CANCEL function to abort a transaction in progress. All current items are removed(voided).This option forces the operator to count the cash drawer and input the results before thefinancial report can be taken. Absentee owners may want clerks or managers to declare thedrawer counts to insure that all cash is deposited, regardless of overages, or shortages. As anadded benefit, the overage or shortage amount is calculated and printed on the financialreport.Sales clerks are individuals who are responsible for selling the merchandise to the customer.Typically, management wants to know merchandise sales levels for each clerk, in order tomonitor productivity, account for cash and other media, and/or pay commissions. The defaultprogram provides operation for 15 clerks, however up to 99 different clerks can used bychanging the default memory allocation.When an operation is programmed compulsory, the appropriate entry must be performed inorder to complete the operation.Compulsory Amount TenderingThis forces the operator to input the tender, rather than pressing a payment key directly. Thechange will always be computed by the register when a customer tenders an amount greaterthan the total due. Compulsory tendering will reduce cashier change errors.Compulsory CondimentWhen a kitchen printer, or requisition system is used, the merchant may wish to force theentry of a condiment or instruction for specific items. If compulsory condiment status is setfor a specific PLU, then a condiment PLU must follow the entry of the item.<strong>SAM4s</strong> <strong>SPS</strong>-<strong>300</strong> Operator's & Programming <strong>Manual</strong> v1.2 Glossary • 283
Compulsory DrawerWith compulsory drawer enabled, the clerk cannot begin a new transaction until the drawer isclosed. This simple feature was designed to teach cashiers the habit of closing the cashdrawer after each transaction. You’ll reduce potential errors, theft and fraud that can takeplace when your cashier works out of an open drawer.Compulsory Number EntryConsecutive NumberThis option forces the operator to enter a reference number (using the #/NS key) before aPLU entry can be made or a transaction finalized with a Charge key. The number couldrepresent an SKU number that would be tracked manually, or other data such as a customercount.A sequential number is printed on each receipt issued. This is not a “customer count” as thisnumber is incremented for non-sales activity such as no-sales and reports. A count of revenuegenerating transactions (true customer count) is printed with the Net Sales total on thefinancial report.Currency ConversionUse the currency conversion function to convert and display the value of the transaction inforeign currency. Only cash tender is allowed after pressing the currency conversionfunction. Change is calculated and issued in home currency.Decimal MultiplicationDefault ProgramDepartmentIf you sell weighed goods, yard goods, or any merchandise sold in fractions of a unit, thedecimal multiplication feature calculates each transaction quickly and accurately. Forexample, if your customer selects 4.75 pounds of an item sold at $1.59 per pound, you enter4.75 on the numeric keypad, press the X/TIME (multiplication) key, then enter the price perpound and press the appropriate PLU key.The original program installed in the <strong>SPS</strong>-<strong>300</strong> <strong>Series</strong>. The register has a default programwhich makes it operational after a memory clear. Nearly all option, rate, and status programsare set to zero as the default condition.Note: The <strong>SPS</strong>-<strong>300</strong> <strong>Series</strong> uses price look-ups (PLUs) to perform the function of traditionalcash register departments. PLUs may be registered directly on the keyboard (like traditionaldepartments) or indirectly by entering the item or PLU number and then pressing the PLUkey.284 • Glossary <strong>SAM4s</strong> <strong>SPS</strong>-<strong>300</strong> Operator's & Programming <strong>Manual</strong> v1.2
Electronic JournalError ConditionError CorrectFlash ROMFood StampThe <strong>SPS</strong>-320 does not provide a journal printer; the <strong>SPS</strong>-340 and <strong>SPS</strong>-345 provide atraditional journal printer. Today many systems, even expensive PC-based systems do notprint a traditional sales journal. For business records, a copy of daily financial summaries isusually all that is needed. Like some of the more expensive POS systems, the <strong>SAM4s</strong> <strong>SPS</strong>-<strong>300</strong> <strong>Series</strong> has the capability of storing a sales journal in memory. The electronic journal canbe reviewed and discarded, saved to an SD card or polled by a PC for archival. When ECRmemory reserved for electronic journal is full, current records are saved and old data isdiscarded.An error condition signals that mis-operation has occurred. It is identified by an audible toneand an error descriptor appearing on the display.An error correct operation voids the last item entered, it must be used within a sale.Flash ROM is used by the manufacturer to contain the program that runs the register. FlashROMs maintain memory when power is off, allowing the register to be especially stable andreliable. In the case that the register’s program is improved, or updated, the Flash ROM canbe updated by a qualified service technician through a utility in the register.Note: Many areas now administer food stamp payments through EBT cards, rather thantraditional food stamp coupons. The <strong>SPS</strong>-<strong>300</strong> <strong>Series</strong> is not capable of accepting EBTelectronic payments at this time.Merchants who accept food stamp payments have the responsibility of accepting food stampsonly for food stamp eligible merchandise.The <strong>SAM4s</strong> <strong>SPS</strong>-<strong>300</strong> <strong>Series</strong> offers a sophisticated routine to separate food stamp eligibleitems and accept the appropriate payments. First, each PLU is pre-programmed with foodstamp eligibility status. If the customer is paying by food stamps, the operator can then recalland display the food stamp eligible total. Depending upon local rules, sales tax can beforgiven on any taxable food stamp eligible item. Change less than one dollar from foodstamp tender is applied to non-food stamp eligible items, or issued in cash change. If bothcash and food stamp change is due, the register displays both types of change due.Using this system, all food stamp items are automatically sorted, with change and taxcalculated by the register. Thus, a potentially confusing transaction can be handled quicklywith little risk for errors.<strong>SAM4s</strong> <strong>SPS</strong>-<strong>300</strong> Operator's & Programming <strong>Manual</strong> v1.2 Glossary • 285
GallonageTo simplify gasoline transactions, PLUs can be designated to calculate gallons sold on fuelpurchases. The price of the fuel sold is entered as it would be in a normal “open” PLU.However the price per gallon of fuel is entered where the PLU preset price is normallymaintained. When fuel is sold, the register will refer to the programmed price per gallon andcalculate the number of gallons sold. Both the gallons pumped and dollar amount of the gaspurchase are conveniently printed on the customer receipt and sales journal. This provides allthe necessary information for a customer that needs a receipt for gas purchases. The total ofgallons sold is also maintained on the appropriate PLU report, in the place of the PLU itemcounter. Several gallonage PLUs could be placed on the keyboard to maintain records fordifferent pumps, or types of fuel. Thus, the dollar and gallon totals can provide a usefulsecurity check against separate pump totals.Groups (PLU Groups)HALOHASHLink (PLU Link)MacroMemory AllocationGroups are used to organize sets of items. For example, in a restaurant Grill Items, Drinks,and Ice Cream items might be separated into different groups. Up to 99 group totals areavailable. Group reporting is available on the group report.The high amount lock-out (HALO) limits the amount allowed to be entered in a PLU, orfunction key.Merchants often sell non-merchandise items, such as lottery tickets, or bottle deposits, thatthey do not wish to account for as reportable revenue. HASH PLUs are useful to account fornon-revenue income. They will add to the appropriate totals on the PLU report, they will addto the transaction totals, and they will be accountable for in drawer totals, but they will notaffect the merchants, NET SALES, GROSS SALES or NON-RESETTABLE GRANDTOTAL. As a system option, HASH can be defined to not add to the transaction (NON-ADD).Use linked PLUs if you wish the registration a PLU to automatically cause the registration ofanother PLU (for example to automatically add a bottle deposit.) Linked PLUs are set withProgram 350, PLU Link programming.Macro keys may be programmed to record, and then later perform, up to 50 keystrokes.For example, a macro key could be set to tender (preset tender) a common currency, such as$5 into the cash key.Memory allocation is a program that determines how the system memory is divided toprovide the correct features for your application. For example, you may require more or lessclerk memory, PLUs, or electronic journal memory. Memory allocation allows you tomaximize the features you need while minimizing the features you do not need.286 • Glossary <strong>SAM4s</strong> <strong>SPS</strong>-<strong>300</strong> Operator's & Programming <strong>Manual</strong> v1.2
Mix & MatchMultiple ReceiptsNegative PLUsNLUNo SaleNot Found PLUOpen (PLU)OverrideRetailers often offer discounts when multiples of different items are purchased. For example,the offer: “save $5 on any three bottles of wine” can be handled by a mix and match discount.The default <strong>SPS</strong>-<strong>300</strong> <strong>Series</strong> can accommodate up to 10 different mix and match discounts, thetotal can be increased to a maximum of 100 through memory allocation.In some cases, for example where a mail-in rebate is offered, an extra copy of a receipt isneeded. If allowed, the receipt must be re-printed immediately, before another transaction isstarted.As you program PLUs, you will find a setting to make them negative (normally they arepositive). Positive PLUs are used for items that add to the sale. Negative PLUs are used foritems that subtract from a sale, like individual store coupons or bottle deposit credits.Number Look-Up (NLU) refers to PLU code that is accessed when a Keyboard PLU is used.In the default program each Keyboard PLU will look up the appropriate numeric PLU,beginning with PLU #1 for Keyboard PLU key #1 and continuing sequentially through thekeyboard.However, this numbering sequence may be impractical for some applications. For example,Keyboard PLU #1 may represent a can of Diet Pepsi. The merchant may wish to have theKeyboard PLU look up the UPC code number for Diet Pepsi, which is “120500”. Using thisprogram you can change the Number Look-Up (NLU) for the keyboard PLU to any 15-digitnumber you choose.No sale is an operation to simply open the cash drawer. No sales are counted and reported onthe financial report.For small merchants, the <strong>SPS</strong>-<strong>300</strong> <strong>Series</strong> can build a PLU file “on the fly”. Each time an itemis scanned (or entered by PLU number) that is not in the PLU file, the operator is prompted toenter the price and other options for the item. At the end of the day, the “Not Found PLUReport” will allow the manager to verify the prices and update the PLU file as needed. TOpen PLUs accept price entries, rather than register a preset price. To prevent errors, youmay set a high limit (HALO) for open entries.Override is an operation used to bypass a programmed price or entry limit (HALO).<strong>SAM4s</strong> <strong>SPS</strong>-<strong>300</strong> Operator's & Programming <strong>Manual</strong> v1.2 Glossary • 287
Over-Tendering/Under-TenderingPaid OutPLUsPost TenderWhen a payment is made less than the amount due, it is called an under-tender. After anunder-tender, the register calculates and displays the remaining balance for the sale.Additional payments must be made until the total due is satisfied. When the sale is fully paid,the cash drawer will then open and the receipt is completed. When a payment is made morethan the amount due, it is called an over-tender. The register will compute and display thechange due and the receipt will be completed. Note that register options can be set to allowor disallow over-tendering for check and charge payments.The Paid Out key is used to track cash paid out of the cash drawer or to record pick ups fromthe cash drawer.Price look-ups (PLUs) are accessed by indexing a code number and pressing the PLU key, orby pressing a keyboard PLU key. PLUs can be programmed with a preset or open price.PLUs record an activity count and dollar total on the PLU report. PLU sales may also reportto a group.Post tendering is available to help prevent cashier confusion when a customer decides tochange the tender amount. When Post Tendering is allowed, the operator can re-enter a cashtender and the register will re-calculate the change.To post tender after finalizing the sale, enter the cash amount presented by the customer andthen press CASH. The amount of change due to the customer is then displayed. This is acalculation function only, and no totals or counters are updated by the use of this feature.Preamble/Postamble MessagePreset (PLU)Preset OverrideReceiptProgrammable messages allow each merchant to customize his receipt with the store name,address, phone number, website or other critical identification information or advertisingmessages. The <strong>SAM4s</strong> <strong>SPS</strong>-<strong>300</strong> <strong>Series</strong> allows a preamble message of up to six lines, eachwith up to 24-characters, to be printed at the top of each receipt. A postamble of up to 6-linesof 24-characters can also be printed at the bottom of the receipt.When a PLU is pre-programmed or pre-set with a fixed amount, the preset amount willautomatically register when the PLU is pressed or entered.When a PLU is preset, it is possible to override the preset price with a different price. If theoverride function is set to be allowed in the PLU program, you can simply enter a new priceand press the PLU key.Received on AccountA receipt is a printed tape given to a customer as a record of the sale transaction.The Received on Account key is used to track cash received into the cash drawer or to record288 • Glossary <strong>SAM4s</strong> <strong>SPS</strong>-<strong>300</strong> Operator's & Programming <strong>Manual</strong> v1.2
Register NumberSingle ItemSplit PricingStock (PLU Stock)Surcharge (Item)Surcharge (Sale)Tareloans to the cash drawer.The number of the register can be set and printed on each receipt. If the merchant uses morethan one register, or has more than one location, the register where a transaction took place orreport was taken is easily identified.The transaction is finalized automatically when a single item PLU is registered as the firstitem in a sale. Single item status is used to speed transaction entry when an item is normallysold in a one-item sale, for example, a pack of cigarettes, a newspaper or an admission ticket.Often merchants price items in multiples, for example 3 for $1. The register will compute theprice of items when the exact quantity is not purchased. If the customer chooses to buy 2items at 3 for $1, enter 2, press the X/TIME key, enter 3, press the X/TIME key and thenenter the price and the PLU. The register will compute the price for the items purchased.Each PLU reports an activity counter. Normally the activity counter increments (adds) and isreset when a PLU Z-report is taken. You can choose to use the PLU activity counter as astock counter. If used as a stock counter, each PLU activity will reduce the count. A separateprogram allows you to add to the stock count or enter a new stock count. Stock counts arenot reset when PLU Z-reports are taken.An item percent surcharge adds a percentage to the price of an item. This addition nets thePLU total.A sale percent surcharge adds a percentage to the entire sale.Tares are container weights. If you are using the scale function, you can preset up to 5different tare weights. The tare can be subtracted automatically when a specific PLU isregistered, or manually inputting the tare number and pressing the TARE key can subtract thetare. Tare #5 can be programmed for entering tare weights manually.Tax Computation by Rate/Tax Computation by TableTax ExemptIn the simplest method of tax calculation, the register is set with a tax rate (or rates) and thetaxes are computed by a percentage calculation. In some cases, a tax that is entered as apercentage does not follow exactly the tax charts that apply in your area (even if the tax chartis based on a percentage). In these cases, we recommend that you enter your tax using taxtable programming. This method will match tax collection exactly to the break points of yourtax table.Tax exempt is used to exclude the tax from an entire sale.<strong>SAM4s</strong> <strong>SPS</strong>-<strong>300</strong> Operator's & Programming <strong>Manual</strong> v1.2 Glossary • 289
Tax ShiftTenderTraining OperationTransaction NumberVATVoidX & Z ReportsTax shift keys are used to reverse the tax status of a PLU entry.A tender is the register operation in which the amount of the payment is entered. If the tenderexceeds the amount due, the sale is finalized and change due is displayed.Training operations do not add to PLU or function key totals. This allows an operator topractice making entries without updating sales totals. If you wish to perform trainingoperations, designate one of the clerks for training. You must clear (Z) the register before thetraining clerk can be used. When that clerk is signed on, the register is in “training mode”.See consecutive number.Value-Added Tax (VAT) is a tax collection system where a portion of the item’s sale price istax. VAT is different than most sales taxes where tax amounts are calculated and added-on tothe sale. Value added taxes are included in the item price. Most locales in the USA do notuse a VAT system, which is used in Canada and other nations.A void operation will erase a previous item entry. It must be used inside of a sale only.X (eXamine) reads reports without resetting and Z (Zero) reads and resets your sales totals.290 • Glossary <strong>SAM4s</strong> <strong>SPS</strong>-<strong>300</strong> Operator's & Programming <strong>Manual</strong> v1.2
<strong>Manual</strong> Revision RecordEdition Date published Revision ContentsV1.0 01-31-2012 Initial PublicationV1.1 Update Basic features functions; Power switch coveroptions described, Added charge posting operations &function key programs. Updated FLASH updateprocedures. Default store name is “STORE_A”.V1.2 IRC Appendix information added.<strong>SAM4s</strong> <strong>SPS</strong>-<strong>300</strong> Operator's & Programming <strong>Manual</strong> v1.2 <strong>Manual</strong> Revision Record • 291