Epoxy Application Guide - Loctite.ph
Epoxy Application Guide - Loctite.ph
Epoxy Application Guide - Loctite.ph

Create successful ePaper yourself
Turn your PDF publications into a flip-book with our unique Google optimized e-Paper software.
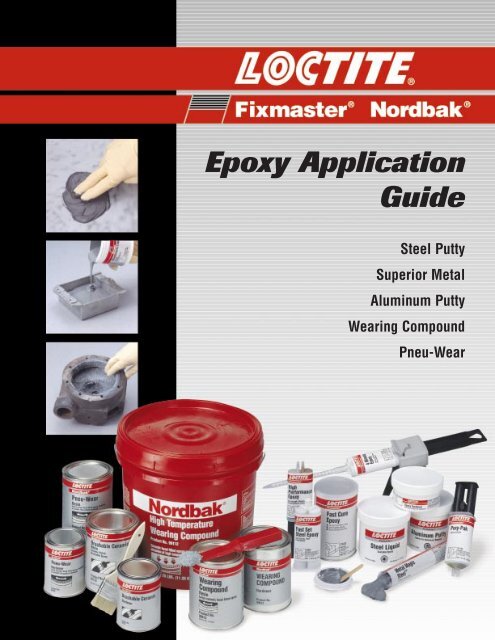
<strong>Epoxy</strong> <strong>Application</strong><strong>Guide</strong>Steel PuttySuperior MetalAluminum PuttyWearing CompoundPneu-Wear
Table of ContentsFIXMASTER ® & NORDBAK ®<strong>Epoxy</strong> <strong>Application</strong> <strong>Guide</strong><strong>Loctite</strong> ® <strong>Epoxy</strong> Compounds have been developed toprovide cost-effective solutions for numerous repairand maintenance applications.<strong>Loctite</strong> ® <strong>Epoxy</strong> Compounds offer provenmaintenance solutions to the problems caused bywear, abrasion, chemical attack, erosion, vibration,corrosion, fatigue, and mechanical damage.This manual is designed to assist maintenancepersonnel through many common everyday repairs.Not all repair procedures are listed. However, withthe techniques shown here, combined with theversatility of <strong>Loctite</strong> ® products and the ingenuity ofthe user, many hundreds more are possible. Forapplication assistance or technical information inthe United States, call 1-800-LOCTITE(1-800-562-8483). In Canada, call 1-800-263-5043.Or visit us on the web at www.loctite.comGENERAL INFOMixing . . . . . . . . . . . . . . . . . . . . . . . . . . . . . . .2Surface Preparation . . . . . . . . . . . . . . . . . . .2-3<strong>Application</strong> Tips . . . . . . . . . . . . . . . . . . . . . .3-4Fixmaster ® Epoxies . . . . . . . . . . . . . . . . . . . . .4Nordbak ® Epoxies . . . . . . . . . . . . . . . . . . . . . .5REPAIR APPLICATIONSPipe and Ducting Repairs . . . . . . . . . . . . . . .6-7Metal Surface Repairs . . . . . . . . . . . . . . . . .8-9Shaft Repairs . . . . . . . . . . . . . . . . . . . . . . .9-10Keyways . . . . . . . . . . . . . . . . . . . . . . . . . . . .11Splines . . . . . . . . . . . . . . . . . . . . . . . . . . . . .12Heat Exchangers & Condenser Repairs . . .13-14Pump Repairs . . . . . . . . . . . . . . . . . . . . . .15-16APPLICATION EXAMPLESFixmaster ® Epoxies . . . . . . . . . . . . . . . . . . . .17Nordbak ® Epoxies . . . . . . . . . . . . . . . . . . . . .17PRODUCT SELECTIONOrdering Information . . . . . . . . . . . . . . . .18-19Properties/<strong>Application</strong> Charts . . . . . . . . . .20-21<strong>Epoxy</strong> <strong>Application</strong> <strong>Guide</strong>1
General InfoMIXINGThe following tips are designed to facilitate the process ofworking with <strong>Loctite</strong> ® repair compounds under a varietyof conditions.Mixing. Thorough mixing of epoxies, inproper ratio, is critical to the performanceof the material. Whenever possible, thecomplete container should be mixed atone time. If the material is to be mixed inseparate batches, the user must becareful to adhere to the mix ratios whichappear on the product label.The material is mixed by adding hardenerto resin. The mixing process is completewhen the product is free from streaks or<strong>Epoxy</strong> is turned out ontoa disposable surface toensure proper mixingother variances. Failure to thoroughly mix the material will causesoft spots or overall failure of the product. Mixing should take3 to 5 minutes.Large masses of epoxy (over one pound) can be mixed moreeasily by turning out the resin and hardener onto a clean,disposable surface. Mix and knead material with a putty knife orother flat tool until the product is thoroughly mixed. Do not foldmaterial into the mix as this process can cause air entrapmentthat will weaken the cured product.Cure. <strong>Epoxy</strong> compounds begin to cure, or harden, when thehardener is added to the resin. <strong>Epoxy</strong> cures by a chemicalreaction that causes exotherming, or the process of giving offheat. There are some basic principles of working with epoxycompounds that every user should understand:Cure times are mass dependent. The larger the mass that ismixed, the faster it will cure. If the mixed material cannot beapplied during the working time specified on the product label,mix it in smaller batches.Cure times are temperature dependent. The higher thetemperature, the faster the product will cure. Ideal mixingtemperature of epoxies is between 55°F and 80°F.If the application is to occur at higher temperatures, the productshould be stored at room temperature or slightly below to slowdown the chemical reaction between resin and hardener.At lower temperatures, the epoxy will cure very slowly or mayfail to cure at all. To speed up the cure at low temperatures,store product at room temperature and heat parts to be repairedprior to application. The repaired area can also be heated with aheat gun upon completion of the application.Most epoxies are skin and eye irritants, and many epoxyhardeners are corrosive. Always wear appropriate gloves andgoggles or face shield during mixing and handling. Observegood industrial safety practices, and review product MaterialSafety Data Sheet (MSDS) prior to use for completeprecautionary information.SURFACE PREPARATIONThe successful application of any <strong>Loctite</strong> ® FIXMASTER ® orNORDBAK ® epoxy is largely dependent on correct surfacepreparation. For this reason, it is critical that allapplications begin with a thorough preparation of the repairsurface in keeping with the instructions in this section.Surface conditions vary from application to application. Thissection is designed to prepare any substrate for use with allrepair products in the <strong>Loctite</strong> ® epoxy range.GENERAL SURFACE PREPARATIONEnsure that the surface is dry and stop all liquid leakage.Remove all dirt, paint, rust, and other contaminates byabrasive blasting or other suitable mechanical techniques.Degrease thoroughly using <strong>Loctite</strong> ® ODC-Free Cleaner& Degreaser.Provide a profile by abrasive blastingor other mechanical means.To bond an epoxy to a badly degradedsurface or to fill large voids, first tackweld wire mesh over the damagedarea, then fill the prepared area withthe epoxy.To prevent epoxy from adhering to asurface, as when casting parts or intooling applications, coat the surfacewith <strong>Loctite</strong> ® Silicone Lubricant (ProductNo. 51360) or other release agent.CLEANING THE SURFACEThe wire meshreinforces the repairarea and forms amechanical backing forthe epoxy.Clean the surface with <strong>Loctite</strong> ® ODC-Free Cleaner & Degreaser.Areas immersed in oil must be cleaned repeatedly to draw theoil out of the surface. Use a heat gun to force oil out of thepores. Allow the surface to cool, then degrease again.After cleaning, roughen the surface to produce a good profile.The following methods may be used, but in all cases theobjective is to obtain an anchor profile of 0.003 to 0.005inches (75 to 125 microns).Abrasive blast using an angular grit such as aluminum oxide,silicon carbide, or Black Beauty 1240 medium grade. Roundabrasive grit should not be used. High velocity water blastingwith an abrasive medium is also recommended. (See figure 1)2 <strong>Epoxy</strong> <strong>Application</strong> <strong>Guide</strong>
General InfoStop all leakage or seepage by:¥ Turning off the water flow.¥ Fitting a wooden peg or sheet metal screw.¥ Stuffing with cork, wax, rags, or any other suitablematerial. (See figure 3)Figure 1. For best results, abrasive blast the application surface.If grit blasting is not possible, roughen the surface using acoarse grinding wheel (60 grit or coarser) or a needle gun toachieve the desired profile. (See figure 2)Figure 3. Stop leaks with a wooden plug or screw inserted in areaof seepage.If the leak is caused by corrosion, the side wall may be weak.Open the hole to a point where the wall is close to its originalthickness. Then plug the opening using a suitable material.All surface condensation, wetness, or dampness must bewiped clean and dried off using a hot air gun or similar device.Continue surface preparation in accordance with the precedingsection on Surface Cleaning.Figure 2. Coarse grinding of the surface is also recommended forsurface preparation.Using coarse sandpaper or a file is acceptable only if the firsttwo methods cannot be utilized.After roughening, the surface must again be thoroughlycleaned with <strong>Loctite</strong> ® ODC-Free Cleaner & Degreaser.Repairs should be made as soon as possible to avoid rusting.WET SURFACESSurface must be dry. Exceptions are when using Wet SurfaceRepair <strong>Epoxy</strong>, Underwater Repair <strong>Epoxy</strong> or Metal MagicSteel. These products will cure in the presence of water.APPLICATION TIPS¥ For Maximum BondPre-coat the application surface byrubbing the mixed epoxy into thesubstrate. This technique, called"wetting out the surface," helps theepoxy repair material fill all thecrevices in the application surface,creating a superior bond betweenthe epoxy and substrate. The restof the mixed epoxy can then beapplied over the pre-coat to finishthe application.¥ Pouring Liquid EpoxiesAvoid air entrapment in curedepoxies by pouring close to themold in a steady, even stream.<strong>Epoxy</strong> <strong>Application</strong> <strong>Guide</strong>3
General InfoAPPLICATION TIPS (cont.)¥ Eliminating Air EntrapmentUse a heat gun (do not use anopen flame) to pull air bubbles outof cast epoxy. Heat will causebubbles to rise to the top of theepoxy and dissipate.¥ Creating a Smooth FinishSmooth out the uncured epoxyfinish with a warm trowel for asmooth, glossy finish. A heat guncan also be used to create asmooth finish.FIXMASTER ® EPOXIESFilled epoxies repair, rebuild and restore damaged parts toget equipment back into service quickly.Different fillers provide a range of performancecharacteristics, making FIXMASTER ® epoxies suitable forspecific applications. Putty, liquid and stick forms give youthe flexibility to fix equipment throughout the plant.PUTTIES¥ Steel PuttyThe workhorse of the FIXMASTER ®line, this steel-filled product is usedfor making cost-saving repairs onmetal parts all over the plant. Ourmost recommended, generalpurposeepoxy.¥ Fast Set Steel PuttyA fast-curing version of Steel Putty, this material reaches afunctional cure in about 10 minutes. Use it wherever a fast,general-purpose epoxy is called for.¥ Superior MetalIdeal for surfaces subject to corrosion, abrasion and harshenvironments. Ferro-silicon-filled epoxy has outstandingcompressive strength and chemical resistance.Non-rusting.¥ Wear Resistant PuttyCeramic fibers give this trowelable putty excellent wear andabrasion resistance. Provides a smooth, low-friction finish.Particularly suitable for repairing shafts and other lowfrictionsurfaces.¥ Aluminum PuttyAluminum-filled epoxy rebuilds and repairs aluminumequipment, forming a non-rusting finish.¥ Stainless Steel PuttyStainless steel-filled epoxy forms a very hard, durablefinish on damaged stainless steel surfaces.¥ Wet Surface Repair PuttyThis unique, trowelable epoxy can repair and rebuild wet,even underwater, surfaces. Bonds to wood, concrete, steel,iron, aluminum, brass, and some plastics.LIQUIDS¥ Steel Liquid¥ Aluminum LiquidThese epoxies are similar in chemistryto putty types, however, liquid versionsare self-leveling and can be poured orcast to form molds, tools orreplacement parts. Also used to repairand rebuild difficult to reach areas.STICK¥ Metal Magic SteelNo toolbox is complete without thisconvenient, fast-curing epoxy instick form. Just cut off a section,knead and apply to leaking pipesor damaged equipment. Cures in10 minutes. It’s the ultimate inrepair convenience. NSF approvedto Standard 61.¥ Underwater Repair <strong>Epoxy</strong>This putty-like material works on both wet and dry surfacesand sets up and cures underwater. It is ideal for plumbing,irrigation and marine applications because it is unaffectedby chlorinated or salt water. It is hand kneadable and fullycures in one hour.4 <strong>Epoxy</strong> <strong>Application</strong> <strong>Guide</strong>
General InfoNORDBAK ® EPOXIESTackle the toughest industrial repair jobs with the #1 namein wearing compounds.NORDBAK ® epoxies utilize the superior wear properties ofceramic and the convenience of two-part epoxies. Availablein trowelable and brushable formulations with special fillersfor the toughest conditions, NORDBAK ® products aredesigned to keep equipment like pumps, chutes and augersin tip-top operating condition. NORDBAK ® epoxies are idealfor all those large-scale repairs that have to last.PUTTIES WITH BEADS¥ Wearing CompoundLarge ceramic beads and fine siliconcarbide in a high performanceepoxy system protect against hardsliding abrasion.¥ Pneu-WearThis epoxy contains small ceramicbeads and silicon carbide formaximum protection against pneumatic abrasion.¥ High Impact Wearing CompoundA rubber-modified epoxy with better impact resistance thanceramic tile. For applications where both sliding abrasionand impact are present.¥ Combo Bead Wearing CompoundCombines large and small ceramic beads and siliconcarbide. Protects against hard sliding abrasion. Extends thelife of material handling equipment.HIGH TEMPERATURE FORMULAS¥ High Temperature WearingCompound¥ High Temperature Pneu-WearSame great performance as standardcuring versions, only these hightemperature formulas can be used upto 450°F/232°C. Both must bepost-cured for maximum temperature resistanceand performance.Both epoxies are also available, as a special order, in anUltra High Temperature formula, good to 550°F/288°C withpost-cure.FAST SET FORMULAS¥ Fast Cure Wearing Compound¥ Fast Cure Pneu-WearThese faster curing versions perform like standard wearingproducts while reducing equipment downtime. Now you canrenew worn surfaces and put equipment back in service in aslittle as three hours.BRUSH-ON FORMULAS¥ Brushable CeramicUltra-smooth and ceramic filled fora high gloss, low-friction coating.Protects against turbulence,abrasion and cavitation. Also worksas a topcoat over WearingCompound for surface rebuildingand lasting protection.¥ High Temperature Brushable CeramicPerforms like standard Brushable Ceramic while providingprotection up to 550°F/288°C. Must be post-cured formaximum temperature resistance and performance.SPECIAL FORMULAS¥ Chemical Resistant CoatingThis advanced formulation epoxy protects against extremechemical attack and corrosion. Low viscosity means it canbe applied by brush. Smooth, glossy, low-friction finish.¥ Castable Wearing CompoundPourable ceramic epoxy can be cast into any shape. Use itfor making replacement parts, lining cyclone apexes andfilling flat back elbows.¥ Ceramic Tile AdhesiveSecure ceramic tiles to vertical,horizontal and overhead surfaceswith this high-strength epoxy.Excellent shock and impactresistance make it an ideal grout.<strong>Epoxy</strong> <strong>Application</strong> <strong>Guide</strong>5
Repair <strong>Application</strong>sPIPE AND DUCTINGREPAIRSPipes are used for transporting all compositions of fluids,slurries, gases, and solids. Wear, corrosion, abrasion andchemical attack can lead to progressive damage to pipewalls, leading to eventual piping failure.Industries such as coal-fired power plants, sewagetreatment plants, pulp and paper processors, and aggregatesites are particularly vulnerable to pipe abrasion due tocaustic and abrasive media carried in the piping system.The areas of piping most subject to wear and damage areelbows, t-junctions, reduction fittings and weld spots in bothseams and joints. Flange faces can also suffer erosion,preventing effective gasket sealing.The problem of pipe damage can be as simple as a leakypipe or as severe as a total plant shutdown, servicecontamination, or fire damage; but good plant maintenancedepends on keeping equipment, such as piping systems,running smoothly and efficiently. The following informationis intended to identify possible problem areas that can besuccessfully protected or repaired with <strong>Loctite</strong> ® epoxies inorder to reduce downtime and equipment failure.Note: Before starting any pipe repair, the line pressure mustbe removed.3. For large, low pressure pipes (diameter > 3" or 7.6 cmand pressure less than 100 psi or 0.70 mpa), prepare thepipe as above. Inspect the damaged area to see if thefracture or crack is under stress. If so, relieve by drillingthe ends and "V"-ing out the crack.Apply the epoxy to the prepared area forcing the productinto the crack. Also apply epoxy to the inside radius of thebacking plate. Press the backing plate firmly over the repairarea. (See figures 4 & 5) Force out any air, and removeexcess epoxy. Use ties, clamps, or wire to hold the repairfirmly in place. After the epoxy has cured, the clamps maybe removed and the patch coated with more product forreinforcement of the repair. (See figure 6)EXTERIOR REPAIR – FRACTURES AND PINHOLES1. To prepare the application, plug the hole or fracture withFIXMASTER ® Metal Magic Steel, an epoxy in stick formthat hardens in just 10 minutes. Or use a wooden dowel,putty or plasticine. If the wall thickness is insufficient tosupport a mechanical plug, use a rubber patch and anadhesive such as FIXMASTER ® 4-Minute <strong>Epoxy</strong>.Figure 4. Force epoxy into the damaged area.Abrasive blast, grind, or file off all deposits, paint, rust, andmillscale. The area must be prepared with an extensionborder of 3" (7, 6 cm) around the damaged area. Degreasethe application area completely with <strong>Loctite</strong> ® ODC-FreeCleaner & Degreaser.2. For repairs to large diameter pipes, weeping pipework,and high-pressure pipes, use a half section of pipe with aslightly larger diameter than the pipe to be repaired. Acurved aluminum or steel backing plate that extends 2" (5cm) radially and axially beyond the damaged area will alsowork to reinforce the repair.Abrade the inside and outside of the backing plate anddegrease thoroughly with ODC-Free Cleaner & Degreaser.Figure 5. Press backing plate over the damaged repair area.6 <strong>Epoxy</strong> <strong>Application</strong> <strong>Guide</strong>
Repair <strong>Application</strong>sFigure 6. Reinforce repair area by tying or clamping the repairuntil the epoxy is cured.4. For high-pressure pipes (> 100 psi or 0.70 mpa) preparethe pipe as above. For small diameter pipes, wrap therepair firmly with reinforcing mesh impregnated withepoxy. Before the epoxy hardens, over-coat and shape therepair with a final application of epoxy. (See figure 7)Figure 8. Use steel clamps to reinforce repairs to largediameter pipes.5. For low pressure, small diameter pipes (< 100 psi or0.70 mpa and < 3" or 7.6 cm diameter). Prepare as inStep 1 above. Apply 1/8" or 3 mm layer of epoxy, workingit well into the anchor pattern and into the hole. Wrapreinforcement mesh treated with repair compound at leasttwice around the pipe. Remove excess product. As epoxystarts to cure, over-coat the repair with a final applicationof epoxy.INTERNAL REPAIRInternal repair of pipes, elbows, and fittings is sometimespossible and necessary. This procedure should include exteriorpatching according to Step 3 above.1. To prepare the surface, flush the interior of the pipeliberally with high-pressure water, if available. Abrasiveblast to achieve .003 - .005" (75 - 125 microns) profile.Blast inside and outside, as well as the backing plate, forthe exterior patching.Figure 7. Wrap the repair area with reinforcing mesh whenrepairing small pipes.For large diameter pipes, once patched, clamp intoposition using steel clamps 2" (5 cm) apart. Do not removethe clamps. (See figure 8)Degrease thoroughly.2. Exterior patching must be done prior to internal lining. Ifbacking plate is not suitable, tack weld a heavy metal meshand apply 1/8 to 1/4” (3 - 6 mm) of epoxy.3. Coat the interior by applying a series of thin coats ofepoxy pressed into the abraded profile. Continue to buildup the original profile. As the epoxy begins to cure, apply a1/4" (6 mm) over-coat of epoxy to the repair area.Do not coat the ends of sectioned pipe.CAUTION: PRESSURIZED LINES SHOULD BE REPLACEDWHEN TIME AND MANPOWER PERMITS.<strong>Epoxy</strong> <strong>Application</strong> <strong>Guide</strong>7
Repair <strong>Application</strong>sMETAL SURFACE REPAIRSThe following procedures are developed for surface repairsthat call for filling or rebuilding a damaged metal surface.Damage caused by metal fatigue or stress cracks shouldbe replaced.<strong>Loctite</strong> ® Repair Epoxies are recommended for making surfacerepairs to restore the integrity of cracked or damaged metal. Ingeneral, epoxies are not recommended for heavy load bearingapplications or for making structural repairs; however,experience has shown that successful temporary oremergency repairs can be made to seriously damagedequipment using skillful and imaginative techniques.Non-stress cracking problems are common to pump casings,bearing housings, valve bodies, tanks and gearboxes.Note: When the equipment to be repaired may have containedflammable or explosive material, proper safeguards must betaken to clean the area thoroughly to remove all flammablematerial. If in doubt, contact a <strong>Loctite</strong> representative.1. To prepare the surface of the damaged metal, refer toSurface Preparation in this manual.2. Drill holes 1/8" (3 mm) larger than the crack at either endof the crack. Use detecting dye if necessary to determinethe actual area of the crack. If the crack is over 5" (12.5cm) long, drill multiple holes along the length of the crack.(See figure 9)3. To create a better bond, drill or edge grind the crackedarea with an abrasive wheel to "V" out the cracked area.After the area has been opened up, clean the area of anyresidue using <strong>Loctite</strong> ® ODC-Free Cleaner & Degreaser.(See figure 10)Figure 10. Grind out the repair area for maximum adhesion.4. Apply the epoxy with a putty knife, forcing the epoxymaterial into the crack. Fill the "V" thoroughly, and overlapapproximately 1" on each side of the application area.(See figure 11)Figure 9. Drill holes at either end of the crack.Figure 11. Fill the repair area with epoxy.8 <strong>Epoxy</strong> <strong>Application</strong> <strong>Guide</strong>
Repair <strong>Application</strong>s5. Using reinforcing mesh, such as fiberglass or wirescreening, lay a strip of the reinforcement material overthe application and imbed the tape into the epoxy.(See figure 12)SHAFT REPAIRS<strong>Loctite</strong> ® epoxies can often be used to repair damaged orscored shafts. In some cases, however, the repair may notprovide long-term service and should not be made.Repairs are not recommended to the following shafts:¥ Any repair on an area subject to frictional heat such as on ashaft worn by mechanical packing.¥ The worn area under a bearing, bushing or mechanical sealthat exceeds its width.¥ Shafts under 1/2" (13 mm).THE SHAFTSince the area to be repaired needs to be machined, thestandard preparation procedures are not used. (See figure 14)Figure 12. Reinforce the repair by applying tape over the epoxy.6. Apply another 1/16" to 1/4" (1.5 – 6 mm) of epoxy over thereinforced mesh and smooth out the epoxy. To preventlifting of the repair, be sure to feather the edges in keepingwith the contour of the repaired equipment.(See figure 13)Figure 14.Undercut the worn area according to the following guidelines:Shaft DiameterDesired Undercut1/2 to 1" (13 – 25 mm) 1/16" (1.5 mm)1 to 3" (25 – 75 mm) 1/8" (3 mm)1. Using a lathe, undercut to the desired depth. If the shaftis already worn to the recommended depth, go to thenext step.Dovetail the ends of the worn area to lock the applicationinto place and to serve as a guide when repairing.(See figure 15)Figure 13. Over-coat the epoxy/tape application with anothercoating of epoxy.7. To speed the cure, heat the repair area with a heat gun orheat lamp. Never expose epoxy to an open flame.Figure 15. Dovetailing provides mechanical lock for epoxy.<strong>Epoxy</strong> <strong>Application</strong> <strong>Guide</strong>9
Repair <strong>Application</strong>sSHAFT REPAIRS (cont.)2. Finish undercutting by machining a rough cut surface orgramo<strong>ph</strong>one pattern, the larger the shaft diameter, thedeeper the threads. Degrease thoroughly. (See figure 16)4. Machine the repair to the required dimensions using theguidelines below. (See figure 18)Figure 16. Roughen shaft for better adhesion.3. Apply a very thin layer of the recommended repair epoxyand force into the bottom of the threads. Turn the shaft at avery low speed and continue to apply more material byusing a tool, such as a putty knife, that can be bent.(See figure 17)Figure 18. Machine the epoxy to the original dimensions ofthe shaft.Lathe Speed: 150 ft./min. 46 m/min.Feed Rate: Roughing .025 in./rev 0.64 mm/revFinishing .010 in./rev 0.25 mm/revTop Rake: 3°Side Clearance: 3°Front Clearance: 3°Comments: Cut dry; use carbide or high speed steel bits. Ifpolishing is required, use only wet 400 to 600 gritemery paper. (See figure 19)Figure 17. Fill the repair area with epoxy.Allow the product to cure for the required period at 70°F(20°C) or higher. Apply dry heat to the area, if necessary, tospeed up the cure.Figure 19. If necessary, polish repair with emery paper.10 <strong>Epoxy</strong> <strong>Application</strong> <strong>Guide</strong>
Repair <strong>Application</strong>sKEYWAYSA keyway becomes worn through constant pressure fromstarting and stopping.1. To prepare the surface, follow the Surface Preparationsection.Roughen the surface with a file or rotary cutting/grindingtool and degrease again. (See figure 20)Figure 22. Fill keyway with epoxy and install coated key.4. Scrape away excess epoxy from the side of the keyway.(See figure 23)Figure 20. Roughen the damaged surface.2. Apply a thin layer of <strong>Loctite</strong> ® Silicone Lubricant releaseagent to the key and to any area where you do not want theproduct to stick. (See figure 21)Figure 23. Immediately scrape excess epoxy away from repair area.5. Immediately reposition the shaft on the hub to properlyalign the key, shaft and hub. Leave assembled.(See figure 24)Figure 21. Coat with release agent.3. Apply the recommended epoxy using a spatula or puttyknife. Use a thin coat on the bottom and a thicker layer onthe side walls to ensure the key will not be raised and alsoto ensure a close tolerance fit. (See figure 22)Figure 24. Immediately align key, shaft and hub.<strong>Epoxy</strong> <strong>Application</strong> <strong>Guide</strong>11
Repair <strong>Application</strong>sHEAT EXCHANGER ANDCONDENSER REPAIRSTubes in a heat exchanger are subject to severe galvaniccorrosion since the tubes and the tube sheet are not of thesame metal. The corrosion process is accelerated by thepresence of hot, wet conditions and, if left unattended, thetube plate will corrode and eventually fail. The following isan easy and effective way to rebuild and extend the life of atube plate in a heat exchanger using <strong>Loctite</strong> ® Epoxies thatare designed to fight bi-metallic corrosion.1. Install stoppers. Remove the end plates and baffles, andinsert rubber stoppers into the end of the tubes. Thestoppers should protrude no more than 1/8" (3 mm).This clearance will allow for a 1/8" coating of epoxy, asillustrated. (See figure 31)2. Surface preparation. Once the stoppers are installed,abrasive blast the entire faceplate. After blasting, blow outthe debris from the sheet using clean air. Degreasethoroughly with <strong>Loctite</strong> ® ODC-Free Cleaner & Degreaser.For best results, steam clean the application surface afterblasting and degreasing. Prepare the baffle plates and endcovers as the tube sheet itself. (See figure 33)Figure 33. Sandblast the tube sheet once stoppers are installed.3. Apply <strong>Loctite</strong> ® Brushable Ceramic in two coats. After thefirst coat, wait 1-3 hours and recoat again. The two-coatsystem helps fill any voids missed after the first coat.(See figure 34)Figure 31. Install stoppers flush with the ends of the tubes.The best way to install stoppers is to push each one snug. Ifthe tube is not flush with the tube plate due to wear or design,install the stopper to be flush with the end of the tube.(See figure 32)Figure 34. Apply two coats of epoxy to the tube sheet.Figure 32. Install stoppers flush with the end of the tube when thetube extends beyond the sheet.<strong>Epoxy</strong> <strong>Application</strong> <strong>Guide</strong>13
Repair <strong>Application</strong>sHEAT EXCHANGER ANDCONDENSER REPAIRS(cont.)4. To build up depressions where there is a greater than 1/8"(3 mm) distance from the tube sheet, first coat the sheetwith Brushable Ceramic to help "wet out" the surface andact as an excellent prime coat for the next step.(See figure 35)Next, trowel on <strong>Loctite</strong> ® Wear Resistant Putty to the tubeplate surface at the desired thickness. Build up thethickness of the face plate to be flush with the tubesthemselves. Then apply a topcoat of Brushable Ceramic.(See figure 36)Figure 37. Coat inlet areas, baffle plate inserts and end covers forcomplete protection of equipment.6. Wait at least 18 hours after the coating has been appliedbefore taking out the stoppers. Then take a packing pulleror large pliers and pull out all the rubber stoppers.(See figure 38)Figure 35. Brush apply epoxy to "wet out" surface.Figure 38. Remove stoppers with a packing puller.7. To provide a clean finish in the tubes, allowing an easyflow of liquid, smooth the opening of the tubes to removeexcess epoxy. Use a conical grinding bit for best results.(See figure 39)Figure 36. Build up damaged surface with epoxy putty.5. Coat the inlet areas, baffle plate inserts, and the endcovers. Be sure not to apply any epoxy material to thebaffle plate holder tracks, otherwise, it may be difficult toreassemble the plates after all the coatings have beenapplied, as illustrated in the next column. (See figure 37)Figure 39. Smooth ends of tubes by grinding.14 <strong>Epoxy</strong> <strong>Application</strong> <strong>Guide</strong>Note: Be sure not to coat machined surfaces that aregasket areas.
Repair <strong>Application</strong>sPUMP REPAIRSPump castings, impellers and volutes wear due to corrosion,erosion, cavitation, and mechanical damage. All these formsof damage can be effectively and economically repairedwith <strong>Loctite</strong> ® epoxies. The two main areas subject to wearare the volute and the impeller.REPAIRING VOLUTES1. To prepare the surface, remove all rust, old paint, andother debris from the area to be repaired. For best results,abrasive blast large areas or, use a needle gun or grinder.Prepare the area at least 1/2" (12 mm) greater than therepair area on all sides.Where the equipment has been pumping salt solutions,abrasive blast all areas to be treated and leave for 24hours, after which time the entire area should be given abrush blast to remove all salts which may have sweated tothe surface.Sandblast to sound metal and clean with <strong>Loctite</strong> ® ODC-FreeCleaner & Degreaser.2. Build up the gouges and worn areas on the inside of thebody by applying a smooth coating of epoxy. To avoid airentrapment, use a suitably shaped thin plastic or metalapplicator to apply a thin coat of product to all faces of thecavities. (See figure 40)3. To fill the cavities, press epoxy into the repair area. Usethe applicator to smooth and shape the repair area to theoriginal contour. Alternatively, the epoxy can be used tobuild up the repair area slightly larger than the requiredcontour. After the epoxy has cured, it can be ground downto the original contour using a combination of grindingwheel and sanding disc attachments.4. Top coat the entire volute area with Brushable Ceramic<strong>Epoxy</strong> to increase pump efficiency. (See figure 41)Figure 41. Brushable Ceramic applied over the epoxy putty repairprovides a low friction finish that extends the operating life andefficiency of the pump.Figure 40. <strong>Epoxy</strong> putty is used to rebuild worn areas of volute.For Material Safety DataSheets (MSDS) or forTechnical Data Sheets(TDS), Call 1-800-LOCTITE(1-800-562-8483)or visit us on the web at<strong>Epoxy</strong> <strong>Application</strong> <strong>Guide</strong>15
Repair <strong>Application</strong>sPUMP REPAIRS (cont.)REBUILDING IMPELLERS1. Prepare the surface as in step 1 on previous page. To aidin penetration of the epoxy into cavities, warm the impellerto 120-140°F (50-60°C) before applying product.2. For severely eroded blades, tack weld expanded metalfrom the edge to be rebuilt to the existing metal surface.(See figure 42)4. To finish the repair, brush apply a 15-20 mil coating ofBrushable Ceramic to entire impeller area, filling in porousspots in the casting. Once the first coat has cured, apply asecond coat of Brushable Ceramic. (See figure 44)Figure 44. Two coats of Brushable Ceramic seal the metal andprovide a low friction surface.Figure 42. Expanded metal, used over damaged blades, rebuildsand reinforces the repair area.3. Apply epoxy over the expanded metal, forcing the epoxythrough the mesh, being careful to avoid air entrapment.Smooth the finish with a thin plastic or metal applicator.(See figure 43)Note: After full cure, balance impeller before returningto service.For technical informationand/or product availability,Call 1-800-LOCTITE(1-800-562-8483)or visit us on the web atFigure 43. Coat expanded metal with epoxy and smooth out finish.16 <strong>Epoxy</strong> <strong>Application</strong> <strong>Guide</strong>
<strong>Application</strong> ExamplesFIXMASTER ® EPOXIESProblem:Equipment:Solution:Gap between ceramic tileand flange lipsDischarge flange faceof cycloneFIXMASTER ® WearResistant PuttyFIXMASTER ® Wear Resistant Putty fills the gap between linerand flange, created when new ceramic tiles were installed.Wear Resistant Putty is troweled into the gap and either"wet finished" (see <strong>Application</strong> Tips on page 4) or machinedto exact tolerances.Problem:Equipment:Leaking flangeFlange face on achemical pumpSolution: FIXMASTER ®Aluminum PuttyFlange faces, eroded by chemical exposure, were previouslyrepaired by welding and machining. FIXMASTER ® AluminumPutty repairs aluminum faces at a lower cost and with far lessdowntime than conventional methods.Problem:Equipment:Severely damaged pipeSlurry transport pipeSolution: FIXMASTER ®Metal Magic SteelDamage to this pipe was so severe that expanded mesh iswelded over the opening to provide reinforcement for theepoxy application. FIXMASTER ® Metal Magic Steel is pressedover the mesh to fill and seal the application area. The pipe isready for service in just minutes.NORDBAK ® EPOXIESProblem:Equipment:Uneven tiled liningInlet section of heavymedia cycloneSolution: NORDBAK ®Brushable CeramicIn this two-step process, NORDBAK ® Wearing Compound isused to rebuild the flat disk area of the cyclone intake.NORDBAK ® Brushable Ceramic is then applied to provide alow-friction finish to prevent turbulence created byirregularities in the tile profile.Problem:Equipment:Eroded processingequipmentCyclone apexSolution: NORDBAK ®Wearing CompoundA form on the end of the apex is used to rebuild the interior toits original dimensions. NORDBAK ® Wearing Compound isapplied here with a gloved hand to fill the eroded area andsmooth the finish.Problem:Equipment:Damage from abrasivecoal handlingHeavy media cycloneSolution: NORDBAK ®Wearing CompoundBoth the inlet section and vortex finder of this heavymedia cyclone are rebuilt and protected with NORDBAK ®Wearing Compound.Problem:Equipment:Erosion of internalstructureSide suctionmedia pumpSolution: NORDBAK ®Wearing CompoundA pump divider designed to reduce the turbulence inside thepump was almost completely worn away due to abrasion. Itwas rebuilt using a form over which NORDBAK ® WearingCompound was applied until the repaired section replicated theoriginal divider.Problem:Equipment:Solution:Worn bronze partsPropeller castingNORDBAK ® Pneu-Wearand Brushable CeramicSevere abrasion had worn out a critical part of a marinepropeller. To rebuild the surface and provide maximumprotection from salt water exposure, NORDBAK ® Pneu-Wearwas applied. The area was then coated with NORDBAK ®Brushable Ceramic to provide a durable, low-friction finish.<strong>Epoxy</strong> <strong>Application</strong> <strong>Guide</strong>17
Product SelectionCHOOSING THE BEST LOCTITE ® EPOXY FOR YOUR APPLICATIONA wide range of high performance repair epoxies are available to youfrom <strong>Loctite</strong>. Since each application has specific requirements relativeto equipment type, operating conditions, application and operatingtemperatures and other critical factors, it is important to know how tochoose the best product for your application.The following is a brief description of each type of <strong>Loctite</strong> ® repairepoxy with typical recommended applications. Use this informationalong with the Physical Properties Charts on pages 20 and 21 todetermine the <strong>Loctite</strong> ® repair material that is suitable for yourparticular application.LOCTITE ® REPAIR EPOXIESFIXMASTER ® EPOXIESSteel Putty and Liquid: Steel-filled epoxies in putty and liquid formscure to a metal-like finish that can be drilled, tapped and machined. Aversatile repair compound, this epoxy is used for routine surfacerebuilding applications that do not require outstanding wear resistantproperties or a low friction, non-rusting finish. Recommended for pipeand tank repair.Product # SizeSteel Putty 99913 1 lb.99914 4 lbs.99912 25 lbs.Steel Liquid 97483 1 lb.97484 4 lbs.97482 16 lbs.Wet Surface Repair Putty: Non-rusting repair material adheres todamp and wet surfaces, even cures underwater. Recommended forrepairing pipes, tanks, and other equipment when the applicationsurface cannot be fully dried.Product # Size96583 1 lb.Aluminum Putty and Liquid: Similar in properties to Steel <strong>Epoxy</strong>,Aluminum <strong>Epoxy</strong> is recommended for rebuilding and repairingaluminum or other non-rusting equipment.Aluminum Product # SizePutty 97463 1 lb.Aluminum 97453 1 lb.LiquidStainless Steel Putty: Recommended for rebuilding and repairingstainless steel and other non-rusting equipment.Product # Size97443 1 lb.Fast Set Steel Putty: Steel Putty in a special formula that cures in just10 minutes. Recommended for emergency and temporary repairs thatrequire a fast-setting material. This material can be used to make initialrepairs, followed by an application of a second, higher performanceepoxy for long-term durability of the application.Product # Size39917 1 lb.Wear Resistant Putty: Trowelable putty with excellent wear andabrasion resistance provides a smooth, low friction surface forequipment exposed to wear and erosion. Recommended for rebuildingand repairing pumps, keyways, tube sheets and valves. Non-rusting.Product # Size98742 1 lb.98743 3 lbs.Metal Magic Steel: Fast curing epoxy in a convenient stick form forplugging holes in pipes and tanks and other emergency repairs.Product # Size98853 4 oz./114 gSuperior Metal: Similar in properties to Wear Resistant Putty, thisferro-silicon filled material is a non-rusting putty with outstandingcompressive strength and chemical resistance. Recommended forrebuilding and protecting pumps, shafts, keyways, splines, bearings,tube sheets, impellers, and valves.Product # Size97473 1 lb.18 <strong>Epoxy</strong> <strong>Application</strong> <strong>Guide</strong>
Product SelectionCHOOSING THE BEST LOCTITE ® EPOXY FOR YOUR APPLICATIONNORDBAK ® EPOXIESWearing Compound: Large ceramic bead filled repair compoundprovides extra protection against extreme abrasion as may be requiredto protect pumps that process heavy, abrasive slurries. Available in6 formulas.Product # SizeWearing 99813 5 lbs.99812 25 lbs.Castable 98992 25 lbs.Fast Cure 96373 6 lbs.High Impact 39918 25 lbs.High Temp. 99112 25 lbs.Ultra High 96392 25 lbs.TemperaturePneu-Wear: Small ceramic bead formulation is a patented design thatprovides maximum protection against fine particle abrasion. Availablein 4 formulas.Product # SizePneu-Wear 98383 3 lbs.98382 25 lbs.Fast Cure 98363 6 lbs.High 98372 25 lbs.Temperature 98382 25 lbs.Ultra High 96332 25 lbs.TemperatureBrushable Ceramic: Ceramic-filled, brushable epoxy. When used on itsown, can fill cavitated areas and protect equipment from corrosion andabrasion. Used as a top coat over an epoxy putty, Brushable Ceramicprovides a low friction coating that protects pump casings, impellers,fans and other processing equipment against turbulence, abrasionand wear. Available in 2 formulas.Product # Size/ColorBrushable 98733 2 lbs./GreyCeramic 98732 6 lbs./Grey96443 2 lbs./WhiteHigh Temp. 96433 2 lbs./RedBrushableCeramicThe following <strong>Loctite</strong> ® products are also referenced in this guide andare available from industrial distributors:Product # SizeNordbak ® 96092 12 lbs.ChemicalResistant CoatingNordbak ® 97762 20 lbs.Ceramic TileAdhesiveODC-Free 22355 15 oz. AerosolCleaner & 20162 16 fl. oz. Pump SprayDegreaser 20260 1 gallon canCombo Bead Wearing Compound: Large and small ceramic beadformulation protects against hard sliding abrasion by multiple particles.Product # Size96303 6 lbs.Silicone 51360 5.3 oz. TubeLubricant 81246 13 oz. AerosolFixmaster ® 97434 50 ml Cartridge4-Minute <strong>Epoxy</strong>Fixmaster ® 82093 4 oz. StickUnderwaterRepair <strong>Epoxy</strong><strong>Epoxy</strong> <strong>Application</strong> <strong>Guide</strong>19
Product SelectionFIXMASTER® EPOXIESPROPERTIES CHARTP R O D U C TProductNumberContainerCoverage, ft. 2@ 1/4″ thicknessColorMaximum operatingtemperature, °FCompressivestrength, psi †Tensile strength,psi †Hardness (Shore D)Working time,minutesFunctional cure,hoursMix Ratioby volume, r : hMix Ratioby weight, r : hAluminum Liquid974531 lb. kit17 in. 3Alumin.20017,0006,000852065:19:1Aluminum Putty974631 lb. kit0.5Alumin.22511,3004,000872064:16.3:1Fast Set Steel Putty399171 lb. kit0.4Grey20010,8004,60080310 min.1:16.3:1Metal Magic Steel988534 oz.7 in. 2Grey25012,0002,50080310 min.N/AN/AStainless Steel Putty974431 lb. kit0.25Grey22514,0004,600852064:19:1Steel Liquid9748397484974821 lb. kit4 lb. kit16 lb. kit13 in. 352 in. 3208 in. 3Grey22513,5006,000892564:19.5:1Steel Putty9991399914999121 lb. kit4 lb. kit25 lb. kit0.31.27.5Grey22513,0004,900903062.5:16.25:1Superior Metal974731 lb. kit0.25DarkGrey25018,0005,500902064:17.25:1Wear Resistant Putty98742987431 lb. kit3 lb. kit0.361.1Grey22511,6004,900863064:18:1Wet SurfaceRepair Putty965831 lb. kit0.5Grey15012,5003,5008530181:110:9Properties are based on mixing one lb. mass at 77°F, 7 days cure.†Ultimate cure.APPLICATIONSELECTION GUIDEP R O D U C TEmergency metalrepairsCorrosion protectionRepairing pipes, tanksRebuilding shafts,keyways, bearingsRepairing threaded partsRestoringtube sheetsPump repairRepairing engineblocksFixtures andprototypesRebuilding impellers,valvesRepairing aluminumpartsRepairing stainlesssteel partsForming molds,fixturesWet surface repairsAluminum LiquidAluminum PuttyFast Set Steel PuttyMetal Magic SteelStainless Steel PuttySteel LiquidSteel PuttySuperior MetalWear Resistant PuttyWet SurfaceRepair PuttyPreferred ChoiceGood Choice20 <strong>Epoxy</strong> <strong>Application</strong> <strong>Guide</strong>
Product SelectionNORDBAK ® EPOXIESPROPERTIES CHARTP R O D U C TProductNumberContainerCoverage, ft. 2@ 1/4" thicknessColorMaximum operatingtemperature, °FCompressivestrength, psiHardness(Shore D)Working time,minutes, 77˚FFunctional cure,hours, 77˚FMix ratioby volume, r : hMix ratioby weight, r : hWearing Compound99813998125 lb. kit25 lb. kit1.758.75Grey25016,000903072:12:1Fast CureWearing Compound963736 lb. kit2.1Blue22510,000901032:12:1High TemperatureWearing Compound9911225 lb. kit9Grey45015,0008530▲4:13.9:1Ultra High TemperatureWearing Compound9639225 lb. kit9Grey550–9030▲2.44:12.85:1High ImpactWearing Compound3991825 lb. kit8.75Grey25015,000853062:12:1Castable Wearing Compound9899225 lb. kit277 in. 3Grey22518,500903062:16.8:1Pneu-Wear98383983823 lb. kit25 lb. kit1.19Grey25015,000903064:14:1Fast Cure Pneu-Wear963636 lb. kit2.1Blue22512,000901032:12:1High Temperature Pneu-Wear9837225 lb. kit8.8Grey45015,0009030▲4:14:1Ultra High Temp. Pneu-Wear9633225 lb. kit8.8Grey550–9030▲2:12.27:1Combo Bead Wearing963036 lb. kit2.3Grey25013,000902582:12:1Brushable Ceramic9873398732964432 lb. kit6 lb. kit2 lb. kit12*36*12*GreyGreyWhite20020020012,50012,50012,5008585853030156652.75:12.75:12.9:14.8:14.8:14.8:1High TemperatureBrushable Ceramic964332 lb. kit21.5*Red60016,00090120▲2.6:14.25:1Chemical Resistant Coating9609212 lb. kit74*Grey15010,0008320162.2:13.7:1Ceramic Tile Adhesive9776220 lb. kit12Beige20014,0008860121:13.7:1Properties based on mixing one lb. mass at 77°F, ultimate cure. *20 mil thickness. ▲ Requires heat cure. See Technical Data Sheet.APPLICATIONSELECTION GUIDEP R O D U C TFine particleabrasionMultiple particleabrasionImpactresistanceChemical corrosionprotectionHigh temperatureresistanceFast cureCorrosionprotectionTile installationPump repairElbowsFan housingsCyclonesChutesWearing CompoundFast CureWearing CompoundHigh TemperatureWearing CompoundUltra High TemperatureWearing CompoundHigh ImpactWearing CompoundCastable Wearing CompoundPneu-WearFast Cure Pneu-WearHigh Temp. Pneu-WearUltra High Temp. Pneu-WearCombo Bead WearingBrushable CeramicHigh TemperatureBrushable CeramicChemical Resistant CoatingCeramic Tile AdhesivePreferred choiceGood choice<strong>Epoxy</strong> <strong>Application</strong> <strong>Guide</strong>21
USALocal <strong>Loctite</strong> Adhesives & Sealants Specialist1-800-323-5106Nearest Authorized <strong>Loctite</strong> DistributorArrange an in-plant seminarTechnical Product Assistance1-800-LOCTITE (1-800-562-8483)To place an order1-800-243-4874<strong>Loctite</strong> Corporation1001 Trout Brook CrossingRocky Hill, Connecticut 06067860-571-5100fax: 860-571-5465<strong>Loctite</strong> CorporationOne Northfield Plaza, 5600 Crooks RoadSuite 105Troy, Michigan 48098248-828-8000fax: 248-828-8009CanadaLocal <strong>Loctite</strong> Adhesives & Sealants SpecialistNearest Authorized <strong>Loctite</strong> DistributorArrange an in-plant seminarTechnical Product AssistanceTo place an order1-800-263-5043 (within Canada)<strong>Loctite</strong> Canada Inc.2225 Meadowpine Blvd.Mississauga, Ontario L5N 7P2800-263-5043 (within Canada)905-814-6511fax: 905-814-5391BrazilLocal <strong>Loctite</strong> Adhesives & Sealants SpecialistNearest Authorized <strong>Loctite</strong> DistributorArrange an in-plant seminarTechnical Product AssistanceTo place an order(55.11) 426-4011/5011<strong>Loctite</strong> BrazilAv. Prof. Vernon Krieble, 9106690-11- ItapeviSão Paulo - Brazil(55.11) 426-4011/5011fax: (55.11) 426-4820/4493MexicoLocal <strong>Loctite</strong> Adhesives & Sealants SpecialistNearest Authorized <strong>Loctite</strong> DistributorArrange an in-plant seminarTechnical Product Assistance01-800-901-8100 (within Mexico)To place an order01-800-849-9412 (within Mexico)<strong>Loctite</strong> Company de México, S.A. de C.V.Calzada de la Viga s/n, Fracc. Los LaurelesLoc. Tulpetlac, C.P. 55090Ecatepac de Morelos, Edo. de México, México011-525-836-1305fax: 011-525-787-9404For Material Safety Data Sheets orTechnical Information call the <strong>Loctite</strong>24-hour fax and information network.In the U.S.A., call1-800-LOCTITE (562-8483).In Canada, call 1-800-263-5043.For information on the ProActiveMaintenance Process call:1-800-LOCTITE (562-8483) (U.S.A.),1-800-263-5043 (Canada).<strong>Loctite</strong> AmericasAll trademarks in this catalog, except where noted, arethe property of or used under license by <strong>Loctite</strong>Corporation. U.S.A.© Copyright 2000. <strong>Loctite</strong> Corporation. All rights reserved.Printed in U.S.A.0004-307/ LT-3335A