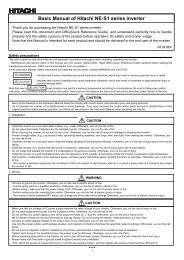
Closed CaptionWHAT IS CLOSED CAPTIONING?This television has the capability to decode and display ClosedCaptioned television programs. Closed Caption<strong>in</strong>g will displaytext on the screen <strong>for</strong> hear<strong>in</strong>g impaired viewers.Captions: This Closed Caption Mode will display text on thescreen <strong>in</strong> English or another language if program supports otherlanguages. Generally, Closed Captions <strong>in</strong> English are transmittedon C1 and Closed Captions <strong>in</strong> other languages are transmitted onC2.Text: The Text Closed Caption Mode will usually fill 1/2 of thescreen <strong>with</strong> other text <strong>in</strong><strong>for</strong>mation such as weather if programsupports this feature.Select “Setup”, then press ▶ or ENTER.123Press ▲ or ▼ to select “Closed Captions”, then press ▶ orENTER.The Closed Caption menu will appear.Press ◀ or ▶ to set “CC Display” to “On”.On: Captions will be displayed on the screen.Off: Captions will not be displayed on the screen.4 Press ▲ or ▼ to select “Analog Caption” or “Digital Caption”.When you select “Analog Caption”, you can choose CC1,CC2, CC3, CC4, Text1, Text2, Text3 and Text4.When you select “Digital Caption”, you can choose fromService1, Service2, Service3, Service4, Service5 and Service6.Press ◀ or ▶ to select the desired Closed Caption mode <strong>for</strong>5both Digital and Analog Caption.6 Press ▲ or ▼ to select “CC Priority”, then press ◀ or ▶ toselect “Digital CC” or “Analog CC”.NOTE:• Depend<strong>in</strong>g on the broadcast signal, some Analog Captionswill function <strong>with</strong> a Digital broadcast signal. This stepprevent that two k<strong>in</strong>d of captions are overlapp<strong>in</strong>g.NOTE:• If the program or video you selected is not closed-captioned, nocaptions will display on-screen.• If text is not available <strong>in</strong> your view<strong>in</strong>g area, a black rectanglemay appear on-screen. If this happens, set the CC Display to“Off”.• When select<strong>in</strong>g Closed Captions, the caption<strong>in</strong>g will be delayedapprox. 10 seconds.• If no caption signal is received, no captions will appear, but thetelevision will rema<strong>in</strong> <strong>in</strong> the Caption Mode.• Misspell<strong>in</strong>gs or unusual characters may occasionally appeardur<strong>in</strong>g Closed Caption<strong>in</strong>g.This is normal <strong>with</strong> Closed Caption<strong>in</strong>g, especially <strong>with</strong> liveprograms. This is because dur<strong>in</strong>g live programs, captions arealso entered live. These transmissions do not allow time <strong>for</strong>edit<strong>in</strong>g.• When Captions are be<strong>in</strong>g displayed, on-screen displays, suchas volume and mute may be seen but may <strong>in</strong>terfere <strong>with</strong> ClosedCaptions.• Some cable systems and copy protection systems may<strong>in</strong>terfere <strong>with</strong> the Closed Captioned signal.• If us<strong>in</strong>g an <strong>in</strong>door antenna or if TV reception is very poor, theClosed Caption Decoder may not appear or may appear <strong>with</strong>strange characters or misspelled words. In this case, adjust theantenna <strong>for</strong> better reception or use an outdoor antenna.CC advancedWhen you have selected Custom as the display method,you can adjust the various sett<strong>in</strong>g listed below as follows:This feature is designed to customize Digital Captions only.1 Select “Setup”, then press ▶ or ENTER.2 Press ▲ or ▼ to select “Closed Captions”, then press ▶ orENTER.The Closed Caption menu will appear.3 Press ◀ or ▶ to set “CC Display” to “On”.4 Press ▲ or ▼ to select “Digital CC Preset”, then press ◀ or ▶to select “Custom”.5 Press ▲ or ▼ to select “CC Advanced”, then press ▶ orENTER.The CC Advanced menu will appear.6 Press ▲ or ▼ to select the desired item, then press ◀ or ▶ tochange the sett<strong>in</strong>g.CC AdvancedText SizeAutoText TypeAutoText EdgeAutoText ColorAutoText OpacityAutoBackground Color AutoBackground Opacity Auto: Move : AdjustYou can select from among the follow<strong>in</strong>g items andparameters.Text Size: Auto, Small, Standard, LargeText Type: Auto, Style1, Style2, Style3, Style4, Style5,Style6, Style7Text Edge: Auto, None, Raised, Depressed, Uni<strong>for</strong>m, LeftShadow, Right ShadowText Color: Auto, Black, White, Red, Green, Blue, Yellow,Magenta, CyanText Opacity: Auto, Solid, Transparent, Translucent,Flash<strong>in</strong>gBackground Auto, Black, White, Red, Green, Blue, Yellow,Color: Magenta, CyanBackground Auto, Solid, Transparent, Translucent,Opacity: Flash<strong>in</strong>gNOTE:• You cannot set both “Text Color” and “Background Color” as asame color.• You cannot set both “Text Opacity” and “Background Opacity” to“Transparent”.Aspect Switch<strong>in</strong>gYou can display the image at its optimum condition byselect<strong>in</strong>g display aspect.Select<strong>in</strong>g the picture <strong>for</strong>mat aspect ratio1 Select “Video”, then press ▶ or ENTER.2 Press ▲ or ▼ to select “Aspect”, then press ▶ or ENTERto display Aspect. Press ▲/▼ or correspond<strong>in</strong>g Numberbuttons (0-4) to select the desired picture <strong>for</strong>mat aspect ratio,as described below.Aspect0.Natural1.C<strong>in</strong>ema Wide12.C<strong>in</strong>ema Wide23.C<strong>in</strong>ema Wide34.Full[0-4]:Select22
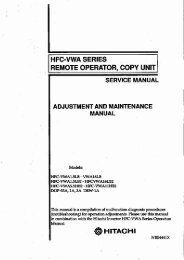
NOTE:• Selectable picture <strong>for</strong>mat aspect ratios may vary depend<strong>in</strong>g onthe <strong>in</strong>put source or broadcast signal.• Picture Size menu also can be displayed by press<strong>in</strong>g ASPECTon the remote control.NaturalIn some cases, this image will display the size of standard 4:3 <strong>with</strong>a black side bar.C<strong>in</strong>ema Wide1 (<strong>for</strong> 4:3 <strong>for</strong>mat programs)To fill the screen, the right and left edges are extended, however;the center of the picture rema<strong>in</strong>s near its <strong>for</strong>mer ratio.The top and bottom edges of the picture may be hidden.PreparationThe follow<strong>in</strong>g pages describe the setup/operation <strong>in</strong> <strong>DVD</strong>mode.PreparationBe<strong>for</strong>e <strong>DVD</strong>/CD operation, please make the follow<strong>in</strong>gpreparations.1 Insert the AC cord plug <strong>in</strong>to a standard 120V 60Hz polarizedAC outlet.• If the AC cord plug is plugged <strong>in</strong> <strong>for</strong> the first time, wait <strong>for</strong>about 5 seconds be<strong>for</strong>e press<strong>in</strong>g POWER.NOTE:• When connect<strong>in</strong>g to other equipment, unplug the unit fromthe AC outlet.2 Press POWER on the unit or on the remote control to turn onthe unit. The POWER <strong>in</strong>dicator will change to green.• Each time you turn the unit ON, the TV/<strong>DVD</strong> starts from theTV mode.• When us<strong>in</strong>g an amplifier, switch on the amplifier.3 Press TV/<strong>DVD</strong> to select <strong>DVD</strong> mode.The <strong>DVD</strong> startup screen will appear on the screen.ENGLISHC<strong>in</strong>ema Wide2 (<strong>for</strong> letter box programs <strong>with</strong> subtitles)To fill the width of the screen, it is extended horizontally. However;it is only slightly extended at the top and the bottom.The top and bottom edges of the picture may be hidden.C<strong>in</strong>ema Wide3 (<strong>for</strong> letter box programs <strong>with</strong> subtitles)To fill the width of the screen, it is extended horizontally. However;it is only slightly extended at thetop and the bottom.The top and bottom edges of the picture may be hidden.A B C D E F G - - - - - - - - - - - - - - - -A B C D E F G - - - - - - - - - - - - - - - - - - - - - - - - - -Full (<strong>for</strong> 16:9 source programs)Full will display the picture at the maximum size.Native (<strong>for</strong> PC mode only)Detects the resolution of the signal of the image and it will be shownon the screen <strong>with</strong> same amount of pixels.NOTE:• Some High Def<strong>in</strong>ition and/or Digital broadcasts may not allowyou to change the picture <strong>for</strong>mat aspect ratio.• In HDMI or COMPONENT mode <strong>with</strong> a scann<strong>in</strong>g rate of 720p,1080i or 1080ip, only the C<strong>in</strong>ema Wide2 and Full are available.• In PC Mode, only the Natural, Full and Native are available. InPC Mode (WXGA), only the Full and Native are available.NOTE:• If the unit does not operate properly:Static electricity, etc., may affect the player’s operation.Disconnect the AC power cord once, then connect it aga<strong>in</strong>.Status display of discPress DISPLAY. The status display of the disc will appear on thescreen.TITLE NO.DISC OPERATIONELAPSEDTIMETOTALTIME<strong>DVD</strong> 00:15:25 01:41:39Title 1/3 Chapter 2/241/1 Eng Dolby Digital 1/2 Eng1/1ANGLE NO.SUBTITLE LANGUAGEAUDIO LANGUAGE A KIND OF AUDIOCHAPTERNO.To make the status display screen disappear, press DISPLAYaga<strong>in</strong>.Playback procedure1 Press TV/<strong>DVD</strong> to select <strong>DVD</strong> mode.2 Place the disc <strong>in</strong> the discslot <strong>with</strong> the label sidefac<strong>in</strong>g <strong>for</strong>ward. (If the dischas a label.) Hold the disc<strong>with</strong>out touch<strong>in</strong>g either ofits surfaces, align it <strong>with</strong>the guides, and place it <strong>in</strong>position.3 On the screen, “ ” changes to “Read<strong>in</strong>g” and then playbackwill commence.• A menu screen may appear on the TV screen, if the dischas a menu feature. In this case, press ▲, ▼, ◀, ▶ orENTER to operate a menu feature.Read<strong>in</strong>g23