Atria 6100 Operator's manual - Roxon
Atria 6100 Operator's manual - Roxon Atria 6100 Operator's manual - Roxon
2 Equipment Setup!!WARNINGMisdiagnosis. Using unshielded or excessively long cables may cause orincrease susceptibility to electromagnetic interference.Always use the shortest possible shielded cables.CautionEquipment damage. The Atria must be operated only at the line voltageand frequency specified on the external medical grade power supply (partnumber: 010-1684-00).The input power cable includes a 3-conductor, medical grade power cable.Using the two power cables supplied, connect line power, in the followingorder:1. Connect the external power supply (part number: 010-1684-00) to theExternal Power Connector (labeled C, below) on the back of the Atria.2. Connect the AC power cable to the external power supply.3. Connect the AC power cable to a properly grounded, medical gradewall outlet.Figure 2-1Back PanelA BC2-2 Atria Electrocardiograph Operating InstructionsAEquipotentialgroundingKeyConnect equipotential ground cable here. (See“Equipotential Ground” on pg. 2-1.)B Power indicator The green LED indicates the Atria is connectedto AC power.CExternal powerconnectorConnect cable from power external powersupply here.NOTE: The Atria does not have an AC powerswitch. To shut off AC power, unplug the Atriafrom the AC outlet.NOTE: For communication connections refer to“Communications Setup” on pg. 5-1.
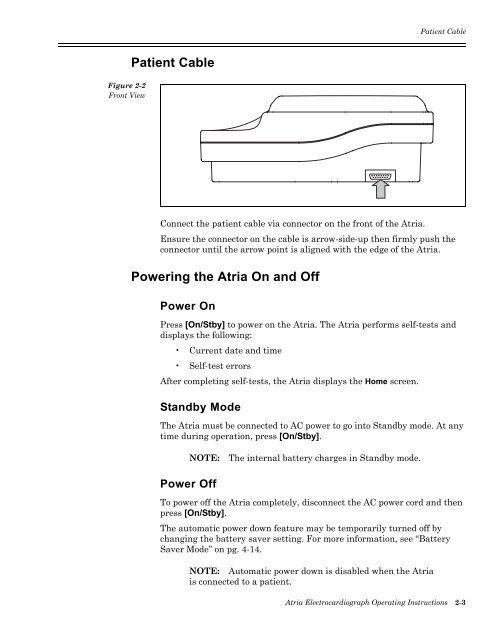
Patient CableFigure 2-2Front ViewPatient CableConnect the patient cable via connector on the front of the Atria.Ensure the connector on the cable is arrow-side-up then firmly push theconnector until the arrow point is aligned with the edge of the Atria.Powering the Atria On and OffPower OnPress [On/Stby] to power on the Atria. The Atria performs self-tests anddisplays the following:• Current date and time• Self-test errorsAfter completing self-tests, the Atria displays the Home screen.Standby ModeThe Atria must be connected to AC power to go into Standby mode. At anytime during operation, press [On/Stby].NOTE:The internal battery charges in Standby mode.Power OffTo power off the Atria completely, disconnect the AC power cord and thenpress [On/Stby].The automatic power down feature may be temporarily turned off bychanging the battery saver setting. For more information, see “BatterySaver Mode” on pg. 4-14.NOTE: Automatic power down is disabled when the Atriais connected to a patient.Atria Electrocardiograph Operating Instructions 2-3
- Page 1 and 2: OperatingInstructionsAtria 3100 Ele
- Page 3 and 4: Table of ContentsIntended Use . . .
- Page 5 and 6: Intended UseUnder the supervision o
- Page 7 and 8: Manufacture dateManufactured for008
- Page 9: Quick StepsAtriaElectrocardiographC
- Page 12 and 13: 1 General Information• Battery or
- Page 14 and 15: 1 General InformationHelp MenuTo ac
- Page 18 and 19: 2 Equipment SetupPower IndicatorA g
- Page 20 and 21: 2 Equipment Setup6. Slide the door
- Page 22 and 23: 3 User InterfaceFigure 3-2User Inte
- Page 24 and 25: 3 User InterfaceFunction Key Descri
- Page 28 and 29: 3 User InterfaceLabel Text Descript
- Page 30 and 31: 3 User InterfaceDisplay Atria 3100T
- Page 32 and 33: 3 User Interface3-12 Atria Electroc
- Page 34 and 35: 4 User SettingsSetup MenuThe Setup
- Page 36: 4 User SettingsECGMenu Items:Report
- Page 39 and 40: Waveform PreferencesWaveform Prefer
- Page 41 and 42: RhythmRhythmTo print rhythm reports
- Page 43 and 44: Patient SettingsRhythmMenu Items:Se
- Page 45 and 46: System SettingsSystem SettingsUse t
- Page 47 and 48: Chapter5 Communications Setup!WARNI
- Page 49 and 50: GroundingGroundingAll connected equ
- Page 51 and 52: Network Setup3. Enter the following
- Page 53 and 54: Network SetupCREATE A SUPPLICANT CO
- Page 55 and 56: External Printer Setup• Start Fin
- Page 57 and 58: Setup Email2. Select Send Receive >
- Page 59 and 60: Setup EMR Communications7. Enter th
- Page 61 and 62: Chapter6 Patient Preparation!!!WARN
- Page 63 and 64: Sensor ApplicationSensor Applicatio
- Page 65 and 66: Disposable Resting ECG SensorsDispo
Patient CableFigure 2-2Front ViewPatient CableConnect the patient cable via connector on the front of the <strong>Atria</strong>.Ensure the connector on the cable is arrow-side-up then firmly push theconnector until the arrow point is aligned with the edge of the <strong>Atria</strong>.Powering the <strong>Atria</strong> On and OffPower OnPress [On/Stby] to power on the <strong>Atria</strong>. The <strong>Atria</strong> performs self-tests anddisplays the following:• Current date and time• Self-test errorsAfter completing self-tests, the <strong>Atria</strong> displays the Home screen.Standby ModeThe <strong>Atria</strong> must be connected to AC power to go into Standby mode. At anytime during operation, press [On/Stby].NOTE:The internal battery charges in Standby mode.Power OffTo power off the <strong>Atria</strong> completely, disconnect the AC power cord and thenpress [On/Stby].The automatic power down feature may be temporarily turned off bychanging the battery saver setting. For more information, see “BatterySaver Mode” on pg. 4-14.NOTE: Automatic power down is disabled when the <strong>Atria</strong>is connected to a patient.<strong>Atria</strong> Electrocardiograph Operating Instructions 2-3


