nextGeneration II 2x7-280, 14-280, 14-350 - Schulze Elektronik GmbH
nextGeneration II 2x7-280, 14-280, 14-350 - Schulze Elektronik GmbH
nextGeneration II 2x7-280, 14-280, 14-350 - Schulze Elektronik GmbH
Create successful ePaper yourself
Turn your PDF publications into a flip-book with our unique Google optimized e-Paper software.
46<br />
Page Issue 03.10<br />
28.5<br />
+ -<br />
28.2<br />
+ -<br />
28.3<br />
28.1<br />
USB<br />
-<br />
4<br />
+<br />
<strong>nextGeneration</strong> <strong>II</strong> Firmware V 1.00 and higher<br />
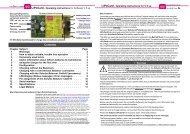
28 Additional sockets on the right side<br />
5<br />
28.1: mini-USB (standard)<br />
28.2: Flashing light output (nextConn<strong>II</strong> module only)<br />
28.3: External fan output (nextConn<strong>II</strong> module only)<br />
28.4: Temperature sensor input (nextConn<strong>II</strong> module only)<br />
28.5: AMS (Akku-Memory-Schnittstelle) for battery 2.<br />
On the opposite side of the charger also for battery 1.<br />
(Included as a standard. See also chapter 18.2)<br />
29 Specifications<br />
Common:<br />
All data given is based on a car battery voltage of 12.5 volts<br />
Recommended car battery 12V / bigger than 90 Ah, minimum 12 V / 63 Ah<br />
Tolerances @ battery 1 and 2 currents: typical 5%; max. about 15% resp. 250mA<br />
(larger value counts)<br />
next <strong>2x7</strong>-<strong>280</strong> next <strong>14</strong>-<strong>280</strong> next <strong>14</strong>-<strong>350</strong><br />
Weight ca. 730 g 733 g 770 g<br />
Dimensions (w*d*h) about 160 * 180 * 67 mm 160 * 180 * 67 mm 160 * 180 * 67 mm<br />
Supply voltage 10,0 - 25,0 V 10,0 - 25,0 V 10,0 - 25,0 V<br />
Under-voltage warning adjustable ~ 11,6 - 10,4 V 11,6 - 10,4 V 11,6 - 10,4 V<br />
- cut-off: volts lower ~ 0,5 V 0,5 V 0,5 V<br />
Supply current @13,8/12,0 V up to ~ 25/28 A 25/28 A 31/36 A<br />
Max. input power up to about 360 W 360 W 470 W<br />
Idle current about 100 mA 100 mA 100 mA<br />
+ display illumination (disconnectable) ~ 50 mA 50 mA 50 mA<br />
Fan (internal) 12V/1,1 W/32 dBa 12V/1,1 W/32 dBa 2x 12V/1,1W/32 dBa<br />
Trickle currents Ni-Cd Trickle-Pulse Trickle-Pulse Trickle-Pulse<br />
Trickle currents other battery types none none none<br />
Additional connection terminals<br />
Standard mini-USB B mini-USB B mini-USB B<br />
Numb. of cell voltage measuring inputs** 2 x 7 2 x 7 2 x 7<br />
AMS connectors for battery 1 and battery 2 Yes Yes Yes<br />
Optional available for nextGen.<strong>II</strong>-„eco“ Geräte. Standard at nont-“eco“ devices<br />
1) Temperature sensor Sensor included ready for use<br />
Resolution: 1 °C<br />
2) Flashing light connector + cable cable about 2 m, flashing light not included<br />
Voltage: Supply voltage of the charger, max. current 2,0*** A<br />
3) Fan connector + cable cable about 2 m, fan not included<br />
Voltage: Supply voltage of the charger, max. current 2,0*** A<br />
Remarks<br />
* Charging is possible from 1 cell and higher. However the „Delta-Peak“ cut-off automatic has to do<br />
a hard job at low cell counts because the peak voltage of 1...3 cells is not very high.<br />
** via balancing connectors<br />
*** Flashing light current plus fan current added together = 3 amps max. current.<br />
**** When both batteries are discharging at the same time the the lower value is valid at the<br />
next-XX-<strong>280</strong> chargers.<br />
<strong>nextGeneration</strong> <strong>II</strong> Firmware version V 1.00 and higher<br />
2 General remarks and precautions<br />
Operating<br />
instructions<br />
Issue 03.10, page<br />
• The CE marking which you will find on all schulze products indicated that the equipment has been tested to<br />
meet the stringent European safety and radiation requirements; this does not mean that you do not have to<br />
follow these instructions!<br />
• Please remember that fast-charging batteries can push the batteries to their limit; never operate the chargers<br />
unattended. The charger as well as the batteries may get warm; when in use, they should be placed on an<br />
appropriately sized, non-heat-conducting and non-combustible surface. By following these rules extensive<br />
damage will be avoided in case of a mishap. This applies in the same way also for the attached batteries.<br />
• Many modern transmitters are equipped with an internal reverse-voltage protection diode. No “smart” charger can<br />
fast-charge these transmitters unless this diode is bypassed (shunted) (see chapter 11 for additional information<br />
when charging transmitters). Preferably, you can remove the transmitter’s battery and fast-charge it outside the<br />
transmitter. If you want to bypass the diode, contact the transmitter manufacturer. In many cases the fastcharge<br />
current for a transmitter pack should not exceed 1.2 Amp (see operating instructions of transmitter).<br />
In order to keep possible damages small in the case of an error, we recommend strongly to remove the<br />
batteries from the transmitter!<br />
• Do not modify the charger’s car battery power cables or the enclosed connecting clamps; they are very low loss<br />
to support the charger’s high-end charge capabilities. Do NOT insert fuses and NOT plug the charger into the<br />
car´s cigarette lighter!<br />
• RISK OF SHORT CIRCUIT! When a balancing cable is plugged into one of the balancing connectors of the<br />
charger the corresponding pins of the remaining two connectors are also carrying voltage. Therefore it is<br />
neither allowed to short pins nor connect a second pack to them!<br />
• Do not cross-connect individual output charge cables. Do not short circuit output 1 to output 2. Each<br />
charger outlet has its own sensing circuitry - but no cross-sensing. Prevent electrical contact between any<br />
charger outlet and your car’s body. All this may damage your charger and/or your batteries! It is safest to place<br />
the charger on the ground. Place the charger on a safe support, do not “hang” it somewhere under the hood.<br />
The best approach is to use a separate, fully charged, dedicated 12-V battery and take it to the flight line.<br />
• The internal software is always checking for operational errors. Do not operate the charger in the case that any of<br />
the cables are damaged or frayed, or in case the display panel indicates an ERROR.<br />
• The <strong>nextGeneration</strong><strong>II</strong> charging devices operates on a wide range of input votage but may also be connected<br />
directly to a 12 V car battery! DO NOT RUN YOUR ENGINE OR ATTEMPT TO CHARGE YOUR CAR<br />
BATTERY WITH EXTERNAL EQUIPMENT WHILE OPERATING THE CHARGER, OR AS LONG AS THE<br />
CHARGER IS HOOKED UP TO YOUR CAR’S BATTERY.<br />
• Should you decide to operate the charger from a (110V/240V AC to 12V or 13.8V DC) power supply, make sure<br />
this power supply is well regulated, can supply continuous DC current as high as 16 or 25 Amps**, has a very<br />
high output capacitance (>5000µF/16V), very low ripple and is insensitive to the frequency of the charger´s<br />
internal switching voltage converter. Using any other source is likely to damage your charger or your batteries,<br />
and voids the warranty. ALWAYS use a schulze nt-16A ... nt-40A power supply**, NEVER use an automotive<br />
battery charger as the source for the precision-engineered schulze charger.<br />
When a <strong>nextGeneration</strong><strong>II</strong> is connected to a dc-generator and/or more than one <strong>nextGeneration</strong><strong>II</strong> is powered by a<br />
single mains power supply, the power supply must be buffered (stabilized) by a buffer battery to avoid interaction<br />
between the charger(s) and the power supply.<br />
• Because of the high charge current capabilities of these chargers, you should always use high-quality, gold-plated<br />
connectors in the charge cables to your batteries. Also, use heavy-duty (12-g) flex wire. We recommend<br />
you to use either schulze short circuit protected charging cables and/or (in the USA) 4 mm bullet<br />
connectors, the Deans Ultra plug or similar. See you local hobby dealer.<br />
• Always connect the banana plugs of your charge cables first; then, connect the charge cable to the battery. Note<br />
that “open” banana plugs, when the charge cable and battery are connected, carry the full battery voltage (and<br />
current).<br />
• Avoid short circuits of the charge outputs or the batteries with the car body - the <strong>nextGeneration</strong><strong>II</strong> is not protected<br />
against wrong connections like the above mentioned. Place the charger best on the ground.<br />
• Note that all chargers have ventilation holes. Especially in discharge mode or when charging batteries less than<br />
12V, the charger will dissipate energy, and gets warm (the <strong>nextGeneration</strong><strong>II</strong> even has an internal cooling fan).<br />
Do not block these ventilation holes and make sure you allow free air flow.<br />
3


