nextGeneration II 2x7-280, 14-280, 14-350 - Schulze Elektronik GmbH
nextGeneration II 2x7-280, 14-280, 14-350 - Schulze Elektronik GmbH
nextGeneration II 2x7-280, 14-280, 14-350 - Schulze Elektronik GmbH
Create successful ePaper yourself
Turn your PDF publications into a flip-book with our unique Google optimized e-Paper software.
20<br />
Page Issue 03.10<br />
<strong>nextGeneration</strong> <strong>II</strong> Firmware V 1.00 and higher<br />
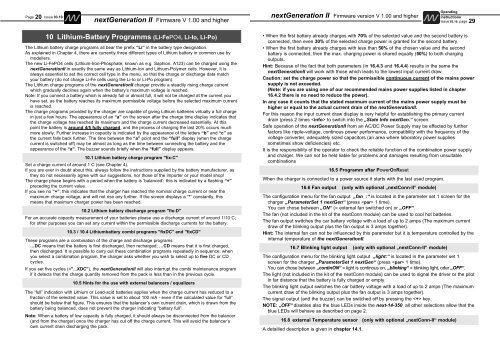
10 Lithium-Battery Programms (Li-FePO4, Li-Io, Li-Po)<br />
The Lithium battery charge programs all bear the prefix “Li” in the battery type designation.<br />
As explained in Chapter 4, there are currently three different types of Lithium battery in common use by<br />
modellers.<br />
The new Li-FePO4 cells (Lithium-Iron-Phosphate; known as e.g. Saphion, A123) can be charged using the<br />
<strong>nextGeneration</strong><strong>II</strong> in exactly the same way as Lithium-Ion and Lithium-Polymer cells. However, it is<br />
always essential to set the correct cell type in the menu, so that the charge or discharge data match<br />
your battery (do not charge Li-Fe cells using the Li-Io or Li-Po program).<br />
The Lithium charge programs of the <strong>nextGeneration</strong><strong>II</strong> charger provide a steadily rising charge current<br />
which gradually declines again when the battery’s maximum voltage is reached.<br />
Note: If you connect a battery which is already full or almost full, it will not be charged at the current you<br />
have set, as the battery reaches its maximum permissible voltage before the selected maximum current<br />
is reached.<br />
The charge programs provided by the charger are capable of giving Lithium batteries virtually a full charge<br />
in just a few hours. The appearance of an “a” on the screen after the charge time display indicates that<br />
the charge voltage has reached its maximum and the charge current decreased essentially. At this<br />
point the battery is around 4/5 fully charged, and the process of charging the last 20% occurs much<br />
more slowly. Further increase in capacity is indicated by the appearance of the letters “b” and “c” as<br />
the current falls back further. The time between the “a” point and the “full” display (when the charge<br />
current is switched off) may be almost as long as the time between connecting the battery and the<br />
appearance of the “a”. The buzzer sounds briefly when the “full” display appears.<br />
10.1 Lithium battery charge program "fix-C"<br />
Set a charge current of around 1 C (see Chapter 4).<br />
If you are ever in doubt about this, always follow the instructions supplied by the battery manufacturer, as<br />
they do not necessarily agree with our suggestions, nor those of the importer or your model shop!<br />
The charge phase begins with a period when the battery is ‘balanced’; this is indicated by a flashing “+”<br />
preceding the current value.<br />
If you see no “+”, this indicates that the charger has reached the nominal charge current or near the<br />
maximum charge voltage, and will not rise any further. If the screen displays a “*” constantly, this<br />
means that maximum charger power has been reached.<br />
10.2 Lithium battery discharge program "fix-D"<br />
For an accurate capacity measurement of your batteries please use a discharge current of around 1/10 C;<br />
for other purposes you can set any current within the permissible discharge currents for the battery.<br />
10.3 / 10.4 Lithiumbattery combi programs "fixDC" and "fixCD"<br />
These programs are a combination of the charge and discharge programs.<br />
…DC means that the battery is first discharged, then recharged; …CD means that it is first charged,<br />
then discharged. It is possible to carry out these combination programs repeatedly in sequence: when<br />
you select a combination program, the charger asks whether you wish to select up to five DC or CD<br />
cycles.<br />
If you set five cycles (="...XDC"), the <strong>nextGeneration</strong><strong>II</strong> will also interrupt the combi maintenance program<br />
if it detects that the charge quantity removed from the pack is less than in the previous cycle.<br />
10.5 Hints for the use with external balancers / equalizers<br />
The “full” indication with Lithium or Lead-acid batteries applies when the charge current has reduced to a<br />
fraction of the selected value. This value is set to about 100 mA - even if the calculated value for “full”<br />
should be below that figure. This ensures that the balancer’s own current drain, which is drawn from the<br />
battery being balanced, does not prevent the charger indicating “battery full”.<br />
Note: When a battery of low capacity is fully charged, it should always be disconnected from the balancer<br />
(and from the charger) once the charger has cut off the charge current. This will avoid the balancer’s<br />
own current drain discharging the pack.<br />
<strong>nextGeneration</strong> <strong>II</strong> Firmware version V 1.00 and higher<br />
Operating<br />
instructions<br />
Issue 03.10, page<br />
• When the first battery already charges with 70% of the selected value and the second battery is<br />
connected, then even 30% of the selected charge power is granted for the second battery.<br />
• When the first battery already charges with less than 50% of the chosen value and the second<br />
battery is connected, then the max. charging power is shared equally (50%) to both charging<br />
outputs.<br />
Hint: Because of the fact that both parameters (in 16.4.3 and 16.4.4) results in the same the<br />
<strong>nextGeneration</strong><strong>II</strong> will work with those which leads to the lowest input current draw.<br />
Caution: set the charge power so that the permissible continuous current of the mains power<br />
supply is not exceeded.<br />
(Note: if you are using one of our recommended mains power supplies listed in chapter<br />
16.4.2 there is no need to reduce the power).<br />
In any case it counts that the stated maximum current of the mains power supply must be<br />
higher or equal to the actual current drain of the <strong>nextGeneration</strong><strong>II</strong>.<br />
For this reason the input current draw display is very helpful for establishing the primary current<br />
drain (press 2 times to switch into the „State Info nextGen.“ screen.<br />
Safe operation of the <strong>nextGeneration</strong><strong>II</strong> from an AC/DC Power Supply may be effected by further<br />
factors like ripple-voltage, continous power performance, compatibility with the frequency of the<br />
voltage converter, adequately sized capacitors (an area where laboratory power supplies<br />
sometimes show deficiencies) etc.<br />
It is the responsibility of the operator to check the reliable function of the combination power supply<br />
and charger. We can not be held liable for problems and damages resulting from unsuitable<br />
combinations<br />
16.5 Programm after PowerOnReset<br />
When the charger is connected to a power source it starts with the last used program.<br />
16.6 Fan output (only with optional „nextConn-<strong>II</strong>“ module)<br />
The configuration menu for the fan output „fan :“ is located in the parameter set 1 screen for the<br />
charger „ParameterSet 1 nextGen“ (press 1 time).<br />
You can chose between „ON“ (= external fan switched on) or „OFF“.<br />
The fan (not included in the kit of the nextConn module) can be used to cool hot batteries.<br />
The fan output switches the car battery voltage with a load of up to 2 amps (The maximum current<br />
draw of the blinking output plus the fan output is 3 amps together).<br />
Hint: The internal fan can not be influenced by this parameter but it is temperature controlled by the<br />
internal temperature of the <strong>nextGeneration</strong><strong>II</strong>.<br />
16.7 Blinking light output (only with optional „nextConn-<strong>II</strong>“ module)<br />
The configuration menu for the blinking light output „light:“ is located in the parameter set 1<br />
screen for the charger „ParameterSet 1 nextGen“ (press 1 time).<br />
You can chose between „continON“ = light is continous on, „blinking“ = blinking light, oder „OFF“.<br />
The light (not included in the kit of the nextConn module) can be used to signal the driver or the pilot<br />
in far distance that the battery is fully charged or empty.<br />
The blinking light output switches the car battery voltage with a load of up to 2 amps (The maximum<br />
current draw of the blinking output plus the fan output is 3 amps together).<br />
The signal output (and the buzzer) can be switched off by pressing the key.<br />
NOTE: „OFF“ disables also the blue LEDs inside the next-<strong>14</strong>-<strong>350</strong>, all other selections allow that the<br />
blue LEDs will behave as described on page 2.<br />
16.8 external Temperature sensor (only with optional „nextConn-<strong>II</strong>“ module)<br />
A detailled description is given in chapter <strong>14</strong>.1.<br />
29


