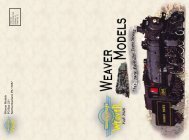
NKP Hudson Owner's Manual.cdr - Weaver Models
NKP Hudson Owner's Manual.cdr - Weaver Models
NKP Hudson Owner's Manual.cdr - Weaver Models
- No tags were found...

Create successful ePaper yourself
Turn your PDF publications into a flip-book with our unique Google optimized e-Paper software.
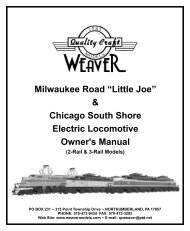
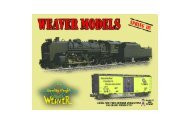
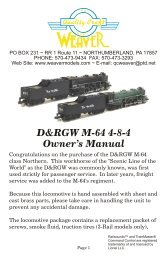
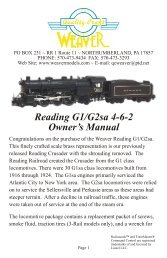
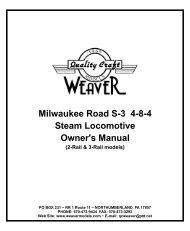
Nickel Plate Road L1a & L1b 4-6-4Steam Locomotive<strong>Owner's</strong> <strong>Manual</strong>(2-Rail & 3-Rail <strong>Models</strong>)PO BOX 231 ~ 315 POINT TOWNSHIP DRIVE ~ NORTHUMBERLAND, PA 17857PHONE: 570-473-9434 FAX: 570-473-3293Web Site: www.weavermodels.com ~ E-mail: customerservice@weavermodels.com
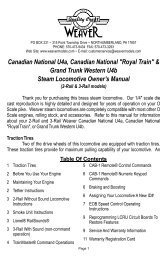
Table Of Contents1 Traction Tires 3 CAB-1 Remote Controller® Commands1 Before You Use Your Engine 4 CAB-1 Remote Controller® Numeric Keypad Commands1 Maintaining Your Engine 4 Turning Your Locomotive's Performance Momentum1 Operating Instructions For The TAS Fan Driven Smoke Unit 4 Braking and Boosting2 Adding Smoke Fluid To Your Smoke Unit 4 Stall2 Smoke Unit Operation 4 Assigning Your Locomotive A New ID#2 3-Rail Without Sound (non command mode) 5 Reprogramming LCRU Circuit Boards To Restore Features2 Lionel® RailSounds 5 Service and Warranty Information2 3-Rail With Sound (non command mode) 6 Warranty Registration Card3 TrainMaster® Command OperationsThank you for purchasing this <strong>Weaver</strong> Nickel Plate Road 4-6-4 steam locomotive. Our 1/4" scale brass reproduction is highly detailedand designed for years of operation on your O Gauge or O Scale pike. <strong>Weaver</strong> steam locomotives are completely compatible with most other OGauge and O Scale engines, rolling stock, and accessories. Refer to this manual for information about your 2-Rail and 3-Rail <strong>Weaver</strong> Nickel PlateRoad 4-6-4 <strong>Hudson</strong>.Traction TiresTwo of the drive wheels of this locomotive are equipped with traction tires. These traction tires provide for maximum pulling capability ofyour locomotive. An extra set of traction tires are included with your engine (3-Rail models only).Before You Use Your Engine:This 4-6-4 brass steam locomotive is tested and greased before leaving the factory and is ready-to-run on your layout. However, it isrecommended that all moving parts on this engine are lubricated lightly upon the first initial use and after a heavy or extended period of use, in orderto enhance performance. For specific lubrication points please refer to the diagram in Figure 1.Maintaining Your Engine:As with all our <strong>Weaver</strong> steam engines, this locomotive is designed so that very little maintenance is required from the owner. It isrecommended that all moving parts (side rod linkages and axles) be oiled after 25 hours of operation. On heavily used engines, bearing grease (or asimilar lubricant) should be added to the gear box, located between the blind drivers on the drive train. To add grease, remove the two small Phillipsscrews on the inspection cover and insert the grease using a screw driver. For specific greasing points, please refer to the diagram in Figure 2 onpage 2. Reassemble and run the engine as normal.Operating Instructions For The TAS Fan Driven Smoke UnitYour locomotive is equipped with the most state-of-the-art smoke unit available today. The TAS fan driven smoke unit is equipped with anauto shut off circuit that protects the smoke units longevity by constantly monitoring the temperature of the heating element. Even if you run yoursmoke unit without smoke fluid the auto shut off circuit will prevent damage from occurring to the unit. This system ensures years of enjoyment withno maintenance.Figure 1Lubrication PointsLubrication PointsPage 1
The e-unit in your locomotive alternates between three states: forward, neutral, and reverse. You may deactivate the operation of the e-unit by moving the "Full - Signal" switch to the "Signal" position. This will put your locomotive in a Forward lock out operating state. This will allowyour engine to only run in the Forward position.TrainMaster® Command OperationsLionel® TrainMaster® Command is the advanced model railroad control system from Lionel. Your steam locomotive is equipped with theLionel® Command reverse unit and an LCRX for digital RailSounds control. TrainMaster® Command gives you the power to operate multipleCommand equipped locomotives on the same track, at the same time. To operate in Command mode, you need a Command Base and a CAB-1Remote Controller®. These can be purchased from your train retailer.Place your engine on the track. Make sure track power is OFF before placing the engine on the track. Make sure your Lionel® CommandBase is ON and its communications wire is connected to the COMMON post on your transformer or the U on any of your installed Powermaster®.Once positioned on the track, increase track voltage to FULL (on Powermaster®, slide the CMD/CONV switch to CMD).Address your steam engine using the CAB-1 Remote Controller®. Press ENG and 1 on the numeric keypad of your CAB-1 RemoteControler®. This command is sent by the CAB-1 Remote Controller® to the Command Base, which then translates your command into digital code.That code is sent around your railroad's outside rails in the form of a digital "halo". All command equipped engines listen to this digitalcommunication, but they do not respond until they hear their individual ID number - in this case, 1. The digital language of TrainMaster Command -and not track power - controls the actions of command equipped engines.All command equipped engines come factory programmed with an ID# of 1. See page 5 for information on changing this ID#.Throttle up or press any command button on the CAB-1 Remote Controller®. Your engine will respond to every command. Yourcommand equipped engine comes factory programmed with an ID# of 1. To get your locomotive in action, set Powermaster® to CMD or set allpower supplies on full. Press ENG and 1 on CAB-1 Remote Controller®. Turn the throttle or press any command button; your engine is ready forcommand operations.CAB-1 Remote Controller® CommandsPress AUX1 to activate numerickeypadPress WSTL/HRN to activatewhistle. Release it to discontinue.Press AUX2 to turn headlight onand offPress BELL once to activate thebell, again to discontinue.Couple F/R buttons will releasecoupler and produce couplerrelease sounds.Press DIR - the locomotivedecelerates to a complete stop;turn the throttle up, and thelocomotive will accelerate in thenew, opposite direction. There isno neutral state.Press HALT to shut down allPowermaster® electrical outletson your railroad. Stops allCommand equipped engines inoperation.Turn the THROTTLE to the rightto accelerate, left to decelerate.Press and hold BOOST for extrapower. Release BOOST andreturn to the engine's previousspeed.Press and hold BRAKE to slowdown or stop. Release BRAKEand return to previous speed.Page 3
CAB-1 Remote Controller® Numeric Keypad CommandsWhen you press the AUX1 on CAB-1 Remote Controller®, you turn the numeric keypad into 10 command buttons. The keypad lets youcontrol extra command features (until you press any top row button).0 Stops and resets the steam locomotive to forward. Whistle blows. Headlight flickers.1 Raises the volume of RailSounds.2 CrewTalk is the sound of inaudible walkie talkie communication.3 Starts up RailSounds. Startup sequence commences. Steam blowoff sound.4 Lowers the volume of RailSounds.5 Activates the RailSounds shutdown sequence. Just like the real thing, your steam locomotive must be at idle for shutdown to occur. Steamshutdown commences. Remember, the whistle and bell will not sound until you restart RailSounds.6 Steam release sound.7 TowerCom is an audible announcement from the tower.8 Turns the smoke unit off.9 Turns the smoke unit on.Turning Your Locomotive's Performance MomentumTrainMaster® Command's momentum feature simulates the labored performance of a locomotive pulling a heavy load. Press L,M, or H(located under the CAB-1 Remote Controller's® removable panel) for light, medium, or heavy momentum. The LCRU2 remembers the setting untilyou change it. For delayed response, use H. For quick response use L.Braking and BoostingThere's more to starting and stopping than just turning the CAB-1 Remote Controller® throttle. Use the BOOST and BRAKE commandbuttons - they give you incremental control of speed and are the superior way to handle grades, gradual stops-and-starts and more. Plus, usingBRAKE in the Command environment gives you a bonus RailSounds effect - the realistic sound of squealing brakes.StallMake your locomotive feel more responsive by setting a stall voltage. Get your locomotive moving, then press SET; the engine will stop.Turn the throttle clockwise to get the locomotive moving, then decrease the speed until the locomotive just stops. Then press SET again; the LCRUremembers the stall setting until you change it. To clear stall, press SET twice, holding it for one second each time.Assigning Your Locomotive A New ID#As your fleet of command equipped engines grows, new engines require a different ID#. Choose from any between 2 and 99.Remember, all command equipped engines ship as ID#1.We recommend that you choose an easy to remember ID# for your engine. Some possibilities are part of the engine road number, yourage, or any two digit number that is not used by another engine. If you like, write the number on a small piece of tape and put this on the bottom of theengine chassis to aid in remembering.Step 1: Turn the Command Base ON and set the engine on the track.Step 2: Power up, then slide the PROGRAM / RUN switch to PROGRAM.Step 3: Turn track power on (Powermaster®).Step 4: Press BOOST.Step 5: Press ENG and new ID#.Step 6: Press SET located under the removable cover.Step 7: See the headlight flash and hear the horn blow; that's your signal that programming has been accepted.Step 8: Set the PROGRAM / RUN switch to RUN.Your engine remembers its ID# forever, change it any time with these steps.Page 4
Reprogramming LCRU Circuit Boards To Restore FeaturesDue to the inevitable derailments, static and the nature of electricity, it is possible that your LCRU could someday lose its setup program.The symptoms of this condition would be unresponsiveness in command mode. This can easily be remedied by "reprogramming" your LCRU usingthe following steps.Step 1: Move switch on locomotive from RUN to PROGRAM.Step 2: Turn on Command Base.Step 3: Place locomotive on track, then turn on power to track.Step 4: Press ENG, then input locomotive ID#. Press SET.Step 5: Press ENG, then the ID#, AUX1 then press 43.Step 6: Turn off power to track, wait ten seconds.Step 7: Remove locomotive from track, move switch from PROGRAM to RUN.Step 8: Place locomotive back on track, turn power on to the track.Step 9: Press ENG and ID#, then operate normally.Service And Warranty InformationThis item is warranted for one year from the date of purchase. We will repair or replace (at our option) the defective part without charge forparts or labor, if the item is returned in the manner listed below within one year of the original date of purchase. This warranty does not cover itemsthat have been abused or damaged by careless handling. Transportation costs incurred by the customer are not covered under this warranty.For warranty repair, DO NOT return your product to the place of purchase. Instead, follow the instructions below to obtain warrantyservice as our dealer network is not prepared to service the product under the terms of this warranty.1. First: WRITE, CALL or FAX <strong>Weaver</strong> <strong>Models</strong>, PO Box 231, 315 Point Township Drive, Northumberland, PA 17857, 570-473-9434 (FAX#570-473-3293), requesting a Return Authorization Number and stating when the unit was purchased and a description of the problem.2. CAUTION: Make sure the product is packed in its original factory packaging including its foam and plastic wrapping material so as toprevent damage during shipping. The shipment must be prepaid and we recommend that it be insured. A cover letter, including you name,address, daytime phone number and a full description of the problem MUST be included to facilitate the repairs. Please include thedescription regardless of whether you discussed the problem with one of our service technicians when contacting <strong>Weaver</strong> <strong>Models</strong>.3. Please make sure you have followed the instructions carefully before returning any merchandise for service.Lionel®, RailSounds, CAB-1 Remote Controller®, Powermaster®, TowerCom, CrewTalk, and TrainMaster® Command Control are registered trademarks ofand licensed by Lionel LLC.Page 5