Murano Wardrobe V2 - Mamas & Papas
Murano Wardrobe V2 - Mamas & Papas
Murano Wardrobe V2 - Mamas & Papas
- No tags were found...

Create successful ePaper yourself
Turn your PDF publications into a flip-book with our unique Google optimized e-Paper software.
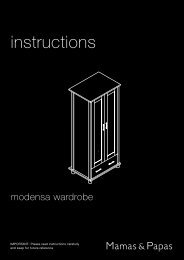
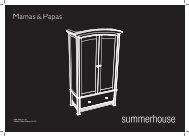
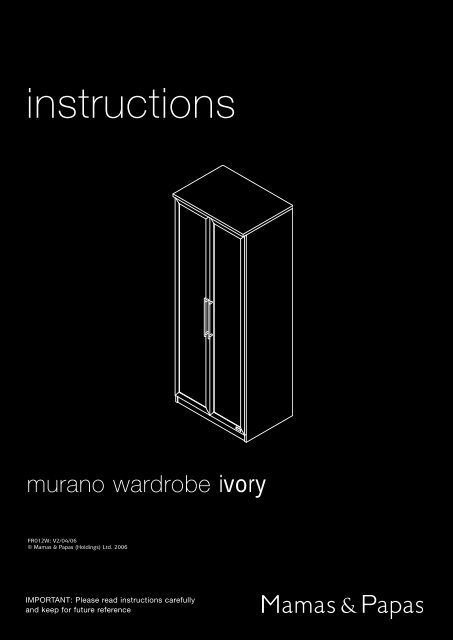
<strong>Murano</strong> <strong>Wardrobe</strong> <strong>V2</strong> 5/4/06 15:22 Page 1instructionsmurano wardrobe ivoryFR012W: <strong>V2</strong>/04/06© <strong>Mamas</strong> & <strong>Papas</strong> (Holdings) Ltd. 2006IMPORTANT: Please read instructions carefullyand keep for future reference
<strong>Murano</strong> <strong>Wardrobe</strong> <strong>V2</strong> 5/4/06 15:22 Page 2MURANO WARDROBETHESE INSTRUCTIONS ARE IMPORTANT. PLEASE READ THEM CAREFULLY AND RETAIN FOR FUTURE REFERENCE.Before assembling your wardrobe...Unpack all components / fittings and identify them against the components and fittings lists.Do not discard any packaging until you are certain you have all the correct panels and fittings.If any items are damaged or missing, please contact your retailer or <strong>Mamas</strong> & <strong>Papas</strong> on 01484 438222.Allow plenty of time and space when beginning the construction of your wardrobe.7COMPONENTS561692843310Item Name Part no. Qty1 Left side panel 360200000201 12 Right side panel 360200000202 13 Bottom rails 360200000203 24 Base panel 360200000204 15 Top panel 360200000205 1Item Name Part no. Qty6 Back panels 360200000206 27 H-section 360200000207 18 Left door 360200000208 19 Right door 360200000209 110 Hanger rail 360200000210 1- 2 -
<strong>Murano</strong> <strong>Wardrobe</strong> <strong>V2</strong> 5/4/06 15:22 Page 3A x 6FITTINGSB x 2Hinge platesC x 4Hanger cupsD x 12Euro screwsE x 12Cam studsF x 12DowelsG x 1CamsH x 14Door plateI x 32ScrewsJ x 4NailsK x 6FeetL x 4Hinge armsM x 4Handle screwsN x 2Handle spacersO x 1HandleP x 1Wall strapQ x 1Wall strap screwWall strap washerFittings pack part no. 3602---00201TOOLSCross-head ScrewdriverTo fit: A, C, D, H, L & P.HammerTo be used for: E & J.- 3 -Flat-head ScrewdriverTo fit: F.
<strong>Murano</strong> <strong>Wardrobe</strong> <strong>V2</strong> 5/4/06 15:22 Page 42STEP 1Attach the six hingeplates (A) to the left (1)and right (2) side panelsusing a cross-headscrewdriver.1ASTEP 2Attach the two hangercups (B) to the sidepanels using the foureuro screws (C) and across-head screwdriver.CB- 4 -
<strong>Murano</strong> <strong>Wardrobe</strong> <strong>V2</strong> 5/4/06 15:22 Page 5STEP 3Screw four cam studs(D) into the bottoms ofthe side panels using across-head screwdriver.DSTEP 4Insert four dowels (E)into the two inner holesin the top edges of thetwo side panels.You may need to use alight hammer to gentlytap the dowels in.E- 5 -
<strong>Murano</strong> <strong>Wardrobe</strong> <strong>V2</strong> 5/4/06 15:22 Page 6FSTEP 5Insert four dowels (E)into the largest holes inthe ends of the twobottom rails (3).You may need to use alight hammer to gentlytap the dowels in fully.Insert four cams (F) intothe large holes in theinside faces of the tworails.Ensure that the arrowson the heads of thecams face the ends ofthe rails, see diagram.E333STEP 6Slot the two bottomrails (3) onto the leftside panel (1) as shownin the diagram.Tighten the cams in theinside faces of thebottom rails by insertinga flat-head screwdriverinto the slots in the topsof the cams. Turn thecams clockwise untilthey are tight.1- 6 -
<strong>Murano</strong> <strong>Wardrobe</strong> <strong>V2</strong> 5/4/06 15:22 Page 74STEP 7Insert four dowels (E)into the inner holes inthe sides of the basepanel (4).You may need to use alight hammer to gentlytap the dowels in fully.Insert four cams (F) intothe large holes in theunderside of the basepanel.Ensure that the arrowson the heads of thecams face theconnecting holes in thesides of the panel, seediagram.EF4STEP 8Slot the base panel (4)onto the left side panelas shown in the diagram.Tighten the cams in theunderside of the basepanel by inserting a flatbladedscrewdriver intothe slots in the tops ofthe cams. Turn the camsclockwise until they aretight.- 7 -
<strong>Murano</strong> <strong>Wardrobe</strong> <strong>V2</strong> 5/4/06 15:22 Page 8STEP 9Turn the carcass over sothat the back edge ofboth of the side panelsface upwards.The back edges of thepanels have a recess tofit the back panels, seediagram.Slot the right side panel(2) onto the base paneland the two bottomrails, see diagram.Tighten the cams in theunderside of the basepanel and the bottomrails by inserting a flatheadscrewdriver intothe slots in the tops ofthe cams. Turn the camsclockwise until they aretight.2Screw four cam studs(D) into the outer holesalong the edge of thetop panel (5) using across-head screwdriver,see diagram.5STEP 10Attach the door stop (G)to the front edge of thetop panel by aligning theslots in the back of theplate with the pilot holesin the front edge of thetop panel.Screw two screws (H)through the slots in thedoor stop and into thepilot holes in the toppanel using a cross-headscrewdriver.DGH- 8 -
<strong>Murano</strong> <strong>Wardrobe</strong> <strong>V2</strong> 5/4/06 15:22 Page 9STEP 11Insert four cams (F) intothe large holes in thetops of the side panels.Ensure that the arrowson the heads of thecams face the top of theside panels, seediagram.Slot the top panel (5)onto the two sidepanels, ensure that thegroove in the back edgeof the top panel isaligned with the recessin the side panels.Tighten the cams in thetops of the side panelsby inserting a flat-headscrewdriver into theslots in the tops of thecams. Turn the camsclockwise until they aretight.F5STEP 12Before fixing the backpanels to the wardrobeyou will need to checkthat it is square.To do this, measure fromthe bottom corner ofone side panel to the topcorner of the opposite(A to A), see diagram.Now measure theopposite diagonal (B toB), if the measurementsare unequal then thewardrobe is not square.To square the wardrobe,gently push the topcorner of the longestdiagonal towards theshortest top corner andre-measure, continueuntil equal (a 2-3mmdifference is acceptable).- 9 -
<strong>Murano</strong> <strong>Wardrobe</strong> <strong>V2</strong> 5/4/06 15:22 Page 10ISTEP 13Lower the back panels (6)into the recesses in theback edges of the sidepanels.Push the back panelsalong the recess and intothe groove in the toppanel.Fasten the back panelsinto position using threeof the nails (I) and a lighthammer, see diagram.66STEP 14Slot the inside edges ofthe side panels into thegrooves in the sides ofthe H-section (7).Push the H-section up tothe top panel.Fasten the sides andbottoms of the backpanels to the wardrobeusing the remainingnails.7- 10 -
<strong>Murano</strong> <strong>Wardrobe</strong> <strong>V2</strong> 5/4/06 15:22 Page 11JSTEP 15Slot the lugs on the fourfeet (J) into the holes inthe bottom edges of thetwo side panels.You may need to gentlytap the lugs on the feetin using a light hammer.Attach the hinge arms (K)to the left (8) and right(9) doors.8STEP 16Slot the hinge arms intothe holes in the edges ofthe doors and align theholes in the sides of thehinge arms with the pilotholes in the door frame.Screw two screws (H)through the holes in thehinge arms and into thepilot holes in the doorsusing a cross-headscrewdriver.9KH- 11 -
<strong>Murano</strong> <strong>Wardrobe</strong> <strong>V2</strong> 5/4/06 15:22 Page 12STEP 17Attach the left (8) andright (9) doors (the rightdoor has a metal badgeon the bottom of thedoor frame) to thewardrobe. Slide thehinge arms onto themounting plates so thatscrew ‘A’ on the hingeplate slots into the keyhole on all of the hingearms, see diagram.Tighten screw ‘A’ on allof the hinge plates.89STEP 18Adjusting the width ofthe gap between thedoors.Turn screw ‘B’ eitherclockwise or anticlockwiseuntil the gapbetween the doors isequal.You will need to loosenscrew ‘A’ before turningscrew ‘B’.Always ensure screw ‘A’is re-tightened beforeusing the wardrobe.- 12 -
<strong>Murano</strong> <strong>Wardrobe</strong> <strong>V2</strong> 5/4/06 15:22 Page 13Adjusting the height ofthe doors.STEP 19Loosen screws ‘C’ on allof the hinge plates.Lift or lower the dooruntil it lines up with thetop of the other doorand re-tighten both ofthe screws.STEP 20Slot the four handlescrews through the holesin the edges of the doorframes, see diagram.Slot the four handlespacers onto the threadedends of the screws withthe flat ends of thespacers against the doors.Align the threaded holesin the handles with theends of the screws.Tighten the screws intothe handles using a crossheadscrewdriver.NMLEnsure that the curvedend of the handle spacersare fitted around thehandles.- 13 -
<strong>Murano</strong> <strong>Wardrobe</strong> <strong>V2</strong> 5/4/06 15:22 Page 1410STEP 21Slot the hanger rail (10)into the hanger cups onthe inside of thewardrobe.STEP 22fix the wall strap (O) tothe wardrobe using thescrew and the washersupplied. Thread the wallstrap screw (P) througha washer (Q) and thenpush it through the endof the wall strap.Align the wall strapscrew with the pilot holein the back edge of thewardrobes top panel.Tighten the wall strapscrew into the pilot holeusing a cross-headscrewdriver.OPQDo not fix the wallstrap to any othercomponent.Secure the other end ofthe wall strap to thewall using theappropriate fittings.- 14 -
<strong>Murano</strong> <strong>Wardrobe</strong> <strong>V2</strong> 5/4/06 15:22 Page 15• Warning: Never leave your child unattended. The safety of your child is your responsibility.• Before use, ensure the wardrobe is on a stable, level surface.• Do not allow children to climb on the wardrobe.• Never use the wardrobe if any parts are broken or missing.• Never pivot or drag the wardrobe on its feet, the wardrobe must always be lifted by at least two people whenmoved.• Do not place the wardrobe in the vicinity of open fires or other sources of strong heat, such as electric or gasfires.• Always leave the wardrobe clean and dry. Wipe away any spillage straight away. The wardrobe can be cleanedwith a damp cloth. Never use abrasive, bleach or strong detergents.• Check regularly that all fittings and screws are correctly tightened and are not damaged.Wall Attachment StrapINSTRUCTIONS FOR SAFE USE & MAINTENANCE• THE WALL ATTACHMENT STRAP IS ONLY INTENDED TO BE USED WITH THE MAMAS & PAPASPRODUCT THAT IT IS SUPPLIED WITH.• Never attempt to modify or change the wall attachment strap in any way. Never use any other fittings forattaching the strap to your furniture than those supplied.• Never use the screw provided to attach the wall attachment strap to the wall.NO WALL ATTACHMENT FITTINGS ARE SUPPLIED. This is because the type of fittings required toattach the wall strap to the chosen wall is determined by the walls composition.If you are in any doubt about the correct type of fittings to use when attaching your wall strap, consulta professional before attempting to fix it to the wall.• The wall strap must not be used to replace any other fitting supplied with your piece of furniture.• Furniture falling over is generally due to the surface it is placed on. A warped floor or wall-to-wall carpetingwill enable the furniture to rock, so greatly increasing the potential for the furniture to fall. If the furniture isplaced on a flat level wood or tiled floor the risk is reduced, but we still recommend the wall strap is fitted.Due to constant updating and improvements, some components may occasionally differ slightly from the diagrams shown inthese instructions. Any spare components should be thrown away after you have fully constructed your product. We reservethe right to change the specifications of any piece of furniture without prior notice.AFTER SALES SERVICE: If you need assistance, spare parts or you are unhappy with any of thegoods please contact Customer Services on: 0870 8307700,or e-mail us at: customer.services@mamasandpapas.comVisit our website at www.mamasandpapas.com for the latest product information.ALL OUR PRODUCTS ARE MADE FROM THE FINEST QUALITY MATERIALSAND ARE MANUFACTURED UNDER THE STRICTEST QUALITY CONTROLSWe guarantee all our products or part thereof, for a period of six months from the date of delivery to theconsumer against faulty manufacture. This guarantee is not effective against damage caused as a resultof incorrect usage of the product or accidental damage. This in no way affects your statutory rights.GUARANTEETo validate this guarantee, fill in this coupon and return to: <strong>Mamas</strong> & <strong>Papas</strong>, Colne Bridge Rd, Huddersfield, HD5 0RHAlternatively, call our Guarantee Registration Line on: 0870 8307700 or visit our website: www.mamasandpapas.comTitle (Mr/Mrs/Miss/Ms) ................ First name ....................................................................... Surname ..............................................................Address ......................................................................................................................................................................................................................................................................................................................................................... Postcode ..............................................................Daytime Tel. No. .................................................................. Email....................................................................................................................Baby’s due date/date of birth ............................................................................................................................................................................Product purchased <strong>Murano</strong> <strong>Wardrobe</strong> Ivory .............................. Purchase date................................ Price ..............................................................If you would like to receive further information regarding new products, promotions and special offers from <strong>Mamas</strong> & <strong>Papas</strong> please tick the boxes indicating yourpreferred method(s) of contact. Post ; Email .If you would like to receive information from carefully selected 3rd parties please tick the boxes indicating your preferred method(s) of contact. Post ; Email .- 15 -
<strong>Murano</strong> <strong>Wardrobe</strong> <strong>V2</strong> 5/4/06 15:22 Page 16www.mamasandpapas.com<strong>Mamas</strong> & <strong>Papas</strong>Colne Bridge RoadHuddersfield, HD5 0RHcustomer services helpline: 0870 8307700customer services email: customer.services@mamasandpapas.com