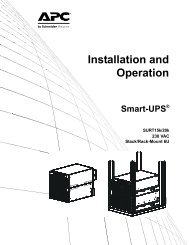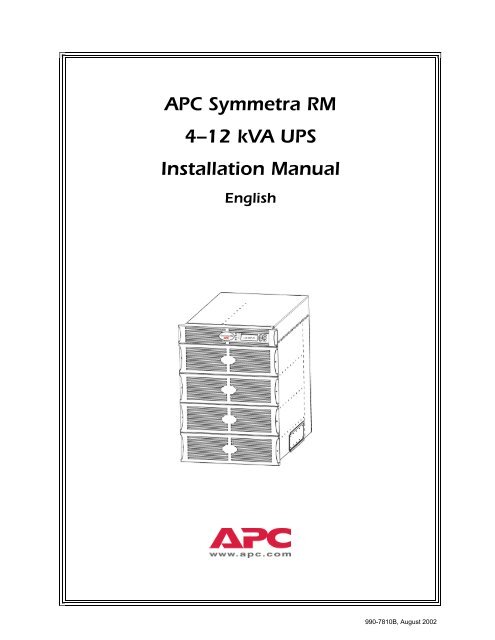
APC Symmetra RM 4â12 kVA UPS Installation Manual - APC Media
APC Symmetra RM 4â12 kVA UPS Installation Manual - APC Media
APC Symmetra RM 4â12 kVA UPS Installation Manual - APC Media

You also want an ePaper? Increase the reach of your titles
YUMPU automatically turns print PDFs into web optimized ePapers that Google loves.
<strong>APC</strong> <strong>Symmetra</strong> <strong>RM</strong>4–12 <strong>kVA</strong> <strong>UPS</strong><strong>Installation</strong> <strong>Manual</strong>English990-7810B, August 2002
TABLE OF CONTENTSChapter 1: Safety and General Information........................................................ 1Save These Instructions ----------------------------------------------------------------------------------------------------------------------1Conventions Used in this <strong>Manual</strong>-----------------------------------------------------------------------------------------------------------1General Equipment Safety -------------------------------------------------------------------------------------------------------------------1Handling Safety ---------------------------------------------------------------------------------------------------------------------------------1Deenergizing Safety ---------------------------------------------------------------------------------------------------------------------------2Electrical Safety ---------------------------------------------------------------------------------------------------------------------------------2Battery Safety------------------------------------------------------------------------------------------------------------------------------------2Battery Replacements Kits and Battery Recycling -------------------------------------------------------------------------------------3PowerStruXure Type A Systems -----------------------------------------------------------------------------------------------------------3Radio Frequency Interference---------------------------------------------------------------------------------------------------------------3North America and 208 V Countries----------------------------------------------------------------------------------------------------3Europe and 230 V Countries -------------------------------------------------------------------------------------------------------------3Japan and 200 V Countries---------------------------------------------------------------------------------------------------------------3Regulatory Agency Approvals ---------------------------------------------------------------------------------------------------------------4Declaration of Conformity (Europe and 230 V Countries) ----------------------------------------------------------------------------4Life Support Policy -----------------------------------------------------------------------------------------------------------------------------5Limited Warranty--------------------------------------------------------------------------------------------------------------------------------5Copyright and Trademark Information-----------------------------------------------------------------------------------------------------5<strong>APC</strong> Contact Numbers and Support -------------------------------------------------------------------------------------------------------5Chapter 2: Basics .............................................................................................. 7About Your <strong>UPS</strong> --------------------------------------------------------------------------------------------------------------------------------7Product Overview-------------------------------------------------------------------------------------------------------------------------------9Front View Component Identification---------------------------------------------------------------------------------------------------9Rear View Component Identification -------------------------------------------------------------------------------------------------10System Block Diagram-------------------------------------------------------------------------------------------------------------------11Chapter 3: Site Preparation ............................................................................. 13Reminder Checklist --------------------------------------------------------------------------------------------------------------------------13Purchase of System ----------------------------------------------------------------------------------------------------------------------13Site Preparation----------------------------------------------------------------------------------------------------------------------------13Electrical Preparation---------------------------------------------------------------------------------------------------------------------13Shipping & Receiving ------------------------------------------------------------------------------------------------------------------------14Short-Term Battery Module Storage Requirements ---------------------------------------------------------------------------------14<strong>Installation</strong> Requirements-------------------------------------------------------------------------------------------------------------------15Electrical Requirements---------------------------------------------------------------------------------------------------------------------16
TABLE OF CONTENTSChapter 4: <strong>Installation</strong>..................................................................................... 17Unpacking --------------------------------------------------------------------------------------------------------------------------------------17Inspection -----------------------------------------------------------------------------------------------------------------------------------17Contents -------------------------------------------------------------------------------------------------------------------------------------17Installing the <strong>UPS</strong>-----------------------------------------------------------------------------------------------------------------------------17Moving the <strong>UPS</strong> to the <strong>Installation</strong> Site ----------------------------------------------------------------------------------------------17Installing in a Four Post Rack ----------------------------------------------------------------------------------------------------------19Wiring the <strong>UPS</strong>-----------------------------------------------------------------------------------------------------------------------------22Completing the <strong>Installation</strong>--------------------------------------------------------------------------------------------------------------25Connecting Load Equipment to the <strong>UPS</strong> --------------------------------------------------------------------------------------------27Final <strong>Installation</strong> Checklist --------------------------------------------------------------------------------------------------------------28Post <strong>Installation</strong> Procedures ---------------------------------------------------------------------------------------------------------------29Replacing Battery Modules -------------------------------------------------------------------------------------------------------------29Replacing Power Modules --------------------------------------------------------------------------------------------------------------29Replacing Intelligence Modules--------------------------------------------------------------------------------------------------------30Chapter 5: Specifications ................................................................................. 31Technical Reference -------------------------------------------------------------------------------------------------------------------------31
CHAPTER 1: SAFETY AND GENERAL INFO<strong>RM</strong>ATIONSave These InstructionsThis Safety section contains important instructions that must be followed during installation and maintenance of <strong>APC</strong>equipment.Conventions Used in this <strong>Manual</strong>The following symbols are used throughout this manual. Carefully read all information boxes and abide by theinstructions.The WARNING sign denotes a serious hazard. It calls attention to a procedure, practice,condition, or the like, which, if not correctly performed or adhered to, could result in injuryto personnel.The CAUTION sign denotes a hazard. It calls attention to an operating procedure, practice, orthe like, which, if not correctly performed or adhered to, could result in damage to or destructionof all or part of the product.The NOTE sign denotes important information. It calls attention to a procedure, practice,condition, or the like, which is essential to highlight.General Equipment Safety• Connection to the branch circuit (mains) must be performed by a licensed electrician.• <strong>Installation</strong> and removal of the power, battery, intelligence modules, and interface accessoriesmust be performed by service personnel.Operation of the equipment can be performed by any individual with no previous technicalexperience.Handling SafetyBe careful. Do not lift heavy loads without assistance.120 lb)This equipment is intended for installation in a temperature-controlled indoor area free ofconductive contaminants. Refer to Specifications at the <strong>APC</strong> web site for the actual temperaturerange.1
CHAPTER 1: SAFETY AND GENERAL INFO<strong>RM</strong>ATIONDeenergizing SafetyThe <strong>UPS</strong> contains internal batteries and may present a shock hazard even when disconnectedfrom the branch circuit (mains). Before installing or servicing the equipment, ensure that thesystem enable switch and input circuit breaker are set to stand-by (OFF), that internal batterymodules are removed, that external extended run batteries are disconnected and the branchcircuit (mains) is disconnected.Electrical Safety• The protective earth conductor for the <strong>UPS</strong> carries the leakage current from the load devices(computer equipment). Therefore, the size of the conductor must be at least as large as thewire required by IEC 950. An insulated grounding conductor that is identical in size, insulationmaterial, and thickness to the grounded and ungrounded branch-circuit supply conductors,except that it is green with or without a yellow stripe is to be installed as part of the branchcircuit that supplies the <strong>UPS</strong>.• The grounding conductor described above is to be grounded to earth at the serviceequipment, or if supplied by a separately derived system, at the supply transformer or motorgeneratorset.• The attachment-plug receptacles near the unit or subsystem are all to be of a grounding type,and the grounding conductors serving these receptacles are to be connected to earth groundat the service equipment.Battery Safety• Each battery module is a 120 V, 7.2 Ah battery pack. There is a risk of energy hazard. Beforeinstalling or replacing battery nodules, remove jewelry such as wristwatches and rings. Highshort -circuit current through conductive materials could cause severe burns.• Do not dispose of batteries in a fire. The batteries may explode.• Do not open or mutilate batteries. Released electrolyte is harmful to the skin and eyes, andmay be toxic.Do not install the battery modules in the frame until you are ready to power up the <strong>UPS</strong>. Failureto do so can result in a deep discharge of the batteries, which may cause permanent damage.• Batteries are recyclable. Used batteries can be sent to <strong>APC</strong> for recycling or delivered to arecycling facility.• Store the battery module(s) at a cool ambient temperature of < 25 °C.• Only use <strong>APC</strong> batteries when adding or replacing battery modules in the <strong>UPS</strong>.2
CHAPTER 1: SAFETY AND GENERAL INFO<strong>RM</strong>ATIONBattery Replacements Kits and Battery RecyclingSee your dealer or visit the <strong>APC</strong> web site at http://www.apc.com for information on battery replacement kits andbattery recycling. If returning used batteries to <strong>APC</strong> for recycling, ship used batteries in the battery replacementpacking material.PowerStruXure Type A SystemsIf your <strong>UPS</strong> is installed in a PowerStruXure Type A system, contact your <strong>APC</strong> representative or visithttp://www.apc.com/support for additional PowerStruXure Type A accessories and product documentation.Radio Frequency InterferenceNorth America and 208 V Countries• This equipment has been tested and found to comply with the limits for a Class A digitaldevice, pursuant to part 15 of the Federal Communications Commission (FCC) rules and theClass A limits for radio noise emissions from digital apparatus set out in the Radio InterferenceRegulations of the Canadian Department of Communications (CDC). These limits aredesigned to provide reasonable protection against harmful interference when the equipment isoperated in a commercial environment. This equipment generates, uses, and can radiate radiofrequency energy and, if not installed and used in accordance with the instruction manual,may cause harmful interference to radio communications. Operation of this equipment in aresidential area is likely to cause interference, in which case the user, at his own expense, willbe required to take whatever measures may be required to correct the interference. Changesor modifications to this unit not expressly approved by the party responsible for compliancecould void the user’s authority to operate the equipment.• Use shielded signal cables with this product to ensure compliance with Class A FCC limits.Europe and 230 V CountriesThis is a Class A product. In a domestic environment, this product may cause radio interference,in which case, the user may be required to take corrective actions.Japan and 200 V CountriesThis is a Class A product based on the standard of the Voluntary Control Council for Interferenceby Information Technology Equipment (VCCI). If this equipment is used in a domesticenvironment, radio disturbance may occur, in which case, the user may be required to takecorrective actions.3
CHAPTER 1: SAFETY AND GENERAL INFO<strong>RM</strong>ATIONRegulatory Agency ApprovalsCountriesNorth Americaand208V CountriesLISTED 42C2E96563LR63938Europeand230V Countries N 394Japanand200 V Countries LISTED 42C2E96563Declaration of Conformity (Europe and 230 V Countries)4
CHAPTER 1: SAFETY AND GENERAL INFO<strong>RM</strong>ATIONLife Support PolicyAs a general policy, American Power Conversion (<strong>APC</strong>) does not recommend the use of any of its products in lifesupport applications where failure or malfunction of the <strong>APC</strong> product can be reasonably expected to cause failure ofthe life support device or to significantly affect its safety or effectiveness. <strong>APC</strong> does not recommend the use of any ofits products in direct patient care. <strong>APC</strong> will not knowingly sell its products for use in such applications unless itreceives in writing assurances satisfactory to <strong>APC</strong> that (a) the risks of injury or damage have been minimized, (b) thecustomer assumes all such risks, and (c) the liability of American Power Conversion is adequately protected underthe circumstances.Examples of devices considered to be life support devices are neonatal oxygen analyzers, nerve stimulators (whetherused for anesthesia, pain relief, or other purposes), autotransfusion devices, blood pumps, defibrillators, arrhythmiadetectors and alarms, pacemakers, hemodialysis systems, peritoneal dialysis systems, neonatal ventilator incubators,ventilators for both adults and infants, anesthesia ventilators, infusion pumps, and any other device designated as“critical” by the U.S.F.D.A.Hospital grade wiring devices and reduced leakage currents that meet medical safety standards may be ordered asoptions on many <strong>APC</strong> <strong>UPS</strong> systems. <strong>APC</strong> does not claim that units with these modifications are certified or listed assuch by <strong>APC</strong> or any other organization, therefore these units do not meet the requirements for use in direct patientcare.Limited WarrantyAmerican Power Conversion (<strong>APC</strong>) warrants its products to be free from defects in materials and workmanship for aperiod of two years from the date of purchase, except in India where the period is one year for battery module(s). Itsobligation under this warranty is limited to repairing or replacing, at its own sole option, any such defective products.To obtain service under warranty you must obtain a Returned Material Authorization (<strong>RM</strong>A) number from customersupport (see Service in the SYMMETRA <strong>RM</strong> OPERATION MANUAL). Products must be returned with transportationcharges prepaid and must be accompanied by a brief description of the problem encountered and proof of date andplace of purchase. This warranty does not apply to equipment that has been damaged by accident, negligence, ormisapplication or has been altered or modified in any way. This warranty applies only to the original purchaser whomust have properly registered the product within 10 days of purchase.EXCEPT AS PROVIDED HEREIN, AMERICAN POWER CONVERSION MAKES NO WARRANTIES, EXPRESSEDOR IMPLIED, INCLUDING WARRANTIES OF MERCHANTABILITY AND FITNESS FOR A PARTICULARPURPOSE. Some states do not permit limitation or exclusion of implied warranties; therefore, the aforesaidlimitation(s) or exclusion(s) may not apply to the purchaser.EXCEPT AS PROVIDED ABOVE, IN NO EVENT WILL <strong>APC</strong> BE LIABLE FOR DIRECT, INDIRECT, SPECIAL,INCIDENTAL, OR CONSEQUENTIAL DAMAGES ARISING OUT OF THE USE OF THIS PRODUCT, EVEN IFADVISED OF THE POSSIBILITY OF SUCH DAMAGE. Specifically, <strong>APC</strong> is not liable for any costs, such as lostprofits or revenue, loss of equipment, loss of use of equipment, loss of software, loss of data, costs of substitutes,claims by third parties, or otherwise. This warranty gives you specific legal rights and you may have other rights thatvary from state to state.Copyright and Trademark InformationEntire contents copyright © 2002 by American Power Conversion Corporation. All rights reserved. Reproduction inwhole or in part without permission is prohibited.<strong>APC</strong> ® , <strong>Symmetra</strong> ® , Smart-Ups ® , NetShelter ® , PowerStruXure ® , SmartSlot ® and PowerChute ® are registeredtrademarks of American Power Conversion Corporation. All other trademarks are the property of their respectiveowners.<strong>APC</strong> Contact Numbers and SupportVisit the <strong>APC</strong> Web site at http://www.apc.com/support contact numbers and technical support.5
CHAPTER 1: SAFETY AND GENERAL INFO<strong>RM</strong>ATION6
CHAPTER 2: BASICSAbout Your <strong>UPS</strong>The <strong>Symmetra</strong> <strong>RM</strong> is a high-performance, uninterruptible power system (<strong>UPS</strong>) in a “power array” configuration.It is designed to power high availability servers and other sensitive electronic equipment. The <strong>UPS</strong> providesconditioned, reliable AC power to connected equipment, and provides protection from power blackouts,brownouts, swells, sags, surges, and interference.The <strong>UPS</strong> is modular in design and can be configured to deliver a maximum output of 12 <strong>kVA</strong> N+1 redundant or16-<strong>kVA</strong> non-redundant power.Table 1:System Configurations and Model NumbersNorth Americaand208/240V(Ø- Ø -G)Europeand 230V(Ø- N -G)Complete SystemEnd Item SKUAvailablePower <strong>kVA</strong>BatteryModulesPowerModulesSYP8K12<strong>RM</strong>T 8 2 2SYP12K12<strong>RM</strong>T 12 3 3SYP8K12<strong>RM</strong>T-P1 8 2 2SYP12K12<strong>RM</strong>T-P1SYP12K12<strong>RM</strong>T-P2PSXBR12KTPSXRX12KTNominalInputVoltageNominalOutputVoltage208/240 208/24012 3 3 208 120 and 208SYP8K12<strong>RM</strong>I 8 2 2SYP12K12<strong>RM</strong>IPSXBR12KI12 3 3 220/230/240 220/230/240PSXRX12KIJapanand 200 V(Ø- Ø -G)SYP8K12<strong>RM</strong>J 8 2 2SYP12K12<strong>RM</strong>J 12 3 3 200SYP8K12<strong>RM</strong>J-P1 8 2 2SYP12K12<strong>RM</strong>J-P1200 100 and 200SYP12K12<strong>RM</strong>J-P2PSXBX12KJ12 3 3PSXRX12KJTable 2:Replacement ModulesReplacementModulesModel NumberSYMIM3SYRIM3SYPM4KUSYBT3SYB3FRSYCCAP9606DescriptionMain Intelligence ModuleRedundant Intelligence Module4 <strong>kVA</strong> Power ModuleBattery ModuleFlame Retardant Battery ModuleCommunications CardWeb/SNMP Management Card7
CHAPTER 2: BASICSTable 3:Optional AccessoriesPowerDistributionOptionsExtended RunOptionsSmart SlotManagementOptionsModelNumberSYTF2SYTF2JSYTF3SYTF3JSYPD3SYPD4SYPD5Description208 Vac to 120 Vac, 5 <strong>kVA</strong>step-down transformer with(2) 15-amp circuits and(4) 5-20R T-slots200 Vac to 100 Vac, 3.5 <strong>kVA</strong>step-down transformer with(2) 15-amp circuits and(4) 5-20R T-slots208 Vac to 120 Vac, 5 <strong>kVA</strong>step-down transformer with(2) 20-amp circuits and(4) 5-20R T-slots200 Vac to 100 Vac, 3.5 <strong>kVA</strong>step-down transformer with(2) 20-amp circuits and(4) 5-20R T-slots(2) L6-20 and(1) L6-30 receptacles(8) IEC320-C13 and(2) IEC320-C19 receptacles(8) IEC320-C13 and(2) IEC320-C19 receptaclesNorthAmericaand208/240V(Ø- Ø -G)YesYesYesEuropeand230V(Ø- N -G)YesJapanand200 V(Ø- Ø -G)SYPD7 (3) L6-20 receptacles Yes YesSYPD8SYPD9AP7630AP7631SY<strong>RM</strong>XR4SY<strong>RM</strong>XR4ISY<strong>RM</strong>XR4JAP9608AP9612THAP9610AP9615(6) L6-20R and(3) L6-30R receptacles(2) hardwiring circuit breakers(4) IEC320-C19 receptacles(1) L6-30R receptacle and(4) output circuit breakers(4) IEC320 C19 receptaclesand (4) output circuit breakers<strong>UPS</strong> rackmount 4U extendedrun battery cabinet (holds up to4 battery modules)Out-of band management cardEnvironmental monitoring cardRelay I/O card5-port 10Base-T hubYesYesYesYesYesYesYesYesYesYesYesYesYesYesYes8
Product OverviewCHAPTER 2: BASICSFront View Component IdentificationPower Module(s) : Each module can provide upto 4 <strong>kVA</strong>/2.8 KW power. The <strong>UPS</strong> frame can supportup to four power modules.Main Intelligence Module : The Main IntelligenceModule (MIM) performs all monitoring, control, andcommunication functions for the <strong>UPS</strong>.Redundant Intelligence Module : TheRedundant Intelligence Module (RIM) providesbackup in the event of a MIM failure.Battery Module(s) : Each battery moduleprovides backup energy storage. The <strong>UPS</strong> framecan support up to four battery modules.Input Circuit Breaker : The input circuit breakerprotects the <strong>UPS</strong> and load equipment from extremeoverloads.Figure 1: <strong>UPS</strong> – Front ViewPowerView and Bezels RemovedMaintenance Bypass Switch : <strong>Manual</strong> control ofthe bypass function. When the maintenance bypassswitch is in the “ON” position, power is delivereddirectly from the branch circuit (mains) to the loadequipment.Rail Cleats : Two cleats (one on each side)engage with the rack mounting rails to secure the<strong>UPS</strong> in the rack.Mounting Flanges : Two mounting flanges areused to secure the <strong>UPS</strong> to the rack.PowerView : The user interface can beprogrammed to provide full control, monitoring, andconfiguration for the <strong>UPS</strong>.Front Bezels : Blank faceplates cover the powermodules, battery modules, and unoccupied bays inthe front of the <strong>UPS</strong>.Figure 2: <strong>UPS</strong> – Front and Side View9
CHAPTER 2: BASICSRear View Component IdentificationSystem Fan : The system fan provides cooling forframe components.Communications Card : Provides serial interface portfor remote management and communications to extendedrun battery cabinets.Accessory Ports : Two accessory ports are providedfor optional SmartSlot accessories. A Web/SNMPmanagement card for accessing data via a network ispreinstalled.Power Distribution Unit (PDU) : Power distributionpanels provide receptacles for connecting load equipment.Panel type is based on configuration.System Enable Switch : When in the “ON” position,the <strong>UPS</strong> powers up internally, but does not power the load.When in the “OFF” position, the system powers downinternally.Figure 3: <strong>UPS</strong>- Rear View(SYPD3 installed)Remote Emergency Power Off (REPO) Connection :Provides connection to an emergency power off switch,that shuts OFFpower to the <strong>UPS</strong> and prevents the unitfrom operating on-battery.Input Voltage Selection Switch : Set this switch tocorrespond to your input power.External Battery Cabinet Connector : Attach anexternal battery cabinet to the <strong>UPS</strong> using this connector.Wiring Access Panel : Provides access to wiringterminal blocks for hardwiring the input and (optional)output.Figure 4: <strong>UPS</strong>- Rear View(SYPD4 installed)10
CHAPTER 2: BASICSSystem Block DiagramAccessoryCardsDB9COMPortExternalBatteryFrameCOMCOM CardBatteryModule120 VDCBatteryMonitorBusMIMPowerModuleRIMPowerView DisplayBatteryModule120 VDCPowerModuleBatteryModule120 VDCBatteryModule120 VDCPowerModulePowerModuleExternal BatteryPowerAutomaticBypassAC in155 to 276 VACInput CircuitBreakerBackfeed Relay<strong>Manual</strong> Bypass11
CHAPTER 2: BASICS12
CHAPTER 3: SITE PREPARATIONReminder ChecklistPurchase of SystemHave you ...1. determined your load power and runtime requirements?2. purchased redundant power and battery module if desired?3. evaluated and selected a service plan?Refer to http://www.apc.com/products/symmetra_rm for answers to these andother questions.Site PreparationHave you ...1. determined where to install your <strong>UPS</strong> and ensured that enough rack space is available?2. verified that the floor can support the total weight of a fully loaded system?3. ensured that the site meets minimum environmental requirements, including HVAC?Answers to these and other installation questions are found in the following sections.Electrical PreparationHave you ...1. verified that the required input voltage is available?2. scheduled an electrician for connecting the branch circuit (mains) or to hardwire the system?3. determined all output-wiring configurations to be installed?4. provided a copy of this document to the electrician?Answers to these and other wiring questions are found in the following sections.13
CHAPTER 3: SITE PREPARATIONShipping & ReceivingThe <strong>UPS</strong> and modular components are shipped on one or more pallets, depending on the configuration. The frame isinstalled first and then modular components are installed within the frame.Weights andMeasurementsLengthInches (cm)WidthInches (cm)HeightInches (cm)Weightlbs (kg)UnpackagedChassis* 27.8 (70.6) 18.9 (48.0) 26.1 (66.3) 185.0 (84.1)Power module 23.4 (59.4) 10.0 (25.4) 5.2 (13.2) 29.0 (13.2)Battery module 23.5 (59.7) 6.6 (16.8) 5.2 (13.2) 64.0 (29.1)Intelligence modules 19.6 (49.8) 6.6 (16.8) 1.6 (4.1) 5.0 (2.3)PackagedChassis** 36.0 (91.4) 30.0 (76.2) 37.4 (95.0) 264.0 (120.0)Power module 30.8 (78.2) 12.3 (31.2) 17.0 (43.2) 35.0 (15.9)Battery module 30.8 (78.2) 12.3 (31.2) 17.0 (43.2) 70.0 (31.8)Intelligence modules 22.8 (57.9) 12.5 (31.8) 7.3 (18.5) 7.0 (3.2)* Overall length including bezel** Includes rail and accessory bezel kitShort-Term Battery Module Storage RequirementsDo not install battery modules until you are ready to power up the <strong>UPS</strong>. Batteries can bepermanently damaged if loaded prematurely.• Store the battery module(s) at a cool ambient temperature of < 25 °C.• Storage of batteries longer than six months without recharging may result in permanentdamage.14
CHAPTER 3: SITE PREPARATION<strong>Installation</strong> RequirementsWhen selecting a location for the <strong>UPS</strong>, consider the following:Physical RequirementsStandard <strong>Installation</strong> (4-post rack)• Standard 19 in. (46.5 cm) rack• At least 800 mm deep• 15U rack space• Recommended installation is in the bottom of the rack,due to its weight of up to 600 lbs (273 kg), dependingon the configuration.• Mounting rails and hardware providedFunctional Access• Front access for circuit breakers, maintenance bypass,PowerView, and module installation or replacement.• Rear access for system enable switch, power distributionand management communications.• Front to rear airflow.Air FlowDo not block front bezels and vents onrear or sides of the <strong>UPS</strong>.Environmental RequirementsInstall the <strong>UPS</strong> in a temperature controlled, clean, dry and protected indoor area that is free ofconductive contaminants.Temperature 0 – 40 degrees Celsius (32 – 104 degrees F)Relative HumidityElevation0 – 95% non-condensing0 – 3,000 m (0 – 10,000 ft above mean sea level)Thermal Dissipation<strong>UPS</strong> 12 <strong>kVA</strong> N+ 1(Full load)4246 BTUs typical – Batteries charged9664 BTUs typical – Batteries charging15
CHAPTER 3: SITE PREPARATIONElectrical RequirementsThe following provides guidance for planning the electrical installation. Check local and national codes. A qualifiedelectrician may be required.Input ConnectionMethodMaximumLoadVoltage(Vac)CurrentFull LoadConnectionHardwired 16 <strong>kVA</strong> 200, 208, 220,230, or 240100 A • External circuit breaker• #3 AWG (25 mm 2 )Output ConnectionMethodMaximumLoadVoltage(Vac)CurrentFull LoadConnectionHardwired 16 <strong>kVA</strong> 200, 208, 220,230, or 240Cord connected:North America, Japan, and other200/208/240 Vac countriesCord connected:Europe and other220/230/240 Vac Countries90 A • External circuit breakerAvailable receptacles:• (3) L6-30R• (6) L6-20RAvailable receptacles:• (8) IEC320-C13• (2) IEC320-C19• #3 AWG (25 mm 2 )If required, the output power can be disabled in anemergency by closing a switch connected to the REPO.Remote Emergency Power Off (REPO)Two connection methods are available:• Internally powered for use with non-poweredswitch circuits.• Externally powered for use with +24Vdc poweredswitch circuits.• The REPO circuit is considered aClass 2 (UL and CSA standards)and SELV (IEC standard) circuit.• Both Class 2 and SELV circuitsmust be isolated from all primarycircuitry. Do not connect any circuitto the REPO terminal block unlessit can be confirmed that the circuitis SELV or Class 2. If there is aquestion, use a contact closureswitch.• Use one of the following cable types toconnect the <strong>UPS</strong> to the REPO switch:CL2: Class 2 cable for general use.CL2P: Plenum cable for use in ducts,plenums, and other spaces used forenvironmental air.CL2R: Riser cable for use in a verticalrun in a shaft of from floor to floor.CLEX: Limited use cable for use indwellings and for use in raceways.• For installation in Canada: Use onlyCSA Certified, type ELC (extra-lowvoltage control cable).• Wiring by a qualified electrician isrequired.16
CHAPTER 4: INSTALLATIONUnpackingThe <strong>UPS</strong> and accompanying components is packaged in a robust shipping carton. Carefully remove the packagecontents. The <strong>UPS</strong> and modular components are shipped on one or more pallets, depending on the configuration.The packaging is recyclable; save it for reuse or dispose of it properly.InspectionInspect the equipment upon receipt. <strong>APC</strong> has designed robust packaging for your product. However, accidentsand damage may occur during shipment. Notify the carrier and dealer if there is damage or missing equipment.ContentsCheck the packaging contents. Two shipping pallets are included:(1) Boxed <strong>UPS</strong>, shrink-wrapped on a pallet.• Transportation cart• Rail kit (containing the mounting rails and hardware),• Accessory bezel kit (containing two transportation cart brackets, display bezel with Powerview, four blankbezels, blank panel kit, and literature kit(2) Individually boxed and shrink-wrapped power and battery modules.The number of each depends on the configuration ordered.Installing the <strong>UPS</strong>This section provides information on the steps required to install and connect the <strong>UPS</strong>.The <strong>UPS</strong> is designed for use in a data center or other office environment. Refer to Chapter 3: Site Preparation toselect a location.Moving the <strong>UPS</strong> to the <strong>Installation</strong> Site• The <strong>UPS</strong> is heavy. Two people, one on each side, must support the <strong>UPS</strong> when it is beingtransported on the cart to the rack; installed, or removed from the rack.• A qualified electrician must install or remove battery modules.• Two people are required to lift, move, install, or remove battery and power modules. Thebattery and power modules are heavy.Do not install battery modules until you are ready to power up the <strong>UPS</strong>. Batteries can bepermanently damaged if loaded prematurely.• To comply with FAA regulations, the battery modules are shipped disconnected tothe <strong>UPS</strong>.• Mounting rails are included with the <strong>UPS</strong>. The rails support the unit in the rack.17
CHAPTER 4: INSTALLATION1. Remove the bolts securing the shippingbrackets to the pallet.Front2. Use the metal brackets (contained in themounting rail kit) to attach the cart tothe pallet.18
CHAPTER 4: INSTALLATION3. Transfer the <strong>UPS</strong> to the cart.Two people are required to lift,move, or install the <strong>UPS</strong> due toits weight.• Slide the <strong>UPS</strong> onto the cart.• Once the <strong>UPS</strong> is on the cart, pull thecart away from the pallet.• Remove the metal brackets from thecart and pallet.4. Move the <strong>UPS</strong> on its cart to the front of theequipment rack where it will be installed.Installing in a Four Post Rack1. Install the clip nuts in the rack as shown.Bottom U-Space19
CHAPTER 4: INSTALLATION2. Assemble the rails as shown.Left sidefacing frontRight sidefacing front3. Install the rails in the rack.Bottom U-Space20
CHAPTER 4: INSTALLATION4. Slide the <strong>UPS</strong> frame into the rack.Two people are required to lift,move, and install the <strong>UPS</strong> dueto its weight.5. Secure the <strong>UPS</strong> frame in the rack.21
CHAPTER 4: INSTALLATIONWiring the <strong>UPS</strong>• Verify that all branch circuit (mains) and low voltage (control) circuits arede-energized, and locked out before installing cables or making connections, whether inthe junction box or to the <strong>UPS</strong>.• Verify that the battery modules are not installed in the <strong>UPS</strong>.Do not install battery modules until you are ready to power up the <strong>UPS</strong>. Batteries can bepermanently damaged if loaded prematurely.• Check national and local codes before wiring.• Wiring by a qualified electrician is required.• Select wire size and connectors according to national and local codes.• Use flexible metal conduit to make maintenance and service easier.1. Set the input selection switch according to thetable shown below.Table 4:Power Cord RatingsSwitch SettingNorth Americaand 208/240V(Ø- Ø -G)Europe and230V(Ø- N –G)Japan and200 V(Ø- Ø -G)Ø Ø200/208/240VACØ N220/230/240VACØ Ø200/208/240VAC2. Make sure the input circuit breaker is in the OFFposition.22
CHAPTER 4: INSTALLATION3. Remove the input-wiring access panels .4. Remove the input and output (if applicable)knockouts .5. Ensure that the battery jumper is installed betweenthe terminal blocks . The battery jumper is usedto disconnect batteries during shipment, if thebattery modules are shipped installed.6. Attach input and if applicable, output conduitand feed the wire through the holes on the wiringpanel.7. Connect the wires to the terminal block .8. Inspect the connections.9. With the input circuit breaker still OFF,turn ON the branch circuit (mains) and measurethe L1-L2/N voltage.• If the value does not match your branchvoltage (200/208/220/230 or 240), checkyour wiring.• Turn OFF the branch circuit (mains) andcomplete the installation.10. Replace the access panels and fasten with thescrews.11. After the <strong>UPS</strong> is connected to the branch circuit(mains), install the three (3) “Isolate <strong>UPS</strong> beforeworking on this circuit” labels on the branch circuit(mains) disconnect panels.23
CHAPTER 4: INSTALLATION12. If required, connect the Remote Emergency Power Off (REPO) circuit. Check national and local codes before wiring.The output power can be disabled in an emergency byclosing a switch connected to the REPO. You must physicallyreset the system enable switch on the front of the <strong>UPS</strong> torestart the unit.Option 1: Internally Powered(with Jumper Cable)24Vdc• The REPO circuit is considered a Class 2(UL and CSA standards) and SELV(IEC standard) circuit.• Class 2 Circuit: Used in North America by ULand CSA. It is defined in the National ElectricalCode (NFPA 70, Article 725) and in theCanadian Electrical Code (C22.1, Section 16).• SELV Circuit: Used in Europe by IEC; acronymfor “safety extra low voltage.” A SELV circuit isisolated from primary circuitry through anisolating transformer and designed so that undernormal conditions, the voltage is limited to42.4 V peak or 60 V dc• Both Class 2 and SELV circuits must be isolatedfrom all primary circuitry. Do not connect anycircuit to the REPO terminal block unless itcan be confirmed that the circuit is SELV orClass 2. If there is a question, use a contactclosure switch.• Use one of the following cable types to connectthe <strong>UPS</strong> to the EPO switch:CL2: Class 2 cable for general use.CL2P: Plenum cable for use in ducts, plenums,and other spaces used for environmental air.CL2R: Riser cable for use in a vertical run in ashaft of from floor to floor.CLEX: Limited use cable for use in dwellingsand for use in raceways.For installation in Canada: Use only CSACertified, type ELC (extra-low voltagecontrol cable).• Wiring by a qualified electrician is required.• Connect using Option 1 if internally powered.• Connect using Option 2 if externally powered.Option 2: Externally Powered(no Jumper Cable)24
CHAPTER 4: INSTALLATIONCompleting the <strong>Installation</strong>1. Install all power modules. Power modulescan be installed in any slot on the left side ofthe <strong>UPS</strong>.• Slide the power module into the frame.• Slide the latch up and tighten thecaptive screw .Two people are required to lift,move, install, or remove batterymodules due to its weight.Do not install battery modulesuntil you are ready to power upthe <strong>UPS</strong>. Batteries can bepermanently damaged if loadedprematurely.2. Install all battery modules on the right side ofthe <strong>UPS</strong>.• Slide the battery module into the frameuntil the safety latch engages.• Slide the latch up and tighten thecaptive screw .25
CHAPTER 4: INSTALLATIONBlank cover plates must beinstalled over slots that do notcontain battery or power modules.3. Install the bezels .4. Install the PowerView Display .• Connect the cable to the MainIntelligence Module (MIM).• Align the tabs on the sides of the bezelwith the slots on the front of the <strong>UPS</strong>frame and gently snap it into place.5. Install and connect any Smart Slot accessoryin the appropriate accessory port .See the <strong>APC</strong> website at http://www.apc.comfor available accessories. Refer to theaccessory manual for installation and setupinformation.26
CHAPTER 4: INSTALLATIONConnecting Load Equipment to the <strong>UPS</strong>1. Plug all load equipment into PDU receptacles .2. Ensure that all PDU circuit breakers are turnedON. Refer to Table 2 on page 8 for additionalinformation.SYPD3 (200/208/240 V)SYPD4 (220/230/240 V)27
CHAPTER 4: INSTALLATIONFinal <strong>Installation</strong> ChecklistTurn OFF or disconnect the load equipment.Verify the Input Voltage Selection switch setting.Ensure that the system is securely mounted in rack.Ensure that all modules (power, battery, and intelligence) are fully installed.Check that the PowerView is connected to the Main Intelligence Module (MIM).Verify that branch circuit (mains) voltage is properly connected to the terminal block.Ensure that the input cord is connected.Turn ON the branch circuit (mains).Turn ON the Input Circuit Breaker and System Enable switches.The system will make some clicking sounds as it powers up, and may display fault messages on thePowerView display. Disregard the messages at this time. Press the ‘Esc’ button until the Monitoringscreen is displayed.Verify that the input voltage, Vin, matches your branch circuit (mains) voltage. The output voltage, Vout,should be zero.Switch the Maintenance Bypass ON.Disregard any LED indicators or messages on the PowerView. Press the ‘Esc’ button until the monitoringscreen is displayed.Verify that the input voltage, Vin, and the output voltage, Vout, match your branch circuit (mains) voltage.Test the REPO switch. The System Enable switch should physically move to the Standby position, andthe system should shut down completely.If all prior checks are completed, the installation is successful. Turn OFF the Input Circuit Breaker,System Enable, and Maintenance Bypass switches.28
CHAPTER 4: INSTALLATIONPost <strong>Installation</strong> ProceduresThis section contains information on how to replace battery, power, and intelligence modules.Replacing Battery ModulesTwo people are required to lift,move, install, or remove batterymodules due to its weight.1. Loosen the captive screw and slide thelatch down.2. Slide the battery module until the safetyinterlock engages.3. Depress the safety interlock and lift themodule out.4. Slide the new battery module into the frame.5. Slide the latch up and tighten the captivescrew .Replacing Power Modules1. Loosen the captive screw .2. While holding the door latch down, slidethe power module out of the frame.3. Slide the new power module into the frame.4. Slide the latch up and tighten the captivescrew .29
CHAPTER 4: INSTALLATIONReplacing Intelligence Modules1. Loosen captive retaining screws .2. While holding retaining latch, remove theMain Intelligence Module (MIM) orRedundant Intelligence Module (RIM) 3. Slide new MIM or RIM module into the frame.4. Tighten the captive retaining screws .30
CHAPTER 5: SPECIFICATIONSTechnical ReferenceThis section contains operation, input, output, physical, and compliance specifications for the <strong>UPS</strong>.Operational SpecificationsSystemTopologyPower Array with hot-swappable modules that are redundant, scalable,self-diagnosing, and fault-tolerantOn-line, double conversion with input power factor correctionPower Capacity 4 –16 <strong>kVA</strong> N, 12 <strong>kVA</strong> N+1Battery TypeBattery ChargerBattery Recharge TimeExtended Battery OptionHot-swappable, sealed, maintenance-free, lead acid, 3 – 5 years lifeAutomatic float, equalized high frequency PWM charger< 4 hours with standard supplied packs in the frameYesAmbient Temperature 0 – 40 °CRelative HumidityElevation< 95% non-condensing0 – 10,000 ft (3,000 mm)Input SpecificationsNominal Input VoltageInput Voltage RangeInput Frequency RangeInput Power FactorInput Current THDInput Inrush CurrentInput Generator Sizing200, 208, 220, 230, 240 Vac; 60 or 50 Hz, 1 phase, 3 wire155 to 276 Vac with batteries charging & supporting full load47 – 63 HzApproximately. 0.98 @ full loadApproximately. 6% @ full loadMaximum 150% of full load current1.5 x <strong>UPS</strong> capacity31
CHAPTER 5: SPECIFICATIONSOutput SpecificationsNominal Output VoltageOutput Power <strong>kVA</strong>Output Power kW200, 208, 220, 230, 240 Vac; 50 or 60 Hz, 1 phase, 3 wire4 – 16 <strong>kVA</strong>2.8 – 11.2 kWLoad Power Factor 0 – 1Output FrequencyOutput Voltage RegulationSteady StateOutput Voltage RegulationTransient/DynamicRecovery TimeTotal Harmonic Distortion60 or 50 Hz nominal< ± 3% for no load to full load, min ac input to max ac, min dc to max dc,linear or non-linear load or any combination< ± 5% for 100% load application or removal, linear or non-linear load< 10 milliseconds (i.e. half cycle to steady state)< 2% for linear loads; < 5% for non-linear loads.Load Crest Factor Supported < 5% for 100% non-linear loads up to 5:1Overload Capacity 130% for 10 minutes. With N+1EfficiencyApproximately 90% @ full load—linear or non-linear loadsPhysical SpecificationsAudible NoiseDimensions (H x W x D)Weight – Fully LoadedHeat Dissipation (Full Load)< 62 dBA26.1 in x 18.9 in x 27.8 in (with bezel)(66.3 cm x 48.0 cm x 70.6 cm)Approximately 557 lb (133.6 kg)4246 BTUs typical – Batteries charged9664 BTUs typical – Batteries chargingCompliance SpecificationsVDE-GS Certifications EN 60950, EN 50091-1-1, EN 50091-2, IEC 60950, IEC 146-4,VDE 0558 and VDE 0805UL Listing UL 1778CSA Certification CSA 107.132
<strong>APC</strong> <strong>Symmetra</strong> <strong>RM</strong>2–6 and 4–12 <strong>kVA</strong> <strong>UPS</strong>Operation <strong>Manual</strong>English990-7810B, August 2002
TABLE OF CONTENTS<strong>APC</strong> Contact Numbers and SupportVisit the <strong>APC</strong> Web site for contact numbers and support at http://www.apc.com/support.Battery Replacements Kits and Battery RecyclingSee your dealer or visit the <strong>APC</strong> web site at http://www.apc.com for information on battery replacement kits andbattery recycling. If returning used batteries to <strong>APC</strong> for recycling, ship used batteries in the battery replacementpacking material.Chapter 1: Overview ......................................................................................... 1PowerView................................................................................................................................................................. 1Navigation.............................................................................................................................................................. 1Functions............................................................................................................................................................... 2Chapter 2: Getting Started ................................................................................ 3Turning on the <strong>UPS</strong> ................................................................................................................................................... 3Powering Up the Load Equipment ............................................................................................................................. 4Powering Down the Load Equipment ........................................................................................................................ 5Bypass Operation ...................................................................................................................................................... 6Language Setting ...................................................................................................................................................... 7Chapter 3: Menu Commands ........................................................................... 11Command Reference .............................................................................................................................................. 11Accessories Menu ............................................................................................................................................... 11Control Menu ....................................................................................................................................................... 11Display Menu....................................................................................................................................................... 12Diagnostics Menu ................................................................................................................................................ 13Help Menu ........................................................................................................................................................... 13Logging Menu...................................................................................................................................................... 13Status Menu ........................................................................................................................................................ 14Setup Menu ......................................................................................................................................................... 15Chapter 4: Messages ....................................................................................... 17Troubleshooting....................................................................................................................................................... 17Chapter 5: Maintenance .................................................................................. 23Service .................................................................................................................................................................... 23
TABLE OF CONTENTS
CHAPTER 1: OVERVIEWPowerViewThis manual contains information on how tooperate the <strong>UPS</strong> using the PowerView userinterface.PowerView provides the ability to control,configure, and monitor the <strong>UPS</strong>.Figure 1: Typical PowerView DisplayNavigationEight (8) PowerView menus allow you to perform functions and commands.MenuDescriptionControlStatusSetupAccessoriesLoggingDisplayDiagnosticsHelpProvides power control commands, such as Load ON and Load OFF.Displays information regarding load, battery and power modules; voltage and electricalcurrent.Allows the user to customize the <strong>UPS</strong> functionality.Allows monitoring of installed <strong>APC</strong> accessories, if they are present.Provides ability to log system events.Allows configuration of PowerView settings.Provides detailed information useful in troubleshooting the system.Provides access to help information.1
CHAPTER 1: OVERVIEWFunctionsPowerView includes an alphanumericdisplay, navigation keys, statusindicators and an audible alarm.Figure 2: Display PanelThe tables below describe the statusindicators and how to navigate betweenPowerView menus.Status Indicator Color StatusLOAD ON Green The <strong>UPS</strong> is supplying power to the load. It may be operating in any one ofthe following modes: On-Line, On-Battery, Command-Bypass, orMaintenance.ON BATT Yellow A mains power failure has occurred, resulting in battery modules supplyingpower to the load equipment.BYPASS Yellow The <strong>UPS</strong> is removed from the circuit. Power to the load is being supplieddirectly by the mains power source.FAULT Red The <strong>UPS</strong> has detected an internal fault condition. An alarm message willdisplay on the PowerView.NavigationKeysName Sound FunctionUp Short beep Moves the selection arrow upward.Down Short beep Moves the selection arrow downward.ESC Escape Short beepExits the current screen and returns to the previousscreen.Programming mode only: when pressed until a shortbeep (up to one second) occurs, it exits theprogramming mode.? Help Short beep Opens context-sensitive help.Enter Short beep Opens the selected menu item or setting.ESC + ? +Escape +Help + EnterTwo shortbeepsOne long beepWhen pressed simultaneously for about 1 second,resets the PowerView interface.When pressed simultaneously for about 3 seconds,puts the interface in programming mode for installingnew language program files.2
CHAPTER 2: GETTING STARTEDTurning on the <strong>UPS</strong>Follow the steps below to turn ON the <strong>UPS</strong>.PowerView <strong>RM</strong>Rev: A EnglishPlease wait...Fuel 100% ▌▌▌▌▌▌▌▌▌Load 000% ---------220Vin 000Vout 60HzRuntime: 00hr 30min>Control LoggingStatus DisplaySetup DiagsAccessories Help• The factory defaultMonitoring screen is shown.Your actual screen mayvary.• After the PowerView hasbeen inactive for 10 minutes(user settable), the displaywill revert to the Monitoringscreen.1. Ensure that branch (mains) power is supplied tothe system.2. Ensure that the input circuit breaker on the <strong>UPS</strong>is turned ON.3. Turn the System Enable switch ON. TheStartup screen appears on the LCD.After initialization, the Monitoring Screen appears, providing a concise view of keyoperating parameters.FuelLoadVinVoutHzRuntimePercentage of battery capacityavailablePercentage of power capacity usedInput voltageOutput VoltageOutput FrequencyRuntime expected based onbattery capacity and connectedload4. At the Monitoring screen, press any navigationkey to open the Main Menu . This menucontains items that access eight submenus.5. To open a submenu, move the selection arrowto its item and press the ENTER key.3
CHAPTER 2: GETTING STARTEDPowering Up the Load EquipmentFollow the steps below to turn ON the output of the <strong>UPS</strong> and power the load equipment.>Control LoggingStatus DisplaySetup DiagsAccessories Help>Turn Load OnDo Self TestSimulate Power FailGraceful Reboot1. Use ‘ESC’ to view to Main Menu , and thenselect CONTROL.2. Select the TURN LOAD ON command.3. Confirm choice by selecting YES .4. You will hear some clicking sounds and seemessage .5. In approximately 30 seconds, you will seemessage , and the green LOAD ON statusindicator will be ON.The output is now ON and fully protecting theload equipment.Confirm:Turn <strong>UPS</strong> ONNO, ABORT> YES, Turn <strong>UPS</strong> ON<strong>UPS</strong> HAS BEENCOMMANDED TO TURNLOAD POWER ON<strong>UPS</strong> LOAD IS ONPress any key...4
CHAPTER 2: GETTING STARTEDPowering Down the Load EquipmentFollow the steps below to turn OFF the output of the <strong>UPS</strong> and power down the load equipment.>Control LoggingStatus DisplaySetup DiagsAccessories Help>Turn Load OffDo Self TestSimulate Power FailGraceful RebootConfirm:Turn <strong>UPS</strong> OFFNO, ABORT> YES, Turn <strong>UPS</strong> OFF<strong>UPS</strong> HAS BEENCOMMANDED TO TURNLOAD POWER OFF1. Use ‘ESC’ to view to Main Menu , and thenselect CONTROL.2. Select the TURN LOAD OFF command.3. Confirm choice by selecting YES .4. You will hear some clicking sounds and seemessage .5. In approximately 30 seconds, you will seemessage , and the green LOAD ON statusindicator will be OFF.The output is now OFF.6. To fully power down the <strong>UPS</strong>, turn OFF theSystem Enable switch, and open the inputcircuit breaker.Do not install battery modulesuntil you are ready to power upthe <strong>UPS</strong>. Batteries can bepermanently damaged if loadedprematurely.<strong>UPS</strong> LOAD IS OFFPress any key...5
CHAPTER 2: GETTING STARTEDBypass OperationIn addition to the automatic bypass, a maintenance bypass switch is provided with the <strong>UPS</strong>. Placing this switch inbypass mode connects the load equipment to the branch circuit, even if the <strong>UPS</strong> is turned OFF.When using the maintenance bypass, the input circuit breaker must be ON, or power will not besupplied to the Load screen.Follow the steps below to connect directly to the branch circuit (mains) via the automatic bypass.>Control LoggingStatus DisplaySetup DiagsAccessories Help>Turn Load OffDo Self TestSimulate Power FailGraceful Reboot ➪1. Use ‘ESC’ to view to Main Menu , and thenselect CONTROL.2. Select the <strong>UPS</strong> INTO BYPASS command.3. Confirm choice by selecting YES .4. You will see message . In addition, the greenLOAD ON and yellow BYPASS status indicators willbe ON.Graceful Turn OffStart Runtime Cal><strong>UPS</strong> into BypassConfirm:<strong>UPS</strong> into BypassNO, ABORT>YES,<strong>UPS</strong> into Bypass<strong>UPS</strong> LOAD IS BYPASSEDPress any key...6
CHAPTER 2: GETTING STARTEDLanguage SettingThe factory default language of the user interface is English. You can change the language by downloading newfirmware into the PowerView. French, German, Italian, and Spanish are available on the enclosed CD. Visit the <strong>APC</strong>web site at http://www.apc.com for multilingual product documentation and firmware language support.To change the user interface language, perform the following steps.1. Remove the PowerView Display bezel from the front of the <strong>UPS</strong>.2. Disconnect the <strong>UPS</strong> cable from theRJ-45 port on the PowerView.Figure 3: Shown connected to<strong>Symmetra</strong> <strong>RM</strong> 2-6 <strong>kVA</strong>7
CHAPTER 2: GETTING STARTEDFigure 4: Typical Programming Cable3. Connect the programming cable (included,<strong>APC</strong> part number 940-0082) between thePowerView and the <strong>UPS</strong> cable.• Attach the RJ-45 connector to the porton the rear of the PowerView.• Connect the female DB-9 connector ofthe programming cable to a serial porton the computer.The downloading computer must haveaccess to the files on the CD providedeither with the <strong>UPS</strong> or to the <strong>APC</strong>Web site (http://www.apc.com).• Attach the <strong>UPS</strong> cable to the femaleRJ-45 connector on the programmingcable.4. Locate the language program file to bedownloaded into the <strong>UPS</strong>.Each language program file appears on theCD under the folder of its language(français, español, etc.) with a .binextension. Program files for additionallanguage support or code updates may beavailable on the <strong>APC</strong> Web site.5. Place the PowerView in programming modeby pressing simultaneously the three keyson the right (ESCAPE, HELP, and ENTER) forabout three seconds, until the PowerViewemits a long beep.• The LCD will display the Programmingscreen.• To leave the Programming screenbefore starting a file transfer (step 6),press ESC until it beeps (about onesecond).8
CHAPTER 2: GETTING STARTEDFigure 5: Shown connected to<strong>Symmetra</strong> <strong>RM</strong> 2-6 <strong>kVA</strong>6. Start HyperTerminal or another terminalemulation program on the computer.• Set the communication parameters to 8bits, no parity, no flow control, 1 stopbit, and 19,200 bps.• After establishing a connection, use theXmodem protocol to transfer thelanguage program file from the CD oryour download folder to PowerView.• When the file transfer is complete, thePowerView will reset itself and displaythe Startup screen in the new language.7. If the file transfer fails, PowerView will resetitself. Retry the file transfer by repeatingsteps 4 and 5.8. Quit the terminal session.• Disconnect the programming cable andreconnect the <strong>UPS</strong> cable to thePowerView.9. Align the tabs on the size of the PowerViewDisplay bezel with the slots on the front ofthe <strong>UPS</strong> frame and gently snap it into place.9
CHAPTER 2: GETTING STARTED10
CHAPTER 3: MENU COMMANDSCommand ReferenceThe following sections describe the details of each command. Commands are organized according to the menuhierarchy in the PowerView.Accessories MenuThe Accessories menu allows you to monitor <strong>APC</strong> accessories if they are installed. Note that the PowerViewmust be connected to the computer interface port at the back of the <strong>UPS</strong> frame in order to monitor internalaccessories.Control MenuUse the Control menu and its submenus to control how power flows to and from the <strong>UPS</strong>.Menu ItemTurn Load On/OffDo Self TestSimulate PowerFail(ure)Graceful RebootFunctionControls the delivery of output power to connected equipment.Initiates a system of self-testing and diagnostics. An error message is displayed when aproblem is detected.Simulates a power failure/return to test server’s recognition of failure event.Initiates a signal for the server to shutdown. After user-defined “Low-Battery Duration” plus“Shutdown Delay,” the output power is switched off for the duration of the user-defined “ReturnDelay.” Then the output power is switched on again. See Setup-Shutdown to set these timedelays.PowerChute software must be used on the server for it to be properly shutdown.Graceful Turn OffInitiates a signal for the server to shut down. After the user-defined “Low-Battery Duration” plus“Shutdown Delay,” the output power is switched off. Use the Setup-Shutdown menu to setthese times.PowerChute software must be used on the server for it to be properly shutdown.Start/Stop RuntimeCal(ibration)<strong>UPS</strong> into/out ofBypassCalculates an accurate battery runtime measurement. Delivers load output power from batterysource. Discharges battery to 50% of capacity. Battery capacity must be at 100% to executethis test.Controls the bypass function. When in the bypass mode, power is delivered directly from utilitysource to load equipment.11
CHAPTER 3: MENU COMMANDSDisplay MenuThe Display menu lets the user customize the PowerView display.Display Function OptionsDate/Time Sets the correct date and time. dd:mmm:yyyyPasswordPasswordProtects against unauthorized configurationchanges.Sets a password.Valid characters include:A–Z, or 0–9;type ‘_’ to complete.TimeoutInvalidateInformationBeeperAt <strong>UPS</strong>At DisplayVolumeSets the inactivity timer.Puts password into effect. Prevents unauthorizedchanges to the <strong>UPS</strong> configuration.Displays PowerView model number, serialnumber, date of manufacture, and revisioninformation.Sets audible alarm (beeper) criteria.Not used with the <strong>UPS</strong>.Sets parameters for the audible alarm in thePowerView.Sets audible alarm volume.1, 2, 5, 10(default); 30minutes; 1, 2, or 4 Hours;or ForeverPower Failure,Power Failure +30 seconds,Low Battery, or NeverOff, Low(default), Medium,or HighClick Sets sound when pressing display buttons. On(default), OffContrast Sets LCD screen contrast. 1, 2, 3, 4, or 5ConfigureCustomizes the information displayed on theStartup screen.Use factory defaults whenpossible.12
CHAPTER 3: MENU COMMANDSDiagnostics MenuThe Diagnostics menu provides information for use in troubleshooting.Menu ItemFault and Diagnostics(Main) Intelligence ModuleRedundant IntelligenceModulePower ModulesBatteriesFunctionDisplays current system fault and diagnostic information of that fault.Displays detailed intelligence module status and information.Displays detailed redundant intelligence module status and information.Displays detailed power module status and information.Displays detailed battery module status and information.Help MenuTo access PowerView online help screens, press the SCROLL UP and SCROLL DOWN keys simultaneously to accesscontext sensitive help.Logging MenuThe Logging menu lets you customize the <strong>UPS</strong> log.Menu ItemFunctionView LogView StatisticsConfigure LoggingLogs the most recent 64 events. Point to an entry and press the ENTER key formore information on that event.Records the total number of transfers to battery, low battery, faults, andon-battery runtime events.Allows different types of events to be included or excluded from the log. Eventtypes include Power Events, <strong>UPS</strong> Controls, <strong>UPS</strong> Faults, and User Activity.Power Events<strong>UPS</strong> Controls<strong>UPS</strong> FaultsUser Activity<strong>UPS</strong> Control EventsOn (default), OffUser Activities<strong>UPS</strong> Fault EventsMeasure<strong>UPS</strong> Events13
CHAPTER 3: MENU COMMANDSLogging Menu (continued)List Event GroupsMenu ItemLists the specific events in each group.FunctionPower Events<strong>UPS</strong> Control EventsUser Activities<strong>UPS</strong> Fault EventsMeasure<strong>UPS</strong> EventsClear LogClears the view log. Does not clear the active event lists.Status MenuThe Status menu displays information regarding load, battery and power modules, voltage, and electrical current.Menu ItemØ Vin Vout Iout% load assumingno redundancy% load allowing forn+ redundancyFrequenciesBattery StatusScreenPower ModuleStatus ScreenAlarm ThresholdsStatus ScreenMiscellaneousStatus ScreenFunctionDisplays input voltage, output voltage, and output current information.Compares the current load to the total capacity of all power modules.Compares the current load to the total capacity of all power modules except the power modulesthat are set aside by the “Fault Tolerance” alarm threshold. For example, if there are fourpower modules installed, and the fault tolerance alarm threshold is set to “1,” this percentage ofload uses only 3 power modules for the calculation. See Setup-Alarms to set the redundancylevel.Displays the measured input and output frequencies.Displays battery module source capacity, runtime, and status information.Displays power module source capacity, fault tolerance, and status information.Displays the user-defined alarm settings. See Setup-Alarms to set these alarm thresholds.Displays the summary result Self Test, Last System Transfer, Operating Mode, and status ofIntelligence and redundant intelligence modules.14
CHAPTER 3: MENU COMMANDSSetup MenuThe Setup menu lets the user customize the <strong>UPS</strong> functionality.Menu Item Function OptionsShutdownLow Batt(ery)Dur(ation)Shutdown DelayReturn DelayReturn BatteryCapacitySets the shutdown parameters in the event of a utilitypower failure.Sets the number of minutes an audible alarm soundsbefore the <strong>UPS</strong> shuts down due to battery exhaustion.Sets the additional runtime for computer issuingshutdown command if it needs additional time to shutitself down.Sets the delay interval that allows utility power tostabilize before the system goes back online after autility power failure.Sets the minimum battery capacity necessary beforerepowering the load when returning from an extendedutility power failure.None2(default), 5, 7, 10, 12, 15,18, or 20 minutes0, 20(default), 60, 120,240, 480, 720, or 960seconds0(default), 20, 60, 120,240, 480, 720, or 960seconds0(default), 15, 25, 35, 50,60, 75, or 90 secondsDefaults Sets all settings to factory defaults. NoneOutput Freq(uency)The <strong>UPS</strong> output will phase lock to the input within thisrange.50 ± 3 Hz, 60 Hz ± 3 Hz,Full Range Tracking15
CHAPTER 3: MENU COMMANDSSetup Menu (continued)Menu Item Function OptionsAlarms Sets the alarm thresholds. NoneRedundancyLoadRuntimeAn audible alarm sounds if the redundancy falls belowthis level.An audible alarm sounds when the load exceeds thislimit. (Upper value is limited by the maximum power ofthe <strong>UPS</strong>.)An audible alarm sounds if the available runtime fallsbelow this level (Hours:min).0(default), 1, or 2Never(default), 1, 2, 3, 4,5, 6, 7, 8, 9, 10, or 12 <strong>kVA</strong>0:0(default),5m, 10m,15m, 30m, 45m,1h, 2h, 3h,4h, 5h, 6h, 7h, or 8hBypassIn the unlikely event that both the <strong>UPS</strong> fails and the inputvoltage or line frequency is outside of normal range, thisoption lets you choose to go into Bypass mode or dropthe load.Go to Bypass orDrop LoadCopy Not used with this <strong>UPS</strong>. NoneOther Remaining user-defined settings. NoneSelf Test<strong>UPS</strong> IDThe <strong>UPS</strong> can automatically test itself at this userspecifiedinterval.Assigns an eight-character text string to a system.At Power On, 7 days,14 days(default) , orDisabledOutputSets output voltage. Selection depends upon systemconfiguration.200V, 208V, 220V, 230V,or 240VVout Reporting Reports the most significant output voltage. Auto16
CHAPTER 4: MESSAGESTroubleshootingThe PowerView reports various messages on the display, including alarm status and changes in systemconfiguration. This section lists all the PowerView display messages, what each means, and an appropriatecorrective action.Contact <strong>APC</strong> Technical Support Staff for assistance with complex <strong>UPS</strong> problems. Refer to the <strong>APC</strong> Web siteat http://www.apc.com/support for a location near you.More than one of these messages may occur at one time. If this happens, be sure to review all of the messages for abetter understanding of the system condition.PowerView Message Meaning Corrective ActionStart-Up#Pwr modules changedsince last ON.At least one power module has beenadded or removed from the <strong>UPS</strong>since the last time the Pwr ONcommand was issued.No corrective action necessary.Proceed with the startup.#Batteries changed sincelast ON.At least one battery module has beenadded or removed from the <strong>UPS</strong>since the last time the Pwr ONcommand was issued.No Redundant IntelligenceModule.There is no RIM installed.Proceed with the startup or abortthe startup and install a RIM.Note: Without a functioning RIM,there is no redundancy in theevent of a MIM failure.Batt capacity less thanReturn Batt Cap.The battery capacity of the <strong>UPS</strong> isless than the user specified minimumbattery capacity required to turn onthe load.Option 1: Abort the startup andallow batteries to recharge.Option 2: Continue startup, withless than minimum batterycapacity.Input Freq outsideconfigured range.The input frequency to the <strong>UPS</strong> isoutside the configured range. Theoutput frequency will not synchronizewith the input frequency. Normalbypass is not available. The systemwill start on-battery.Option 1: Improve the frequencyof the incoming voltage.Option 2: Widen the range of theacceptable incoming frequencywith the PowerView.(Startup>Setup>OuputFreq)Option 3: Proceed with startup.Normal bypass is not availableand system may start on batterypower.17
CHAPTER 4: MESSAGESPowerView Message Meaning Corrective ActionStart-Up(continued)AC adequate for <strong>UPS</strong> butnot for bypass.The <strong>UPS</strong> will function on-line with theinput voltage, but in the event thatbypass is required, the input voltage isnot adequate to power the loadequipment.Option 1: Improve the incomingvoltage.Option 2: Proceed with startup.Normal bypass is not available.Low/No AC input, startupon battery.Input voltage is not adequate to start the<strong>UPS</strong>. If startup proceeds, the <strong>UPS</strong> willfunction from battery.Option 1: Abort startup untilacceptable input voltage ispresent.Option 2: Proceed with startup.Battery will be discharged.GeneralStatus# of batteries increased. At least one battery module has beenadded to the system.# of batteries decreased. At least one battery has been removedfrom the system.No corrective action necessary.# of Pwr Modulesincreased.Intelligence Moduleinserted.Intelligence Moduleremoved.Redundant IntelligenceModule inserted.Redundant IntelligenceModule removed.# of External BatteryCabinets increased.# of External BatteryCabinets decreased.At least one power module has beenadded from the system.A MIM has been installed into the <strong>UPS</strong>.A MIM has been removed from the <strong>UPS</strong>.A RIM has been installed into the <strong>UPS</strong>.A RIM has been removed from the <strong>UPS</strong>.At least one external battery cabinet hasbeen connected to the frame.At least one external battery cabinet hasbeen disconnected from the <strong>UPS</strong>.18
CHAPTER 4: MESSAGESPowerView Message Meaning Corrective ActionGeneralStatus(continued)Redundancy Restored.Power module redundancy loss occurredand was restored. Either additionalmodules have been installed or the loadhas been reduced.No corrective action necessary.Load is No Longer aboveAlarm Threshold.The load exceeded the load alarmthreshold. The situation has beencorrected because either the loaddecreased or the threshold wasincreased.Min Runtime restored.The system runtime dropped below theconfigured minimum runtime and wasrestored.Either additional battery modules wereinstalled, the existing battery moduleswere recharged, the load was reduced,or the threshold was raised.ModuleFailureBad Battery Module.Bad Power Module.A battery module failed and requiresreplacement.A power module failed and requiresreplacement.Refer to module replacementprocedure SYMMETRA <strong>RM</strong>INSTALLATION MANUAL.Intelligence Module isinstalled and failed.The MIM failed and requiresreplacement.Redundant IntelligenceModule is installed andfailed.The RIM failed and requiresreplacement.ThresholdAlarmLoad is above <strong>kVA</strong> alarmthreshold.The load has exceeded the userspecified load alarm threshold.Option 1: Reduce the load.Option 2: Use the PowerViewinterface to raise the alarmthreshold.Redundancy has beenlost.The <strong>UPS</strong> no longer detects redundantpower modules. Either power module(s)failed or the load increased.Option 1: If possible, installadditional power modules.Option 2: Decrease the load.Option 3: Disable theredundancy alarm by settingredundancy to zero.(Startup>Setup>Alarms>Redundancy>Zero)19
CHAPTER 4: MESSAGESPowerView Message Meaning Corrective ActionThresholdAlarm(continued)Redundancy is belowalarm threshold.Actual power module redundancy hasfallen below the user specifiedredundancy alarm threshold. Eitherpower module(s) failed or the load hasincreased.Option 1: If possible, installadditional power modules.Option 2: Decrease the load.Option 3: Use the PowerView todecrease the redundancy alarmthreshold.(Startup>Setup>Alarms>Redundancy)Runtime is below alarmthreshold.The predicted runtime is lower than theuser specified for the minimum runtimealarm threshold. Either the batterycapacity has decreased or the loadincreased.Option 1: Allow the batterymodules to recharge.Option 2: If possible, increasethe number of battery modules.Option 3: Decrease the load.Option 4: Use the PowerView todecrease the minimum runtimealarm threshold.(Startup>Setup>Alarms>Runtime)BypassBypass is not in range(either freq or voltage).The frequency and/or voltage are out ofacceptable range for bypass. Thismessage occurs when the <strong>UPS</strong> is onlineand indicates that the bypass mode maynot be available if required. The systemmay starton-battery.Option 1: Decrease thesensitivity to input frequency.(Startup>Setup>OutputFreq)Option 2: Correct input voltageto provide acceptable voltageand/or frequency.Bypass contactor stuck inbypass position.Bypass contactor stuck inon-line position.The <strong>UPS</strong> is positioned in the bypassposition and cannot go on-line.The <strong>UPS</strong> is positioned in the on-lineposition and cannot go to bypass.Call your contract serviceprovider or <strong>APC</strong> TechnicalSupport.<strong>UPS</strong> in bypass due tointernal fault.The <strong>UPS</strong> has transferred to bypassmode because a fault has occurred.<strong>UPS</strong> in bypass due tooverload.The load exceeded the system powercapacity. The <strong>UPS</strong> has switched tobypass mode.Option 1: Decrease the load.Option 2: If possible, add powermodules to the system.System is in MaintenanceBypass.The <strong>UPS</strong> is in bypass because themaintenance bypass switch is in the Onposition.No corrective action necessary.20
CHAPTER 4: MESSAGESPowerView Message Meaning Corrective ActionGeneral FaultOn Battery.The <strong>UPS</strong> is in the on-battery mode. Thebattery modules are being discharged.No corrective action isnecessary.Note: Runtime is limited induration. Prepare to shutdownthe <strong>UPS</strong> and the loadequipment, or restore incomingvoltage.Need Bat Replacement.One or more battery modules are in needof replacement.Refer to module replacementprocedure.<strong>UPS</strong> Fault.A fault occurred in a power module. The<strong>UPS</strong> Fault message always occurs whenthere is a bad power module failuremessage.Call your contract serviceprovider or <strong>APC</strong> TechnicalSupport.Shutdown or unable totransfer to Batt due tooverload.The <strong>UPS</strong> has shutdown because anoverload occurred and bypass is notavailable.Option 1: Reduce the load toeliminate overload.Option 2: If possible, add powermodules to eliminate overload.Option 3: Replace failed powermodules to eliminate overload.Note: If bypass is not availablebecause of a power failure, waitfor power to be restored. If thereis a utility problem, have itcorrected.Load Shutdown fromBypass. Input Freq/Voltsoutside limits.The <strong>UPS</strong> shut the load down while it wason bypass, because the input powerwent out of acceptable range.Correct the input voltageproblem.Fault, Battery ChargerFailure.The battery charger in one or morepower module(s) failed.Refer to module replacementprocedure.Fault, Bypass RelayMalfunction.The bypass relay has malfunctioned.Call your contract serviceprovider or <strong>APC</strong> TechnicalSupport.Fault, Internal Tempexceeded normal limits.The temperature of one or more batterymodules is too hot.Replace overheated module.Refer to module replacementprocedure.21
CHAPTER 4: MESSAGESPowerView Message Meaning Corrective ActionGeneral Fault(continued)Input circuit breakertripped open.The input circuit breaker on the <strong>UPS</strong>tripped open. Input voltage isdisconnected to the <strong>UPS</strong>.Option 1: If this occurs inconjunction with an overloadcondition, decrease the load andreset the breaker.Option 2: If no overloadcondition exists, reset breaker. Ifit trips open again, call yourcontract service provider or <strong>APC</strong>Technical Support.System level fan failed. A cooling fan in the <strong>UPS</strong> frame failed. Call your contract serviceprovider or <strong>APC</strong> TechnicalSupport.The RedundantIntelligence Module (RIM)is in control.IIC inter-modulecommunications failed.The MIM failed, and the RIM isfunctioning as the primary intelligencemodule.The communications between the MIMand at least one other module failed.Replace the intelligence module.Refer to module replacementprocedure.Call your contract serviceprovider or <strong>APC</strong> TechnicalSupport.22
CHAPTER 5: MAINTENANCEServiceIf the <strong>UPS</strong> requires service, do not return it to the dealer! Follow these steps:1. Review the problems discussed in the Messages chapter to eliminate common problems.2. Verify that no circuit breakers are tripped. A tripped circuit breaker is the most common <strong>UPS</strong> problem!3. If the problem persists, call customer service or visit the <strong>APC</strong> Internet Website athttp://www.apc.com/support.• Note the model number of the <strong>UPS</strong>, the serial number, and the date purchased. A technician will askyou to describe the problem and try to solve it over the phone, if possible. If this is not possible, thetechnician will issue a Returned Material Authorization Number (<strong>RM</strong>A#).• If the <strong>UPS</strong> is under warranty, repairs are free. If not, there is a repair charge.4. Pack the <strong>UPS</strong> in its original packaging. If the original packing is not available, ask customer service aboutobtaining a new set. Visit the <strong>APC</strong> web site at http://www.apc.com/support for customer supporttelephone numbers.5. Pack the <strong>UPS</strong> properly to avoid damage in transit. Never use polystyrene beads for packaging. Damagesustained in transit is not covered under warranty.6. Mark the <strong>RM</strong>A# on the outside of the package.23
CHAPTER 5: MAINTENANCE24