SPM manual - Wellcome Trust Centre for Neuroimaging - UCL
SPM manual - Wellcome Trust Centre for Neuroimaging - UCL
SPM manual - Wellcome Trust Centre for Neuroimaging - UCL

You also want an ePaper? Increase the reach of your titles
YUMPU automatically turns print PDFs into web optimized ePapers that Google loves.
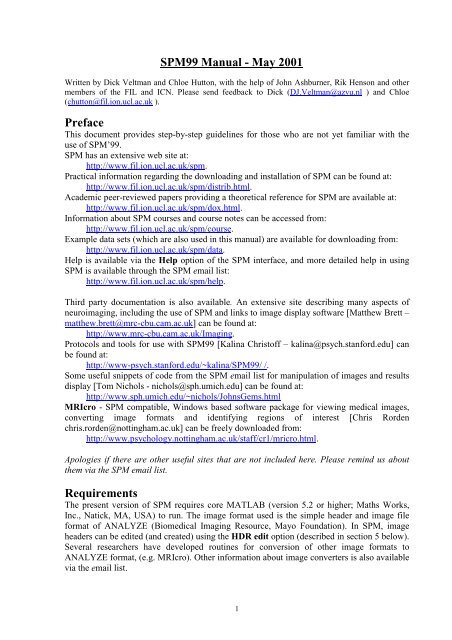
<strong>SPM</strong>99 Manual - May 2001Written by Dick Veltman and Chloe Hutton, with the help of John Ashburner, Rik Henson and othermembers of the FIL and ICN. Please send feedback to Dick (DJ.Veltman@azvu.nl ) and Chloe(chutton@fil.ion.ucl.ac.uk ).PrefaceThis document provides step-by-step guidelines <strong>for</strong> those who are not yet familiar with theuse of <strong>SPM</strong>’99.<strong>SPM</strong> has an extensive web site at:http://www.fil.ion.ucl.ac.uk/spm.Practical in<strong>for</strong>mation regarding the downloading and installation of <strong>SPM</strong> can be found at:http://www.fil.ion.ucl.ac.uk/spm/distrib.html.Academic peer-reviewed papers providing a theoretical reference <strong>for</strong> <strong>SPM</strong> are available at:http://www.fil.ion.ucl.ac.uk/spm/dox.html.In<strong>for</strong>mation about <strong>SPM</strong> courses and course notes can be accessed from:http://www.fil.ion.ucl.ac.uk/spm/course.Example data sets (which are also used in this <strong>manual</strong>) are available <strong>for</strong> downloading from:http://www.fil.ion.ucl.ac.uk/spm/data.Help is available via the Help option of the <strong>SPM</strong> interface, and more detailed help in using<strong>SPM</strong> is available through the <strong>SPM</strong> email list:http://www.fil.ion.ucl.ac.uk/spm/help.Third party documentation is also available. An extensive site describing many aspects ofneuroimaging, including the use of <strong>SPM</strong> and links to image display software [Matthew Brett –matthew.brett@mrc-cbu.cam.ac.uk] can be found at:http://www.mrc-cbu.cam.ac.uk/Imaging.Protocols and tools <strong>for</strong> use with <strong>SPM</strong>99 [Kalina Christoff – kalina@psych.stan<strong>for</strong>d.edu] canbe found at:http://www-psych.stan<strong>for</strong>d.edu/~kalina/<strong>SPM</strong>99/ /.Some useful snippets of code from the <strong>SPM</strong> email list <strong>for</strong> manipulation of images and resultsdisplay [Tom Nichols - nichols@sph.umich.edu] can be found at:http://www.sph.umich.edu/~nichols/JohnsGems.htmlMRIcro - <strong>SPM</strong> compatible, Windows based software package <strong>for</strong> viewing medical images,converting image <strong>for</strong>mats and identifying regions of interest [Chris Rordenchris.rorden@nottingham.ac.uk] can be freely downloaded from:http://www.psychology.nottingham.ac.uk/staff/cr1/mricro.html.Apologies if there are other useful sites that are not included here. Please remind us aboutthem via the <strong>SPM</strong> email list.RequirementsThe present version of <strong>SPM</strong> requires core MATLAB (version 5.2 or higher; Maths Works,Inc., Natick, MA, USA) to run. The image <strong>for</strong>mat used is the simple header and image file<strong>for</strong>mat of ANALYZE (Biomedical Imaging Resource, Mayo Foundation). In <strong>SPM</strong>, imageheaders can be edited (and created) using the HDR edit option (described in section 5 below).Several researchers have developed routines <strong>for</strong> conversion of other image <strong>for</strong>mats toANALYZE <strong>for</strong>mat, (e.g. MRIcro). Other in<strong>for</strong>mation about image converters is also availablevia the email list.1
ContentsPreface1. Getting started 22. Spatial pre-processing 52.1 Realignment 52.2 Coregistration 102.3 Slice timing 142.4 Normalisation 162.5 Smooth 232.6 Segment 243. Model specification and parameter estimation 263.1 PET/SPECT models 263.2 fMRI models 353.2.1 Specification of a model – first step 353.2.2 Specification of a model – second step 413.3 Customisations <strong>for</strong> PET/SPECT and fMRI statistics 453.4 Basic models 464. Results assessment 514.1 Example 1: single-subject fMRI block design (plotting and overlays) 514.2 Example 2: multi-subject PET design (volume of interest, maskingand conjunction analyses). 594.3 Example 3: single-subject event-related fMRI design 705. Miscellaneous functions and Utilities 815.1 Display 815.2 CheckReg 825.3 Render 825.4 PET/fMRI 845.5 Toolboxes 845.6 Means 845.7 ImCalc 855.8 HDR edit 855.9 Help 855.10 Utils 855.11 Defaults 865.12 Quit 862
1. Getting startedFor start-up from Matlab, type spm.Select from:PET and SPECT (or enter spm pet)Studies are considered as a series of independent scansfMRI (or enter spm fmri)Studies are considered as a temporally correlated time-seriesN.B.• The interface and usage <strong>for</strong> the above models of operation are similar. Differencesbetween these components are indicated where applicable.About <strong>SPM</strong><strong>SPM</strong>’99 in<strong>for</strong>mation<strong>SPM</strong>webLink to the <strong>SPM</strong>-pages of the <strong>Wellcome</strong> Dept of Cognitive Neurology website(http://www.fil.ion.ucl.ac.uk/spm)QuitExits <strong>SPM</strong>, closes windows and clears workspace variablesN.B.• The directory from which <strong>SPM</strong> is started becomes the <strong>SPM</strong> working directory, to which agraphical output file spm99.ps (postscript file containing displays) and the results ofstatistical analyses are written.• The spm99.ps file is appended when written to. <strong>SPM</strong> signals the risk of overwritingprevious statistical results.3
The <strong>SPM</strong> graphical user interfaceThe <strong>SPM</strong> graphical user interface (shown above) is divided into three panels: the upper <strong>for</strong>spatial pre-processing of data, the middle <strong>for</strong> model specification/estimation and statisticalinference, and the lower <strong>for</strong> general utilities (shown above <strong>for</strong> fMRI).Spatial pre-processing functions are:Realign: realignment of functional time-seriesCoregister: Coregistration of same modality and multi-modality image volumesSlice timing: Adjustment <strong>for</strong> timing differences in multi-slice image acquisition (fMRI)Normalize: Spatial normalisation of image volumes to a templateSmooth: Convolution of image volume with a Gaussian kernelSegment: Segmentation of MRI volume(s) into CSF, grey and white matterModel specification & parameter estimation:fMRI and PET/SPECT models: set-up of modality-specific modelsBasic models: basic statistical models <strong>for</strong> independent dataExplore design: review a previously specified modelEstimate: estimation of a previously specified model and configurationStatistical inference:Results: analysis and display of regional effectsThe lower panel includes miscellaneous and general utility functions.4
2. Spatial pre-processing2.1 Realignment (spm_realign_ui.m)Realignment of an image time-series of the same modality.Specify:Specify (<strong>for</strong> fMRI only):Select scans:Clicking the *.img will select those images, clicking the preceding number (in white) willshow individual scans. <strong>SPM</strong> displays the total number of selected scans (lower part ofwindow).Other options:- Filter disables filter- All selects all images shown- Edit allows editing of image file names- Keybd allows command line input of image file names- Reset will undo selection- Done completes selection.Specify:Coregister only: determines parameters used to realign to the first image in the selectedseries. For multiple sessions, the first scan of each session is realigned to the first scan of thefirst session; then the images within each session are realigned to the first scan of the session.Saves the trans<strong>for</strong>m parameters <strong>for</strong> each filename.img in filename.mat. Realignment5
parameters are saved <strong>for</strong> each session as realignment_params_*.txt, which can be used as aset of 6 covariates to regress out movement-related activations.N.B.• The first image = the first selected image. This need not be the first acquired in time.• For each realignment, the current *.mat files are used and updated.• All output images are written to the same directory as the input images. The mean*.img iswritten to the directory containing the images <strong>for</strong> the first session.• In PET, realignment is in two steps: all images are realigned to the first and a mean imageis computed to which all images are realigned in a second pass.Reslice only: reslices and saves images using the trans<strong>for</strong>ms specified by *.mat files.Trans<strong>for</strong>ms filename.img using filename.mat and saves as rfilename.img.*Coregister & Reslice (*=default): above steps combined. Saves trans<strong>for</strong>m parameters <strong>for</strong>filename.img in filename.mat. Reslices and saves images as rfilename.img.Specify:Trilinear interpolation: uses trilinear interpolation to resample images.Sinc interpolation (default): uses a truncated (kernel is 9x9x9 voxels) sinc interpolation.Slower than trilinear but more accurate; recommended <strong>for</strong> fMRI time-series.Fourier space interpolation: added option also found in other packages (AIR). Per<strong>for</strong>msrigid body rotations as shears in Fourier space (Eddy et al. 1996, MRM 36, 923-931). Forisotropic voxels only.Specify:All images (1-n): reslices all images including the first which is untrans<strong>for</strong>med (i.e., <strong>SPM</strong>duplicates the first and saves it as rfirstimage).Images 2-n: reslices all images except the first (useful when the first image has a differentmodality).All images + Mean Image (default): reslices all images and creates a mean of all reslicedimages, which is saved as meanfilename.img.Mean Image only: creates mean image only.6
N.B.• Because each reslicing slightly degrades the images, this may be postponed until thenormalisation step. It is useful, however, to create a mean image to determine parametersfrom at the normalisation stage (2.4) or to coregister to a structural MR (2.3). SelectCoregister & Reslice, Trilinear or Sinc interpolation (trilinear is probably sufficient andmuch faster) and Mean Image Only. The other images will have only their *.mat filesupdated.• If the ORIGIN coordinates in the image headers need adjustment, this should be doneprior to realignment (because <strong>SPM</strong> will ignore the ORIGIN coordinates in the header oncea *.mat file is created). Select the Display option (lower panel), select an image, and placethe crosshair at the anterior commissure. Select HDRedit, select ‘set Origin’, and copy &paste the coordinates (in voxels) from the Graphics window. Apply to all time-seriesimages (see 5 <strong>for</strong> discussion of utilities).Specify (<strong>for</strong> fMRI only):This removes interpolation errors arising from reslicing of the data by doing a regularised fit<strong>for</strong> motion-related variance and removes estimated variance from resliced images. However,if there is any motion-related variance that is correlated with the task, this option may removevariance of interest (i.e. true positives).Output from spm_realign:Display (shown here <strong>for</strong> a 12-scan PET study): spm_realign displays realignment parametersin graphic <strong>for</strong>m. This display is written to the spm99.ps file in the working directory. This filecan be viewed using a postscript reader package such as ghostview or pageview.7
Files: the realigned images r*.img, r*.hdr, and the updated .mat files are written to the inputfile directory. The mean*.img and mean*.hdr are written to the input file directory <strong>for</strong> thefirst session. Realignment parameters are saved as realignment_params_*.txt to the inputfile directory <strong>for</strong> each session.Customisations <strong>for</strong> realignment (optional):N.B.• Changes in default settings are valid only during one session. After quitting and restarting<strong>SPM</strong>, these adjustments need to be renewed.From the ‘Defaults’ options (lower panel), select ‘Realignment’:Specify:- allow separate coregistration and reslicing (default)- always combine coregistration and reslicingSpecify:- always create all images & mean image- full options (default, see above)Specify:- always adjust <strong>for</strong> interpolation errors- never adjust <strong>for</strong> interpolation errors (e.g., when realignment parameters are used ascovariates)- optional adjust (default)8
Specify:- always mask images (=default): to avoid movement-related artefactual variance at theedge of the FOV- optional maskSpecify:which refers to the density of voxel sampling <strong>for</strong> computation of realignment parameters. Thequality improves with higher density, which is also more time-consuming.9
2.2 Coregistration (spm_coreg_ui.m)Between and within modality image coregistration.Specify:Specify:Coregister only: determines parameters used to coregister to one image to another. Thisoption saves the trans<strong>for</strong>m parameters filename.img in filename.mat.Reslice only: reslices and saves images using the trans<strong>for</strong>ms specified by the *.mat files.Trans<strong>for</strong>ms filename.img using filename.mat and saves as rfilename.img.*Coregister & Reslice (*=default): above steps combined. Saves trans<strong>for</strong>m parameters <strong>for</strong>filename.img in filename.mat. Reslices and saves images as rfilename.img.FOR ‘Coregister only’ AND ‘Coregister & Reslice’:Specify:Specify:10
Select:Select:Select (or press ‘Done’):The TARGET image is the image to which the OBJECT image is realigned. OTHER images(if any) are trans<strong>for</strong>med in the same way as the OBJECT image.For example, to realign a structural T1-MRI to a fMRI time-series:- TARGET : mean EPI- OBJECT : T1- OTHER : -To realign a sequence of PET-images to a structural T1-MRI:- TARGET: T1- OBJECT: mean PET- OTHER: PET1.img, PET2.img,….N.B.• If the target and object images have different modalities, an image segmentation (see 2.6)is per<strong>for</strong>med to partition target and object into CSF, white and grey matter. Thesepartitions are then used in the coregistration.FOR ‘Reslice Only’:Select:The space of this image (i.e. the space defined by the .mat file associated with this image) willbe used to reslice the object image.Select:This image is the object image that will be resliced in the space of the previously selectedimage. The image will be resliced at the voxel size and origin of the previously selected imageand will have the same space defined by the corresponding .mat file.Output from spm_coregister:11
Display: spm_coregister displays the coregistered images with the contours of the OBJECTimage overlaid on both sets of images. This display is written to the spm99.ps file in theworking directory. If OBJECT and TARGET image have different modalities, a segmentationis also carried out <strong>for</strong> both images. This is displayed as in spm_segment (see 2.6) and writtento the spm99.ps file.12
Files: the coregistered images rfilename.img and rfilename.hdr are written to the samedirectory as the input images if ‘reslice’ is specified. The current rfilename.mat files areupdated.Customisations <strong>for</strong> coregistration (optional):N.B.• Changes in default settings are valid only during one session. After quitting and restarting<strong>SPM</strong>, these adjustments need to be renewed.From the ‘Defaults’ options (lower panel), select ‘coregistration’:Specify:- use default registration- use mutual in<strong>for</strong>mation registration (advisable when default between-modalitycoregistration doesn’t work due to e.g. poor grey/white contrast, so that the segmentationstep fails)Specify (<strong>for</strong> default between-modality coregistration only):- do all three coregistration steps (i.e., (1) 6-parameter (rigid body) normalisation of objectand target image to a template of its own modality, (2) segmentation of object and targetimage, (3) coregistering the segmented images using the results of (1) as a starting point;=default)- do first coreg step only (6-parameter normalisation of object and target image, each to atemplate of its own modality), e.g. when coregistering two images with poor grey/whitecontrast such as a PET transmission scan and a CT-scan, or as a first step prior to mutualin<strong>for</strong>mation registration13
2.3 Slice timing (spm_slice_timing.m)Correction <strong>for</strong> differences in slice acquisition time.This is only <strong>for</strong> fMRI. Corrects <strong>for</strong> differences in acquisition time between slices duringsequential imaging (as in echo-planar imaging). It is especially relevant <strong>for</strong> event-relateddesigns. This routine per<strong>for</strong>ms a phase shift, resulting in each time series having the valuesthat would have been obtained had the slice been acquired at (<strong>for</strong> example) the beginning ofeach TR.N.B.• This step can be per<strong>for</strong>med either be<strong>for</strong>e or after realignment (but be<strong>for</strong>e normalisation).Both procedures have potential disadvantages:- slice time correction be<strong>for</strong>e realignment may interpolate signals from different brainregions if there is significant head movement (which may be particularly problematicnear the edge of the brain, where large signal differences occur across nearby voxels);- slice time correction after realignment however may shift voxels to adjacent slices(and hence different time points).• The latter problem is especially relevant <strong>for</strong> interleaved acquisitions, where the timedifference between adjacent slices may be ½ TR. It is there<strong>for</strong>e recommended to per<strong>for</strong>mslice time correction first <strong>for</strong> interleaved sequences.• The latter problem is less relevant to sequential (ascending/descending) acquisitions,where the time difference between adjacent slices is small, and so realignment may bebetter first <strong>for</strong> ascending/descending sequences, to allow <strong>for</strong> movement effects.Specify:Select:Specify:ascending (first slice = bottom; e.g. 1 2 3 ………..68)descending (first slice = top; e.g. 68 67 66 ……..1)interleaved (first slice = top; e.g. 68 66 64 ……2 67 65 63….1)user specified (e.g., other interleaved sequences; <strong>SPM</strong> will prompt <strong>for</strong> a vector specifyingslice acquisition order, where the slices are numbered in Analyze <strong>for</strong>mat)14
2.4 Normalisation (spm_sn3d.m)Three-dimensional spatial normalisation of PET, SPECT and (f)MRI images to a standardspace.Normalisation consists of two steps: first the determination of an optimum 12-parameter(translations, rotations, zooms & shears) affine trans<strong>for</strong>mation (from an image to a template),followed by a nonlinear estimation of de<strong>for</strong>mations. These parameters can be used to resliceother images coregistered to the image from which the parameters were determined.Select:Determine parameters only: determines parameters (linear and nonlinear) used to normaliseimage to a template. Saves normalisation parameters in filename_sn3d.mat.Write normalised only: reslices and saves images using normalisation parameters specifiedby the selected sn3d.mat file. Applies parameters to filename.img (*.hdr, *.mat) and savesas nfilename.img (n*.hdr, n*.mat).Determine parameters and write normalised (=default): the above steps combined. Savesnormalisation parameters <strong>for</strong> filename.img in filename_sn3d.mat. Saves normalised imagesas nfilename.img (n*.hdr, n*.mat).N.B.• All output images, headers and *.mat files as well as the *_sn3d.mat file are written to theinput directory.• To assure optimal normalisation, image and template should be in a similar startingposition. This can be tested with the Check Reg option in the lower panel. Use the Displayoption to reposition the image (see section 5).Specify:Select:<strong>for</strong> example, a coregistered T1 structural image or a mean functional (PET or EPI) image.Select:Select:16
The selected template image which should be the same modality (and have very similarcontrast) as the image from which the parameters are to be determined.N.B.• The space of the template images in <strong>SPM</strong> is based upon the Talairach system, but doesnot make assumptions about brain symmetry, and includes the cerebellum.• The stereotactic space is based on 152 brains from the Montréal Neurological Institute,and will eventually be replaced in due course by a 450-brain version <strong>for</strong> the entire ICBMconsortium ().• The 152 subject average brain was chosen rather than the MNI305 official standard brainbecause from the 152 subjects T2- and PD-weighted images were also available, allowingmuch more flexibility in the range of different MR contrasts that can be spatiallynormalized to the same stereotaxic space. See spm_templates.man <strong>for</strong> details.• A combination of templates may be used when the image to determine parameters from isdifferent (e.g., intensity with a new MRI sequence) from the templates provided by <strong>SPM</strong>.For other purposes, e.g. normalising PET-ligand scans, creating a user-specified templateshould be considered.Specify:Nearest neighbour: fast but not very accurate and there<strong>for</strong>e not usually recommended.Bilinear (=default): recommended <strong>for</strong> fMRI images which have been resliced at therealignment stage, and PET.Sinc interpolation: uses a modified sinc interpolation (9x9x9 voxels kernel); slowest,recommended <strong>for</strong> fMRI data which have not been resliced at the realignment stage.Output from spm_sn3d:17
Display: spm_sn3d displays the normalised image and the template. The display is written tothe spm99.ps file in the working directory.Files: the normalisation parameters filename_sn3d.mat are written to the same directory asthe input image(s). The normalised images nfilename.img (n*.hdr, n*.mat) are written to theinput directory if ‘write normalised’ is specified.18
Customisations <strong>for</strong> normalisation (optional):N.B.• Changes in default settings are valid only during one session. After quitting and restarting<strong>SPM</strong>, these adjustments need to be renewed.From the ‘Defaults’ options (lower panel), select ‘Spatial Normalisation’:Specify:- Defaults <strong>for</strong> Parameter Estimation (first step)- Defaults <strong>for</strong> Writing Normalised (second step)For changing Parameter Estimation defaults, specify:- Neurological Convention (R=R): <strong>SPM</strong> assumes that the images are in neurologicalconvention (as used by <strong>SPM</strong>) so the starting estimates won’t include a L-R flip (0 0 0 0 00 1 1 1 0 0 0)- Radiological Convention (L=R; default): <strong>SPM</strong> assumes that the images are in radiologicalconvention so the starting estimates will include a L-R flip (0 0 0 0 0 0 -1 1 1 0 0 0)- Custom Starting Estimates:enter these in the following order:x translation (mm)y translation (mm)z translation (mm)x rotation ‘pitch’ (radians)y rotation ‘roll’ (radians)z rotation ‘yaw’ (radians)x scalingy scalingz scalingx sheary shearz shear19
N.B.• As an alternative to customising starting estimates, prior to normalisation the images maybe repositioned using the Display option (see above).Specify:- Allow customised (options <strong>for</strong> # nonlinear basis functions and iterations, type ofregularisation, and masking)- Disallow customised normalisation (=default; standard options <strong>for</strong> # nonlinear basisfunctions and iterations, type of regularisation, and masking)If customised is selected, specify:The default is 7x8x7 functions. A large number of functions will improve the quality of thenormalisation provided the images do not contain gross lesions and/or have different contrastscompared to the template. More functions will be computationally slower, however.Specify:The default is 12 iterations. Again, the more iterations the better the result, but memorydemands will similarly increase.20
Specify:Regularisation involves stabilising the estimation of the de<strong>for</strong>mations by penalising largede<strong>for</strong>mations. Heavy regularisation basically means that more weight is applied to the penaltyterm. There<strong>for</strong>e, if the spatial normalisation introduces excessive warping that is clearlywrong, more regularisation is needed. Conversely, if the images do not get warped enough tomatch the template, the amount of regularisation needs to be decreased. The default ismedium regularisation.Specify:Masks template brain (1 1 1 1 .. <strong>for</strong> voxels within the brain, 0 0 0 0 .. <strong>for</strong> voxels outside thebrain) in order to per<strong>for</strong>m normalisation based on the shape of the brain instead of the skull.Not necessary when normalising a mean EPI image to the EPI template, in which caseunmasked normalisation may give better results.Specify:Similarly using 1 1 1 1 .. <strong>for</strong> voxels within the brain, 0 0 0 0 .. <strong>for</strong> voxels outside the brain. Anobject brain mask might be used e.g. to prevent an abnormal region (lesion) influencing thenormalisation.For changing Writing Normalised defaults, specify:In mm distances (x y z) from the anterior commissure. When choosing ‘Runtime option’,<strong>SPM</strong> will prompt <strong>for</strong> bounding box dimensions during specification of the normalisation.21
Specify:In mm (x y z):- 1 1 1- 1.5 1.5 1.5- 2 2 2 (=default; may lead to oversampling of the data; the advantage is that the data willrequire less smoothing to meet the assumptions of Gaussian field theory, disadvantage isthat resulting *.img files will use more disk space)- 3 3 3- 4 4 4- 1 1 2 (e.g., <strong>for</strong> structural MRI’s with 1mm interslice gap)- 2 2 4 (e.g., <strong>for</strong> EPI images with 2mm in-plane resolution and 2mm interslice gap)- Customise- Runtime option (i.e., <strong>SPM</strong> will prompt <strong>for</strong> voxel sizes during specification of thenormalisation)22
2.5 Smooth (spm_smooth.m)Three-dimensional convolution of an image with a Gaussian kernel.Specify:Gaussian filter width. This can be a scalar (<strong>for</strong> isotropic voxels) or a vector of length 3 (sx sysz) <strong>for</strong> anisotropic voxels. Suggested is 2-3 times the voxel size.Select:N.B.Spatial smoothing has three important objectives:• it increases signal to noise ratio• it conditions the data so that they con<strong>for</strong>m more closely to a Gaussian field model. This isimportant if Gaussian field theory is used to make statistical inferences about regionallyspecific effects (i.e., assign p-values)• it ensures that effects between different subjects are assessed on a reasonable spatial scalewith respect to functional anatomy.See also Matthew Brett's basic tutorial on smoothing at:http://www.mrc-cbu.cam.ac.uk/Imaging/smoothing.htmlOutput from spm_smooth:Images are saved as sfilename.img (s*.hdr, s*.mat) in the same directory as the input files.23
2.6 Segment (spm_segment.m)Segments MRI-image(s) into grey and white matter, CSF, and other.Specify:Select:if more than one, they should be coregistered.Specify:If not, specify:to match with a template which will be used <strong>for</strong> affine normalisation of the image(s). This isrequired <strong>for</strong> probabilistic segmentation.Specify:this option attempts to model intensity inhomogeneities using smooth basis functions.If inhomogeneity correction is to be applied, specify:Inhomogeneity-corrected images may be saved as corr_filename.img <strong>for</strong> inspection.Output from spm_segment.m:24
Display: spm_segment displays the segmentation results. This display is written to thespm.ps file in the working directory. N vox is the proportion of voxels belonging to eachclass, worked out from a subregion of the volume that encloses the brain.Files: the segmented images are written as filename_seg1.img, filename_seg2.img, andfilename_seg3.img <strong>for</strong> grey and white matter, and CSF. These images are saved to the inputdirectory.25
3. Model specification & parameter estimationThis section deals with the specification of a model to analyse imaging data, and subsequentparameter estimation. Statistical inference is per<strong>for</strong>med using the Results option (see 4). <strong>SPM</strong>distinguishes three classes of models:- For modality-specific, independent data (PET/SPECT models; 3.1).- For modality-specific, serially correlated data (fMRI models, 3.2).- Basic models <strong>for</strong> independent data, which include random effects (RFX) analyses (3.3).3.1 PET/SPECT models (spm_spm_ui.m)<strong>SPM</strong> offers a number of PET/SPECT prototype models, which limits the number of necessaryspecifications <strong>for</strong> easy use.N.B.• All data entered in the model need to be in the same position (i.e., coregistered), and haveidentical dimensions and voxel sizes.- Single-subject, conditions & covariates: e.g. analysis of an individual subject, 12 scans(ARARARARARAR), with habituation (time) as a covariate. See example 1 below- Single-subject, covariates only: e.g., analysis of an individual subject, 12 scans duringwhich a task is per<strong>for</strong>med, with covariate = task score (this example is discussed inMatthew Brett’s tutorial on <strong>SPM</strong> statistics; see http://www.mrccbu.cam.ac.uk/Imaging/spmstats.html)26
- Multi-subject, conditions & covariates: e.g., a study with 10 subjects, each per<strong>for</strong>ming atask with three levels of difficulty, with reaction time as a covariate (i.e, a condition xcovariate interaction)- Multi-subject, condition x subject interaction & covariates: conditions are modelledseparately <strong>for</strong> each subject, which allows assessment of condition x subject interactions.See example 2 below- Multi-subject, covariates only: e.g., a study with 6 spider phobic patients shown slidesof spiders during each of 12 scans, with anxiety ratings as a covariate- Multi-group: conditions & covariates: e.g., a factorial design with two groups ofsubjects both per<strong>for</strong>ming an ARARARARARAR experiment. This design allowsassessment of main effects (task vs. rest) <strong>for</strong> each group separately and both groupscombined, as well as task x group interaction effects- Multi-group, covariates only: e.g., the ‘Multi-subject, covariates only’ spider study witha group of non-phobic controls added- Population main effect: 2 conditions, 1 scan/condition (= modality-adjusted paired t-test), e.g., a PET or SPECT study using a dopaminergic ligand in subjects withParkinson’s disease scanned both pre- and post-therapy- Dodgy population main effect: > 2 conditions, 1 scan/condition; ‘dodgy’ becausesphericity assumptions are likely to be violated (see example 1 below)- Compare-populations: 1 condition, 1 scan/condition (=modality-adjusted two-sample t-test), e.g., a PET or SPECT ligand study comparing patients to normal controls- Compare-populations (AnCova): 1 condition, 1 scan/condition, with nuisancevariable(s) added, e.g. the preceding study with age entered as a possible confound- The Full Monty: ‘asks you everything’; an amalgam of ‘Multi-subject, cond x subjinteraction & covariates’ and ‘Multi-group’ optionsExample 1: single-subject: conditions & covariatesSelect:Specify a vector whose length equals the number of scans, e.g. 1 2 1 2 1 2 1 2 1 2 1 2:Specify:If a covariate is modelled, specify a vector whose length also equals the number of scans:Specify (e.g., time):Specify:‘none’ will model the covariate (=time) as one parameter (time x session) or column in thedesign matrix (see below); ‘with condition’ as two (time x cond1 and time x cond2).27
Specify:Centring a covariate ensures that main effects of the interacting factor are not affected by thecovariate, there<strong>for</strong>e <strong>SPM</strong> suggests centring on the overall mean. If ‘interaction by condition’had been specified, the default becomes ‘centring around condition means’.Specify:(=0 in this example; otherwise, specification of nuisance variables is similar to covariates).Specify:Scan to scan differences in global flow can be:- modelled as a nuisance variable (AnCova),- adjusted <strong>for</strong> by scaling the voxel values <strong>for</strong> each scan to the mean (proportional scaling)- ignored.AnCova is advised <strong>for</strong> multi-subject studies unless differences in global flow are large (e.g.,due to variability in injected tracer dose). Because AnCova also uses one degree of freedom<strong>for</strong> each subject/group, proportional scaling may be preferable <strong>for</strong> single-subject studies.If proportional scaling is selected, specify:the default of which scales the global flow to a physiologically realistic value of 50 ml/dl/min.Specify:to ensure that only grey-matter voxels are included in the analysis, by masking out from allscans voxels that fail to reach the specified threshold.If ‘proportional’ is selected, specify:the default being 80% of the mean global value. If thresholding is to be omitted, specify ‘-Inf’.Specify:28
The default is a two-step process in which first the overall mean is computed, after whichvoxels which do not reach a threshold of overall mean/8 (i.e., those which are extra-cranial)get masked out, followed by a second computation of the mean of the remaining voxels.Specify:Sphericity assumes equal variance and independency of measures across replications,condition types, and/or subjects. If this assumption is not met, without a correction statisticalinference might produce biased (i.e., inflated) results. If a correction is to be applied, <strong>SPM</strong>will prompt to specify violations.Output from PET/SPECT models (spm_spm_ui) <strong>for</strong> example 1:29
Display: <strong>SPM</strong> displays a design matrix having columns <strong>for</strong> each parameter (in this example,two conditions, one covariate, and one constant (block)) and a row <strong>for</strong> each scan. The greyand-whitebar below the design matrix signals that the matrix is rank deficient (columns 1,2and 4 are linearly dependent) which limits selection of meaningful contrasts (parameterweights) <strong>for</strong> condition effects to those which sum up to zero (see 4).File: the design matrix will be saved as <strong>SPM</strong>cfg.mat in the working directory.Specify:to begin parameter estimation now or at a later stage. If ‘later’, select ‘Estimate’ (middlepanel) and select the appropriate <strong>SPM</strong>cfg.mat file.Example 2: Multi-subject, cond x subj interaction & covariates.Consider a study in which five subjects per<strong>for</strong>m an attention task with two stimulus typesalternated with rest (ABRABRABRABR, suitably randomised across subjects) whereindividual differences in arousal (measured as skin conductance (GSR)) may interact withper<strong>for</strong>mance.Specify (5):Select:Specify (<strong>for</strong> each subject) a vector whose length equals the number of scans, e.g. A B R R AB B R A A R B:Specify (1):Specify a vector whose length equals the total number of scans:Specify (GSR):Specify (with subject):30
‘none’ will model the covariate (=GSR) as one parameter (GSR x session) or column in thedesign matrix (see below); ‘with condition’ as three (GSR x cond1-3) and ‘with subject ’ asfive (GSR x subj1-5).Specify:Centring a covariate ensures that main effects of the interacting factor are not affected by thecovariate, there<strong>for</strong>e <strong>SPM</strong> here suggests centring on subject means.Specify (0):Select:Scan to scan differences in global flow can be:- modelled as a nuisance variable (AnCova),- adjusted <strong>for</strong> by scaling the voxel values <strong>for</strong> each scan to the mean (proportional scaling)- ignored.AnCova is advised <strong>for</strong> multi-subject studies unless differences in global flow are large (e.g.,due to variability in injected tracer dose). Because AnCova also uses one degree of freedom<strong>for</strong> each subject/group, proportional scaling may be preferable <strong>for</strong> single-subject studies.If AnCova is selected, specify:the default corrects <strong>for</strong> subject to subject differences in mean global flow (within-subjectdifferences were modelled during the previous step).Specify (50):the default of which scales the global flow to a physiologically realistic value of 50 ml/dl/min.As in example 1, specify:to ensure that only grey-matter voxels are included in the analysis, by masking out voxelswhich fail to reach the specified threshold.31
If ‘proportional’ is selected, specify:the default being 80% of the mean global value. If thresholding is to be omitted, specify ‘-Inf’.Specify:the default is a two-step process in which first the overall mean is computed, after whichvoxels which do not reach a threshold of overall mean/8 (i.e. extracranial voxels) get maskedout, followed by a second computation of the mean of the remaining voxels.Specify:Sphericity assumes equal variance and independency of measures across replications,condition types, and/or subjects. If this assumption is not met, without a correction statisticalinference might produce unrealistic (i.e., inflated) results. If a correction is to be applied, <strong>SPM</strong>will prompt to specify violations.Output from PET/SPECT models (spm_spm_ui) <strong>for</strong> example 2:32
Display: <strong>SPM</strong> displays a design matrix having columns <strong>for</strong> each parameter (in this example,fifteen conditions (three conditions, modelled separately <strong>for</strong> each subject), one covariate(GSR <strong>for</strong> each subject), five constants (block) and five nuisance variables (GBF)), and a row<strong>for</strong> each scan. The grey-and-white bar below the design matrix signals that the matrix is rankdeficient (columns 1-15 and 21-25 are linearly dependent) which limits selection ofmeaningful contrasts (parameter weights) <strong>for</strong> condition effects to those which sum up to zero(see 4).File: the design matrix will be saved as <strong>SPM</strong>cfg.mat in the working directory.As in example 1, specify:33
to begin parameter estimation now or at a later stage. If ‘later’, select ‘Estimate’ (middlepanel) and select the appropriate <strong>SPM</strong>cfg.mat file.N.B.• Model estimation may also be launched via the ‘Explore design’ option. <strong>SPM</strong> will thenprompt you to select a <strong>SPM</strong>cfg.mat file <strong>for</strong> inspection.• Clicking ‘Design’ (lower left window) will activate a pull-down menu which allowsselection of displays <strong>for</strong> the design matrix, details of design orthogonality (surfable),selected scans and specified conditions, and covariates. It does not provide options to editthe model.Output from PET/SPECT parameter estimation (spm_spm.m):- beta_0001.img/hdr, beta_0002.img/hdr, beta_0003.img/hdr, ….. : images containingparameter estimates <strong>for</strong> each column in the design matrix- mask.hdr/img : mask image consisting of 0’s and 1’s indicating which voxels within theimage volume are to be assessed- ResMS.hdr/img : image of estimated residual variance- RPV.hdr/img : image of estimated resels per voxel- <strong>SPM</strong>.mat file : contains details of design matrix, analysed images, search volume,smoothness estimates and results files.- xCon.mat file : contains default F-contrast (so-called ‘effects of interest’) which are used<strong>for</strong> selecting ‘interesting’ voxels at which to save raw data <strong>for</strong> future plotting- Y.mad file : contains (in compressed <strong>for</strong>m) the raw (unsmoothed) data at voxels with anF-statistic higher than the default. Each column corresponds to one voxel, each row to aninput image- Yidx.mat file : contains a 1 x N vector of column indices used in the Y.mad file (where N= number of available voxels)34
3.2 fMRI models (spm_fmri_spm_ui.m)3.2.1 Specification of a model – first step:Select ‘specify a model’:As with PET/SPECT, <strong>SPM</strong>’99 allows separate model specification & inspection, andparameter estimation, <strong>for</strong> fMRI designs. However, fMRI model building is more flexible, themain distinction being between epoch- and event-related designs.N.B.• Whereas model specification & parameter estimation occurs in two stages <strong>for</strong>PET/SPECT studies, <strong>for</strong> fMRI there are three:(i) specification of conditions, timings, user-specified covariates, and regressor types(e.g. boxcar),(ii) selecting scans, modelling nuisance variables and other confounds, i.e. lowfrequencydrifts and temporal autocorrelation,(iii) parameter estimation. This permits the use of a single design matrix (i.e., the firststep) <strong>for</strong> different data sets (sessions/subjects) acquired with the same paradigm, andalso <strong>for</strong> designing an experiment (stochastic designs, see below). In <strong>SPM</strong>, the firststep is termed ‘specify a model’, the second and third ‘estimate a specified model’.• In the ‘specify and estimate a model’ option, the order of the prompts is slightly different;moreover, <strong>SPM</strong> does not display graphs of the specified regressor(s) and designorthogonality (these can be displayed using the ‘review a specified model’ option andselecting the appropriate <strong>SPM</strong>_fMRIDesMtx.mat file).Specify:N.B.• As with PET/SPECT, all data entered in the model need to be in the same position (i.e.,coregistered), and have identical dimensions and voxel sizes.• In addition, the TR must be identical.Specify:Here <strong>SPM</strong> does not distinguish between sessions and subjects: e.g., <strong>for</strong> a design with 4subjects each having two sessions of 96 scans, enter 96 96 96 96 96 96 96 96.When more than one session is entered, specify:35
If ‘no’, <strong>SPM</strong> will prompt <strong>for</strong> the number (and names) of conditions / trials <strong>for</strong> each session. If‘yes’, specify:If ‘no’ (as will be usually the case, i.e. when replications are randomised across sessions),<strong>SPM</strong> will prompt <strong>for</strong> onset times/trial lengths <strong>for</strong> each session.Specify:<strong>for</strong> all sessions combined when conditions are replicated, or otherwise <strong>for</strong> each sessionseparately.Specify:<strong>for</strong> each condition.Specify:This option allows building an (event-related) experiment rather than analysing one. If ‘yes’,<strong>SPM</strong> will prompt to specify:(i) Whether to include a null event,(ii) Whether there is a fixed time delay between consecutive events of the same type(SOA, see below),(iii) The relative frequency of event types (e.g., 1/1),(iv) Whether this frequency should be stationary or modulated across the experiment.The resulting design matrix can be used <strong>for</strong> both conducting and analysing an experiment.Otherwise, select ‘no’.Specify:if ‘fixed’, specify:SOA = stimulus onset asynchrony = time (in scans) between the onset of two consecutiveappearances of the same condition/trial type. This must be entered <strong>for</strong> each trial/condition.Specify:<strong>for</strong> each trial/condition. For example, if the1 st trial occurs at the beginning of the first scan,enter 0, if it occurs halfway through the 3 rd scan, enter 2.5.If SOA = ‘variable’, specify:again <strong>for</strong> each trial/condition. Enter the onset in scans <strong>for</strong> each occurrence of the trial. Thelength of this vector should equal the number of times the trial occurs (replications).36
Next, specify:and if yes, specify trial durations <strong>for</strong> each replication:Again, the length of this vector should equal the number of trials (4 in this example).N.B.• SOA = stimulus onset asynchrony = time (in scans) between the onset of two consecutiveappearances of the same condition/trial type. As an example, consider a time series of 96scans with conditions A, B, and R, each block lasting 8 scans; if the scanning order isABRABRABRABR, SOA = fixed (24 scans), onset time = 0/8/16 <strong>for</strong> A/B/R. If thescanning order is randomised to ABRRBABARRAB, SOA = variable, vector of onsets =0 40 56 80/8 32 48 88/16 24 64 72 <strong>for</strong> A/B/R.• If block lengths within a condition are different, it should be analysed as an event-relateddesign (see below). Alternatively, it can be specified as an epoch design with separateconditions <strong>for</strong> each block length. For example, consider a simple ARAR… study in whichcondition A alternately lasts 7 or 8 scans; this can be modelled as A1RA2R… where A1 =7-scan activation blocks, and A2 = 8-scan activation blocks.• In these examples, a resting condition is included <strong>for</strong> clarity. A resting condition(baseline) need not be explicitly modelled in <strong>SPM</strong>, however.Specify:This option allows modelling changes over replications of conditions/trials across session.If ‘time’ or ‘other’, select:to model linear, exponential, or polynomial changes. (When choosing ‘polynomial’, <strong>SPM</strong> willprompt <strong>for</strong> the order of the polynomial, the default being 2 generating a polynomial withlinear + squared components).Next, specify condition or trial numbers in which a parametric term should be included (e.g.<strong>for</strong> 2 trials, select 1, 2 or both):If ‘other’, <strong>SPM</strong> will also prompt <strong>for</strong> a vector whose length is equal to the number ofreplications (e.g., 10):For two or more condition/trial types, specify:For each condition, trials should be either events or epochs. If mixed, <strong>SPM</strong> prompts to specify‘events’ or ‘epochs’ <strong>for</strong> each condition separately. If there is only one condition, <strong>SPM</strong> willalso prompt to specify ‘events’ or ‘epochs’.37
For an epoch design, select:i.e., a function or set of functions which, convolved with the timings specified earlier,provides the most adequate modelling of the data. Basis functions are more flexible than fixedresponse models but their components usually cannot be interpreted in a physiologicallymeaningful way; there<strong>for</strong>e multivariate or F-contrasts are required <strong>for</strong> statistical inference(see 4). A discrete cosine set may be useful when a steady-state response does not occur;<strong>SPM</strong> will prompt <strong>for</strong> the number of functions (default = 2). Similarly, mean & exponentialdecay may be chosen when the response decreases over time within an epoch (as opposed toacross replications, see above).Next, select:Convolving with the canonical hemodynamic response function (hrf) will add a delayedonset, early peak, and late undershoot to the model.Select:if yes, the partial derivative of e.g. the boxcar function with respect to time is added as anadditional regressor, which will enable modelling of slight onset differences.Finally, specify <strong>for</strong> each condition modelled as epochs:For an event-related design, select:- hrf (alone): canonical hemodynamic response function; based on empirical (visualstimulation) data; consists of two gamma functions (one positive, one negative) shifted 2sapart.- hrf (with time derivative): hrf with partial derivative <strong>for</strong> time added; allows modelling ofslight (ca. 1s) onset differences.- hrf (with time and dispersion derivatives): hrf with partial derivatives <strong>for</strong> time anddispersion added; allows modelling of slight onset differences in onset time and responsewidth.- basis functions (Fourier set): uses a set of sines/cosines to model responses. The defaultwindow length is 32s (at which time the canonical hrf has returned to baseline), the38
default number of functions is 4, resulting in 9 basis functions: sines/cosines withfrequency 1/32, 2/32, 3/32 and 4/32 Hz, and a constant. The number of functions shouldbe chosen with regard to the TR, as it is doubtful whether one should include componentshigher than the Nyquist frequency (i.e., 1/(2TR) Hz).- basis functions (Fourier set with Hanning): similar to the previous option but with anamplitude modulation (Hanning filter) added so that all functions start and end at zero.- basis functions (Gamma functions): uses three gamma functions (which areasymmetrical) with different onset-to-peak times and orthogonalised with respect to eachother.- basis functions (Gamma functions with derivatives): similar to the previous option butwith temporal derivatives <strong>for</strong> each function added.- basis functions (Finite Impulse Response): uses a set of ‘mini-boxcars’ to model peristimulustime. The default bin size (= ‘boxcar length’) is 2s, the default number of bins is8, giving 9 functions (1 constant).N.B.• As with epoch designs, basis functions are more flexible (no prior assumptions regardingthe shape of the response, especially the Fourier and FIR sets) but their componentscannot be interpreted in a physiologically meaningful way and there<strong>for</strong>e usually need F-contrasts <strong>for</strong> inference.• When T-contrasts are required (e.g., <strong>for</strong> a second-level analysis, see 3.3 and 4), hrf with orwithout time and dispersion derivatives should be chosen.For both epoch and event-related designs, specify:This option allows modelling (regressing out) of non-linearities due to the interaction ofsuccessive trials of the same type (<strong>for</strong> example, repetition suppression (priming)). Use alsowhen the time between successive events is 2s or less.Specify:to model any other covariates (i.e., other than modulation across replications (e.g., time) orwithin a block (=mean and exponential decay, see above)). <strong>SPM</strong> will prompt <strong>for</strong> a vectorwhose length equals the number of scans (e.g., 64):39
Output from fMRI model specification (spm_fmri_spm_ui.m) – first step:Display: shown <strong>for</strong> an event-related design, 112 scans, one event type, modelled using acanonical hrf with time and dispersion derivatives. There are six panels:40
- upper left: shows the columns in the design matrix, one <strong>for</strong> each regressor, one constant(block). This matrix is surfable: R-clicking will show parameter names, L-clicking willshow design matrix values <strong>for</strong> each scan- upper middle: shows the ‘columns’ of the previous graph (except <strong>for</strong> the constant) after a90° rotation, giving a ‘bar graph’ showing positive (light grey –white) and negative (darkgrey – black) values across session <strong>for</strong> regressor(s) used- upper right: graph of design orthogonality: white = orthogonal, black = collinear, grey =between orthogonal and collinear. This matrix is also sourball: L-clicking will give thevalue of the cosine of the angle between two parameters (0 = orthogonal, 1 = collinear)- middle left: shows a more detailed graph of each regressor across session (cf. uppermiddle panel)- middle right: shows a Fourier (frequency domain) trans<strong>for</strong>m of each regressor- lower: shows a graph of each regressor relative to peri-stimulus sampling (time bins)N.B.• As shown in this example, the regressors are not completely orthogonal due to the limitednumber of sampling points (orthogonality there<strong>for</strong>e varies with TR length).File: the output of fMRI model specification at this point is saved as<strong>SPM</strong>_fMRIDesMtx.mat in the working directory.N.B.• <strong>SPM</strong> displays only the first trial/session. To review the model <strong>for</strong> subsequenttrials/sessions, select ‘review a model’ from ‘fMRI models’, select the<strong>SPM</strong>_fMRIDesMtx.mat file, and click ‘Explore fMRI design’ (lower left window),which will activate a pull-down menu.3.2.2 Specification of a model – second step:To complete specification and proceed to estimating your model, select estimate a specifiedmodel from ‘fMRI models’:Select:Select scans (<strong>for</strong> each session/subject):Specify:which provides the option of scaling global activity within a session (scaling acrosssessions/subjects occurs implicitly). This may remove e.g. scanner drifts within a session; onthe other hand, large activations may be scaled down as well.41
Specify:Select specify if low-frequency confounds are to be removed.:The default suggested by <strong>SPM</strong> <strong>for</strong> epoch designs is two times the experimental cycle, e.g., <strong>for</strong>an ARAR…. design with A=8 scans and R=6, the default cut-off is 2(8+6)*TR. For eventrelateddesigns, the default is two times the longest interval between two appearances of themost frequently occurring event. For both epoch- and event-related designs the lowerthreshold is 32sec, the upper threshold is 512sec.Specify:If there were no correction <strong>for</strong> temporal autocorrelation in fMRI data, statistical inferencewould produce inflated results (the actual number of degrees of freedom is lower than thenumber of observations (scans)). <strong>SPM</strong>99 gives two options to deal with this problem:(i) Replacing the unknown autocorrelations by an imposed autocorrelation structure, bysmoothing the data with a temporal filter that will attenuate high frequencycomponents, hence a ‘low-pass filter’. The shape of this filter can be either Gaussianor hrf. Differences between these two are slight but hrf may provide a bettersensitivity <strong>for</strong> event-related data modelled using a hrf-basis function;(ii) Attempting to regress out the unknown autocorrelations (AR(1)-model, see below).If Gaussian, specify filter width (default = 4sec):A large (wide) filter implies that attenuation will occur at lower frequencies (or, putdifferently, that high frequencies will be suppressed more) than with a small filter. The tradeoffis that a large filter may remove interesting data while a small filter will not be adequate toimpose a new (known) autocorrelation structure on the data.Specify:AR(1) = auto-regression (1) = modelling serial correlations by regressing out the varianceexplained by the previous observation (scan).N.B.• Either temporal smoothing or AR(1) should be chosen, not both.• It is unclear whether the AR(1) option provides adequate correction <strong>for</strong> serial correlationsand hence biased statistics. More extensive autoregression models (AR(n)) are moreflexible than low-pass filtering but are computationally demanding.• Serial correlations affect only statistical inference at the first level. Correction maythere<strong>for</strong>e be omitted when one is only interested in a second-level (random effects)analysis.42
Finally, specify:i.e., default F-contrasts <strong>for</strong> each trial type will be computed.Output from fMRI model specification (spm_fmri_spm_ui.m) – 2nd step:43
Display: the design matrix shown at this point is simply the left upper panel of the previousgraph, with the file names of the scans added, and with other details of the configuration listedunderneath.Output: the configuration <strong>for</strong> the design matrix is saved as <strong>SPM</strong>cgf.mat in the workingdirectory.N.B.• The design matrix is also shown when the ‘specify and estimate a model’ option has beenchosen.As with PET/SPECT models, <strong>SPM</strong> provides the option to begin parameter estimation now orat a later stage:If ‘later’, select ‘Estimate’ (middle panel) and select the appropriate <strong>SPM</strong>cfg.mat file.N.B.• Model estimation may also be launched via the ‘Explore design’ option. <strong>SPM</strong> will promptyou to select a <strong>SPM</strong>DesMtx.mat or a <strong>SPM</strong>cfg.mat file <strong>for</strong> inspection.• Clicking ‘Design’ (lower left window) will activate a pull-down menu that allowsselection of displays <strong>for</strong> the design matrix <strong>for</strong> each session, details of design orthogonality(surfable), and model estimation (when the <strong>SPM</strong>cfg.mat file was selected).Output from fMRI parameter estimation (spm_spm.m):- beta_0001.img/hdr, beta_0002.img/hdr, beta_0003.img/hdr, ….. : images containingparameter estimates <strong>for</strong> each column in the design matrix- mask.hdr/img : mask image consisting of 0’s and 1’s indicating which voxels within theimage volume are to be assessed- ResMS.hdr/img : image of estimated residual variance- RPV.hdr/img : image of estimated resels per voxel- <strong>SPM</strong>.mat: contains details of design matrix, analysed images, search volume, smoothnessestimates and results files.- xCon.mat: contains default F-contrast (so-called ‘effects of interest’) which are used <strong>for</strong>selecting ‘interesting’ voxels at which to save raw data <strong>for</strong> future plotting- Y.mad: contains (in compressed <strong>for</strong>m) the raw (unsmoothed) data at voxels with an F-statistic higher than the default. Each column corresponds to one voxel, each row to aninput image- Yidx.mat: contains a 1 x N vector of column indices used in the Y.mad file (where N =number of available voxels)44
3.3 Customisations <strong>for</strong> PET/SPECT and fMRI statisticsSelect PET or fMRI statistics from the lower panel:Defaults <strong>for</strong> model specification and parameter estimation are few to allow maximalflexibility.For both PET and fMRI, specify:<strong>for</strong> the default ‘effects of interest’-F-test. The default value <strong>for</strong> PET is p
3.4 Basic models (spm.spm_ui.m)These are basic models <strong>for</strong> simple statistics, usually at a second level to extend the sphere ofinference (random effects (RFX) analysis). Because <strong>SPM</strong> considers only a single componentof variance (the residual error of variance), all analyses involving repeated measures withinsubjects are to be considered fixed-effects analyses, so that inferences are only valid <strong>for</strong> thesample under study. To allow inferences valid <strong>for</strong> the population from which the sample wasdrawn, a two-stage analysis is required, to account <strong>for</strong> first or intrasubject and second orbetween-subject levels of variance. During the first step, scan to scan variance (intrasubject) ismodelled <strong>for</strong> each subject separately, resulting in a summary measure or ‘scan’. Thesesummary scans (usually t-contrast images (con*.img), containing weighted parameterestimates; see 4) are then fed into a second, between-subjects level analysis, using the ‘Basicmodels’ option.N.B.• For second-level analyses, first-level individual subject models should be the same (i.e. itshould be a balanced design).• To compute contrast images <strong>for</strong> a second-level analysis, either a single-subject OR asubject-separable multi-subject model should be chosen <strong>for</strong> the first level analysis, i.e. <strong>for</strong>PET ‘Multi-subject, cond x subj interaction & covariates’ (single-group design) or ‘FullMonty’ (multi-group design).• For fMRI, each subject should be specified as one session, or contrasts should be specifiedover sessions. For example, if 10 subjects did two sessions each, this can be analysed as a20-session experiment, with individual contrast images specified by 1 1 0 0 0 …., 0 0 1 10 ….., and so <strong>for</strong>th.• The ‘Basic models’ option may also be used to analyse ‘raw’ (first-level) data. For thispurpose <strong>SPM</strong> provides options <strong>for</strong> global normalisation, grand mean scaling andthresholding / implicit masking similar to those discussed <strong>for</strong> PET/SPECT models. Forsecond-level analyses, however, it is not necessary to use these options at this stagebecause global normalisation etc. has been specified as part of the first level analysis.Select:- One sample t-test: tests the null hypothesis that the mean of one group of observations isidentical to zero. For example, a second level analysis of activation-rest contrast imagesfrom a multi-subject experiment.- Two sample t-test: tests the null hypothesis that the mean of one group of observations isidentical to the mean of a second group of observations. For example, a second levelanalysis of activation-rest contrast images from a two-group (e.g., patients and controls)experiment.46
- Paired t-test: tests the null hypothesis that the mean difference between a group of pairedobservations is zero. For example, a second level analysis of activation-rest contrastimages from a multi-subject experiment with two separate sessions (e.g., pre- and posttherapy).- One way Anova: tests the null hypothesis that the means of two or more groups ofobservations are identical. For example, a second level analysis of activation-rest contrastimages from a three-group (e.g., patients A, patients B, and controls) experiment.- Simple regression (correlation): tests the null hypothesis that the slope of a fitted (usinga least squares solution) regression line describing the relation between a predictor and anoutcome variable is zero. For example, a multi-subject PET-ligand study with age as apotential confound.- Multiple regression: regression with two or more predictors and one outcome variable.Tests the null hypothesis that the slope of the regression line <strong>for</strong> each predictor variable iszero. For example, a multi-subject PET-ligand study with age AND weight as potentialconfounds.N.B.• Designs in which one or more factors represent repeated measures (e.g. from the samesubject) with more than two levels (e.g. a one-way Anova on three observations from thesame group) are not strictly valid. This is because <strong>SPM</strong> (currently) assumes that the dataare “spherical”, which is rarely true in such models. RFX analyses are there<strong>for</strong>e normallyrestricted to one- or two-sample t-tests.• Designs with one measurement of a potential confound per subject (age, weight, educationlevel, etc.) may also be analysed using the PET/SPECT models: ‘single subject, covariatesonly’ option, treating each subject as a scan.- AnCova: analysis of covariance: regression with two or more groups of observations andone predictor. Tests the null hypothesis that the distance between parallel regression linesis zero AND the null hypothesis that the means of two or more groups of observations areidentical, with the effects of the predictor (confound) removed. For example, a secondlevel analysis of activation-rest contrast images from a two-group (e.g., patients andcontrols) experiment, with IQ as a potential confound. See example belowExample: AnCova (two groups, one covariate)Specify (e.g. 2):Select (<strong>for</strong> both groups):Specify a vector whose length equals the total number of scans:Specify (e.g., IQ):47
Select:- scaling of all images to overall grand mean: use only <strong>for</strong> first-level analyses.- no grand mean scaling (= default): <strong>for</strong> second-level analyses (as in this example).Select (none):Select (no):Thresholding and implicit masking (i.e., ignoring zeros. <strong>SPM</strong> will automatically disregardzero values indicated by NaN (Not a Number)) should only be per<strong>for</strong>med at the first level.Select (no):This option is primarily <strong>for</strong> analysing raw data; usually, images will be masked at thenormalisation stage (2.4).Select (omit):Again, this option is <strong>for</strong> first-level analyses only.48
Output from Basic models (spm_spm_ui):Display: <strong>SPM</strong> displays a design matrix having columns <strong>for</strong> each parameter (in this example,two groups, one constant (block), and one covariate (IQ in this example), and a row <strong>for</strong> eachscan (subject). Again, the grey-and-white bar below the design matrix signals that the matrixis rank deficient (columns 1-3 are linearly dependent) which limits selection of meaningfulcontrasts (parameter weights) <strong>for</strong> group effects to those which sum up to zero (see 4).File: the configuration <strong>for</strong> the design matrix will be saved as <strong>SPM</strong>cfg.mat in the workingdirectory.Finally, specify:49
to begin parameter estimation now or at a later stage. If ‘later’, select ‘Estimate’ (middlepanel) and select the appropriate <strong>SPM</strong>cfg.mat file.N.B.• Model estimation may also be launched via the ‘Explore design’ option. <strong>SPM</strong> willprompt you to select a <strong>SPM</strong>cfg.mat file <strong>for</strong> inspection.• Clicking ‘Design’ (lower left window) will activate a pull-down menu which allowsselection of displays <strong>for</strong> the design matrix, details of design orthogonality (surfable),selected scans and specified conditions, and covariates. It does not provide options to editthe model.Output from Basic models parameter estimation (spm_spm.m):- beta_0001.img/hdr, ... : images containing parameter estimates <strong>for</strong> each column in thedesign matrix.- mask.hdr/img : mask image consisting of 0’s and 1’s indicating which voxels within theimage volume are to be assessed.- ResMS.hdr/img : image of estimated residual variance.- RPV.hdr/img : image of estimated resels per voxel.- <strong>SPM</strong>.mat: contains details of design matrix, analysed images, search volume, smoothnessestimates and results files.- xCon.mat: contains default F-contrast (‘all effects‘ or ‘effects of interest’) which is used<strong>for</strong> selecting voxels at which to save raw data <strong>for</strong> future plotting.- Y.mad: contains (in compressed <strong>for</strong>m) the raw (unsmoothed) data at voxels with an F-statistic higher than the default. Each column corresponds to one voxel, each row to aninput image.- Yidx.mat: contains a 1 x N vector of column indices used in the Y.mad file (where N =number of available voxels).50
4. Results assessment (spm_results_ui.m)This section deals with the interactive exploration and characterisation of the results of astatistical analysis. For this purpose, three data sets will be discussed, which can be found athttp://www.fil.ion.ucl.ac.uk/spm/data. These examples are (i) a single-subject epoch (block)fMRI study, (ii) a multi-subject PET study, (iii) a single-subject event-related fMRI study.4.1 Example 1: single-subject fMRI block design (plotting and overlays)This is a single-subject auditory activation study, with alternating 6-scan blocks of rest andbinaural stimulation (speech). Details of model specification and parameter estimation can befound in the README_analysis.txt.After completing model estimation (this is shown in the lower left <strong>SPM</strong> and Matlabwindows), press ‘Results’.Select:This will invoke the Contrast Manager:The contrast manager displays the design matrix (surfable) in the right panel and listsspecified contrasts in the left panel. Either ‘t-contrast’ or ‘F-contrast’ can be selected. One F-contrast is predefined (‘effects of interest’).To examine statistical results <strong>for</strong> condition effects, select ‘Define new contrast’:51
Main effects <strong>for</strong> the active condition (i.e., a one-sided t-test) can be specified (in this example)as ‘1’ (active > rest) and ‘-1’ (rest > active). <strong>SPM</strong> will accept correct contrasts only. Acceptedcontrasts are displayed at the bottom of the contrast manager window in green, incorrect onesare displayed in red. To view a contrast, select the contrast name (e.g., active>rest) and press‘Done’:Specify (no):Masking implies selecting voxels specified by other contrasts. If ‘yes’, <strong>SPM</strong> will prompt <strong>for</strong>(one or more) masking contrasts, the significance level of the mask (default p = 0.05uncorrected), and will ask whether an inclusive or exclusive mask should be used. Exclusivewill remove all voxels which reach the default level of significance in the masking contrast,inclusive will remove all voxels which do not reach the default level of significance in themasking contrast. Masking does not affect p-values of the ‘target’ contrast, it only includes orexcludes voxels.52
Select (enter a title):Specify (yes):Select a height/amplitude threshold to examine results that are either corrected <strong>for</strong> multiplecomparisons (‘yes’), or uncorrected (‘no’) at a voxel-level.Specify:For corrected comparisons, the <strong>SPM</strong> default is p=0.05, <strong>for</strong> uncorrected comparisons, p=0.001.Specify:Select the number of voxels to restrict the minimum cluster size. 0 will include single voxelclusters (‘spike’ activations).Output from Contrast Manager:Files: images containing weighted parameter estimates are saved as con_0002.hdr/img,con_0003.hdr/img, …etc. in the working directory. Images of T-statistics are saved asspmT_0002.hdr/img, spmT_0003.hdr/img.. etc., also in the working directory.Display: in the Graphics window, <strong>SPM</strong> displays(i) a maximum intensity projection (MIP) on a glass brain in three orthogonal planes.The MIP is surfable: R-clicking in the MIP will activate a pulldown menu, L-clickingon the red cursor will allow it to be dragged to a new position.(ii) the design matrix (showing the selected contrast). The design matrix is also surfable:R-clicking will show parameter names, L-clicking will show design matrix values <strong>for</strong>each scan.In the <strong>SPM</strong> Interactive window (lower left panel) a button box appears with various options<strong>for</strong> displaying statistical results (p-values panel) and creating plots/overlays (visualisation53
panel). Clicking ‘Design’ (upper left) will activate a pulldown menu as in the ‘Exploredesign’ option.To get a summary of local maxima, press ‘volume’:This will list all clusters above the chosen level of significance as well as separate (>8mmapart) maxima within a cluster, with details of significance thresholds and search volumeunderneath. The columns show, from right to left:- x, y, z (mm): coordinates in Talairach space <strong>for</strong> each maximum- voxel-level: the chance (p) of finding (under the null hypothesis) a voxel with this or agreater height (T- or Z-statistic), corrected / uncorrected <strong>for</strong> search volume- cluster-level: the chance (p) of finding a cluster with this or a greater size (k e ), corrected /uncorrected <strong>for</strong> search volume- set-level: the chance (p) of finding this or a greater number of clusters (c) in the searchvolume54
N.B.• The table is surfable: clicking a row of cluster coordinates will move the pointer in theMIP to that cluster, clicking other numbers will display the exact value in the Matlabwindow (e.g. 0.000 = 6.1971e-07).• To inspect a specific cluster (e.g., in this example data set, the R auditory cortex), eithermove the cursor in the MIP (by L-clicking & dragging the cursor, or R-clicking the MIPbackground which will activate a pulldown menu).• Alternatively, click the cluster coordinates in the volume table, or type the coordinates inthe lower left windows of the <strong>SPM</strong> Interactive window.Select ‘cluster’:This will show coordinates and voxel-level statistics <strong>for</strong> local maxima (>4mm apart) in theselected cluster. This table is also surfable.To plot effect size and/or signal time course from a voxel, e.g. <strong>for</strong> the cluster maximum, movethe cursor to (60 –20 8). Next, press ‘plot’:- Contrast of parameter estimates: <strong>SPM</strong> will prompt <strong>for</strong> a specific contrast (e.g.,active>rest). The plot will show effect size and error bars (in %).- Fitted and adjusted response: Plots adjusted data and fitted response acrosssession/subject. <strong>SPM</strong> will prompt <strong>for</strong> a specific contrast and provides the option to choosedifferent ordinates (‘an explanatory variable’, ‘scan or time’, or ‘user specified’). If ‘scanor time’, the plot will show adjusted BOLD data (in %, blue dashed line) and theregressor(s) used (red solid line):55
- Event/epoch-related responses: Plots adjusted data and fitted response across peristimulustime. <strong>SPM</strong> provides four options: fitted response: simple plot of mean (i.e., averaged over session) regressor(s) across PST fitted response and PSTH (peri-stimulus time histogram): plots mean regressor(s) andmean signal +/- SE <strong>for</strong> each time bin. fitted response +/- standard error: plots mean regressor(s) +/- SE fitted response and adjusted data: plots regressor(s) and individual data (note that inthis example the data are shown in columns due to the fixed TR/ISI relationship)56
N.B.• The values <strong>for</strong> the fitted response across session/subject <strong>for</strong> the selected plot can bedisplayed and accessed in the Matlab window by typing ‘Y’. Typing ‘y’ will display theadjusted data.• ‘Adjusted’ data = adjusted <strong>for</strong> confounds (e.g., global flow) and high- and low passfiltering.For anatomical visualisation of a cluster (in this example, R auditory cortex), press ‘overlays’which will activate a pulldown menu. There are three options:- slices: overlay on three adjacent (2mm) transaxial slices. <strong>SPM</strong> will prompt <strong>for</strong> an image<strong>for</strong> rendering (a canonical image (see spm_template.man) or an individual T1/mean EPIimage <strong>for</strong> single-subject analyses)57
- sections: overlay on three intersecting (sagittal, coronal, transaxial) slices. Theserenderings are surfable: clicking the images will move the crosshair- render: overlay on a volume rendered brain, with options <strong>for</strong> using a smoothed brain, andold (left) and new (right) style rendering.Renderings can be saved as filename.img and filename.hdr in the working directory by usingthe write filtered option.Other options (in the results controls panel):- clear: clears lower subpanel of Graphics window- exit: exits the results section- ? : launches spm_results_ui help58
4.2 Example 2: Multi-subject PET study (volume of interest, masking and conjunctionanalyses)This is a PET word generation study with five subjects, each having 12 scans, with alternatingconditions of word shadowing (baseline) and word generation (active), randomised acrosssubjects (see the README.txt). Although this data set can be analysed in several ways, it issuggested to select a subject-separable model (Multi-subj: cond x subj interaction &covariates, see 3.1). Specify: # covariates = 0, # nuisance variables = 0, GloNorm: AnCova bysubject.After completing model estimation (this is shown in the lower left <strong>SPM</strong> and Matlabwindows), press ‘Results’.Select:This will invoke the Contrast Manager:To examine condition effects e.g. <strong>for</strong> subject 2, select ‘Define new contrast’. Specify e.g.‘active>rest_subj2’ (name) and ‘0 0 -1 1’ (contrast), and press ‘submit’:59
As shown, <strong>SPM</strong> will interpret ‘0 0 –1 1’ as ‘0 0 –1 1 0 0 0 0 0 0’. Condition effects <strong>for</strong> eachsubject may be assessed as in the previous fMRI example.To examine group effects, define e.g. ‘active>rest_allsubj’ as ‘-1 1 -1 1 -1 1 -1 1 -1 1’ andselect it (press ‘Done’):Specify (no):Masking implies selecting voxels specified by other contrasts. If ‘yes’, <strong>SPM</strong> will prompt <strong>for</strong>(one or more) masking contrasts, the significance level of the mask (default p = 0.05uncorrected), and will ask whether an inclusive or exclusive mask should be used. Exclusivewill remove all voxels which reach the default level of significance in the masking contrast,inclusive will remove all voxels which do not reach the default level of significance in themasking contrast. Masking does not affect p-values of the ‘target’ contrast.60
Specify (yes):Select a height/amplitude threshold to examine results that are either corrected <strong>for</strong> multiplecomparisons (‘yes’), or uncorrected (‘no’) at a voxel-level.Specify:For corrected comparisons, the <strong>SPM</strong> default is p=0.05, <strong>for</strong> uncorrected comparisons, p=0.001.Specify:Select the number of voxels to restrict the minimum cluster size. 0 will include single voxelclusters (‘spike’ activations).Output from Contrast Manager:Files: images containing weighted parameter estimates are saved as con_0002.hdr/img,con_0003.hdr/img, …etc. in the working directory. Images of T-statistics are saved asspmT_0002.hdr/img, spmT_0003.hdr/img etc., also in the working directory.Display: in the Graphics window, <strong>SPM</strong> displays(i)(ii)a maximum intensity projection (MIP) on a glass brain in three orthogonal planes.The MIP is surfable: R-clicking in the MIP will activate a pulldown menu, L-clickingon the red cursor will allow it to be dragged to a new position.the design matrix (showing the selected contrast). The design matrix is also surfable:R-clicking will show parameter names, L-clicking will show design matrix values <strong>for</strong>each scan.In the <strong>SPM</strong> Interactive window (lower left panel) a button box appears with various options<strong>for</strong> displaying statistical results (p-values panel) and creating plots/overlays (visualisationpanel). Clicking ‘Design’ (upper left) will activate a pulldown menu as in the ‘Exploredesign’ option.61
To get a summary of local maxima, press ‘volume’:As in the previous example, this will list all clusters above the chosen level of significance aswell as separate (>8mm apart) maxima within a cluster, with details of significance thresholdsand search volume underneath. The columns show, from right to left:- x, y, z (mm): coordinates in Talairach space <strong>for</strong> each maximum- voxel-level: the chance (p) of finding (under the null hypothesis) a voxel with this or agreater height (T- or Z-statistic), corrected / uncorrected <strong>for</strong> search volume- cluster-level: the chance (p) of finding a cluster with this or a greater size (k e ), corrected /uncorrected <strong>for</strong> search volume- set-level: the chance (p) of finding this or a greater number of clusters (c) in the searchvolume62
N.B.• The table is surfable: clicking a row of cluster coordinates will move the pointer in theMIP to that cluster, clicking other numbers will display the exact value in the Matlabwindow (e.g. 0.000 = 6.1971e-07).• To inspect a specific cluster (e.g., in this example data set, the L prefrontal cortex), eithermove the cursor in the MIP (by L-clicking & dragging the cursor, or R-clicking the MIPbackground which will activate a pulldown menu).• Alternatively, click the cluster coordinates in the volume table, or type the coordinates inthe lower left windows of the <strong>SPM</strong> Interactive window.Select ‘cluster’:This will show coordinates and voxel-level statistics <strong>for</strong> local maxima (>4mm apart) in theselected cluster. The table is also surfable.Both in the ‘volume’ and ‘cluster’ options, p-values are corrected <strong>for</strong> the entire searchvolume. If one has an a priori anatomical hypothesis (obviously, in the present example, thatBroca’s area will be activated during this word generation task) one may use the smallvolume correction option (see also Matthew Brett’s tutorial at http://www.mrccbu.cam.ac.uk/Imaging/vol_corr.html).Select ‘S.V.C.’ (left lower panel), and select a suitableregion, e.g., a 30mm sphere with its centre at –44 16 0. Note that the region should be definedusing prior knowledge (e.g., a mask image derived from previous imaging data).63
N.B.• As is shown, only corrected p-values change (become smaller) when SVC is used.To extract a time course <strong>for</strong> data in this region of interest (spm.regions.m), select V.O.I.(Volume Of Interest) and select (‘don’t adjust’):Specify (e.g., Broca):Specify (accept default):64
Output from spm.regions.m:Display:<strong>SPM</strong> displays a graph of the first eigenvariate of the data in or centered around the chosenvoxel (or the nearest suprathreshold voxel saved in the Y.mad file), and lists the eigenvariatevalues (Y) in the Matlab window. If temporal filtering has been specified (fMRI), then thedata is temporally filtered. Adjustment is with respect to the null space of a selected contrast,or can be omitted.File: Y and VOI details (xY) are saved as VOI_regionname.mat in the working directory.In this example, group effects are calculated averaged across subjects, there<strong>for</strong>e individualdata may bias group results. To assess condition effects common to all subjects, one shouldeither mask (inclusively) the ‘all_subj’ contrast with the individual contrasts, or per<strong>for</strong>m aconjunction analysis.To assess the masked contrast, press ‘Results’, select the appropriate ‘<strong>SPM</strong>.mat’ file, andselect the ‘all_subj’ contrast.Next, press ‘yes’:Select all individual contrasts (by pressing [control] while selecting):65
Specify threshold (select default):Select (inclusive):Specify (accept default):Specify (yes):Specify (accept default):Specify (accept default):When the MIP appears, press ‘volume’:66
The output shows all voxels which are (a) significant at p < 0.05 corrected across all subjectsand (b) significant at p < 0.05 uncorrected <strong>for</strong> each subject individually.To per<strong>for</strong>m a conjunction across subjects, press ‘Results’, and select all individual contrasts(press ‘Control’):67
N.B.• Sometimes (e.g., if global confounds are used) the contrasts of parameter estimates are notexactly orthogonal (even if the contrast weight vectors are).• <strong>SPM</strong> checks whether the contrasts are orthogonal and if not makes them so (relative to thefirst contrast specified).Next, press ‘no’:Specify (accept):Specify (yes):Specify (accept default):The p-value (corrected or uncorrected) refers to the threshold of the conjunction; <strong>SPM</strong> willcompute corresponding thresholds <strong>for</strong> individual contrasts (<strong>for</strong> uncorrected thresholds, theindividual threshold will be p 1/n , where p = individual threshold and n = number of contrastsin the conjunction).N.B.• In <strong>SPM</strong>99b, uncorrected p-values were applied by <strong>SPM</strong> to individual contrasts, so that thethreshold of the conjunction was p n .• Height, and not extent, is used to specify thresholding because the distributionalapproximations <strong>for</strong> the spatial extent of a conjunction <strong>SPM</strong> are not known (at present), sothat inference based on spatial extent is precluded.When the MIP appears, press ‘volume’:68
Although the MIP’s of the masked group contrast and the conjunction are similar, <strong>for</strong> theconjunction an intersection <strong>SPM</strong> or ‘minimum T-field’ is computed. Conjunctions in <strong>SPM</strong>99represent the intersection of several <strong>SPM</strong>s. This intersection is the same as thresholding amap of the minimum T-values (if the smallest T-value is above the specified threshold then allthe T-values associated with the component <strong>SPM</strong>s are above threshold).Conjunction <strong>SPM</strong>s are very useful <strong>for</strong> testing multiple hypotheses (each componenthypothesis being specified by a contrast). In this example, the set of hypotheses tested jointlyis that the first subject did not activate, the second subject did not activate and so on. Inregions that survive a conjunction analysis the null hypothesis is rejected jointly <strong>for</strong> allsubjects. This can be thought of as enabling an inference that subject 1 activated ANDsubject 2 activated AND subject 3... etc.Gaussian field theory results are available <strong>for</strong> <strong>SPM</strong>s of minimum T- (or F-) statistics andthere<strong>for</strong>e corrected p-values can be computed. Note that the minimum T-values do not havethe usual Student’s T-distribution and small minimum T-values can be very significant.69
4.3 Example 3: single-subject fMRI event-related designAs a third and more sophisticated example, consider the data from a repetition primingexperiment per<strong>for</strong>med using event-related fMRI. Again, details regarding the data set can befound in the README.txt. Briefly, this is a 2x2 factorial study where famous and nonfamousfaces were presented twice (while the subject was asked to make fame judgements)against a checkerboard baseline. There are thus four event-types of interest, (first and secondpresentations of famous and non-famous faces, ordered in the design matrix N1-N2-F1-F2),each modelled with a canonical HRF and its temporal derivative. Also included are two eventtypesof no interest – the (rare) errors made by this subject on the fame-judgement task - andthe subject’s realignment parameters, to regress out residual movement-related variance. Thelatter can be achieved by loading the realignment_*.txt file (output from the realignmentstage) as a matrix into the Matlab workspace and entering the matrix name in the <strong>SPM</strong> inputbox (rather than specifying 6 vectors of length 351 in this example). Preprocessing of the dataincludes slice timing correction having the middle slice (12) as the reference slice. There<strong>for</strong>e,prior to specifying the model, in the fMRI statistics defaults, the sampled bin should be equalto half the number of bins. For example, enter number of bins = 24 (the number of slices) andthe sampled bin=12, using the Defaults button. In addition, stimulus onset times have beenspecified as a cell array variable, allowing different vector (row) lengths <strong>for</strong> separate trials.In addition to analysing the data in the above “categorical” design, an alternative “parametric”design is illustrated in which repetition is viewed as a continuum. In this case, the response toeach presentation of famous and non-famous faces is modulated by the time interval (lag)since the previous presentation of that face (<strong>for</strong> first presentations, this lag is infinite).To assess the results <strong>for</strong> the categorical (factorial) analysis, specify and estimate the model(alternatively download the CatStats files). Next, press ‘Results’ and select the appropriate<strong>SPM</strong>.mat file. This will again invoke the contrast manager:To assess the main effects of viewing faces vs. baseline, select ‘Define new contrast’ and type‘Canonical HRF: Faces > Baseline’ (name) and ‘1 0 1 0 1 0 1 0’ (contrast), and press ‘Done’.70
Specify (no):Specify (accept default):After computation of the contrast, specify (yes):Specify (accept default):Specify (accept default):When the MIP appears, press ‘volume’:The table lists all areas where the mean of the parameter estimates <strong>for</strong> the canonical hrf of thefour conditions is significantly greater than baseline (zero). To assess both the hrf and itstemporal derivative, an F-contrast is required. Press ‘Results’, select the <strong>SPM</strong>.mat file, andpress ‘F-contrast’ (radio button). Next, select ‘Define new contrast’, specify ‘hrf + temp deriv:Faces vs. Baseline’ (name) and enter‘1 0 1 0 1 0 1 00 1 0 1 0 1 0 1 ‘ (contrast) and press ‘Done’:71
Select the new contrast, specify ‘mask with other images?‘ (no), specify ‘name ofcomparison’ (accept default), specify ‘corrected height threshold’ (yes), specify ‘corrected pvalue’ (accept default). Again, when the MIP appears, press ‘volume’:72
Although the MIP of this F-contrast looks similar to the previous t-contrast, note that thepresent contrast shows the areas <strong>for</strong> which the mean of the parameter estimates <strong>for</strong> thecanonical hrf OR its temporal derivative <strong>for</strong> the four conditions are different from zero(baseline). In other words, the F-contrast is two-sided, and tests two t-contrastssimultaneously. Also note that an F- (or t-) contrast such as 1 1 1 1 1 1 1 1, which testswhether the mean of the canonical hrf AND its temporal derivative <strong>for</strong> all conditions aredifferent from (larger than) zero is not sensible. This is because the canonical hrf and itstemporal derivative may cancel each other out while being significant in their own right.Finally, note that single F-contrasts can be regarded as t-contrasts^2, so that the F-contrasts 10 -1 0 1 0 –1 0 and –1 0 1 0 –1 0 1 0 are equivalent.The relative contributions of the canonical hrf and its temporal derivative at a given voxelmay also be assessed using F-contrasts to estimate a reduced model, removing all confounds.Press ‘Results’, select the <strong>SPM</strong>.mat file, press ‘F-contrast’ in the contrast manager, and select‘Define new contrast’. Specify ‘Effects of Real Interest’ (name) and type ‘9:19’ in the smallwindow labelled ‘columns <strong>for</strong> reduced design’. This will remove columns 9 to 19 (i.e., hrfand temporal derivative <strong>for</strong> events representing error judgements and nuisance covariates)from the design.Submit and select the new contrast, specify ‘mask with other images?‘ (no), specify ‘name ofcomparison’ (accept default), specify ‘corrected height threshold’ (yes), specify ‘corrected pvalue’ (accept default). Again, when the MIP appears, press ‘volume’:73
Move the cursor to e.g. the anterior right fusi<strong>for</strong>m blob (the R fusi<strong>for</strong>m face area) by clickingthe second set of coordinates in the cluster (45 –48 –27) and press ‘plot’. Select ‘Contrast ofparameter estimates’ and select ‘Effects of real interest’:74
Columns 1,3,5,7 are the canonical hrfs <strong>for</strong> N1 (non-famous faces, first presentation), N2 (nonfamousfaces, second presentation), F1 (famous faces, 1 st presentation) and F2 (famous faces,2 nd presentation), whereas columns 2,4,6,8 are the temporal derivatives. Note that theamplitude of the canonical hrfs is large compared to the temporal derivatives, suggesting that,<strong>for</strong> this region at least, the timing of the model is adequate. Also note the repetition x stimulustype interaction (the decrease from N1 to N2 is smaller than <strong>for</strong> F1 to F2).To assess further the effects of stimulus repetition, press ‘Results’, select the <strong>SPM</strong>.mat file,and press ‘F-contrast’. Specify e.g. ‘hrf + temp deriv: 1 vs. 2’ (name) and‘1 0 –1 0 1 0 –1 00 1 0 –1 0 1 0 –1’ (contrast). Submit and select the contrast. Specify ‘mask with anothercontrast’ (yes), select the ‘Canonical HRF: Faces > Baseline’ t-contrast, specify ‘threshold <strong>for</strong>mask’ (accept default of p=0.05 uncorrected), specify ‘nature of mask’ (inclusive), specify‘title <strong>for</strong> comparison’ (accept default), specify ‘corrected height threshold’ (no), specifythreshold (0.001).Again, when the MIP appears, press ‘volume’:75
The MIP shows all clusters where the difference between the parameter estimates <strong>for</strong> first andsecond presentations <strong>for</strong> the canonical hrf OR its temporal derivative is significantly differentfrom zero AND the canonical hrf <strong>for</strong> all four conditions is significantly larger than zero. Notethat although the mask does not alter the threshold <strong>for</strong> the target contrast, the combinedprobability <strong>for</strong> a voxel to appear in the masked contrast is in the order of 0.05 x 0.001uncorrected due to the orthogonality of the contrasts.To plot repetition suppression effects <strong>for</strong> the R fusi<strong>for</strong>m region, select the third cluster fromthe top (by clicking 48 60 –15; slightly more posterior to that identified above) and press‘plot’.Select ‘event/epoch-related responses’:Specify ‘1:4’:Select ‘fitted response’:To adjust the scale of the x-axis (time), press ‘attrib’ from the plot controls panel:76
Select Xlim, and change the default (-4 32) to ‘0 10’:Note the signal decrease between first and second presentations of both famous and nonfamousfaces:Other options from the plot controls panel:- hold: allows overlaying of plots- grid: toggles between grid on/off- Box: toggles between axes/box- text: allows editing of title and/or axis labels.To assess movement-related activation, press ‘Results’, select the <strong>SPM</strong>.mat file, and select ‘Fcontrast’in the Contrast Manager. Specify e.g. ‘Movement-related activation’ (name) andeither‘0 0 0 0 0 0 0 0 0 0 0 0 10 0 0 0 0 0 0 0 0 0 0 0 0 10 0 0 0 0 0 0 0 0 0 0 0 0 0 10 0 0 0 0 0 0 0 0 0 0 0 0 0 0 10 0 0 0 0 0 0 0 0 0 0 0 0 0 0 0 10 0 0 0 0 0 0 0 0 0 0 0 0 0 0 0 0 1’in the ‘contrasts weights matrix’ window, or ‘1:12 19’ in the ‘columns <strong>for</strong> reduced design’window.77
Submit and select the contrast, specify ‘mask with other contrasts?’ (no), ‘title <strong>for</strong>comparison’ (accept default), ‘corrected height threshold’ (yes), and ‘corrected p-value’(accept default). When the MIP appears, press ‘volume’:78
The table displays all clusters where signal changes correlated with any of the six movementparameters are significantly different from zero. Note the large edge effects, which, however,are not apparent in the fusi<strong>for</strong>m regions.Finally, consider the effects of the interval between first and second presentations of famousand non-famous faces. For this purpose, an alternative statistical model needs to be estimated,with four trial types. (1) First and second presentation of a non-famous face (N1 and N2collapsed). (2) First and second presentation of a famous face (F1 and F2 collapsed). (3)Errors in judging non-famous faces. (4) Errors in judging famous faces. These are modelledwith the canonical hrf alone, with two parametric (exponential) modulations added <strong>for</strong> secondpresentations of non-famous and famous faces. See the README.txt <strong>for</strong> details of designspecification.After completion of model estimation, press ‘Results’ and select the <strong>SPM</strong>.mat file. When theContrast Manager appears, define an F-contrast ‘Effect of Lag (on canonical N+F)’ (name)and ‘0 1 0 1’, and a t-contrast ‘Canonical: Faces>Baseline’ (name) and ‘1 0 1 0’. Select the F-contrast, specify ‘mask with other contrasts’ (yes), select ‘Canonical: Faces>Baseline’,specify ‘uncorrected mask p-value’ (accept default), ‘nature of mask (inclusive), ‘title <strong>for</strong>comparison’ (accept default), ‘corrected height threshold’ (no), and ‘corrected p-value’(accept default). When the MIP appears, press ‘volume’:The table displays all clusters where the exponential change in activation between first andsecond presentations <strong>for</strong> famous OR non-famous faces <strong>for</strong> the canonical hrf is significantlydifferent from zero AND the canonical hrf <strong>for</strong> the first two conditions is significantly largerthan zero (baseline). To plot these parametric effects, select the R fusi<strong>for</strong>m region (45 –60 –18, similar to the region identified in the previous categorical analysis <strong>for</strong> repetition effects),79
and press ‘plot’. Select ‘Plots of parametric responses’ and select ‘F’ (or ‘N’). Note that the‘attrib’ option does not allow adjustment of the scale of the Z-axis; there<strong>for</strong>e, to change thescale <strong>for</strong> all axes, type e.g. ‘figure (1), axis ([0 30 0 100 0 1])’ in the Matlab window.Note that these repetition effects are transient (decrease with increasing intervals between firstand second presentations), especially <strong>for</strong> famous faces.80
5. Miscellaneous functions and utilitiesThis section describes miscellaneous functions and utilities that are included with <strong>SPM</strong>.5.1 Display: Interactive orthogonal display of selected image.81
Display utilities:Bottom left panel:- Image intensity at crosshair position. Translation, rotation and scaling parameters can beentered to reorient images. Image is displayed with new orientation values.- Reorient images… - overwrites the image .mat file with the new trans<strong>for</strong>mation asspecified by the orientation values entered above.- Reset - overwrites the .mat file to contain an estimate of the space of the image.Bottom right panel: contains in<strong>for</strong>mation about image, its size and space.- Full volume/160x160x160mm/…etc: displays full image volume or a selected subvolume.- World Space / Voxel Space: World space – displays image in the space of its .mat file.Voxel space – displays image in voxel space, i.e. without using .mat file.- AutoWindow / Manual Window: Auto Window – scales image between minimum andmaximum values. Manual Window – <strong>manual</strong>ly select values to scale image intensityvalues.- Hide Crosshairs – toggles crosshair display on and off.- NN interp / bilinear interp / sinc interp – interpolation used <strong>for</strong> displayed image.- Add/Remove blobs – can add up to 6 sets of blobs from previously executed statistics ondisplayed image.5.2 Check Reg(istration)This allows >1 and
-New style overlayOld style overlay- Xtract Brain – this requires that a segmentation has been per<strong>for</strong>med and that grey andwhite matter segmented images are available (see segmentation, 2.6). Options are:- Save Extracted Brain – extracted brain is saved as a binary mask image (i.e. 1sidentifying the brain and 0s elsewhere) with the name brain_filename.img, hdr, .mat.Use display to visualise results (as in figure below).- Save Rendering – rendered brain is displayed (as in figure below) and results are saved asrender_filename.mat. This file can be selected to display blobs on a rendered surface(e.g. see x).- Save Extracted Surface – brain surface is saved as surf_filename.mat. The resultingbrain surface can be displayed (as in figure below) and rotated. Type help spm_xbrain atthe matlab prompt <strong>for</strong> code to manipulate the surface.83
Extracted brain Rendered brain Brain surface5.4 fMRI/PETOption to toggle between the PET and the fMRI mode.5.5. ToolboxesThis option provides access to <strong>SPM</strong> toolboxes installed in the toolbox subdirectory of the<strong>SPM</strong> installation directory. A sub-directory must exist under the <strong>SPM</strong> toolbox directorynamed after the toolbox. There must be an M-file in this sub-directory whose name ends withthe toolbox directory name. E.g. a toolbox <strong>for</strong> De<strong>for</strong>mations would contain an M-file called‘spm_De<strong>for</strong>mations.m’ in a subdirectory called De<strong>for</strong>mations under the <strong>SPM</strong> toolboxdirectory.5.6 Means...Options:- Mean: creates a mean image from selected images and writes result to mean.img incurrent working directory. Selected images must have same dimensions, voxel sizes andorientations.- AdjMean: creates a mean image from selected images after adjusting <strong>for</strong> conditions andconfounds using the general linear model. The user selects a design, scaling/normalisationand adjustment options in a similar way to doing <strong>SPM</strong>-PET (section 3.1). The adjustedmeans created with this step were previously used <strong>for</strong> PET RFX analyses. See section x<strong>for</strong> updated RFX analysis.- adjMean/fMRI - creates a mean image from selected images after adjusting <strong>for</strong>conditions and confounds using the general linear model. The user specifies the design,the required global normalisation and high-pass filtering. An adjusted mean is created <strong>for</strong>each condition specified in a single session fMRI epoch-related study. The adjusted meanscreated with this step were previously used <strong>for</strong> fMRI RFX analyses. See section x <strong>for</strong>updated RFX analysis.84
5.7 ImCalcImCalc allows basic algebraic calculations to be per<strong>for</strong>med on selected images and the resultwritten as an image. The user must specify the expression to be evaluated in standard matlab<strong>for</strong>m with the selected images referred to in order as i1, i2, i3 …etc. Logical, relational andtrigonometric operators can be used as well as basic arithmetic operators. For in<strong>for</strong>mation onusing these operators in matlab, type ‘help arith’, ‘help relop’, ‘help slash’ and ‘help elfun’at the matlab prompt. The user must enter a name <strong>for</strong> the resulting output image. This will bewritten to the current working directory.5.8 HDR editHDR edit allows an image header to be edited and applied to selected images. It also allowsthe creation of image headers. Editing options are:Set options <strong>for</strong> editing, then select APPLY to images. A new header file will be written <strong>for</strong>selected images. This utility is especially useful <strong>for</strong> adjusting the origin of one or more imagesto provide a better starting point <strong>for</strong> coregistration with an image where the origin is verydifferent.5.9 HelpThis provides a graphical user interface <strong>for</strong> the help files associated with all buttons in the<strong>SPM</strong> menu window.5.10 Utils…Options:- CD – change present working directory- PWD – report present working directory- delete – file deletion utility- Show <strong>SPM</strong> – pops up figures associated with this <strong>SPM</strong> session. This is very useful whenrunning >1 <strong>SPM</strong> at a time- Run mFile – run selected Matlab M-file in workspace- <strong>SPM</strong>web – opens http://www.fil.ion.ucl.ac.uk/spm in web browser85
5.11 DefaultsThis option allows current defaults to be edited. New default settings are reset to <strong>SPM</strong>defaults when a new <strong>SPM</strong> session is started.Printing Options – allows a variety of different printing options to be selected.Miscellaneous Defaults:- Log to file - allows user to specify a file in which to log all <strong>SPM</strong>-user dialogue.- Command Line Input – allows user to select GUI or command line input mode.- Grid Value – allows user to select intensity <strong>for</strong> any overlaid grids (e.g. on the MIPS display, slices overlay).The grid is brightest <strong>for</strong> a value of 1 and disappears <strong>for</strong> a value of 0.Header Defaults –PET/FMRI – these values are used as the defaults <strong>for</strong> the HDR editutility.The defaults <strong>for</strong> Realignment, Coregistration, Spatial Normalisation, Statistics –PET/FMRI were discussed in each of the relevant sections.Reset All – this reloads the <strong>SPM</strong> startup defaults from spm_defaults.m.5.12 QuitThis exits <strong>SPM</strong> and clears the workspace.86