Owner's manual - Electric bikes & folding bikes
Owner's manual - Electric bikes & folding bikes
Owner's manual - Electric bikes & folding bikes

You also want an ePaper? Increase the reach of your titles
YUMPU automatically turns print PDFs into web optimized ePapers that Google loves.
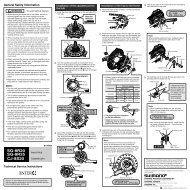
BA228114
TM<strong>Owner's</strong> <strong>manual</strong> Metro
owner's <strong>manual</strong>Contents1.0 Introduction 22.0 Important Information 33.0 Your A2B 4-64.0 Unpacking and adjustment 7-125.0 Understand your A2B 13-176.0 Battery use, storage and disposal 18-227.0 Important Pre-ride Safety Information 23-258.0 Maintenance 26-319.0 Cleaning 3210.0 Trouble Shooting 3311.0 Technical Information 3412.0 Warranty & Security Details 35-3613.0 Disposal 36Owner registration 371
1.0 IntroductionWelcome and congratulations on buying your new A2B Metro*, the electric bike that’s taking transportin a whole new direction.Your bike will give you the freedom to go your own way.New to the US, it’s the revolutionary way to get to work, pop to the shops or just get some fresh air.Compared to jumping in the car, it’s a lot more fun, easier to park and will reduce your fuel costs aswell as your impact on the environment... as you’ll soon find out!The Ultra Motor Team1661 Tennessee St. Unit 2JSan Francisco, CA 94107Phone: 451-693-3110Fax: 415-693-3121www.ultramotor.com*’ A2B Metro is termed as’A2B throughout the rest of this <strong>manual</strong>.2
owner's <strong>manual</strong>2.0 Important informationThis owner <strong>manual</strong> contains important safety, performance and service information.Please ensure you read this thoroughly before your first ride.Your A2B should be fully assembled and the battery charged by your Ultra Motor dealer at the time of delivery.If not contact us immediately as this will void your warranty.Please ensure that all users of your A2B read and understand the following important information.• The A2B is designed for public road use. Don‘t ride off-road,in water and don‘t use the A2B to jump in bumby terrain orfor competition events.• We recommend that you always wear an approvedcycle helmet at all times and light or fluorescentclothing at night when riding the A2B.• Make sure you know and practice the rules of safe andresponsible riding. There is always a risk of serious / fatalImportant symbolsinjury or damage as a result of an accident while ridingan A2B. By choosing to ride the A2B you assumeresponsibility for that risk.• Your existing insurance policies may not provideaccident cover for your A2B. Contact your insurancecompany or agent for information.• This owner’s <strong>manual</strong> makes no representation about thesafe use of the A2B under all conditions.This indicates a potentially hazardous situation which, if not avoided, could result in a serious injury,property damage or damage to equipment or inadvertent system failure.Provides helpful or other important related information.If you have any questions or are not sure about any instructions in this owner <strong>manual</strong> ask your Ultra Motor dealer orcall our Customer Service Department: (415) 693-31103
53.0 Your A2B24221113.1 Components2324 216 7 828318 19202526291716151412 133010927*NOTE: When we refer to the 'right side' and the 'left side' of the A2B. For clarification, 'left' and 'right' arerelative to your position when sitting on the A2B in the normal riding position.4
owner's <strong>manual</strong>1.2.3.4.5.6.7.8.9.10.11.12.13.14.15.16.17.18.19.20.21.22.23.24.25.26.Saddle (seat)Seat postSeat post clampKey switchRear view mirrorHead lightFront mud guardFront wheel/tireFront disk brake and rotorCrank arm and chain ringDisplayKickstandChain tensionerDrive chainRear wheel/tire7-speed derailleur and freewheelHub motorRear mud guardSwing armRear shock absorberDown tube batteryRear rackBattery connectorRack battery (option)Tail lightLicense plate holder27.28.29.30.Quick releaseOn/ Off switch rack batteryFront forkController5
35333131. Left brake lever(operates front brake)32. Right brake lever(operates rear brake)33. 7-speed twist shifter34. Throttle grip35. Left pedal36. Right pedal3634326
owner's <strong>manual</strong>4.0 UnpackingNOTE: Your A2B weighs 37.2 kg (82 lb).LIFT WITH CARE. Two people are recommended.4.1 Tools and equipment• Pliers• Side cutters (for cutting cable ties used to pack the A2B)• Blanket or tarpaulin (to avoid scratching unprotectedsurfaces on the A2B whilst unpacking)4.2 Delivered fully assembled and batterychargedYour A2B should be fully assembled and the batterycharged by your Ultra Motor dealer at the time of delivery.If not contact us immediately as this will void your warranty.However, if you need to unpack your A2B, follow theseinstructions:1. Carefully open the flaps at the top of the carton.Remove all staples (with pliers if necessary), to avoid thepossibility of scratching yourself or your A2B.2. Carefully lift the A2B out of the carton. Two people arerecommended.3. Lay the A2B on a tarpaulin or blanket to avoid scratchingany unprotected surface whilst you remove the packingmaterials.4. Remove the accessory boxes from the carton.5. Using the side cutters, clip the cable ties that hold variouscomponents to the frame. ONLY clip those cable ties thatare used to attach components to the frame or preventmovement during shipment (and NOT those trimmed ofexcess length).The A2B has cable ties that manage electrical andcontrol cable routing (and ARE trimmed of excess length).DO NOT clip these cable ties as they are necessary for thesafe operation of the vehicle.6. Remove all of the protective wrapping from the A2B anddispose of the packaging responsibly.The battery and charger should be tested when received.If the battery or charger is damaged in any way, a claimshould be filed with the carrier. A full report of the damageshould be obtained by the claim agent, and this reportshould be forwarded to Ultra Motor. Ultra Motor will advisethe action required and arrange for repair or replacement.Charge the battery for at least 12 hours before usingthe A2B for the first time. See 6.2 & 6.3.7
acbd4.3 Installing the handlebar and display1. Using a 4 mm allen key, unscrew the three bolts that holdthe handlebar clamp to the handlebar stem (pic a).2. Remove the cap from the handlebar stem (pic b).3. Nest the handlebar into the handlebar stem, ensuringthat it is centred and properly oriented. Replace the cap,reinstall the bolts holding the cap to the stem and tightensecurely the bolts to 6 Nm per bolt (pic c).It is essential to tighten all three bolts evenly to ensureproper installation.4. Install the display and tighten the bolts to 6 Nm per bolt.Caution: this is an A-head stem, the top scew D ispreloaded with 1-2 Nm and does not adjust the handlebarstem. Trying to tighten bolt D can damage the head setbearings.The left side bolt on the bar stem must be tightened to10-12 Nm.The 'Nm' measurements refer to the torque value thatshould be applied to the tightening of bolts, please use anappropriate spanner to apply the correct torque values asspecified.8
owner's <strong>manual</strong>4.4 Installing the pedals1. Lightly coat the threads of the pedal axle with lightgrease. This will make screwing the pedal into the crankarm easier, and will help prevent corrosion in the future.2. Two pedals (a left pedal and a right pedal) are supplied.Each pedal is DIFFERENT. There is an 'R' stamped on thespindle of the right-hand pedal, and there is an 'L' stampedon the spindle of the left-hand pedal.3. Install the right pedal on the right-hand side, and the leftpedal on the left-hand side. It is very important that eachpedal is installed on the correct side.7. Using a 15 mm open end spanner, securely tightenthe pedals.8. Ensure the pedals are installed with a torque valueof 30 Nm.An improperly installed pedal may fall off your A2Bwhilst in use. This may cause an accident resulting in seriousinjury or death and property damage. Ensure that yourpedals are properly installed and tight before each ride.CAUTION: Attempting to screw the left pedal into the rightcrank arm (or vice versa) will damage the internal threadsof the crank arm. This damage is not ‘fixable’ and thecrank arm will have to be replaced.4. When installing the right pedal, screw the threadedsection of the pedal spindle into the crank arm turning thespindle in a CLOCKWISE direction.5. When installing the left pedal, screw the threadedsection of the pedal spindle into the crank arm turning thespindle in a ANTI-CLOCKWISE direction.6. Screw each pedal as far as you can into the crank armwith your fingers.9
owner's <strong>manual</strong>5.0 Understand your A2BAfter having read this section, if you are still unsure, please ask an Ultra Motor dealer to explain any functions or featuresthat you do not understand before your first ride.5.1 OverviewThe A2B has a 'power on demand' function, this means themotor engages only when the rider twist the throttle.3. Mount your A2B and get comfortable.4. Turn the key to position 'A'or 'B' if an optional battery isattached to turn the batterypower ON.5.2 Starting and stopping1. Put your helmet on and select a quiet area away fromcars, other cyclists, obstacles or other hazards.2. Ensure that the power is OFF and raise the kickstand intothe riding position.Mounting the A2B with the power ON may result in theinadvertent actuation of the throttle and the A2B will lurch,potentially resulting in serious injury or death and propertydamage. For the same reason, turn the power OFF beforedismounting .DO NOT sit on the A2B whilst it is supported by thekickstand, you will damage the kickstand, possibly theframe.The throttle must be inzero position while turningthe power ON and will beactivated after 2 seconds.5. To apply motorpower twist thethrottle on the righthand side of thehandlebar gentlytoward you.6. Test the brakes atslow speed. Left lever actuates the rear brake and the rightlever actuates the front brake. Put your weight toward therear and gently apply the brakes, rear brake first. Suddenor excessive application of the front brake could throw youover the handlebars. Applying brakes too hard can lockup a wheel, which could cause you to lose control and fall.13
Remember that there are power cut-off switchesembedded in the brake levers. When you apply thebrakes, power to the motor will turn OFF. Therefore, do nothold the brake lever(s) when you want the motor to run.Your A2B will provide instantaneous power whether youare pedalling or not. Therefore, there is no need to pedalas you start-up. However, the motor consumes more powerduring a start from a standing stop than at any other time,even more than climbing a hill. To conserve battery power,and increase your range, pedal during a start from astanding stop to relieve some of the load from the battery.7. Check out the handling and response of your A2B.Familiarize yourself with how the suspension responds tobrake application and rider weight shifts.5.3 DisplayA – Reset buttonB – Mode buttonC – Battery State-of-ChargeIndicator.D – Speedometer - displays insteps of 0.1 km/h or 0.1 mphE – Odometer / Tripometer - displays km or miles pedalled,this could be your total or your trip distance measuredto 10 meter or 0.01 mile.- Switching between Odometer and Tripmeter - Press theMode button B- Reset Tripmeter - Switch to TRIP and press the Reset buttonA for 2 seconds.- Setting km/h / mph - Press the Reset button A and Modebutton B for more than 2 seconds to get in the settingmode. Press the Reset button to switch between km/hand mph. Press the Mode button for 2 seconds to returnto the normal mode.14
owner's <strong>manual</strong>5.4 Gears and ShiftingYour A2B has a 7-speed rear derailleur controlled by thetwist gear shifter on the left side of the handlebar.To shift gears, pedalat a steady pace androtate the shift grip untilyou find the gear mostcomfortable for youand the current conditions. To make pedalling easier (whenencountering a hill), rotate the grip toward you to downshift,this will also make you pedal faster to achieve anygiven speed.To ride faster (on a flat section or a downhill), rotate thegrip away from you to up-shift, allowing you to pedal moreslowly for a given speed, but with more effort required.Never pedal backward while shifting gears. The chaincould derail and you could lose control, resulting in anaccident that could cause serious or fatal injury and/orproperty damage. Always pedal forward at a steady pacewhen shifting gears.The 7-speed rear derailleur operates independently of themotor. Using the derailleur control, adjust the gear settingto find a gear that makes pedalling comfortable whileassisting the motor.5.5 LightsTo switch the light onand off twist the switchon the head light to onor off position.15
5.6 Luggage CarrierYour A2B equipped with a durable luggage carrier. In caseyou need to carry luggage or any goods with your A2B,please carefully read the enclosed instructions before usingthe luggage carrier.1. The luggage carrier is attached to the rack tube of yourA2B by 4 x T25x18 torx flat head screws. If you are frequentlyusing the luggage carrier, always check that the screws aresecured tightly at torque value 6-8 Nm.2. The maximum weight that could be carried is 10 Kg.3. Please ensure that the luggage is fastened securely, sothat it can not fall off while riding. Take care that loosestraps or other itmes can not get cought by the spokes orwheels while riding.4. The luggage carrier is not designed for carrying a secondrider or an attachment of a child seat. It can also not beingused to pull a trailer.5. The permissible load of your A2B should not be exceeded,please refer to the specification section in the owner’s<strong>manual</strong>.6. Do not modify the luggage carrier in any case of usage.7. You need to distribute the weight of your luggage orgoods evenly between the two sides of the luggage carrier.8. Please be aware when the luggage carrier is loaded,your A2B may behave differently, especially when steeringor braking the bike.9. Once you attached your luggage on the luggagecarrier, please be aware that rear light and reflector maybe obscured by your luggage.Failure to observe these instructions can result in seriousor fatal injury.16
owner's <strong>manual</strong>5.7 At the end of your rideIf you have any questions, or if you feel anything aboutyour A2B is not as it should be, ask your Ultra Motor dealerbefore you ride again.5.8 Recharge your discharged batteryFully recharge your battery within 3 days if the battery iscompletely discharged because a lithium ion battery leftin a discharged condition deteriorates much faster than afully charged battery. See 6.2 & 6.3.5.9 Your rangeFactors affecting range:• Battery state-of-charge• Tire inflation pressure• Front wheel bearings and both brakes (tight bearingsor a dragging brake shoe reduces range)• Rider weight (it takes more energy to accelerate aheavier person)• Your speed and local wind conditions (range is reducedwhen travelling fast against a high wind)• Terrain (travelling on a soft surface or climbing a hill usesmore power)• Lots of starts and stops (full power from a standing startdraws the most amperage from the battery)Maximize your range• Fully charge your battery before each ride• Check tire pressure regularly and inflate to 2.8 bar (40 psi)(printed on the tire sidewall)• Have your A2B serviced periodically to ensure that thefront bearings turn freely and both brake discs do not rubthe brake shoes when they are not applied• Minimize the weight that you carry• Ride at slower speeds• Accelerate more slowly and pedal as you accelerate toyour cruising speed• Keep the chain and derailleur lubricated with bicyclerecommended chain spray17
6.0 Battery use, storage and disposal6.1 The battery & charger1. Rack battery2. Down tube battery3. Battery chargerUse only the batterysupplied with yourA2B or a battery providedby Ultra Motoras a replacement forthe battery suppliedwith your A2B. Use ofany battery not supplied with your A2B WILL void the warrantyand may cause damage to the electrical system andthe hub motor.Improper use and poor storage of this battery will void thewarranty and may cause serious or fatal injury or other hazardoussituation including fire and property damage.Improper use includes: using this battery with any othervehicle or appliance, subjecting the battery to intensephysical shock or severe vibration, creating a short circuitof the discharge terminals of the battery.Poor storage includes: storing near excessive heat and/oropen flames, long term exposure to sunlight.Use only the battery charger supplied with this battery. Useof any other battery charger will void the warranty andmay cause damage to the battery, serious or fatal injuryand/or other hazardous situation.Improper use of this battery charger battery will void thewarranty and may cause serious or fatal injury or otherhazardous situation including fire and property damage.Improper use includes: blocking the fan vent on thecharger while the battery is charging as this will cause overheating,subjecting it to intense physical shock or severevibration.This battery charger supplied with this battery is for INDOORuse only.Avoid any contact with water or other fluids. If the battery,charger or any connections become wet, immediatelyunplug the charger and thoroughly dry all componentsprior to charging the battery.18
owner's <strong>manual</strong>6.2 Charging the batteryYour Ultra Motor dealer should provide a fully chargedbattery upon delivery of your A2B, should this not be thecase, please ensure that prior to its first use, you charge thebattery supplied with your A2B for at least 12 hours.121. Check the Voltage Selectorswitch on the charger to ensure thatit is set to your local voltage (115 VforUS).2. Plug the charger into the walloutlet, ensuring the charger is turnedOFF.5. Carefully alignthe connectorpins and connectthe charger tothe battery byplugging the connectorinto thecharger socket.6. Turn ON the charger using theON/OFF switch on the charger.6342313. Ensure that the battery PowerSwitch is switched OFF before connectingthe charger to the battery.4. Rotate the charger port cover toexpose the charger socket.7. LED Indications:• The Power LED will illuminateRED when the charger isplugged into a wall outlet andthe ON/OFF switch is in the ONposition.7FUSE19
• The Indicator LED will illuminate AMBER while thecharger is charging the battery.• The Indicator LED will change to GREEN when thebattery is fully charged.8. When charging is complete (the Indicator LED is GREEN),turn OFF the charger using the ON/OFF switch on thecharger.9. Unplug the charger from the wall outlet then carefullyunplug the charger from the battery pack by pulling theconnector out of the charger socket.10. Rotate the charger port cover clockwise or counterclockwise to cover the charger socket.11. Your battery is now ready for use.NOTE: The battery will not take a charge if you connectthe battery when the charger is switched on.6.3 Battery chargingCharging timesHoursBefore using battery for first time 12Fully discharged 4 - 6To maximize battery life, recharge as soon as possible afterevery use.Avoid leaving the battery charger ON and pluggedinto your battery for more than 12 hours at a time. Oncethe battery is fully charged, turn OFF the charger andunplug it from the pack.Avoid charging the battery at a temperature lower than0 °C or over 40 °C. If possible charge the battery at roomtemperature.20
owner's <strong>manual</strong>6.4 Low battery chargeThe motor controller and battery management system(BMS) are designed to turn off the power to the motorwhen the voltage of the battery drops to a predeterminedpoint. This is to protect the battery from the harmful effectsof over-discharge.The low battery chargesymbol will turn on if theremaining capacity islower than 10%.When the power turnsoff due to a low battery,plug the battery into thecharger supplied withyour A2B to rechargethe battery within 3days. It will take 4 - 6hours to fully recharge a completely discharged battery.If you have any questions about this battery or its usage,contact our Customer Services Department.Never attempt to use remaining power once the BMShas switched off the battery. You will damage your battery.Fully recharge your battery within 3 days if the batteryis completely discharged because a lithium ion battery leftin a discharged condition deteriorates much faster than afully charged battery. See 6.2 & 6.3.6.5 Battery storageDisconnect the battery from the bike and store the batteryin a cool (50º-70ºF, 10º-21ºC), dry place. Avoiding exposureto direct sunlight.The Battery Management System (BMS) is always on,consuming a small amount of power from the battery.Make sure that the power switch on the battery is switchedoff when not in use including when the A2B is parked. If thebattery pack is not used for an extended period of time,this will eventually drain the battery resulting in permanentdamage.21
Charging instructions for storageBefore storing battery – half charge 2Half re-charge at least every 230 days of storageHoursFailure to follow these battery storage charging instructionswill void the warranty.Ensure the battery is switched off before storage.You may recharge the battery at any time, regardlessof its state-of-charge. As your battery ages, it will graduallylose capacity. With proper care and maintenance, yourbattery will retain up to 80% of its capacity over at least 500discharge/recharge cycles. As capacity diminishes, you willnotice a gradual drop-off in maximum range capability.When range falls to an unacceptable level, contact yourUltra Motor dealer for a replacement battery.6.7 Attaching and connecting the rack battery toyour A2BPrior to its first use, charge the battery supplied with yourA2B for at least 12 hours.1. Insert the key and unlockthe fastener.2. Raise the fastener.3. With the fastener in theopen position, align thebattery with the mountingrails and slide into position.4. Press the fastener down then secure the battery bylocking the fastener into position. Remove the key.6.6 Battery disposalDO NOT dispose of the battery as household waste.Dispose of, or recycle according to local authorityguidelines or contact our Customer Services Departmentfor guidance.22
owner's <strong>manual</strong>5. Connect the battery tothe A2B via the large 6 pinconnector. Carefully alignthe tab and pins of the connectorto the socket on thebattery and plug in. Tightenonto the thread.6. To use the battery ensurethat the battery is switchedon. The switch is on the backof the battery.7.0 Important Pre-ride Safety InformationEnsure that you and your A2B are both ready for safe andenjoyable use.ALWAYS wear an approved bicycle helmet. If you lendyour A2B to someone else – make sure you also lend theman approved helmet.NEVER carry a passenger. Overloading your A2B with asecond rider can lead to severe injury or death.OBEY all traffic laws. Always ride on the correct side of theroad, with and not against the flow of traffic.Watch out for car doors. Be aware of the possibility of cardoors opening into your path.Be extra careful in wet conditions. In wet conditions it mighttake double or triple the distance you need to stop yourA2B. Ride slower, anticipate your stops and apply the brakesearlier. Wet roads are slippery – take corners carefully.Make sure you are seen. In poor light conditions and atnight, wear light coloured clothing, preferably withreflective strips.Ride attentively. Watch out for both moving and stationaryvehicles.23
Check your A2B before every ride.Do a ‘walk around’ of your A2B before every ride checkingbrakes, tires and the tightness of all the important fasteners.Have your A2B checked by an Ultra Motor dealer at LEASTonce a year. Your safety depends on the roadworthiness ofyour A2B.Reflectors. Your A2B has sideand rear reflectors to makeyou more visible at night.Ensure they are in place,properly positioned and cleanbefore each ride.Lights. Your A2B has a front lightand rear tail light to make youmore visible at night. Ensure theyare functional and clean beforeeach ride.Brakes. Check yourbrakes before eachride. Left brake leveractuates the frontbrake and the rightbrake lever actuatesthe rear brake.Brake Pads. When checking your brakes, it is importantto check the full brake system. Brake Pads are subject tonormal wear and tear and over time wear down. Brakepads should never be worn down to their limit. Ask yourUltra Motor dealer to check and replace brake pads.Pedals. Ensure that yourpedals are properly installedand tight before each ride.Saddle. Ensure that yoursaddle is properly adjustedand tight before each ride(see 4.7).Handle bar and bar stem.Ensure that your handle bar and bar stem is properlyadjusted and tight before each ride (see 4.3).24
owner's <strong>manual</strong>Tire pressure. Your A2Bfeatures heavy duty inner tubesto help avoid flat tires. However,tires normally lose pressureover time. An under inflatedtire can cause premature tirefailure, and will requiresignificantly more energy(electric and human) to propelyour A2B. Low tire pressure willsignificantly reduce the range under electric power. Therecommended tire pressure for the front and rear wheel is2.8 bar (40 psi).Quick release. Makesure that your front wheelquick release is properlyadjusted and tight. Failureto properly adjust andlock your front wheelquick release may resultin the wheel falling offwhile you are riding whichcould result in serious orfatal injury and/or property damage. If you are uncertainabout any aspect of the assembly and adjustment of yourA2B, ask your Ultra Motor dealer.Rear view mirror. Your A2B hasa a rear view mirror to enableyou to watch the trafficbehind you. Ensure the mirror isadjusted correctly and cleanbefore each ride.Battery. Check the display priorto setting off on your journey toensure the battery has enoughcharge to easily last yourjourney.If you don’t understandany aspect of the use andcare of your A2B, ask your UltraMotor dealer.25
8.0 MaintenanceHave your A2B checked by an Ultra Motor dealer at leastonce a year.8.1 WheelsThe front and rear wheels shouldbe centred in the fork and frame.Wheels should be checked regularlyfor proper spoke tension and rimalignment. DO NOT ride your A2B if ithas broken or missing spokes. Wheelsshould rotate smoothly withoutwobbling from side-to-side or up-anddown.8.2 Hub bearingsCheck the hub bearingadjustment periodically bylifting the wheel off the groundand spinning it and try tomove the rim from side-to-sidebetween the fork or frame.No lateral movement shouldoccur. If you detect lateralmovement in either wheel, thehub bearings must be adjustedor replaced.8.3 Wheel rimsThe rims must be smooth,without cracks, bulges orflat spots. Take your A2Bto an Ultra Motor dealer orqualified bicycle mechanicto repair and/or adjust yourwheels if necessary.8.4 Drive chainYour A2B has a highquality chain thatneeds to be cleanedand lubricatedregularly with bicycleindustry approvedsynthetic lubricant.26
owner's <strong>manual</strong>8.5 BrakesCheck cables or oil pipes for signs of wear and fraying. Ifyour A2B is equipped with hydraulic disc brakes additionalycheck for signs of oil leakage.Squeeze the brake lever firmly and check for properbrake function.Ensure rotors are free of foreign substances and oils.Brake pads should never be worn down to their limit,replace as necessary.Should your brake pads appear to be worn down or yourbrakes are not as responsive as they used to be, ask yourUltra Motor dealer to check and replace brake pads.Brakes lose effectiveness when wet.Avoid riding in wet weather. If it is unavoidable, rememberthat stopping your A2B will require extra distance.Ride more slowly, keep a greater interval between yourselfand other traffic, and begin braking sooner than normal.Failure to take these precautions could lead to an accidentcausing serious or fatal injury and/or property damage.If you are uncertain about any aspect of the brakeoperation under any condition, ask your Ultra Motor dealer.Brake disks and brake linings must be free of oil andgrease.8.6 TiresCheck tiress for any damage, cracking, unusual orexcessive wear. The tire should be properly seated inthe rim and the fit of the tire bead in the rim should beperiodically checked. Check for foreign objects in the tiretread and that the valve stem is straight in the rim.Damaged or worn tires should be replaced immediately.Take your A2B to an Ultra Motor dealer or a qualifiedbicycle mechanic to repair and/or replace your tires ifnecessary.In the unlikely event of having a flat tire you need to knowthe correct procedure for removing and re-installing thefront or rear wheel.The tire must have at minimum a positiv profil of 1 mmby law.27
8.7 Removing and re-installing wheelsRemoving front wheel1. Release the front hubquick release by rotatingthe quickrelease lever away fromthe hub until it is fully open.2. Turn the adjusting nut onthe opposite side of thehub from the quick releaselever ANTI-CLOCKWISE untilthe nut and quick releaselever body clears thesafety protrusions on thefork tip.3. The front wheel cannow be removed form thebike.Re-installing front wheel1. Position the wheel in thefront fork so that the quickrelease lever is located onthe left side of the frontfork.2. Move the quick releaselever to the OPEN position(lever curves away fromthe hub) and position thewheel in the front fork sothat the axle is located inthe fork drop-outs.28
owner's <strong>manual</strong>3. Turn the adjusting nut onthe right side of the hubclockwise such that youfeel resistance to closingthe lever when the lever isparallel to the centreline ofthe hub.4. Firmly grip the fork withyour left hand, and pushthe lever until it is at a 90ºangle to the centrelineof the hub. The lever issecurely tightened when ittakes a significant amountof force to position it inthe closed position. Theappropriate amount offorce necessary to closethe lever when it is properly adjusted will result in an imprintof the lever in the palm of your hand. Once closed, theOPEN designation on the lever will no longer be visible.When properly closed, it is impossible to move unless youopen it again by reversing the steps above. If you caneasily move it, open the quick release lever and tighten theadjusting nut another 180º and try again.Please follow the instructions provided for the quickrelease mechanism to ensure proper use. Failure toproperly install this quick release front hub may result inthe front wheel falling off while you are riding. This couldresult in serious or fatal injury and/or property damage. Ifyou are uncertain about any aspect of the assembly andadjustment of your A2B, ask your Ultra Motor dealer.5. Ensure that the brake disc is correctly inserted into thebrake calipers and is correctly adjusted.If you are unsure about this brake set-up andadjustment procedure, please take your A2B to your UltraMotor dealer or any qualified bicycle mechanic, and askfor assistance in adjusting the brakes. Improperly adjustedbrakes may cause reduced braking performance, leadingto an accident that could result in serious injury or deathand property damage. DO NOT ride your vehicle if you arenot confident that the brakes are working properly.29
Removing rear wheel1. Ensure that the power is turned OFF and remove the key.2. Remove the cable tiesholding the power cableto the frame located onleft hand chain stay.4. Using a 19 mm spanner, loosen and remove the hubaxle nuts.5. Loosen and remove thetorque arms retention boltfrom the right and left dropout.6. Remove the torque armsfrom the A2B by slidingthem off the axle.3. Disconnect the motorpower connector byunscrewing the cap nut.7. Remove the rear wheel by sliding it out of the framewhile disengaging the chain from the freewheel.Re-installing rear wheelReverse the removal instructions (7 -1) opposite.Re-install the torque arm. Failure to do so will result indamage to the frame.Ensure that the rear wheel is properly centred in theframe before securely tightening the axle nuts to 60 Nm.30
owner's <strong>manual</strong>Ensure that the brake disk iscorrectly inserted in the brakecalliper, and the wheel rotatesfreely withoutinterference from the brakeshoes.Ensure correct replacement ofthe chain on the front and rearchain rings.Reconnect the motor powerconnectors.Cable tie both motor cables tothe frame.If you are unsure about this brake set-up andadjustment procedure, please take your A2B to your UltraMotor dealer and ask for assistance in adjusting the brakes.Improperly adjusted brakes may cause reduced brakingperformance, leading to an accident that could result inserious or fatal injury and/or property damage. DO NOTride your A2B if you are not confident that the brakes areworking properly.31
9.0 CleaningRubber and plastic parts willbe damaged by caustic orpenetrating cleaning agentsor solvents.Always carry out a brake testafter cleaning and beforestarting a ride!Do not use steam or highpressurejet devices!Such devices can damageseals, the battery and electricalsystem.- To wash the A2B, use a softsponge and clean water.- Afterwards, dry off with apolishing cloth or chamois.- Do not wipe off dust or dirtwith a dry cloth, to avoidscratching the paint orcovering.Never use paint-polishingagents on plastic parts.- After a longish ride,thoroughly clean the A2Band preserve it with acommercially availableanti-corrosion agent.Protect the environment by using only environmentallyfriendly preservation agents,and use them frugally.Use of the A2B in the winter can cause considerable damagedue to the presence of salt on the roads.Do not use hot water, which would in crease the effect ofthe salt.- At the end of each ride, wash the A2B with cold water.- Thoroughly dry the A2B.- Treat parts liable to corrosion with wax borne anticorrosionagents.32
owner's <strong>manual</strong>10.0 Trouble ShootingNo power? Here are some solutions. If they do not solve your problem ask an Ultra Motor dealer for help.ProblemA2B does not turn onA2B turns on, but motordoes not run (displayilluminates andstate-of-charge indicatorshows a charged battery)A2B turns on, but if turningthe throttle the motor doesnot turn onMotor power is decreasingwhile climbing uphillPossible cause(s)1. Dead battery2. Key switch is not in power on position1. A brake lever is applied2. The motor power connector is unplugged1. System is not yet activated1. Motor temperature is getting too highSolutionRecharge battery. See 6.2 and 6.3Switch on the key switch / batteryDo not apply the brakes when startingthe vehicle. Make sure brake levers arefully forwardEnsure motor power connector issecurely connectedWait 2 seconds before twisting thethrottleSupport the motor by pedaling and letthe motor cool down33
3411.0 Technical InformationGeneral performance specification• Overall dimensions: 1790 mm x 695 mm x 1105 mm• Tyre size: 3.0" x 20"• Frame size: unisex 49 cm (19")• Curb weight without battery: 33.9 kg (74.7 lb)• Curb weight with battery: 37.2 kg (82.0 lb)• Maximum permitted load: 140 kg (310 lb)• Maximum permitted load on rear carrier: 10 kg (22 lb)• Maximum speed in "on road mode", flat level ground,motor power only: 32 km/h (20 mph) NOTE: regulated• Maximum range, flat level ground, motor power only,no starts/stops: approx. 32 km (20 miles)• Hill climbing capability, motor power only, 75 kg (165 lb)rider, 37.2 kg (82.0 lb) bike, total 112.2 kg (247.4 lb): 5°• Operation conditions: Temperature +23 °F to 104 °F(-5 to 40 °C), maximum humidity 80%<strong>Electric</strong>al specification, battery• Battery chemistry: lithium ion• Configuration: 10S6P• Nominal voltage: 36V• Normal voltage operating range: 31 to 41V• Nominal capacity: 11.4 Ah (410 Wh)• Maximum discharge: 30 A• Charging method: CC/CV (Constant current/Constant voltage)• Weight: 3.3 kg (7.3 lb)• Position: in down tube of the frameBattery management system (BMS)• Controls and stops over-charging• Controls maximum charge current• Controls over-discharge amperage (30 A max)• Controls over-discharge voltage• Over temperature shut-off• Provides cell-to-cell balancing function<strong>Electric</strong>al specification, battery charger• Input voltage: AC 115/230V, 50/60Hz• Output voltage: 42 ± 0.5 VDC• Output amperage: 4.0 ± 0.4A• AC line fuse rating: 10 A<strong>Electric</strong>al specification, motor• Motor type: brushless, gearless• Motor voltage rating: 36-volts• Maximum power output: 800 W• Continuous power output: 500 W• Maximum torque: 50 Nm<strong>Electric</strong>al specification, motor controller• Control function: current, voltage, temperature,recuperation, speed, torque, dynamofunction motor• Power supply light: 6 V, 7 W• Position: end of down tube
owner's <strong>manual</strong>12.0 Warranty & Security DetailsUltra Motor Warranty (the “Warranty”)1. DEFINITIONSThe following definitions in this clause apply in the Warranty:Goods means:A2B means:Time Periods means:Ultra Motor means:You, Your means:2. WARRANTYIn relation to the A2B: the frame; the motorsystem (motor and controller); the lithium ionbattery; and all other components of the A2Bexcept for the tires, tubes and brake pads.Light electric vehicle manufactured anddistributed by Ultra Motor.For the frame, five year on the A2B;For the motor system (motor and controller),two years from the date of delivery of the A2Bto you;For the lithium ion battery, one year from thedate of delivery of the A2B to you;For the charger, 90 days from date of saleFor all other components of the A2B except forthe tires, tubes, brake pads and grips, one yearfrom the date of delivery of the A2B to you.Ultra Motor Ltd.The original purchaser of the A2B from anauthorized Ultra Motor dealer.2.1 Ultra Motor warrants that on delivery of the A2B to You and for theTime Periods, the Goods shall:2.1.1 conform in all material respects with their descriptionsubject to any qualification or representation contained inthe brochures, advertisements or other documentation;2.1.2 be of satisfactory quality;2.1.3 be fit for any purpose Ultra Motor says the Goods are fit foror for any reasonable purpose for which You use the Goods;2.1.4 be free from material defects in design, material andworkmanship; and2.1.5 comply with all applicable statutory and regulatoryrequirements for selling the Goods in Europe.2.2 This Warranty is in addition to Your legal rights in relation to Goodswhich are faulty or which otherwise do not conform with the termsof the Warranty.2.3 This Warranty does not apply to any defect in the Goods arisingfrom:2.3.1 fair wear and tear;2.3.2 wilful damage, accident or negligence by You or any thirdparty;2.3.3 Your A2B having been assembled by someone other thanUltra Motor or an authorised Ultra Motor dealer;2.3.4 if You use the Goods in a way that Ultra Motor does notrecommend, including, but not limited to, using the A2B forcommercial activities or in competitive events or training forsuch activities or events;2.3.5 Your failure to follow our instructions, including, but notlimited to, the owner’s <strong>manual</strong>; or35
2.3.6 any modification, alteration or repair You carry out withoutUltra Motor’s prior written approval.2.4 The Warranty applies to any repaired or replacement Goods thatUltra Motor supply to You in the unlikely event that the original Goodsare faulty or do not otherwise conform with the Warranty.3. DEFECTIVE GOODS AND RETURNS3.1 In the unlikely event that the Goods do not conform with theWarranty, please let Ultra Motor know as soon as possible afterdelivery by contacting an authorised Ultra Motor dealer or Ultra Motoron service@ultramotor.com.3.2 Ultra Motor will ask You to return the A2B together with proof ofpurchase to an authorised Ultra Motor Dealer and once Ultra Motorhas checked that the Goods are faulty, Ultra Motor will at its solediscretion:3.2.1 provide You with a full or partial refund in relation to the faultyGoods; or3.2.2 replace the faulty Goods; or3.2.3 repair the faulty Goods.not limited to, losses that fall into the following categories:4.2.1 loss of income or revenue;4.2.2 loss of business;4.2.3 loss of anticipated savings;4.2.4 loss of data; or4.2.5 any waste of time.4.3 However, clause 4.2 shall not prevent claims for foreseeableloss of, or damage to, Your physical property.4.4 This clause does not include or limit in any way Ultra Motor’sliability for:4.4.1 death or personal injury caused by Ultra Motor’snegligence; or4.4.2 fraud or fraudulent misrepresentation; or4.4.3 any other matter for which it would be illegal or unlawful forUltra Motor to exclude or attempt to exclude Ultra Motor’sliability.364. LIMITATION OF LIABILITY4.1 Subject to clause 4.2, if either You fail or Ultra Motor fails to complywith this Warranty, neither shall be responsible for any losses thatthe other suffers as a result, except for those losses which are aforeseeable consequence of the failure to comply with this Warranty.4.2 Neither You nor Ultra Motor shall be responsible for losses that resultfrom Ultra Motor’s failure to comply with this Warranty including, but13.0 DisposalWe at Ultra Motor, Ltd. support the proper disposal and recycling of our products. Please dispose of your vehicleand associated components at your local recycling facility. Disposal assistance can also be provided throughyour country’s local Ultra Motor customer service line. Ultra Motor will arrange for the proper disposal, whenrequested.
owner's <strong>manual</strong>Owner registrationFill out and return your owner registration cardimmediately so that you may receiveimportant product information in the future.Thank you.Your A2B and certain key components have unique serial numbers.Record these serial numbers for warranty purposes or in case yourvehicle is ever lost or stolen.Vehicle serial number is located on the right side of the steering tube:Vehicle serial number:Motor serial number is engraved to the left side of the motor hub:Motor serial number:Battery number is located on the end cover of the battery.Record this other important information:Date of purchase:Selling dealer:Street address:City / State / Zip:Telephone:Sales person:Please keep this information in a safe place for future reference.Battery serial number:To fully protect your A2B against theft, buy a high quality bicycle lock and chain. Secure your A2B to a stationary object every time it is leftunattended and also lock your front and rear wheel and motor to the frame.37
Ultra MotorUltra Motor USA 1661 Tennessee St. Unit 2J San Francisco CA 94107English Edition 1.2March, 2011© Ultra Motor Ltd. All rights reserved, March 200938