E-table 2 assembly directions - Coalesse
E-table 2 assembly directions - Coalesse
E-table 2 assembly directions - Coalesse

You also want an ePaper? Increase the reach of your titles
YUMPU automatically turns print PDFs into web optimized ePapers that Google loves.
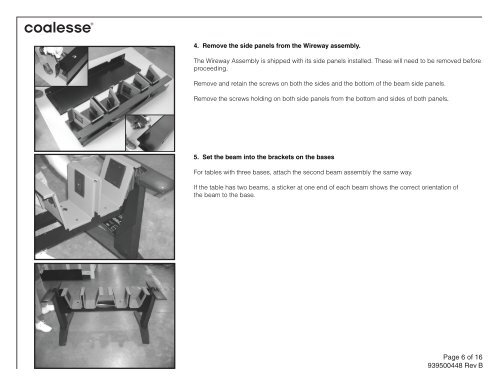
4. Remove the side panels from the Wireway <strong>assembly</strong>.The Wireway Assembly is shipped with its side panels installed. These will need to be removed beforeproceeding.Remove and retain the screws on both the sides and the bottom of the beam side panels.Remove the screws holding on both side panels from the bottom and sides of both panels.5. Set the beam into the brackets on the basesFor <strong>table</strong>s with three bases, attach the second beam <strong>assembly</strong> the same way.If the <strong>table</strong> has two beams, a sticker at one end of each beam shows the correct orientation ofthe beam to the base.Page 6 of 16939500448 Rev B