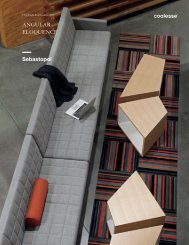
E-table 2 assembly directions - Coalesse
E-table 2 assembly directions - Coalesse
E-table 2 assembly directions - Coalesse

Create successful ePaper yourself
Turn your PDF publications into a flip-book with our unique Google optimized e-Paper software.
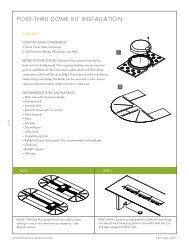
BE CAREFUL NOT TO DAMAGE THE TOP!12. Install the Tite-Joint fasteners on multi-piece <strong>table</strong> tops (If the <strong>table</strong> top is one piece, see step 11).If the top is a multi-piece top, Tite-Joint Fasteners will need to be installed before connecting the top to thebase <strong>assembly</strong>.Carefully remove the protective wood strips from the joining edges of the <strong>table</strong>top sections, prying from theunderside of the top to loosen. Be very careful not to damage the veneer or laminate when removing thesestrips.Several installers should carefully lift each section of the <strong>table</strong>top and place them on the base / beam<strong>assembly</strong> about 12” off center. Care should be taken to make sure <strong>table</strong>top sections are securely supporteduntil they can be attached to the base <strong>assembly</strong>. The sections will need to be spread apart about 12" toprepare the Tite-Joint Fasteners for <strong>assembly</strong>.The Tite-Joint Fastener consists of three parts: the Tightening Nut, the Draw Bolt, and the Locking Sleeve.NOTE: Leave gapfor installingTite JointsInsert the Tightening Nuts into the <strong>table</strong>top halves, alternating halves across the width of the top, with thethreaded ends of the nuts towards the joint. Insert the draw bolts and thread into the nut.The base/beam <strong>assembly</strong> will cover some holes. Carefully slide the top half over to one side, balancing itcarefully, to access these holes. Install the nuts and bolts, and then re-center the top.NOTE: Draw Bolts installedon alternating sidesSlide top over asnecessary to accesscenter Tite Joint holesAfter all nuts and draw bolts have been installed, carefully line up the other <strong>table</strong> top section with the drawbolts, and slide the halves together.Draw BoltTightening NutLocking SleevePage 13 of 16939500448 Rev B