Bob the Builder Manual switchit_bob_the_builder_it.pdf - Inclusive ...
Bob the Builder Manual switchit_bob_the_builder_it.pdf - Inclusive ...
Bob the Builder Manual switchit_bob_the_builder_it.pdf - Inclusive ...
- No tags were found...

You also want an ePaper? Increase the reach of your titles
YUMPU automatically turns print PDFs into web optimized ePapers that Google loves.
ContentsCred<strong>it</strong>s 2Introduction 3Installing Sw<strong>it</strong>chIt! <strong>Bob</strong> <strong>the</strong> <strong>Builder</strong> 4Running Sw<strong>it</strong>chIt! <strong>Bob</strong> <strong>the</strong> <strong>Builder</strong> 5Stopping Sw<strong>it</strong>chIt! <strong>Bob</strong> <strong>the</strong> <strong>Builder</strong> 5Printing from Sw<strong>it</strong>chIt! <strong>Bob</strong> <strong>the</strong> <strong>Builder</strong> 5Activ<strong>it</strong>ies 6Flash Cards 6Picture Builds 7Stories 8Teacher Options 9Activ<strong>it</strong>ies 10Subjects 10Number of Steps 11Sw<strong>it</strong>ch Access 11Delay 13Sw<strong>it</strong>ch Colours 13Serial Sw<strong>it</strong>ches 14Aud<strong>it</strong>ory Scanning 15Saving Options Settings 15Saving 15Loading 16Summary of Access Options 16Troubleshooting Guide 18Sw<strong>it</strong>chIt! <strong>Bob</strong> <strong>the</strong> <strong>Builder</strong>
Cred<strong>it</strong>sWindows is a registered trademark of Microsoft Corporation.© 2006 HIT Entertainment Lim<strong>it</strong>ed and Ke<strong>it</strong>h Chapman. All rightsreserved. <strong>Bob</strong> <strong>the</strong> <strong>Builder</strong> is a trademark of HIT Entertainment Lim<strong>it</strong>ed.Sw<strong>it</strong>chIt! <strong>Bob</strong> <strong>the</strong> <strong>Builder</strong> is © 2006 <strong>Inclusive</strong> Technology Ltd.Sw<strong>it</strong>chIt! <strong>Bob</strong> <strong>the</strong> <strong>Builder</strong> was created using Macromedia Director.Director® is © 1993 Macromedia, Inc.Sassoon Font is © 1993 Sassoon and Williams.No part of this publication or software may be reproduced or transm<strong>it</strong>tedin whole or part by any means w<strong>it</strong>hout <strong>the</strong> wr<strong>it</strong>ten permission of <strong>the</strong>publisher. Whilst every care has been taken w<strong>it</strong>h this product, <strong>the</strong> authorand publisher cannot be held responsible for any errors <strong>it</strong> may contain.No liabil<strong>it</strong>y is accepted for any loss or damage resulting from <strong>the</strong> use ofthis product.Sw<strong>it</strong>chIt! <strong>Bob</strong> <strong>the</strong> <strong>Builder</strong> was designed by Rod Boyes w<strong>it</strong>h RogerBates, Ian Bean, Melanie Jones and Nigel Wallace. Content Design andProject Management by Jennette Holden. Graphics by Terry Rushworth.Sound by Chris Thornton. Coding by Chris Dolan, Guillermo Ibanez andPaul Pearce. Documentation by Alison L<strong>it</strong>tlewood and Chris Thornton.Product Development for HIT Entertainment by Vinka Beecroft.<strong>Inclusive</strong> Technology is delighted to support <strong>the</strong> New Children’s Hosp<strong>it</strong>alAppeal for Manchester, by donating <strong>the</strong> proceeds of this product. <strong>Bob</strong> <strong>the</strong><strong>Builder</strong> and o<strong>the</strong>r characters are used w<strong>it</strong>h <strong>the</strong> kind permission of HITEntertainment Ltd. See: www.newchildrenshosp<strong>it</strong>alappeal.org.ukWe welcome your comments on all <strong>Inclusive</strong> Technology products.<strong>Inclusive</strong> Technology LtdRiverside CourtHuddersfield RoadDelphOldham OL3 5FZUn<strong>it</strong>ed KingdomTel: +44 (0)1457 819790Fax: +44 (0)1457 819799email: inclusive@inclusive.co.ukwww.inclusive.co.ukSw<strong>it</strong>chIt! <strong>Bob</strong> <strong>the</strong> <strong>Builder</strong>
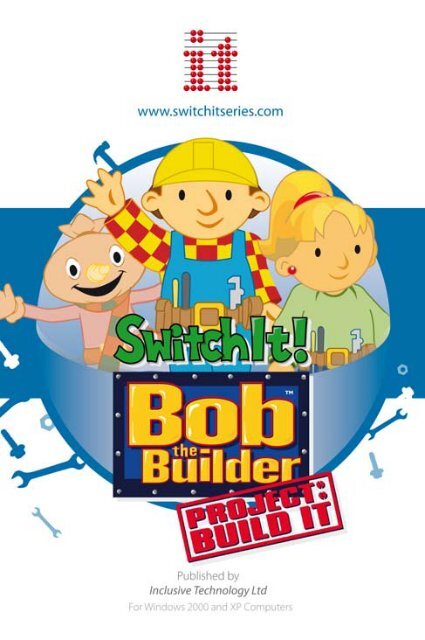
IntroductionLearners who need to use sw<strong>it</strong>ches to access <strong>the</strong> computer require arange of software in order to motivate <strong>the</strong>m to develop <strong>the</strong>ir abil<strong>it</strong>y. Thecomputer can also give <strong>the</strong>m relative independence in learning newconcepts.The Sw<strong>it</strong>chIt! Series from <strong>Inclusive</strong> Technology Ltd is designed to helpsw<strong>it</strong>ch users develop and demonstrate an understanding of languageconcepts, as well as develop <strong>the</strong>ir abil<strong>it</strong>y to use sw<strong>it</strong>ches.All of <strong>the</strong> programs in this series allow access via a single sw<strong>it</strong>ch, twosw<strong>it</strong>ches, a touch mon<strong>it</strong>or or IntelliKeys as well as a mouse. Each programhas lots of options to allow <strong>it</strong> to be used in many different ways.Option settings for a particular student or group can be saved for quickaccess at a later date.The pictures can also be printed out to make activ<strong>it</strong>y cards for use awayfrom <strong>the</strong> computer.Sw<strong>it</strong>chIt! <strong>Bob</strong> <strong>the</strong> <strong>Builder</strong> has lots of fun activ<strong>it</strong>ies around your favour<strong>it</strong>echaracters. It includes <strong>Bob</strong> and Wendy, Scruffty and Spud, Farmer Picklesand Bird, Dizzy and Scrambler, Travis, Scoop, Benny, Lofty, Muck, Roleyand Pilchard.Sw<strong>it</strong>chIt! <strong>Bob</strong> <strong>the</strong> <strong>Builder</strong>
There are three activ<strong>it</strong>ies designed to be used at different levels oflearning:Flash Cards show pictures from <strong>the</strong> program’s <strong>the</strong>me one at a time. Use<strong>the</strong>se to talk about things in isolation.Picture Builds create compos<strong>it</strong>e pictures b<strong>it</strong> by b<strong>it</strong>. These animate oncompletion. Use this to talk about <strong>the</strong> characters and objects.Stories uses <strong>the</strong> pictures from Picture Builds to play a stepped,animated sequence of events. Use this to talk about actions (verbs) andconsequences.Also see: www.<strong>sw<strong>it</strong>ch<strong>it</strong></strong>series.comfor extra support and ideas!Installing Sw<strong>it</strong>chIt! <strong>Bob</strong> <strong>the</strong> <strong>Builder</strong>You will need to install Sw<strong>it</strong>chIt! <strong>Bob</strong> <strong>the</strong> <strong>Builder</strong> before you can run<strong>it</strong>. You only need to do this once.Insert <strong>the</strong> CD.If your computer is set to Auto-run CDs <strong>the</strong> installer window shouldappear on <strong>the</strong> screen after about 10 seconds.O<strong>the</strong>rwise, double-click on My Computer, <strong>the</strong>n double-click on <strong>the</strong> CDicon. Double-click on presetup.exe to run <strong>the</strong> installer.When <strong>the</strong> window appears, follow <strong>the</strong> prompts to begin installation.Sw<strong>it</strong>chIt! <strong>Bob</strong> <strong>the</strong> <strong>Builder</strong>
Running Sw<strong>it</strong>chIt! <strong>Bob</strong> <strong>the</strong> <strong>Builder</strong>If <strong>the</strong> Sw<strong>it</strong>chIt! <strong>Bob</strong> <strong>the</strong> <strong>Builder</strong> icon is on <strong>the</strong> computer screen (<strong>the</strong>desktop), double-click on <strong>it</strong>. O<strong>the</strong>rwise:Click on <strong>the</strong> Start button, <strong>the</strong>n on Programs, <strong>the</strong>n on <strong>Inclusive</strong>Technology, <strong>the</strong>n on Sw<strong>it</strong>chIt! <strong>Bob</strong> <strong>the</strong> <strong>Builder</strong>.Stopping Sw<strong>it</strong>chIt! <strong>Bob</strong> <strong>the</strong> <strong>Builder</strong>Whilst playing an activ<strong>it</strong>y, press <strong>the</strong> Esc key or <strong>the</strong> M key on <strong>the</strong>computer’s keyboard. This will take you to <strong>the</strong> Options screen.To ex<strong>it</strong> <strong>the</strong> program completely, click on <strong>the</strong> Ex<strong>it</strong> button.Printing from Sw<strong>it</strong>chIt! <strong>Bob</strong> <strong>the</strong> <strong>Builder</strong>You can print out a picture from Sw<strong>it</strong>chIt! <strong>Bob</strong> <strong>the</strong> <strong>Builder</strong> at anytime.Hold down <strong>the</strong> Ctrl key and press <strong>the</strong> P key. A standard Windows Printdialogue box will appear. Click <strong>the</strong> Print button to print.Sw<strong>it</strong>chIt! <strong>Bob</strong> <strong>the</strong> <strong>Builder</strong>
Activ<strong>it</strong>iesWhen Sw<strong>it</strong>chIt! <strong>Bob</strong> <strong>the</strong> <strong>Builder</strong> begins, choose an activ<strong>it</strong>y from<strong>the</strong> t<strong>it</strong>le screen. To change <strong>the</strong> activ<strong>it</strong>y, press <strong>the</strong> Esc or M key on <strong>the</strong>keyboard to go to <strong>the</strong> Teacher Options, <strong>the</strong>n select a new activ<strong>it</strong>y andclick <strong>the</strong> Play button at <strong>the</strong> bottom of <strong>the</strong> screen.In all <strong>the</strong> activ<strong>it</strong>ies, a picture of a sw<strong>it</strong>ch will appear at <strong>the</strong> bottom of <strong>the</strong>screen from time to time. You can only click <strong>the</strong> mouse or press your ownsw<strong>it</strong>ches when this sw<strong>it</strong>ch picture is displayed on <strong>the</strong> screen. The pausesin <strong>the</strong> activ<strong>it</strong>ies allow time for pointing to and talking about <strong>the</strong> pictures.Flash CardsClick each time <strong>the</strong> sw<strong>it</strong>ch picture appears on <strong>the</strong> screen to bring up anew ‘card’. There are 30 Flash Cards.Sw<strong>it</strong>chIt! <strong>Bob</strong> <strong>the</strong> <strong>Builder</strong>
Picture BuildsWhen you access <strong>the</strong> Picture Builds activ<strong>it</strong>ies, a wh<strong>it</strong>e screen will bedisplayed w<strong>it</strong>h a picture of a sw<strong>it</strong>ch at <strong>the</strong> bottom. Press your sw<strong>it</strong>ch whenyou see a sw<strong>it</strong>ch displayed on <strong>the</strong> screen.A scene will be built up b<strong>it</strong> by b<strong>it</strong> at each sw<strong>it</strong>ch press. The number ofsteps required to complete <strong>the</strong> scene can be changed in <strong>the</strong> Number ofSteps option. There are 14 Picture Build subjects.Picture Builds w<strong>it</strong>h Picture MenuThis is like Picture Builds above, but also provides a pictorial menu ofall <strong>the</strong> subjects. You should select one of <strong>the</strong>se to start a Picture Build.Selection can be made using <strong>the</strong> mouse, touch mon<strong>it</strong>or, interactivewh<strong>it</strong>eboard or using sw<strong>it</strong>ch scanning (see <strong>the</strong> Sw<strong>it</strong>ch Access section).Sw<strong>it</strong>chIt! <strong>Bob</strong> <strong>the</strong> <strong>Builder</strong>
StoriesWhen you play <strong>the</strong> Stories activ<strong>it</strong>y, a background scene will first bedisplayed when you press <strong>the</strong> Space bar, click <strong>the</strong> mouse or press <strong>the</strong>sw<strong>it</strong>ch.Each story is made up of a sequence of animations w<strong>it</strong>h five or sixsteps.To go through <strong>the</strong> story, click <strong>the</strong> mouse or press your sw<strong>it</strong>ch when yousee <strong>the</strong> sw<strong>it</strong>ch picture displayed at <strong>the</strong> bottom of <strong>the</strong> screen. There are12 Stories.Sw<strong>it</strong>chIt! <strong>Bob</strong> <strong>the</strong> <strong>Builder</strong>
Stories w<strong>it</strong>h Picture MenuThis is like Stories above, but also provides a pictorial menu of all <strong>the</strong>subjects. You should select one of <strong>the</strong>se to start a Story. Selection canbe made using <strong>the</strong> mouse, touch mon<strong>it</strong>or, interactive wh<strong>it</strong>eboard or usingsw<strong>it</strong>ch scanning (see <strong>the</strong> Sw<strong>it</strong>ch Access section).Sw<strong>it</strong>chIt! <strong>Bob</strong> <strong>the</strong> <strong>Builder</strong> Options MenuWhen Sw<strong>it</strong>chIt! <strong>Bob</strong> <strong>the</strong> <strong>Builder</strong> starts, you can click on <strong>the</strong> Optionsbutton to access <strong>the</strong> Teacher Options. When playing a game, press <strong>the</strong>Esc or M key to go to <strong>the</strong> Options.On <strong>the</strong> left-hand side you will see a column of buttons where differentoptions can be set. Click on <strong>the</strong>se to see <strong>the</strong> changes you can make.Sw<strong>it</strong>chIt! <strong>Bob</strong> <strong>the</strong> <strong>Builder</strong>
Activ<strong>it</strong>iesChoose to play w<strong>it</strong>h Flash Cards, Picture Builds or Stories.SubjectsChoose <strong>the</strong> images or story lines you want to be included in youractiv<strong>it</strong>ies. The range that you see here will depend on which activ<strong>it</strong>y youhave selected (Flash Cards, Picture Builds or Stories). You can alsochoose whe<strong>the</strong>r <strong>the</strong> subjects are shown in <strong>the</strong> sequence as shown here,or in random order.The Subjects option also controls which subjects will appear in <strong>the</strong>Picture Menu.10 Sw<strong>it</strong>chIt! <strong>Bob</strong> <strong>the</strong> <strong>Builder</strong>
Number of StepsThis option works only w<strong>it</strong>h Picture Builds. Select <strong>the</strong> number of steps <strong>it</strong>takes to form <strong>the</strong> complete Picture Build.Sw<strong>it</strong>ch AccessIn this section you can choose to use a mouse, touch mon<strong>it</strong>or or sw<strong>it</strong>ches.This section is spl<strong>it</strong> into two parts, one for playing <strong>the</strong> activ<strong>it</strong>ies and onefor <strong>the</strong> Picture Menu.If you are using sw<strong>it</strong>ches, <strong>the</strong>se should be connected to <strong>the</strong> computerusing a sw<strong>it</strong>ch interface, such as <strong>the</strong> Crick Sw<strong>it</strong>ch Interface or <strong>the</strong>Quizworks Sw<strong>it</strong>ch Interface. You can get both of <strong>the</strong>se, and sw<strong>it</strong>ches,from <strong>the</strong> <strong>Inclusive</strong> Technology catalogue or online shop. The sw<strong>it</strong>chesshould be set up to behave like <strong>the</strong> Space bar and Return/Enter keysSw<strong>it</strong>chIt! <strong>Bob</strong> <strong>the</strong> <strong>Builder</strong>11
on <strong>the</strong> computer’s keyboard, or like <strong>the</strong> left and right mouse buttons.See <strong>the</strong> section Summary of Access Options in this guide for fur<strong>the</strong>rinformation.For Activ<strong>it</strong>ies:• One sw<strong>it</strong>ch/Space bar/touch screen/mouse button: w<strong>it</strong>h thissetting, <strong>the</strong> learner just uses any of <strong>the</strong>se, or a single sw<strong>it</strong>ch toplay.• Two Sw<strong>it</strong>ches, alternate: w<strong>it</strong>h this option, pictures of <strong>the</strong> sw<strong>it</strong>cheswill appear alternately on <strong>the</strong> left or right of <strong>the</strong> screen. Only <strong>the</strong>correct sw<strong>it</strong>ch will operate <strong>the</strong> activ<strong>it</strong>y.• Two Sw<strong>it</strong>ches, press as requested: use this when you want <strong>the</strong>learner to watch and use <strong>the</strong> sw<strong>it</strong>ch indicated on <strong>the</strong> screen (see<strong>the</strong> Sw<strong>it</strong>ch Colours option below for easy ways to identify <strong>the</strong>sw<strong>it</strong>ches).For Picture Menu:• Mouse click/Touch Screen: w<strong>it</strong>h this setting, <strong>the</strong> learner justclicks or touches one of <strong>the</strong> pictures to start playing that activ<strong>it</strong>y.• One sw<strong>it</strong>ch/Space bar: this setting uses single sw<strong>it</strong>ch scanning.Press <strong>the</strong> Space bar or sw<strong>it</strong>ch to start a scan box moving between<strong>the</strong> pictures in <strong>the</strong> Picture Menu. Press <strong>the</strong> Space bar or sw<strong>it</strong>chagain when <strong>the</strong> scan box reaches <strong>the</strong> activ<strong>it</strong>y you want to play.There are three speed settings.• Two sw<strong>it</strong>ch scan: this setting is for two sw<strong>it</strong>ches which act like <strong>the</strong>Space bar and Return (Enter) keys on <strong>the</strong> computer’s keyboard,or like <strong>the</strong> left and right mouse buttons. Press <strong>the</strong> first sw<strong>it</strong>ch (orSpace bar or left mouse button) to make <strong>the</strong> scan box appear.Press <strong>it</strong> again to move <strong>it</strong> to <strong>the</strong> next picture. Keep pressing thissw<strong>it</strong>ch to take <strong>the</strong> scan box to <strong>the</strong> activ<strong>it</strong>y you want to play. Nowpress <strong>the</strong> second sw<strong>it</strong>ch (or Return/Enter key or <strong>the</strong> right mousebutton) to begin.12 Sw<strong>it</strong>chIt! <strong>Bob</strong> <strong>the</strong> <strong>Builder</strong>
DelayThe program includes a ‘pre-acceptance delay’ function. This is usefulfor those students who make brief involuntary sw<strong>it</strong>ch presses which youdon’t want <strong>the</strong> program to recognise. If you set <strong>the</strong> delay to 0.4 seconds,<strong>the</strong> program will only accept sw<strong>it</strong>ch presses that last longer than 0.4seconds.Sw<strong>it</strong>ch ColoursThis option allows you to set <strong>the</strong> colour of <strong>the</strong> sw<strong>it</strong>ch or sw<strong>it</strong>ches beingused. If you wish to use <strong>the</strong> software w<strong>it</strong>h a single sw<strong>it</strong>ch, select a colourfor <strong>the</strong> ‘Left Sw<strong>it</strong>ch’.If you are using two sw<strong>it</strong>ches, <strong>the</strong> colours can be set to match your ownrange of sw<strong>it</strong>ches (or place coloured patches on sw<strong>it</strong>ches to identify <strong>the</strong>mfor <strong>the</strong> user).Sw<strong>it</strong>chIt! <strong>Bob</strong> <strong>the</strong> <strong>Builder</strong>13
Serial Sw<strong>it</strong>chesIf you are using sw<strong>it</strong>ches on a Windows computer connected through asw<strong>it</strong>ch box plugged into <strong>the</strong> serial socket, you will need to configure <strong>the</strong>software to recognise how <strong>the</strong> connection is made.If you are using a Concept Keyboard w<strong>it</strong>h a PC as a single sw<strong>it</strong>ch or twosw<strong>it</strong>ches, you will also need to set up <strong>the</strong> software.In ei<strong>the</strong>r case, click on <strong>the</strong> box labelled Serial Sw<strong>it</strong>ches. A dialogue boxappears where you can configure <strong>the</strong> software for your sw<strong>it</strong>ch box orConcept Keyboard.Select <strong>the</strong> COM port through which your serial device is connected.Click on OK. The toolbar will disappear, but <strong>the</strong> serial sw<strong>it</strong>ch program willcontinue to run invisibly and <strong>it</strong> will need to be closed separately from <strong>the</strong>main program when you have finished.IntelliKeys: if you are using an IntelliKeys keyboard, click on <strong>the</strong>IntelliKeys button. An overlay file will <strong>the</strong>n be sent to your board so that <strong>it</strong>will operate as two sw<strong>it</strong>ches (<strong>the</strong> board is divided vertically for two sw<strong>it</strong>choperation). You can also plug sw<strong>it</strong>ches into <strong>the</strong> IntelliKeys. If you haveone or two sw<strong>it</strong>ches plugged in, <strong>the</strong> board will operate correctly.14 Sw<strong>it</strong>chIt! <strong>Bob</strong> <strong>the</strong> <strong>Builder</strong>
Aud<strong>it</strong>ory ScanningThe Picture Menus in Sw<strong>it</strong>chIt! <strong>Bob</strong> <strong>the</strong> <strong>Builder</strong> have aud<strong>it</strong>oryscanning built in. If <strong>the</strong> learner is using <strong>the</strong> mouse scanning in a PictureMenu, <strong>the</strong> names of <strong>the</strong> subjects will be spoken when <strong>the</strong> mouse pointeris moved over <strong>the</strong>m. If <strong>the</strong> learner is using sw<strong>it</strong>ch(es), <strong>the</strong> names of <strong>the</strong>subjects will be spoken when <strong>the</strong> pictures of <strong>the</strong> subjects are scanned.(See pages 7 and 9 for more details about Picture Menus.)The Aud<strong>it</strong>ory Scanning option allows you to turn this speech off.Saving Options SettingsYou might want to set up Sw<strong>it</strong>chIt! <strong>Bob</strong> <strong>the</strong> <strong>Builder</strong> for differentlearners. The settings you choose can be saved as Options files andquickly loaded again later, to save time.SavingWhen you have set up <strong>the</strong> software for a particularlearner, click on <strong>the</strong> Save button at <strong>the</strong> bottom of <strong>the</strong>Options screen. This looks like a floppy disc. A dialoguebox opens where you can type a filename (perhaps <strong>the</strong>user’s name).Sw<strong>it</strong>chIt! <strong>Bob</strong> <strong>the</strong> <strong>Builder</strong>15
LoadingTo use a previously saved Options file, click on <strong>the</strong>Load button at <strong>the</strong> bottom of <strong>the</strong> screen. This looks likea folder.A dialogue box will appear, showing <strong>the</strong> files you havealready saved.Select <strong>the</strong> file you want to load and <strong>the</strong>n click on Open. The Optionsscreen will now automatically show <strong>the</strong> options stored in that file.Summary of Access OptionsMouse, Touch Mon<strong>it</strong>orIf <strong>the</strong> program is set for mouse access, any of <strong>the</strong> mouse buttons willoperate as a single sw<strong>it</strong>ch. The mouse can also work as two sw<strong>it</strong>ches: if<strong>the</strong> Two Sw<strong>it</strong>ches, alternate or <strong>the</strong> Two Sw<strong>it</strong>ches, press as requestedoptions are selected, <strong>the</strong> left and right mouse buttons will operate as twoseparate sw<strong>it</strong>ches.Touch mon<strong>it</strong>ors will work as a single sw<strong>it</strong>ch. Just touch anywhere on <strong>the</strong>screen!KeyboardIf Sw<strong>it</strong>chIt! <strong>Bob</strong> <strong>the</strong> <strong>Builder</strong> is set up for single sw<strong>it</strong>ch operation, <strong>the</strong>Space bar or Enter keys will act as <strong>the</strong> sw<strong>it</strong>ch.If <strong>the</strong> software is set up for two sw<strong>it</strong>ch use, Space bar and Enter willoperate as two separate sw<strong>it</strong>ches.Concept KeyboardYou may use a Concept Keyboard as a single sw<strong>it</strong>ch or as two sw<strong>it</strong>ches,using <strong>the</strong> left and right sides of <strong>the</strong> board.Go to <strong>the</strong> menu screen and click on Setup Serial Sw<strong>it</strong>ches. Select <strong>the</strong>COM port where your Concept Keyboard is attached.16 Sw<strong>it</strong>chIt! <strong>Bob</strong> <strong>the</strong> <strong>Builder</strong>
IntelliKeys KeyboardYou may wish to use an IntelliKeys keyboard as ei<strong>the</strong>r a single sw<strong>it</strong>ch oras two sw<strong>it</strong>ches, using <strong>the</strong> left and right sides of <strong>the</strong> board. The programcomes w<strong>it</strong>h Overlay Sender and an overlay file called IKeys.Go to <strong>the</strong> Sw<strong>it</strong>ch Access menu screen and click on <strong>the</strong> IntelliKeysbutton. This will set up <strong>the</strong> IntelliKeys for use w<strong>it</strong>h <strong>Bob</strong> <strong>the</strong> <strong>Builder</strong>.Sw<strong>it</strong>chesSw<strong>it</strong>ches can be connected to <strong>the</strong> computer in a variety of ways. As arule however, Sw<strong>it</strong>chIt! programs require interface boxes to act as if <strong>the</strong>Space bar or Enter keys are pressed. The descriptions below will covermany of <strong>the</strong> options:• IntelliKeys - if you are connecting sw<strong>it</strong>ches through an IntelliKeyskeyboard, go to <strong>the</strong> Serial Sw<strong>it</strong>ches menu screen and clickon Setup IntelliKeys. The relevant information will be sentautomatically to your IntelliKeys keyboard.• Don Johnston Sw<strong>it</strong>ch Box - plug your sw<strong>it</strong>ch(es) into <strong>the</strong> socketsidentified for [1] and [2].• Serial Sw<strong>it</strong>ch Box - go to <strong>the</strong> Serial Sw<strong>it</strong>ches menu screen andclick on Setup Serial Sw<strong>it</strong>ches. Select <strong>the</strong> COM port throughwhich your sw<strong>it</strong>ch box is connected.• Mouser - sw<strong>it</strong>ches connected through a Mouser act in <strong>the</strong> sameway as mouse buttons. Go to <strong>the</strong> Sw<strong>it</strong>ch Access menu screen andselect one sw<strong>it</strong>ch or two sw<strong>it</strong>ch operation.• USB Sw<strong>it</strong>ch Box - if this has software, <strong>it</strong> should be set up to actlike <strong>the</strong> Space bar and Enter keys.• <strong>Inclusive</strong> Sw<strong>it</strong>chBox - by default, sw<strong>it</strong>ches plugged into sockets 1and 2, Space and Enter, should act like <strong>the</strong> Space bar and Enterkeys on <strong>the</strong> keyboard. If not, run <strong>the</strong> software for <strong>the</strong> box.• Sw<strong>it</strong>chBoard - plug your sw<strong>it</strong>ches into <strong>the</strong> sockets marked Enterand Space.Sw<strong>it</strong>chIt! <strong>Bob</strong> <strong>the</strong> <strong>Builder</strong>17
4. I would like to remove <strong>the</strong> software but don’t know how.There are two ways to remove programs:a) Go to <strong>the</strong> Windows Start menu. Click Settings and <strong>the</strong>n ControlPanel.Double-click on Add or Remove Programs. This will bring up awindow showing all software installed on your computer:Click on <strong>the</strong> Remove button and follow <strong>the</strong> prompts to remove <strong>the</strong> software.b) Not all software appears in Add/Remove programs. If your software does not,follow <strong>the</strong>se steps:• Open My Computer (see Question 1).• Double-click on <strong>the</strong> C drive.• Double-click on <strong>the</strong> <strong>Inclusive</strong> folder.• Highlight <strong>the</strong> folder w<strong>it</strong>h <strong>the</strong> software you want to remove and press Delete.Extra Help from <strong>Inclusive</strong>...Don’t forget that <strong>the</strong>re are over a thousand pages of information aboutusing technology to support your learners on our webs<strong>it</strong>e.See: www.inclusive.co.ukWe organise Information Days around <strong>the</strong> country which are packed w<strong>it</strong>hadvice, inspiration and ideas. See www.inclusive.co.uk/eventsWe also organise exhib<strong>it</strong>ions about ICT for special needs.See www.inclusive.co.uk/exhib<strong>it</strong>ionsSw<strong>it</strong>chIt! <strong>Bob</strong> <strong>the</strong> <strong>Builder</strong>19
5. When I run <strong>the</strong> program, my screen goes black, or only some of <strong>the</strong> programis displayed on <strong>the</strong> screen.This problem is sometimes caused by <strong>the</strong> program trying to fill your computerscreen. It is usually solved by installing <strong>the</strong> correct software drivers for your mon<strong>it</strong>or.If this can’t be done, <strong>the</strong>re is a way to prevent <strong>the</strong> program from trying to fill up yourscreen.a) Click <strong>the</strong> right mouse button on <strong>the</strong> program icon on <strong>the</strong> Desktop. This will makea pop-up menu appear.b) Click <strong>the</strong> left mouse button on Properties at <strong>the</strong> bottom of <strong>the</strong> pop-up menu. Thiswill make <strong>the</strong> following window appear:(If <strong>it</strong> doesn’t look much like this, click on <strong>the</strong> word Shortcut at <strong>the</strong> top of <strong>the</strong>window.)c) Add “ /c” to <strong>the</strong> end of <strong>the</strong> text in <strong>the</strong> Target window. Remember to type a spacebefore “/c”! Also make sure <strong>the</strong> “/” is not a “\”.d) Now click <strong>the</strong> OK button at <strong>the</strong> bottom of <strong>the</strong> window.Now try running <strong>the</strong> program again. If <strong>the</strong> program runs but has a black borderaround <strong>the</strong> edge, you can ex<strong>it</strong> <strong>the</strong> program and try changing <strong>the</strong> “display resolution”to 800 x 600.20 Sw<strong>it</strong>chIt! <strong>Bob</strong> <strong>the</strong> <strong>Builder</strong>