Controller for AD9850 DDS Modules Andy Talbot G4JNT 2012-12-06
Controller for AD9850 DDS Modules Andy Talbot G4JNT 2012-12-06
Controller for AD9850 DDS Modules Andy Talbot G4JNT 2012-12-06

You also want an ePaper? Increase the reach of your titles
YUMPU automatically turns print PDFs into web optimized ePapers that Google loves.
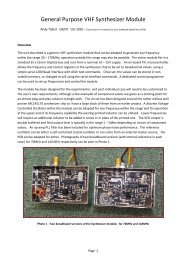
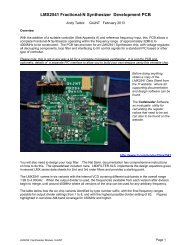
memory.The 16 memories can be cycled through with the M button. At turn on, the first memorylocation, MemA is always loaded. Cycle through each location as desired, using the rotarycontrol to move from this value. Holding S down <strong>for</strong> two seconds stores the new value in thatlocation.A minimum step of 0.01 Hzmay seem a bit pointlesswhen the fundamental <strong>DDS</strong>resolution using the suppliedclock is <strong>12</strong>5MHz / 2 32 =0.029Hz, but it has beenincluded <strong>for</strong> when themodule is used with a lowerclock frequency. Forexample, a 10MHz clockallows 0.0023Hz resolution.PCBA PCB layout <strong>for</strong> SOIC packaged 16F628A PICdevices is shown below. The 14 pin headerplugs directly onto the LCD modules availablefrom [1], with all other connections made viapads or headers. Construction should be selfexplanatory. The LED serves no usefulpurpose in this designs and can be left out. Itis a hangover from an earlier project thatused this PCB. (The odd pin connections <strong>for</strong>the serial interface to the <strong>DDS</strong> module arealso a legacy of backwards compatibility)PIC FirmwareSource code <strong>for</strong> programming into the PIC is contained in the file 9850_rot.asm which includessufficient comments and notes if you need to modify it to change clock frequency, step size or