MCP35A Master Control Panel Manual - Full Compass
MCP35A Master Control Panel Manual - Full Compass
MCP35A Master Control Panel Manual - Full Compass

You also want an ePaper? Increase the reach of your titles
YUMPU automatically turns print PDFs into web optimized ePapers that Google loves.
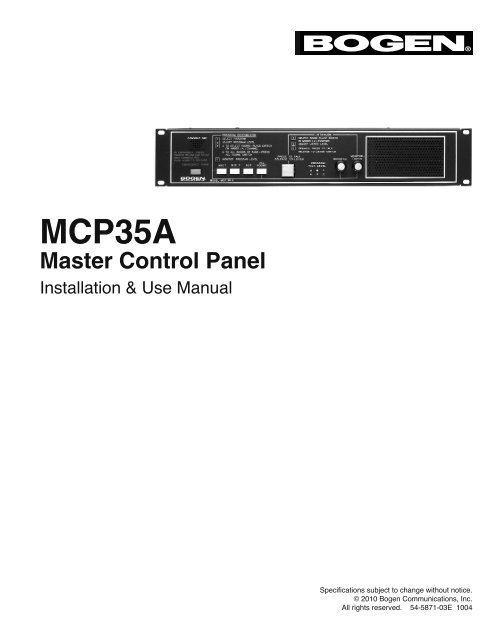
IntroductionThe Bogen Model <strong>MCP35A</strong> <strong>Master</strong> <strong>Control</strong> <strong>Panel</strong> provides facilities forinstantaneous two-way communication and distribution of emergencypages, background music or other program material to speaker-equippedlocations. The control panel has two built-in amplifiers. The intercomamplifier, rated at 20 watts, features a frequency response shaped formaximum intelligibility. The 35-watt program amplifier ensures thatprogram material and/or emergency announcements are clearly heard andeasily understood. Front panel step-by-step instructions and color-codedlines make the <strong>MCP35A</strong> easy to operate.Distribution of program material is accomplished by simple push-buttonprogram selection, following the color-coded guidelines. Emergencyannouncements to all locations take precedence over program distributionand are accomplished with a single (EMERGENCY PAGE) pushbutton selection.Inputs are provided for two Lo-Z balanced microphones, a Hi-Z unbalancedAUX program source (CD player/tuner, etc.), and telephone pagingaccessories. Booster amplifier IN/OUT connections are also provided.Provision are included to supply phantom power to microphones, distributetime signals to speakers, and make emergency all-call pageannouncements from telephone or remote microphone. Rear-panelmountedand internal controls are provided to adjust the gain level ofindividual inputs and to enable/disable system features.A console microphone (built-in) is normally used to communicate with astation over the intercom channel, to send emergency page announcementsto all stations, and may be used as program MIC 1. It is easilydefeated for external microphone applications. A built-in speaker is usedfor intercom communication and for monitoring program material beforedistribution. Provision is included to mute the speaker when the MIC 1switch is pressed.The <strong>MCP35A</strong> uses room selector panels to direct intercom orprogram to selected staff stations. <strong>Panel</strong>s are provided with switches toplace each room on a program channel, intercom channel, or off. Eachswitch position on the panel includes an LED call-in annunciator.When a staff station is called from the control panel, a supervisory tonealerts the staff member to the call. The tone repeats at regular intervals toprevent unauthorized monitoring. Calls from staff stations may be initiatedthrough call-in switches and can include privacy control to positively preventmonitoring. Provision is included for voice call-in from stationsequipped with voice call-in switches.The <strong>MCP35A</strong> control panel permits the user to:Establish direct two-way communication between the control panel andany speaker-equipped location via a room selector panel and the pressto-talk/release-to-listenpush button, while maintaining simultaneousdistribution of program material to any other speaker-equipped location.Make a program source selection by pressing the appropriately labeledpush button corresponding to the input from either of two microphones(MIC 1, MIC 2) or one high-impedance program source (AUX), such as atuner or CD player.Transmit a program selection or voice announcement simultaneously to allspeaker-equipped locations by pressing a program source push buttonand the ALL ROOMS push button.The program level can be monitored audibly (speaker) and visually (LED).Instantaneously transmit emergency messages to all speaker-equippedlocations by pressing the red EMERGENCY PAGE push button. Theemergency page feature overrides all system controls and functions andtransmits the emergency message at a predetermined level.Distribute time signals to all speaker-equipped locations.Provisions have been made for:• Sounding a supervisory tone over any loudspeaker selected fromtwo-way communication. The tone alerts staff to a call and repeats atregular intervals to prevent unauthorized monitoring from the controlpanel.• Staff call origination through the use of a call origination switch,which causes a repetitive tone signal to sound at the control panel andlights the annuniator lamp on the associated switch bank correspondingto the calling location. The annunciator system functions until the call isanswered.• Voice-call origination to the control panel from any location equippedwith a voice call-in switch.• Prevention of monitoring any location from the control panel when thatlocation is equipped with a Bogen Call/Privacy switch.• Transmission of page announcements from remote locations using theTelco Page feature, which overrides all system functions except theemergency page feature. The Telco Page may be used with the TELCOPAGE input or the MIC 2 input (internally selected).UnpackingThe <strong>MCP35A</strong> was carefully checked before leaving the factory.Inspect the shipping carton and unit for damage caused byimproper handling. If damage is found, you must file a claim with thetransportation company that delivered the product.2
Front & Rear <strong>Panel</strong> Connection DiagramsFront<strong>Panel</strong>1 92 3 4 5 6 7 81. Console MIC - Used for intercom and emergency page functions. Normallyconfigured (via terminal link) as microphone 1. Provision has been made to optionallymute the monitor speaker when the MIC 1 switch is depressed.2. Emergency Page - Red push button used to make announcements to allspeaker stations; overrides program distribution and room selector panel settings.3. MIC 1, MIC 2, AUX - Push buttons used to select input source; choose fromMIC 1 (console or external microphone), MIC 2 (external microphone), or AUX,as desired.4. All Rooms - Push button used to distribute program to all speaker stations withroom selector panel switches set to the PROGRAM or OFF positions.6. Program/Talk Level - LED Indicators: N (normal) lights green to indicateproper signal level; P (peak) lights amber to indicate higher than normal signallevel; O (overload) lights red to indicate possible signal clip.7. Program - Amber color knob used to adjust level of program material.8. Monitor/Listen - Green color knob used to adjust volume level to front panelspeaker.9. Front <strong>Panel</strong> Speaker - Used to monitor a program or to listen to a stationvia the INTERCOM channel.5. Press to Talk/Release to Listen - Push button used to communicate withspeaker station selected for intercom communication. Does not affect the distributionof program material to other stations.Rear<strong>Panel</strong>7 6 5 4 32111 10 9 81. Microphone Inputs - A terminal strip provides connection for two-low impedancebalanced microphones. May (optionally) provide phantom power. Theconsole microphone is used as MIC 1; however, this feature may be disabled. Usetwo-conductor shielded microphone cable.2. Voice Call-In - Connects parallel lines from station call-in switches with atwo- conductor shielded cable.3. AUX - Two phono jacks accept an unbalanced line-level input from CD player,tuner, etc.4. Telco Page - Shorting the TELCO PAGE terminal to ground activates theTelco page feature. The associated TELCO PAGE jack accepts an unbalancedline input from Model WMT1A telephone interface device. This input has priorityover all other system functions except for the front-panel-mounted EMERGENCYPAGE.6. Accessory - Mounting port for optional connector used to interface the ModelMCPB <strong>Control</strong> <strong>Panel</strong>.7. Switch Bank - 9-pin connector accepts three audio pairs and three controlwires from room selector panels.8. 25V BAL. INPUT - (From Booster) Stereo phone jack accepts input from abooster amplifier. Refer to Figure 6.9. LINE OUT - Unbalanced line-level output to recorder or booster amplifier. Theoutput level is adjustable with the front panel LEVEL control.10. 12V DC & GND Terminals - For powering SCR25A and other accessories.11. AUX Power - 840-watt, three-wire auxiliary power receptacle for accessoryequipment.5. Time Clock - Shorting the TIME CLOCK Terminal to ground provides singlecircuittime signal capability.3
InstallationPower and GroundingThe <strong>MCP35A</strong> <strong>Master</strong> <strong>Control</strong> <strong>Panel</strong> operates from a 120 volt, 60Hz ACsource and consumes approximately 100 watts. The AC line cord is terminatedin a thee-prong plug, and should be plugged into a three-wiregrounded outlet providing nominal 120 volts, 60 Hz AC. It is important thatthe control panel be grounded properly.Auxiliary Power ReceptacleAn 840-watt, three-wire grounded outlet is provided on the rear panel tosupply power to accessory equipment. Auxiliary equipment connected tothis outlet will be grounded, provided the <strong>MCP35A</strong> line cord has been properlygrounded.Line-Matching TransformersThe <strong>MCP35A</strong> <strong>Master</strong> <strong>Control</strong> <strong>Panel</strong> is designed for 25-volt constant-voltagedistribution systems. All system loudspeakers must be provided with linematchingtransformers. See Figure 1.Figure 1 – Model T725 TransformerCaution: Speakers and transformers must be properly matched withrespect to power requirements. The internal 35-watt amplifier of the <strong>MCP35A</strong>should not be connected to a load of more than 75 loudspeakers, eachtapped at ½ watt (approx. 18 ohm). If a BPA60 booster amplifier is used,the load should not exceed 125 loudspeakers, each tapped at ½ watt(approx. 10 ohm). If loudspeakers are tapped at greater than ½ watt, eitherthe total number of loudspeakers must be reduced, or a more powerfulamplifier used.Adjustments / ModificationsCaution: To avoid electric shock, be sure to disconnect AC Power Cordbefore removing the cover of the amplifier unit.Warning: DO NOT perform any function requiring the removal of thecover of the unit unless you are qualified to do so.Supervisory Tone Defeat (Internal)Shunt J5 enables/disables the supervisory tone feature. Move the shuntto the OFF position to disable the supervisory tone.Gain Adjustments (Internal)Internal controls are provided to set the level of emergency page volume,privacy tone volume, and time tone volume. These controls are factoryset; under normal circumstances no further adjustment is required.Schematic/Circuit board designations: Emergency Page Volume, R39;Supervisory Tone Volume, R74; Time Tone Volume, R75.MIC 1R10MIC 2R20AUXR23TELCOTELCO TALKR26 R41MIC 2J3LISTENR52REAR PANELPhantom Power (Internal)Phantom power may be supplied to MIC 1 and MIC 2 inputs to permit useof phantom-powered condenser microphones. To enable, move shunts J1(for MIC 1) and J2 (for MIC 2) to the ON position.TELCO Page/MIC 2 (Internal)Shunt J3 selects the TELCO PAGE input jack or the MIC 2 input terminalsfor the telephone page function. Place the shunt at the MIC 2 positionwhen using the MIC 2 terminals for telephone paging applications.OFF ONOFF ONJ1J2EMERGENCYPAGE VOLUMER39J4ONOFFFRONT PANELSUPERVISORY TONEDEFEATONOFFJ5R74SUPERVISORYTONE VOLUMETIME TONEVOLUMER75Figure 2 – Jumper Locations on <strong>MCP35A</strong> Card4
Gain Adjustments (Rear <strong>Panel</strong>)Screwdriver-adjustable INPUT GAIN controls are accessible via the rearpanel for MIC 1, MIC 2, AUX, Tel Page, Talk, and Listen. Set the controlsso that signal clipping cannot occur.Proceed as follows:1. Apply input(s) to the desired channel(s).2. Set the corresponding front panel control(s) to maximum.3. Adjust the appropriate Input Gain control (looking at the rear panel, turnclockwise to increase or counterclockwise to decrease gain) so that thered O (overload) LED lights; then turn counterclockwise only until theLED is extinguished.Remote Emergency Microphone Paging (Rear <strong>Panel</strong>)The MIC 2 input may optionally be used in place of the Telco Page inputfor use with a remote microphone (internal jumper). Figure 5 shows theconnection of the MBS1000A to the MIC 2 terminals. Refer to TELCOPAGE/MIC 2 above for the proper configuration when the MIC 2 inputterminals are used for telephone page applications.Note: Talk and Listen controls should be set for adequate intercom level(not indicated by an LED).External MIC for MIC 1/Console MIC (Rear <strong>Panel</strong>)1. Locate and loosen the two screws securing the jumper link on the rearchassis terminal strip connecting MIC 1 HI terminal to the CONS MICterminal.2. Move the link away from the CONS MIC terminal.3. Connect a balanced or unbalanced low-impedance microphone to theMIC 1 terminals. Connect the cable shield to the GND terminal.4. Move the shunt on J4 to the OFF position to disable the monitor speakermuting feature when the MIC 1 push button is selected (see Fig. 2).Figure 3 – Remote Emergency Page fromTelephone System Page PortNote: J1 should be in the OFF position when the console mic is connectedto the MIC 1 input (see Fig. 2).Time Tone (Rear <strong>Panel</strong>)A tone signal sounds through all speakers when the time clock terminal isgrounded through a closure. (The tone may be used as a class change signalor for other purposes, such as a telephone night ringer or alarm signal.)External Booster Amplifier (Rear <strong>Panel</strong>)Model BPA60 provides increased power output. To install, connect a cableterminated in a male phone plug from the <strong>MCP35A</strong> Line Out jack to theHi-Z input jack on the rear panel of the amplifier. Connect the 25V outputfrom the amplifier to input jack labeled 25V BAL INPUT. Refer to Fig. 6.Remote Emergency Telephone Paging (Rear <strong>Panel</strong>)Figures 3 and 4 show the connection of a telephone to the TELCO pagefeature of the <strong>MCP35A</strong>.Figure 4 – Remote Emergency Page usingTelephone Interface DeviceFigure 6 – Booster Amplifier OutputConnection for <strong>MCP35A</strong>Figure 5 – Remote Emergency MicrophonePage with MBS1000ACaution: Do not insert or remove this connector while power is on;amplifier failure may result.5
Associated EquipmentSBA225 Room Selector <strong>Panel</strong>Bogen Model SBA225 Room Selector <strong>Panel</strong>s are capable of connectingup to 25 speaker-equipped locations to a PROGRAM, INTERCOMchannel, or off. Each unit provides 25 lever-action, three-position,four-pole selector switches with positive detents, and red LED indicators.Switch positions are graphically identified as PROGRAM A, OFF O, andINTERCOM C, each with color-coded guidelines.Each switch functions as follows:PROGRAM / A – (Up position, amber color-code) Connects the speakerstation to the Program channel for distribution of program from microphoneor other program source. Overridden by Emergency Page, Telco Page,and Time Signaling.OFF / O – (Center position, white color-code) Disconnects the speakerstation from the system; overridden by Emergency Page, Telco Page,All Rooms, and Time Signaling.INTERCOM / C – (Down position, green color-code) Connects thespeaker station to the intercom channel. Overridden by Emergency Page,Telco Page, and Time Signaling.Note: To preserve intelligibility, only one station at a time should beconnected to the intercom channel.A white tabular strip, protected by a clear plastic snap-off cover, isprovided for labeling the station controlled by each selector switch. Whenstations are identified by numbers, it is common practice to connect andlabel the switches from left to right (viewed from the operatorʼs position),starting at the uppermost panel.When a station makes a call to the control panel, the corresponding LEDlights on the SBA panel and a repetitive tone alerts the operator to the call.The LED remains on until the call is acknowledged by placing the appropriateswitch to the C position.Each room selector panel has provisions for accommodating the add-onBogen Model SCR25A Call-In Module, providing the circuits necessarywhen using the call-origination switches which do not contain siliconcontrolledrectifiers.SBA225 WiringAcross the rear of each switch bank is a row of male centerline terminals.Each individual selector switch corresponds to the four terminals directlybehind it.Note: The first three pins on the left (looking from the rear) and the lastpin on the right provide special functions and should not be connected tospeakers. Connectors used to connect speaker or handset wiring to theSBA panel are standard parts stocked by many electronic parts distributors.We use Panduit .156 centerline connectors; however, equivalentconnectors are available by AMP or MOLEX. Wires are attached toconnectors using Panduit tool MRT-156F, or MCT with CTD-156F nose,or equivalent.Wire switch banks, as shown in Figure 12, using one female centerlineplug to terminate wires from the speaker and/or call switch. Connect theshield to the ground terminal. This is the only place where speakercable shields should be grounded.SCR25A Call-In ModuleCaution: The installation of accessory equipment requires the removal ofprotective covers; exposure of internal components presents an electricalshock hazard. Accessory equipment should be installed by qualifiedservice personnel only.The Model SCR25A Call-In Module is an annunciator latching control bankdesigned for use with Bogen SBA-Series Room Selector panels. TheSCR25A provides 25 silicon-controlled rectifiers and programmablejumpers, and permits the use of either a momentary switch (such as theBogen Model CA17) or a telephone handset with fixed closure for call-infrom each staff location.The SCR25A provides annunciator latching (as needed) to keep theappropriate LED lamp illuminated until the call is acknowledged. Jumpersare provided to select the method of call-in (momentary switch or fixedclosure handset).The module is connected to the switch bank by a plug-in method and isconstructed of G-10 glass epoxy. Power supply is selectable by a jumperand is taken from the switch bank or from an external power source.Termination is via centerline connectors (Panduit or equivalent).SCR25A InstallationConnections1. Align the SCR25A module with the connector pins at the rear of theSBA-Series panel and carefully press into place.2. Make speaker and annunciator connections directly to the SCR25Amodule as you would to the room selector panel.Note: The pins that normally would not have been used on the SBAseriespanel do not appear on the SCR25A panel.Power Requirements1. Jumper J26 in the upper right-hand corner of the SCR25A printedcircuit board must be in the Multi-Graphic position, as illustrated in thediagram on the PC board.2. Connect a wire from one of the pins marked P12, in the lower right-handcorner, to the positive (+) terminal on an external 12V DC power supply.Connect the negative (-) terminal on the power supply to ground on the<strong>MCP35A</strong>. If more than one SCR25A is used, parallel P12 to eachSCR25A.Note: If only one or two SCR25A modules are used, they can be poweredfrom the +12V terminal on the rear of the <strong>MCP35A</strong>.Mode SelectionFor each channel using momentary switch contacts (no SCR) for call-in,set the corresponding jumper (J1-J25) to the TOGGLE position (towardsthe left, as looking at the rear).For each channel to which a phone or SCR-equipped call-in switch (BogenCA10A or CA11A) is connected, set the corresponding jumper (J1-J25) tothe PHONE position (towards the right, as looking at the rear).For clarity, two diagrams showing the relative positions of jumpers J1-J25and J26 are screened onto the PC board.6
TWK351 OptionThe TWK351 option permits light call-in on 2-conductor shielded cable.See Figure 7 for wiring diagram.AppendixGeneral WiringWhere possible, locate the <strong>MCP35A</strong> centrally, relative to the rooms beingserved, in order to minimize the length of speaker cables. Orient the unitso that the operator, program director, or other parties are able to see thecontrols at all times. Provide adequate lighting and ventilation. Do notlocate the unit close to heat sources (radiators, warm air ducts, etc.), or awall which would impede air flow through or around it.Wires – Class II wiring may be used for all audio and annunciator lines.Support cables to prevent sagging or strain. Keep wires clear of objectsthat would subject them to heat, friction, or other abuse.Figure 7 – Wiring Diagram: TWK351 OptionUse No. 22 AWG shielded pairs with insulated outer jacket for speaker lines.Annunciator lines require a third wire, which usually is No. 22AWG insulatedwire with clear insulation. The number and type of wire running fromeach room to the control center are dependent upon the type of speakeroperation required. See Table 1.Staff Station EquipmentStaff station equipment may include wall-or ceiling-mounted cone loudspeakers,or horn-type loudspeakers (used to ensure clear, intelligiblecommunication in areas with relatively high noise levels). Figure 9 showsa wiring diagram for a loudspeaker. To initiate calls, locations are providedwith call-origination switches. The voice call-in option may be used whenstations are equipped with a customer-supplied DPDT momentary switch.Call-Origination SwitchesVoice Call-In Option – A customer-supplied double-pole, double throw,momentary contact switch maybe used to connect a staff station speakerto the call-in line when the switch is actuated. See Figure 8.Figure 8 – Wiring Diagram: Room Speaker withCustomer-Supplied Voice Call-In SwitchCA10A and CA11A – These momentary, rocker-type Call Switches areused to signal the control panel operator to establish communicationsthrough a two-way speaker. The CA11A incorporates a privacy mode toprevent monitoring. See Figure 10.Figure 9 – Wiring Diagram: Loudspeaker (only)A. B.Figure 10 – Wiring Diagram: A: Model CA10A; B: Model CA11A7
Call Switches and SpeakersFlush-mounted switches require single-gang outlet boxes. Install outletboxes about four feet from the finished floor, in a location which will allowpersonnel easy access to the switch for call-in and/or communicating viathe room speaker. Wall-mounted speakers should be installed at arecommended height of 7-1/2 feet above the finished floor.Grounds – Do not connect cable shields to earth grounds or convenientmetal objects. It is important to connect cable shields only as shown in thewiring diagrams.Call/Privacy OptionFigure 10 shows the room connections and the switch required for incorporatingthe optional privacy feature in the system.Caution: To avoid electric shock, be sure to disconnect AC Power Cordbefore removing the cover of the amplifier unit.Warning: DO NOT perform any function requiring the removal of thecover of the unit unless you are qualified to do so.Voice Call-In OptionFigure 8 shows room connections and the customer-supplied switchrequired for voice call-in. The wiring must be completed by connecting theshielded pair from the switch to the terminal strip at the rear of the <strong>MCP35A</strong>chassis. The polarity of the inner conductors is not critical, but make certainto connect this cable shield to the shield already connected to the terminalstrip.Note: Only one cable goes to the terminal strip. Usually, cables from allroom switches utilizing this function are connected by a common controlcable and one cable is run to the control panel. If this type of installationis not practical, the control cables for two or more switches are run to thecontrol center and are connected in parallel at a junction box; a singlecontrol cable is then run to the terminal strip at the rear of the <strong>MCP35A</strong>chassis.Table 1 – Cable Running ChartType of Call Switch orDevice used with SpeakerWires from Room to <strong>Control</strong> <strong>Panel</strong>Wires from Room Switch to Room SpeakerNo. 22 AWG Shielded No. 22 AWG No. 22 AWG Refer to Fig.Voice Call-In, Non-Private(Customer-supplied DPDT Switch) 2* 0 1 8None (Loudspeaker) 1 0 0 9Call Switch (CA10A) 1 1 1 10ACall Switch (CA11A) 1 1 1 10B* Alternative Method: Run two cables from room nearest the control panel and one cable from each remaining room.Run one cable in a loop or branch circuit connecting all room switches.8
Figure 11– Schematic Diagram, SBA225 Room Selector <strong>Panel</strong>Figure 12– Typical Interconnection DiagramFigure 13– Typical Wiring Diagram9
Technical SpecificationsRated OutputProgramIntercomFrequency ResponseProgramIntercomDistortionInputsOutput<strong>Control</strong>sFront <strong>Panel</strong>Rear <strong>Panel</strong>InternalTone SpecificationsPower RequirementsDimensionsWeightOptional Equipment:35W RMS20W RMS+1,-3 dB from 80 Hz to 15 kHzShaped for maximum intelligibilityLess than 1% @ RPO and bandwidthTwo Lo-Z balanced microphones; Hi-Z unbalanced AUX; TELCO PAGE; 25V BOOSTER25V balanced lineProgram Selection: MIC 1, MIC 2, AUXLevel: MONITOR/LISTEN, PROGRAMDistribution: ALL ROOMS, EMERGENCY PAGE, PRESS TO TALKIndicators: PROGRAM/TALK LEVELInput Gain: MIC 1, MIC 2, AUX, TELCO PAGE, TALK, LISTENGain: Emergency Page, Supervisory Tone,Time Tone; Enable/Disable: MIC1/CONSOLE MIC,MIC 2/TELCO PAGE, Phantom Power, Supervisory ToneTime Tone: 750 Hz; Supervisory Tone: Repeating, 500 Hz; Call-in Tone: Repeating,oscillates between 500 Hz and 750 Hz (Switching Frequency, 16 Hz)120V, 60 Hz AC, 100W maximum19" W x 3- 1 /2" H x 10" D, 2 Rack spaces6 lb.Model MCP-EXP Input Expander <strong>Panel</strong>, Model TWK351 adapterLimited Warranty; Exclusion of Certain DamagesThe Bogen <strong>MCP35A</strong> <strong>Master</strong> <strong>Control</strong> <strong>Panel</strong> is warranted to be free from defects in material and workmanship for two (2) years from the date ofsale to the original purchaser. Any part of the product covered by this warranty that, with normal installation and use,becomes defective (as confirmed by Bogen upon inspection) during the applicable warranty period, will be repaired or replaced by Bogen, atBogenʼs option, provided the product is shipped insured and prepaid to: Bogen Factory Service Department, 50 Spring Street, Ramsey, NJ 07446,USA. Repaired or replacement product will be returned to you freight prepaid. This warranty does not extend to any of our products that havebeen subjected to abuse, misuse, improper storage, neglect, accident, improper installation or have been modified or repaired or altered in anymanner whatsoever, or where the serial number or date code has been removed or defaced.THE FOREGOING LIMITED WARRANTY IS BOGENʼS SOLE AND EXCLUSIVE WARRANTY AND THE PURCHASERʼS SOLE ANDEXCLUSIVE REMEDY. BOGEN MAKES NO OTHER WARRANTIES OF ANY KIND, EITHER EXPRESS OR IMPLIED, AND ALL IMPLIEDWARRANTIES OF MERCHANTABILITY OR FITNESS FOR A PARTICULAR PURPOSE ARE HEREBY DISCLAIMED AND EXCLUDED TOTHE MAXIMUM EXTENT ALLOWABLE BY LAW. Bogen's liability arising out of the manufacture, sale or supplying of products or their use ordisposition, whether based upon warranty, contract, tort or otherwise, shall be limited to the price of the product. IN NO EVENT SHALL BOGENBE LIABLE FOR SPECIAL, INCIDENTAL OR CONSEQUENTIAL DAMAGES (INCLUDING, BUT NOT LIMITED TO, LOSS OF PROFITS,LOSS OF DATA OR LOSS OF USE DAMAGES) ARISING OUT OF THE MANUFACTURE, SALE OR SUPPLYING OF PRODUCTS, EVEN IFBOGEN HAS BEEN ADVISED OF THE POSSIBILITY OF SUCH DAMAGES OR LOSSES. Some States do not allow the exclusion or limitationof incidental or consequential damages, so the above limitation or exclusion may not apply to you. This warranty gives you specific legal rights,and you may also have other rights which vary from State to State.Products that are out of warranty will also be repaired by the Bogen Factory Service Department – same address as above or call 201-934-8500.The parts and labor involved in these repairs are warranted for 90 days when repaired by the Bogen Factory Service Department. All shippingcharges in addition to parts and labor charges will be at the owner's expense. All returns require a Return Authorization number. For mostefficient warranty or repair service, please include a description of the failure.12/200850 Spring Street, Ramsey, NJ 07446, U.S.A.Tel. 201-934-8500 • Fax: 201-934-9832www.bogen.com10