Area Imager Bar Code Scanner - Champtek
Area Imager Bar Code Scanner - Champtek
Area Imager Bar Code Scanner - Champtek

You also want an ePaper? Increase the reach of your titles
YUMPU automatically turns print PDFs into web optimized ePapers that Google loves.
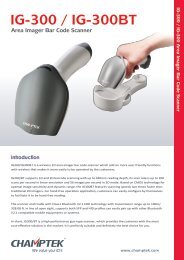
<strong>Area</strong> <strong>Imager</strong> <strong>Bar</strong> <strong>Code</strong> <strong>Scanner</strong>C O N F I G U R A T I O N G U I D EFor IG610/BT, IG710/BT, LIBRA L‐7080i, MICA M‐9080i models
Copyright @ 2013This manual is copyrighted, with all right reserved. Under the copyrightlaws, this manual may not, in whole or in part, be copied, photocopied,reproduced, translated or converted to any electronic medium or machinereadable form without prior written consent of maker.Note: Due to product improvement programs, specifications and featuresare subject to change without prior notice.P/N: 0145-SIL0061 March 2013Ver. 2
Table of ContentsChapter 1 General Description .............................................. 1Chapter 2 Introduction .......................................................... 2Chapter 3 User Preferences ................................................... 4RETURN TO DEFAULT ................................................................................ 4PARAMETER SCANNING ........................................................................... 5BEEPER TONE .............................................................................................. 6BEEPER VOLUME ........................................................................................ 7BEEPER DURATION .................................................................................... 7TRIGGER MODES ........................................................................................ 8POWER MODE .............................................................................................. 9TIME DELAY TO LOW POWER MODE ................................................... 10DECODE SESSION TIMEOUT ................................................................. 11BEEP AFTER GOOD DECODE ................................................................ 12Chapter 4 <strong>Imager</strong> Preferences ............................................. 13SNAPSHOT MODE ..................................................................................... 15DECODING AUTO EXPOSURE ............................................................... 16DECODING ILLUMINATION ...................................................................... 16DECODE AIMING PATTERN .................................................................... 17IMAGE CAPTURE AUTO EXPOSURE .................................................... 17IMAGE CAPTURE ILLUMINATION .......................................................... 18EXPOSURE TIME........................................................................................ 19SNAPSHOT MODE TIMEOUT .................................................................. 20SNAPSHOT AIMING PATTERN ............................................................... 20‐ I ‐
IMAGE CROPPING ..................................................................................... 21CROP TO PIXEL ADDRESSES ................................................................ 22IMAGE RESOLUTION ................................................................................ 23JPEG IMAGE OPTIONS ............................................................................. 24JPEG QUALITY AND SIZE VALUE .......................................................... 24IMAGE FILE FORMAT SELECTOR ......................................................... 25BITS PER PIXEL .......................................................................................... 25VIDEO VIEW FINDER ................................................................................. 26TARGET VIDEO FRAME SIZE .................................................................. 26VIDEO VIEW FINDER IMAGE SIZE ......................................................... 26Chapter 5 Serial Interface ................................................... 27SERIAL PARAMETER DEFAULTS .......................................................... 28SERIAL HOST TYPES ................................................................................ 29BAUD RATE ................................................................................................. 30PARITY .......................................................................................................... 31STOP BIT SELECT ...................................................................................... 32DATA BITS .................................................................................................... 32CHECK RECEIVE ERRORS ...................................................................... 33HARDWARE HANDSHAKING ................................................................... 34SOFTWARE HANDSHAKING ................................................................... 36HOST SERIAL RESPONSE TIME-OUT .................................................. 38RTS LINE STATE ........................................................................................ 39BEEP ON ......................................................................................... 39INTERCHARACTER DELAY ..................................................................... 40‐ II ‐
IGNORE UNKNOWN CHARACTERS ...................................................... 41ASCII CHARACTER SET FOR SERIAL HOSTS ................................... 42Chapter 6 USB Interface ...................................................... 47USB HOST PARAMETERS ....................................................................... 48NATIVE API (SNAPI) STATUS HANDSHAKING ................................... 50USB COUNTRY KEYBOARD TYPES (COUNTRY CODES) ............... 50USB KEYSTROKE DELAY ........................................................................ 52USB CAPS LOCK OVERRIDE .................................................................. 52USB IGNORE UNKNOWN CHARACTERS ............................................. 53EMULATE KEYPAD .................................................................................... 53USB KEYBOARD FN 1 SUBSTITUTION ................................................. 54FUNCTION KEY MAPPING ....................................................................... 54SIMULATED CAPS LOCK .......................................................................... 55CONVERT CASE ......................................................................................... 55ASCII CHARACTER SET FOR USB ........................................................ 56Chapter 7 Symbologies ....................................................... 67SYMBOLOGY PARAMETER DEFAULTS ............................................... 68UPC/EAN ....................................................................................................... 73CODE 128 ..................................................................................................... 85CODE 39 ....................................................................................................... 87CODE 93 ....................................................................................................... 95CODE 11 ....................................................................................................... 97INTERLEAVED 2 OF 5 (ITF).................................................................... 100DISCRETE 2 OF 5 (DTF) ......................................................................... 104‐ III ‐
CODABAR (NW - 7) .................................................................................. 106MSI ............................................................................................................... 109POSTAL CODES ....................................................................................... 113GS1 DATABAR .......................................................................................... 117COMPOSITE .............................................................................................. 1222D SYMBOLOGIES ................................................................................... 127PDF417 ........................................................................................................ 127MICROPDF417 .......................................................................................... 127DATA MATRIX ........................................................................................... 129MAXICODE ................................................................................................. 129QR CODE .................................................................................................... 130REDUNDANCY LEVEL ............................................................................. 130SECURITY LEVEL ..................................................................................... 132INTERCHARACTER GAP SIZE .............................................................. 133MACRO PDF FEATURES ........................................................................ 134Chapter 8 Miscellaneous <strong>Scanner</strong> Options ........................ 138TRANSMIT CODE ID CHARACTER ...................................................... 140PREFIX/SUFFIX VALUES ........................................................................ 141SCAN DATA TRANSMISSION FORMAT .............................................. 142FN1 SUBSTITUTION VALUES ................................................................ 143TRANSMIT “NO READ” MESSAGE ....................................................... 144Chapter 9 Bluetooth Configuration .................................. 145SCANNER MODE SELECTION .............................................................. 145OUT OF RANGE ........................................................................................ 147‐ IV ‐
SLEEP MODE ............................................................................................ 147BATCH MODE ............................................................................................ 148FIRMWARE VERSION : ........................................................................... 149APPENDIX A : STANDARD DEFAULT PARAMETERS ..................... 150APPENDIX B : SYMBOL CODE IDENTIFIERS .................................... 159APPENDIX C : ASCII CHARACTER SET .............................................. 166APPENDIX D : NUMERIC BAR CODES ................................................ 179APPENDIX E : READABLE SYMBOLOGIES ....................................... 181‐ V ‐
Chapter 1 General DescriptionThank you for purchasing this barcode scanner with an advanced and versatiledecoder.The decoder works with variety of barcode types,reading devices, andcomputer interfaces.It discriminates over twenty different symbologies automatically.This menu provides an easy way to configure the decoding options and interfaceselections by scan- ning bar codes listed in the menu.FCC ApprovalThis device had been tested in accordance with the pro- cedures and in compliance with Part15 Subpart B of FCC Rules. And keeps all requirments according ANSI C63.4 & FCC Part 15 BRegulation and CISPR22 Class B.CE StandardsThe CE mark as shown here indicates this product had been tested in accordance with theprocedures given in European Council Directive 2004/108/EC and confirmed to comply with theEurope Standard EN55022:2006:Class B, EN 55024:1998+A1:2001+A2:2003,IEC61000-3-2:2006,IEC61000-3-3:1995+A1:2005,IEC61000-4-2:2001,IEC61000-4-:2006,IEC61000-4-4:2004,IEC61000-4-5: 2006,IEC61000-4-6:2001,IEC61000-4-8:2001,IEC61000-4-11:2004.LEGISLATION AND WEEE SYMBOLThis marking shown on the product or its literature, indicates that it should not bedisposed with other households wastes at the end of its working life.To preventpossible harm to the environment or hu- man healthy from uncontrolled wastedisposal, please separate this from other types of wastes and recyle it responsibly topromote the sustainable re- use of material resources.Household users should contact either the retailer where they purchased thisproduct,or their local government office,for details of wher and how they can takethis item fore environm entally safe recycling.Business users should contact theirsup- plier and check the terms and conditions of the purchase.1
Chapter 2 IntroductionThis document provide an easy way to program the decoding options andinterface selections by scanning bar codes listed in this guide.Important Notice1. This document is in A5 size. Please check your printing setting beforeprinting it out.2. When printing barcodes for programming, the use of a high-resolutionlaser printer is strongly suggested for the best scan result.3. The settings shall be updated periodically without prior notice. For thelatest version, please contact your authorized distributor.Factory Default SettingThe factory default settings are shown with < > and bold in the followingsections. You can make your own settings by scan a series of selectedbarcode patches in this manual to affect setup and programming of yourhandheld 2D Image Reader.By scanning “Set All Defaults” Label, the settings will go back to the factorydefault settings.Settings and ProgrammingScan a series of selected barcode patches in this manual to affect setup andprogramming of your handheld 2D Image Reader. Decoding options andinterface protocols can be tailored to a specific application.Setup parameters are stored in non-volatile memory in the scanner and areretained even when power is off. Setup parameters change only when youreset them.You may need to hide adjacent code patches with your hand when doingprogramming scanning.2
Default Factory Device SettingsUser PreferencesParameterSet Default ParameterParameter ScanningBeeper ToneBeeper VolumeBeeper DurationDefaultAll DefaultsEnableMediumHighLongTrigger ModePower ModeHandheld/Hands-free <strong>Scanner</strong>Scan ModuleHandheld/Hands-free <strong>Scanner</strong>Scan ModuleLevelPresentationLow PowerLow PowerTime Delay to Low Power ModeDecode Session TimeoutTimeout Between Decodes, Same SymbolBeep After Good DecodePresentation Mode Session Timeout1.0 Sec9.9 Sec0.4 SecEnable2 Seconds3
Chapter 3 User PreferencesRETURN TO DEFAULT1. For Desktop and Fixed mount default :(LIBRA L-7080i and MICA M-9080i)You can scan this programming code to restore the scanner’s parameters tofactory default configuration.Remark: these default setting are associated to configuration inChapter 3 to Chapter 8.2. For Handheld models default :(IG610, IG610BT, IG710 and IG710BT)You can scan this programming code to restore the scanner’s parametersto factory default configuration.Remark: these default setting are associated to configuration inChapter 3 to Chapter 8.4
3. For Bluetooth’s default:(IG610BT and IG710BT)You can scan this programming code to restore the bluetooth’sparameters to factory default configuration.Remark: this default setting is associated to configuration in Chapter9, no effect for wired models.Restore the Bluetooth to Factory DefaultPARAMETER SCANNINGTo disable decoding of parameter bar codes, including the Set All Defaultsparameter bar code, scan the Disable Parameter Scanning bar code below. Toenable decoding of parameter bar codes, scan Enable Parameter Scanning.< Enable Parameter Scanning >Disable Parameter Scanning5
BEEPER TONETo select a decode beep frequency (tone); scan the Low Frequency, MediumFrequency, or High Frequency bar code.Low FrequencyMedium Frequency< High Frequency >6
BEEPER VOLUMETo select a beeper volume, scan the Low Volume, Medium Volume, or HighVolume bar code.Low VolumeMedium Volume< High Volume >BEEPER DURATIONTo select the duration for the beeper, scan one of the following bar codes.ShortMedium< Long >7
TRIGGER MODES• Level Mode - A trigger event activates decode processing, whichcontinues until the trigger event ends, a valid decode, or thedecode session time-out is reached. This scan mode is notavailable for scan module.• Presentation Mode - When the device detects an object in its fieldof view it triggers and attempts to decode. The range of objectdetection does not vary under normal lighting conditions. Thisapplies to decode mode only. In this mode the unit does not enterits sleep state.• Host Mode- A host command issues the triggering signal. Thedevice interprets a trigger pull as a level triggering option. This scanmode is not available for scan module.< Level Mode >(Default for handheld scanners.)< Presentation Mode >(Default for Desktop andFixed mount scanmodules)Host Mode8
POWER MODEThis parameter determines whether or not power remains on after a decodeattempt. In low power mode, the decoder enters into a low power consumptionmode to preserve battery life after each decode attempt. In continuous powermode, power remains on after each decode attempt.Continuous On< Low Power Mode >9
TIME DELAY TO LOW POWER MODEThis parameter sets the time the decoder remains active after decoding. Thedecoder wakes upon trigger pull or when the host attempts to communicatewith the decoder.Note: 1. This parameter only applies when Power Mode is set to Low Power.2. This setting is not available for scan module since it is always inpresentation mode and its power is continuous on.< 1 Second >5 Seconds1 Minute5 Minutes15 Minutes101 Hour
DECODE SESSION TIMEOUTThis parameter sets the maximum time decode processing continues during ascan attempt. It is programmable in 0.1 second increments from 0.5 to 9.9seconds. The default timeout is 9.9 seconds.To set a Decode Session Timeout, scan the bar code below. Next, scan twonumeric bar codes from Appendix D, Numeric <strong>Bar</strong>codes that correspond to thedesired on time. Single digit numbers must have a leading zero. For example,to set a Decode Session Timeout of 0.5 seconds, scan the bar code below, andthen scan the 0 and 5 bar codes. To correct an error or change the selection,scan Cancel barcode.Decode Session TimeoutTimeout Between Decodes, Same SymbolThis option is used in presentation mode to prevent multiple reads of a symbolleft in the Device’s field of view. The timeout begins when the symbol isremoved from the field of view. It is programmable in 0.1 second incrementsfrom 0.0 to 9.9 seconds. The default interval is 0.4 seconds.To select the timeout between decodes for the same symbol, scan the barcode below, then scan two numeric bar codes from Appendix D, Numeric <strong>Bar</strong><strong>Code</strong>s that correspond to the desired interval, in 0.1 second increments.Timeout Between Decodes, Same Symbol11
BEEP AFTER GOOD DECODEScan a bar code below to select whether or not the decoder issues a beepsignal after a good decode. If selecting Do Not Beep after Good Decode,beeper signals are issued during parameter menu scanning and to indicateerror conditions.< Beep After Good Decode >Do Not Beep After Good Decode(Disable)12
Chapter 4 <strong>Imager</strong> PreferencesLists the defaults for imaging preferences options. To change the default values,scan the appropriate bar codes in this guide.Imaging optionsDefaultDecoding Auto exposureDecoding IlluminationDecode Aiming PatternImage Capture Auto exposureImage Capture IlluminationEnableEnableEnable (Handheld)EnableEnableGain 100Exposure TimeSnapshot Mode TimeoutSnapshot Aiming PatternImage CroppingCrop to Pixel AddressesImage ResolutionJPEG Image Options10 ms0 (30 seconds)EnableDisable0 top, 0 left, 479 bottom, 639 rightFullQualityJPEG Quality Value 65JPEG Size ValueImage File Format SelectionBits per Pixel (BPP)Signature CaptureSignature Capture Image File FormatSelection40 (41K)JPEG8 BPPDisableJPEG13
Signature Capture Bits per Pixel(BPP)8 BPPSignature Capture Width 400Signature Capture Height 100Signature Capture JPEG Quality 65Video View FinderVideo View Finder Image SizeDisable1700 bytesThe parameters in this section control image capture characteristics.Image capture occurs in all modes of operation, including decode, video,and snapshot.The decoder has three modes of operation:* Decode Mode* Snapshot ModeDecode ModeBy default, upon a trigger event, the decoder attempts to locate and decodeenabled bar codes within its field of view. The decoder remains in this mode aslong as the trigger is active or until a bar code is decoded.14
SNAPSHOT MODEUse Snapshot Mode to capture a high-quality image and transmit it to the host.To temporarily enter this mode scan the Snapshot Mode bar code. While in thismode the decoder blinks the orange LED at 1-second intervals to indicate it isnot in standard operating (decode) mode.In Snapshot Mode, the decoder turns on the laser aiming pattern to highlightthe area to be captured in the image. The next trigger event instructs thedecoder to capture a high quality image and transmit it to the host. A short timemay pass (less than 2 seconds) between when the trigger is activated and theimage is captured as the decoder adjusts to the lighting conditions. Hold thedecoder steady until the image is captured, denoted by a single beep.If a trigger event is not activated within the Snapshot Mode Timeout period, thedevice returns to Decode Mode. Use Snapshot Mode Timeout to adjust thistimeout period. The default timeout period is 30 seconds.To disable the laser aiming pattern during Snapshot Mode, see SnapshotAiming Pattern.Use Video View Finder to enable Snapshot with Viewfinder Mode. In this modethe decoder behaves as a video camera until the trigger is active, at which timea Snapshot is performed as described above.Snapshot Mode15
DECODING AUTO EXPOSURESelect Enable Auto exposure to allow the device to control gain settings andexposure (integration) time to best capture an image for the selected operationmode.Select Disable Auto exposure to manually adjust the gain and exposure time.This option is only recommended for advanced users with difficult imagecapture situations.< Enable Decoding Auto exposure >Disable Decoding Auto exposureDECODING ILLUMINATIONSelecting Enable Illumination causes the decoder to flash illumination on everyimage capture to aid decoding. Select Disable Illumination to prevent thedecoder from using decoding illumination.Enabling illumination usually results in superior images. The effectiveness ofthe illumination decreases as the distance to the target increases.< Enable Decoding Illumination >16Disable Decoding Illumination
DECODE AIMING PATTERNThis parameter only applies when in Decode Mode. Select Enable DecodeAiming Pattern to project the aiming pattern during bar code capture, orDisable Decode Aiming Pattern to turn the aiming pattern off.< Enable Decode Aiming Pattern >(Default for handheld scanners.)(Default for desktop and fixedmount module.)IMAGE CAPTURE AUTO EXPOSURESelect Enable Auto exposure to allow the decoder to control gain settings andexposure (integration) time to best capture an image for the selected operationmode.Select Disable Auto exposure to manually adjust the gain and exposure time.This option is only recommended for advanced users with difficult imagecapture situations.< Enable Image Capture Autoexposure >17Disable Image Capture Autoexposure
IMAGE CAPTURE ILLUMINATIONSelecting Enable Image Capture Illumination causes the decoder to flashon every image capture. Select Disable Illumination to prevent the decoderfromusing artificial illumination.Enabling illumination usually results in superior images. The effectivenessof the illumination decreases as the distance to the target increases.< Enable Image Capture Illumination >Disable Image Capture Illumination18
EXPOSURE TIMEThis parameter is only available when Image Capture Auto exposure isdisabled. Exposure Time controls the amount of time the CCD is allowed tocollect light, much like the shutter speed for a camera. Generally, the brighterthe environment is, the shorter the exposure time would be. Set the manualexposure time to one of the following values: 5 ms, 10 ms, 15 ms, 20 ms, 25ms, or 30 ms. Increasing the exposure time past 20 ms in a handheldapplication increases the risk of blurring the image due to hand jitter.5 ms15 ms20 ms30 ms19
SNAPSHOT MODE TIMEOUTThis parameter sets the amount of time the decoder remains in SnapshotMode. The decoder exits Snapshot Mode upon a trigger event, or when theSnapshot Mode Timeout elapses. To set this timeout value, scan the bar codebelow followed by a bar code from Appendix D, Numeric <strong>Bar</strong> <strong>Code</strong>s. Thedefault value is 0 which represents 30 seconds; values increment by 30. Forexample, 1 = 60 seconds, 2 = 90 seconds, etc.Snapshot Mode TimeoutSNAPSHOT AIMING PATTERNSelect Enable Snapshot Aiming Pattern to project the aiming pattern when inSnapshot Mode, or Disable Snapshot Aiming Pattern to turn the aiming patternoff.< Enable Snapshot Aiming Pattern >Disable Snapshot Aiming Pattern20
IMAGE CROPPINGThis parameter crops a captured image. If Disable Image Cropping is selected,the full 640 x 480 pixels are presented. If Enable is selected, the decoder cropsthe image to the pixel addresses set in Crop to Pixel Addresses.Enable Image Cropping(Use Full 742 x 480 Pixels)21
CROP TO PIXEL ADDRESSESIf Enable Image Cropping is selected, set the pixel addresses from (0, 0) to(639,479) to crop to.Columns are numbered from 0 to 639, rows from 0 to 479. Specify four valuesfor Top, Left, Bottom, and Right, where Top and Bottom correspond to rowpixel addresses, and Left and Right correspond to column pixel addresses. Forexample, for a 4 row x 8 column image in the extreme bottom-right section ofthe image set the following values:Top = 476, Bottom = 479, Left = 744, Right = 751To set the pixel address to crop to, scan each Pixel Address bar code followedby three bar codes from Appendix D, Numeric <strong>Bar</strong> <strong>Code</strong>s which represent thevalue. Leading zeros are required, so to enter a value of 3, for example, scan 0,0, 3.Top Pixel Address(Default: 0)(0 - 479 Decimal)Left Pixel Address(Default: 0)(0 - 751 Decimal)Bottom Pixel Address(Default: 479)(0 - 479 Decimal)22Right Pixel Address(Default: 751)(0 - 751 Decimal)
IMAGE RESOLUTIONThis option alters image resolution before compression. Multiple pixels arecombined to one pixel, resulting in a smaller image containing the originalcontent with reduced resolution.Select one of the following values:ResolutionValueUncropped ImageSizeFull 752 x 4801/2 376 x 2401/4 188 x 120< Full Resolution >1/2 Resolution1/4 Resolution23
JPEG IMAGE OPTIONSJPEG images can be optimized for either size or for quality. Scan the QualitySelector bar code to enter a quality value; the decoder then selects thecorresponding image size. Scan the Size Selector bar code to enter a sizevalue; the decoder then selects the best image quality.< JPEG Quality Selector>JPEG QUALITY AND SIZE VALUEJPEG Size SelectorIf JPEG Quality Selector is selected, scan the JPEG Quality Value bar codefollowed by 3 bar codes from Appendix D, Numeric <strong>Bar</strong> <strong>Code</strong>s correspondingto a value from 5 to 100, where 100 represents the highest quality image.If JPEG Size Selector is selected, scan JPEG Size Value followed by 3 barcodes from Appendix D, Numeric <strong>Bar</strong> <strong>Code</strong>s corresponding to a value from 5to 150 which represent the file size in multiples of 1024 bytes (1K). Forexample, setting this value to 8 (008) permits the file size to be as large as8192 bytes.JPEG Quality Value(Default: 065)(5 - 100 Decimal)JPEG Size Value(Default: 160)(5 - 350 Decimal)24
IMAGE FILE FORMAT SELECTORSelect an image format appropriate for the system (BMP, TIFF, or JPEG). Thedecoder stores captured images in the selected format.BMP File Format< JPEG File Format >TIFF File FormatBITS PER PIXELSelect the number of significant bits per pixel (BPP) to use when capturing animage. Select 1BPP for a black and white image, 4BPP to assign 1 of 16 levelsof grey to each pixel, or 8BPP to assign 1 of 256 levels of grey to each pixel.The decoder ignores these settings for JPEG files, which always use 8BPP.1 BPP4 BPP< 8 BPP >25
VIDEO VIEW FINDERSelect Enable Video View Finder to project the video view finder while in ImageMode, or Disable Video View Finder to turn the video view finder off.< Disable Video View Finder >TARGET VIDEO FRAME SIZEEnable Video View FinderSelect the number of 100-byte blocks to be transmitted per second. Selecting asmaller value allows more frames to be transmitted per second but reducesvideo quality; selecting a larger value increases video quality but slowstransmission.To set the Target Video Frame Size, scan the bar code below followed by twobar codes from Appendix D, Numeric <strong>Bar</strong> <strong>Code</strong>s corresponding to the 100-bytevalue from 800 to 3300 bytes. For example, to select 1500 bytes, enter 1, 5. Toselect 900 bytes, enter 0, 9.VIDEO VIEW FINDER IMAGE SIZETarget Video Frame SizeSelect the number of 100-byte blocks. Values range from 800 to 3000 bytes.Selecting a smaller value allows more frames to be transmitted per second;selecting a larger value increases video quality.To set the Video View Finder <strong>Imager</strong> Size, scan the bar code below followed bytwo bar codes from Appendix D, Numeric <strong>Bar</strong> <strong>Code</strong>s corresponding to the100-byte value from 800 to 3000 bytes. For example, to select 1500 bytes,enter 1, 5. To select 900 bytes, enter 0, 9.26
Chapter 5 Serial InterfaceIntroductionThis chapter describes how to set up the decoder with a serial host. The serialinterface is used to connect the decoder to point-of sale devices, hostcomputers, or other devices with an available serial port (e.g. com port).Note: The decoder uses TTL signal levels, which interface with most systemarchitectures. System architectures that use RS-232C signal levels require aconversion circuitry.The serial host type requires proper configuration of the sysconfig lines, andtypically require scanning bar code menus as part of initial configuration.Most computer monitors allow scanning the bar codes directly on the screen.When scanning from the screen is sure to set the document magnification to alevel where the bar code can be seen clearly, and bars and/or spaces are notmerging.27
SERIAL PARAMETER DEFAULTSThe table below lists the defaults for serial host parameters. To change anyoption, scan the appropriate bar code(s) provided in the Serial HostParameters section.Note: See Appendix A, Standard Default Parameters for all user preferences,hosts, symbologies, and miscellaneous default parameters.Serial Host Default TableSerial Host ParametersSerial Host TypesParameterDefaultStandardBaud Rate 9600Parity TypeStop Bit SelectData BitsCheck Receive ErrorsHardware HandshakingSoftware HandshakingHost Serial Response Time-outRTS Line StateBeep on Intercharacter DelayNixdorf Beep/LED OptionsIgnore Unknown CharactersNone1 Stop Bit8-BitEnableNoneNone2 SecLow RTSDisable0 msecNormalOperationSend <strong>Bar</strong><strong>Code</strong>28
SERIAL HOST TYPESTo select a serial host interface, scan one of the following bar codes.Enable Serial Host (Standard RS232)*Scanning Enable Serial Host (No Variant) activates the serial driver, but doesnot change port settings (e.g., parity, data bits, handshaking). Selectinganother serial host type bar code changes these settings.OPOS/JPOS29
BAUD RATEBaud rate is the number of bits of data transmitted per second. Set thedecoder's baud rate to match the baud rate setting of the host device.Otherwise, data may not reach the host device or may reach it in distortedform.< Baud Rate 9600>Baud Rate 38,400Baud Rate 57,600Baud Rate 115,20030
PARITYA parity check bit is the most significant bit of each ASCII coded character.Select the parity type according to host device requirements.Select Odd parity and the parity bit value is set to 0 or 1, based on data, toensure that an odd number of 1 bits are contained in the coded character.Select Even parity and the parity bit value is set to 0 or 1, based on data, toensure that an even number of 1 bits are contained in the coded character.Select None when no parity bit is required.OddEven< None >31
STOP BIT SELECTThe stop bit(s) at the end of each transmitted character marks the end oftransmission of one character and prepares the receiving device for the nextcharacter in the serial data stream. The number of stop bits selected (one ortwo) depends on the number the receiving terminal is programmed toaccommodate. Set the number of stop bits to match host device requirements.< 1 Stop Bit >2 Stop BitsDATA BITSThis parameter allows the decoder to interface with devices requiring a 7-bit or8-bit ASCII protocol.7-Bit< 8-Bit >32
CHECK RECEIVE ERRORSSelect whether or not the parity, framing, and overrun of received charactersare checked. The parity value of received characters is verified against theparity parameter selected above.< Check For Received Errors >Do Not Check For Received Errors33
HARDWARE HANDSHAKINGThe data interface consists of a serial port designed to operate either with orwithout the hardware handshaking lines, Request to Send (RTS), and Clear toSend (CTS).If Standard RTS/CTS handshaking is not selected, scan data is transmitted asit becomes available. If Standard RTS/CTS handshaking is selected, scan datais transmitted according to the following sequence:• The decoder reads the CTS line for activity. If CTS is asserted, thedecoder waits up to Host Serial Response Time-out for the host tode-assert the CTS line. If, after Host Serial Response Time-out(default), the CTS line is still asserted, the decoder sounds atransmit error, and any scanned data is lost.• When the CTS line is de-asserted, the decoder asserts the RTSline and waits up to Host Serial Response Time-out for the host toassert CTS. When the host asserts CTS, data is transmitted. If,after Host Serial Response Time-out (default), the CTS line is notasserted, the decoder sounds a transmit error, and discards thedata.• When data transmission is complete, the decoder de-asserts RTS10 msec after sending the last character.• The host should respond by negating CTS. The decoder checks fora de-asserted CTS upon the next transmission of data.During the transmission of data, the CTS line should be asserted. If CTS isdeasserted for more than 50 ms between characters, the transmission isaborted, the decoder sounds a transmission error, and the data is discarded. Ifthe above communication sequence fails, the decoder issues an errorindication. In this case, the data is lost and must be rescanned. If HardwareHandshaking and Software Handshaking are both enabled, HardwareHandshaking takes precedence.Note: The DTR signal is jumpered to the active state.• None: Scan the bar code below if no Hardware Handshaking isdesired.• Standard RTS/CTS: Scan the bar code below to select StandardRTS/CTS Hardware Handshaking.• RTS/CTS Option 1: When RTS/CTS Option 1 is selected, thedecoder asserts RTS before transmitting and ignores the state ofCTS. The decoder de-asserts RTS when the transmission iscomplete.• RTS/CTS Option 2: When Option 2 is selected, RTS is always highor low (user-programmed logic level). However, the decoder waitsfor CTS to be asserted before transmitting data. If CTS is notasserted within Host Serial Response Time-out (default), the34
decoder issues an error indication and discards the data.• RTS/CTS Option 3: When Option 3 is selected, the decoder assertsRTS prior to any data transmission, regardless of the state of CTS.The decoder waits up to Host Serial Response Time-out (default)for CTS to be asserted. If CTS is not asserted during this time, thedecoder issues an error indication and discards the data. Thedecoder de-asserts RTS when transmission is complete.< None >Standard RTS/CTSRTS/CTS Option 1RTS/CTS Option 2RTS/CTS Option 335
SOFTWARE HANDSHAKINGThis parameter offers control of the data transmission process in addition to, orinstead of, that offered by hardware handshaking. There are five options.If Software Handshaking and Hardware Handshaking are both enabled,Hardware Handshaking takes precedence.• None: When this option is selected, data is transmitted immediately.No response is expected from host.• ACK/NAK: When this option is selected, after transmitting data, thedecoder expects either an ACK or NAK response from the host.When a NAK is received, the decoder transmits the same dataagain and waits for either an ACK or NAK. After three unsuccessfulattempts to send data when NAKs are received, the decoder issuesan error indication and discards the data.• The decoder waits up to the programmable Host Serial ResponseTime-out to receive an ACK or NAK. If the decoder does not get aresponse in this time, it issues an error indication and discards thedata. There are no retries when a time-out occurs.• ENQ: When this option is selected, the decoder waits for an ENQcharacter from the host before transmitting data. If an ENQ is notreceived within the Host Serial Response Time-out, the decoderissues an error indication and discards the data. The host musttransmit an ENQ character at least every Host Serial ResponseTime-out to prevent transmission errors.• ACK/NAK with ENQ: This combines the two previous options. Forre-transmissions of data, due to a NAK from the host, an additionalENQ is not required.• • XON/XOFF: An XOFF character turns the decodertransmission off until the decoder receives an XON character.There are two situations for XON/XOFF:• XOFF is received before the decoder has data to send. When thedecoder has data to send, it waits up to Host Serial ResponseTime-out for an XON character before transmission. If the XON isnot received within this time, the decoder issues an error indicationand discards the data.• XOFF is received during a transmission. Data transmission thenstops after sending the current byte. When the decoder receives anXON character, it sends the rest of the data message. The decoderwaits indefinitely for the XON.36
None >ACK/NAKENQACK/NAK with ENQXON/XOFF37
HOST SERIAL RESPONSE TIME-OUTThis parameter specifies how long the decoder waits for an ACK, NAK, or CTSbefore determining that a transmission error has occurred. This only applieswhen in one of the ACK/NAK Software Handshaking modes, or RTS/CTSHardware Handshaking option.< Minimum: 2 Sec >Low: 2.5 SecMedium: 5 SecHigh: 7.5 SecMaximum: 9.9 Sec38
RTS LINE STATEThis parameter sets the idle state of the Serial Host RTS line. Scan a bar codebelow to select Low RTS or High RTS line state.< Host: Low RTS >Host: High RTSBEEP ON When this parameter is enabled, the decoder issues a beep when a character is detected on the serial line. is issued to gain a user'sattention to an illegal entry or other important event.Beep On Character(Enable)< Do Not Beep On Character >(Disable)Note: A NULL character must be sent to the decoder before BEL to ensure theBEL character is processed correctly.39
INTERCHARACTER DELAYThis parameter specifies the intercharacter delay inserted between charactertransmissions.< Minimum: 0 msec >Low: 25 msecMedium: 50 msecHigh: 75 msecMaximum: 99 msec40
IGNORE UNKNOWN CHARACTERSUnknown characters are characters the host does not recognize. When Send<strong>Bar</strong> <strong>Code</strong>s with Unknown Characters is selected, all bar code data is sentexcept for unknown characters, and no error beeps sound on the decoder.When Do Not Send <strong>Bar</strong> <strong>Code</strong>s With Unknown Characters is selected, bar codedata is sent up to the first unknown character and then an error beep will soundon the decoder.< Send <strong>Bar</strong> <strong>Code</strong>s (with unknowncharacters) >Do Not Send <strong>Bar</strong> <strong>Code</strong>s (withunknown characters)41
ASCII CHARACTER SET FOR SERIAL HOSTSThe values in the table below can be assigned as prefixes or suffixes forASCII character data transmission.Prefix/Suffix ValuesPrefix/SuffixValueFull ASCII <strong>Code</strong> 39Encode Character42ASCII Character1000 %U NUL1001 $A SOH1002 $B STX1003 $C ETX1004 $D EOT1005 $E ENQ1006 $F ACK1007 $G BELL1008 $H BCKSPC1009 $I HORIZ TAB1010 $J LF/NW LN1011 $K VT1012 $L FF1013 $M CR/ENTER1014 $N SO1015 $O SI1016 $P DLE1017 $Q DC1/XON1018 $R DC21019 $S DC3/XOFF1020 $T DC4
1021 $U NAK1022 $V SYN1023 $W ETB1024 $X CAN1025 $Y EM1026 $Z SUB1027 %A ESC1028 %B FS1029 %C GS1030 %D RS1031 %E US1032 Space Space1033 /A !1034 /B "1035 /C #1036 /D $1037 /E %1038 /F &1039 /G ‘1040 /H (1041 /I )1042 /J *1043 /K +1044 /L ,1045 - -1046 . .1047 /O /1048 0 01049 1 143
1050 2 21051 3 31052 4 41053 5 51054 6 61055 7 71056 8 81057 9 91058 /Z :1059 %F ;1060 %G 1063 %J ?1064 %V @1065 A A1066 B B1067 C C1068 D D1069 E E1070 F F1071 G G1072 H H1073 I I1074 J J1075 K K1076 L L1077 M M1078 N N44
1079 O O1080 P P1081 Q Q1082 R R1083 S S1084 T T1085 U U1086 V V1087 W W1088 X X1089 Y Y1090 Z Z1091 %K [1092 %L \1093 %M ]1094 %N ^1095 %O _1096 %W `1097 +A a1098 +B b1099 +C c1100 +D d1101 +E e1102 +F f1103 +G g1104 +H h1105 +I i1106 +J j1107 +K k45
1108 +L l1109 +M m1110 +N n1111 +O o1112 +P p1113 +Q q1114 +R r1115 +S s1116 +T t1117 +U u1118 +V v1119 +W w1120 +X x1121 +Y y1122 +Z z1123 %P {1124 %Q |1125 %R }1126 %S ~1127 Undefined7013 ENTER46
Chapter 6 USB InterfaceIntroductionThis chapter describes how to set up the decoder with a USB host. Thedecoder connects directly to a USB host, or a powered USB hub, and ispowered by it. No additional power supply is required.Note: Most computer monitors allow scanning the bar codes directly on thescreen. When scanning from the screen, be sure to set the documentmagnification to a level where the bar code can be seen clearly, and barsand/or spaces are not merging.USB Parameter DefaultsTable below lists the defaults for USB host parameters. To change any option,scan the appropriate barcode(s) provided in the Parameter Descriptionssection.Note: See Appendix A, Standard Default Parameters for all user preferences,hosts, symbologies, and miscellaneous default parameters.USB Host Default TableUSB Host ParametersParametersUSB Device TypeSymbol Native API (SNAPI) Status HandshakingUSB Country Keyboard Types (Country <strong>Code</strong>s)USB Keystroke DelayUSB CAPS Lock OverrideUSB Ignore Unknown CharactersEmulate KeypadUSB FN1 SubstitutionFunction Key MappingSimulated Caps LockConvert CaseDefaultHID Keyboard EmulationEnable SNAPI StatusHandshakingNorth AmericanNo DelayDisableEnableDisableDisableDisableDisableNo Case Conversion47
USB HOST PARAMETERSUSB Device TypeSelect the desired USB device type.Note: When changing USB Device Types, the decoder automatically resets.The decoder issues the standard startup beep sequences.< HID Keyboard Emulation >USB virtual COM port emulation;(requiring driver)Simple COM Port Emulation(requiring driver)Native API (SNAPI) withImaging InterfaceNative API (SNAPI) withoutImaging Interface48
* Note: Steps for activating CDC COM port emulation (USB virtual COM):1. Execute the driver (installMOTCDC.exe). If you don’t have the driver,contact your distributor.2. Connect the scanner USB cable to the host computer. The scanner wouldgive a “Do Re Mi” melody when powered on.3. Read the “CDC COM Port Emulation” barcode to set up the interface.4. On the computer, check Device Manager to see if the computersuccessfully detects the scanner as “<strong>Bar</strong> <strong>Code</strong> <strong>Scanner</strong>.” The COMport number would vary depending on different hardware environment.5. If you can’t directly install the driver follow the Found New Hardware Wizardto locate the install the driver.49
NATIVE API (SNAPI) STATUS HANDSHAKINGAfter selecting a SNAPI interface as the USB device type, select whether toenable or disable status handshaking.< Enable SNAPI Status Handshaking >Disable SNAPI Status HandshakingUSB COUNTRY KEYBOARD TYPES (COUNTRY CODES)Scan the bar code corresponding to the keyboard type. This setting appliesonly to the USB HID Keyboard Emulation device.Note: When changing USB country keyboard types the decoder automaticallyresets. The decoder issues the standard startup beep sequences.< North American Standard USBKeyboard >German Windows50French Windows
French Canadian Windows 2000/XPFrench Canadian Windows 95/98Spanish WindowsItalian WindowsSwedish WindowUK English WindowsJapanese Windows (ASCII)51Portuguese-Brazilian Windows
USB KEYSTROKE DELAYThis parameter sets the delay, in milliseconds, between emulated keystrokes.Scan a bar code below to increase the delay when hosts require a slowertransmission of data.< No Delay >Medium Delay (20 msec)Long Delay (40 msec)USB CAPS LOCK OVERRIDEThis option applies only to the HID Keyboard Emulation device. When enabled,the case of the data is preserved regardless of the state of the caps lock key.This setting is always enabled for the Japanese, Windows (ASCII) keyboardtype and can not be disabled.Override Caps Lock Key(Enable)< Do Not Override Caps Lock Key >(Disable)52
USB IGNORE UNKNOWN CHARACTERSThis option applies only to the HID Keyboard Emulation device and IBM device.Unknown characters are characters the host does not recognize. When Send<strong>Bar</strong> <strong>Code</strong>s With Unknown Characters is selected, all bar code data is sentexcept for unknown characters, and no error beeps sound. When Do Not Send<strong>Bar</strong> <strong>Code</strong>s With Unknown Characters is selected, for IBM devices, bar codescontaining at least one unknown character are not sent to the host, and anerror beep sounds. For HID Keyboard Emulation devices, the bar codecharacters up to the unknown character are sent, and an error beep sounds.< Send <strong>Bar</strong> <strong>Code</strong>s with UnknownCharacters (Transmit) >Do Not Send <strong>Bar</strong> <strong>Code</strong>s withUnknown Characters (Disable)EMULATE KEYPADWhen enabled, all characters are sent as ASCII sequences over the numerickeypad. For example ASCII A would be sent as “ALT make” 0 6 5 “ALT Break”.This allows support for other country variants.< Disable Keypad Emulation >53Enable Keypad Emulation
USB KEYBOARD FN 1 SUBSTITUTIONThis option applies only to the USB HID Keyboard Emulation device. Whenenabled, this allows replacement of any FN 1 characters in an EAN 128 barcode with a Key Category and value chosen by the user.Enable< Disable >FUNCTION KEY MAPPINGASCII values under 32 are normally sent as a control-key sequence. When thisparameter is enabled, the keys in bold are sent in place of the standard keymapping. Table entries that do not have a bold entry remain the same whetheror not this parameter is enabled.< Disable Function Key Mapping >Enable Function Key Mapping54
SIMULATED CAPS LOCKWhen enabled, the decoder inverts upper and lower case characters on the barcode as if the Caps Lock state is enabled on the keyboard. This inversion isdone regardless of the current state of the keyboard’s Caps Lock state.< Disable Simulated Caps Lock >Enable Simulated Caps LockCONVERT CASEWhen enabled, the decoder converts all bar code data to the selected case.< No Case Conversion >Convert All to Upper CaseConvert All to Lower Case55
ASCII CHARACTER SET FOR USBPrefix/ SuffixValueUSB Prefix/Suffix ValuesFull ASCII <strong>Code</strong>39 EncodeCharacter1000 %U CTRL 21001 $A CTRL A1002 $B CTRL B1003 $C CTRL C1004 $D CTRL D1005 $E CTRL E1006 $F CTRL F1007 $G CTRL G56KeystrokeCTRL1008 $HH/BACKSPACE 11009 $I CTRLI/HORIZONTALTAB 11010 $J CTRL J1011 $K CTRL K1012 $L CTRL L1013 $M CTRL M/ENTER 11014 $N CTRL N1015 $O CTRL O1016 $P CTRL P1017 $Q CTRL Q1018 $R CTRL R1019 $S CTRL S1020 $T CTRL T1021 $U CTRL U1022 $V CTRL V
1023 $W CTRL W1024 $X CTRL X1025 $Y CTRL Y1026 $Z CTRL Z1027 %A CTRL [/ESC 11028 %B CTRL \1029 %C CTRL ]1030 %D CTRL 61031 %E CTRL1032 Space Space1033 /A !1034 /B “1035 /C #1036 /D $1037 /E %1038 /F &1039 /G ‘1040 /H (1041 /I )1042 /J *1043 /K +1044 /L ,1045 - -1046 . .1047 /O /1048 0 01049 1 11050 2 21051 3 357
1052 4 41053 5 51054 6 61055 7 71056 8 81057 9 91058 /Z :1059 %F ;1060 %G 1063 %J ?1064 %V @1065 A A1066 B B1067 C C1068 D D1069 E E1070 F F1071 G G1072 H H1073 I I1074 J J1075 K K1076 L L1077 M M1078 N N1079 O O1080 P P58
1081 Q Q1082 R R1083 S S1084 T T1085 U U1086 V V1087 W W1088 X X1089 Y Y1090 Z Z1091 %K [1092 %L \1093 %M ]1094 %N ^1095 %O _1096 %W `1097 +A a1098 +B b1099 +C c1100 +D d1101 +E e1102 +F f1103 +G g1104 +H h1105 +I i1106 +J j1107 +K k1108 +L l1109 +M m59
1110 +N n1111 +O o1112 +P p1113 +Q q1114 +R r1115 +S s1116 +T t1117 +U u1118 +V v1119 +W w1120 +X x1121 +Y y1122 +Z z1123 %P {1124 %Q |1125 %R }1126 %S ~The keystroke in bold is sent only if the “Function KeyMapping” is enabled. Otherwise, the unbolded keystroke issent.60
USB ALT Key Character SetALT KeysKeystroke2064 ALT 22065 ALT A2066 ALT B2067 ALT C2068 ALT D2069 ALT E2070 ALT F2071 ALT G2072 ALT H2073 ALT I2074 ALT J2075 ALT K2076 ALT L2077 ALT M2078 ALT N2079 ALT O2080 ALT P2081 ALT Q2082 ALT R2083 ALT S2084 ALT T2085 ALT U2086 ALT V2087 ALT W2088 ALT X2089 ALT Y2090 ALT Z61
USB GUI Key Character SetGUI KeyKeystroke3000 Right Control Key3048 GUI 03049 GUI 13050 GUI 23051 GUI 33052 GUI 43053 GUI 53054 GUI 63055 GUI 73056 GUI 83057 GUI 93065 GUI A3066 GUI B3067 GUI C3068 GUI D3069 GUI E3070 GUI F3071 GUI G3072 GUI H3073 GUI I3074 GUI J3075 GUI K3076 GUI L3077 GUI M3078 GUI N3079 GUI O3080 GUI P62
3081 GUI Q3082 GUI R3083 GUI S3084 GUI T3085 GUI U3086 GUI V3087 GUI W3088 GUI X3089 GUI Y3090 GUI ZNote: GUI Shift Keys - The Apple iMac keyboard has anapple key on either side of the space bar. Windows-basedsystems have a GUI key to the left of the left ALT key, and tothe right of the right ALT key.63
USB F Key Character SetF KeysKeystroke5001 F15002 F25003 F35004 F45005 F55006 F65007 F75008 F85009 F95010 F105011 F115012 F125013 F135014 F145015 F155016 F165017 F175018 F185019 F195020 F205021 F215022 F225023 F235024 F2464
USB Numeric Keypad Character SetNumeric KeypadKeystroke6042 *6043 +6044 undefined6045 -6046 .6047 /6048 06049 16050 26051 36052 46053 56054 66055 76056 86057 96058 Enter6059 Num Lock65
USB Extended Keypad Character SetExtended KeypadKeystroke7001 Break7002 Delete7003 PgUp7004 End7005 Pg Dn7006 Pause7007 Scroll Lock7008 Backspace7009 Tab7010 Print Screen7011 Insert7012 Home7013 Enter7014 Escape7015 Up Arrow7016 Down Arrow7017 Left Arrow7018 Right Arrow66
Chapter 7 SymbologiesIntroductionThis chapter describes symbology features and provides the programming barcodes for selecting these features.The device is shipped with the settings shown in the Symbology Default TableIf the default values suit requirements, programming is not necessary.There are two ways to change a parameter value:• Scan the appropriate bar codes in this guide. These new valuesreplace the standard default values in memory.• For SSI and USB SNAPI hosts, send a “parameter send” commandfrom the host system. Hexadecimal parameter numbers are shownin this chapter below the parameter title, and options are shown inparenthesis beneath the accompanying bar codes. See the SimpleSerial Interface (SSI) Programmer’s Guide for detailed instructionsfor changing parameter values using this method.Note: Most computer monitors allow scanning the bar codes directly on thescreen. When scanning from the screen, be sure to set the documentmagnification to a level where the bar code can be seen clearly, and barsand/or spaces are not merging.To return all features to default values, scan the Set Default Parameter barcode. Throughout the programming bar code menus, default values areframed.67
SYMBOLOGY PARAMETER DEFAULTSTable below lists the defaults for all symbologies parameters. To change anyoption, scan the appropriate barcode(s) provided in the SymbologiesParameters section.Note: See Appendix A, Standard Default Parameters for all user preferences,hosts, and miscellaneous default parameters.Symbology Default TableParameterDefaultUPC/EANUPC-AUPC-EUPC-E1EAN-8/JAN 8EAN-13/JAN 13EnableEnableDisableEnableEnableBookland EANDisableDecode UPC/EAN/JAN Supplementals(2 and 5 digits)IgnoreUPC/EAN/JAN Supplemental Redundancy 10Transmit UPC-A Check DigitTransmit UPC-E Check DigitTransmit UPC-E1 Check DigitUPC-A PreambleUPC-E PreambleUPC-E1 PreambleConvert UPC-E to AConvert UPC-E1 to A68EnableEnableEnableSystem CharacterSystem CharacterSystem CharacterDisableDisable
EAN-8/JAN-8 ExtendUCC Coupon Extended <strong>Code</strong>DisableDisable<strong>Code</strong> 128<strong>Code</strong> 128UCC/EAN-128ISBT 128EnableEnableEnable<strong>Code</strong> 39<strong>Code</strong> 39Trioptic <strong>Code</strong> 39Convert <strong>Code</strong> 39 to <strong>Code</strong> 32(Italian Pharmacy <strong>Code</strong>)<strong>Code</strong> 32 PrefixEnableDisableDisableDisableSet Length(s) for <strong>Code</strong> 39 2 to 55<strong>Code</strong> 39 Check Digit VerificationTransmit <strong>Code</strong> 39 Check Digit<strong>Code</strong> 39 Full ASCII ConversionBuffer <strong>Code</strong> 39DisableDisableDisableDisable<strong>Code</strong> 93<strong>Code</strong> 93DisableSet Length(s) for <strong>Code</strong> 93 4 to 55<strong>Code</strong> 11<strong>Code</strong> 11DisableSet Lengths for <strong>Code</strong> 11 4 to 55<strong>Code</strong> 11 Check Digit VerificationDisable69
Transmit <strong>Code</strong> 11 Check Digit(s)DisableInterleaved 2 of 5 (ITF)Interleaved 2 of 5 (ITF)EnableSet Lengths for I 2 of 5 14I 2 of 5 Check Digit VerificationTransmit I 2 of 5 Check DigitConvert I 2 of 5 to EAN 13DisableDisableDisableDiscrete 2 of 5 (DTF)Discrete 2 of 5DisableSet Length(s) for D 2 of 5 12Codabar (NW - 7)CodabarDisableSet Lengths for Codabar 5 to 55CLSI EditingNOTIS EditingDisableDisableMSIMSIDisableSet Length(s) for MSI 4 to 55MSI Check DigitsTransmit MSI Check DigitOneDisableMSI Check Digit Algorithm Mod 10/Mod 10Postal <strong>Code</strong>sUS PostnetUS PlanetEnableEnable70
UK PostalTransmit UK Postal Check DigitJapan PostalAustralian PostalDutch PostalTransmit US Postal Check DigitEnableEnableEnableEnableEnableEnableRSS (Reduced Space Symbology)RSS 14RSS LimitedRSS ExpandedConvert RSS to UPC/EANEnableEnableEnableDisableCompositeComposite CC-CComposite CC-A/BComposite TLC-39UPC Composite ModeComposite Beep ModeUCC/EAN <strong>Code</strong> 128 Emulation Mode forUCC/EAN Composite <strong>Code</strong>sDisableDisableDisableAlways LinkedBeep As Each <strong>Code</strong>Type is DecodedDisable2D SymbologiesPDF417MicroPDF417<strong>Code</strong> 128 EmulationEnableDisableDisable71
Data MatrixMaxicodeQR <strong>Code</strong>EnableEnableEnableSymbology-Specific Security LevelsRedundancy Level 1Security Level 1Inter character Gap SizeNormalReport VersionMacro PDFMacro PDF Transmit/Decode Mode SymbolsTransmit Macro PDF Control HeaderEscape CharactersPass through ModeDisableNoneFlush Macro PDF BufferAbort Macro PDF Entry72
UPC/EANEnable/Disable UPC-ATo enable or disable UPC-A, scan the appropriate barcode below.< Enable UPC-A >Disable UPC-AEnable/Disable UPC-ETo enable or disable UPC-E, scan the appropriate bar code below.< Enable UPC-E >Disable UPC-E73
Enable/Disable UPC-E1UPC-E1 is disabled by default. To enable or disable UPC-E1, scan theappropriate bar code below.Note: UPC-E1 is not a UCC (Uniform <strong>Code</strong> Council) approved symbology.Enable UPC-E1< Disable UPC-E1 >Enable/Disable EAN-8/JAN-8To enable or disable EAN-8/JAN-8, scan the appropriate bar code below.< Enable EAN-8/JAN-8 >Disable EAN-8/JAN-874
Enable/Disable EAN-13/JAN-13To enable or disable EAN-13/JAN-13, scan the appropriate bar code below.< Enable EAN-13/JAN-13 >Disable EAN-13/JAN-13Enable/Disable Bookland EANTo enable/disable Bookland EAN, scan the appropriate barcode below.Enable Bookland EANDisable Bookland EAN75
Decode UPC/EAN/JAN SupplementalsSupplemental are bar codes appended according to specific formatconventions (e.g., UPC A+2, UPC E+2, EAN 13+2). Six options are available.• If Decode UPC/EAN/JAN Only With Supplemental is selected,UPC/EAN/JAN symbols without supplemental are not decoded.• If Ignore Supplemental is selected, and the decoder is presentedwith a UPC/EAN/JAN with a supplemental, the UPC/EAN/JAN isdecoded and the supplemental bar code is ignored.• An Auto discriminate Option is also available. If this option isselected, choose an appropriate UPC/EAN/JANSupplemental Redundancy value from the next page. A value of 5or more is recommended.• Enable 378/379 Supplemental Mode to delay only EAN-13/JAN-13bar codes starting with a ‘378’ or ‘379’ prefix by the supplementalsearch process. All other UPC/EAN/JAN bar codes are exemptfrom the search and are reported instantly upon decodes.• Select Enable 978 Supplemental Mode to delay onlyEAN-13/JAN-13 bar codes starting with a ‘978’ prefix by thesupplemental search process. All other UPC/EAN/JAN bar codesare exempt from the search and are reported instantly upondecodes.• Select Enable Smart Supplemental Mode to delay onlyEAN-13/JAN-13 bar codes starting with a ‘378’, ‘379’, or ‘978’ prefixby the supplemental search process. All other UPC/EAN/JAN barcodes are exempt from the search and are reported instantly upondecodes.Note: To minimize the risk of invalid data transmission, select either to decodeor ignore supplemental characters.76
Decode UPC/EAN/JAN OnlyWith Supplemental< lgnore Supplemental >Auto discriminate UPC/EAN/JANSupplementalEnable 378/379 Supplemental ModeEnable 978 Supplemental ModeEnable Smart Supplemental Mode77
UPC/EAN/JAN Supplemental RedundancyWith Auto discriminate UPC/EAN/JAN Supplemental selected, this optionadjusts the number of times a symbol without supplemental is decoded beforetransmission. The range is from two to thirty times. Five or above isrecommended when decoding a mix of UPC/EAN/JAN symbols with andwithout supplemental, and the auto discriminate option is selected. The defaultis set at 10.Scan the bar code below to set a decode redundancy value. Next, scan twonumeric bar codes in Appendix D, Numeric <strong>Bar</strong> <strong>Code</strong>s. Single digit numbersmust have a leading zero. To correct an error or change a selection, scanCancel.UPC/EAN/JAN Supplemental RedundancyTransmit UPC-A Check DigitThe check digit is the last character of the symbol used to verify the integrity ofthe data. Scan the appropriate bar code below to transmit the bar code datawith or without the UPC-A check digit. It is always verified to guarantee theintegrity of the data.< Transmit UPC-A Check Digit >Do Not Transmit UPC-A Check Digit78
Transmit UPC-E Check DigitThe check digit is the last character of the symbol used to verify the integrity ofthe data. Scan the appropriate bar code below to transmit the bar code datawith or without the UPC-E check digit. It is always verified to guarantee theintegrity of the data.< Transmit UPC-E Check Digit >Do Not Transmit UPC-E Check DigitTransmit UPC-E1 Check DigitThe check digit is the last character of the symbol used to verify the integrity ofthe data. Scan the appropriate bar code below to transmit the bar code datawith or without the UPC-E1 check digit. It is always verified to guarantee theintegrity of the data.< Transmit UPC-E1 Check Digit >Do Not Transmit UPC-E1 CheckDigit79
UPC-A PreamblePreamble characters are part of the UPC symbol, and include Country <strong>Code</strong>and System Character. There are three options for transmitting a UPC-Apreamble to the host device: transmit System Character only, transmit SystemCharacter and Country <strong>Code</strong> (“0” for USA), and transmit no preamble. Selectthe appropriate option to match the host system.No Preamble ()< System Character >()System Character & Country <strong>Code</strong>(< COUNTRY CODE> )80
UPC-E PreamblePreamble characters are part of the UPC symbol, and include Country <strong>Code</strong>and System Character. There are three options for transmitting a UPC-Epreamble to the host device: transmit System Character only, transmit SystemCharacter and Country <strong>Code</strong> (“0” for USA), and transmit no preamble. Selectthe appropriate option to match the host system.No Preamble ()< System Character >()System Character & Country <strong>Code</strong>( )81
UPC-E1 PreamblePreamble characters are part of the UPC symbol, and include Country <strong>Code</strong>and System Character. There are three options for transmitting a UPC-E1preamble to the host device: transmit System Character only, transmit SystemCharacter and Country <strong>Code</strong> (“0” for USA), and transmit no preamble. Selectthe appropriate option to match the host system.No Preamble ()< System Character >()System Character & Country <strong>Code</strong>( )Convert UPC-E to UPC-AEnable this to convert UPC-E (zero suppressed) decoded data to UPC-Aformat before transmission. After conversion, the data follows UPC-A formatand is affected by UPC-A programming selections (e.g., Preamble, CheckDigit). When disabled, UPC-E decoded data is transmitted as UPC-E data,without conversion.Convert UPC-E to UPC-A (Enable)< Do Not Convert UPC-E to UPC-A >(Disable)82
Convert UPC-E1 to UPC-AEnable this to convert UPC-E1 decoded data to UPC-A format beforetransmission. After conversion, the data follows UPC-A format and is affectedby UPC-A programming selections (e.g., Preamble, Check Digit).When disabled, UPC-E1 decoded data is transmitted as UPC-E1 data, withoutconversion.Convert UPC-E1 to UPC-A (Enable)< Do Not Convert UPC-E1 to UPC-A >(Disable)EAN-8/JAN-8 ExtendWhen enabled, this parameter adds five leading zeros to decoded EAN-8symbols to make them compatible in format to EAN-13 symbols.When disabled, EAN-8 symbols are transmitted as is.Enable EAN/JAN Zero Extend< Disable EAN/JAN Zero Extend >83
UCC Coupon Extended <strong>Code</strong>When enabled, this parameter decodes UPC-A bar codes starting with digit ‘5’,EAN-13 bar codes starting with digit ‘99’, and UPCA/EAN-128 Coupon <strong>Code</strong>s.UPCA, EAN-13, and EAN-128 must be enabled to scan all types of Coupon<strong>Code</strong>s.Enable UCC Coupon Extended <strong>Code</strong>< Disable UCC Coupon Extended<strong>Code</strong> >Note: Use the Decode UPC/EAN Supplemental Redundancy parameter tocontrol auto discrimination of the EAN128 (right half) of a coupon code.84
CODE 128Enable/Disable <strong>Code</strong> 128To enable or disable <strong>Code</strong> 128, scan the appropriate bar code below.< Enable <strong>Code</strong> 128 >Disable <strong>Code</strong> 128Enable/Disable UCC/EAN-128To enable or disable UCC/EAN-128, scan the appropriate bar code below.< Enable UCC/EAN-128 >Disable UCC/EAN-12885
Enable/Disable ISBT 128ISBT 128 is a variant of <strong>Code</strong> 128 used in the blood bank industry. Scan a barcode below to enable or disable ISBT 128. If necessary, the host must performconcatenation of the ISBT data.< Enable ISBT 128 >Disable ISBT 12886
CODE 39Enable/Disable <strong>Code</strong> 39To enable or disable <strong>Code</strong> 39, scan the appropriate bar code below.< Enable <strong>Code</strong> 39 >Disable <strong>Code</strong> 39Enable/Disable Trioptic <strong>Code</strong> 39Trioptic <strong>Code</strong> 39 is a variant of <strong>Code</strong> 39 used in the marking of computer tapecartridges. Trioptic <strong>Code</strong> 39 symbols always contain six characters. To enableor disable Trioptic <strong>Code</strong> 39, scan the appropriate bar code below.Enable Trioptic <strong>Code</strong> 39< Disable Trioptic <strong>Code</strong> 39 >Note: Trioptic <strong>Code</strong> 39 and <strong>Code</strong> 39 Full ASCII cannot be enabledsimultaneously.87
Convert <strong>Code</strong> 39 to <strong>Code</strong> 32<strong>Code</strong> 32 is a variant of <strong>Code</strong> 39 used by the Italian pharmaceutical industry.Scan the appropriate bar code below to enable or disable converting <strong>Code</strong> 39to <strong>Code</strong> 32.Note: <strong>Code</strong> 39 must be enabled for this parameter to function.Enable Convert <strong>Code</strong> 39 to <strong>Code</strong> 32< Disable Convert <strong>Code</strong> 39 to <strong>Code</strong> 32 ><strong>Code</strong> 32 PrefixScan the appropriate bar code below to enable or disable adding the prefixcharacter “A” to all <strong>Code</strong> 32 bar codes.Note: Convert <strong>Code</strong> 39 to <strong>Code</strong> 32 must be enabled for this parameter tofunction.Enable <strong>Code</strong> 32 Prefix< Disable <strong>Code</strong> 32 Prefix >88
Set Lengths for <strong>Code</strong> 39The length of a code refers to the number of characters (i.e., human readablecharacters), including check digit(s) the code contains. Set lengths for <strong>Code</strong> 39to any length, one or two discrete lengths, or lengths within a specific range. If<strong>Code</strong> 39 Full ASCII is enabled, Length within a Range or Any Length is thepreferred options.Note: When setting lengths for different bar code types by scanning single digitnumbers, single digit numbers must always be preceded by a leading zero.• One Discrete Length - Select this option to decode only <strong>Code</strong> 39symbols containing a selected length. Select the length using thenumeric bar codes in Appendix D, Numeric <strong>Bar</strong> <strong>Code</strong>s. Forexample, to decode only <strong>Code</strong> 39 symbols with 14 characters, scan<strong>Code</strong> 39 - One Discrete Length, then scan 1 followed by 4. Tocorrect an error or change the selection, scan Cancel barcode.• Two Discrete Lengths - Select this option to decode only <strong>Code</strong> 39symbols containing either of two selected lengths. Select lengthsusing the numeric bar codes in Appendix D, Numeric <strong>Bar</strong> <strong>Code</strong>s.For example, to decode only those <strong>Code</strong> 39 symbols containingeither 2 or 14 characters, select <strong>Code</strong> 39 - Two Discrete Lengths,then scan 0, 2, 1, and then 4. To correct an error or change theselection, scan Cancel barcode.• Length Within Range - Select this option to decode a <strong>Code</strong> 39symbol with a specific length range. Select lengths using numericbar codes in Appendix D, Numeric <strong>Bar</strong> <strong>Code</strong>s. For example, todecode <strong>Code</strong> 39 symbols containing between 4 and 12 characters,first scan <strong>Code</strong> 39 - Length Within Range. Then scan 0, 4, 1, and 2(single digit numbers must always be preceded by a leading zero).To correct an error or change the selection, scan Cancel barcode.• Any Length - Select this option to decode <strong>Code</strong> 39 symbolscontaining any number of characters within the decoder capability.<strong>Code</strong> 39 - One Discrete Length<strong>Code</strong> 39 - Two Discrete Lengths89
<strong>Code</strong> 39 - Length Within Range<strong>Code</strong> 39 - Any Length<strong>Code</strong> 39 Check Digit VerificationWhen this feature is enabled, the decoder checks the integrity of all <strong>Code</strong> 39symbols to verify that the data complies with specified check digit algorithm.Only <strong>Code</strong> 39 symbols which include a modulo 43 check digit are decoded.Enable this feature if the <strong>Code</strong> 39 symbols contain a Modulo 43 check digit.Enable <strong>Code</strong> 39 Check Digit< Disable <strong>Code</strong> 39 Check Digit >90
Transmit <strong>Code</strong> 39 Check DigitScan a bar code below to transmit <strong>Code</strong> 39 data with or without the check digit.Transmit <strong>Code</strong> 39 Check Digit(Enable)< Do Not <strong>Code</strong> 39 Check Digit >(Disable)Note: <strong>Code</strong> 39 Check Digit Verification must be enabled for this parameter tofunction.<strong>Code</strong> 39 Full ASCII Conversion<strong>Code</strong> 39 Full ASCII is a variant of <strong>Code</strong> 39 which pairs characters to encodethe full ASCII character set. To enable or disable <strong>Code</strong> 39 Full ASCII, scan theappropriate bar code below.Enable <strong>Code</strong> 39 Full ASCII< Disable <strong>Code</strong> 39 Full ASCII >Note: Trioptic <strong>Code</strong> 39 and <strong>Code</strong> 39 Full ASCII cannot be enabledsimultaneously.<strong>Code</strong> 39 Full ASCII to Full ASCII Correlation is host-dependent, and istherefore described in the ASCII Character Set Table for the appropriateinterface. See Appendix C, ASCII Character Set.91
<strong>Code</strong> 39 Buffering (Scan & Store)This feature allows the decoder to accumulate data from multiple <strong>Code</strong> 39symbols.Selecting the Scan and Store option (Buffer <strong>Code</strong> 39) temporarily buffers all<strong>Code</strong> 39 symbols having a leading space as a first character for latertransmission. The leading space is not buffered.Decode of a valid <strong>Code</strong> 39 symbol with no leading space causes transmissionin sequence of all buffered data in a first-in first-out format, plus transmissionof the “triggering” symbol. See the following pages for further details.When the Do Not Buffer <strong>Code</strong> 39 option is selected, all decoded <strong>Code</strong> 39symbols are transmitted immediately without being stored in the buffer.This feature affects <strong>Code</strong> 39 only. If selecting Buffer <strong>Code</strong> 39, we recommendconfiguring the decoder to decode <strong>Code</strong> 39 symbology only.Buffer <strong>Code</strong> 39 (Enable)< Do Not Buffer <strong>Code</strong> 39 (Disable) >While there is data in the transmission buffer, selecting Do Not Buffer <strong>Code</strong>39 is not allowed. The buffer holds 200 bytes of information.To disable <strong>Code</strong> 39 buffering when there is data in the transmission buffer, firstforce the buffer transmission or clear the buffer.92
Buffer DataTo buffer data, <strong>Code</strong> 39 buffering must be enabled and a <strong>Code</strong> 39 symbol mustbe read with a space immediately following the start pattern.• Unless the data overflows the transmission buffer, the decoderissues a lo/hi beep to indicate successful decode and buffering.(For overflow conditions, see Overfilling Transmission Buffer.)• The decoder adds the decoded data excluding the leading space tothe transmission buffer.• No transmission occurs.Clear Transmission BufferTo clear the transmission buffer, scan the Clear Buffer bar code below, whichcontains only a start character, a dash (minus), and a stop character.• The decoder issues a short hi/lo/hi beep.• The decoder erases the transmission buffer.• No transmission occurs.Clear BufferNote: The Clear Buffer contains only the dash (minus) character. In order toscan this command, be sure <strong>Code</strong> 39 length is set to include length 1.Transmit BufferThere are two methods to transmit the <strong>Code</strong> 39 buffer.1. Scan the Transmit Buffer bar code below. Only a start character, aplus (+), and a stop character.• The decoder transmits and clears the buffer.• The decoder issues a Lo/Hi beep.Transmit Buffer2. Scan a <strong>Code</strong> 39 bar code with a leading character other than aspace.• The decoder appends new decode data to buffered data.• The decoder transmits and clears the buffer.• The decoder signals that the buffer was transmitted with a lo/hibeep.• The decoder transmits and clears the buffer.93
Note: The Transmit Buffer contains only a plus (+) character. In order to scanthis command, be sure <strong>Code</strong> 39 length is set to include length 1.Overfilling Transmission BufferThe <strong>Code</strong> 39 buffer holds 200 characters. If the symbol just read results in anoverflow of the transmission buffer:• The decoder indicates that the symbol was rejected by issuingthree long, high beeps.• No transmission occurs. The data in the buffer is not affected.Attempt to Transmit an Empty BufferIf the symbol just read was the Transmit Buffer symbol and the <strong>Code</strong> 39 bufferis empty:• A short lo/hi/lo beep signals that the buffer is empty.• No transmission occurs.• The buffer remains empty.94
CODE 93Enable/Disable <strong>Code</strong> 93To enable or disable <strong>Code</strong> 93, scan the appropriate bar code below.Enable <strong>Code</strong> 93< Disable <strong>Code</strong> 93 >Set Lengths for <strong>Code</strong> 93The length of a code refers to the number of characters (i.e., human readablecharacters), including check digit(s) the code contains. Set lengths for <strong>Code</strong> 93to any length, one or two discrete lengths, or lengths within a specific range.• One Discrete Length - Select this option to decode only <strong>Code</strong> 93symbols containing a selected length. Select the length using thenumeric bar codes in Appendix D, Numeric <strong>Bar</strong> <strong>Code</strong>s. Forexample, to decode only <strong>Code</strong> 93 symbols with 14 characters, scan<strong>Code</strong> 93 - One Discrete Length, then scan 1 followed by 4. Tocorrect an error or to change the selection, scan Cancel barcode.• Two Discrete Lengths - Select this option to decode only <strong>Code</strong> 93symbols containing either of two selected lengths. Select lengthsusing the numeric bar codes in Appendix D, Numeric <strong>Bar</strong> <strong>Code</strong>s.For example, to decode only those <strong>Code</strong> 93 symbols containingeither 2 or 14 characters, select <strong>Code</strong> 93 - Two Discrete Lengths,then scan 0, 2, 1, and then 4. To correct an error or to change theselection, scan Cancel barcode.95
• Length Within Range - Select this option to decode a <strong>Code</strong> 93symbol with a specific length range. Select lengths using thenumeric bar codes in Appendix D, Numeric <strong>Bar</strong> <strong>Code</strong>s. Forexample, to decode <strong>Code</strong> 93 symbols containing between 4 and 12characters, first scan <strong>Code</strong> 93 - Length Within Range. Then scan 0,4, 1, and 2 (single digit numbers must always be preceded by aleading zero). To correct an error or change the selection, scanCancel barcode.• Any Length - Scan this option to decode <strong>Code</strong> 93 symbolscontaining any number of characters within the decoder’scapability.<strong>Code</strong> 93 – One Discrete Length<strong>Code</strong> 93 – Two Discrete Length<strong>Code</strong> 93 – Any Length96
CODE 11To enable or disable <strong>Code</strong> 11, scan the appropriate bar code below.Enable <strong>Code</strong> 11< Disable <strong>Code</strong> 11 >Set Lengths for <strong>Code</strong> 11The length of a code refers to the number of characters (i.e., human readablecharacters), including check digit(s) the code contains. Set lengths for <strong>Code</strong> 11to any length, one or two discrete lengths, or lengths within a specific range.• One Discrete Length - Select this option to decode only <strong>Code</strong> 11symbols containing a selected length. Select the length using thenumeric bar codes in Appendix D, Numeric <strong>Bar</strong> <strong>Code</strong>s. Forexample, to decode only <strong>Code</strong> 11 symbols with 14 characters, scan<strong>Code</strong> 11 - One Discrete Length, then scan 1 followed by 4. Tocorrect an error or to change the selection, scan Cancel onbarcode.• Two Discrete Lengths - Select this option to decode only <strong>Code</strong> 11symbols containing either of two selected lengths. Select lengthsusing the numeric bar codes in Appendix D, Numeric <strong>Bar</strong> <strong>Code</strong>s.For example, to decode only those <strong>Code</strong> 11 symbols containingeither 2 or 14 characters, select <strong>Code</strong> 11 - Two Discrete Lengths,then scan 0, 2, 1, and then 4. To correct an error or to change theselection, scan Cancel barcode.97
• Length Within Range - Select this option to decode a <strong>Code</strong> 11symbol with a specific length range. Select lengths using numericbar codes in Appendix D, Numeric <strong>Bar</strong> <strong>Code</strong>s. For example, todecode <strong>Code</strong> 11 symbols containing between 4 and 12 characters,first scan <strong>Code</strong> 11 - Length Within Range. Then scan 0, 4, 1, and 2(single digit numbers must always be preceded by a leading zero).To correct an error or change the selection, scan Cancel barcode.• Any Length - Scan this option to decode <strong>Code</strong> 11 symbolscontaining any number of characters within the decoder capability.<strong>Code</strong> 11 - One Discrete Length<strong>Code</strong> 11 - Two Discrete Lengths<strong>Code</strong> 11 - Length Within Range<strong>Code</strong> 11 - Any Length98
<strong>Code</strong> 11 Check Digit VerificationThis feature allows the decoder to check the integrity of all <strong>Code</strong> 11 symbols toverify that the data complies with the specified check digit algorithm. Thisselects the check digit mechanism for the decoded <strong>Code</strong> 11 bar code. Theoptions are to check for one check digit, check for two check digits, or disablethe feature.To enable this feature, scan the bar code below corresponding to the numberof check digits encoded in the <strong>Code</strong> 11 symbols.< Disable >One Check DigitTwo Check DigitsTransmit <strong>Code</strong> 11 Check DigitsParameter # 2FhThis feature selects whether or not to transmit the <strong>Code</strong> 11 check digit(s).Transmit <strong>Code</strong> 11 Check Digit(s)(Enable)< Do Not Transmit <strong>Code</strong>11 CheckDigit(s) (Disable) >Note: <strong>Code</strong> 11 Check Digit Verification must be enabled for this parameter tofunction.99
INTERLEAVED 2 OF 5 (ITF)Enable/Disable Interleaved 2 of 5To enable or disable Interleaved 2 of 5, scan the appropriate bar code below,and select an Interleaved 2 of 5 length from the following pages.< Enable Interleaved 2 of 5 >Disable Interleaved 2 of 5Set Lengths for Interleaved 2 of 5The length of a code refers to the number of characters (i.e., human readablecharacters), including check digit(s) the code contains. Set lengths for I 2 of 5to any length, one or two discrete lengths, or lengths within a specific range.• One Discrete Length - Select this option to decode only I 2 of 5symbols containing a selected length. Select the length using thenumeric bar codes in Appendix D, Numeric <strong>Bar</strong> <strong>Code</strong>s. Forexample, to decode only I 2 of 5 symbols with 14 characters, scan I2 of 5 - One Discrete Length, then scan 1 followed by 4. To correctan error or to change the selection, scan Cancel barcode.• Two Discrete Lengths - Select this option to decode only I 2 of 5symbols containing either of two selected lengths. Select lengthsusing the numeric bar codes in Appendix D, Numeric <strong>Bar</strong> <strong>Code</strong>s.For example, to decode only those I 2 of 5 symbols containingeither 2 or 14 characters, select I 2 of 5 - Two Discrete Lengths,then scan 0, 2, 1, and then 4. To correct an error or to change theselection, scan Cancel barcode.100
first scan I 2 of 5 - Length Within Range. Then scan 0, 4, 1, and 2(single digit numbers must always be preceded by a leading zero).To correct an error or change the selection, scan Cancel barcode.• Any Length - Scan this option to decode I 2 of 5 symbols containingany number of characters within the decoder capability.Note: Due to the construction of the I 2 of 5 symbology, it is possible for a scanline covering only a portion of the code to be interpreted as a complete scan,yielding less data than is encoded in the bar code. To prevent this, selectspecific lengths (I 2 of 5 - One Discrete Length - Two Discrete Lengths) for I 2of 5 applications.I 2 of 5 - One Discrete LengthI 2 of 5 - Two Discrete LengthsI 2 of 5 - Length Within RangeI 2 of 5 - Any Length101
I 2 of 5 Check Digit VerificationWhen this feature is enabled, the decoder checks the integrity of all I 2 of5 symbols to verify the data complies with either the specified UniformSymbology Specification (USS), or the Optical Product <strong>Code</strong> Council (OPCC)check digit algorithm.< Disable >USS Check DigitOPCC Check DigitTransmit I 2 of 5 Check DigitScan the appropriate bar code below to transmit I 2 of 5 data with or withoutthe check digit.Transmit I 2 of 5 CheckDigit(Enable)< Do Not Transmit I 2 of 5 CheckDigit (Disable) >102
Convert I 2 of 5 to EAN-13Enable this parameter to convert 14-character I 2 of 5 codes to EAN-13, andtransmit to the host as EAN-13. To accomplish this, the I 2 of 5 code must beenabled, and the code must have a leading zero and a valid EAN-13 checkdigit.Convert I 2 of 5 to EAN-13 (Enable)< Do Not Convert I 2 of 5 to EAN-13 >(Disable)103
DISCRETE 2 OF 5 (DTF)Enable/Disable Discrete 2 of 5To enable or disable Discrete 2 of 5, scan the appropriate bar code below.Enable Discrete 2 of 5< Disable Discrete 2 of 5 >Set Lengths for Discrete 2 of 5The length of a code refers to the number of characters (i.e., human readablecharacters), including check digit(s) the code contains. Set lengths for D 2 of 5to any length, one or two discrete lengths, or lengths within a specific range.• One Discrete Length - Select this option to decode only D 2 of 5symbols containing a selected length. Select the length using thenumeric bar codes in Appendix D, Numeric <strong>Bar</strong> <strong>Code</strong>s. Forexample, to decode only D 2 of 5 symbols with 14 characters, scanD 2 of 5 - One Discrete Length, and then scan 1 followed by 4. Tocorrect an error or to change the selection, scan Cancel barcode.• Two Discrete Lengths - Select this option to decode only D 2 of 5symbols containing either of two selected lengths. Select lengthsusing the numeric bar codes in Appendix D, Numeric <strong>Bar</strong> <strong>Code</strong>s.For example, to decode only those D 2 of 5 symbols containingeither 2 or 14 characters, select D 2 of 5 - Two Discrete Lengths,then scan 0, 2, 1, and then 4. To correct an error or to change theselection, scan Cancel barcode.• Length Within Range - Select this option to decode a D 2 of 5symbol with a specific length range. Select lengths using numericbar codes in Appendix D, Numeric <strong>Bar</strong> <strong>Code</strong>s. For example, todecode D 2 of 5 symbols containing between 4 and 12 characters,first scan D 2 of 5 - Length Within Range. Then scan 0, 4, 1, and 2(single digit numbers must always be preceded by a leading zero).104
To correct an error or change the selection, scan Cancel barcode.• Any Length - Scan this option to decode D 2 of 5 symbolscontaining any number of characters within the decoder capability.Note: Due to the construction of the D 2 of 5 symbology, it is possible for a scanline covering only a portion of the code to be interpreted as a complete scan,yielding less data than is encoded in the bar code. To prevent this, selectspecific lengths (D 2 of 5 - One Discrete Length - Two Discrete Lengths) for D 2of 5 applications.D 2 of 5 -One Discrete LengthD 2 of 5 -Two Discrete LengthsD 2 of 5 – Lengths Within RangeD 2 of 5 -Any Length105
CODABAR (NW - 7)Enable/Disable CodabarTo enable or disable Codabar, scan the appropriate bar code below.Enable Codabar< Disable Codabar >Set Lengths for CodabarThe length of a code refers to the number of characters (i.e., human readablecharacters), including check digit(s) the code contains. Set lengths for Codabarto any length, one or two discrete lengths, or lengths within a specific range.• One Discrete Length - Select this option to decode only Codabarsymbols containing a selected length. Select the length using thenumeric bar codes in Appendix D, Numeric <strong>Bar</strong> <strong>Code</strong>s. Forexample, to decode only Codabar symbols with 14 characters,scan Codabar - One Discrete Length, then scan 1 followed by 4. Tocorrect an error or to change the selection, scan Cancel barcode.• Two Discrete Lengths - Select this option to decode only Codabarsymbols containing either of two selected lengths. Select lengthsusing the numeric bar codes in Appendix D, Numeric <strong>Bar</strong> <strong>Code</strong>s.For example, to decode only Codabar symbols containing either 2or 14 characters, select Codabar - Two Discrete Lengths, thenscan 0, 2, 1, and then 4. To correct an error or to change theselection, scan Cancel barcode.106
first scan Codabar - Length Within Range. Then scan 0, 4, 1, and 2(single digit numbers must always be preceded by a leading zero).To correct an error or change the selection, scan Cancel barcode.• Any Length - Scan this option to decode Codabar symbolscontaining any number of characters within the decoder capability.Codabar - One Discrete LengthCodabar - Two Discrete LengthsCodabar - Length Within RangeCodabar - Any Length107
CLSI EditingWhen enabled, this parameter strips the start and stops characters and insertsa space after the first, fifth, and tenth characters of a 14-character Codabarsymbol. Enable this feature if the host system requires this data format.Note: Symbol length does not include start and stop characters.Enable CLSI Editing< Disable CLSI Editing >NOTIS EditingWhen enabled, this parameter strips the start and stop characters from adecoded Codabar symbol. Enable this feature if the host system requires thisdata format.Enable NOTIS Editing< Disable NOTIS Editing >108
MSIEnable/Disable MSITo enable or disable MSI, scan the appropriate bar code below.Enable MSI< Disable MSI >Set Lengths for MSIThe length of a code refers to the number of characters (i.e., human readablecharacters), including check digit(s) the code contains. Set lengths for MSI toany length, one or two discrete lengths, or lengths within a specific range.• One Discrete Length - Select this option to decode only MSIsymbols containing a selected length. Select the length using thenumeric bar codes in Appendix D, Numeric <strong>Bar</strong> <strong>Code</strong>s. Forexample, to decode only MSI symbols with 14 characters, scanMSI - One Discrete Length, then scan 1 followed by 4. To correctan error or to change the selection, scan Cancel barcode.• Two Discrete Lengths - Select this option to decode only MSIsymbols containing either of two selected lengths. Select lengthsusing the numeric bar codes in Appendix D, Numeric <strong>Bar</strong> <strong>Code</strong>s.For example, to decode only MSI symbols containing either 2 or 14characters, select MSI - Two Discrete Lengths, then scan 0, 2, 1,and then 4. To correct an error or to change the selection, scanCancel barcode.• Length Within Range - Select this option to decode a MSI symbolwith a specific length range. Select lengths using numeric barcodes in Appendix D, Numeric <strong>Bar</strong> <strong>Code</strong>s. For example, to decodeMSI symbols containing between 4 and 12 characters, first scanMSI - Length Within Range. Then scan 0, 4, 1, and 2 (single digitnumbers must always be preceded by a leading zero). To correct109
• Any Length - Scan this option to decode MSI symbols containingany number of characters within the decoder capability.Note: Due to the construction of the MSI symbology, it is possible for a scanline covering only a portion of the code to be interpreted as a complete scan,yielding less data than is encoded in the bar code. To prevent this, selectspecific lengths (MSI - One Discrete Length - Two Discrete Lengths) for MSIapplications.MSI - One Discrete LengthMSI - Two Discrete LengthsMSI - Length Within RangeMSI - Any Length110
MSI Check DigitsWith MSI symbols, one check digit is mandatory and always verified by thereader. The second check digit is optional. If the MSI codes include two checkdigits, scan the Two MSI Check Digits bar code to enable verification of thesecond check digit.See MSI Check Digit Algorithm for the selection of second digit algorithms.< One MSI Check Digits >Two MSI Check DigitsTransmit MSI Check Digit(s)Parameter # 2EhScan a bar code below to transmit MSI data with or without the check digit.Transmit MSI Check Digit(s)(Enable)< Do Not Transmit MSI CheckDigit(s) (Disable) >111
MSI Check Digit AlgorithmTwo algorithms are possible for the verification of the second MSI check digit.Select the bar code below corresponding to the algorithm used to encode thecheck digit.MOD 10/MOD 11< MOD 10/MOD 10 >112
POSTAL CODESUS PostnetTo enable or disable US Postnet, scan the appropriate bar code below.< Enable US Postnet >Disable US PostnetUS PlanetTo enable or disable US Planet, scan the appropriate bar code below.< Enable US Planet >Disable US Planet113
UK PostalTo enable or disable UK Postal, scan the appropriate bar code below.< Enable UK Postal >Transmit UK Postal Check DigitSelect whether to transmit UK Postal data with or without the check digit.< Transmit UK Postal Check Digit >Do Not Transmit UK Postal Check Digit114
Japan PostalTo enable or disable Japan Postal, scan the appropriate bar code below.Enable Japan PostalAustralian PostalTo enable or disable Australia Postal, scan the appropriate barcode below.Enable Australian Postal115
Transmit US Postal Check DigitSelect whether to transmit US Postal data with or without the check digit.Do not Transmit US Postal CheckDigit116
GS1 DATABARGS1 Data<strong>Bar</strong> types include• GS1 Data<strong>Bar</strong> Omnidirectional• GS1 Data<strong>Bar</strong> Truncated• GS1 Data<strong>Bar</strong> Stacked• GS1 Data<strong>Bar</strong> Stacked Omnidirectional• GS1 Data<strong>Bar</strong> Limited• GS1 Data<strong>Bar</strong> Expanded• GS1 Data<strong>Bar</strong> Expanded StackedScan the appropriate bar codes to enable or disable each type of GS1Data<strong>Bar</strong>.GS1 Data<strong>Bar</strong>Scan the appropriate bar code below to enable or disable the following codetypes:• GS1 Data<strong>Bar</strong> Omnidirectional• GS1 Data<strong>Bar</strong> Truncated• GS1 Data<strong>Bar</strong> Stacked• GS1 Data<strong>Bar</strong> Stacked Omnidirectional,Disable GS1 Data<strong>Bar</strong>117
GS1 Data<strong>Bar</strong> LimitedEnable GS1 Data<strong>Bar</strong> Limited118
GS1 Data<strong>Bar</strong> Limited Security LevelThe decoder offers four levels of decode security for GS1 Data<strong>Bar</strong> Limitedbar codes. There is an inverserelationship between security and decoder aggressiveness. Increasing thelevel of security may result inreduced aggressiveness in scanning, so only choose the level of securitynecessary.• Level 1 – No clear margin required. This complies with the original GS1standard, yet might result in erroneous decoding of the Data<strong>Bar</strong> Limitedbar code when scanning some UPC symbols that start with the digits “9”and “7”.• Level 2 – Automatic risk detection. This level of security may result inerroneous decoding of Data<strong>Bar</strong> Limited bar codes when scanning someUPC symbols. If a misdecode is detected, the decoder operates in Level3 or Level 1.• Level 3 – Security level reflects newly proposed GS1 standard thatrequires a 5X trailing clear margin.• Level 4 – Security level extends beyond the standard required by GS1.This level of security requires a 5X leading and trailing clear margin.Security Level 1Security Level 2Security Level 4119
GS1 Data<strong>Bar</strong> ExpandedScan the appropriate bar code below to enable or disable the following codetypes:• GS1 Data<strong>Bar</strong> Expanded• GS1 Data<strong>Bar</strong> Expanded Stacked.Disable GS1 Data<strong>Bar</strong> Expaneded120
Convert GS1 Data<strong>Bar</strong> to UPC/EANThis parameter only applies to GS1 Data<strong>Bar</strong> and GS1 Data<strong>Bar</strong> Limitedsymbols not decoded as part of a Composite symbol. Enable this to strip theleading '010' from Data<strong>Bar</strong> and Data<strong>Bar</strong> Limited symbols encoding a singlezero as the first digit, and report the bar code as EAN-13.For bar codes beginning with two or more zeros but not six zeros, thisparameter strips the leading '0100' and reports the bar code as UPC-A. TheUPC-A Preamble parameter that transmits the system character and countrycode applies to converted bar codes. Note that neither the system characternor the check digit can be stripped.Enable Convert GS1 Data<strong>Bar</strong> to UPC/EAN121
COMPOSITEComposite CC-CScan a bar code below to enable or disable Composite bar codes of typeCC-C.Enable CC-C< Disable CC-C >Composite CC-A/BScan a bar code below to enable or disable Composite bar codes of typeCC-A/B.Enable CC-A/B< Disable CC-A/B >122
Composite TLC-39Scan a bar code below to enable or disable Composite bar codes of typeTLC-39.Enable TLC39< Disable TLC39 >123
UPC Composite ModeUPC symbols can be “linked” with a 2D symbol during transmission as if theywere one symbol. There are three options for these symbols:• Select UPC Never Linked to transmit UPC bar codes regardless ofwhether a 2D symbol is detected.• Select UPC Always Linked to transmit UPC bar codes and the 2Dportion. If 2D is not present, the UPC bar code does not transmit.• If Auto discriminate UPC Composites is selected, the devicedetermines if there is a 2D portion, and then transmits the UPC, aswell as the 2D portion if present.UPC Never Linked< UPC Always Linked >Auto discriminate UPC Composites124
Composite Beep ModeTo select the number of decode beeps when a composite bar code is decoded,scan the appropriate bar code.Single Beep after both are decoded< Beep as each code type is decoded >Double Beep after both are decoded125
UCC/EAN <strong>Code</strong> 128 Emulation Mode for UCC/EAN Composite <strong>Code</strong>sSelect whether to enable or disable this mode.Enable UCC/EAN <strong>Code</strong> 128Emulation Mode forUCC/EAN Composite <strong>Code</strong>s< Disable UCC/EAN <strong>Code</strong> 128Emulation Mode forUCC/EAN Composite <strong>Code</strong>s >126
2D SYMBOLOGIESPDF417Enable/Disable PDF417To enable or disable PDF417, scan the appropriate bar code below.< Enable PDF417 >Disable PDF417MICROPDF417Enable/Disable MicroPDF417To enable or disable MicroPDF417, scan the appropriate bar code below.Enable MicroPDF417< Disable MicroPDF417 >127
<strong>Code</strong> 128 EmulationWhen this parameter is enabled, the device transmits data from certainMicroPDF417 symbols as if it was encoded in <strong>Code</strong> 128 symbols. TransmitAIM Symbology Identifiers must be enabled for this parameter to work. If <strong>Code</strong>128 Emulation is enabled, these MicroPDF417 symbols are transmitted withone of the following prefixes:]C1 if the first codeword is 903-907, 912, 914, 915]C2 if the first codeword is 908 or 909]C0 if the first codeword is 910 or 911If disabled, they are transmitted with one of the following prefixes:]L3 if the first codeword is 903-907, 912, 914, 915]L4 if the first codeword is 908 or 909]L5 if the first codeword is 910 or 911Scan a bar code below to enable or disable <strong>Code</strong> 128 Emulation.Enable <strong>Code</strong> 128 Emulation< Disable <strong>Code</strong> 128 Emulation >128
DATA MATRIXTo enable or disable Data Matrix, scan the appropriate barcode below.< Enable Data Matrix >Disable Data MatrixMAXICODETo enable or disable Maxicode, scan the appropriate bar code below.< Enable Maxicode >Disable Maxicode129
QR CODETo enable or disable QR <strong>Code</strong>, scan the appropriate bar code below.< Enable QR <strong>Code</strong> >Disable QR <strong>Code</strong>REDUNDANCY LEVELThe decoder offers four levels of decodes redundancy. Select higherredundancy levels for decreasing levels of bar code quality. As redundancylevels increase, the decoder’s aggressiveness decreases.Select the redundancy level appropriate for the bar code quality.Redundancy Level 1The following code types must be successfully read twice before beingdecoded:CodabarMSID 2 of 5I 2 of 5<strong>Code</strong> Type<strong>Code</strong> TypeAll<strong>Code</strong> Length8 characters or less4 characters or less8 characters or less8 characters or lessRedundancy Level 2The following code types must be successfully read twice before beingdecoded:<strong>Code</strong> LengthAll130
Redundancy Level 3<strong>Code</strong> types other than the following must be successfully read twice beforebeing decoded. The following codes must be read three times:<strong>Code</strong> TypeMSI PlesseyD 2 of 5I 2 of 5Codabar<strong>Code</strong> Length4 characters or less8 characters or less8 characters or less8 characters or lessRedundancy Level 4The following code types must be successfully read three times before beingdecoded:<strong>Code</strong> TypeAll<strong>Code</strong> LengthAll< Redundancy Level 1 >Redundancy Level 2Redundancy Level 3Redundancy Level 4131
SECURITY LEVELThe decoder offers four levels of decode security for delta bar codes, whichinclude the <strong>Code</strong> 128 family, UPC/EAN, and <strong>Code</strong> 93. Select increasinglevels of security for decreasing levels of bar code quality. There is an inverserelationship between security and decoder aggressiveness, so choose onlythat level of security necessary for any given application.• Security Level 0: This setting allows the decoder to operate in itsmost aggressive state, while providing sufficient security indecoding most “in-spec” bar codes.• Security Level 1: Select this option if misdecodes occur. Thisdefault setting should eliminate most misdecodes.• Security Level 2: Select this option if Security level 1 fails toeliminate misdecodes.• Security Level 3: If Security Level 2 was selected and misdecodesstill occur, select this security level. Be advised, selecting thisoption is an extreme measure against miss-decoding severely outof spec bar codes. Selecting this level of security significantlyimpairs the decoding ability of the decoder. If this level of security isnecessary, try to improve the quality of the bar codes.Security Level 0< Security Level 1 >Security Level 2Security Level 3132
INTERCHARACTER GAP SIZEThe <strong>Code</strong> 39 and Codabar symbologies have an intercharacter gap that istypically quite small. Due to various bar code-printing technologies, this gapcan grow larger than the maximum size allowed, preventing the decoder fromdecoding the symbol. If this problem occurs, scan the Large IntercharacterGaps parameter to tolerate these out-of-specification bar codes.< Normal Intercharacter Gaps >Large Intercharacter GapsReport VersionScan the bar code below to report the version of software currently installed inthe decoder.Report Software Version133
MACRO PDF FEATURESMacro PDF is a special feature for concatenating multiple PDF symbols intoone file. The decoder can decode symbols that are encoded with this feature,and can store more than 64 kb of decoded data stored in up to 50 Macro PDFsymbols.Caution: When printing, keep each Macro PDF sequence separate, as eachsequence has unique identifiers. Do not mix bar codes from several MacroPDF sequences, even if they encode the same data. When scanning MacroPDF sequences, scan the entire Macro PDF sequence without interruption.Macro PDF User IndicationsIn this mode the decoder provides the following feedback.User ScansMacro PDF User IndicationsPass throughAll SymbolsTransmit AnySymbol in SetBuffer AllSymbolsBeep T Beep T Beep TLast Macro PDF in setAny Macro PDF in set except lastMacro PDF is not in current SetInvalid formatted Macro PDFMacro PDF from a set has alreadybeen scannedOut of Macro PDF memoryDecodeBeepDecodeBeepDecodeBeepDecodeBeepDecodeBeepN/AY DecodeBeepY DecodeBeepY 2 LongLowY 2 LongLowY 4 LongLow3 Long-Low4 Long-LowAny non-Macro PDF scanned N/Aduring a setFlush Macro PDF Low Hi N 5 LongAbort Macro PDFLowHigh N HighLowLowHighHighLowLowYYNNNNNDecodeBeep2 ShortLow2 LongLow2 LongLow4 LongLow3 LongLow4 LongLow5 LongLowHigh LowHigh LowNotes:1. The beep only sounds if the *BEEPER_ON signal is connected.2. The column marked T indicates whether the symbol is transmitted to the host. N = Notransmission.NNYNNNNNNYN134
Macro PDF Transmit / Decode Mode SymbolsSelect one of the options below for handling Macro PDF decoding. In BufferAll Symbols the decoder can handle sets of up to 50 maximum-sized MacroPDF symbols. In all other modes there is no limit to the size of the MacroPDF set.• Buffer All Symbols / Transmit Macro PDF When Complete: Thistransmits all decode data from an entire Macro PDF sequence onlywhen the entire sequence is scanned and decoded. Use the beeperand LED signals when using this mode to ensure proper userfeedback.• If the decode data exceeds the limit of 50 symbols, there is notransmission because the entire sequence was not scanned. Usethe parameter Flush Macro Buffer to purge the buffer.• Transmit Any Symbol in Set / No Particular Order: This transmitsdata from each Macro PDF symbol as decoded, regardless of thesequence (although some error handling is performed). Whenselecting this mode, enable Transmit Macro PDF Control Header.Also use the beeper and LED signals provided to ensure properuser feedback.• Pass through All Symbols: This transmits and decodes all MacroPDF symbols and performs no processing. In this mode the host isresponsible for detecting and parsing the Macro PDF sequences.Use this mode when the decoder’s BEEPER_ON signal is not usedto drive a beeper. In the other modes, some Macro PDF scanningsequences provide audible feedback only, so if BEEPER_ON is notused no user feedback is provided. All actions marked NoTransmission provide no feedback unless the BEEPER_ON signalis used. By using Pass through All Symbols mode every userdecode is transmitted to the host where the host software canprovide the appropriate feedback.Buffer All Symbols / Transmit MacroPDF When Complete135
Transmit Any Symbol in Set / NoParticular Order< Pass through All Symbols >Transmit Macro PDF Control HeaderWhen enabled, this activates transmission of the control header, whichcontains the segment index and the file ID, in Macro PDF symbols. Forexample, the field may be: \92800000\725\120\343. The five digits after the\928 are the segment index (or block index), and \725\120\343 is the file ID.Enable this when selecting Transmit Any Symbol in Set / No Particular Orderfor the Macro PDF Transmit / Decode Mode Symbols, and disable this whenselecting Buffer All Symbols / Transmit Macro PDF When Complete. Thisparameter has no effect when Pass through All Symbols is selected.Enable Macro PDF Control HeaderTransmit< Disable Macro PDF Control HeaderTransmit >136
Escape CharactersThis enables the backslash (\) character as an Escape character for systemsthat can process transmissions containing special data sequences. Scan a barcode below to either format special data according to the GLI (Global LabelIdentifier) protocol, or to disable this parameter. This parameter only affects thedata portion of a Macro PDF symbol transmission; the Macro PDF ControlHeader (if enabled) is always sent with GLI formatting.GLI Protocol< None >Flush Macro BufferThis flushes the buffer of all decoded Macro PDF data stored to that point,transmits it to the host device, and aborts from Macro PDF mode.Flush Macro PDF BufferAbort Macro PDF EntryThis clears all currently-stored Macro PDF data in the buffer withouttransmission and aborts from Macro PDF mode.Abort Macro PDF Entry137
Chapter 8 Miscellaneous <strong>Scanner</strong> OptionsIntroductionThis chapter includes commonly used bar codes to customize how data istransmitted to the host device.See Appendix A, Standard Default Parameters for all host device andmiscellaneous scanner defaults. If the default values suit requirements,programming is not necessary.There are two ways to change a parameter value:• Scan the appropriate bar codes in this guide. These new valuesreplace the standard default values in memory.• For SSI and USB SNAPI hosts, send a “parameter send” commandfrom the host system. Hexadecimal parameter numbers are shownin this chapter below the parameter title, and options are shown inparenthesis beneath the accompanying bar codes.Note: Most computer monitors allow scanning the bar codes directly on thescreen. When scanning from the screen, is sure to set the documentmagnification to a level where the bar code can be seen clearly, and barsand/or spaces are not merging.To return all features to default values, scan the Set Default Parameter barcode. Throughout the programming bar code menus, default values areframed.Scanning Sequence ExamplesIn most cases, scan one bar code to set a specific parameter value. Otherparameters, such as Prefix Value, require scanning several bar codes. Seeeach parameter for descriptions of this procedure.Errors While ScanningUnless otherwise specified, to correct an error during a scanning sequence,just re-scan the correct parameter.138
Miscellaneous <strong>Scanner</strong> Parameter DefaultsTable below lists the defaults for miscellaneous scanner options parameters.To change any option, scan the appropriate barcode(s) provided in theMiscellaneous <strong>Scanner</strong> Parameter.Note: See Standard Default Parameters for all user preferences, hosts,symbologies, and miscellaneous default parameters.Miscellaneous <strong>Scanner</strong> Options Default TableParameterTransmit <strong>Code</strong> ID CharacterSSI Prefix ValueSSI Suffix 1 Value SSI Suffix 2ValueNon-SSI Prefix ValueNon-SSI Suffix 1 Value Non-SSISuffix 2 ValueScan Data Transmission FormatFN1 Substitution ValuesTransmit “No Read” MessageNoneDefault Data as isSetDisable139
Miscellaneous <strong>Scanner</strong> ParametersTRANSMIT CODE ID CHARACTERA <strong>Code</strong> ID character identifies the code type of a scanned bar code. This isuseful when the decoder is decoding more than one code type. In addition toany single character prefix already selected, the <strong>Code</strong> ID character is insertedbetween the prefix and the decoded symbol.Select no <strong>Code</strong> ID character, a Symbol <strong>Code</strong> ID character, or an AIM <strong>Code</strong>ID character. For <strong>Code</strong> ID Characters, see Symbol <strong>Code</strong> Identifiers and AIM<strong>Code</strong> Identifiers.Symbol <strong>Code</strong> ID CharacterAIM <strong>Code</strong> ID Character< None >140
PREFIX/SUFFIX VALUESA prefix and/or one or two suffixes can be appended to scan data for use indata editing. To set a value for a prefix or suffix, scan a prefix or suffix bar codebelow, then scan a four-digit number (i.e., four barcodes from Appendix D,Numeric <strong>Bar</strong> <strong>Code</strong>s) that corresponds to that value. To correct an error orchange a selection, scan Cancel barcode.Note: To use Prefix/Suffix values, first set the Scan Data Transmission Format.For non-SSI hosts, when using host commands to set the prefix or suffix, setthe key category parameter to 1, then set the 3-digit decimal value.Scan PrefixScan Suffix 1Scan Suffix 2141
SCAN DATA TRANSMISSION FORMATTo change the scan data format, scan one of the following eight bar codescorresponding to the desired format. If using this parameter do not use ADFrules to set the prefix/suffix.To set values for the prefix and/or suffix, see Prefix/Suffix Values.< Data As ls > 142
FN1 SUBSTITUTION VALUESThe Wedge and USB HID Keyboard hosts support a FN1 Substitution feature.When enabled any FN1 character (0x1b) in an EAN128 bar code is substitutedwith a value. This value defaults to 7013 (Enter Key).When using host commands to set the FN1 substitution value, set the keycategory parameter to 1, then set the 3-digit keystroke value. See the ASCIICharacter Set table for the currently installed host interface for the desiredvalue.To select a FN1 substitution value via bar code menus:1. Scan the bar code below.Set FN1 Substitution Value2. Look up the keystroke desired for FN1 Substitution in the ASCIICharacter Set table for the currently installed host interface. Enter the4-digit ASCII Value by scanning each digit in Appendix D, Numeric <strong>Bar</strong><strong>Code</strong>s.To correct an error or change the selection, scan Cancel. To enable FN1substitution for USB HID keyboard, scan the Enable FN1 Substitution barcode.143
TRANSMIT “NO READ” MESSAGEScan a bar code below to select whether or not to transmit a No Readmessage. When enabled, the characters NR are transmitted when a bar codeis not decoded. When disabled, if a symbol does not decode, nothing is sent tothe host.Enable No Read< Disable No Read >144
Chapter 9 Bluetooth ConfigurationThis Chapter is only adaptable for IG610BT and IG710BT.SCANNER MODE SELECTION< SPP Master Mode >Please follow the steps to setup the communication between the scanner andcradle.1) The scanner must scan “SPP Master Mode” barcode to set the scanner inmaster mode.2) Scan the Bluetooth MAC address code located on the bottom of the cradle.3) When the Bluetooth MAC address code was successfully scanned, scannerwill sound 3 short beeps with green LED flash once.4) Wait approximately five seconds for completing the connection process withup-tone.5) If successful, blue LED of scanner will slow flash and the cradle will becontinued on.SPP Slave ModePlease follow the below steps to setup the communication between the scannerand Bluetooth application device.1) The scanner must scan “SPP Slave Mode” barcode, to set the scanner inslave mode.2) When control the Bluetooth device to search the scanner, enter pin code(default 00:00:00) to setup comport.3) When scanner is successful connected, the scanner blue LED will also blinkwith up-tone. Blue LED will slowly flash to finish the setup.145
HID Slave ModeTo setup the communication between the scanner and Bluetooth HID profileapplication device, follow the steps.1) The scanner must scan “HID Slave Mode” barcode to set the scanner in HIDslave mode.2) When control the Bluetooth device to search the scanner, enter pin code tosetup pairing. You can scan number barcode on Appendix A, “Decimal ValueTable ” number 0~9, to setup.3) When scanner is successful connected, scanner blue LED will also blink withup-tone. Blue LED will slowly flash to finish the setup.146
OUT OF RANGEWhen “Out of Range” function is enabled, and the scanner is working at out oftransmission range, the scanned data will be stored to out-of-range memory.Memory size is approximately 30,000 sets of EAN13 barcode type. The all storeddata will be transmitted to device when the link is reconnected, and the all datastored in out-of-range memory will be cleared.Out of Range DisableSLEEP MODEThe scanner is equipped with sleep mode function to save battery energy whenthe scanner is not used for 1 minute or 10 minutes. During sleep mode, all thefunctions and connection will be halted until pressing the trigger button. Thecommunication with cradle or Bluetooth device will be reconnected.Sleep Mode 1 min. OnSleep Mode10 min. On147
BATCH MODE“***” means “Quick Setting Label”. The function can be executed directly byscanning barcode instead of doing the general programming process.Batch Mode On< Batch Mode Off >*** Batch Data Read*** Batch Data Clear***Delete Last Data148
FIRMWARE VERSION :Display the firmware version of the scanner, please scan below barcode.<strong>Scanner</strong> Firmware VersionCradle Firmware Version<strong>Scanner</strong> MAC AddressCradle MAC Address149
APPENDIX A : STANDARD DEFAULT PARAMETERSDefault ParametersTable A-1. Standard Default Parameters TableParameterDefaultUser PreferencesSet Default ParameterParameter ScanningBeeper ToneBeeper VolumeAll DefaultsEnableMediumHighTrigger ModesPower ModeHandheld/hands-free scannerScan moduleHandheld/hands-free scannerScan moduleLevelPresentationLow PowerContinuous OnTime Delay to Low Power ModeDecode Session TimeoutTimeout Between Decodes, Same SymbolBeep After Good DecodePresentation Mode Session Timeout1.0 Sec9.9 Sec0.6 SecEnable2 Seconds<strong>Imager</strong> PreferencesFocus ModeDecoding Auto exposureDecoding IlluminationFar FocusEnableEnable150
Decode Aiming PatternImage Capture Auto exposureImage Capture IlluminationEnableEnableEnableGain 100Exposure TimeLED IlluminationSnapshot Mode TimeoutSnapshot Aiming Pattern10 msInternal LEDIllumination0 (30 seconds)EnableImage CroppingDisableCrop to Pixel Addresses 0 top, 0 left, 479bottom, 639 rightImage ResolutionJPEG Image OptionsFullQualityJPEG Quality Value 65JPEG Size ValueImage File Format SelectionBits per Pixel (BPP)Signature CaptureSignature Capture Image File Format SelectionSignature Capture Bits per Pixel (BPP)40 (41K)JPEG8 BPPDisableJPEG8 BPPSignature Capture Width 400Signature Capture Height 100Signature Capture JPEG Quality 65Video View FinderDisable151
Target Video Frame SizeVideo View Finder Image Size2200 bytes1700 bytesEvent ReportingDecode EventBoot Up EventParameter EventDisableDisableDisableSerial Host ParametersSerial Host TypesSSI HostBaud Rate 9600Parity TypeStop Bit SelectData BitsCheck Receive ErrorsHardware HandshakingSoftware HandshakingHost Serial Response Time-outRTS Line StateBeep on Intercharacter DelayNixdorf Beep/LED OptionsIgnore Unknown CharactersUSB Host ParametersUSB Device TypeNone1 Stop Bit8-BitEnableNoneNone2 SecLow RTSDisable0 msecNormalOperationSend <strong>Bar</strong> <strong>Code</strong>HID KeyboardEmulation152
Symbol Native API (SNAPI) Status HandshakingUSB Country Keyboard Types (Country <strong>Code</strong>s)USB Keystroke DelayUSB CAPS Lock OverrideUSB Ignore Unknown CharactersEmulate KeypadUSB FN1 SubstitutionFunction Key MappingSimulated Caps LockConvert CaseEnableNorth AmericanNo DelayDisableEnableDisableDisableDisableDisableNoneUPC/EANUPC-AUPC-EUPC-E1EAN-8/JAN 8EAN-13/JAN 13Bookland EANDecode UPC/EAN/JAN Supplemental (2 and 5 digits)EnableEnableDisableEnableEnableDisableIgnoreUPC/EAN/JAN Supplemental Redundancy 10Transmit UPC-A Check DigitTransmit UPC-E Check DigitTransmit UPC-E1 Check DigitUPC-A PreambleEnableEnableEnableSystemCharacter153
UPC-E PreambleUPC-E1 PreambleConvert UPC-E to AConvert UPC-E1 to AEAN-8/JAN-8 ExtendUCC Coupon Extended <strong>Code</strong>SystemCharacterSystemCharacterDisableDisableDisableDisable<strong>Code</strong> 128<strong>Code</strong> 128UCC/EAN-128ISBT 128EnableEnableEnable<strong>Code</strong> 39<strong>Code</strong> 39Trioptic <strong>Code</strong> 39Convert <strong>Code</strong> 39 to <strong>Code</strong> 32 (Italian Pharmacy <strong>Code</strong>)<strong>Code</strong> 32 PrefixEnableDisableDisableDisableSet Length(s) for <strong>Code</strong> 39 2 to 55<strong>Code</strong> 39 Check Digit VerificationTransmit <strong>Code</strong> 39 Check Digit<strong>Code</strong> 39 Full ASCII ConversionBuffer <strong>Code</strong> 39DisableDisableDisableDisable<strong>Code</strong> 93<strong>Code</strong> 93DisableSet Length(s) for <strong>Code</strong> 93 4 to 55154
<strong>Code</strong> 11<strong>Code</strong> 11DisableSet Lengths for <strong>Code</strong> 11 4 to 55<strong>Code</strong> 11 Check Digit VerificationTransmit <strong>Code</strong> 11 Check Digit(s)DisableDisableInterleaved 2 of 5 (ITF)Interleaved 2 of 5 (ITF)EnableSet Lengths for I 2 of 5 14I 2 of 5 Check Digit VerificationTransmit I 2 of 5 Check DigitConvert I 2 of 5 to EAN 13DisableDisableDisableDiscrete 2 of 5 (DTF)Discrete 2 of 5DisableSet Length(s) for D 2 of 5 12Codabar (NW - 7)CodabarDisableSet Lengths for Codabar 5 to 55CLSI EditingNOTIS EditingDisableDisableMSIMSIDisableSet Length(s) for MSI 4 to 55MSI Check DigitsOne155
Transmit MSI Check DigitDisableMSI Check Digit Algorithm Mod 10/Mod 10Postal <strong>Code</strong>sUS PostnetUS PlanetUK PostalTransmit UK Postal Check DigitJapan PostalAustralian PostalDutch PostalTransmit US Postal Check DigitEnableEnableEnableEnableEnableEnableEnableEnableRSS (Reduced Space Symbology)RSS 14RSS LimitedRSS ExpandedConvert RSS to UPC/EANEnableEnableEnableDisableCompositeComposite CC-CComposite CC-A/BComposite TLC-39UPC Composite ModeComposite Beep ModeDisableDisableDisableAlways LinkedBeep As Each<strong>Code</strong> Type isDecoded156
UCC/EAN <strong>Code</strong> 128 Emulation Mode for UCC/EANComposite <strong>Code</strong>sDisable2D SymbologiesPDF417MicroPDF417<strong>Code</strong> 128 EmulationData MatrixMaxicodeQR <strong>Code</strong>EnableDisableDisableEnableEnableEnableSymbology-Specific Security LevelsRedundancy Level 1Security Level 1Intercharacter Gap SizeNormalReport VersionMacro PDFMacro PDF Transmit/Decode Mode SymbolsTransmit Macro PDF Control HeaderPass throughModeDisableEscape CharactersNoneFlush Macro PDF BufferPage 134Abort Macro PDF EntryPage 134Miscellaneous <strong>Scanner</strong> OptionsTransmit <strong>Code</strong> ID CharacterSSI Prefix ValueNone157
SSI Suffix 1 Value SSI Suffix 2 ValueNon-SSI Prefix ValueNon-SSI Suffix 1 Value Non-SSI Suffix 2 ValueScan Data Transmission FormatFN1 Substitution ValuesTransmit “No Read” Message Data as isSetDisable158
APPENDIX B : SYMBOL CODE IDENTIFIERS<strong>Code</strong> CharacterSymbol <strong>Code</strong> Characters<strong>Code</strong> TypeAUPC-A, UPC-E, UPC-E1, EAN-8, EAN-13B <strong>Code</strong> 39, <strong>Code</strong> 32CCodabarD <strong>Code</strong> 128E <strong>Code</strong> 93F Interleaved 2 of 5GDiscrete 2 of 5, or Discrete 2 of 5 IATAH <strong>Code</strong> 11JKLMSIUCC/EAN-128Bookland EANM Trioptic <strong>Code</strong> 39NRCoupon <strong>Code</strong>RSS FamilyT UCC Composite, TLC 39XP00P01P02PDF417, Macro PDF417, Micro PDF417Data MatrixQR <strong>Code</strong>Maxicode159
P03P04P05P06P08P09P09US PostnetUS PlanetJapan PostalUK PostalDutch PostalAustralian PostalUK Postal160
AIM <strong>Code</strong> IdentifiersEach AIM <strong>Code</strong> Identifier contains the three-character string ]cm where:] = Flag Character (ASCII 93)c = <strong>Code</strong> Characterm = Modifier Character<strong>Code</strong> CharacterAim <strong>Code</strong> Characters<strong>Code</strong> TypeA <strong>Code</strong> 39, <strong>Code</strong> 39 Full ASCII, <strong>Code</strong> 32CdEeF<strong>Code</strong> 128, Coupon (<strong>Code</strong> 128 portion)Data MatrixUPC/EAN, Coupon (UPC portion)RSS FamilyCodabarG <strong>Code</strong> 93H <strong>Code</strong> 11I Interleaved 2 of 5LMQPDF417, Macro PDF417, Micro PDF417MSIQR <strong>Code</strong>S Discrete 2 of 5, IATA 2 of 5UXMaxicodeBookland EAN, Trioptic <strong>Code</strong> 39, USPostnet, US Planet, UK Postal, JapanPostal, Australian Postal, Dutch Postal161
The modifier character is the sum of the applicable option values based onTable B-3.Modifier CharactersOption<strong>Code</strong> TypeOptionValue0 No check character or Full ASCII processing.<strong>Code</strong> 39Trioptic <strong>Code</strong>39<strong>Code</strong> 128I 2 of 5Codabar1 Reader has checked one check character.Reader has checked and stripped check3character.Reader has performed Full ASCII character4conversion.Reader has performed Full ASCII character5conversion and checked one check character.Reader has performed Full ASCII character7 conversion and checked and stripped checkcharacter.Example: A Full ASCII bar code with check character W,A+I+MI+DW, is transmitted as ]A7AIMID where 7 = (3+4).0 No option specified at this time. Always transmit 0.Example: A Trioptic bar code 412356 is transmittedas ]X0412356Standard data packet, no Function code 1 in first0symbol position.1 Function code 1 in first symbol character position.Function code 1 in second symbol character2position.Example: A <strong>Code</strong> (EAN) 128 bar code with Function 1character FNC1 in the first position, AIMID is transmittedas ]C1AIMID0 No check digit processing.1 Reader has validated check digit.3 Reader has validated and stripped check digit.Example: An I 2 of 5 bar code without check digit, 4123, istransmitted as ]I041230 No check digit processing.1 Reader has checked check digit.Reader has stripped check digit before3transmission.Example: A Codabar bar code without check digit, 4123, is162
<strong>Code</strong> 93MSID 2 of 5UPC/EANBookland EAN<strong>Code</strong> 11RSS Familytransmitted as ]F04123No options specified at this time. Always transmit00.Example: A <strong>Code</strong> 93 bar code 012345678905 is transmittedas ]G00123456789050 Check digits are sent.1 No check digit is sent.Example: An MSI bar code 4123, with a single check digitchecked, is transmitted as ]M14123No options specified at this time. Always transmit00.Example: A D 2 of 5 bar code 4123, is transmittedas ]S041230 Standard packet in full EAN country code format,which is 13 digits for UPC-A and UPC-E (notincluding supplemental data).1 Two-digit supplement data only.2 Five-digit supplement data only.4 EAN-8 data packet.Example: A UPC-A bar code 012345678905 is transmittedas ]E00012345678905No options specified at this time. Always transmit00.Example: A Bookland EAN bar code 123456789X istransmitted as ]X0123456789X0 Single check digit1 Two check digits3 Check characters validated but not transmitted.No option specified at this time. Always transmit 0.RSS-14 and RSS-Limited transmit with anApplication Identifier “01”. Note: In UCC/EAN-128emulation mode, RSS is transmitted using <strong>Code</strong>128 rules (i.e., ]C1).Example: An RSS-14 bar code 100123456788902 istransmitted as ]e001100123456788902.Native mode transmission. Note: UPC portion ofcomposite is transmitted using UPC rules.0 Standard data packet.163
EAN.UCCComposites(RSS,UCC/EAN-128,2D portion ofUPCcomposite)PDF417, MicroPDF417Data MatrixData packet containing the data following an1encoded symbol separator character.2 Data packet containing the data following anescape mechanism character. The data packetdoes not support the ECI protocol.3 Data packet containing the data following anescape mechanism character. The data packetsupports the ECI protocol.UCC/EAN-128 emulation Note: UPC portion ofcomposite is transmitted using UPC rules.Data packet is a UCC/EAN-128 symbol (i.e., data1is preceded with ]JC1).0 Reader set to conform to protocol defined in 1994PDF417 symbology specifications. Note: Whenthis option is transmitted, the receiver cannotreliably determine whether ECIs have beeninvoked or whether data byte 92DEC has beendoubled in transmission.1 Reader set to follow the ECI protocol (ExtendedChannel Interpretation). All data characters92DEC are doubled.2 Reader set for Basic Channel operation (noescape character transmission protocol). Datacharacters 92DEC are not doubled. Note: Whendecoders are set to this mode, unbuffered Macrosymbols and symbols requiring the decoder toconvey ECI escape sequences cannot betransmitted.The bar code contains a UCC/EAN-128 symbol,3and the first codeword is 903-907, 912, 914, 915.The bar code contains a UCC/EAN-128 symbol,45and the first codeword is in the range 908-909.The bar code contains a UCC/EAN-128 symbol,and the first codeword is in the range 910-911.Example: A PDF417 bar code ABCD, with no transmissionprotocol enabled, is transmitted as ]L2ABCD.0 ECC 000-140, not supported.1 ECC 200.2 ECC 200, FNC1 in first or fifth position.3 ECC 200, FNC1 in second or sixth position.164
Maxi<strong>Code</strong>QR <strong>Code</strong>4 ECC 200, ECI protocol implemented.ECC 200, FNC1 in first or fifth position, ECI5protocol implemented.ECC 200, FNC1 in second or sixth position, ECI6protocol implemented.0 Symbol in Mode 4 or 5.1 Symbol in Mode 2 or 3.Symbol in Mode 4 or 5, ECI protocol2implemented.Symbol in Mode 2 or 3, ECI protocol implemented3in secondary message.0 Model 1 symbol.1 Model 2 symbol, ECI protocol not implemented.2 Model 2 symbol, ECI protocol implemented.3456Model 2 symbol, ECI protocol not implemented,FNC1 implied in first position.Model 2 symbol, ECI protocol implemented, FNC1implied in first position.Model 2 symbol, ECI protocol not implemented,FNC1 implied in second position.Model 2 symbol, ECI protocol implemented, FNC1implied in second position.165
APPENDIX C : ASCII CHARACTER SETASCII ValueASCII Value TableFull ASCII <strong>Code</strong> 39Encode CharKeystroke1000 %U CTRL 21001 $A CTRL A1002 $B CTRL B1003 $C CTRL C1004 $D CTRL D1005 $E CTRL E1006 $F CTRL F1007 $G CTRL GCTRL1008 $HH/BACKSPACE 1CTRL1009 $II/HORIZONTALTAB 11010 $J CTRL J1011 $K CTRL K1012 $L CTRL L1013 $MCTRL M/ENTER 11014 $N CTRL N1015 $O CTRL O1016 $P CTRL P1017 $Q CTRL Q166
1018 $R CTRL R1019 $S CTRL S1020 $T CTRL T1021 $U CTRL U1022 $V CTRL V1023 $W CTRL W1024 $X CTRL X1025 $Y CTRL Y1026 $Z CTRL Z1027 %A CTRL [1028 %B CTRL \1029 %C CTRL ]1030 %D CTRL 61031 %E CTRL1032 Space Space1033 /A !1034 /B “1035 /C #1036 /D $1037 /E %1038 /F &1039 /G ‘1040 /H (167
1041 /I )1042 /J *1043 /K +1044 /L ,1045 - -1046 . .1047 /o /1048 0 01049 1 11050 2 21051 3 31052 4 41053 5 51054 6 61055 7 71056 8 81057 9 91058 /Z :1059 %F ;1060 %G 1063 %J ?168
1064 %V @1065 A A1066 B B1067 C C1068 D D1069 E E1070 F F1071 G G1072 H H1073 I I1074 J J1075 K K1076 L L1077 M M1078 N N1079 O O1080 P P1081 Q Q1082 R R1083 S S1084 T T1085 U U1086 V V169
1087 W W1088 X X1089 Y Y1090 Z Z1091 %K [1092 %L \1093 %M ]1094 %N ^1095 %O_1096 %W ‘1097 +A a1098 +B b1099 +C c1100 +D d11 +E e11 +F f11 +G g11 +H h11 +I i1106 +J j1107 +K k1108 +L l1109 +M m170
1110 +N n1111 +O o1112 +P p1113 +Q q1114 +R r1115 +S s1116 +T t1117 +U u1118 +V v1119 +W w1120 +X x1121 +Y y1122 +Z z1123 %P {1124 %Q I1125 %R }1126 %S ~The keystroke in bold is sent only if the Function KeyMapping is enabled. Otherwise, the unbold keystroke is sent.171
ALT Key Standard Default TablesALT KeysKeystroke2064 ALT 22065 ALT A2066 ALT B2067 ALT C2068 ALT D2069 ALT E2070 ALT F2071 ALT G2072 ALT H2073 ALT I2074 ALT J2075 ALT K2076 ALT L2077 ALT M2078 ALT N2079 ALT O2080 ALT P2081 ALT Q2082 ALT R2083 ALT S2084 ALT T2085 ALT U2086 ALT V2087 ALT W2088 ALT X2089 ALT Y2090 ALT Z172
USB GUI Key Character SetGUI KeyKeystroke3000 Right Control Key3048 GUI 03049 GUI 13050 GUI 23051 GUI 33052 GUI 43053 GUI 53054 GUI 63055 GUI 73056 GUI 83057 GUI 93065 GUI A3066 GUI B3067 GUI C3068 GUI D3069 GUI E3070 GUI F3071 GUI G3072 GUI H3073 GUI I3074 GUI J3075 GUI K3076 GUI L3077 GUI M3078 GUI N3079 GUI O3080 GUI P173
3081 GUI Q3082 GUI R3083 GUI S3084 GUI T3085 GUI U3086 GUI V3087 GUI W3088 GUI X3089 GUI Y3090 GUI ZNote: GUI Shift Keys - The Apple iMac keyboard hasan apple key on either side of the space bar.Windows-based systems have a GUI key to the left of theleft ALT key, and to the right of the right ALT key.174
PF Key Standard Default TablePF KeysKeystroke40 PF 140 PF 240 PF 340 PF 440 PF 540 PF 640 PF 740 PF 840 PF 940 PF 1040 PF 1140 PF 1240 PF 1340 PF 1440 PF 1540 PF 16175
F key Standard Default TableF KeysKeystroke5001 F 15002 F 25003 F 35004 F 45005 F 55006 F 65007 F 75008 F 85009 F 95010 F 105011 F 115012 F 125013 F 135014 F 145015 F 155016 F 165017 F 175018 F 185019 F 195020 F 205021 F 215022 F 225023 F 235024 F 24176
Numeric Key Standard Default TableNumeric KeypadKeystroke6042 *6043 +6044 Undefined6045 -6046 .6047 /6048 06049 16050 26051 36052 46053 56054 66055 76056 86057 96058 Enter6059 Num Lock177
Extended Keypad Standard Default TableExtended KeypadKeystroke7001 Break7002 Delete7003 Pg Up7004 End7005 Pg Dn7006 Pause7007 Scroll Lock7008 Backspace7009 Tab7010 Print Screen7011 Insert7012 Home7013 Enter7014 Escape7015 Up Arrow7016 Dn Arrow7017 Left Arrow7018 Right Arrow178
APPENDIX D : NUMERIC BAR CODESFor parameters requiring specific numeric values, scan the appropriatelynumbered bar code(s).01234561797
89CancelTo correct an error or change a selection, scan the bar code below.Cancel180
APPENDIX E : READABLE SYMBOLOGIESSymbologies1D SymbologiesEAN/UPCUPC-AUPC-EUPC-E1EAN-8/JAN 8EAN-13/JAN 13Bookland EANBookland ISBN FormatDecode UPC/EAN/JANSupplementals (2 and 5 digits)DefaultEnable○○Disable○○○ISBN-10IgnoreUPC/EAN/JAN SupplementalRedundancy 10Decode UPC/EAN/JANSupplemental AIM IDCombinedTransmit UPC-A Check Digit○Transmit UPC-E Check Digit○Transmit UPC-E1 Check Digit○UPC-A PreambleSystem CharacterUPC-E PreambleSystem CharacterUPC-E1 PreambleSystem CharacterConvert UPC-E to ADisableConvert UPC-E1 to ADisableEAN-8/JAN-8 ExtendDisableUCC Coupon Extended <strong>Code</strong> DisableCoupon ReportNew CouponSymbolsISSN EANDisable181
SymbologiesDefaultEnable<strong>Code</strong> 128<strong>Code</strong> 128Set Length(s) for <strong>Code</strong> 128GS1-128(formerly UCC/EAN-128)ISBT 128ISBT ConcatenationCheck ISBT TableISBT ConcatenationRedundancy 10<strong>Code</strong> 39<strong>Code</strong> 39Trioptic <strong>Code</strong> 39Convert <strong>Code</strong> 39 to <strong>Code</strong> 32(Italian Pharmacy <strong>Code</strong>)<strong>Code</strong> 32 PrefixSet Length(s) for <strong>Code</strong> 39<strong>Code</strong> 39 Check DigitTransmit <strong>Code</strong> 39 Check Digit<strong>Code</strong> 39 Full ASCII ConversionBuffer <strong>Code</strong> 39<strong>Code</strong> 93<strong>Code</strong> 93Set Length(s) for <strong>Code</strong> 93<strong>Code</strong> 11<strong>Code</strong> 11Set Lengths for <strong>Code</strong> 11<strong>Code</strong> 11 Check DigitVerificationTransmit <strong>Code</strong> 11 Check○Any Length○○Disable○○DisableDisableDisableLength WithinRange: 2 to 55DisableDisableDisableDisableDisableLength WithinRange: 4 to 55DisableLength WithinRange: 4 to 55DisableDisable182
Interleaved 2 of 5 (ITF)Interleaved 2 of 5 (ITF)DisableSet Lengths for I 2 of 51 Length;Length = 14I 2 of 5 Check Digit Verification DisableTransmit I 2 of 5 Check Digit DisableConvert I 2 of 5 to EAN 13DisableDiscrete 2 of 5 (DTF)Discrete 2 of 5DisableSet Length(s) for D 2 of 51 Length;Length = 12Codabar (NW - 7)CodabarDisableSet Lengths for Codabar Length WithinRange: 5 to 55CLSI EditingNOTIS EditingCodabar Upper or Lower CaseStart/Stop CharactersDetectionMSIMSISet Length(s) for MSIMSI Check DigitsTransmit MSI Check DigitDisableDisableUpper CaseDisableLength WithinRange: 4 to 55OneDisableMSI Check Digit Algorithm Mod 10/Mod 10Chinese 2 of 5Chinese 2 of 5Matrix 2 of 5Matrix 2 of 5 LengthsMatrix 2 of 5DisableDisableLength;Length = 14Matrix 2 of 5 Check DigitTransmit Matrix 2 of 5 CheckDisableDisable183
Korean 3 of 5Inverse 1DKorean 3 of 5Postal <strong>Code</strong>sUS PostnetUS PlanetTransmit US Postal Check DigitUK PostalTransmit UK Postal Check DigitJapan PostalAustralia PostAustralia Post FormatNetherlands KIX <strong>Code</strong>USPS 4CB/One<strong>Code</strong>/Intelligent MailUPU FICS PostalGS1 Data<strong>Bar</strong>GS1 Data<strong>Bar</strong>(GS1 Data<strong>Bar</strong> Omnidirectional,GS1 Data<strong>Bar</strong> Truncated,GS1 Data<strong>Bar</strong> Stacked,GS1 Data<strong>Bar</strong> StackedOmnidirectional)DisableRegularDisableDisable○Disable○DisableDisableAutodiscriminateDisableDisableDisable○GS1 Data<strong>Bar</strong> LimitedDisableGS1 Data<strong>Bar</strong> Limited Security 3GS1 Data<strong>Bar</strong> Expanded(GS1 Data<strong>Bar</strong> Expanded,○GS1 Data<strong>Bar</strong> Expanded Stacked)Convert GS1 Data<strong>Bar</strong> to UPC/EANDisable184
CompositeComposite CC-CComposite CC-A/BComposite TLC-39UPC Composite ModeComposite Beep ModeGS1-128 Emulation Mode forUCC/EAN Composite <strong>Code</strong>sDisableDisableDisableUPCAlwaysLinkedBeep As Each <strong>Code</strong>Type is DecodedDisableSymbologies2D SymbologiesDefaultEnable○DisableDisable○RegularPDF417MicroPDF417<strong>Code</strong> 128 EmulationData MatrixData Matrix InverseDecode Mirror Images(Data Matrix Only)MaxicodeQR <strong>Code</strong>QR InverseMicroQRAztecAztec InverseRedundancy Level 1Security Level (UPC/EAN and<strong>Code</strong> 93) 1Intercharacter Gap SizeMacro PDF Transmit/Decode Mode SymbolsTransmit Macro PDF ControlEscape CharactersAutoDisable○Regular○○Inverse AutodetectNormalPassthrough ModeDisableNone185