

INSTRUCTION MANUAL Singer Sewing Machine ... - The Needlebar
INSTRUCTION MANUAL Singer Sewing Machine ... - The Needlebar
INSTRUCTION MANUAL Singer Sewing Machine ... - The Needlebar

You also want an ePaper? Increase the reach of your titles
YUMPU automatically turns print PDFs into web optimized ePapers that Google loves.
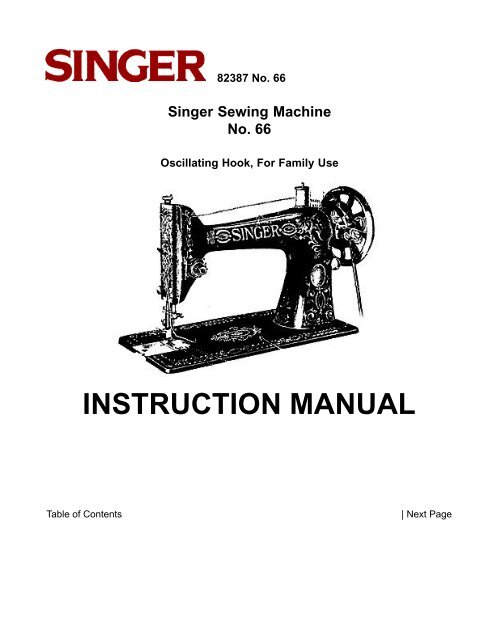
82387 No. 66<strong>Singer</strong> <strong>Sewing</strong> <strong>Machine</strong>No. 66Oscillating Hook, For Family Use<strong>INSTRUCTION</strong> <strong>MANUAL</strong>Table of Contents| Next Page
82387 No. 66Table of ContentsMain PartsParts of the <strong>Machine</strong> StandInstructions for Operating the <strong>Machine</strong>To Ensure Perfect Action of the <strong>Machine</strong>To Take Out the BobbinTo Wind the BobbinTo Replace the BobbinTo Set the NeedleTo Thread the NeedleTo Prepare for <strong>Sewing</strong>To Commence <strong>Sewing</strong>To Remove the WorkTensionsTo Regulate TensionsTo Turn a CornerTo Regulate the Length of StitchTo Regulate the Pressure on the MaterialTo Sew Flannel or Bias SeamsA Stitch to Ravel EasilyTo Oil the <strong>Machine</strong>Hints<strong>The</strong> Belt<strong>Machine</strong> WOrking HeavilyTo Avoid Breaking NeedlesBreaking of Needle ThreadBreaking of Bobbin ThreadSkipping of StitchesAttachments with the <strong>Machine</strong>Instructions for Using the AttachmentsFoot Hemmer-- Hemming-- Hemming and<strong>Sewing</strong> on Lace-- FellingAdjustable Hemmer-- Hemming-- Wide HemmingBinder -- BindingBias Gauge-- To Bind with Dress BraidRufflingRuffler -- Ruffling Between BandsTo Ruffle and Sew On-- Five Stitch Ruffling or PaitingRuffler with Shirring Plate -- ShirringQuilterTuckerUnder BraiderEmbroidary and DarningRelative Sizes of Needles and ThreadPrevious Page | Next Page
82387 No. 66Main PartsParts of the <strong>Machine</strong> StandA. BELT GUIDEB. BAND WHEELC. BAND WHEEL CRANKD. PITMANE. TREADLEF. BELT SHIFTERG. LEGH. DRESS GUARDTable of ContentsPrevious Page | Next Page3
82387 No. 66<strong>INSTRUCTION</strong>S FOROPERATING THE MACHINERaise the presser foot (B. Fig. 3) by means ofthe presser bar lifter (C, Fig. 3) to preventinjury to the foot (B. Fig. 3) and feed (A, Fig..3).It is necessary to understand the stop motion(D, Fig. 3) by which the balance wheel (E,Fig. 3) can be released when required, thusenabling the operator to become proficient inthe use of the treadle and permitting thewinding of bobbins without running the stitchingmechanism. It also allows the operator towind bobbins without removing partially sewnwork and without unthreading the machine.To release the balance wheel (E, Fig. 3) turnthe stop motion screw (D, Fig. 3, page 3)over toward you. It may be necessary to holdthe balance wheel while loosening the stopmotion screw.After releasing the balance wheel place yourfeet upon the treadle and with the right hand,turn the balance wheel over toward you. Thiswill start the band wheel, treadle and pitman,the sewing mechanism having been disconnected.FIG.3. FRONT VIEW OF THE MACHINEContinue the motion thus begun by an alternatepressure of heel and toe, until a regularand easy movement is acquired, and the balancewheel kept in continuous rotation by useof the feet alone.When you are thoroughly familiar with thetreadle movement, and can restart themachine without turning the balance wheel inthe wrong direction, tighten the stop motionscrew to connect the balance wheel with thestitching mechanism.Place a piece of cloth under the presser foot,let the foot down upon it, and operate themachine in this way without being threaded,until you have become accustomed to guidingthe material.Table of ContentsPrevious Page | Next Page4
82387 No. 66To Ensure Perfect Action of the <strong>Machine</strong><strong>The</strong> balance wheel must always turn overtoward the operator.Do not run the machine with the presser footresting on the feed without cloth under thepresser foot.Do not run the machine when both bobbincase and needle are threaded unless there ismaterial under the presser foot.Do not try to help the machine by pulling thefabric lest you bend the needle. <strong>The</strong> machinefeeds the work without assistance.<strong>The</strong> slide over the bobbin case should bekept closed when the machine is in operation.FIG. 4. REMOVING THE BOBBINTo Take Out the BobbinDraw to the left the slide in the bed of themachine and press the forefinger of the righthand upon the bobbin ejected as shownabove; this will raise the bobbin so that it canbe easily taken out.Table of ContentsPrevious Page | Next Page5
82387 No. 66To Wind the BobbinRelease the balance wheel (E, Fig. 3, page3) by turning the stop motion screw (D, Fig.3, page 3) over toward you.Place the bobbin on the bobbin winder spindle(E, Fig. 6, page 7) and push it up closelyagainst the shoulder, having the small pin inthe spindle enter the hole in the side of thebobbin. Put the spool of thread on the spoolpin (1, Fig. 5). Pass the end of the thread intothe thread guide (2, Fig. 5) then up into thelower eyelet (3, Fig. 6) of the bobbin winderthread guide, into the notch (4, Fig. 6) andpass the thread through the hole in the leftside of the bobbin (5, Fig. 6) from the inside.Press the bobbin winder pulley (B, FIG. 6)down on the balance wheel hub and the latch(C, Fig. 6) will drop down and hold it. <strong>The</strong>noperate the treadle the same as for sewing.FIG. 5. MACHINE THREADEDFOR WINDING THE BOBBINTable of ContentsPrevious Page | Next Page6
82387 No. 66To Wind the Bobbin continued...<strong>The</strong> end of the thread must be held by thehand unti1 a few coils are wound and shouldthen be broken off. Figs. 5 and 6 show thebobbin winder properly threaded and in positionfor winding. When sufficient thread hasbeen wound upon the bobbin it is automaticallyreleased from the stop latch (C, Fig. 6).If the pressure of the rubber ring (B, Fig. 6)against the hub of the balance wheel is insufficientfor winding the bobbin, loosen theadjusting screw (D, Fig. 6) and press the bobbinwinder lightly until the rubber ring is incontact with the hub of the balance wheel;then tighten the screw.FIG. 6. WINDING THE BOBBINTable of ContentsPrevious Page | Next Page7
82387 No. 66To Replace the BobbinHold the bobbin between the thumb and forefingerof the left hand, the thread leading ontop from the right toward the left, as shown inFig. 7.Place the bobbin into the bobbin case anddraw the thread into the slot (1, Fig. 8) in thebobbin case, as shown below.FIG. 7.REPLACING THE BOBBINDraw the thread backward between the bobbincase and the tension spring until it reachesthe notch (2, Fig. 9) then pull the threadtoward the right as shown in Fig. 9.When closing the slide see that the thread isin the slot (3, Fig. 10) in the right edge of theslide, as shown below.FIG. 8. THREADING the BOBBIN CASEFIG. 9. BOBBIN CASE THREADEDFIG. 10. UNDER THREADING COMPLETEDTable of ContentsPrevious Page | Next Page8
82387 No. 66To Set the NeedleTurn the balance wheel over toward you untilthe needle bar moves up to its highest pointin the sleeve (D, Fig. 5), loosen the thumbscrew (C, Fig. 5) in the needle clamp (B. Fig.5) and put the needle up into the clamp as faras it will go, with its flat side toward the right,then tighten the thumb screw.To Thread the NeedleSEE FIG. 11Turn the balance wheel over toward you untilthe thread take-up lever (5) is raised to itshighest point. Place the spool of thread onthe spool pin at the top of the machine; leadthe thread into the thread guide (1) at the left,down, under and from right to left betweenthe tension discs (2), into the small wirespring (3), under the thread regulator (4) atthe left (not through the eye in the thread regulator),up and from right to left through thehole in the end of the thread take-up lever(5), down into the eyelet (6), into the lowerwire guide (7), then from left to right throughthe eye of the needle (8).Draw about two inches of thread through theeye of the needle with which to commencesewing.FIG. 11. THREADING THE NEEDLEInstructions for threading the machine fordarning and for embroidery are given onpages 34 and 35.Table of ContentsPrevious Page | Next Page9
82387 No. 66To Prepare for <strong>Sewing</strong>With the left hand hold the end of the needlethread, leaving it slack from the hand to theneedle.Turn the balance wheel over toward you untilthe needle moves down and up again to itshighest point, thus catching the bobbinthread; draw up the needle thread and thebobbin thread will come up with it through thehole in the throat plate (see Fig. 12). Lay boththreads back under the presser foot.To Commence <strong>Sewing</strong>FIG. 12. DRAWING UP THE BOBBIN THREADPlace the material beneath the presser foot,lower the presser foot and commence to sew,turning the balance wheel over toward you.To Remove the WorkLet the thread take-up lever rest at its highestpoint, raise the presser foot and draw the fabricback and to the left, pass the threads overthe thread cutter (A, Fig. 12) and pull downlightly to sever them. Leave the ends of thethreads under the presser foot.Table of ContentsPrevious Page | Next Page10
82387 No. 66TensionsFor ordinary stitching the needle and bobbinthreads should be locked in the centre of thethickness of the material, thus:FIG. 13. PERFECT STITCHIf the tension on the needle thread is tootight, or if that on the bobbin thread is tooloose, the needle thread will lie straight alongthe upper surface of the material, thus:To Regulate the Tensions<strong>The</strong> tension on the needle thread should onlybe regulated when the presser foot is down.Having lowered the presser foot, turn thesmall thumb nut (E, shown in Fig. 16, above,and Fig. 5, page 6) at the front of the tensiondiscs over to the right to increase the tension.To decrease the tension, turn the thumb nutover to the left.FIG. 14. TIGHT NEEDLE THREAD TENSIONIf the tension on the bobbin thread is too tightor if hat on the needle thread is too loose, thebobbin thread will lie straight along the underside of the material, thus:FIG. 15. LOOSE NEEDLE THREAD TENSIONFIG 16. NEEDLE THREAD TENSION<strong>The</strong> tension on the bobbin thread is regulatedby the larger screw (Fig. 4) which is nearestthe back in the bobbin case tension spring.To increase the tension, turn the screw overtoward you. To decrease the tension, turn thescrew over from you.When the tension on the bobbin thread hasbeen once properly adjusted it is seldom necessaryto change it, as a correct stitch canusually be obtained by varying the tension onthe needle thread.Table of ContentsPrevious Page | Next Page11
82387 No. 66To Turn a CornerStop the machine with the needle at its lowestpoint. Raise the presser foot and turn thework as desired, using the needle as a pivot.To Regulate the Length of Stitch<strong>The</strong> length of stitch is regulated by the largethumb screw (A, Fig. 6) at the front of themachine near the bobbin winder.To lengthen the stitch turn this screw over tothe right. To shorten the stitch turn this screwover to the left.To Regulate the Pressure on the MaterialFor ordinary family sewing it is seldom necessaryto change the pressure on the material.If sewing fine silk or flimsy material, lightenthe pressure by turning the thumb screw (A,Fig. 5) on the top of the machine over to theleft.To increase the pressure turn this screw overto the right. <strong>The</strong> pressure should be onlyheavy enough to prevent the material fromrising with the needle and to enable the feedto move the work along evenly; a heavierpressure will make the machine run hard.To Sew Flannel or Bias SeamsUse a short stitch and as light a tension aspossible on the needle thread so as to leavethe thread loose enough in the seam to allowthe goods to stretch if necessary.A Stitch to Ravel Easilycan be made if desired, by having the tensionon the needle thread so light that the bobbinthread will not draw into the goods but liestraight, as shown in Fig. 15.Table of ContentsPrevious Page | Next Page12
82387 No. 66To Oil the <strong>Machine</strong>To ensure easy running the machine andstand requires oiling and if used continuouslyit should be oiled each day. With moderateuse an occasional oiling is sufficient. Oilshould be applied at each of the placesshown by arrows in Figs. 17, 18 and 19. Onedrop of oil at each point is sufficient. Oil holesare provided in the machine for bearingswhich cannot be directly reached.To oil the mechanism under the slide, drawthe slide (see Fig. 17) to the left and afterremoving the lint and dust which may haveaccumulated put a few drops of oil on thesmall piece of felt at the right of the bobbinejector. <strong>The</strong> slide should then be closed.FIG. 17. FRONT VIEW, SHOWING OILING POINTSTake out the thumb screw (A, Fig. 17) nearthe lower end of the face plate, raise theplate and slip it off over the head of the screwnear the upper end of the plate; put one dropof oil into each of the oil holes and joints.Table of ContentsPrevious Page | Next Page13
82387 No. 66To Oil the <strong>Machine</strong> continued...At the back of the machine is a round plate orcover, fastened by a thumb screw; loosen thescrew, turn the plate upward and fasten bytightening the screw; turn the balance wheelslowly and oil the moving parts inside thenturn the cover down and fasten it as before.To reach the parts underneath the bed thebelt must be thrown off the band wheel onthe machine stand. For this purpose the beltshifter (F. Fig. 1, page 1) is placed at the frontof the band wheel. By pressing the belt shifterlever to the left and working the treadlemeanwhile, the belt is released and themachine can then be turned back on itshinges. <strong>The</strong> places to be oiled are indicatedin Fig. 18, page 17, by arrows pointing to theoil holes and bearings.FIG. 18. OILING POINTS IN BASE OF MACHINETo oil the stand, put a drop of oil on each ofthe places shown by arrows in the aboveillustration (Fig. 19).FIG. 19. POINTS IN STANDTable of ContentsPrevious Page | Next Page14
82387 No. 66HINTS<strong>The</strong> Belt.See that the belt is not too tight; it shouldalways be tight enough not to slip. If tooloose remove the hook at one end, shortenthe belt and rejoin.<strong>Machine</strong> Working Heavily.If the machine runs hard after standing idlefor some time use a little kerosene in the oilingplaces, run the machine rapidly, then wipeclean and oil.To Avoid Breaking Needles.See that the presser foot or attachments aresecurely fastened by the thumb screw. Do notsew heavy seams or very thick goods withtoo fine a needle. A large needle and threadto correspond should be used on heavy work(see page 36).See that the needle is not bent and avoidpulling the material when stitching.Breaking of Needle Thread.If the needle thread breaks it maybe caused by:Improper threading.Tension being too tight.<strong>The</strong> thread being too coarsefor size of needle.<strong>The</strong> needle being bent, having ablunt point, or beingset incorrectly.Breaking of Bobbin Thread.If the bobbin thread breaks it maybe caused by:Improper threading of bobbin case.Tension being too tight.Skipping of Stitches.<strong>The</strong> needle may not be accurately set into theneedle bar or the needle may be blunt orbent. <strong>The</strong> needle may be too small for thethread in use.<strong>Singer</strong> Needles are the best for every kind of sewingmachine. <strong>The</strong>y are the only satisfactory needles on themarket and are sold in the <strong>Singer</strong> Green NeedlePacket with the famous red letter "S" upon it. <strong>Singer</strong>Needles can be obtained from any <strong>Singer</strong> Shop or<strong>Singer</strong> Salesman.Table of ContentsPrevious Page | Next Page15
82387 No. 66ATTACHMENTS WITH THE MACHINETable of ContentsPrevious Page | Next Page16
82387 No. 66<strong>INSTRUCTION</strong>S FOR USINGTHE ATTACHMENTSFOOT HEMMER - HemmingRaise the needle to its highest point. Removethe presser foot and attach the toot hemmerin its place (see Fig. 21). Clip off the righthand corner of the cloth, so that it will takethe roll easily, turn up the edge about a quarterof an inch, insert it in the mouth of thehemmer and draw or push it along with thestiletto until under the needle. <strong>The</strong>n let downthe presser bar and after taking two or threestitches, draw gently on the ends of thethreads to help the work along till the feedcatches it. In order to produce a smooth evenhem the mouth of the hemmer must be keptjust full.Fig 21.Fig. 21 shows also what is known as a bagseam or fell, made by passing two pieces offabric through the hemmer together and hemmingthem down.Table of ContentsPrevious Page | Next Page17
82387 No. 66FOOT HEMMERHemming and <strong>Sewing</strong> on LaceStart the hem as previously explained, andwhen it is well started raise the needle to itshighest point.Raise the hemmer to relieve its pressure ontile hem, pass the end of the lace through theslot in the side of the hemmer, under theback of tile hemmer and over the hem, asshown in Fig. 22.Take care that the hem is not displaced in thehemmer and that the needle goes downthrough the lace and hem together. <strong>The</strong>n letdown tile presser bar and guide the lace overthe front of the hemmer, keeping it well intothe slot.FIG. 22Table of ContentsPrevious Page | Next Page18
82387 No. 66FOOT HEMMERFelling<strong>The</strong> two pieces of cloth to he felled should belaid one over the other, right sides together,the edge of the under piece being a little fartherto tile right than the upper piece. Stitchthem together using the hemmer as a presserfoot, the front end of the hemmer forming aguide for tile edges of both pieces, the upperpiece being guided by the inside and theunder piece by the outside of the projectingfront of the foot hemmer (see Fig. 23). <strong>The</strong>nopen the work out flat, wrong side up, theedges straight, and taking the edges near thebeginning of the seam in the right hand, andthe ends of the threads in the left hand, drawthe edges into the hemmer which will ill turnthem as in hemming. Guide the second rowof stitching by following the first row with theinside of the projecting front of the foot hemmer(see Fig. 24).FIG. 23FIG. 24Table of ContentsPrevious Page | Next Page19
82387 No. 66ADJUSTABLE HEMMERHemmingRemove the presser foot and attach theadjustable hemmer in its place as shown inFig. 25. This hemmer will turn hems from3/16 inch to 1 inch wide. <strong>The</strong> adjustment ismade by loosening the thumb screw on thehemmer and moving the slide to the right orleft until the hem turned is of the desiredwidth. Enter the edge of the cloth into thehemmer under the scale and draw it backand forth until the hem is formed, stoppingwith the end under the needle. Lower thepresser bar and commence to sew, beingcareful to guide cloth as to keep hemmer full.Felling can also be done with the adjustablehemmerFIG. 25ADJUSTABLE HEMMERWide HemmingTo make a hem more than one inch wide takeout the thumb screw in the hemmer andremove the slide and pointer; fold and creasedown a hem of the desired width; pass thefold under the extension at the right of thehemmer, and the edge into the folder asshown in Fig. 26 and proceed to stitch thehem.FIG. 26Table of ContentsPrevious Page | Next Page20
82387 No. 66BINDERBindingRemove the presser foot and attach thebinder in its place. Pass the binding throughthe scroll of the hinder and draw it backunder the needle. Place the edge of thegoods to he bound between the scrolls of thehinder and draw it under the needle. Lowerthe presser bar and sew as usual. To makeFrench folds proceed as directed for bindingexcept that the fold is stitched on to the faceof the material instead of on the edge (seeFig. 27). After loosening the binder set screwand adjusting the binder the line of stitchingcan be brought nearer the centre, this beingmore effective when making French folds.FIG. 27FIG. 28BIAS GAUGE<strong>The</strong> bias gauge may be used by placing it onthe point of a pair of scissors, as below, anddifferent widths of material may be cut byadjusting the slide (S. Fig. 28,). Bias bindingfor binder No. 36595 should be cut fifteen-sixteenthsof an inch wide if muslin or similarfabrics are used, and to do this the slide (S)should be placed half way between the linesmarked "F" and "B." <strong>The</strong> edge of the goodsshould be passed through the attachmentand against the slide while cutting. Whenbinding with fine, soft or flimsy materials, cutthe bias binding a suitable fraction wider.BINDERBind with Dress Braid<strong>The</strong> braid being stitched on the edge it shouldfit the binder without turning in the edges, asis the case with bias binding.Table of ContentsPrevious Page | Next Page21
82387 No. 66RUFFLERRufflingRemove the presser foot and attach the rufflerin its place, connecting the arm with theneedle clamp, as shown in Fig. 29.<strong>The</strong> ruffler can be adjusted to make a gatheror plait either at every stitch or once in everyfive stitches as the operator may choose.To make a ruffle with a gather or plait atevery stitch see that the adjusting lever (A,Fig. 29) of the ruffling is at its lowest point.Place the material to be ruffled between thelower or separator blade and the rufflingblade, draw the material slightly back of theneedle, lower the presser bar and proceed tosew.FIG. 29To make a finer gather shorten the stroke ofthe ruffling blade by turning the regulatingthumb screw (B. Fig. 29) over to the left, alsoshorten the stitch. To make a fuller gather orplait lengthen the stroke of the arm by turningthe regulating thumb screw (B. Fig. 29) overto the right, also lengthen the stitch. By varyingthese adjustments many pleasing varietiesof work can be accomplished.Table of ContentsPrevious Page | Next Page22
82387 No. 66RUFFLERRuffling Between BandsPlace the lower piece of material below theseparator blade, the piece of material to beruffled under the ruffling blade and over theseparator blade and the upper piece of materialover the ruffling blade, as shown in Fig.30.TO RUFFLE AND SEW ONPlace the band below the separator blade thepiece to be ruffled between the separatorblade and the ruffling blade, and proceed.<strong>The</strong> ruffler should never be operated withoutcloth between the blades.FIG. 30RUFFLERFive Stitch Ruffling or PlaitingTo make a five stitch ruffle or plait, raise theadjusting lever (A, Fig. 31) to its highestpoint. <strong>The</strong> ruffling blade will then move forwardand back once every fifth stitch.FIG. 31Table of ContentsPrevious Page | Next Page23
82387 No. 66RUFFLER WITH SHIRRING PLATEShirringTo attach the shirring plate (see Fig. 20) drawto the left the slide that covers the bobbincase, insert the downwardly projecting hookson the shirring plate under the edge of thethroat plate, push as far as possible to theright and press the pin into the hole at theright of the throat plate, then close the slidecovering the bobbin case.<strong>The</strong> lower or separator blade of the ruffler isfastened by a screw. Loosen the screw, takeoff the separator blade and attach the rufflerto the presser bar as instructed.FIG. 32Place the cloth between the ruffling blade andthe shirring plate, lower the ruffler on thegoods and operate as in ruffling.Table of ContentsPrevious Page | Next Page24
82387 No. 66QUILTERRemove the presser foot and attach the quilterfoot in its place. <strong>The</strong> quilter guide can beused on either the right or left side of the needleand the distance of the guide from theneedle determines the width of spacebetween the rows of stitching. Slide the wireof the guide into the holder prepared for it onthe foot and set it to the width desired.Let the quilter guide follow the edge of thegoods, a straight crease, or a chalk line, asthe case may be, for the first row of stitching.All succeeding rows are made straight and ata uniform distance by keeping the last rowsteadily under the guide.FIG. 33Table of ContentsPrevious Page | Next Page25
82387 No. 66TUCKERRemove the presser foot and attach the tuckerin its place. <strong>The</strong> width of the tuck is determinedby the scale of figures nearest theneedle, which shows in eighths and sixteenthsof an inch the distance of the edge ofthe fold from the line of stitching.<strong>The</strong> crease or mark for the second and followingtucks is determined by the scale nearestthe operator and this is set by the line infront of the needle hole in the presser foot.For blind tucks without spaces set bothscales at the same figure; to make spacesbetween the tucks move the front scale fartherto the left until the desired space isobtained.Having adjusted the scales for tuck andspace as desired, fold the material andcrease by hand; pass the folded edgebetween the spring and spur near you, thenbetween the two blades of the second scale,and back under the presser foot; draw to theright against the guide, lower the presser bar;see that the lever for the needle clamp tostrike is in its backward position so as to forma crease for the next tuck, then proceed withthe first tuck.FIG. 34For the second tuck fold carefully at thecrease made by the spur and place the edgeof the first tuck underneath and against thespur at the left. <strong>The</strong> spur will serve as a guideand will also make a distinct crease for thenext tuck. Always place the last tuck againstthe spur to ensure perfect work.When making the last tuck the lever uponwhich the needle clamp strikes while tuckingshould he raised to its highest point; while thelever is in this position no crease for a succeedingtuck is made upon the goods.Table of ContentsPrevious Page | Next Page26
82387 No. 66UNDER BRAIDERRemove the presser foot and attach the quilterfoot in its place. Attach the under braider(see Fig. 20) as directed for the shirring plate(see page 30). <strong>The</strong> design to be braided mustbe stamped or traced on the wrong side ofthe goods. Pass the end of the braid backthrough the guides in the under braider andunder the quilter foot as shown above. Lowerthe quilter foot and proceed to sew.FIG. 35Table of ContentsPrevious Page | Next Page27
82387 No. 66EMBROIDERY AND DARNINGWhile embroidery anti darning can be doneon the machine when threaded for regularsewing, the use of feed cover plate (B. Fig.36) No. 32622 is recommended, as movablecontact with the feed in some cases mightinterfere with the handling of the work.into position, and close the slide (see Fig.36).Feed cover plates are not included in the regularsets of attachments; they are on sale atall <strong>Singer</strong> shops at the price of ten centseach.Do not change the adjustment of the feeddog in any way as it is essential that its positionshould remain as originally fixed.When the feed cover plate (B. Fig. 36) isused it is necessary to lead the needle threadthrough the eye in the thread regulator (A,Fig. 36) at the left of the tension discs, andnot under the thread regulator. With thisexception the threading is the same as forregular sewing (see Fig. 11).Remove the presser foot and let down thepresser bar lifter to restore the tension on theneedle thread, which is released and inoperativewhen the lifter is raised.To attach the feed cover plate draw to the leftthe slide that covers the bobbin case andinsert the downwardly projecting hooks on thecover plate under the edge of the throat plateand push to the right. After bringing the holeat the right of the cover plate in line with thehole in the throat plate, press the coverTable of ContentsPrevious Page | Next Page28
82387 No. 66RELATIVE SIZES OF NEEDLES AND THREAD(Class and Variety of Needles Used, 15 x 1)SIZESOFNEEDLES9111416181921CLASSESOFWORKVery thin Muslins, Cambrics,Linens,etc.Very fine Calicoes, Linens,Shirtings.fine Silk Goods, etc.Shirtings, Sheetings, Calicoes,Muslins, Silk and general domesticgoods and all classes of general work.All kinds of heavy Calicoes, lightWoolen Goods, heavy Silk, Seaming,Stitching,. etc.Tickings. Woolen Goods, Trousers,Boys' Clothing,Corsets, Cloaks,Mantles, etc.Heavy Woolens, Tickings, Bags, HeavyCoats, Trousers, etc. Heavy Clothinggenerally.Bags, Coarse Cloths and HeavyGoods.SIZES of COTTON,SILK ORLINEN THREAD100 to 150 Cotton 00 & 000 SilkTwist80 to 100 COTTON 0 Silk Twist60 to 80 CottonA & B Silk Twist40 to 60 Cotton C Silk Twist30 to 40 Cotton D Silk Twist24 to 30 Cotton E Silk Twist60 to 80 Linen40 to 60 Linen or very CoarseCottonWhen sending orders for needlesalways specify size required.Table of ContentsPrevious Page29


