

OScale Trains
OScale Trains
OScale Trains
- No tags were found...

You also want an ePaper? Increase the reach of your titles
YUMPU automatically turns print PDFs into web optimized ePapers that Google loves.
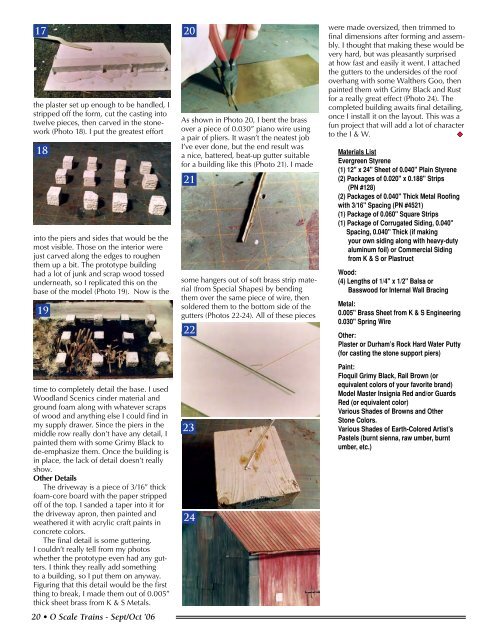
17the plaster set up enough to be handled, Istripped off the form, cut the casting intotwelve pieces, then carved in the stonework(Photo 18). I put the greatest effort18into the piers and sides that would be themost visible. Those on the interior werejust carved along the edges to roughenthem up a bit. The prototype buildinghad a lot of junk and scrap wood tossedunderneath, so I replicated this on thebase of the model (Photo 19). Now is the19time to completely detail the base. I usedWoodland Scenics cinder material andground foam along with whatever scrapsof wood and anything else I could find inmy supply drawer. Since the piers in themiddle row really don’t have any detail, Ipainted them with some Grimy Black tode-emphasize them. Once the building isin place, the lack of detail doesn’t reallyshow.Other DetailsThe driveway is a piece of 3/16” thickfoam-core board with the paper strippedoff of the top. I sanded a taper into it forthe driveway apron, then painted andweathered it with acrylic craft paints inconcrete colors.The final detail is some guttering.I couldn’t really tell from my photoswhether the prototype even had any gutters.I think they really add somethingto a building, so I put them on anyway.Figuring that this detail would be the firstthing to break, I made them out of 0.005”thick sheet brass from K & S Metals.20 • O Scale <strong>Trains</strong> - Sept/Oct ’0620As shown in Photo 20, I bent the brassover a piece of 0.030” piano wire usinga pair of pliers. It wasn’t the neatest jobI’ve ever done, but the end result wasa nice, battered, beat-up gutter suitablefor a building like this (Photo 21). I made21some hangers out of soft brass strip material(from Special Shapes) by bendingthem over the same piece of wire, thensoldered them to the bottom side of thegutters (Photos 22-24). All of these pieces222324were made oversized, then trimmed tofinal dimensions after forming and assembly.I thought that making these would bevery hard, but was pleasantly surprisedat how fast and easily it went. I attachedthe gutters to the undersides of the roofoverhang with some Walthers Goo, thenpainted them with Grimy Black and Rustfor a really great effect (Photo 24). Thecompleted building awaits final detailing,once I install it on the layout. This was afun project that will add a lot of characterto the I & W.uMaterials ListEvergreen Styrene(1) 12" x 24" Sheet of 0.040" Plain Styrene(2) Packages of 0.020" x 0.188" Strips(PN #128)(2) Packages of 0.040" Thick Metal Roofingwith 3/16" Spacing (PN #4521)(1) Package of 0.060" Square Strips(1) Package of Corrugated Siding, 0.040"Spacing, 0.040" Thick (if makingyour own siding along with heavy-dutyaluminum foil) or Commercial Sidingfrom K & S or PlastructWood:(4) Lengths of 1/4" x 1/2" Balsa orBasswood for Internal Wall BracingMetal:0.005" Brass Sheet from K & S Engineering0.030" Spring WireOther:Plaster or Durham’s Rock Hard Water Putty(for casting the stone support piers)Paint:Floquil Grimy Black, Rail Brown (orequivalent colors of your favorite brand)Model Master Insignia Red and/or GuardsRed (or equivalent color)Various Shades of Browns and OtherStone Colors.Various Shades of Earth-Colored Artist’sPastels (burnt sienna, raw umber, burntumber, etc.)


