KilnLoq System - Webshop, Gas Analysis Technology
KilnLoq System - Webshop, Gas Analysis Technology
KilnLoq System - Webshop, Gas Analysis Technology

Create successful ePaper yourself
Turn your PDF publications into a flip-book with our unique Google optimized e-Paper software.
Operation InstructionKilnloq system12.5 DISMOUNTING OF HEATED SAMPLE LINE .................................................................. 5813 COMMISSIONING THE SYSTEM ..................................................................................... 5914 OPTIONS ............................................................................................................. 6014.1 GAS LEAK DETECTION ........................................................................................ 6014.1.1 GENERAL. ............................................................................................... 6014.1.2 PROCEDURE DURING ALARM. ......................................................................... 6014.1.3 COMMISSIONING OF GAS LEAK DETEKTION ....................................................... 6114.1.4 MAINTENANCE GAS LEAK DETEKTION ............................................................... 6114.2 GASLOQ CUBE LOW AMBIENT TEMPERATURE: T
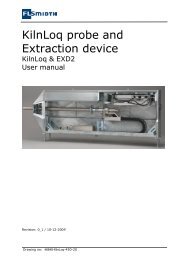
Operation InstructionKilnloq system1 PREFACEThis operating instruction is a <strong>System</strong> operation instruction. The operating instructioncovers this particular FLSmidth A/S gas analysis system with respect to technical data,installation, use etc. The Operation instruction must be used in conjunction with alldocuments included in the complete system users manualThe document overview is to be found in section 1.1.The whole analysis system is to be operated and maintained as described in this systemmanual. If not, the efficiency and lifetime of the system will be reduced. An alarm mustalways be corrected at once. Qualified and trained personnel must perform themaintenance.1.1 DOCUMENT MAPThis manual is to be considered as part of the complete system documentation. A completeset of system documentation for an FLSmidth A/S gas analysis system may comprise:v User manuals (Binder) (all project specific drawings, list etc.) includingo <strong>System</strong> datasheets covering project specific data.• <strong>System</strong> operation instructions (this document)• Unit operating instructions (including drawings,list etc.)o Drawing GMUo Circuit diagram GMUo Cable list for systemo Part list for systemo Bus List for systemv Data sheets (Binder)o Sub supplier’s manuals and datasheetsWhereoIndicates Project and system specific documents• Indicates general document for actual issue1.2 DEFINITIONS AND TERMS1.2.1 GENERAL<strong>System</strong> (analysis system) The complete analysis system.<strong>KilnLoq</strong>FLSmidth A/S <strong>Gas</strong> <strong>Analysis</strong> <strong>Technology</strong> brand for One-pipe KilnInlet probeExtraction Device FLSmidth A/S <strong>Gas</strong> <strong>Analysis</strong> <strong>Technology</strong> Extraction Device v.2for <strong>KilnLoq</strong> probe.One-pipePatent pending one-pipe design from process through filter.Kilnloq probeExtracts sample gas from a specific point in process.GMU<strong>Gas</strong> Monitoring Unit: Cabinet or housing comprising analysisparts, power distribution and control.GASloq 1200FLSmidth A/S <strong>Gas</strong> <strong>Analysis</strong> <strong>Technology</strong> analysis cabinetcomprising analysis parts, power distribution and control.GASloq CUBEFLSmidth A/S <strong>Gas</strong> <strong>Analysis</strong> <strong>Technology</strong> analysis housinginsulated, heated, with air conditioning and with GMUinstalled.Field cabinetFLSmidth A/S <strong>Gas</strong> <strong>Analysis</strong> <strong>Technology</strong> analysis cabinetcomprising power distribution and control. without gasanalysis components.Utility AirFLSmidth A/S <strong>Gas</strong> <strong>Analysis</strong> <strong>Technology</strong> Utility Air is a basis airDrawing no: <strong>KilnLoq</strong>-400-10 Page 4 of 72
Operation InstructionKilnloq systemProbe CoolingTrained/qualified Personnelunit to handle, regulate and distribute cleaning and control airfor the FLSmidth analysis system. The Utility Air comprises anair receiver with piping, and valves among others.FLSmidth A/S <strong>Gas</strong> <strong>Analysis</strong> <strong>Technology</strong> Probe Cooling is tosupply cooling water to the <strong>KilnLoq</strong> probe.The Probe Cooling is a steel frame containing a 200 literswater tank, water circulation pump, heat exchanger and acontrol cabinet. The water is cooled down by heat-exchanger.Probe Cooling pump and fan is controlled by GMU ControllerIndicates personnel that is not only certified to work on theplant according to all local and national regulations, butpersonnel who also has specific training from e.g. FLSmidth<strong>Gas</strong> <strong>Analysis</strong> <strong>Technology</strong> in use and maintenance of gasanalysis systems.1.2.2 UNITS AND CONVERSION FACTORSAll units in FLSmidth <strong>Gas</strong> <strong>Analysis</strong> <strong>Technology</strong> documentation are SI-units except from:Pressure:BarTemperature:°C (degrees Celsius)For general use the following approximations can be used for conversion:Length: mm to inch factor 0,04Pressure: Bar to PSI (US) factor 14,5Temperature: °C to °F °F = °C × 1.8 + 321.2.3 KILNLOQ SYSTEMKilnloq system always consist of:Extraction device with probe, heated sample hoseandField CabinetorGASloq 1200orGASloq CUBEOptional:Probe CoolingUtility Air1.3 HOW TO READ THIS MANUALRead the instructions in this manual carefully before installing the system.FLSmidth A/S <strong>Gas</strong> <strong>Analysis</strong> <strong>Technology</strong> cannot accept any liability for damagesdue to non-observance of this manual.Sign:Before doing anything to the system, read warnings in section 1.4.This manual must be used in conjunction with the appendix. The document map in section1.1 shows an overview of the complete gas analysis system. This document covers theProbe Cleaning Panel only. For e.g. electrical wiring, the reader must use the appendix“Circuit diagram”. All issues related to system performance must be found in the systemmanual.Drawing no: <strong>KilnLoq</strong>-400-10 Page 5 of 72
Operation InstructionKilnloq systemNo part of this manual may be reproduced or transmitted in any form or by any means,electronic or printed, without the prior written permission of FLSmidth A/S <strong>Gas</strong> <strong>Analysis</strong><strong>Technology</strong>. If this manual is translated, the English version is to be considered as theoriginal one.1.4 WARNING1.4.1 WARNING – HAZARDOUS VOLTAGES!Sign:All electrical installations must be in accordance with national and local regulations, andqualified personnel who are aware of these regulations must perform the electricalinstallation.Voltage must not be applied to the system until all electrical connections have been madeand checked and then only by qualified personnel who are aware of the risks involved.Any disconnection of the earthed conductor inside or outside the device or the release of theearthed conductor connection can make the device hazardous to life. Deliberatedisconnection is inadmissible/prohibited.All connections must be made in accordance with the drawings in this manual.1.4.2 WARNING – TOXIC, EXPLOSIVE GASESSign:Be sure to observe the safety regulations for the respective gases (sample gas and testgases/span gases) and test gas cylinders! The gas outlet should be led to ambient air toavoid danger to operators.Inflammable or explosive gas mixtures must not be introduced into the analysis systemunless the system is designed for the application.To avoid danger to operators by explosive, toxic or unhealthy gas components, flush thegas lines with ambient air or nitrogen before cleaning or exchange parts of the gas paths.1.4.3 WARNING - ACIDSSign:To avoid danger to operators by acid droplets build up in gas lines, first flush the gas linesbefore cleaning or exchange parts of the gas paths.Always use skin and eye protection before cleaning or exchanging parts of the gas pathsincluding condensate trap.Drawing no: <strong>KilnLoq</strong>-400-10 Page 6 of 72
Operation InstructionKilnloq system1.4.4 WARNING - BURNSSign:To avoid the danger of operators getting burned due to high temperatures of probe andother components, the demands of occupational health regulations should be followed.Always plug the hole to the process when the probe is removed from the flange. The plugmust be secured with the lock pin.1.4.5 WARNING - PRESSUREESign:To avoid danger to operator the hoses must be without pressure before dismounting of anyconnections or hoses.1.4.6 WARNING – MOVING MACHINERYSign:Do not remove covers from Extraction Device with compressed air pressure to ExtractionDevice.2 APPLICATIONThis KILNLOQ system is designed for analysis in the Kiln Inlet or after the calciner in a dryprocess cement plant, and measures various gases at process temperatures of up to 1200 Cdepending on <strong>KilnLoq</strong> probe type, and dust concentrations up to 1000 g/Nm 3 . The KILNLOQsystem is a dry-sample system with or without water cooled probe.3 SCOPE OF SUPPLYPlease referrer to “<strong>System</strong> Data Sheet” for system configurationDrawing no: <strong>KilnLoq</strong>-400-10 Page 7 of 72
Operation InstructionKilnloq system4 TECHNICAL SPECIFICATION KILNLOQ ANALYSIS SYSTEM4.1 CONSUMPTIONCompressed air:Pressure:Consumption:600 kPaRange 550-750 kPa3 Nm 3 /h at 600 kPaPeak flow up to 10-20 times higher. Pipedimensions min. 1" recommended!Quality: 3-3-3 according to ISO 8573-1Maximum 5 mm (size) 5 mg/m 3 particlesMinimum -20° water pressure dew point**Pressure dew point must be minimum -10°Cbelow minimum ambient temperature at anytime.Maximum 1 mg/m 3 oilCooling water:Pressure: (water supply)Minimum 200 kPaConsumption 0 m 3 /hThe following values of the water quality should Hardness:10 dH*.not be exceededChloride:1000 mg/litre.Note:Total salt conc.: 3000 mg/litre.Never use:(evaporation residue.)de-mineralized water orFree CO 2 :20 mg/litre.de-ionized water orSuspended solids : 5000 mg/litre.distilled waterSilica (SiO 2 ):50 mg/litre.Sulphate (SO 4 ): 680 mg/litre.Algae growth:NOT ALLOWED.pH: 5 – 7.*1 dH = 10 mg CaO/litre or 7.14 mg MgO/litre.DosingConsumption (default settings)0,33Liter / 24hourDrawing no: <strong>KilnLoq</strong>-400-10 Page 8 of 72
Operation InstructionKilnloq system4.2 PHYSICAL DISTANCE BETWEEN EQUIPMENTBetween <strong>Gas</strong> Monitoring Unit (GMU) andprobeBetween Probe and Probe CoolingAvailable length of heated sample line is Totallength of hose minus 4 meters (L Heated Hose total –4m).Each additional meter will increase the systemresponse time with one second.Probe Cooling should be placed as close to the<strong>KilnLoq</strong> probe as possible. (customerinstallation)Between probe and Utility Air Recommended length of air pipe is max. 4 m.(customer installation)For further information see layout drawing “<strong>KilnLoq</strong>: <strong>System</strong> view”.4.3 ENCLOSURESDepending on system layout the <strong>Gas</strong> Monitoring Unit (GMU) could be a “GASloq1200” or a GASloq CUBE. Furthermore the Kilnloq system can be supplied with atField Cabinet. Where the GMU description differs in this manual the text is marked“GASloq 1200”, “GASloq CUBE” or "Field Cabinet".More details about system layout are found in the layout drawings4.3.1 GASLOQ 1200This is the compact GMU version with all components installed in one cabinet. Electricalcomponents i.e. PLC, breakers, relays etc. are mounted on the back plate while gasanalyzers and other gas components are mounted in a swing-frame to achieve easyaccessibility.4.3.2 TECHNICAL INFORMATION ENCLOSURE GASLOQ 1200See layout drawing: 1200: Cabinet, 1200: Component layout, 1200: swing-frameDimension:Dimensions l x w x h:Dimensions seaworthy package l x w x h:Foundation:Weight:Weight, dry:Weight seaworthy package gross dry:1200x 600 x 2100 mm.1420 x 800 x 2280 mm.4x12mm for 12mm expansion boltsApproximately 400 kg.Approximately 570 kg.Temperatures:Ambient temperature: 5°C to 40°CStorage temperature:-15°C to 55°C under roofPlacement:Analyzer housingConnections:<strong>Gas</strong> connections:In a dust- and vibration-free (max +- 0.04 mmat 5 to 55 Hz. 0.5 g at 55 to 150 Hz) and wellventilatedroom of min. 6 m 2 .6 / 10 mm PVDF fittings.Drawing no: <strong>KilnLoq</strong>-400-10 Page 9 of 72
Operation InstructionKilnloq system4.3.3 GASLOQ CUBEThis is the GMU version with great accessibility. The CUBE is a complete plug and playhousing containing in addition to gas analysis equipment, also Air-condition, heating andlightning. All electrical components are installed in a control cabinet placed inside theGASloq CUBE. All gas components are mounted on the wall. <strong>Gas</strong> analyzers are installed inan open data rack.See layout drawing: CUBE: Cabinet, CUBE: Component layout, CUBE: Front, CUBE: Topview, CUBE: Front wall, CUBE: Back wall.4.3.4 TECHNICAL INFORMATION ENCLOSURE GASLOQ CUBEDimension: (default sizes)Dimensions l x w x h:, weight dry(Standard measures, special on request)Special:Foundation:Temperatures:Ambient temperature:Ambient temperature with low temperatureoption (section 14).Storage temperature:Placement:Cube platformConnections:<strong>Gas</strong> connections:1800 x 2200 x 2200 mm., approx. 1000kg3900 x 2200 x 2200 mm., approx. 1400kg“See project drawings for actual CUBE”-20 C to 55 C-40°C to 55°C-15 C to 55 CEquipment must be protected against heatradiationVibration-free (max +- 0.04 mm at 5 to 55 Hz.0.5 g at 55 to 150 Hz).6 /10 mm PVDF fittings.Technical information enclosure Field CabinetDimension:Dimensions l x w x h:Dimensions seaworthy package l x w x h:Wall mounted:Weight:Weight, dry:Weight seaworthy package gross dry:600 x 210 x 600 mm.800 x 400 x 800 mm.4x10mm for 10mm expansion boltsApproximately 50 kg.Approximately 100 kg.Temperatures:Ambient temperature: 5°C to 40°CStorage temperature:-15°C to 55°C under roofPlacement:Analyzer housingIn a dust- and vibration-free (max +- 0.04 mmat 5 to 55 Hz. 0.5 g at 55 to 150 Hz) and wellventilatedroom of min. 6 m 2 .Connections:Drawing no: <strong>KilnLoq</strong>-400-10 Page 10 of 72
Operation InstructionKilnloq system<strong>Gas</strong> connections:None.Drawing no: <strong>KilnLoq</strong>-400-10 Page 11 of 72
Operation InstructionKilnloq system5 INSTALLATION OF GMUSee layout drawing “<strong>System</strong> View”5.1 BEFORE INSTALLATION5.1.1 TRANSPORTAll transport must be carried out according to local regulations. Transport may be doneeither with equipment in transport box or unpacked. When equipment is still in a box, itmay be moved by standard fork lift.When unpacked, the GMU frame is equipped with 4 lifting eyes on top of panel. Panel mustbe lifted and secured by the 4 lifting eyes during transport or lifting.It is highly recommended to unpack equipment as close as possible to installation point toprotect against damage during storage and transport.5.1.2 UNPACKINGBefore installation equipment must be unpacked, the wood box must be opened with acrowbar, or e.g. a circular saw (buzz saw) may be used to open the seaworthy box. The sawmust be carefully adjusted to a cutting dept of max. 2 mm though wood panels to avoiddamage of equipment.5.2 INSTALLATIONInstall the GMU on a vibration-free platform as close as possible to the probe.5.2.1.1 Location of GMUInstall the GMU in a dust- and vibration-free dry room/area as close as possible to theprobe.5.3 ELECTRICAL INSTALLATION5.3.1 GENERALAll electrical installation must be in accordance with national and local regulations, and mustbe made by qualified personnel who are aware of these regulations.Voltage must not be applied to the system until all electrical connections have been madeand checked. This work must be done only by qualified personnel who are aware of therisks involved.All connections must be in accordance with this documentation, with conductor dimensionsat least as indicated. Where indicated shielded cables must be used.Cable connection is trough the bottom of the GMU.5.3.2 POWER CABLE TO GAS MONITORING UNITCable must be connected according to section “Cable list” in this manual. Relevantinformation about power supply is found here.Drawing no: <strong>KilnLoq</strong>-400-10 Page 12 of 72
Operation InstructionKilnloq system5.3.3 SIGNAL CABLES TO GAS MONITORING UNITCables must be connected according to section “Cable list” in this manual.5.3.3.1 Hard wire signalsFollowing basic signals are available:SignalSYSTEM ONUNIT ALARMMNT REQUESTTEST ONCLEANING ONHMI LOCKSHOCK BLASTW1 HILHSTART_STOPFunctionIndicates the analysis system is running (cleaning or analyzing). Incase of manual stop, Unit alarm or power failure the signal turns off.Indicates active unit alarm. <strong>System</strong> stops and the <strong>KilnLoq</strong> probe isextracted from the processIndicates active maintenance request. <strong>System</strong> is still running but actionhas to be takenIndicates test mode. All other alarm signals are disabled.Indicates active probe cleaning sequence.Input for locking the local HMI panel.Indicates start of chock blasting of mating flange.Indicates: Heat input Low High on probe for more than 3 minutes.Input for Field Cabinet only! Pulse start or stop Kilnloq probe systemfrom eg. 3 party analysis system.More information about analogue and digital hard wire signals is found in the “Cable list”section of this manual.5.3.4 CABLING BETWEEN GAS MONITORING UNIT AND OTHER EQUIPMENTCables must be connected according to section “Cable list” in this manual.5.4 BUS COMMUNICATIONDepending on the system and PLC made a various sort of bus communications areavailable. Please referrer to “<strong>System</strong> Datasheet” to verify type of communication e.g. opticalprofibus.5.4.1 BUS SIGNALSAll signals are available at the BUS connection. All signals for this KILNLOQ system arelisted in the “BUS list” section of this manual.5.5 HOSE CONNECTIONSThe heated sample line is connected in the probe and has to be connected to the GMU. Thehose must be rolled out in its lengths and then installed on a cable tray or similar. It mustbe weather protected and mechanical protected. The hose end with the power cable is to belocated in the GMU and fixed in the hose clamp.Bending radius has to be greater than 250 mm.Note.If the hose has to be coiled the coils must not touch each other there should be at least 100mm between.The distance between heated hoses should be at least 100 mm.5.5.1 HEATED HOSEFrom ProbeThis connection is always done by FLSmidthTo GMUThrough cable gland labelled “Line 1” to 6mmDrawing no: <strong>KilnLoq</strong>-400-10 Page 13 of 72
Operation InstructionKilnloq system<strong>Gas</strong> <strong>Analysis</strong> <strong>Technology</strong>fitting on gas cooler stage E1.1_L15.5.2 POWER CONNECTION TO HEATED SAMPLE LINEThe power cable for the heated hose E1 has to be mounted according to the following table.Fixed power cableThe power cable is at fixed part of the heatedsample line E1To GMUTo terminal row X16 according to the cablelist5.5.2.1 Commissioning of Heated Sample LineAfter installation, as described in section 13 and checking of all electrical and mechanicalinstallation, the system can be commissioned as follows:Issue:Check set point temperatureProcedure:Check on temperature controller that the set point is 180°C.5.5.3 HEATED SAMPLE LINE TEMPERATUREThe temperature of the heated sample line is controlled by the PLC. Settings are done onthe HMI see section5.5.4 DISMOUNTING OF HEATED SAMPLE LINEIssue:Stop the analysisShut of powerDisconnect gas hose at bothends.Procedure:Put the system into TEST mode and stop the analysis asdescribed in section 9.3.2.Turn off circuit breaker 11F1 located in the GMU.Disconnect power cable at terminal row X16 in the GMURefer to section 6 to extract and secure the probeDisconnect hose in both endsPurge hose with ambient air, N 2 or instrument airFree Heated Sample Line for support throughout its length5.5.5 PTFE HOSE CONNECTIONS.Hoses is part of Start Up Accessories. (see section “Partlist” in system users manual)Detailed overview of hoses to and from system can be seen on drawing “P&I diagram”GMUFrom bulkhead labelled “CALIBRATION GAS”From bulkhead labelled “GAS OUT”From bulkhead labelled “PURGE OUT 1”From bulkhead labelled “PURGE OUT 2”ToCalibration gas cylinders.Open air or at least a well ventilated place, Notin the analysis room. This hose must not beblocked.Open air or at least a well ventilated place, Notin the analysis room. This hose must not beblocked.Open air or at least a well ventilated place, Notin the analysis room. This hose must not beblocked.From bulkhead labelled “CONDENSATE”From bulkhead labelled “DOSING”DANGER: Pressurized during cleaning.Acid condensate can exit from bulkhead.Lead to low level (max. 50cm above floor)To condensate container C2To H2O2 container C1Drawing no: <strong>KilnLoq</strong>-400-10 Page 14 of 72
Operation InstructionKilnloq systemIMPORTANT!The hoses must be mechanical and weather protected and installed thus bends are avoided.Drawing no: <strong>KilnLoq</strong>-400-10 Page 15 of 72
Operation InstructionKilnloq system6 SAFETY INSTRUCTIONSSafety procedure before work on <strong>KilnLoq</strong> probeIssue:Procedure:Stop systemPress “Start Off” on the HMI. The system stops, and the probemoves out. See section 9.3 for HMI operation.Test modePress “Test on” on the HMI. The system is in test mode and allalarms to CCS are disabled. See section 9.3 for HMI operation.Secure <strong>KilnLoq</strong> probeMove lock device for probe bogie from “Bogie free” to “Bogielocked”. Install padlock to secure lock device.Shut off the air supplyClose valve V4.1 and V4.2 on the EXD. This will blow down thepressure in the extraction cylinders. Install padlock to securevalve.Remove coversRemove covers from Extraction Device.Safety procedure after work on <strong>KilnLoq</strong> probeIssue:Procedure:Install coversInstall covers on Extraction Device.Remove probe lock device Remove padlock. Move lock device for probe bogie from “Bogielocked” to “Bogie free”.Open air supplyRemove padlock. Open valve V4.1 on the PCP.Test mode offAcknowledge active alarms if any and press “Test Off”. Seesection 9.3 for HMI operation.Start systemPress “Start On” on the HMI. The system starts, and the probemoves in.See section 9.3 for HMI operation.Drawing no: <strong>KilnLoq</strong>-400-10 Page 16 of 72
Operation InstructionKilnloq system7 GAS MONITORING UNIT (GMU)7.1 GENERALThe gas-monitoring unit contains the actual gas analyzers, calibration system, flowmonitors, regulators, PLC and other electronics that control the system.A Human Machine Interface (HMI) shows the operation of the system. It shows the entiremain components of the system, and contains symbols, which indicate their function, redand amber lamps indicate alarms. Green lamps indicate normal functions. The HMI hasoperating switches to control the entire system. Furthermore it has an Alarm List withActive, History and Event logs. The use of the HMI is described in section 97.2 SAFETYSee warnings in section 1.4And see Safety Instruction in section 67.3 ADJUSTMENT IN GMU7.3.1 GAS FLOWThe gas flow adjustment should be made with the probe in the process, and with normalprocess running, to allow for pressure.1. Start LEAK as described in section 9.3.52. Open Needle valve V1.3 the GMU completely3. Check that the sampling has more than sufficient gas flow available. This means thatthe system is able to provide a gas flow rate above 100 l/h. If this is not achieved theflow problem must be corrected before further investigation and adjustments are done.If there is too much flow it must be adjusted down with V1.1, constant pressure valves4. Adjust the gas flow shown on B1.2 to 60 l/h using needle valve V1.3 in the GMU.5. Start analysis as described in section 9.3.27.3.2 GMU TEMPERATURE (GASLOQ 1200 OR FIELD CABINET)The thermostat controls the cooling fan in the GMU. When the temperature exceeds the setpoint value, the thermostat starts the cooling fan.Adjust the temperature in GMU to 30°C using the thermostat7.3.3 GMU TEMPERATURE (GASLOQ CUBE)The Air condition and electrical heater controls the temperature in CUBE.Adjust the maximum temperature in CUBE on Air condition to 25°C using the remotecontrol.Adjust the minimum temperature in CUBE on heater thermostat to 15°C.-Above set points ensure safe operation of equipment, with minimum power consumption.Drawing no: <strong>KilnLoq</strong>-400-10 Page 17 of 72
Operation InstructionKilnloq system8 KILNLOQ SYSTEM FUNCTION DESCRIPTIONSee layout drawing: KILNLOQ: P&I Diagram8.1 GENERALIn normal operation the <strong>KilnLoq</strong> system switches between two modes; “<strong>Analysis</strong>” and“Cleaning”. In “<strong>Analysis</strong>” mode the sample gas, from the <strong>KilnLoq</strong> probe, is conditioned andsend to gas analyzers. In “Cleaning” mode the shut off valve Y1.11 is closed and the probefilter is cleaned with compressed air from the Probe cleaning unit in EXD. At certain cleaningintervals, the <strong>KilnLoq</strong> probe is extracted from the process. This is done in order to clean thesample pipe from material build-up.8.1.1 CLEANING OF PROBE FILTERThe cleaning or blow back sequence is controlled by the PLC. In normal conditions thecleaning is initiated by at pre-adjusted timer. This “<strong>Analysis</strong> time” parameter is available onthe “<strong>Analysis</strong>” page on the HMI. If there is a heavy dust load on the filter it is necessary toclean with shorter intervals. In order to face changing dust loads in the process the systemis equipped with a pressure transmitter P4.1. In periods with high dust loads the cleaning isinitiated by P4.1 if the suction pressure becomes too low. In periods with easy dust loadsthe cleaning is initiated by the timer. The default switch limit for the suction pressure is -0.5bar in 15 seconds.If too many cleanings are initiated in a row the maintenance request P4.1_PAL or unit alarmP4.1_PALL is activated. See also 9.3.68.1.1.1 Cleaning PerformanceIn case blockings are faced on the Kilnloq probe the cleaning sequence can be optimized toachieve more efficient cleaning.In general cleaning problems can be divided into 2 sections. It is of major importance to tryto determine the actual problem by visual inspections etc.:• Heated sample pipe / Filter blocking:o Blocking may be cause buy temperature errors. Due to temperature profile inpipe and filter different chlorides/components from gasses will crystallize andthus over time block sample line. Handling of this kind of blocking is directlyrelated to cleaning valve sequence (Y4.7-Y4.10). In some situations alsotemperatures may be adjusted slightly up or down. (e.g +/-30°C) In generaldry dust build up are a minor cause.• Probe tip plugging/coatingooBlocking or coating directly on Probe tip (Process end of Cooling jacket andHeated pipe) are often related directly to process. Those kinds of coatings areto be handled by the Tip cleaning system (Y4.4). Puls time and length can beadjusted to change punch and cooling shock effect on coating.To stress the probe tip coatings further a "Tip Puls" function can be enabled.Tip Puls is active during analysis and works at a lower (earlier) setpoint eg.200mbar and thus works as a preventive state. Tip puls sends only 1 pulsmaximum every 2 minutes. Analoge hold during tip puls is possible.Drawing no: <strong>KilnLoq</strong>-400-10 Page 18 of 72
Operation InstructionKilnloq system8.2 KILNLOQ SYSTEM OVERVIEWGMU/Field Cabinetcovered by thismanualSee ”Utility Air"Users ManualSee ”Kilnloq Probe andExtraction device"Users manualSee ”Probe Cooling"Users manual8.3 PARTS / GAS FLOW IN GMUThe sample gas passes through a number of components in the <strong>Gas</strong> Monitoring Unit.Following table shows the purpose of each component. The components are shown in orderof the gas flow.See layout drawing: KILNLOQ: P&I Diagram for exact system configurationTag number Type FunctionW1 <strong>KilnLoq</strong> probe Takes the sample from the process, cleans it from dust andsend it to the heated sample line. The sample is delivered at180 °C.E1 Heated line Transports the sample gas from the <strong>KilnLoq</strong> probe to theshut off valve Y1.1 in the <strong>Gas</strong> Monitoring Unit. The sample isdelivered at 180 °C.E1.1 Line 1 <strong>Gas</strong> cooler Cools down the gas in order to condensate the water. Thedew point of the gas is 5°C.M1.3 (E1.1) CondensatepumpPumps condensate from gas cooler E1.1 to container C2. Thepump is timer controlled by the PLCC1.3 <strong>Gas</strong> mixer Mixes up the gas with the dosing liquid.M1.6 (C1.3) Dosing pump Pumps liquid from container C1 to gas mixer C1.3E1.1 Line 2 <strong>Gas</strong> cooler Cools down the gas in order to condensate the water. Thedew point of the gas is 5°C.See NOTE on E1.1 Line 3 for SO2 high range applications.M1.4 (E1.1) CondensatepumpPumps condensate from gas cooler E1.1 to container C2. Thepump is timer controlled by the PLCM1.1 <strong>Gas</strong> pump Pumps the gas from the process through conditioningcomponents to gas analyzers.V1.1 (M1.1) Ctrl. Valve Maintains constant pressure over pump M1.1. The meaningis to reduce working pressure for V1.3 in order to avoidcondensed acid in the system.Drawing no: <strong>KilnLoq</strong>-400-10 Page 19 of 72
Operation InstructionKilnloq systemY1.2 3/2 valve Used to purge <strong>KilnLoq</strong> probe and sample line after probecleaning. When the system purges out this way, the flow ishigher than 60 l/h and the purge time is then reduced.C1.1 Filter Catches aerosols before the gas enters last cooler step.E1.1 Line 3 <strong>Gas</strong> cooler Cools down the gas to a dew point of 5 °C.NOTE: For SO2 high range applications: E1.1 Line 2 and 3are combined in a -30°C deep cooling stage. Cooler switchesautomatic sample gas between Line 2 and 3. In rest positionthe stages are defrosting to remove condensate.M1.5 (E1.1) CondensatepumpPumps condensate from gas cooler E1.1 to container C2. Thepump is timer controlled by the PLCY1.5 3/2 valve Switches to calibration gas during calibration.B1.1 Humidity filter Monitors the humidity content in the sample gas. If the gasis too wet the Unit alarm B1.1_MAH is activated.V1.3 Adj. valve Reduces the gas flow to 60 l/h. The valve is adjustable.C1.2 Filter Last filter before gas analyzers. If dirt or water is found herethe system must be stopped for inspection.U1.1-U1.x Analyzer(s) <strong>Analysis</strong> the specific components in the sample gas.B1.2 Flow meter Monitors the gas flow. If the flow is less than 10 l/h themaintenance request B1.2_FAL is activated.B1.6 Pressure switch Measures the zero gas pressure (reference gas) connectedto O2 analyzerV1.5 Adj. valve Reduces the zero gas flow to 60 l/h. The valve is adjustable.8.4 ANALYZERSThe system can be configured with at various ranges of analyzers depending on actualprocess demands.In the below table is shown a range of chemical components that may be measured in a<strong>KilnLoq</strong> system. The exact configuration is to be found in “<strong>System</strong> Datasheet”Component Default range Analyzer typeO 2 0-10 / (25) Vol.% Paramagnetic0-10 / (25) Vol.% Electro chemicalCO 0-(3)/ 5 Vol.% IR (Infra Red)CH 4 0-3 Vol.% IR (Infra Red)NO 0-2000 / (4000) ppm IR (Infra Red)SO 20-1 Vol.%UV (Ultra Violet)0-10000 ppm() indicates defaultalternative rangeFor further information see the manufactures manual found in Binder “Datasheets”.To calibrate the analyzer zero-gas N 2 and test-gas containing a concentration of app. 80 %of the measuring range must be used or the internal calibration cells in the analyzer.(Calibration cell is optional for some brands e.g. the ABB)For calibration see section 10.28.4.1 NO X CONVERTERFor measuring NO x components with the NO analyzer the system uses a M&C Products NOxconverter. The converter uses a carbon-molybdenum mixture as catalyst, at hightemperature around 330ºC. For further information see the M&C operation instructions.Drawing no: <strong>KilnLoq</strong>-400-10 Page 20 of 72
Operation InstructionKilnloq system8.4.2 SIEMENS O 2 ANALYZER REMARKThis analyzer needs constant ref. gas pressure, why the zero gas-bottle must be left open atall times. The ref. gas must always flow though the analyzer when measuring gas is flowingthrough. The measuring cell can be damaged if the analyzer operates without ref. gas.8.4.3 SO2 HIGH RANGE W. DEEP COOLINGFor measuring SO 2 at high ranges a deep cooling cooler is used in some configurations. Thedeep cooler comprises of a 5°C Prestage and a -30°C double stage with cool/heat functionto remove condensate in rest position.8.5 COMMISSIONING OF GMUAfter installation, as described in section 7.1 and checking of all electrical and mechanicalinstallation, the system can be commissioned as follows:Issue:Power to analysis system:Adjusting set pointtemperatures:Acknowledge alarmsProcedure:Check all electrical installations according to the cable list.Turn on the main switch, located on the left cabinet side.Check that the supply voltage is correct.Turn on all circuit breakers one by one until all are on.GASloq 1200:Check the cabinet fan set point temperature to 30°C, if not set itas described in section 7.3.2Check the heated sample line set point temperature to 180°C, ifnot set it as described in section 12.4.1Press “2 arrow up” button on HMI if not already in MAIN MENUPress ACTIVE Screen switches to ACTIVE ALARMSPress ENTER and ACK to acknowledge alarms. Alarm stopsflashing.This is the list of active alarms the system can only be started ifno Unit alarm is present.8.6 DISMOUNTING OF THE GMUIssue:Procedure:Stop the analysisPut the system into TEST mode and stop the analysis asdescribed in section 9.3.2.Make sure that the probe has been extracted from the process.Close down all external units: As described Unit manuals for each Unitthe probe, WCP, PCPFlush the system Flush the analysis gas path with ambient air or N 2Shut of powerTurn off main switch 1Q1 and 1Q2, and all circuit breakers shutoff power to GMU externallyDismount the GMUDismount the cable connections to the all other units.NOTE: The GMU end must be dismounted first.Dismount the GMU mechanicallyDrawing no: <strong>KilnLoq</strong>-400-10 Page 21 of 72
Operation InstructionKilnloq system9 HUMAN MACHINE INTERFACE (HMI) DISPLAYThe HMI display is used to control and to receive status of the system.9.1 SETTING TIME IN HMIIssue:Setting of time in HMIContrast adjustmentBrightness adjustmentProcedure:Press upper right corner on Main screen to enter system mode.Or use the Button: “<strong>System</strong>” on Language page on new pages.Press the button right corner on the clock.SET UP TIME in the pop-up menu.Choose SET UP TIME in the pop-up menu.Set time using key pad Press SET when done.Press MAIN MENU and Press RUN.Press: lower left corner and lower right corner of screen in thatorder and keep pressed.Adjust and press anywhere on screenPress: upper left corner and upper right corner in that order andkeep pressed.Adjust and press anywhere on screen9.2 GENERAL OPERATIONS ON HMIThe HMI has several screens. At the upper right corner the system status can be seen. Thisis on all screens.Green indicates on or OK.Red indicates off or FailureAmber indicates WarningWhite indicates informationIssue Illuminated indicate Not illuminated Linked with DO signalindicateSYSTEM ON Green, <strong>Analysis</strong> mode <strong>System</strong> stopped, DO_SYSTEM_ONeither by alarm orwith purposeTEST ON Green, TEST mode DO_TEST_ONCLEANING ONGreen, CleaningDO_CLEANING_ONsequence runningUNIT ALARMRed, Failure, no validDO_UNIT_ALARManalogue signalsMNT REQUESTAmber, MaintenanceDO_MNT_REQUESTRequestHMI LOCKED White, HMI is locked HMI is unlocked. DO_HMI_LOCKHEAT INPUT (optional) White, Heat inputabnormalHeat input normal DO_HILHTo choose a function just press on the wanted button and the screen will appear.On each screen there are arrows:3= Previous screen, if any4= Next screen, if any5 = Jump to MAIN MENUDrawing no: <strong>KilnLoq</strong>-400-10 Page 22 of 72
Operation InstructionKilnloq system9.3 MIMICNOTE: The layout and functions shown in this chapter is based on a standard 10”HMI in colors. Layout may vary if other HMI versions are selected according to“<strong>System</strong> Data Sheet”. On smaller displays some functions may be omitted,especially in service menus.9.3.1 MAIN MENUThe main menu screen is used as a main switchboard, where the path to all information andoperation are linked together. The menu has three Column Mimic, Alarm list and Parameter.In the button of the window the last active alarm is shown. Press the alarm line and thewindow will change to active alarm view for more details.Go to HMI system menu.Go to active alarm list.* Figure above is only an example, and not totally similar to HMI screenMIMIC, ALARM LIST, PARAMETERIssue:MIMICALARM LISTPARAMETERFunction:Control of the systemStatus of systemSet-up of systemDrawing no: <strong>KilnLoq</strong>-400-10 Page 23 of 72
Operation InstructionKilnloq system9.3.2 START/STOPThis shows the main components in the system. Green indicates “On”. E.g. pump symbolgreen = pump running.* Figure above is only an example, and not totally similar to HMI screenIssue ON OFF Linked with statussignalSTART<strong>System</strong> starts if no <strong>System</strong> stopsSTOPPEDUnit alarm present.ANALYSIS MODECLEANINGInitiate cleaningsequenceNACLEANINGDrawing no: <strong>KilnLoq</strong>-400-10 Page 24 of 72
Operation InstructionKilnloq system9.3.3 EXTRACTIONThis shows the main components in the system. Green indicates “On”. E.g. pump symbolgreen = pump running.From here it is possible to test the Extraction in manual mode (See Extraction manual).* Figure above is only an example, and not totally similar to HMI screenIssue Only enable in ON OFFMANUAL OPERATION TEST mode Allows local operationof Extraction DeviceDisables localoperationTESTStart test mode, if noUnit alarm present.TEST MODEStop test mode TESTDrawing no: <strong>KilnLoq</strong>-400-10 Page 25 of 72
Operation InstructionKilnloq system9.3.4 CALIBRATIONThis shows the main components in the system. Green indicates “On”. E.g. pump symbolgreen = pump running.* Figure above is only an example, and not totally similar to HMI screenIssue Only enable in ON OFFCAL TEST mode Enable SPAN andZEROSwitch Y1.5 tocalibration gasDisable SPAN andZEROSwitch valve Y1.5 tosample gasY1.9(Optional!)CALEnable SPAN andZERO of optional gaspaths.Switch Y1.9 tocalibration gasDisable SPAN andZEROSwitch valve Y1.9 offDrawing no: <strong>KilnLoq</strong>-400-10 Page 26 of 72
Operation InstructionKilnloq system9.3.5 LEAK TESTThis shows the main components in the system. Green indicates “On". E.g. pump symbolgreen = pump running.* Figure above is only an example, and not totally similar to HMI screenIssue Only enable in ON OFFLEAK TEST mode Disable CLEANINGDisables B1.2_FALStarts pump M1.1Stops leak test modeDrawing no: <strong>KilnLoq</strong>-400-10 Page 27 of 72
Operation InstructionKilnloq system9.3.6 ACTIVE ALARMSThis shows the active alarm, normally it should be empty. If there is an alarm the errormust be corrected at once. See section 16 for help.When an alarm occurs, it will appear in active alarm, flashing. To stop it flashing pressENTER, ACK or CLEAR.If the alarm is still present (not recovered) it can be read, if the alarm has disappeared theline will be cleared.The list can contain more than 700 lines. It uses FiFo, First in First out principle.Date and time for when the alarm occurred (“Trigger”) can be read. Furthermore the timewhen it was acknowledged (ACK) can be read.9.3.6.1 P4.1 Under pressure alarmThe two purple counters show the actual number of analysis periods less than 2 or 5minutes. To the right of the counters the limit values for Maintenance request (MNT) andunit alarm (AL) is shown in (). If one of the limits are exceeded the under pressure alarmP4.1_PAL or P4.1_PALL will appear in the active alarm display.* Figure above is only an example, and not totally similar to HMI screenIssue Only enable in ON OFFENTEREnable other buttons to be NAactivated, line appears in list.Up When ENTER has been pressed Move lines up NADown When ENTER has been pressed Move lines down NAACK When ENTER has been pressed Acknowledge alarm NACLEAR When ENTER and ACK has beenpressedClear Acknowledge alarm NADrawing no: <strong>KilnLoq</strong>-400-10 Page 28 of 72
Operation InstructionKilnloq system9.3.7 ALARM HISTORYThis shows the historic alarms.The list can contain more than 700 lines. It uses FiFo, First in First out principle.Date and time for when the alarm occurred (ON) can be read. Furthermore the time when itwas cleared (OFF) can be read. The Elapsed time is how long this kind of alarm has been onsince last clear of time “CLR ATIME”.All alarms present are shown in white, all historic are shown in green* Figure above is only an example, and not totally similar to HMI screenIssue Only enable in ON OFFENTEREnable other buttons to beNAactivated, line appears in listUpWhen ENTER has Move line upNAbeen pressedDownWhen ENTER hasbeen pressedMove line downNAROLL UpWhen ENTER hasbeen pressedRoll lines upNAROLL DownWhen ENTER hasbeen pressedRoll lines downNACLEAR ATIMEWhen ENTER hasbeen pressedClear the ON time log of historyactive alarms.NADrawing no: <strong>KilnLoq</strong>-400-10 Page 29 of 72
Operation InstructionKilnloq system9.3.8 EVENT LOGThis shows the events to system.When an event is on, it will appear in event log in green text and in red when is it offThe list can contain more than 700 lines. It uses FiFo, First in First out principle.* Figure above is only an example, and not totally similar to HMI screenIssue Only enable in ON OFFENTEREnable other buttons to beNAactivated, line appears in listUpWhen ENTER has Move lines upNAbeen pressedDownWhen ENTER hasbeen pressedMove lines downNADrawing no: <strong>KilnLoq</strong>-400-10 Page 30 of 72
Operation InstructionKilnloq system9.3.9 ANALYSISThis is the set up of analysis parameters. The values are by pressing the value and akeypad will show. The values have a minimum and maximum setting.9.3.9.1 Interval extraction for <strong>KilnLoq</strong> probeIn order to keep the <strong>KilnLoq</strong>-probe clean from material build-up it has to be automaticallyextracted with certain intervals. The optimal interval for automatic extraction differs fromkiln to kiln and has to be determined on site. If ANALYSIS TIME is set to 10 minutes andEXTRACTION EVERY to 6 the probe will be extracted every 10x6 minutes = one time eachhour.* Figure above is only an example, and not totally similar to HMI screenIssue Function Default Minimum MaximumsettingANALYSIS ON TIME* Active analysis time 10 minutes 6 minutes 20 minutesThis is also the timebetween cleaningsPURGE TIMETime to purge system 30 s 1 s 99 safter cleaningPURGE ANALYZER Time to purge analyzer 5s 1 s 99 sTIMEafter PURGE TIMEEXTRACTION EVERY Number of cleaningsbetween extraction6 1 99The realized analysis time can be shorter than the parameter value if the cleaning sequenceis initiated by the pressure transmitter P4.1.Drawing no: <strong>KilnLoq</strong>-400-10 Page 31 of 72
Operation InstructionKilnloq system9.3.9.2 TemperatureFor the in PLC temperature regulators the setpoint and actual temperatures can bemonitored.* Figure above is only an example, and not totally similar to HMI screenSettings are setup on service page, during startup or service by FLSmidth <strong>Gas</strong> <strong>Analysis</strong><strong>Technology</strong>.Issue Function Default Minimum MaximumsettingE1 Reg. Parameter Set point for regulator 180 0 200E1 temperature.E3 Reg. Parameter Set point for regulator 180 0 200E3 temperature.E4 Reg. Parameter Set point for regulatorE4 temperature.230 0 250Drawing no: <strong>KilnLoq</strong>-400-10 Page 32 of 72
Operation InstructionKilnloq system9.3.10 COOLING WATER TEMPERATURE CONTROLWater control temperature is controlled by E3.1 and 1B3.This a on/off regulation.The inlet and outlet temperature is shown, with the regulator and alarm set points.* Figure above is only an example, and not totally similar to HMI screenIssue Function Default Minimum MaximumsettingTemperatureSet point for regulator 70 degC 10 degC 100 degC1B3 temperature.Hysteresis cooling Hysteresis for3 degC 1 degC 20 degCtemperature control.Alarm highSet point for alarm 10 degC 1 degC 20 degC1B3 temperature.NOTE: Temperature + Alarm high may not exceed 90°CDrawing no: <strong>KilnLoq</strong>-400-10 Page 33 of 72
Operation InstructionKilnloq system9.3.11 EXD A4 TEMPERATUREThe EXD temperature is shown, with the alarm set points.Temperature is controlled by using flangecleaner valve Y4.3 to cool down Extraction devicenose and flange.* Figure above is only an example, and not totally similar to HMI screenIssue Function Default Minimum MaximumsettingTemperatureSet point Temperature 45 degC 10 degC 55 degCcontrol.Hysteresis cooling Set point Hysteresis of 5 degC 1 degC 20 degCtemperature controlAlarm highSet point for alarm5B3 temperature.10 degC 1 degC 20 degC9.3.12 DOSINGThis is the set up of dosing parameters. The values are changed by press the value andchange on the keypad. The values have a minimum and maximum setting.The H 2 O 2 is used to neutralize the acid components in the sample gas. The reaction betweenthe H 2 O 2 and the acid takes place in the spiral tube C1.3 in the GMU. A timer in the PLCprogram controls the H 2 O 2 dosing. The timer should be optimized in the PLC duringoperation in order to use as little H 2 O 2 as possible.The dosing must be optimized, this can only be done when the system is installed andrunning in the application. The run and wait time is depending of the SO 2 content in thesample gas. If the fluid in the C1.3 has a yellow color the amount of H 2 O 2 has to beincreased (run time longer).The H 2 O 2 can sometimes react with other gasses. To check this, the dosing is turned off for2-5 hours and the on again. This has to be done during stable running of the process. Notethe different, if any, of the measured gasses. The different can be reduced by optimizing ofrunning and wait time.With the time set to default the amount of H 2 O 2 is approximately 0.33 l/24 h.A container with H 2 O 2 should be placed on the side of the GMU Cabinet and a 6/4 mm hoseshould be connected to the appropriate pipe stub.Drawing no: <strong>KilnLoq</strong>-400-10 Page 34 of 72
Operation InstructionKilnloq systemH 2 O 2 concentration: 30 %Dosing pump is working with 7 ml/min.To find how much dosing is used [l/day]: 24 * 60 * (Run time / Wait time + Run time) * 7* (1/1000)WARNING: Take the appropriate safety measures according to manufacturesspecification.* Figure above is only an example, and not totally similar to HMI screenIssue ON OFFDOSINGEnable M1.6 to dose Disable M1.6according to timersIssue Function Default Minimum MaximumsettingM1.6 RUN TIME Time pump M1.6 2 s 1 s 60 srunningM1.6 WAIT TIME Time pump M1.6 wait 60 s 1 s 60 sDrawing no: <strong>KilnLoq</strong>-400-10 Page 35 of 72
Operation InstructionKilnloq system9.3.13 HEAT INPUT SYSTEMThe heat input system is an option and is therefore not included in all systems.9.3.13.1 Difference temperature Low/High indication for <strong>KilnLoq</strong> probeThe difference between in- and outlet temperature for the cooling water is monitored by thePLC. If the difference temperature is abnormal high, the <strong>KilnLoq</strong> probe is in some wayprotected against insulating material build-up on the cooling jacket i.e. the kiln feed isstopped or material build-up is surrounding the cooling jacket with out physical contact. Ifthe difference temperature is abnormal low the insulating build-up layer is too big. Bothsituations could in worst case damage the <strong>KilnLoq</strong> probe. If the actual differencetemperature crosses the maximum or minimum limit for more than three minutes theindication “W1_HILH” is activated. Adjustments of these limits must be based on siteexperience. The actual difference temperature and alarm limits are shown on the trendpage. With the “On” and “Off” button this alarm can be enabled or disabled.The “Heat input inlet and outlet” are the actual temperature value of the cooling water. The“Difference temperature” is a calculated value of output – input temperature.* Figure above is only an example, and not totally similar to HMI screenIssue ON OFFHEAT INPUT SYSTEM Enables the system Disables the systemIssue Function Default Minimum MaximumsettingMAX DIFF TEMP Maximum difference 25 5 30temperature for<strong>KilnLoq</strong> probeMIN DIFF TEMP Minimum differencetemperature for<strong>KilnLoq</strong> probe1 0 25Drawing no: <strong>KilnLoq</strong>-400-10 Page 36 of 72
Operation InstructionKilnloq system9.3.14 TRENDOn the trend page, showed values can be monitored in live or historic mode. The Y-axis is0-100% and the X-axis is half an hour. The history buffer contains values from 7.5 hours.• Probe IN / CleaningThis “digital” curve shows if the <strong>KilnLoq</strong> probe is in or out and if the cleaning is active.Probe out + cleaning off : 5 %Probe out + cleaning on : 35 %Probe in + cleaning off : 65 %Probe in + cleaning on : 95 %• OxygenOxygen value in 0-100% of actual measuring range• P4.1 Pressure dropActual pressure drop across <strong>KilnLoq</strong> probe, 0-1000 mbar.Following trends are only included if the heat input system is installed (Optional):• Probe temperature diff. (cooling water inlet – cooling water outlet)Difference temperature for cooling water, 0-30 °C• <strong>KilnLoq</strong> temp. diff. MAX/MINLimit values for difference temperature alarm. These values are only visible if the differencetemperature alarm is enabled on the “<strong>KilnLoq</strong>” parameter page.On this button each trend can beshown or turned off in the graph.* Figure above is only an example, and not totally similar to HMI screenIssue Only enable if ON OFFDisp Change between live and historic. NAPrev Disp is active Previous page in history NAFwd Disp is active Next page in history NADisp is activeOn this button each trend can beshown or turned off in the graph.The history value of the trend isshown on the curser line.The trendis notshown.NANADrawing no: <strong>KilnLoq</strong>-400-10 Page 37 of 72
Operation InstructionKilnloq system9.3.15 LANGUAGEChose the language you want the HMI to use. Some of the HMI text are names andexpressions and are therefore not translated.In the right corner the close button (X) shut down the HMI application, and go the Pro-facesystem menu.Go to HMI system menu.* Figure above is only an example, and not totally similar to HMI screenDrawing no: <strong>KilnLoq</strong>-400-10 Page 38 of 72
Operation InstructionKilnloq system9.3.16 FRONT PAGEThis picture show the standby picture with gas levels system status.Go to config menu forFront Page.<strong>System</strong> OK and running<strong>System</strong> Running with MNT Request (Service is required)<strong>System</strong> Stopped or with Unit Alarm.* Figure above is only an example, and not totally similar to HMI screenDrawing no: <strong>KilnLoq</strong>-400-10 Page 39 of 72
Operation InstructionKilnloq system9.3.16.1 Front page configurationHere is the configuration of the standby picture.Select gas to be shown.And press checkmarkSet scale set point.* Figure above is only an example, and not totally similar to HMI screen9.3.17Turn on signal forWirebreak control etc.Drawing no: <strong>KilnLoq</strong>-400-10 Page 40 of 72
Operation InstructionKilnloq system9.3.18 SERVICE PAGEThis is the main menu of service page. From here there is access to the five pages shownbelow.The page show 4 log of time counters:1. Power on ”ON”, is how long there has been power on the system.2. <strong>System</strong> running “SYSTEM ON”, is how long the system has been running with outunit alarm.3. Maintenance on “MNT REQUEST”, is how long there has been MNT alarm whenrunning.4. Unit alarm on “UNIT ALARM”, is how long there has been a unit alarm.in hour, minutes and seconds.Number of puls is how many time the system has changed status of system on,maintenance alarms and unit alarms.9.3.18.1 Service passwordThe Service pages is protected with password, this is only for administrators of the system.Type the password and press ENT.* Figure above is only an example, and not totally similar to HMI screenReset the counter valueand time counters forMNT / UNIT ALARM.* Figure above is only an example, and not totally similar to HMI screenIssue Only enable if ON OFFReset the counter and timer value. NADrawing no: <strong>KilnLoq</strong>-400-10 Page 41 of 72
Operation InstructionKilnloq systemIssue Only enable if ON OFFRemoteStartStopEnables Remote start and stop byBUS and HW Input(Toggle function)NADrawing no: <strong>KilnLoq</strong>-400-10 Page 42 of 72
Operation InstructionKilnloq system9.3.18.2 Advanced ParameterOn this page it is possible to save and set standard and plant parameter for the system.From the disk button opens a new window where the log files can be copied to a USB stick.Select witch parameter name tosave to as backup, and press √.Select witch parameter name toget from backup, and press √.* Figure above is only an example, and not totally similar to HMI screenUse the key pad numbersand press enter “ENT”.Copy data from CF to USB stickFrom this window it is possible tomanagement the files on the USB stick andthe CF card.Ex copy the log files from CF card by presscopy, and then paste on the USB view.Issue ON OFFSave plant parameter Save the actual system NAvalue as parameter set.Set plant parameter Set a parameter set torunning system value.NAIssue Function Default Minimum MaximumsettingP4.1 pressure drop Set point for P4.1 500 0 1000when to start cleaning.Condensate run time On time for30 0 300condensate pumps.Condensate wait time Wait time forcondensate pumps.300 0 300Issue ON OFFShutter enableShutter functionenabledShutter functiondisabled.GMU enable GMU function enabled GMU function disabled.Drawing no: <strong>KilnLoq</strong>-400-10 Page 43 of 72
Operation InstructionKilnloq system9.3.18.3 Analogue scale valueThis window is showing the analog value.The actual value is read on the analog card input.The setpoint is the max value for the calculated scale value.The scale value is a calculated value.Change all the setpointto the new input value.* Figure above is only an example, and not totally similar to HMI screenIssue Only enable if ON OFFSet pointRange max value for the calculated NAscale value.Go the trend window, see below. NADrawing no: <strong>KilnLoq</strong>-400-10 Page 44 of 72
Operation InstructionKilnloq systemGraph of analogue valueThis window show the analogue value on a graph. Each trend* Figure above is only an example, and not totally similar to HMI screenSelect witch analogue input trend toshow or turn off, and press √.This will toggle the trend on or off.The “ALL” button will turn all trend on.IssueOnly enable ONOFFifDisp Change between live and historic. NAPrev Disp is active Previous page in history NAFwd Disp is active Next page in history NAZoom in Disp is active Zoom in on the actual page in history NAZoom out Disp is active Zoom out on the actual page in NAhistoryDisp is active By press “DISP” the trend show NAandhistory data. The curser can beplaced, and the value can be read onthe right.Drop downmenuEach trend can be shown, see below. The trend is notshown.Scale the min and maximum of the Y-axis “0-x”NA0 Scale the minimum of the Y-axis NA10000 Scale the maximum of the Y-axis NANADrawing no: <strong>KilnLoq</strong>-400-10 Page 45 of 72
Operation InstructionKilnloq system9.3.18.4 Digital IO statusThe page show the actual value of each hardwire digital io.* Figure above is only an example, and not totally similar to HMI screenThis show the HMI and PLC system value.This is only for very trainedadministrators.* Figure above is only an example, and not totally similar to HMI screenDrawing no: <strong>KilnLoq</strong>-400-10 Page 46 of 72
Operation InstructionKilnloq system9.3.18.5 Cleaning sequenceOn this page the parameter for the cleaning sequence can be set, and make a manualcleaning.Press to see the help text for Cleaning.Page:Tip CleaningSetup* Figure above is only an example, and not totally similar to HMI screenIssue ON OFF Linked with status signalCLEANINGInitiate cleaning NACLEANINGsequenceIssue Function Defaul Minimum MaximumtsettingCleaning on delay Delay for cleaning before 10 1 10start at extraction.Puls ON On time of pulses. 1 0 10Puls OFF Off time of pulses. 1 0 10NO. of Puls Number of pulses. 4 0 10Issue ON OFFInvert Y2.1 & Y2.2 Y2.2 is starting the pulssequence, and is on at the end.Y2.1 is starting the pulssequence, and is on at the end.Tip cleaningThe tip cleaning function isenabled.The tip cleaning function isdisabled.DefaultUpdate the values to default NAvalues.Show a help text above thebutton. See below cleaning help.Close help text.Issue Only enable if ON OFFManual TEST ON Reset the analyse time, and enablethe manual cleaning function.Reset manualcleaningfunction.Y2.1 TEST ON and manual Valve Y2.1 filter is set on.NAcleaning on.Y2.2 TEST ON and manual Valve Y2.2 pipe is set on. NADrawing no: <strong>KilnLoq</strong>-400-10 Page 47 of 72
Operation InstructionKilnloq systemIssue Only enable if ON OFFcleaning on.Y2.3 TEST ON and manual Valve Y2.3 supply is set on.NAcleaning on.Y2.4 TEST ON and manual Valve Y2.4 relieve is set on.NAcleaning on.Y4.4 TEST ON and manualcleaning on.Valve Y4.4 tip cleaning is set on. NADrawing no: <strong>KilnLoq</strong>-400-10 Page 48 of 72
Operation InstructionKilnloq system9.3.18.6 Tip cleaningOn this page the parameter for tip cleaning is set.* Figure above is only an example, and not totally similar to HMI screenP4.1 Pressure drop init cleaning.Issue Function Default Minimum MaximumsettingP4.1 pressure drop Set point for P4.1 500 0 1000when to start tip andprobe cleaningsequence .Puls ON On time of pulses. 2 0 10Puls OFF Off time of pulses. 1 0 10NO. of Puls Number of pulses. 2 0 10NOTE Tip cleaning is followed by probe/filter cleaning sequence9.3.18.7 Tip PulseIn case of build up (blocking) during analysis period, the Tip Pulse can be enabled to shootone pulse at lower under pressure e.g 250mbar for at preventive cleaning of probe tip. Tippulse can only run again after 2 minutes delay. Tip pulse does not influence on regularcleanings.Issue Function Default Minimum MaximumsettingTip PulsON/OFFEnables Tip pulsfunctionSeconds Length of Tip puls 2 0 10Analogue HoldEnables Hold of analog 1 0 10signals during Tip Puls(BUS signals only!!)Hold delayDelay before hold of 25 0 60signalsHold timeAnalog signal holdtime10 0 60Drawing no: <strong>KilnLoq</strong>-400-10 Page 49 of 72
Operation InstructionKilnloq systemo9.3.18.8 PID regulator parameterThis page the administrator operator can set up and monitor the regulator for the heatedhose, pipe and filter.Press to see the help text for PID regulator.Go to graph page.Press to set default factory regulator parameter value.* Figure above is only an example, and not totally similar to HMI screenIssue Function Default Minimum MaximumsettingE1 Reg. Parameter Set point for regulator 180 0 200E1 temperature.E3 Reg. Parameter Set point for regulator 180 0 200E3 temperature.E4 Reg. Parameter Set point for regulator 230 0 250E4 temperature.E1 DifferenttemperatureSet point for regulatorE1 temperature minand max alarm limits.20 0 50E3 DifferenttemperatureE4 DifferenttemperatureSet point for regulatorE3 temperature minand max alarm limits.Set point for regulatorE4 temperature minand max alarm limits.Press to set test regulator parameter value.20 0 5030 0 50Issue ON OFFShow a help text above. Close help text.Show the graph of eachheat unit. See below.NAGraph of PID regulator E1On this window the trend of the heated hose temperature is shown. Below the temperatureset point can be set, the min and max alarm limits. The actual temperature is measured andshow below.The blue line is the temperature set point.The grey and blue dot line is the actual temperature value.Drawing no: <strong>KilnLoq</strong>-400-10 Page 50 of 72
Operation InstructionKilnloq systemThe grey and green dot line is the min alarm value.The grey and red dot line is the max alarm value.The grey line is the extraction status, see reference 9.3.14.* Figure above is only an example, and not totally similar to HMI screenIssue Function Default Minimum MaximumsettingE1 Reg. Parameter Set point for regulatorE1 temperature.180 0 200DifferencetemperatureSet point for E1temperature min andmax alarm limits.20 0 20Issue Only enable if ON OFFDisp Change between live and historic. NAPrev Disp is active Previous page in history NAFwd Disp is active Next page in history NAZoom in Disp is active Zoom in on the actual page in history NAZoom Disp is active Zoom out on the actual page in NAouthistoryDisp is active The history value of the trend isshown on the curser line.Drawing no: <strong>KilnLoq</strong>-400-10 Page 51 of 72
Operation InstructionKilnloq system10 CALIBRATIONThe analyzers have to be calibrated at regular time intervals to avoid drift. It is also a checkof the function of the analyzer.The following description contains brief instructions intended to help you calibrate theanalyzers quickly. Once you are familiar with the procedure. The analyzer should have beenwarmed up for at least 24 hours before calibration. Before calibrating for the first time, it isstrongly recommended that you read the manufacturers instruction manual to thoroughlyfamiliarize yourself with the procedure.IMPORTANT! After introducing the test gases into the analyzers, it is essential to wait untilthe analyzer signals are stable before calibrating. Failure to do this will result in an incorrectcalibration and in extreme cases can make the analyzers unusable.10.1 TEST GASES:10.1.1 GENERALThe test gases are used to calibrate the various analyzing components.Zero gas N 2 or ambient air (ambient air can not be used for O 2 analyzers)Span gas 80 % of the range. If there are two ranges use gas for the most used range.The test gases are connected to the GMU. The system is designed for manual calibration.The ABB Uras 14 analyzers has calibrations cell for span calibration but the analyzer has tobe purged with zero gas during the use of this feature.10.1.2 INSTALLATION OF TEST GASSES IN GASLOQ 1200Test gas bottles must be connected to gas connectors on the right side of the GMU panel.All 6mm PVDF connectors are clearly marked with a sign: “Span gas 1”, “Zero gas” etc.The test gas contains various gas components and is supplied at high pressure (100-200bar). The following safety measures must be taken:• Test gas bottles must be secured from falling, by using supplied holders.• The area/room where the test gasses are placed / stored must be well ventilated.• The main valves on the gas bottles must be closed when they are not in use.NOTE:Be sure to observe national and local safety regulations for the respective test gasbottles.10.1.3 INSTALLATION OF TEST GASSSES IN GASLOQ CUBETest gas bottles must be connected to gas connectors in the GMU. All connectors are clearlymarked with a sign: “Span gas 1”, “Zero gas” etc.The test gas contains various gas components and is supplied at high pressure (100-200bar). The following safety measures must be taken:• Test gas bottles must be secured from falling, by using supplied holders.• The GASloq CUBE must be well ventilated, by using the air-conditioning.• The main valves on the gas bottles must be closed when they are not in use.•NOTE: Be sure to observe national and local safety regulations for the respectivetest gas bottles.Drawing no: <strong>KilnLoq</strong>-400-10 Page 52 of 72
Operation InstructionKilnloq system10.2 CALIBRATION PROCEDUREIt’s essential that the operator reads the Operator’s manual for the analyzers, beforeattempting to calibrate the analyzers. The below describes how to calibrate one analyzedcomponent the procedure must be repeated until all are calibrated.CAUTION! During calibration, check periodically that the flow remains constant at 60 l/h.10.2.1 ABB ANALYZERSIssue:Procedure:Set system to calibration Put the system to TEST mode as described in section 9.3.2modePut the system to CAL mode as described in section 9.3.4Purge analyzer with Zero gas Check gas bottle is correct connected according P&I diagramRelease regulating valve and check outlet valve (if any) iscomplete open on the bottle valve unit.Open main valve on gas bottle.Turn regulating valve on the bottle until gas flow is 60l/h on flowmeter B1.2Make Zero calibration on Press MENU on analyzeranalyzerChoose CALIBRATE (use 56 and ENTER key)Choose MANUAL CALIBRATION (use 56 and ENTER key)Follow instructions on analyzer displayWhen zero is done on all components press MEASClose zero gas cylinder valve Close valve zerogas valve and make sure that flow stopsPurge analyzer with Span gas Check gas bottle is correct connected according P&I diagramRelease regulating valve and check outlet valve (if any) iscomplete open on the bottle valve unit.Open main valve on gas bottle.Turn regulating valve on the bottle until gas flow is 60l/h on flowmeter B1.2Make SPAN calibration on Press MENU on analyzeranalyzerChoose CALIBRATE (use 56 and ENTER key)Choose MANUAL CALIBRATION (use 56 and ENTER key)Follow instructions on analyzer displayWhen span is done on all components press MEASClose Span gas cylinder valve Close spangas valves and make sure that flow stopsClose main valves on gas cylinders when they are not in use.10.2.2 SIEMENS ANALYZERSIssue:Procedure:Set system to Test mode Put the system to TEST mode as described in section 9.3.2Purge analyzer with Zero gas Check gas bottle is correct connected according P&I diagramRelease regulating valve and check outlet valve (if any) iscomplete open on the bottle valve unit.Open main valve on gas bottle.Turn regulating valve on the bottle until gas flow is 60l/h on flowmeter B1.2Make Zero calibration on Press for desired measuring component on the analyzeranalyzerChoose CALIBRATIONEnter level 1 code “111”Check the set points for Zero/Span and correct these to matchthe testgas certificatesChoose ZERO CALIBRATIONWait for the measuring to get stabile close to zero.Drawing no: <strong>KilnLoq</strong>-400-10 Page 53 of 72
Operation InstructionKilnloq systemIssue:Close Zero gas cylinder valvePurge analyzer with Span gasMake SPAN calibration onanalyzerProcedure:Chose START CALIBRATIONWait for the calibration to end and the press MEASClose valve on zero gas cylinderCheck gas bottle is correct connected according P&I diagramRelease regulating valve and check outlet valve (if any) iscomplete open on the bottle valve unit.Open main valve on gas bottle.Turn regulating valve on the bottle until gas flow is 60l/h on flowmeter B1.2Press for desired measuring component on the analyzerChoose CALIBRATIONEnter level 1 code “111”Check the set points for Zero/Span and correct these to matchthe testgas certificatesChoose SPAN CALIBRATIONWait for the measuring to get stabile close to span point.Choose START CALIBRATIONWait for the calibration to end and the press MEASClose valve on span gas cylindersClose Span gas cylinder valveClose main valves on gas cylinders when they are not in use.10.2.3 ABB EASYLINE ANALYZERSIssue:Set system to calibrationmodePurge analyzer with Zero gasMake Zero calibration onanalyzerClose Zero gas cylinder valvePurge analyzer with Span gasMake SPAN calibration onanalyzerProcedure:Put the system to TEST mode as described in section 9.3.2Put the system to CAL mode as described in section 9.3.4Check gas bottle is correct connected according P&I diagramRelease regulating valve and check outlet valve (if any) iscomplete open on the bottle valve unit.Open main valve on gas bottle.Turn regulating valve on the bottle until gas flow is 60l/h on flowmeter B1.2Press OK on analyzer (main menu)Choose OPERATION(use ▲)Choose CALIBRATION (use ▲ )Choose MANUAL CALIBRATION (use ▲ )Choose ZERO POINT/SINGLE POINT (use ▲ and OK)Choose calibration for all components and (OK)Follow instructions on analyzer displayWhen zero is done on all components press ESC until out inmainClose valve on zero gas cylinderCheck gas bottle is correct connected according P&I diagramRelease regulating valve and check outlet valve (if any) iscomplete open on the bottle valve unit.Open main valve on gas bottle.Turn regulating valve on the bottle until gas flow is 60l/h on flowmeter B1.2Press OK on analyzer (main menu)Choose OPERATION(use ▲)Choose CALIBRATION (use ▲ )Choose MANUAL CALIBRATION (use ▲ )Choose SPAN (use ► and OK)Follow instructions on analyzer displayDrawing no: <strong>KilnLoq</strong>-400-10 Page 54 of 72
Operation InstructionKilnloq systemIssue:Procedure:When span is done on all components press ESCClose Span gas cylinder valve Close valve on span gas cylindersClose main valves on gas cylinders when they are not in use.Drawing no: <strong>KilnLoq</strong>-400-10 Page 55 of 72
Operation InstructionKilnloq system11 LEAK TESTThis test is essential to ensure correct function of the system. It must be made after anyservice or repair of the probe or gas hoses, or whenever you suspect that air may beentering the system and affecting the measurement.To make leak test the <strong>KilnLoq</strong> probe must be secured• Put system in “Test mode”• Prepare probe as described in “<strong>KilnLoq</strong> Probe Unit Manual” !• For system with SO 2 analyser before Pump M1.1: Bypass analyser. This is done byconnecting gas in (1) / gas out (4) sample hoses on the back of the analyser using oneof the 6 mm bulkheads included in start-up accessories. This is done to avoid damagingthe analyser due to vacuum.• Press “Leak ON” on the HMI. See section 9.3 for HMI operation.• Check flow monitor B1.2 shows 0 l/h. The steel ball must remain stationary at thebottom of the flow meter. If the ball is not completely stationary, the leakage must befound and corrected (It will be found before the gas pump M1.1, on suction side).• Press “Leak Off” on the HMI. See section 9.3 for HMI operation.• Prepare probe to analysis as described in “<strong>KilnLoq</strong> Probe Unit Manual”• Reconnect bypassed analyser if appropriate.Restart system for analysis mode.Drawing no: <strong>KilnLoq</strong>-400-10 Page 56 of 72
Operation InstructionKilnloq system12 HEATED SAMPLE GAS HOSE12.1 GENERALTo transport the samplegas from <strong>KilnLoq</strong> Probe to GMU a Heated Sample gas hose is used.To prevent condensation in the gas sample hose a electrically heated to 180 °C and has a6/4 mm PTFE exchangeable inner hose. It has a Pt100 sensor used together with atemperature regulator and a solid state relay to control the temperature.12.2 TECHNICAL INFORMATION HEATED SAMPLE LINEPower supply:Power comsumption:100 W/m.Dimension:Dimensions l x ø: Length according to “<strong>System</strong> Data Sheet” x 40mm.Weight:Weight:Connections:Hose connections::1 kg/m.Probe end: 6 mm stainless steel Swagelok.GMU end: 6 mm PVDF12.3 INSTALLATION OF HEATED SAMPLE GAS HOSEThe heated sample line is connected in the <strong>KilnLoq</strong> probe and has to be connectedto the GMU. The hose must be rolled out in its full length and the installed on acable tray or similar. It must be weather protected and mechanical protected. Theend with the power cable is to be located in the GMU and fixed in the hose clamp.Bending radius has to be greater than 250 mm.Note.If the hose has to be coiled the coils must not touch each other there should be at least 100mm betweenThe distance between heated hoses should be at least 100 mm12.3.1 HOSE CONNECTION HEATED SAMPLE LINEConnect the heated sample line according to the following tableFrom <strong>KilnLoq</strong> probeThis connection is always done by FLSmidth<strong>Gas</strong> <strong>Analysis</strong> <strong>Technology</strong>To GMUThrough cable gland labeled “Line 1” to 6mmfitting on gas cooler stage E1.1_L112.3.2 POWER CONNECTION TO HEATED SAMPLE LINEThe power cable for the heated hose E1 must be mounted according to the following table.Fixed power cableThe power cable is at fixed part of the heatedsample line E1To GMUTo terminal row X16 according to the cable listDrawing no: <strong>KilnLoq</strong>-400-10 Page 57 of 72
Operation InstructionKilnloq system12.4 COMMISSIONING OF HEATED SAMPLE LINEAfter installation, as described in section 12.3 and checking of all electrical and mechanicalinstallation, the system can be commissioned as follows:Issue:Check set point temperatureProcedure:Check on temperature controller 11K3 that the set point is180°C, if not use the arrow keys to adjust the temperature.12.4.1 HEATED SAMPLE LINE TEMPERATUREThe temperature of the heated sample line is adjusted by the arrow keys on the front of thecontroller 11K3.12.5 DISMOUNTING OF HEATED SAMPLE LINEIssue:Stop the analysisShut of powerDisconnect gas hose at bothends.Procedure:Put the system into TEST mode and stop the analysis asdescribed in section 9.3.2.Turn off circuit breaker 11F1 located in the GMU.Disconnect power cable at terminal row X16 in the GMURefer to section 6 to extract and secure the probeDisconnect hose in both endsPurge hose with ambient air, N 2 or instrument airFree Heated Sample Line for support throughout its lengthDrawing no: <strong>KilnLoq</strong>-400-10 Page 58 of 72
Operation InstructionKilnloq system13 COMMISSIONING THE SYSTEMThe <strong>Gas</strong> Monitoring Unit must have been in a vertical position for at least 24 hours beforeswitching on power.The system should be started at least 24 hours before analysis is required, to give allcomponents time to warm up.If any alarm occurs during commissioning see section 16 for help.After installation, as described the previous sections, and checking all electrical andmechanical installation, the system can be started up as follows:• Commission all the <strong>System</strong> Units according to each “Unit Operation Manual” for:o Probe Cleaning Panelo Probe Coolingo <strong>KilnLoq</strong> probeo Extraction Device• Commission the <strong>Gas</strong> Monitoring Unit as described in section 8.5• Commission the heated sample line as described in section 12.4Set system to ANALYSIS MODE as described in section 9.3.2Drawing no: <strong>KilnLoq</strong>-400-10 Page 59 of 72
Operation InstructionKilnloq system14 OPTIONSFollowing options may be included in system on request. See “<strong>System</strong> Data Sheet” foroverview.14.1 GAS LEAK DETECTIONFor all analysis systems FLSmidth A/S recommend to install a <strong>Gas</strong> Leak detection system,for personal safety.The GDS 404 is a multi channel combustible and toxic gas monitor, which canaccommodate up to 4 sensor channels housed in wall mounting enclosure. Each sensorcontinuously monitors for gas, with the digital display sequentially sampling each sensorreadingThe gas alarms are activated at preset levels and will remain on until the gas clears.14.1.1 GENERAL.It’s essential that the operator reads GDS404 Operator handbook, before attempting tooperate detector.Where a particular sensor reading requires to be viewed, the hold button should be pressedwhen the channel indicator is on the appropriate sensor, pressing the hold button again willrestart the sampling sequence.14.1.2 PROCEDURE DURING ALARM.Audible and visual alarm initiated in the presence of a fault or gas alarm condition. If analarm occurs it is important to leave the room and ventilate and not enter before gas is notpresent anymore.In other words:• If the beacon/sounder turns on. LEAVE THE CUBE/ROOM AT ONCE.• If the beacon/sounder is on when arriving to the cube DO NOT ENTER. Start ventingthe CUBE/Room until the air is not hazardous any more.Maintenance must be in accordance with national and local regulations. Only qualifiedDrawing no: <strong>KilnLoq</strong>-400-10 Page 60 of 72
Operation InstructionKilnloq systempersonnel who are aware of these regulations must make the maintenance.14.1.3 COMMISSIONING OF GAS LEAK DETEKTIONIssue:<strong>Gas</strong> leak detectorProcedure:Loose 4 screws on gas detection control panelRemove front panel.Connect battery leads to main board.Tight 4 screws on gas detection control panel.Commission detector according to Operating handboook.14.1.4 MAINTENANCE GAS LEAK DETEKTIONDate /Initials Maintenance program D W M YA check should be made that any fault condition which Xmay be indicated is in fact being attended to and that allother indicators are normal.In plants involving a high risk process or having gasesXwhich may cause loss of sensitivity a check on calibrationshould be carried out.All zeros at the control unit to be checked, logged and½aligned.Each detector to be gas tested and reading logged½(sensitivity checked).Field indicators to be tested.½All alarm set points checked and re-aligned.½Lamp Test.½All filter elements checked and replaced as necessary.½Power supply - complete functional check.½Visual inspection made to confirm that all cabling fittingand equipment is secure, undamaged and adequatelyprotected.½14.2 GASLOQ CUBE LOW AMBIENT TEMPERATURE: T
Operation InstructionKilnloq system14.4 ABB ANALYSER: AUTOMATIC TIMER OR REMOTELY CONTROLLEDCALIBRATIONOverview: <strong>System</strong>s prepared automatic calibration are able to handle the analyserconfigured automatic calibration cycle. The concept are based on the fact that analyser canbe calibrated with air as reference (zero) for all components except Oxygen (O2).Automatic Calibration comprises below features:• All components (expect O2) must be equipped with internal calibration cell.o Zeropoint calibration on Airo Spanpoint calibration on Air + Internal Calibration cell• O2 is to be calibrated as single point only (due to the nature of analyser the zero point arealways valid and thus no need of daily calibration)• Auto calibration cycle is configured on analyser• Auto calibration can be initiated automatic by analyser internal timer• Auto calibration can be initiated by bus or on HMI• In case of invalid calibration a MNT request is set in system.• Calibration cell values must be measured on at least yearly basis with calibration gasesDrawing no: <strong>KilnLoq</strong>-400-10 Page 62 of 72
Operation InstructionKilnloq system15 MAINTENANCE15.1 GENERALThe analysis system must be maintained and checked daily, the following sections containsmaintenance sheets for each unitTo ensure optimal drift and highest possible run time, the equipment should be serviced byan authorised service engineer. The service interval can vary from 1-4 times pr. year.Please contact us at the email address or telephone mentioned below for:• Proposal for a specific service agreement for the present equipment, 24h or normalcontract• Preventive maintenance according to technical documentation• Technical support• Immediate service at breakdown15.2 CONTACT INFO<strong>Gas</strong> <strong>Analysis</strong> <strong>Technology</strong>FLSmidth A/SKlostermarken 6DK-9550 Mariager · DenmarkTel.: +45 7010 2277 · Fax: +45 7010 2288Main e-mail: gas@flsmidth.comService e-mail: gas-service@flsmidth.comCVR-No. DK 1502 8882www.flsmidth.com/gas15.3 SPARE PARTSWear parts and recommended spare parts are listed in a section of the parts list. To ensurethat the correct part is delivered when ordering spare parts, please provide FLSmidth withthe project number which is found on the “<strong>System</strong> Data Sheet” and the FLSmidth No (6digit) or Parts Id / Int. No.15.4 MAINTENANCE GMUDuring the first few weeks of operation it is important to check the system every day, inorder to get to know the system and the applications in which it is installed and perhaps doadjustments if any. Always keep cabinet clean do not use compressed air for this.NOTE warnings in section 2.15.4.1 MAINTENANCE OF THE HOSES ETC IN GMUVisually check hoses and connection.Issue:Procedure:Drawing no: <strong>KilnLoq</strong>-400-10 Page 63 of 72
Operation InstructionKilnloq systemIssue:Procedure:Visually check level inEmpty if necessarycondensate container C2Visually check level in H2O2 Make up with a 30% solution, if necessarycontainer C1Visually check hoses Check for dirt or moisture in hoses, if any see section 16.1Visually check flow B1.2 Adjust flow to 60 l/h, if not possible see section 7.3.1Visually check pressure inspan and zero gas cylindersCheck that the pressure is above 10 bar with open main valve, ifnot order new cylinder.15.4.2 MAINTENANCE OF THE HUMIDITY MONITOR B1.1Exchange the filter paper every 4 weeks or when required.Issue:Stop the analysisExchange the filterStart the analysisProcedure:Put the system into TEST mode and stop the analysis asdescribed in section 9.3.2.Dismantle the coverReplace the filter paperRemount the coverPut the system into ANALYSIS mode as described in section9.3.2.15.4.3 MAINTENANCE OF THE COALESCING FILTER C1.1Exchange the filter element each year or when required.Issue:Stop the analysisExchange the filterStart the analysisProcedure:Put the system into TEST mode and stop the analysis asdescribed in section 9.3.2.Dismantle the coverReplace the filterClean the two holes in the steel pipeRemount the coverPut the system into ANALYSIS mode as described in section9.3.2.15.4.4 MAINTENANCE OF THE CABINET FILTERSGASloq 1200: (2M3, 2M3.1)GASloq CUBE: (2M3.1, 2M3.2)Exchange or clean the filter element each month or when required.Issue:Open to filterProcedure:Dismantle the cover by pulling at the bottom of coverClean or replace the filterRemount the cover top first and press firmly at the bottom ofcover until it clicks15.4.5 MAINTENANCE OF THE COALESCING FILTER C1.2Exchange the filter element every second year or when required.Drawing no: <strong>KilnLoq</strong>-400-10 Page 64 of 72
Operation InstructionKilnloq systemIssue:Stop the analysisExchange the filterStart the analysisProcedure:Put the system into TEST mode and stop the analysis asdescribed in section 9.3.2.Dismantle the coverReplace the filterRemount the coverPut the system into ANALYSIS mode as described in section9.3.2.15.4.6 MAINTENANCE OF THE GAS PUMP M1.1Exchange the pump membrane every ½ year or when requiredIssue:Stop the analysisReplace the membraneStart the analysisProcedure:Put the system into TEST mode and stop the analysis asdescribed in section 9.3.2.Dismantle the pump headReplace the membrane kitRemount the pump headPut the system into ANALYSIS mode as described in section9.3.2.15.4.7 MAINTENANCE OF THE PERISTALTIC PUMPS M1.3, M1.4 AND M1.5Exchange the pump hose every third month or when requiredIssue:Stop the analysisReplace the hoseStart the analysisProcedure:Put the system into TEST mode and stop the analysis asdescribed in section 9.3.2.Dismantle the hose cover by turning “S” lock anti clock wiseReplace the hoseRemount the hose cover by turning “S” lock clock wiseCheck that hoses are located correctPut the system into ANALYSIS mode as described in section9.3.2.Drawing no: <strong>KilnLoq</strong>-400-10 Page 65 of 72
Operation InstructionKilnloq system15.4.8 MAINTENANCE OF THE SOLENOID VALVES Y1.2, ETC.Exchange of the valve membrane every 3 months or when required.Issue:Stop the analysisReplace the membraneStart the analysisProcedure:Put the system into TEST mode and stop the analysis asdescribed in section 9.3.2.Dismantle the valveReplace the membrane kitRemount the valvePut the system into ANALYSIS mode as described in section9.3.2.15.5 MAINTENANCE PROGRAM FOR THE GMURefer to section 7.2, to get instructions how to do the maintenance in the following table.All intervals in table must be considered as recommended and due to process etc. it mustbe done as required due to experience with actual installation.Date /Initials Maintenance program D W M YHose connectionsXCheck the hoses visually for leakage and condensation.Check levels in C2 and C1Cabinet and roomXClean the inside of the cabinet and the room to removedust. Use a vacuum cleaner to clean inside the cabinet.Never use compressed air.Humidity monitor - B1.1Check the colour of the paper-filter. The filter must bewhite without any spots. If spots appear the filter must bereplaced.XFilter C1.1Dismantle, clean and replace any damaged parts.Clean cabinet filter 2M3 and 2M3.1Filter C1.2Dismantle, clean and replace any damaged parts.<strong>Gas</strong> pump – M1.1Check for excessive noise or vibration and for satisfactoryflow.Condensate pump M1.3/M1.4/M1.5Check for correct function by visually checking that thepumps are running. Wait min. 5 minutes to make sure thetimer cycles are running.Dosing pump M1.6Check for correct function by visually checking that thedosing is running.<strong>Gas</strong> flow monitor – B1.2Check and if necessary adjust the gas flow.AnalyzersCheck calibration.Solenoid valves:Dismantle, clean and replace membrane and anydamaged parts.XXXXXXX3XDrawing no: <strong>KilnLoq</strong>-400-10 Page 66 of 72
Operation InstructionKilnloq system16 TROUBLE SHOOTINGBefore trouble shooting set system to test as described in section 9.3.2. For some of thebelow describe actions the system should be in Test and <strong>System</strong> on for other in Test and<strong>System</strong> off.Actual alarm list may vary according to implementation in the systemFaultA1_TAHAlarmtypeMNT.RequestMeaning Probable cause SolutionHightemperature inGMU or CUBE1. Defect airconditioning2. Dirty cabinet filters1. Check/repair air-con.2. Clean/replace cabinetfilters.B1.1_MAHUnitalarmCondensation inpaper filter B1.11. Water in systembefore installation/commissioning2. Defective gas cooler3. Defective or blockedcondensate pump.4. Defective condensatesensors5. Leak in hoses fromcondensate collectorto pump1. General: Clean anddry all components,flush hoses with N 2 .2. See fault no. TALHE1.13. Check condensatepumps by touchingsensor in condensatecollector and pumpshould start.4. Check sensors,replace if necessary5. Check and changedefect hoses.B4.2_PALUnitalarmThe compressedair pressure isbelow 4 bar1. Air supply to PCP isclosed2. No air supply3. Regulating valve V2.5is closed or filter isblocked.1. Open valves V2.1 andV2.32. Call skilled personal3. Clean / replace filterand adjust to 6-7 bar.B4.1_PALUnitalarmThere is nocooling waterflow through<strong>KilnLoq</strong> probe1. Circuit breaker topump is off2. A valve is closed3. No power to WCP4. Pump is defect5. Low water level1. 1.1. Switch it on2. Check valve V3.2 isopen.3. Call skilled personal4. Replace pump5. Refill water tank.Check for leaks1B3_TAHUnitalarmThe watertemperature is10°C above setpoint1. Heat exchanger notworking2. Temperature sensordefect1. Clean radiator. Checkfan is running2. Replace sensorDrawing no: <strong>KilnLoq</strong>-400-10 Page 67 of 72
Operation InstructionKilnloq systemFaultM4.1_PSAP4.1_PALP4.1_PALLAlarmtypeUnitalarmMNT.RequestUnitalarmMeaning Probable cause SolutionThe probe hasnot the positionthe programexpectDue to suctionpressure
Operation InstructionKilnloq systemFaultB1.2_FALLB1.6_PALAlarmtypeMNT.RequestMeaning Probable cause SolutionFLOW FAILUREAFTER PUMPThe Zero gaspressure isbelow 3 bar1. Hose or fitting afterpump blocked2. Leak in hose or fitting3. Filter C1.1 blocked4. Glass heat exchangerin cooler broken5. Condensate collectorbroken6. Lid on B1.1 notinstalled correct7. Filter C1.2 blocked orplug missing8. Valve Y1.5 or Y1.6 orY1.7 blocked/leaking9. Flow meter tube orball dirty1. Zero gas cylinder isempty2. Defective pressureregulator or leakingair pipe1. Clean or replacehose/fitting2. Tighten fitting orreplace hose3. Clean filter and holesin steel pipe4. Replace heatexchanger5. Replace condensatecollector6. Install lid correct.7. Replace filer orreplace plug8. Replace defect valve9. Dismount tube andclean it and steel ball1. Replaced zero gascylinder2. Call skilled personalE1_TALHE3_TALHE4_TALHE1.1_TALHU1.1_AFMNT.RequestUnitalarmUnitalarmMNT.RequestMNT.RequestHoseTemperature +/-20°C from setpointFilter housetemperature +/-20°C from setpointHeated samplepipetemperature +/-30°C from setpoint<strong>Gas</strong> cooler temptoo high.Analyzer hasinternal fault.1. Circuit breaker toHeated Sample Lineis off2. <strong>System</strong> just switchedon3. Solid state defect1. Circuit breaker tofilter heaters is off2. <strong>System</strong> just switchedon3. Solid state defect4. Heating elementdefect1. Circuit breaker toHeated Sample pipeis off2. <strong>System</strong> just switchedon3. Solid state defect4. Heated pipe defect1. Temperatureregulation defect2. Condenser surfacedirty3. GMU temperature tohigh1. Internal fault inanalysing instrument1. Switch it on2. Wait untiltemperature is ok.3. Call skilled personal1. Switch it on2. Wait untiltemperature is ok.3. Call skilled personal4. Replace defectelement.1. Switch it on2. Wait untiltemperature is ok.3. Call skilled personal4. Replace heated pipe1. Check sensor,compressor andcontrol electronics ingas cooler.2. Clean surface3. Check cabinet fan isrunning1. Refer tomanufacturers'instruction manualDrawing no: <strong>KilnLoq</strong>-400-10 Page 69 of 72
Operation InstructionKilnloq systemFaultU1.2_AFAlarmtypeMNT.RequestMeaning Probable cause SolutionAnalyzer hasinternal fault.1. Internal fault inanalysing instrument1. Refer tomanufacturers'instruction manualU1.3_AFMNT.RequestAnalyzer hasinternal fault.1. Internal fault inanalysing instrument1. Refer tomanufacturers'instruction manual14E1_ALW1_HILHMNT.RequestIndication<strong>Gas</strong> detectorfault or gasalarm condition.Power input to<strong>KilnLoq</strong> probedeviates fromnormal level1. Internal fault in <strong>Gas</strong>detektor.2. <strong>Gas</strong> alarm .1. Too much materialbuild-up on probe.2. No insulating materialbuild-up directly onthe probe.1. Refer tomanufacturers'instruction manual.2. Ventilate CUBE beforeentering.1. Extract and cleansurface of coolingjacket see Unitmanual “<strong>KilnLoq</strong>probe and EXD”.2. Extract the probe andcorrect the problemin the process.16.1 CONTAMINATION IN GAS PARTSVisual problem Probable cause SolutionDust or materials in gashosesOil, dirt or water in gashosesOxygen analyzer reads tohighLeakage of air into system1. Probe filter or 'O'-ringdamaged1. Replace damagedparts andcontaminated hoses1. Compressed air contaminated. 1. Replace compressor orfit filter1. Probe or gas hoses leaking2. Leakage from kiln seal - probeposition incorrect1. Make leakage test.Find and correct leak.Increase probe length inprocess.Acid or water droplet in gashoses.1. Dosing not started2. Time for dosing has to beoptimized1. Start dosing form HMI2. Optimise dosing asdescribed in section9.3.12Drawing no: <strong>KilnLoq</strong>-400-10 Page 70 of 72
Operation InstructionKilnloq system17 DOCUMENT REVISIONRev. Date Author Description Serial numberscovered2_1 26-09-12 RBN Option Autocal ABB analyser Project basis2_0 03-01-11 RBN Kilnloq V2 Field cabinet Project basis1_1 09-02-10 RBN Deep cooling for SO2 in func. Project basis1_0 19-02-09 RBN New doc. Project basisOld sdfDrawing no: <strong>KilnLoq</strong>-400-10 Page 71 of 72