Create successful ePaper yourself
Turn your PDF publications into a flip-book with our unique Google optimized e-Paper software.
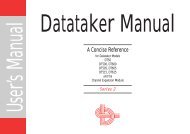
www.<strong>dataTaker</strong>.com<strong>dataTaker</strong>®...keeping an eye on realityGetting Startedwith <strong>dataTaker</strong>® DT800 data loggersAn introductory guide to:• data acquisition• data logging• your DT800• <strong>dataTaker</strong> softwareUM-0071-A1
UM-0071-A1
Getting StartedwithDT800<strong>dataTaker</strong>UM-0071-A1UM-0071-A1<strong>dataTaker</strong> is a registered trademark of <strong>dataTaker</strong> Pty Ltd.All other brand and product names are trademarks or registered trademarks of their respective holders.Copyright © <strong>dataTaker</strong> Pty Ltd 2000
UM-0071-A1About this User’s GuideWelcome to Getting Started with DT800 <strong>dataTaker</strong>.This quick-start user’s guide is a tutorial that uses stepby-stepinstructions, simple explanations and simpleexamples to get you up-and-running with your<strong>dataTaker</strong> DT800 data logging and acquisition system.If You Never Read ManualsIf you’re new to <strong>dataTaker</strong>, this user’s guide is onemanual you must read.It won’t take you long and, just like any goodinvestment, the time you spend working through theinformation provided here will be repaid to you manytimes over as you use your <strong>dataTaker</strong>.Which User Are You?This guide is primarily designed for new <strong>dataTaker</strong>users. If you work through all the steps in the order inwhich they’re presented, you can be confident thatyou’ll learn enough about data acquisition andlogging, your DT800 data logger, and the softwareyou use to communicate with it to satisfy your needs fora very long time.If you’re an experienced <strong>dataTaker</strong> user, you can skimthrough this guide noting only the major instructionsteps. These are designated by the arrow icon shownin the example immediately below. Instructions taggedin this way form a quick guide to prompt experiencedusers.➲ This is an example of a major instructionstep. Instructions tagged like this summarizewhat follows, and experienced users may needto read only these.If you’re an experienced <strong>dataTaker</strong> and computer userin a hurry, you can go directly to the DT800 <strong>dataTaker</strong>User’s Manual supplied with your DT800.ExtrasAll readers will benefit from the “Extras”included with many of the topics. Extrasare additional information intended tosupplement each topic. You don’t need toread the Extras to be able to work through this guide,although we do recommend you read them at sometime because they contain valuable backgroundinformation that will enhance your “big picture” ofdata acquisition, data logging and the DT800<strong>dataTaker</strong> system.More InformationYour DT800 is capable of extremely sophisticated dataacquisition and logging. So if you want moreinformation than this guide provides, refer to theDT800 <strong>dataTaker</strong> User’s Manual supplied with eachnew DT800, or other DT800 documentation availableseparately (ask your <strong>dataTaker</strong> distributor, or visitwww.datataker.com).In any case, at your leisure, we recommend that youbrowse through the DT800 <strong>dataTaker</strong> User’s Manual toget an overview of everything your DT800 is capableof.This Guide Assumes…• Microsoft ® Windows ® 95, Windows ® 98,Windows ® 2000 or Windows NT ® is correctlyinstalled on your computer and works reliably.• You are familiar with basic Microsoft Windowsoperations and the concepts of COM ports andWindows communications.If you are inexperienced with Windows, refer toMicrosoft publications such as Microsoft WindowsUser’s Guide and Getting Started with MicrosoftWindows, or any of the many third-partyWindows reference books available.What Now?Go to “Contents” on page 5 for a bird’s-eye-view ofwhat’s in store, then begin working through this tutorialstarting with Chapter 1 “Acquisition? Logging?…” onpage 6.4 Getting Started with DT800 <strong>dataTaker</strong>
ContentsAbout this User’s Guide......................... 4Contents................................................ 5CHAPTER 1ACQUISITION? LOGGING?…1-1 Important Concepts.........................................61-2 Important Terminology ..................................11CHAPTER 2SET UP THE HARDWARE2-1 Checklist .....................................................132-2 Power the DT800 .........................................142-3 Make the Hardware Connection ....................142-4 Attach a Sensor............................................15CHAPTER 3SET UP THE DELOGGER SOFTWARE3-1 Install DeLogger ...........................................163-2 Start DeLogger .............................................183-3 Make the Software Connection ......................193-4 Verify the Connection....................................20CHAPTER 4A QUICK OVERVIEW OF DELOGGER4-1 The Big Pictures............................................224-2 DeLogger’s Main Toolbar ..............................264-3 DeLogger’s Menus........................................274-4 More Important Concepts and Terminology .....28CHAPTER 5YOUR FIRST PROGRAM5-1 DeLogger’s Program Builder Window .............315-2 Create a Program.........................................335-3 See What You’ll Send...................................365-4 Send the Program.........................................36CHAPTER 8SEE YOUR DATA — MIMIC WINDOW8-1 DeLogger’s Mimic Window........................... 498-2 Display Returned Data in a Meter .................. 508-3 Replay a File to a Meter ............................... 518-4 Add a Picture .............................................. 528-5 Disconnect .................................................. 53CHAPTER 9EXTEND YOUR PROGRAM9-1 Reconnect ................................................... 549-2 Change Schedule A’s Rate............................ 559-3 Add a Channel Label ................................... 559-4 Add More Channels to Schedule A ................ 569-5 Re-Send the Program .................................... 599-6 Reassign the Form, Chart and Mimic Windows 599-7 DeLogger’s Text Window.............................. 609-8 Return Data to the Text Window .................... 619-9 Add an Alarm ............................................. 639-10 Add Schedule B to the Program ..................... 64CHAPTER 10OTHER THINGS YOU CAN DO WITHDELOGGER10-1 Unload Logged Data .................................... 6610-2 DeLogger’s Spreadsheet Window.................. 6810-3 Load Data into a Spreadsheet ....................... 6910-4 Finish Off.................................................... 6910-5 What’s Next?.............................................. 69Index .................................................. 70CHAPTER 6SEE YOUR DATA — FORM WINDOW6-1 DeLogger’s Form Window .............................386-2 View the Returned Data.................................416-3 Set the DT800’s Date and Time......................42CHAPTER 7SEE YOUR DATA — CHART WINDOW7-1 DeLogger’s Chart Window ............................437-2 Chart the Returned Data ................................48Contents 5UM-0071-A1
CHAPTER 1ACQUISITION? LOGGING?…You really can’t avoid it — there’s just no way you canafford to short-cut this chapter.It’s quick to read, and it will make you comfortablewith some fundamental <strong>dataTaker</strong> data acquisition andlogging concepts, terminology and conventions.So read on…1-1 IMPORTANTCONCEPTSYour first job as you work through this tutorial-in-theform-of-a-user’s-guideis to familiarize yourself with thefollowing concepts.Data Acquisition versus Data LoggingData acquisition and data logging are NOT the same.Traditionally, data acquisition has been defined as theregular collection of data — scanning sensors, makinginstantaneous measurements, then feeding these to arecorder or computer.Data logging has two possible definitions:• It’s considered by some to be simply making apermanent record of data that has been collected:printing or plotting it, writing it on a sheet of paper,or storing it on a computer’s hard disk or inelectronic memory.• Others perceive data logging as the total operationof collecting data and making a permanent recordof it. Therefore, they see data acquisition as part ofdata logging.Now, with <strong>dataTaker</strong>, any distinction between thesetwo terms has become even more blurred because the<strong>dataTaker</strong> DT800 combines acquisition and logging(and much more) in a single instrument about the sizeof a house brick.So, when using your DT800, it’s important that youtreat acquisition and logging as two separatefunctions.<strong>dataTaker</strong>’s Acquisition FunctionOne of the DT800’s two basic functions is to readsensors (that is, to measure, sample or scan sensors)and present the values to you on a computer screen orother display (Figure 1).Although these readings can be used, say, to triggeran alarm, they are temporary: the DT800 has notrecorded, stored or remembered them anywhere —UM-0071-A16 Getting Started with DT800 <strong>dataTaker</strong>
that is, the data has not yet been logged by theDT800.DT800scanssensorsFIGURE 1Data acquisitionDT800displays dataAlarms, actions<strong>dataTaker</strong>’s Logging FunctionThe second of the DT800’s two basic functions is to logdata — that is, to record or store data (Figure 2).Once you’ve instructed the DT800 to acquire data,you must then issue the LOGON command (explainedlater) if you want it to store the data.DT800displays dataAlarms, actionsDT800 saves data to• its internal memory• a removable memory card• the host computer.The DT800The <strong>dataTaker</strong> DT800 is an instrument for intelligentlyacquiring data from sensors connected to it, recording(logging) the data for later reference and analysis, andtaking action (like raising alarms or altering itsoperation) based on the values it measures orcalculates.What It Can DoMore specifically, your DT800 can perform any or allof the following tasks:• acquire data (scan sensors, make instantaneousmeasurements and forward them to a computer)• log data (that is, store measurements in its owninternal memory and/or its removable memorycard)• convert measurements according to yourrequirements (voltages to ºC or ºF, for example)• carry out calculations on the measurements(average, standard deviation, maximum,minimum,…)• log the converted measurements and the results ofcalculations to its internal memory and/or aremovable memory card, or transfer them to acomputer• display all of this on a computer screen• return data directly to a computer in real time (thatis, as each measurement is made) as well as, orinstead of, logging it• raise alarms when data is outside specified ranges.Alarms can trigger outside events (turn on awarning light or siren, for example), or make theDT800 carry out additional tasks (scan morefrequently, stop logging, or scan and log additionalsensors, for example).FIGURE 2Data loggingYou’re the BossBeing microprocessor-based, you send instructions(“commands” — see the Extras panel “SendingCommands” on page 8) to the DT800 from acomputer running DT800-compatible software such asDeLogger (used later in this guide). These instructionstell the DT800• which sensors to read• how often to read them• what to do with the data.Then you sit back and let the DT800 do the work.CHAPTER 1ACQUISITION? LOGGING?…: Important Concepts 7UM-0071-A1
Look, No HandsOnce you’ve set the DT800 running you candisconnect the computer if you wish — the DT800continues to operate as programmed because thesoftware that controls it is inside the DT800 itself. Thisis called stand-alone operation.Input TypesThe DT800 lets you monitor, record and raise alarmsfor readings from many types of sensors andtransducers — temperature (thermocouples,thermistors, RTDs and solid-state sensors), pressure,flow, strain, digital state (high or low, off or on), count,frequency, period, voltage, current, resistance and soon.The DT800 measures these fundamental parameters,from which all others are derived:voltageresistancefrequencytimecounts (pulses)thermocouple reference temperatureThis means that the DT800 supports many types ofinputs. For example:voltageresistancecurrent (including 4–20mA loops)thermocouplesthermistorsRTDs (Resistance Temperature Detectors)solid-state temperature sensorsbridges (strain gauges)frequencytimecountspressure sensorsflow sensorsload cellsdigital state (on/off, high/low)You can connect many sensors — each one different— to a single DT800 and have them scannedwhenever you choose.UM-0071-A1Sending CommandsThere are three ways you can send commands tothe DT800:• from a computer connected to the DT800• from a removable memory card — commandsloaded into a memory card can be transferred tothe DT800 and acted upon the moment the card isinserted into the DT800’s memory card socket (thisis a handy way of configuring and programminga remote DT800)• using alarms (see the DT800 <strong>dataTaker</strong> User’sManual).Meaningful QuantitiesWhatever the sensor, its raw output will be eithervoltage, current, resistance, frequency, time, counts ordigital state. For example, the output from athermocouple is a voltage that varies according to thetemperature being measured: the thermocouple’s rawoutput is volts (under 100 millivolts, actually), notdegrees Centigrade or Fahrenheit.Then the raw output must be converted to a meaningfulquantity (to a temperature value in this example).Depending on the type of sensor, this conversioninvolves linearization and possibly compensation,terms which are beyond the scope of this guide. Justbe aware that raw measurements usually have to beconverted before they become the meaningfulquantities that are useful to you (Figure 3).One of the features of the DT800 is that itautomatically performs these conversions for you. Allyou have to do is tell the DT800 what type the sensoris (a type T thermocouple, for example) and themicroprocessor inside the logger performs theappropriate linearization and compensation, turningthe raw sensor output into a quantity with meaningfulunits.8 Getting Started with DT800 <strong>dataTaker</strong>
Rawthermocoupleoutput(volts)CONVERSIONBY DT800DT800automatically performslinearizationandcompensationMeaningfulquantity(degreesCentigrade)FIGURE 3 One of the DT800’s many automaticconversion routinesIn addition, the DT800 allows you to• define your own linearization characteristics for anyunusual sensor that is not directly supported by theDT800• carry out statistical operations on the measurements,only returning the statistical results you want(average, standard deviation, maximum,minimum,…)• apply other calculations or expressions you defineto process the collected data.Time and Date StampsBecause you’ll often want to know the time and dateeach measurement was made, the DT800automatically keeps this information along with themeasurements. This facility ensures that every readingfrom every sensor can be time-stamped and datestamped.Measurement 1Date 1 Time 1Example163.4°C5/6/00 9:14:00Measurement 2Date 2 Time 2163.7°C5/6/00 9:15:00Measurement 3Date 3 Time 3162.1°C5/6/00 9:16:00FIGURE 4 Your DT800 produces a series ofinformation “chunks”.MeDat5/6Data Format, Display and StorageYour DT800 is extremely powerful and flexible in theways it allows you to format, view and store data.Data FormatYou can format (layout, arrange) the data provided byyour DT800 to best suit the way you want to use it,and the DT800 has two modes for doing this: freeformatmode and fixed-format mode.In free-format mode, you’re free to format the dataany way you want. For example, you can make it easyand meaningful to read, likeBoiler temperature 123.4 Deg Cor comma-separated ready for direct importing into asoftware spreadsheet, like123.4,123.7,123.1,123.6123.3,123.7,124.2,124.5124.2,124.6,124.8,125.1or with the time of each reading included, like00:00:00,24.800:00:02,24.900:00:04,24.500:00:06,24.200:00:08,24.0In fixed-format mode, the DT800 returns data in apredictable, repeatable, comprehensive format readyto be imported into spreadsheets and other dataanalysis software.Real-time data can be returned in either free- or fixedformatmode, but logged data is always returned infixed-format mode. These two modes are discussed in“Format of Returned Data" in Part A of the DT800<strong>dataTaker</strong> User’s Manual.Data DisplayYou can connect the DT800 to any computer and,using appropriate software, data can be viewed onthe computer screen as it is acquired.Data StorageData can be stored in the DT800’s own internalmemory, in a removable memory card, or you cantransfer it to a computer.Once in the computer, you can save the data file forlater reference, or bring it into one of manyspreadsheet or plotting programs for analysis. Forexample, you can use Microsoft ® Excel to create aprinted report (including graphs), or <strong>dataTaker</strong>’sCHAPTER 1ACQUISITION? LOGGING?…: Important Concepts 9UM-0071-A1
DeLogger or DeLogger Pro to plot graphs of your dataversus time directly on the computer screen.CommunicationThe most common method of supervising your DT800is to send commands to it directly from a computer.(There are other methods — see the Extras panel“Sending Commands” on page 8.)To do this, and for the DT800 to return data to thecomputer,• your computer must be running one of <strong>dataTaker</strong>’sDT800-friendly software packages such asDeLogger, DeLogger Pro, or DeTransfer• the computer’s communications port must beconnected to one of the DT800’s communicationsports by any of the methods described in the Extraspanel “Communications Links”.PowerYou can power the DT800 from three sources:InternalExternalExternalThe DT800’s internal main batteryA mains adaptor (11 to 28 volts DC)External batteries, solar panels, vehiclepower supplies and other DC sources (11to 28 volts DC)A mains adaptor and 12 volt internal battery aresupplied with your DT800. This 12V battery is knownas the internal main battery to distinguish it from theDT800’s other internal battery, the internal memorybackupbattery (next topic).NOTE The DT800 is shipped with its internal mainbattery disconnected. Although you don’t need it towork through this user’s guide (because we instruct youto power the logger from its mains adaptor), it’s agood idea to connect the internal main battery in thenear future so that it can be fully charged — see “MainBattery is Disconnected for Shipping” in Part C of theDT800 <strong>dataTaker</strong> User’s Manual supplied with yourDT800.UM-0071-A1Communications LinksWith appropriate software, the DT800 and the hostcomputer can communicate with each other bymeans of• a communications cable (called a “direct”connection) — for distances of up to 50 meters / 55yards (a <strong>dataTaker</strong> communications cable, productcode IBM-6, is supplied with your DT800)• a communications cable fitted with line drivers —for distances of up to 5000 meters / 5500 yards• telephone or radio modems, or satellite links — formuch longer distances (you’ll need to upgrade toDeLogger Pro if you want to use modems)• an Ethernet network — the DT800 supports10BaseT Ethernet.Good Power PracticeThe recommended method of working with the DT800is — while you are programming it “back at base” —to power it from the mains using a mains adaptor. Themains adaptor supplies the DT800 and charges themain internal battery.When you’ve finished programming and are ready touse the DT800 “in the field”, you disconnect it fromboth the computer and the mains adaptor and itcontinues to operate from the freshly-charged mainbattery. The amount of power consumed by the DT800depends on the program running.DT800 Mains AdaptorSometimes called a plug pack.Converts mains power (that is,power from a wall outlet) to avoltage suitable for the DT800(11–28Vdc).10 Getting Started with DT800 <strong>dataTaker</strong>
Internal Memory-Backup BatteryIn addition to the main internal battery, the DT800contains a small 3.6V lithium internal memory-backupbattery that ensures your data, real-time clock andprimary settings are not lost if power to the logger isinterrupted. The backup battery can maintain thisinformation for up to 12 months if necessary.Sleep ModeTo conserve battery power, the DT800 “goes to sleep”if it has no measurements to do and there has been nocommunication for a period of 30 seconds.This applies only if the DT800 is powered by itsinternal battery. If it’s powered from an externalsource, the DT800 never goes to sleep (unless youoverride this default behaviour).In sleep mode, most of the internal electronics shutsdown. The current drain drops from a typical 400mAwhen awake to a tiny 250µA when asleep; just 0.07%of the awake value.Auto-Sleep in the Event of PowerSupply FailureIf the power supply to the DT800 drops below 9.5volts, the logger automatically attempts to minimize itspower requirements and maintain any logged dataand settings by going to sleep. When the supply isrestored, the logger senses this and automaticallyreturns to its previous mode of operation.1-2 IMPORTANTTERMINOLOGYThis section introduces you to some data acquisitionand logging terms you’ll need right away. Others areexplained as they arise.Sensors and TransducersOrigins of data in a data acquisition and loggingsystem.Sensors are the raw, basic devices that detect variablequantities (temperature, pressure, flow,…) and convertthem into electrical signals. Sensors see, hear, taste,sniff or feel the environment and tell the DT800 (inelectrical terms) what’s going on.If electronic components are added to a sensor, theresult is sometimes called a transducer. The electronicsmay be added to excite, amplify, compensate,linearize, filter or interface to other equipment.If the electronics include a software-controlledmicroprocessor, the result is a smart sensor.Power-upApplying power to a previously un-powered device.FormatWith <strong>dataTaker</strong>, you can format data in a variety ofways. That is, you can arrange the physicalappearance and layout of data as it comes from theDT800 so that it best suits the way you want to use it.Host ComputerThe computer you use for supervising the DT800.Host SoftwareThe software you run on the host computer to supervisethe DT800 (DeLogger, DeLogger Pro and DeTransfer,for example). See the Extras panel “DT800 HostSoftware” on page 16.PC CardA plug-in card meeting the PCMCIA standard(Personal Computer Memory Card InternationalAssociation). It can be a storage card such as an ATAFlash card, or a communications device such as aPSTN modem card or GSM modem card.CHAPTER 1ACQUISITION? LOGGING?…: Important Terminology 11UM-0071-A1
CHAPTER 2SET UP THE HARDWAREIn this chapter, you get the DT800 hardware up-andrunning.You firstly check that you have everything, then youpower the DT800 from the mains adaptor and connectthe computer to the DT800.Mains adaptorComms cableCage-clamp toolsPotentiometerThermocoupleCD containingsoftwareand manualsUser’s manual2-1 CHECKLISTMake sure you have everything you’ll need tosuccessfully work through this user’s guide.➲ Check that you have the following items:a) From your DT800 shipping box:• a DT800 data logger• a mains adaptor• a communications cable (“comms cable”; DE-9female to DE-9 female) to connect between theDT800 and the host computer• a pair of cage-clamp tools to open the terminalcage clamps for sensor wiring• a potentiometer (variable resistance) mounted ina child’s building block• a thermocouple• a DT800 CD (contains software and manuals)•a DT800 <strong>dataTaker</strong> User’s Manual• the document you’re reading now (GettingStarted with DT800 <strong>dataTaker</strong>)If anything is missing, contact your supplierimmediately.b) You also need a PC running Windows 95, 98,2000 or NT with• a CD-ROM drive• a 200MHz Pentium ® II processor or better• at least•64MB of RAM (“memory”) for Windows 95or 98•128MB of RAM for Windows 2000 or NT(NT also requires Service Pack 4 or later)• 40MB of free space on the hard disk forinstalling <strong>dataTaker</strong>’s DeLogger software(installed DeLogger occupies 25MB).FIGURE 7 Accessories supplied with your DT800 (plusthe user’s guide you’re reading now)CHAPTER 2SET UP THE HARDWARE: Checklist 13UM-0071-A1
2-2 POWER THEDT800There are several ways of providing power to yourDT800, which are covered in “Powering the DT800”in Part C of the DT800 <strong>dataTaker</strong> User’s Manual. Inparticular, be sure to read “Main Battery isDisconnected for Shipping”.For this tutorial, you’ll simply use the mains adaptor.➲ Provide external power to the DT800 usingthe mains adaptor supplied.To do this…a) Plug the coaxial connector of the mains adaptor intothe coaxial 11–28Vdc socket on the left side of theDT800.FIGURE 8adaptor11–28VdcPowering the DT800 from a mainsb) Plug the mains adaptor into a wall outlet and, whilewatching the DT800’s front panel, switch on at thewall.If the DT800’s internal main battery is not connected(we’re assuming yours is not), the five red LED (lightemittingdiode) indicators on the front panel flashrapidly four times. Then the Acquiring LED begins its“heartbeat” flash — every three seconds. (Thefunctions of these LEDs are described in “IndicatorLEDs” in Part B of the DT800 <strong>dataTaker</strong> User’sManual supplied with your DT800.)2-3 MAKE THEHARDWARECONNECTIONFor the computer to talk to the DT800, and the DT800to return data to the computer, you must establish acommunications link between the two.You can use any of the links described in the Extraspanel “Communications Links” (page 10), but in thisguide we’ll use the simplest of all, the comms cablesupplied with the DT800. You’ll connect it between theDT800’s Host RS-232 port and a COM port on yourcomputer.➲ Locate and identify your computer’s COM1serial port then connect the comms cable to it.To do this…a) On the rear of your computer, locate the COM1port and remove anything plugged into it (amodem, for example).If you find several likely connectors and don’t knowwhich is COM1, just choose any one. Later, ifcommunication with the DT800 is unsuccessful,simply change to a different connector (we’ll remindyou about this in the next chapter).b) Plug either end of the comms cable supplied withthe DT800 into the computer’s COM1 port.➲ Connect the comms cable to the DT800.To do this…a) On the left side panel of the DT800, plug the otherend of the comms cable into the connector labelledHost RS-232.UM-0071-A114 Getting Started with DT800 <strong>dataTaker</strong>
2-4 ATTACH ASENSORNow use the potentiometer supplied with your DT800(see Figure 7 on page 13) to simulate a resistivesensor.Firstly, you attach this “sensor” to your DT800.➲ Attach the potentiometer supplied to analogchannel 1 of your DT800 as shown in Figure 9.To do this…a) Locate the potentiometer (variable resistance)supplied with your DT800.It’s the child’s building block with a knob on top andfour wires.b) Connect the potentiometer’s yellow and white wiresto the + and – terminals of analog channel 1 on thefront panel of the DT800, as shown in Figure 9.To open the terminals, we recommend that you useone of the cage-clamp tools supplied — refer to“Connecting Sensors to Channel Terminals” in PartB of the DT800 <strong>dataTaker</strong> User’s Manual.Analog Channel 1FIGURE 9Yellow and white potentiometerwires: one wire to the + terminal,the other to the – terminal(polarity is not important for thistype of “sensor”).Connecting the potentiometerCHAPTER 2SET UP THE HARDWARE: Attach a Sensor 15UM-0071-A1
CHAPTER 3SET UP THE DELOGGERSOFTWAREHost SoftwareYou communicate with, supervise, and transfer datafrom a DT800 by sending commands to it from thehost computer using host software.DeLogger host software is a powerful Windowsapplication designed to make this communication,supervision and data return as simple yet fully-featuredas possible.As you work through this chapter, you’ll becomefamiliar with DeLogger and some basic DT800operations.3-1 INSTALLDELOGGERFollow the steps in this section to install DeLogger fromthe CD supplied with your DT800 to your computer’shard disk. The process requires about 40MB of freespace on the hard disk (installed DeLogger occupies25MB) and takes less than five minutes.If you already have DeLogger or DeLogger Proinstalled on your computer, see the Extras panel“Re-Installing and Project Compatibility”.DeLogger Serial NumberDeLogger is free to use and requires no serial number.(But you do need one for DeLogger Pro — see the“Enabling DeLogger Pro” Extras panel on page 18.)UM-0071-A1DT800 Host SoftwareAlthough you can use any terminal software tocommunicate with your logger, you’ll find thatDT800-friendly software packages incorporateproductivity features specific to data acquisition,data logging and the DT800 that make it pointlessto use anything else.• DeLogger (included on the CD provided with yourDT800 and used predominately throughout thisguide) has a totally graphical interface, whichmeans that knowledge of the <strong>dataTaker</strong>programming language is not required. Instead,you supervise the DT800 just by clicking on iconsand making selections from menus and dialogboxes. And, in addition to standard text output,you can display and print real-time and loggeddata in dynamic table, chart and mimic (needlemeter) views, load data into a fully-featuredspreadsheet, and replay saved data to any of thedynamic views.• DeLogger Pro is the big brother of DeLogger. It hasthe added features of modem support, a databasedata storage option, the ability to connect to morethan one data site at a time, enhanced mimicscreens, and additional spreadsheet/graphicalanalysis tools.• DeTransfer (included on the CD provided withyour DT800) is the easiest non-graphical hostsoftware to use with the DT800 programminglanguage. It provides complete access to all of theDT800’s capabilities, and has separate send andreceive windows, which are the basis of itsexceptional and unique functionality. If you prefercommand-line interfaces, DeTransfer is for you.16 Getting Started with DT800 <strong>dataTaker</strong>
➲ Run the DeLogger installer Setup.exe,which is located in the DeLogger folder on theCD supplied (Software > DeLogger > Setup.exe).You do not need a serial number for thisinstallation of DeLogger.To do this…a) Place the CD supplied with your DT800 into yourcomputer’s CD drive.b) Follow the numbered steps in Figure 10.➊ On the Windows taskbar, click theStart button and select Run….➌ Double-click in order:My Computer,<strong>dataTaker</strong> (the current CD),the Software folder,the DeLogger folder,and finallySetup or Setup.exe (mayappear in uppercase).FIGURE 10 Starting the DeLogger installer➋ Click theBrowse…button.c) In the Run dialog box, click OK.The DeLogger installer starts.d) Follow the on-screen instructions.e) After clicking Finish in the Setup Complete dialogbox, restart the computer (Start menu >Shut Down… > select Restart > OK).f) When the computer has restarted, notice that theStart > Programs menu now contains a DeLoggerfolder (Figure 11), from which you can launch• DeLogger — the main application• On-Line Help• Schedule — for DeLogger Pro users; a utility thatautomatically runs DeLogger Pro events at predeterminedtimes (for example, dial a data siteat 6:00pm every day, unload data on thesecond Tuesday of every month, or run Job3every 15 minutes between 11am and 3pmevery Friday)• SiteAdmin — a utility that allows you to clearDeLogger’s error and alarm logs• Uninstall DeLogger — use to remove DeLoggerfrom the hard disk.You are returned to the Run dialog box, which nowcontains the path to DeLogger’s Setup.exe.FIGURE 11Typical Programs menu after installationRe-Installing and Project CompatibilityEarlier Versions If an earlier version (that is,pre-version 4) of DeLogger already exists on thecomputer, you can do one of the following:• Clean Install Remove the existing version (useWindows’ Add/Remove Programs control panel)then install the new version.• Have Both Install the new version to a differentdirectory from the old one (both version 3 andversion 4 can co-exist on your computer, but notin the same location).Project Compatibility Project files from earlierversions (that is, pre-version 4) of DeLogger orDeLogger Pro can not be used with this version(version 4) of DeLogger (or DeLogger Pro). You’llneed to re-create your version 3 projects using thenew version of DeLogger.DeLogger and DeLogger Pro Together Donot install DeLogger 4 and DeLogger Pro 4 togetheron a computer.CHAPTER 3SET UP THE DELOGGER SOFTWARE: Install DeLogger 17UM-0071-A1
3-2 START DELOGGER➲ Start your new installation of DeLogger forthe first time.To do this…a) On the Start menu> Programs > DeLogger menu,click DeLogger — see Figure 11.DeLogger starts and presents you with its SerialNumber Entry dialog box (Figure 12).b) In the Serial Number Entry dialog box, leave thefield empty and click OK.FIGURE 12Leave the field empty (unless you’re upgradingto DeLogger Pro and have purchased a Proserial number) and click OK.No serial number for DeLoggerThe Welcome dialog box opens.For more information about serial numbers andupgrading see the “Enabling DeLogger Pro” Extraspanel.c) In the Welcome dialog box, click Start New Project(Figure 13).d) In the New Project dialog box that opens, typeProject99 (or whatever you like) and click OK(Figure 13).Type anamefor yournewproject.FIGURE 13Click.Then click OK.Creating a new DeLogger projectProject99’s windows open within DeLogger’s mainwindow. Your screen should look like Figure 18(page 25).e) Notice that two windows are open in DeLogger’sworkspace (labelled Prog1.dlp and Prog1.dl8 intheir title bars) and five windows are minimized atthe bottom of the workspace (Mimic1.dlm,Form1.dlf, Text1.dlt, Chart1.dlc and Spread1.dls).Prog1.dlp is the program builder for DT500/600series <strong>dataTaker</strong>s, and Prog1.dl8 is for your DT800.f) Click Prog1.dlp’s minimize button ( in its titlebar).You’re not using the DT500/600 program builderin this tutorial.UM-0071-A1Enabling DeLogger ProIf you purchase DeLogger Pro, or purchase anupgrade from DeLogger to DeLogger Pro, you’llreceive a serial number that you use as follows:• If you’ve purchased DeLogger Pro Install andstart DeLogger exactly as described in topics 3-1and 3-2 beginning on page 16 but, when theSerial Number Entry dialog box opens(Figure 12), enter your DeLogger Pro serialnumber.• If you’ve purchased an upgrade from DeLogger toDeLogger Pro With DeLogger running, chooseRegister Product… from DeLogger’s File menu. Inthe dialog box that opens (Figure 12), replace0000-0000 in the field with your Pro serialnumber and click OK. (0000-0000 is the defaultserial number that enables basic DeLogger.) Thenext dialog box offers you the choice of quittingthen restarting the program with the newfunctionality either now or later.18 Getting Started with DT800 <strong>dataTaker</strong>
g) In DeLogger’s File menu, choose Save Project.This saves the change you just made to the windowview (minimizing Prog1.dlp).We’ll introduce you to the things you can see in theDeLogger window in the next chapter. For now,continue with “Make the Software Connection”.3-3 MAKE THESOFTWARECONNECTIONYour computer is physically connected to the DT800(you did this in the previous chapter). Now youcomplete the communications link by making thesoftware connection between DeLogger and the DT800.From now on in this guide we use the term“Connection” — note the uppercase C — to mean“software connection” (see also page 28).The “dt800 Com1” ConnectionAlthough you can create your own Connections, in thistutorial you’ll use one already provided with DeLogger.It’s called dt800 Com1 and contains instructions that tellDeLogger• that the <strong>dataTaker</strong> at the other end of thecommunications link is a DT800• to detect the DT800’s communications baud rateand match the computer’s baud rate to it• to use software flow control when communicatingwith the DT800 (see the “Flow Control” Extraspanel).In addition, this Connection specifies that the DT800 isdirectly connected to the computer’s COM1 serial port.So, if you chose to plug the comms cable into a serialport other than COM1 on the back of your computer,modify the dt800 Com1 Connection in DeLogger now(Connections menu > Properties…).Connection TroubleshootingIf DeLogger responds with an “Error connectingto…” message, try the following:• Check that the comms cable’s connectors arefirmly plugged into their sockets, then repeat“Make the Software Connection” above.• If the computer has more than one COM port,swap the comms cable to the other port, thenrepeat “Make the Software Connection” above.• Perform a hardware reset on the DT800(described in “Resetting the DT800” in Part H ofthe DT800 <strong>dataTaker</strong> User’s Manual), then repeat“Make the Software Connection” above.• Make sure there is no software configured toaccess the computer’s COM port you’re using forthe DT800 (COM1 if you’re following this tutorial“to the letter”). If there is such software, you can• re-configure it to use a different COM port, or• quit it while you use DeLogger (you’ll have todo this every time), or• remove it (use Windows’ Add/RemovePrograms control panel).Then repeat “Make the Software Connection” above.• Change the serial port specification in theDeLogger software Connection (Connections menu> Properties) to, say, COM2. Then repeat “Makethe Software Connection” above.CHAPTER 3SET UP THE DELOGGER SOFTWARE: Make the Software Connection 19UM-0071-A1
➲ Connect to the DT800 using dt800 Com1.To do this…a) In DeLogger’s Connections menu (fourth from theleft), choose Connect….b) In the Connect dialog box that opens, highlight (oneclick) dt800 Com1 and click OK.FIGURE 14Connect dialog boxTwo progress bar dialog boxes open, then closeautomatically to indicate that you’ve successfullyconnected to the DT800.If a dialog box opens asking if you want to upgradeto a later version of the <strong>dataTaker</strong> firmware, clickNo. (You can do this at another time.)If DeLogger is unable to connect (you’ll see an“Error connecting to…” message), go to the Extraspanel “Connection Troubleshooting”.3-4 VERIFY THECONNECTIONNow carry out some simple communication with theDT800.➲ Get the <strong>dataTaker</strong>’s status.To do this…a) From DeLogger’s <strong>dataTaker</strong> menu (sixth from theleft), choose Status….DeLogger communicates with the DT800, retrievesinformation about what’s currently happening in theDT800, and presents the information to you in thelarge dialog box that opens (Figure 15).You can do this anytime you’re connected to aDT800. In fact, as well as using this command tofind out which schedules (see page 33) and alarms(see page 63) are currently running in the DT800,how much data storage (memory) is used and freein the DT800, and so on, you can send thiscommand simply to confirm that you’re connectedto the DT800.b) Look through the Status dialog box tabs tofamiliarize yourself with the information you can getfrom it, then click OK.UM-0071-A1Flow ControlFlow control is a communications feature that allowscommunicating devices to control each other’stransmission of information.DeLogger and the DT800 support two types of flowcontrol:• Hardware Flow Control (HWFC) Flow controlsignals are sent between the communicatingdevices by means of dedicated RTS and CTScontrol wires in the cable.• Software Flow Control (SWFC) Flow controlcommand characters XOFF and XON are sentbetween the communicating devices by means ofthe data wires in the cable.Setting Flow Control You must set the sametype of flow control at each end of acommunications link. For example, for this tutorial,both the DT800 and your DeLogger Connectionmust be set for software flow control.This Tutorial We recommend that you usesoftware flow control for this tutorial. This is thedefault/factory setting for a new DT800 and forDeLogger’s dt800 Com1 Connection. (If you’re usinga DT800 that has previously been set to hardwareflow control, you must either change the DeLoggerConnection to hardware flow control also, or changethe DT800 to software flow control.)20 Getting Started with DT800 <strong>dataTaker</strong>
FIGURE 15The five tabs of DeLogger’s DT800 Status dialog boxCHAPTER 3SET UP THE DELOGGER SOFTWARE: Verify the Connection 21UM-0071-A1
CHAPTER 4A QUICK OVERVIEW OFDELOGGERDeLogger host software provides you with a powerfulset of tools for working with your DT800. (These arefully covered in the User’s Manual for DeLogger4 andDeLogger4 Pro.)To get you up-and-running now, this chapter presents abird’s-eye-view of DeLogger’s windows, main toolbarand menus, which you’ll use in later chapters.Be sure not to miss “More Important Concepts andTerminology” on page 28.4-1 THE BIG PICTURESFigure 16 is an overview of the window typesavailable in a DeLogger project and some of the thingsyou can do with them. Figure 17 shows therelationship between DeLogger projects, programs,schedules and channels. Figure 18 shows howDeLogger starts up the first time after installing it.Then the remainder of this chapter gives you a quickvisual tour of DeLogger:• DeLogger’s main toolbar — page 26• DeLogger menus — page 27• important DeLogger concepts — page 28UM-0071-A122 Getting Started with DT800 <strong>dataTaker</strong>
Program builder window — createa program and send it to the DT800.(Note: this is different from theprogram builder you use with theDT50 and the DT500/600 Series.)Note You can openmore than one of each ofthese window types in anyDeLogger project (chooseNew from the File menu).Form window — view each channel’slatest data and other informationone row per channel.REAL-TIMECONNECTIONSend program to DT800PrintDynamic data views —these DeLogger windowsdisplay incoming real-timeor historical data “live”.REPLAYCONNECTIONChart window — view live trend plots(data versus time) just like traces on achart recorder.REAL-TIMECONNECTIONPrintREPLAYCONNECTIONText window — view incoming data inthe display screen; type commands tosend to the DT800 in the entry screen(an alternative to the program builder ifyou’re familiar with the DT800 nativeprogramming language).Load text file (.cmd/.dxc or .txt)Load program builder as textREAL-TIMECONNECTIONREPLAYCONNECTIONCapture data to disk as it arrives(as a replay file .dlr)Save screen buffer (.txt or .csv)PrintSave text file (.cmd/.dxc or .txt)Send program to DT800PrintMimic window — view data on aneedle meter; add backgroundgraphics.REAL-TIMECONNECTIONPrintSpreadsheet window — load areplay file one row per timestamp, onecolumn per channel. Then manipulatethe data, save it in a variety of formats,or export it directly into Microsoft Excel.REPLAYCONNECTIONStatic data view — loadan entire replay file intoDeLoggger’s spreadsheetwindow.Load into Excel (opens Excel)Load session from replay fileExport worksheetPrintFIGURE 16The big picture 1 — an overview of the window types available in a DeLogger projectCHAPTER 4 A QUICK OVERVIEW OF DELOGGER: The Big Pictures 23UM-0071-A1
PROJECT AProgram Builder 1 (Program 1)Schedule A (every 5 seconds)Channel 1 (details…)Channel 2 (details…)Schedule B (every hour)Channel 1 (details…)Channel 3 (details…)Schedule C (every day)Channel 1 (details…)Schedule … (…)Channel … (details…)Schedule K (…)Channel … (details…)Channel … (details…)Other commandsCommentsProgram Builder 2 (Program 2)Schedule …Channel … (details…)A channel can bescanned by morethan one schedule.A program can containup to eleven schedules(“timetables”, “agendas”).They are labelled A, B,C, D,…K.PROJECT BProgram Builder … (Program …)Schedule … (…)Channel … (details…)Channel … (details…)Schedule … (…)Channel … (details…)Other commandsCommentsProgram Builder … (Program …)Schedule … (…)Channel … (details…)Channel … (details…)Schedule … (…)Channel … (details…)Other commandsCommentsSchedule …Channel … (details…)Other commandsCommentsProgram Builder … (Program …)Schedule …Channel … (details…)Other commandsCommentsDeLogger’s conceptual hierarchy:project > program (job) > schedule > channelPROJECT …Program Builder … (Program …)Schedule … (…)Channel … (details…)Other commandsCommentsUM-0071-A1FIGURE 17The big picture 2 — Projects, programs, schedules and channels24 Getting Started with DT800 <strong>dataTaker</strong>
DeLogger’s main toolbar allows you to quickly initiate frequently-used file,connection and <strong>dataTaker</strong> commands. See Figure 19.The buttons duplicate commands found on the menu bar. If you drag thetoolbar (by its gray background) from its docked position it becomes afloating toolbar. Use the View menu to show or hide the main toolbar.Menu barSee Figure 20.The title bar contains standardWindows controls (minimize,maximize,…) and the name of thefront-most DeLogger window.DT800 program builder window.Here you create a program ready tosend to the DT800. See page 31.DT500 series program builderwindow — for DT50 and DT500/600SeriesWatch the status bar forprompts when you pausethe mouse over a button ora menu item.Use the View menu to showor hide the status bar.The document bar gives you quick access to DeLogger’swindows:• Single-clicking a window’s name in the document barbrings that window to the front in its current view state(minimized, maximized, or in-between). It’s likechoosing a window using the Window menu, onlyfaster.• Double-clicking a window’s name in the document barbrings the window to the front and maximizes it.• Once any window is maximized, a single click on afilename in the document bar maximizes that file (andminimizes the previous one).Use the View menu to show or hide the document bar.Minimized DeLoggerwindows (form, chart,text, mimic andspreadsheet)FIGURE 18The big picture 3 — DeLogger’s startup layout after a new installationCHAPTER 4 A QUICK OVERVIEW OF DELOGGER: The Big Pictures 25UM-0071-A1
4-2 DELOGGER’S MAIN TOOLBARThe buttons on DeLogger’s main toolbar duplicatefrequently-used commands from the File, Connectionsand <strong>dataTaker</strong> menus.If Toolbar is ticked on the View menu, the main toolbaris always visible no matter which DeLogger windowyou’re working in.FilemenucommandsConnectionsmenucommands<strong>dataTaker</strong>menucommands(DeLogger must be connectedto the DT800)Create a Newdocument(the New Documentdialog box opens).Send the STATUS commandto the DT800.Send the TEST commandto the DT800.STATUS resultsOpen anotherproject.Save the currentproject.Print the current windowOpen a full-page Print Previewof the current window.TEST resultsOpen the Memory Card Optionsdialog box.Quit (stop) the unload process.Start the Unload process (the first Unloaddialog box opens).Connect to the DT800 (theConnection dialog box opens).Disconnect from the DT800.Play a replay file (theReplay Connectiondialog box opens).Run (Go) the current schedule in the DT800.Halt the current schedule in the DT800.UM-0071-A1Halt Optionsdialog boxRun OptionsFIGURE 19 DeLogger’s main toolbardialog box26 Getting Started with DT800 <strong>dataTaker</strong>
4-3 DELOGGER’S MENUS1234567891011Menu bar12345678910117Menu 7 changes according to whichDeLogger window is front-most.7777FIGURE 20DeLogger’s menus (sub-menus not shown)CHAPTER 4 A QUICK OVERVIEW OF DELOGGER: DeLogger’s Menus 27UM-0071-A1
4-4 MOREIMPORTANTCONCEPTS ANDTERMINOLOGYConnectionA DeLogger Connection is nothing more than a groupof communications settings: a user-defined and usernamedsoftware tool that automates the process oflinking DeLogger to a data site (explained below).It specifies• a particular computer port, a particular data siteand particular communications parameters — for aserial Connection• an IP address and port number — for a TCP or UDPEthernet network Connection• a particular DeLogger replay file (*.dlr; seepage 30) — for a file Connection.ExternaldatasitesExternalphysicalcommslinksSerial comms cableSerial comms cableEthernet networkExampleDeLoggerConnectionsdt800 Com1DT800 SERIAL2 9600DT800 ETHERNETDeLoggerDeLoggerdisplayandcaptureengineDeLogger’s live Connect dialog box or Replay dialogbox and click OK (Figure 22).To connect to anexternal data site(a serial or networkConnection):FIGURE 22Choose from theConnectionsmenuor clickIn the dialog boxthat opens, select aConnection.DeLogger makesthe Connection.Making a ConnectionTo connect to aninternal data site(a replay fileConnection):Data SiteA source of data. DeLogger data sites can be• external — a DT800 (or, to be more precise, theConnection to a DT800)• internal — a replay file (or, to be more precise, theConnection to a replay file).Replay file(internal data site)MY FILEFIGURE 21DeLogger’s Connection conceptUM-0071-A1A Connection is the link between a data site andDeLogger.You can create any number of Connections, each for aspecific use, but DeLogger can have only one activeConnection at a time — see the Extras panel “HowMany Connections?”.DeLogger automatically saves each Connection, readyfor the next time you want to use it.To link DeLogger to a particular data site, you simplyselect the appropriate Connection name fromHow Many Connections?With DeLogger, you can make only oneConnection at a time. (DeLogger automaticallydisconnects from the current data site in order toconnect to another one.)But with DeLogger Pro, you can make Connectionsto many data sites at the same time.28 Getting Started with DT800 <strong>dataTaker</strong>
ChannelA “conduit” or “route” for data. See Figure 23.DT800 ChannelsThe DT800 has• external physical channels — the sets of terminalson the outside to which you connect sensors andtransducers, and• internal physical channels — internal sources ofinformation, such as time and date from theDT800’s clock/calendar, temperature, batteryvoltage, system variables and system timers.DeLogger ChannelsDeLogger works with• physical channels — data returned from a DT800 (a“physical data site”) either in real time, or unloadedat the end of a logging session• historical channels — data supplied from a replayfile (a “replay data site”; see page 30).Figure 17 (page 24) shows where channels fit withinprojects, programs and schedules.Details of all channels are kept in DeLogger’s datahub (see page 30).Programs and JobsWhen you’re working with DeLogger and a DT800,the terms program and job mean the same thing.Because the DT800 works with program entities called“jobs”, every program you create in DeLogger isautomatically tagged as a “job” when you send it to aDT800.This tagging is almost invisible to the user (you can seeit if you Load DLP (Program) Text into a text windowentry screen). It’s necessary for the DT800 to recognisea DeLogger program, but not for DT50 or DT500/600Series <strong>dataTaker</strong>s.DatabaseDeLogger stores housekeeping information (such asConnections, windows, and window sizes andpositions) in a database.And, by upgrading to DeLogger Pro, you can haveextra database data management capabilities thatadd immense power to your data collection, analysis,presentation and reporting — all without leavingDeLogger Pro.PhysicalchanneldataForm windowChart windowText windowMimic windowSENSORSHistoricalchanneldataInternal channelsExternal channelsPHYSICALCHANNELSHISTORICAL CHANNELSReplay fileSpreadsheet windowDeLoggerFIGURE 23 Channel concepts — external and internal,physical and historicalCHAPTER 4 A QUICK OVERVIEW OF DELOGGER: More Important Concepts and Terminology 29UM-0071-A1
Data HubAn indispensable table in DeLogger’s database thatstores details of every channel known to DeLoggerduring the current Connection (Figure 24).Think of the data hub as a “resource controller” whosefunction is to• monitor which channels are available(it does this — from all the data sites you’re currentlyconnected to; see the Extras panel “How ManyConnections?” — every time you save a programbuilder window, send a program to the DT800, orotherwise communicate with a data site)• keep an up-to-date list of available channels andtheir details• compare available data site channels against thoseyou’ve assigned in the current project’s windowsand warn you of any mismatch — that is, if anychannels defined in DeLogger’s windows aren’tcurrently available from the connected data site(s)• make valid channels available for you to use in thevarious DeLogger windows.When you disconnect from a data site, that site’sinformation is automatically cleared from the hub.DatasiteDatasiteCHANNELDETAILSCHANNELDETAILSDatasiteDatasiteCHANNELDETAILSCHANNELDETAILSData hubCHANNELDETAILSCHANNELDETAILSDatasiteDatasiteCHANNELDETAILSDatasiteMakes validchannelsavailable toDeLoggerviewsCHANNELDETAILSDatasiteFIGURE 24 Data hub — DeLogger: one Connection ata time; DeLogger Pro: several Connections at a timeLogged DataData stored in the DT800’s internal memory or in aninserted memory card.You retrieve logged data using the Unload… commandon DeLogger’s <strong>dataTaker</strong> menu.The DT800 can log data and return real-time data atthe same time.Replay Data, Replay FileReplay data is data saved in a computer file (a replayfile, *.dlr) in a format that DeLogger can replay to itsform, chart, text and mimic windows, just as if the datawas arriving in real time (except that you can controlthe speed of the replay; see Figure 25).FIGURE 25Name of the file to be replayedResetPausePlayDrag pointer to adjustreplay speedReplay progress barDate and time of therecord currently beingreplayedDeLogger’s replay control panelYou can save both• real-time data and• logged data unloaded from a DT800as a replay file.DeLogger can also replay existing *.dx8 and *.dxufiles (<strong>dataTaker</strong> unload files).A replay file is just another data site: to link to it, youuse a DeLogger Connection called a replay fileConnection (or a file Connection or a replayConnection).You use the File tab in the Connections menu >Properties dialog box to create and edit replay fileConnections. See Figure 22.UM-0071-A1Real-Time DataData returned to the computer in real time — that is,the moment it is obtained by the DT800.Front-Most WindowThe DeLogger window that is in front of any others onyour screen. Its title bar is more brightly colored thanall the others, and it’s always the last window youclicked on. Sometimes known as the “current”, “toplevel”,“active” or “focus” window.We don’t use the term “active window” becauseDeLogger windows behind the front-most window canstill be active. For example, values in a backgroundform window can change as data arrives.30 Getting Started with DT800 <strong>dataTaker</strong>
CHAPTER 5YOUR FIRST PROGRAMWhen you installed DeLogger in Chapter 3 youcreated and named a DeLogger project (done in “StartDeLogger” beginning on page 18). We called itProject99.DeLogger is running on the computer and connected toyour DT800. You verified this in “Verify theConnection” (page 20). You also connected thepotentiometer to channel 1 of the DT800, to simulate aresistive sensor (page 15).Now, in this chapter, you’ll• get to know DeLogger’s program builder window —page 31• create a program using a program builder window— page 33• see the “raw” version of your program — page 36• send the program to the DT800 — page 36.Analog Channels, Digital Channels —What’s the Difference?Analog channel — accepts a continuous range ofinput values between a minimum and a maximum.Digital channel — expects an input that has one ofonly two values:• on or off• high or low• 1 or 0Often an analog channel is able to “read” a digitalinput, but the reverse is not true.5-1 DELOGGER’SPROGRAMBUILDERWINDOWA DT800 program builder window is DeLogger’s toolfor creating a DT800 program. As Figures 26 and 27show, you use it by choosing various schedule,channel and other items from drop-down lists anddialog boxes.Important Program Builder Facts• Each program builder window creates just ONEDT800 program.Although the program may contain severalschedules and involve many DT800 channels,there is only one program per program builder.• A project can contain more than one programbuilder — that is, more than one program.Figure 17 on page 24 illustrates this.(To add another project builder window, chooseNew on the File menu, then click the DT800Program button.)• A DT800 program is everything you specify in aprogram builder window — everything defined onevery tab across the bottom of the programbuilder.• Your DT800 runs one program at a time. Whenyou send a new program, it replaces any existingprogram in the DT800 (DeLogger asks first toensure that this is what you want to do).CHAPTER 5YOUR FIRST PROGRAM: DeLogger’s Program Builder Window 31UM-0071-A1
➋ Specify the schedule’sprimary details here.When you click in a cell in the program builder,information about the clicked item appears here.➌ Specify the schedule’schannels here.Fixed columnsA program builder’s program consists ofeverything specified on all of these tabs(scroll right to reveal more tabs).➊ Select a schedule here: Immediate (a once-onlyscan) or triggered (A, B, C,…K).Scrollable columns➍ Repeat from step 1,but use a differentschedule tab, if youwant to include otherschedules in theprogram (you do thiswhen you want theDT800 to do things atdifferent times oraccording to differenttriggers).Scroll right to revealmore column headings.FIGURE 26DeLogger’s DT800 program builder — general sequence of useClick this Configure button toopen the Rate dialog box.Choose Voltage fromthis drop-down list, then… click this Configure button to open theVoltage Wiring Configurations dialog box.UM-0071-A1FIGURE 27Using specific parts of the DT800 program builder — more details in the following topics32 Getting Started with DT800 <strong>dataTaker</strong>
5-2 CREATE APROGRAMNow you’ll use a DeLogger program builder windowto create a simple program ready to send to theDT800. (You can also create a program in a DeLoggertext window if you’re familiar with the <strong>dataTaker</strong>programming language. But, in this tutorial, we’ll do itthe graphical way — by pointing and clicking in theprogram builder.)The general steps for working in a program builderwindow are summarized by the numbered instructionsin Figure 26.SchedulesScan schedules are the heart of any DT800 program.Here, you specify your program’s first schedule. (If youwant to know more about schedules, see the Extraspanel “Scan Schedules — DT800 Timetables” below,and Part D of the DT800 <strong>dataTaker</strong> User’s Manual.)➲ Define a schedule (use schedule A) thatinstructs the DT800 to scan channel 1 (thepotentiometer) as a 2-wire resistance every halfsecond,and to log the measurements.To do this…a) Minimize all windows except the DT800 programbuilder (the window with Prog1.dl8 in its title bar).b) At the bottom of the program builder window, clickthe tab labelled A.We’ll only use one scan schedule, schedule A, inthe program for now (you don’t have to useschedule A first; you can use any of tabs A to K).c) Set a time interval trigger for schedule A of half asecond (a “0.5-second trigger rate”) by followingthe numbered steps in Figure 29.When the Triggers dialog box is open, notice theother options available:• Name — Schedules can have optional namesfor identification — for example, Boiler1 andHOURLY (spaces are not allowed). If no name isgiven, schedule identification defaults to RA forschedule A, RB for schedule B, and so on.• Trigger on Events — Open the Event(s) dropdownlist to see the event types you can use totrigger a schedule.• Trigger While — Open the While drop-down listto see the “trigger while…” conditions you canassign to the schedule.Scan Schedules — DT800 TimetablesA scan schedule tells the DT800 what to do andwhen to do it. It’s a collection of instructions thatspecifies• which channels to scan (a schedule can containone, two or many channels)• when to scan the specified channels — for example,whenever 5 seconds have elapsed (repeating every5 seconds), whenever a door closes (scan on digitalevent), or whenever an alarm occurs• how to read the channel (voltage, current,temperature, resistance,…)• how to convert the reading, apply alarms, assign thechannel’s data to channel variables, apply gain,excitation and termination,… (may not be required).Each program you send to the DT800 can containup to eleven basic schedules (labelled A, B, C,…K).That is, in one program you send to the DT800, youcan define various groups of channels to be scannedaccording to as many as 11 different “timetables” or“agendas”.See also Figure 17 on page 24. It shows how• projects contain programs (program builders)• programs contain schedules• schedules contain DT800 channels.There’s also an Immediate scan schedule. Readabout this in “Other Schedules and Scans” in Part Dof the DT800 <strong>dataTaker</strong> User’s Manual.CHAPTER 5YOUR FIRST PROGRAM: Create a Program 33UM-0071-A1
➋ In the second Interval field,select Thousandths ofseconds (500 thousandthsof seconds = 0.5 seconds).➊ Click theRate row’sPropertiesbutton .TheTriggersdialog boxopens.You can use this technique to get information aboutmost items in the program builder.e) Click the Burst row’s Configure button and, inthe dialog box that opens, look over the burstschedule options available. When you’ve finished,click Cancel to close the dialog box.➌ In the first Interval field,change the number to500.➍ ClickOK.FIGURE 30The burst schedule dialog boxFIGURE 29Setting schedule A’s rate to 0.5 secondsd) Single-click in the empty/white area of the Burst rowand notice the information text that appears in theinformation area (on the right-hand side of theprogram builder window) — Figure 28.We won’t use a burst schedule in this tutorial, butyou can read more about them in “Other Schedulesand Scans” in Part D of the DT800 <strong>dataTaker</strong> User’sManual.f) In the Options row of the program builder, leaveLogging and Go ticked.Then when you send the program you’re currentlybuilding to the DT800, these options instruct theDT800 to run (Go) schedule A and to log its data.Single-click the Burst fieldto seeBurst information here.FIGURE 28 Information area exampleUM-0071-A134 Getting Started with DT800 <strong>dataTaker</strong>
g) Now specify the channel you want schedule A toread (the potentiometer channel) by following thenumbered steps in Figure 31.When you’ve finished working through Figure 31,you’ve specified your first schedule.h) In DeLogger’s File menu, choose Save Project.This ensures you won’t lose any of the work you’vejust done.i) Note that there are a number of other columns inthe program builder window.They allow you to further affect how your inputchannels and sensors are managed duringmeasurement, and how resulting data is processedand manipulated. Click the Configure buttons andthe drop-down list buttons in these columns to seemore of what’s available.You’ve just created and saved your first DeLoggerprogram. It contains one schedule, schedule A. Whenyou send it to the DT800, it will instruct the DT800 toscan channel 1 every half-second as a resistance andlog the measurements.Your program contains only one schedule because tabA (at the bottom of the program builder window) is theonly one in which you’ve assigned a channel. In laterchapters you’ll add• another channel to schedule A• another schedule, schedule B, to the program.➊ Single-click in the Signal column of R1(the first row of the Channel Definitionsarea).➋ Click the drop-down list buttonthat appears in the Signalcolumn of R1.➌ Click Resistance in the list(because you want the DT800to read the potentiometer as aresistance).➎ Check that both theStart Channel andEnd Channel fieldscontain 1 (youconnected thepotentiometer tochannel 1).➏ Check that the2-Wire +/– option isselected (you made a2-wire connection tothe + and – terminalsof channel 1).➍ Click the Configure buttonin the Wiring column.The Resistance Wiring dialog box opens.➐ Notice the other wiring configurations andthe information area across the bottom of thedialog box.Click 3-Wire Resistance Inputs and 4-Wire Resistance Inputs at the top of thedialog box. Examine these tabs but don’tmake any changes.When you’ve finished, check that the settingson the 2-Wire Resistance Inputs tab areas described in ➎ and ➏ then click OK.FIGURE 31Specifying the potentiometer channelCHAPTER 5YOUR FIRST PROGRAM: Create a Program 35UM-0071-A1
5-3 SEE WHATYOU’LL SENDAt any time, you can see the program you’re buildingin command-line (text) format. This is probably onlyuseful if you’re familiar with the <strong>dataTaker</strong>programming language, but have a look at it now sothat you know this facility exists.➲ Use the program builder’s right-click menu tosee the command-line form of your program.To do this…a) Right-click anywhere in the program builderwindow (except the title bar).A pop-up menu opens (Figure 32).5-4 SEND THEPROGRAMBecause you’re currently connected to the DT800 (youdid this in “Make the Software Connection” back onpage 19), all is now ready for you to send yourprogram.➲ Send your program to the DT800.To do this…a) Make sure that Prog1.dl8 is the front-most window(single-click it if you’re not sure).Always take care if you have more than one DT800project builder in any project. DeLogger sends onlythe program of the active program builder, so makesure the correct program builder is front-most.When a program builder is the front-most window,the seventh menu from the left changes to Program— see Figure 20 (page 27).b) In the Program menu, choose Send to Connection.The Send Program File dialog box opens.FIGURE 33Progress barSend Program progressThe Event Logs window (Figure 34) may also opento report that there is no current job (“program”) inthe DT800. See the “Event Logs” Extras panel.FIGURE 32commandsSee your program’s behind-the-scenesb) In the pop-up menu, choose Show Program.The Program Listing dialog box opens showing yourprogram line-by-line. Scroll down to see all of thecommands that constitute the program.c) Click OK to close the dialog box.FIGURE 34 Event Logs window displays messages,errors and alarmsc) If the Event Logs window is open, click its Closebutton.UM-0071-A136 Getting Started with DT800 <strong>dataTaker</strong>
d) Notice that the Acquiring LED on the DT800’s frontpanel now flashes every half-second — that is,every time the DT800 makes a measurement. (Thisis in addition to the DT800’s three-second“heartbeat” flash discussed in step b) in “Power theDT800” on page 14.Because your program instructed the DT800 to logthe measurements, the Logging LED also flashesevery half-second.The DT800 is now running according to yourprogram, scanning channel 1 every half-secondand logging the value in its internal memory. Wewon’t do it in this tutorial, but you could disconnectfrom the DT800 now, leaving it operatingcompletely independent of the computer; this is howmany <strong>dataTaker</strong>s are used.Remember…When you send a program, you send all settings onevery tab in the current program builder window —see the bottom of Figure 26 (page 32). So, in additionto scan schedules, you’re sending• any span, polynomial and thermistor definitionsyou’ve created on these tabs• the DT800 configuration settings on the Switches,Parameters and Global tabs.Event LogsThe Event Logs window (Figure 34) displays• messages on the Messages tab• errors on the Errors tab• alarms on the Alarms tab.If you tick Show Alarm Events on the View menu,DeLogger opens this window every time an alarmoccurs.If you tick Show Error Events on the View menu,DeLogger opens this window every time an erroroccurs.If you tick Show Message Events on the View menu,DeLogger opens this window every time a changemessage is received from the DT800.(You can alter the degree of this reporting — seeConfiguration menu > Defaults… > ConfirmationLevel area.)You can keep the Event Logs window permanentlyopen on your screen by ticking View Events on theView menu.Switches and ParametersSwitches are a group of internal settings you canuse to configure the operation of a DT800.Parameters are another group of internal settings.Both are described in Part H of the DT800<strong>dataTaker</strong> User’s Manual.Switches and parameters are primarily intendedfor use when programming the DT800 directly (thatis, using the <strong>dataTaker</strong> programming language)and have little relevance when using DeLogger tosupervise the DT800.CHAPTER 5YOUR FIRST PROGRAM: Send the Program 37UM-0071-A1
CHAPTER 6SEE YOUR DATA —FORM WINDOWIn this chapter• you’re introduced to DeLogger’s form window —page 38• you use the form window to see data being returnedfrom the DT800 — page 41• you automatically set the DT800’s date and time —page 42.6-1 DELOGGER’SFORM WINDOWA DeLogger form window displays data from real-timeor replay channels one row per channel (Figure 35).In Microsoft Excel terminology, the form window is aworkbook that initially contains one worksheet. (Youcan add or delete worksheets at any time — explainedin the lower right-hand corner of Figure 35.)Formula bar (Edit Mode only)Co-ordinates of thecurrent cell aredisplayed here(Edit Mode only).Channel datais displayedone rowperchannel.UM-0071-A1Form toolbarThe buttonsduplicate manyof the commandson the Form menu.See figures 36and 37.FIGURE 35A DeLogger form windowSelect a worksheetby clicking its tab.Rename a worksheet bydouble-clicking its tab(the Sheet Name dialogbox opens).Drag the splitter barto shrink or enlargethe tab space.Double-right-click anywherein a worksheet to open it inthe Formula One WorkbookDesigner, where additionalcommands are available ifyou need them (for example,Sheet > Insert Sheet, Sheet >Delete Sheet, Data > Recalc).38 Getting Started with DT800 <strong>dataTaker</strong>
Each channel’s row in the worksheet contains• the channel’s latest value and its timestamp• the channel’s highest value and lowest value• a trend indicator (Up or Down), which showswhether the latest value is above or below theprevious value• the channel’s units• any alarm message.You can have as many form windows open as youneed. (To add a form window, choose New on the Filemenu, then click the Form button.)At any time, you can pause the incoming data andprint selected areas of the form.Edit Mode On/OffThe form window has two distinct modes:• Edit Mode — for configuring the form (Edit Mode onthe Form menu is ticked)• Run Mode — for viewing incoming data (Edit Modeon the Form menu is un-ticked)These modes are compared in Figures 36 and 37.“Edit” appears in the titlebar when the window is inEdit Mode.To rename a column,double-click the columnheader (the Header Namedialog box opens).ConnectionSchedule (A, B, C,…K)Channel label (from the channel’sLabel column in the program builder)Adjust the width of a column by dragging its rightborder in the header row (the cursor changes to ↔).Latest valueTrend indicator (Up/Down)Timestamp of latest valueMaximum and minimumchannel valuesTo assign a different channelto a row already in use,double-click the row’sChannel cell (the SelectChannel dialog box opens).To replace the row numberwith a custom name,double-click the row number(the Header Name dialogbox opens).To assign a channel to anempty row, single-click therow number or in the emptychannel column. In thedialog box that opens,select the channel you wantto display in that row.Turn Edit Mode on/offOpen the form window’s Propertiesdialog box (to control the display ofrealtime and/or logged data).Set number of decimal places of selected cell(s)Left, centre, or right align contents of selected cell(s)Show/hide gridlinesShow/hide row and column headersScale view down (zoom out)Scale view up (zoom in)Reset all values in the Low Value column to zero (updated at the next scan).Reset all values in the High Value column to zero (updated at the next scan).FIGURE 36A DeLogger form window in Edit Mode (Form menu > Edit Mode is ticked)CHAPTER 6SEE YOUR DATA — FORM WINDOW: DeLogger’s Form Window 39UM-0071-A1
Scale view down (zoom out)Scale view up (zoom in)Pause the return of data.Turn Edit Mode on/off.Reset all values in the Low Value column to zero (updated at the next scan).Reset all values in the High Value column to zero (updated at the next scan).Send the X schedule command (“polled” or “scan on host request” schedule).FIGURE 37A DeLogger form window in Run Mode (Form menu > Edit Mode is un-ticked)Can’t See Live Data?If the channel data in the Value column isn’t updatingas you think it should, check that• Edit Mode on the Form menu is un-ticked (that is, theform window is in Run Mode)• Pause on the Form menu is un-ticked• for real-time channels: DeLogger is connected to theDT800, and the DT800 is running the program thatcontains the channels you’ve specified to bedisplayed in the form window• for replay channels: the replay control panel is open andshowing the correct replay file’s name in its title bar.The Form MenuWhen a form window is DeLogger’s front-mostwindow, the seventh menu on DeLogger’s menu bar isForm (see Figure 20 on page 27). Commands on thismenu are specific to the form window, and some areduplicated by buttons on the form toolbar (Figure 38).Edit Mode onEdit Mode is ticked on the Form menu.Edit Mode button depressedButtons available in Edit ModeEdit Mode off (Run Mode)Edit Mode is un-ticked on the Form menu.Edit Mode button raisedButtons available in Run ModeUM-0071-A1FIGURE 38Buttons available on the form toolbar in Edit Mode and Run Mode40 Getting Started with DT800 <strong>dataTaker</strong>
6-2 VIEW THERETURNED DATA➲ Use DeLogger’s form window to view thereal-time data that the DT800 is returning toyour computer.To do this…a) Locate the minimized form window at the bottom ofDeLogger’s main window — it’s named Form1.dlf— and click its Restore button.FIGURE 39Click Form1.dlf’s Restore buttonto enlarge the text window.Restoring the form windowThe form window is restored from its minimizedstate.b) Make sure that the form window is in Edit Mode.Do this by checking for any of the following:• the word “Edit” is present in the form window’stitle bar• the formula bar is present at the top of the formwindow (Figure 35)• the Edit Mode button is in the pressed position(Figure 38)If the window is not in Edit Mode, choose Edit Modeon the Form menu (or click the Edit Mode button).c) Single-click in the Channel column of row 1.Single-clickFIGURE 40 Assigning a channel to row 1The Select Channel for Row 1 dialog box opens. Itcontains the name DeLogger has given to yourpotentiometer channel.d) Notice that the name is composed of• the Connection name• A — the “schedule ID” (this is the defaultschedule ID; it is not replaced by any scheduleID you create in the program builder)• 1R — the “channel ID”, which itself is composedof the “channel number” 1 and the Resistancechannel type (this is the default channel ID; it isreplaced by any channel label you create in theprogram builder — you’ll do this in “Add aChannel Label” on page 55).e) In the Select Channel for Row 1 dialog box,highlight (one click) your channel name and clickOK.See also the “Clearing the Form Window” Extraspanel (page 42).f) Turn Edit Mode off (un-tick Edit Mode on the formmenu, or click/release the Edit Mode button) and —while watching the form window’s Value column —turn the knob on the potentiometer.Returned data (resistance) appears in the Valuecolumn and is updated every half-second.g) Turn the knob in both directions and observe theeffect in the trend indicator column (shows Up orDown) and the High Value and Low Value columns.You may need to enlarge the form window or scrollit horizontally to see these columns.If turning the potentiometer knob fully anticlockwiseproduces a maximum reading instead of aminimum, reconnect the potentiometer using thegreen and white wires instead of those used inFigure 9 (page 15).h) Experiment with the Reset High and Reset Lowbuttons to see the effect they have on the readings inthe High Value and Low Value columns.Reset Low buttonReset High buttonFIGURE 41 Reset High and Reset Low buttonsCHAPTER 6SEE YOUR DATA — FORM WINDOW: View the Returned Data 41UM-0071-A1
6-3 SET THEDT800’S DATEAND TIMECommunicate again with the DT800 to set its date andtime to that of your computer.➲ Use DeLogger’s Set Date/Time command.To do this…a) Notice the current date and time reported by theDT800 in the form window’s Date column.They may not be correct.b) In the <strong>dataTaker</strong> menu, choose Set Date/Time.DeLogger communicates with the DT800 and sendsit your computer’s date and time (a progress dialogbox appears momentarily).c) Observe the Date column again.The DT800 is now returning the correct date andtime.Clearing the Form WindowTo clear one or more rows in the form window,highlight the row(s) — Shift+click and Ctrl+clickwork for multiple rows — then press Delete on yourkeyboard. A dialog box opens in which you selectwhat you want to clear:• all (formats and values)• formats only (special cell alignment, fonts, borders,patterns and so on — see Form menu > Format)• values only (leaves any special cell formattinguntouched)UM-0071-A1FIGURE 42Form window’s clear dialog box42 Getting Started with DT800 <strong>dataTaker</strong>
CHAPTER 7SEE YOUR DATA —CHART WINDOWDeLogger’s chart window turns your computer into apowerful chart recorder.In this chapter• you’re introduced to DeLogger’s chart window —page 43• you chart data being returned from the DT800 —page 48.7-1 DELOGGER’SCHART WINDOWA DeLogger chart window displays how the value ofone or more DT800 channels changes with time. SeeFigures 43 and 44.Incoming data from user-selected real-time or replaychannels is automatically plotted against time. Newdata is plotted on the right-hand side of the trend areaand the trend graphs move from right to left, exactlylike the traces on a chart recorder.You can display data from up to twelve channels ineach chart window — that is, twelve separate trendgraphs per chart window — and you can assign theIndividual graph show/hide buttonsDrag a scale’s handle torelocate the scale.You can, for example, draga scale to the other side ofthe trend area, or place oneabove another (separatesthe trends).See Figure 44.Thevertical overview barshows the currently-visiblerange (the gray bar)and themaximum-to-minimum rangeof the data (the I bar)in proportion to themaximum displayablevertical range of the chart(the full heightof the trend area).Chart toolbarThe buttons duplicate commandsfound on the Chart menu.See Figure 44.Drag it from its docked positionto create a floating toolbar.When you rest the mouse over agraph’s Show/hide button, a popupinformation bar appears.See Figure 44.The horizontal overview barshows the currently-visible section ofdata (the gray bar)in proportion to the entire data set(the full width of the trend area).FIGURE 43A DeLogger chart window displays trend graphs (like a chart recorder).CHAPTER 7SEE YOUR DATA — CHART WINDOW: DeLogger’s Chart Window 43UM-0071-A1
trends to as many as six Y axes (linear or logarithmic).You can also open additional chart windows ifnecessary. (To add a chart window, choose New onthe File menu, then click the Chart button.)You can watch the trends update as the real-time orreplay data arrives, or you can home-in on a section ofthe data already charted (while incoming datacontinues to be recorded by the window).Time (vertical) and data (horizontal) rulers allow you toread precise coordinates from the trends (Figure 47).Mouse PowerIn a DeLogger chart window, you use the mouse toselect and scale sections of the trend graphs foroptimal viewing of regions you’re interested in. Figures45 and 46 show how you do this.Relocate a graph and its scaleby dragging its scale handle.“Edit” appears after the window name in thetitle bar when the window is in Edit Mode.An information barappears when you restthe mouse over a graph’sShow/hide button.Pause the return of data.Only available when thewindow is in Run Mode.Turn Edit Mode on/off.Play Chart button (and indicator).The chart moves (like the paper in achart recorder) and new data entersthe right-hand side of the trend areawhen when this button is pressed (lit).Axis labelChannel label (from thechannel’s Label column inthe program builder)Schedule (A, B, C,…K)ConnectionThe graph’s data pointsymbol (if you’ve appliedone — double-click in thetrend area and go to theCurves tab in the dialogbox that opens)Clear the chart window. Only availablewhen the window is in Edit Mode.Open the chart window’s Properties dialog box(to control the display of realtime and/or logged data).Only available when the window is in Edit Mode.Click the Auto Re-scale button to fit the trend graphs into the chartwindow with maximum horizontal and vertical resolution (squeezesall the data into the window).Rotate the graphs so that they move from top to bottom.Select channels to be plotted in this chart window (the Chart Channelsdialog box opens). Only available when the window is in Edit Mode.UM-0071-A1FIGURE 44More features of the DeLogger chart window44 Getting Started with DT800 <strong>dataTaker</strong>
HORIZONTAL SCALINGRest the mouse over the horizontal scale (the cursor changes to) then click and drag as described here.Horizontal scaling from the rightHorizontal scaling from the leftEXPAND COMPRESS COMPRESS EXPANDMove the left end ofthe scale by dragginghorizontally with the leftmouse button pressed.The right-hand end of the scalestays fixed while you drag.FIXEDFIXEDFor finer control, start dragging further from the fixed end.Move the right end ofthe scale by dragginghorizontally with the rightmouse button pressed.The left-hand end of the scalestays fixed while you drag.VERTICAL SCALINGRest the mouse over the vertical scale (the cursor changes to )then click and drag as described here.The upper end of the scalestays fixed while you drag.Move the lower end ofthe scale by draggingvertically with the leftmouse button pressed.FIXEDEXPAND COMPRESSVerticalscalingfrom thetopUPDOWNShiftingFor finer control, start draggingfurther from the fixed end.LEFTRIGHTMove the upper end ofthe scale by draggingvertically with the rightmouse button pressed.The lower end of the scalestays fixed while you drag.FIXEDEXPANDCOMPRESSVerticalscalingfrom thebottomVERTICAL SHIFTINGRest the mouseover the verticalscale (the cursorchanges to ),then hold downboth mouse buttonsand drag vertically.HORIZONTAL SHIFTINGRest the mouse over the horizontalscale (the cursor changes to ),then hold down both mousebuttons and drag horizontally.FIGURE 45Chart window mouse power 1— horizontal/vertical scaling, and horizontal/vertical shiftingCHAPTER 7SEE YOUR DATA — CHART WINDOW: DeLogger’s Chart Window 45UM-0071-A1
DIAGONAL SCALINGDrag inside the trend area(instead of along the scales)with the appropriate mousebutton pressed.EXPANDCOMPRESSRe-scale from the upper right-hand cornerby dragging diagonallywith the left mouse button pressed.EXPAND COMPRESSFIXEDThe upper right-hand cornerstays fixed while you drag.For finer control, start dragging further from the fixed corner.EXPANDRe-scale from the lower left-hand cornerby dragging diagonallywith the right mouse button pressed.COMPRESSThe lower left-hand cornerstays fixed while you drag.FIXEDCOMPRESSEXPANDUPLEFTRIGHTDOWNDIAGONAL SHIFTINGDrag inside the trend area(instead of along the scales)with both mouse buttonspressed.UM-0071-A1FIGURE 46Chart window mouse power 2— diagonal scaling and diagonal shifting46 Getting Started with DT800 <strong>dataTaker</strong>
Edit Mode On/OffThe chart window has two distinct modes:• Edit Mode — for configuring the chart (Edit Modeon the Chart menu is ticked)• Run Mode — for viewing incoming data or previoussections of the graphs (Edit Mode on the Chart menuis un-ticked)Graphs Not Updating?If your trend graphs are not updating in the chartwindow, check that• Edit Mode on the Chart menu is un-ticked (that is, thechart window is in Run Mode)• Pause on the Chart menu is un-ticked• for real-time channels: DeLogger is connected to theDT800, and the DT800 is running the program thatcontains the channels you’ve specified to bedisplayed in the chart window• for replay channels: the replay control panel is openand showing the correct replay file’s name in its titlebar.The Chart MenuWhen a chart window is DeLogger’s front-mostwindow, the seventh menu on DeLogger’s menu bar isChart (see Figure 20 on page 27). Commands on thismenu are specific to the chart window, and some areduplicated by buttons on the chart window’s toolbar(see Figures 43 and 44).appears beside the cursor when it’s over the ruler.Drag the time ruler fromthe left or right vertical axis.An information bar shows thetime or data coordinate.Drag the data ruler from thetop or bottom horizontal axis.FIGURE 47Chart window rulers for displaying precise time and data coordinatesCHAPTER 7SEE YOUR DATA — CHART WINDOW: DeLogger’s Chart Window 47UM-0071-A1
7-2 CHART THERETURNED DATA➲ Display data from the potentiometer channelin DeLogger’s chart window.To do this…a) Locate the minimized chart window at the bottom ofDeLogger’s main window — it’s named Chart1.dlc— and click its Restore button.The chart window is restored from its minimizedstate.b) Make sure that the chart window is in Edit Mode.c) In the Chart menu (seventh menu from the left),choose Select Channels….The Chart Channels dialog box opens (Figure 48).d) In the Chart Channels dialog box:i. Under Active, tick Curve 1.ii. Open the Channel drop-down list box thatbecomes available and choose thepotentiometer channel.iii. Leave the Y Axis set to 1.iv. Under Label, replace Data 1 in the Y Axis 1field with Ch1 Ohms (or any text you want toappear on the vertical/data axis of the chart).v. Do not tick under Logarithmic.vi. Click OK.The dialog box closes leaving the chart windowalmost ready to receive channel 1’s data.Note the axis text Ch1 Ohms on the left-hand side ofthe chart window.e) Make sure that the Play Chart button ( at the righthandend of horizontal axis) is pressed/green.f) Turn Edit Mode off (un-tick Edit Mode on the Chartmenu, or click the Edit Mode button on the bottom ofthe chart window) and watch the chart windowwhile you turn the potentiometer’s knob.The data points are plotted in the trend area andjoined with straight-line segments as the chart movesfrom right to left.g) In the Chart menu, choose Auto Re-scale.All the data returned to the chart window so far iscompressed into view in the trend area.h) Click the Play Chart button to stop the chart (thebutton turns black ).Note that stopping the chart does not stop the flowof data into the window, whereas the Pausecommand does stop the flow — no data is stored inthe window’s buffer when the window is paused.This is also true for the other windows that can bepaused (form, mimic and text).i) Use your mouse as described in Figures 45 and 46to scale and shift the trace.j) Drag the time and data rulers into the trend area asshown in Figure 47.Notice the information box that appears for eachruler. You can drag the box to your preferredposition in the DeLogger window.k) Turn Edit Mode on then choose Clear from the Chartmenu (or click the Clear button ).All the data returned to the chart window is deleted.l) Continue to experiment in the chart window if youwant. Remember that Edit Mode must be off to plotincoming data.UM-0071-A1FIGURE 48Assigning a channel to the chart window48 Getting Started with DT800 <strong>dataTaker</strong>
CHAPTER 8SEE YOUR DATA —MIMIC WINDOWDeLogger also allows you to present data as a movinganalog needle on a meter panel. (And if you upgradeto DeLogger Pro, you’ll have access to other metertypes, as well as buttons that perform actions.)In this chapter• you’re introduced to DeLogger’s mimic (meter)window — page 49• you create a meter and use it to display data —page 50• you play a replay file to a meter — page 51• you add a graphic to a meter panel — page 52• you practise disconnecting from the DT800 — page 53.Meter Panel BackgroundimageScale text down.Scale text up.Load a picture.Create a meter panel and assign up tofive channels to it.FIGURE 49Mimic toolbarPause the return of data.Turn Edit Mode on/off.Open the mimic window’sProperties . dialog box.A typical DeLogger mimic window8-1 DELOGGER’SMIMIC WINDOWA DeLogger mimic window (Figure 49) lets yourepresent data as a panel containing one or moreneedle (arc) meters on your computer screen.You can have as many mimic windows open as youneed (limited only by computer memory and speed).To add a mimic window, choose New on the Filemenu, then click the Mimic button.Edit Mode On/OffThe mimic window has two distinct modes:• Edit Mode — for creating, moving and resizingmimics, and for assigning channels (Edit Mode onthe Mimic menu is ticked)• Run Mode — for displaying incoming data (EditMode on the Mimic menu is un-ticked)Meters Not Updating?If your meters are not updating in the mimic window,check that• Edit Mode on the Mimic menu is un-ticked (that is,the mimic window is in Run Mode)• Pause on the Mimic menu is un-ticked• for real-time channels: DeLogger is connected to theDT800, and the DT800 is running the program thatcontains the channels you’ve assigned for displayby the meters• for replay channels: the replay control panel is openand showing the correct replay file’s name in its title bar.The Mimic MenuWhen a mimic window is DeLogger’s front-mostwindow, the seventh menu on DeLogger’s menu bar isMimic (see Figure 20 on page 27). Commands on thismenu are specific to the chart window, and some areduplicated by buttons on the mimic window’s toolbar(see Figure 49).CHAPTER 8SEE YOUR DATA — MIMIC WINDOW: DeLogger’s Mimic Window 49UM-0071-A1
8-2 DISPLAYRETURNED DATAIN A METER➲ Create a meter panel and assign thepotentiometer channel to it.To do this…a) Locate the minimized meter window Mimic1.dlmand click its Restore button.b) Make sure that the mimic window is in Edit Mode.c) In the Mimic menu (seventh from the left), chooseNeedle Meters….The Mimic Meter Panel Properties dialog boxopens.d) On tab 1:i. Open the first drop-down list box and choosethe potentiometer channel.FIGURE 51Creating a meter labelf) Drag the anchor point in lower right-hand cornerdown and to the right to enlarge the panel toapproximately double its original size.The mouse pointer changes to a double-endeddiagonal arrow when you’re over the anchor point.g) Hold the mouse pointer anywhere within the panel.When the pointer changes to , drag the panelinto the centre of the mimic window.h) Click outside the panel to de-select it.UM-0071-A1FIGURE 50needleAssigning a channel to a meter’sii. Tick Panel Border (Figure 50).iii. Click the Label button (Figure 50).iv. In the Mimic Label dialog box that opens(Figure 51), select Manual Label and type MyPot. (or any text you want to appear beneaththe meter), then click OK.v. Click OK again to close the Mimic Meter PanelProperties dialog box.The new meter panel appears in the top left-handcorner of the mimic window.e) Single-click anywhere within the meter panel.A striped border appears around the panel to showthat it’s selected.➲ Change the range of the meter to suit yourpotentiometer.To do this…a) Double-click the meter (in the centre of the meter, notthe surrounding panel).b) In the Meter Parameters dialog box that opens:i. Type 600 in the To field of the Range area.This suits your potentiometer, which has amaximum resistance of approximately 550ohms.ii. Type 100 in the Step field of the Ticks area.The tick marks will appear 100 ohms apartaround the meter.iii. Click OK.Your meter should now look like Figure 52.FIGURE 52bandsThe meter before changing its alarm50 Getting Started with DT800 <strong>dataTaker</strong>
➲ Change the meter’s alarm bands.To do this…a) Double-click the meter again.b) In the Meter Parameters dialog box that opens, clickthe Alarm Attributes… button.c) In the Alarm Attributes dialog box that opens:i. Type 500 in the High field (Value column).ii. Type 100 in the Low field (Value column).iii. Click OK.d) Click OK again to close the Meter Parametersdialog box.Your meter should now look like Figure 53.FIGURE 53The finished meter➲ Use the meter to display data from thechannel assigned to it (the potentiometerchannel).To do this…a) Turn Edit Mode off for the mimic window and watchthe meter while you turn the potentiometer’s knob.The needle moves and the value shown under theneedle changes according to the incoming data.b) Look at the form window and the chart window alsoand continue turning the knob.Data in all three views updates every time scheduleA makes a scan (every half-second).8-3 REPLAY A FILE TOA METERData can also come from a file — a replay file — intoDeLogger. You use a special DeLogger Connection —a replay Connection — to do this. See “Replay Data,Replay File” on page 30.➲ Open a replay Connection.To do this…a) In the Connections menu, choose Play….b) In the Replay Connection dialog box that opens,highlight MyFile and click OK.c) In the Select Replay File dialog box that opens,highlight Example.dlr and click Open.The example replay files were placed here whenyou installed DeLogger.The file replay control panel opens ready for you tostart a replay of Example.dlr.d) Familiarize yourself with Figure 25 on page 30,which explains the various components of thereplay control panel.➲ Create another meter panel and assign areplay channel to it.To do this…a) Make sure that the mimic window is in Edit Mode.b) In the Mimic menu, choose Needle Meters….c) On tab 1:i. Open the first drop-down list box and noticethat channels from the replay file Connectionare now available (in addition to those fromyour Connection to the DT800).ii. From the list, choose MyFileB.21CV.iii. Click OK.The new meter panel appears in the top left-handcorner of the mimic window.d) If you want, enlarge the meter’s panel and drag it toa new location.CHAPTER 8SEE YOUR DATA — MIMIC WINDOW: Replay a File to a Meter 51UM-0071-A1
➲ Activate the mimic window and play thereplay file.To do this…a) Turn Edit Mode off for the mimic window.b) Drag the replay control panel to a position thatallows you to see it as well as the mimic window.c) In the control panel, click the Play button and watchthe second meter.The needle of the second meter displays data as it isreceived from the replay file.d) Increase the speed of the replay and watch theeffect on the needle.e) Use the Pause, Reset and Play buttons in the controlpanel.f) During replay, turn the potentiometer’s knob andobserve that each meter displays its appropriatedata.8-4 ADD A PICTUREYou can add pictures to a mimic window as abackground or, for example, to create a flowchart thatincorporates DeLogger meters.➲ Load a picture into the mimic window.To do this…a) Turn Edit Mode on for the mimic window.b) In the Mimic menu, choose Picture….c) In the dialog box that opens, click the Browse buttonat the right-hand end of the File field.d) In the Select Picture File dialog box that opens,select BAKDROP5.bmp and click Open.BAKDROP5.bmp is a blue gradient.e) Click OK to close the Mimic Picture Propertiesdialog box.The picture appears in the mimic window.f) Single-click the picture to select it, then drag itslower right-hand corner to fill the mimic window.g) With the picture still selected, choose Mimic menu >Arrange > Send to Back.h) With the picture still selected, choose Mimic menu >Lock.The picture is locked behind your meters.Tip When using a picture as a background behindyour meters, load the picture first (and lock it) so thatsubsequent meter panels automatically overlay thepicture.UM-0071-A152 Getting Started with DT800 <strong>dataTaker</strong>
8-5 DISCONNECTAlthough you need to be connected to the DT800 inorder to complete this tutorial, we’ll get you todisconnect here and then reconnect in the next chapter— just for practice.➲ Carry out a software disconnection fromyour DT800.To do this…a) In DeLogger’s Connections menu, chooseDisconnect….b) In the Disconnect dialog box that opens, highlight(one click) dt800 Com1 and click OK.FIGURE 54DisconnectingThere is no longer a link between DeLogger andyour DT800, but the DT800 is still runningaccording to your program — scanning channel 1every half-second and logging the results into itsinternal memory.c) Confirm that data is no longer being returned fromthe DT800 by looking at the form window, the chartwindow or the mimic window.These windows are not updated when DeLogger isdisconnected from the DT800.CHAPTER 8SEE YOUR DATA — MIMIC WINDOW: Disconnect 53UM-0071-A1
CHAPTER 9EXTEND YOUR PROGRAMIn this chapter you’ll learn more about DeLogger andyour DT800 by• altering schedule A’s rate — page 55• adding your own label to the potentiometer channel— page 55• adding channels to schedule A using more of theprogram builder’s features — page 56• reassigning the form, chart and mimic windows —page 59• using a DeLogger text window — page 60• adding an alarm to the potentiometer channel —page 63• adding another schedule to your program —page 64.9-1 RECONNECTConnect to the DT800 now so that all is ready to sendyour program after each revision you make.➲ Reconnect to your DT800 (use the sameConnection as last time).To do this…a) Repeat the step “Connect to the DT800 using dt800Com1.” on page 20.b) Confirm the re-connection by checking that theinformation in the form window is again beingregularly updated.UM-0071-A154 Getting Started with DT800 <strong>dataTaker</strong>
9-2 CHANGESCHEDULE A’SRATE➲ Change schedule A’s rate to 5 seconds.To do this…a) In tab A of the program builder, click the Rate row’sConfigure button . (Look back at Figure 29 onpage 34 for a reminder.)The Triggers dialog box opens.b) In the second Interval field, select Seconds from thedrop-down list.c) In the first Interval field, change the number to 5.d) Click OK.In the Rate row of tab A, you’ll now see RA5S(Report schedule A, 5 Seconds).e) In DeLogger’s File menu, choose Save Project.9-3 ADD A CHANNELLABELNext, add your own label to the potentiometer channel(channel 1 of the DT800). You’ll see later where thisbecomes useful.➲ Give channel 1 the label Potentiometer(or any name you want).To do this…a) Single-click in the Label column of row 1 and noticethe related message that appears in the informationarea of the program builder window.b) Double-click in the Label column of row 1.Row 1 (R1) is where you defined channel 1 of theDT800 to be read as a resistance.c) Type Potentiometer.Channel 1 now has a expressive name, andschedule A should now look like Figure 55.FIGURE 55Schedule A after program changesd) In DeLogger’s File menu, choose Save Project.CHAPTER 9EXTEND YOUR PROGRAM: Change Schedule A’s Rate 55UM-0071-A1
9-4 ADD MORECHANNELS TOSCHEDULE ANow add more DT800 channels to schedule A.Because they’re all on schedule A, they’ll all be readevery 5 seconds.You’ll add• channel 6 — to be read as a voltage• channel 7 — to be read as a voltage• channels 9 to 12 — to be read as thermocouples.If you have actual sensors you want to connect them tothese channels, do it now. If you haven’t, don’t worry— you’ll still be able to work through this tutorial andsee data returned (although the data will be nonsense).➲ Use row 2 (R2) to instruct the DT800 toread its channel 6 as an unshared differential+/– voltage.To do this…a) Single-click in the Signal column of R2.b) Click the drop-down list button that appears andchoose Voltage.c) In the Wiring column of R2, click the Configurebutton .The Voltage Wiring dialog box opens for row 2(Figure 56).d) In the Start Channel field at the top of the VoltageWiring dialog box, click the up button until thefield contains 6.Notice that the number in the End Channel field alsochanges to 6.e) Leave the Differential +/– configuration selected(Figure 56) and click OK.Channel 6’s channel definition (R2) should look likeFigure 60 on page 58.Set the Start Channelto 6.Leave the Differential +/–option selected.UM-0071-A1FIGURE 56Defining channel 6 for voltage measurement56 Getting Started with DT800 <strong>dataTaker</strong>
➲ Use copy and paste to duplicate row 2’sdefinition into row 3. Then modify row 3 toinstruct the DT800 to read channel 7 as anunshared differential +/– voltage.To do this…a) Select all of row 2 by clicking its row label (the graybox containing R2) — see Figure 57.b) Now right-click the row label of row 2.A menu appears (Figure 57).c) In the right-click menu, choose Copy.➊ Left-click to select the row.➋ Right-click to reveal themenu.➌ Choose Copy.All of row 2’s cells are copied to the clipboard.d) Click the row label of row 3 to select the entire row.e) Right-click the row label of row 3.f) In the menu that appears, choose Paste.Row 3 and row 2 are now identical.Notice also the Clear command on the right-clickmenu. You use this to delete all information from aselected row.g) In the Wiring column of R3, click the Configurebutton .The Voltage Wiring dialog box opens for row 3(Figure 58).h) In the Start Channel field at the top of the VoltageWiring dialog box, click the up button until thefield contains 7.i) Leave the Differential +/– configuration selectedand click OK.Channel 7’s channel definition (R3) should look likeFigure 60.FIGURE 57Select R2, copy, and paste into R3Set the Start Channelto 7.Leave the Differential +/–option selected.FIGURE 58Defining channel 7 for voltage measurementCHAPTER 9EXTEND YOUR PROGRAM: Add More Channels to Schedule A 57UM-0071-A1
➲ Use row 4 (R4) to instruct the DT800 toread channels 9 to 12 as thermocouples.To do this…a) Single-click in the Signal column of R4.b) Click the drop-down list button that appears andchoose Temperature.c) In the Wiring column of R4, click the Configurebutton .The Thermocouple Wiring dialog box opens for row4 (Figure 59).d) In the Start Channel field at the top of theThermocouple Wiring dialog box, click the upbutton until the field contains 9.e) In the End Channel field at the top of theThermocouple Wiring dialog box, click the upbutton until the field contains 12.f) Leave the Differential +/– configuration selectedand click OK.Row 4’s channel definition should look likeFigure 60.g) In DeLogger’s File menu, choose Save Project.FIGURE 60More channelsSet the Start Channel to 9and the End Channel to 12.Leave the Differential +/–option selected.UM-0071-A1FIGURE 59Defining channels 9 to 12 for thermocouple measurement (temperature)58 Getting Started with DT800 <strong>dataTaker</strong>
9-5 RE-SEND THEPROGRAMUpdate the DT800 with your modified program.➲ Send your program to the DT800.To do this…a) In the Program menu, choose Send to Connection.b) In the “Warning — Job already defined…” dialogbox that opens, click Yes.The Send Program File dialog box opens to informyou of the progress. Also, if you’ve got Show ErrorAlerts ticked (on the View menu), the Event Logsdialog box may open to report (in the Errors tab) theevent that has just occurred — see the Extras panel“Event Logs” on page 37.c) Close the Event Logs dialog box if it’s in your way.You can open it at any time by choosing ViewEvents in the View menu.d) Notice that the Acquiring LED now flashes every 5seconds (in addition to the three-second heartbeatflash). And, because Logging is still ticked inschedule A of the program, the Logging LED alsoflashes briefly every 5 seconds.e) Use the Status command to confirm that the DT800is running the new schedule.You did this before in “Verify the Connection” onpage 20.9-6 REASSIGN THEFORM, CHARTAND MIMICWINDOWSto the original channel ID, which no longer exists. (InDeLogger’s channel drop-down lists, its name used toend with 1R; now it ends with Potentiometer.)➲ Reassign row 1 in the form window to themodified (labelled) potentiometer channel.To do this…a) Make sure that the form window is in Edit Mode.b) Double-click in the Channel column of row 1.c) In the Select Channel for Row 1 dialog box thatopens, highlight the potentiometer channel — itschannel ID is now Potentiometer (instead of 1R) —and click OK.d) Turn Edit Mode off for the form window.You’ll now see information in the form windowbeing updated every 5 seconds (schedule A’s newrate).➲ Carry out a similar procedure to reassignthe chart window and your meter to themodified potentiometer channel.To do this…a) Put each window into Edit Mode.b) For the chart window, use Chart menu > SelectChannels… and choose the channel ending inPotentiometer.c) In the mimic window, select your first meter, then useMimic menu > Edit Panel… and choose the channelending in Potentiometer.d) With Edit Mode off for each of the three windows(form, chart and mimic), check that the three viewsof the potentiometer channel now update accordingto your revised program (that is, every 5 seconds).Information from the potentiometer channel no longerupdates in the form, chart and mimic windowsbecause you changed this channel’s channel ID whenyou added the Potentiometer label in “Add a ChannelLabel” on page 55.Row 1 in the form window, the chart window, andyour first meter in the mimic window are still assignedCHAPTER 9EXTEND YOUR PROGRAM: Re-Send the Program 59UM-0071-A1
9-7 DELOGGER’STEXT WINDOWA DeLogger text (terminal) window contains twoscreens (Figure 61):• Display screen (the upper screen) — displaysincoming real-time data and replay data in variousformats• Entry screen (the lower screen) — if you’re familiarwith <strong>dataTaker</strong>’s native programming language,type commands here and send them to the DT800.The Text MenuWhen a text window is DeLogger’s front-most window,the seventh menu on DeLogger’s menu bar is Text (seeFigure 20 on page 27). Commands on this menu arespecific to the text window, and some are duplicatedby buttons on the text window’s two toolbars.Filter incoming data by schedule.Choose the format of incoming data (replay, text or comma-separated variable).Capture data to disk as it arrives (as a replay file .dlr).Open the text window’s Properties dialog box.Toggle the split screen view on/off.Clear the display screen.Pause the flow of incoming data to the display screen.DisplayscreenbuttonsDisplay screen toolbar(always available)Display screenEntry screenEntry screen toolbar(available when theentry screen is active— click in the entryscreen’s workspace)Clear the entry screen.Turn Command Edit Mode on/off.Site list — assign a Connectionto the text window.UM-0071-A1FIGURE 61A new DeLogger text windowSend the program (send all).Send the highlighted text.Send the current line.Save the program (.txt or .cmd).Load a DeLogger program file (.dlp).Open an existing command file (.txt or .cmd).Entryscreenbuttons60 Getting Started with DT800 <strong>dataTaker</strong>
9-8 RETURN DATA TOTHE TEXTWINDOW➲ Use DeLogger’s text window to view thereal-time data that the DT800 is returning toyour computer.To do this…a) Locate the minimized text window Text1.dlt andclick its Restore button.b) In the Site drop-down list at the bottom of the textwindow, select your DT800’s Connection(Figure 62).A data record appears immediately in the upper(display) screen of the text window. The right-handgroup of figures in the line is the data returned fromthe potentiometer and other channels in yourprogram (see the “Data Structure — Replay Format”Extras panel).c) Carry out the numbered steps in Figure 64 to learnmore about the text window.Select the Connection to your DT800,then returned data from the DT800appears in the upper screen.FIGURE 62 Assigning the DT800’s Connection tothe text windowData Structure — ReplayFormatFigure 63 shows the maincomponents of data displayed inreplay format, which is the textwindow’s default display format.DateofreadingTimeofreading ScheduleTimesub-secondsD,080015,2000/05/02,10:08:24,0.007411,0:A,0,13.94076;D,080015,2000/05/02,10:08:27,0.006801,0:A,0,15.44138;D,080015,2000/05/02,10:08:30,0.007899,0:A,0,24.52851;D,080015,2000/05/02,10:08:33,0.008754,0:A,0,27.10516;D,080015,2000/05/02,10:08:36,0.007411,0:A,0,28.19215;D,080015,2000/05/02,10:08:39,0.007533,0:A,0,26.95922;D,080015,2000/05/02,10:08:42,0.008265,0:A,0,25.12281;D,080015,2000/05/02,10:08:43,0.616821,0:A,0,25.12281;Readings (only oneshown here)DT800 serial numberRecord type (for example,D = Returned Data record)FIGURE 63Record index — depends on record type(for example, 0 = real-time data)Typical default data records (replay format)CHAPTER 9EXTEND YOUR PROGRAM: Return Data to the Text Window 61UM-0071-A1
➊ Click the Splitter View Mode button.The display screen fills the text window.➎ On the main toolbar, click the Haltbutton.The Halt Options dialog box opens.➏ Click OK inthe dialogbox, thenOK in theconfirmationbox.➐ Notice the change record thatmarks your Halt command.➋ Turn the potentiometer’s knob andwatch the resistance value changein the returned data.➌ Click the Splitter View Mode button again.The text window reverts to its split view:• The upper screen displays real-time dataas it is returned from the DT800.• The lower screen is where you can typecommands and send them to the DT800(if you’re familiar with the <strong>dataTaker</strong>programming language).The DT800 stops running your schedule and therefore nodata is returned to the text window.➑ On the main toolbar, click the Runbutton.The Run Options dialog box opens.➒ Click OK inthe dialogbox, thenOK in theconfirmationbox.➓ Notice the change record that marks your Run command.The DT800 resumes running your schedule and datacontinues to be returned to the text window.UM-0071-A1➍ Drag the dividerto enlarge thedata display screen.FIGURE 64Learn more about the text window11 Click the Pause button.Data ceases to flow into thetext window. (The schedule isstill running in the DT800).12 Click the Pause button again.The data flow resumes.13 Click the Clear button.All of the returned data in thedisplay screen is deleted(DeLogger’s “return buffer” isemptied).62 Getting Started with DT800 <strong>dataTaker</strong>
9-9 ADD AN ALARMHere you assign an alarm to the potentiometerchannel.Because alarm channels don’t generate data, you’llmake a copy of the potentiometer channel and assignthe alarm to the copy. In this way, the original instanceof the potentiometer channel generates data, and thecopy generates alarms.➲ Add an alarm that triggers when thepotentiometer’s resistance is greater than 300ohms.To do this…a) Turn the potentiometer knob fully anti-clockwise(minimum resistance).b) In the View menu, make sure that Show AlarmEvents is ticked.This ensures that DeLogger will automatically openthe Event Logs dialog box (Figure 34 on page 36)when an alarm occurs.c) Click the text window to make it active. In the Textmenu, choose Display Screen > Display Data As…then select Replay format and click OK.In this format, alarms are obvious in the textwindow’s display screen.d) Click the program builder window to make it active.e) On tab A of the program builder, use the rightbuttoncopy and paste method (see Figure 57 onpage 57) to copy row 1 to row 5.f) Follow the numbered steps in Figure 65 to specifythe alarm for row 5.g) In DeLogger’s File menu, choose Save Project.h) In the Program menu, choose Send to Connection.Click Yes or OK in any Warning or Attention dialogboxes that open.➊ Click the Configure button in R5’s Alarm column.The Alarmdialog boxopens.➋ Tick Active.➑ Click OK.➌ Set Alarm Number to 1.➍ Tick Repeating Alarmto have the DT800 returnan alarm event on everyscan while the alarmcondition exists (not just onthe first alarm scan).➎ Select the Greater thanor equal to… option.➏ In the 1st set-point field,type 300.➐ Type an alarm message inthe Text field.FIGURE 65 Specifying an alarm for channel 1CHAPTER 9EXTEND YOUR PROGRAM: Add an Alarm 63UM-0071-A1
i) Watch the text window and turn the potentiometerknob to its fully clockwise position.You’ll see• alarm records returned to the text window’sdisplay screen when the potentiometer’s valueexceeds 300 ohms (in addition to the regulardata records); they contain your alarmmessage, are marked with a red pointer on theleft-hand side of the display screen, and areprefixed with A for alarm (data records areprefixed with D) — Figure 66• the Event Logs window open automatically;each new alarm event appears at the top of theAlarms tab.j) Experiment with the potentiometer knob to see thealarm records returned to the text window and theEvent Logs window.Alarm messages are also returned to the formwindow’s Alarm Message column.k) When you’re done, close the Event Logs window ifit’s in your way.9-10 ADD SCHEDULE BTO THE PROGRAMNext, you add a second schedule that instructs theDT800 to scan the potentiometer channel at a fasterrate (in addition to the 5-second rate).➲ Set schedule B’s rate to 2 seconds, and usethe copy and paste method to add thepotentiometer channel to schedule B.To do this…a) At the bottom of the program builder window, clickthe tab labelled B.You could have used any of tabs B to K.b) Set a time interval trigger for schedule B of 2seconds by following a similar procedure to thatshown in Figure 29 on page 34.c) Use the right-button copy and paste method (seeFigure 57 on page 57) to copy row 1 on tab A andpaste it into row 1 on tab B.The program now instructs the DT800 to scan itschannel 1, the potentiometer channel, every 5seconds (by schedule A) and every 2 seconds (byschedule B).d) On tab B, type Potentiometer2s in the Label columnof R1.e) On tab B, click the Configure button in theAlarm column of R1. In the Alarm dialog box thatopens:i. Change the Alarm Number to 2.ii. Change the value in the set-point field to 425.iii. Change the alert message to read ALERT:channel 1 greater than 425 ohms.iv. Click OK to close the dialog box.UM-0071-A1FIGURE 66Alarm and data records returned to DeLogger’s text window — schedule A64 Getting Started with DT800 <strong>dataTaker</strong>
Tab B should now look like Figure 67.FIGURE 67Schedule tab Bf) In DeLogger’s File menu, choose Save Project.g) In the Program menu, choose Send to Connection.Click Yes in any Warning… dialog boxes that open.h) Experiment with the potentiometer knob to see thealarm records returned to the text window(Figure 68) and the Event Logs window.FIGURE 68Alarm and data records returned to DeLogger’s text window — schedules A and Bi) In the Text menu, choose Display Screen > FilterData….j) In the dialog box that opens (Figure 69), notice thatyou can select which schedules’ data is returned tothe text window’s display screen.FIGURE 69Schedule filterk) Click OK to close the Filters dialog box.CHAPTER 9EXTEND YOUR PROGRAM: Add Schedule B to the Program 65UM-0071-A1
CHAPTER 10OTHER THINGS YOU CAN DOWITH DELOGGERThis chapter covers two more important functions ofDeLogger:• unloading logged data (that is, retrieving datastored in the DT800’s internal memory) — page 66• using DeLogger’s spreadsheet window formanipulating and analysing data — page 6810-1 UNLOAD LOGGEDDATAYour DT800 has been logging every measurement ithas made since you first sent your program to it(because logging was enabled in both of yourschedules). Now you’ll retrieve this data from theDT800.By the way: unloading data from the DT800 hasnothing to do with DeLogger’s form, chart, mimic ortext windows — it’s a function that’s available to youno matter which DeLogger window you’re using.➲ Unload all of the data currently logged inyour DT800 to a replay file.To do this…a) In the <strong>dataTaker</strong> menu, choose Unload….The first screen (Options) of the unload dialog boxsequence opens (Figure 70).b) Familiarize yourself with the options available in thisscreen — do NOT make any changes — then clickNext >.The second screen (Unload To File) of the unloaddialog box sequence opens (Figure 70).c) In the second screen, tick Unload to File then selectReplay File.If you upgrade to DeLogger Pro, you’ll have anadditional option here — Unload to Database.UM-0071-A166 Getting Started with DT800 <strong>dataTaker</strong>
➊d) In the Select Replay File dialog box that opens:i. Type MyUnloadFile (or any name you want) inthe File name field.ii. Leave Replay as the destination folder foryour file (Save in).iii. Click Open.You’re returned to the second unload screen,which now contains the path to your unloaddestination.e) Back in the second screen, click Finish.The unload starts and a dialog box shows you itsprogress.You can use other DeLogger windows during anunload.f) While your logged data is unloading, open the<strong>dataTaker</strong> menu on DeLogger’s menu bar andobserve — don’t choose — the Quit Unloadcommand.g) If you want to cut the unload short, choose QuitUnload now. Otherwise, wait until the unloadfinishes.Because you unloaded your data to theMyUnloadFile.dlr replay file, you can load it intoDeLogger’s spreadsheet window, and replay it toDeLogger’s form, chart, text and mimic windows(see Figure 16 on page 23).And remember that you could also have unloadedthe logged data to a comma-separated-variable file(.csv), which you can import into other programssuch as Microsoft Excel.➌➍FIGURE 70Unload dialog box sequenceCHAPTER 10 OTHER THINGS YOU CAN DO WITH DELOGGER: Unload Logged Data 67UM-0071-A1
10-2 DELOGGER’SSPREADSHEETWINDOWA DeLogger spreadsheet window is a standardspreadsheet into which you can load (“dump”) anentire DeLogger replay file one row per timestamp,one column per channel. Then you use standardspreadsheet tools to manipulate and analyse the data.You can also• load the contents of the spreadsheet into MicrosoftExcel (if it’s installed on your computer) with a singlecommand• export the contents of the spreadsheet in a variety offormats.The spreadsheet window is different from the formwindow in several ways:• The form window is a dynamic display of incomingdata; the spreadsheet window is a static display ofhistorical data.• Each row in the form window displays a variety ofinformation from one channel; each row in thespreadsheet window displays just channel readingsfrom one scan that may include many channels,each in a separate column.The Spread MenuWhen a spreadsheet window is DeLogger’s front-mostwindow, the seventh menu on DeLogger’s menu bar isSpread (see Figure 20 on page 27). Commands onthis menu are specific to the spreadsheet window, andsome are duplicated by buttons on the spreadsheettoolbar.Formula barRename a worksheet bydouble-clicking its tab(the Sheet Name dialogbox opens).Double-right-click anywherein a worksheet to open it inthe Formula One WorkbookDesigner, where additionalcommands are available(for example, Sheet > InsertSheet, Sheet > Delete Sheet,Data > Recalc).Spreadsheet toolbarLoad the current worksheet into Excel (opens Excel).Set print rangeLoad a replay file (.dlr).Scale view down (zoom out)Scale view up (zoom in)Set number of decimal places of selected cell(s)Left, centre, or right align contents of selected cell(s)Show/hide gridlinesShow/hide row and column headersUM-0071-A1FIGURE 71A new DeLogger spreadsheet window68 Getting Started with DT800 <strong>dataTaker</strong>
10-3 LOAD DATA INTOA SPREADSHEET➲ Load a replay file into DeLogger’sspreadsheet window.To do this…a) Locate the minimized spreadsheet windowSpread1.dls and click its Restore button.b) In the Spread menu, choose Load Session FromFile….c) In the Select Replay File dialog box that opens,highlight Example2.dlr and click Open.All of the replay file’s data is immediately loadedinto the spreadsheet window.Notice that each row is one data record (one scan)and each column contains data from one channel.10-5 WHAT’S NEXT?Now that you’ve finished working through this guide,you’ll have seen how easy the DT800 <strong>dataTaker</strong> is touse and you have enough knowledge to set up yourown basic data acquisition and logging sessions.So, armed with your DT800 <strong>dataTaker</strong> User’s Manual,this is just the beginning…For help or more information, please visitwww. <strong>dataTaker</strong>.com or contact your <strong>dataTaker</strong>representative. Our engineers are always happy totalk to you.10-4 FINISH OFFWhen you’ve finished working with DeLogger, savethe project if you want (DeLogger remembers yourwindow sizes, locations and so on) then carry out asoftware disconnection from the DT800 (Connectionsmenu > Disconnect…).Or simply quit DeLogger. (You’ll be asked if you wantto save the project, and DeLogger will disconnectautomatically.)The DT800 continues to operate according to itscurrent program.CHAPTER 10 OTHER THINGS YOU CAN DO WITH DELOGGER: Load Data into a Spreadsheet 69UM-0071-A1
IndexNumerics500/600 series 18Aacquire data 6, 7active windowSee front-most window 30adaptor, mains 10alarms 7, 63event logs (Extras) 37analog channel 31Bbatteryinternal main 10internal memory-backup 10, 11Ccable, comms 12, 13cage-clamp tools 13card, PC 11changesSee event logschannel 24defined 29ID 41label 41, 55chart window 43clearprogram builder cells 57clearing the form window (Extras) 42COM ports 12comms cable 12, 13conceptsConnection 28data hub 30data site 28database 29replay 30Connection 19, 28How Many Connections? (Extras) 28replay 30connectorsdiagrams (Extras) 12female 12male 12sex (Extras) 12control panel (replay) 30copy and paste 57current windowSee front-most window 30Ddataacquisition 6, 7hub 30logging 6, 7, 30real-time 7, 30record (Extras) 61replay 30site 28structure (Extras) 61database 29datein returned data (Extras) 61setting 42stamp 9DeLogger Pro (Extras) 18dialog boxEvent Logs 59, 64Status 21Unload 67digital channel 31DT500/600 series 18dynamic data view 23, 68Eerrorsevent logs (Extras) 37event logs (Extras) 37Event Logs dialog box 59, 64ExtrasConnections (how many?) 28connector diagrams 12connector sex 12Connectors, Adaptors 12Data Structure 61DT800 Host Software 16DT800 Mains Adaptor 10Enabling DeLogger Pro 18Event Logs 37Flow Control 20How Many Connections? 28Re-Installing and Project Compatibility 17Scan Schedules — DT800 Timetables 33Sending Commands 8Switches and Parameters 37UM-0071-A170 Getting Started with DT800 <strong>dataTaker</strong>
Ffemale (connectors) 12filereplay 30file Connection (replay) 30filter (text window) 65fixed-format mode 9flow control (Extras) 20focus windowSee front-most window 30form window 38clearing (Extras) 42formatdefined 11of returned data 9fixed-format mode 9free-format mode 9Formula One Workbook Designerform window 38spreadsheet window 68free-format mode 9front-most window (defined) 30Hhardware flow control 20heartbeat (LED flash) 14, 37, 59host computer 11host software 11Extras 16hubSee data — hubHWFC 20IIDchannel 41schedule 41indicators (LEDs) 14internal main battery 10internal memory-backup battery 10, 11Jjobsand programs 29Llabel 41, 55LED indicators 14, 37logging 6, 7, 30Mmain battery 10mains adaptor 10, 13male (connectors) 12memory-backup battery 10, 11menuright-click (program builder) 36, 57mimic window 49Pparameters (Extras) 37pause command 48PC card 11PCMCIA card 11ports 12potentiometer 13power 10external 10internal 10power-up 11program builder window 31programs 24and jobs 29project compatibility (Extras) 17projects 24purchase DeLogger Pro (Extras) 18Rreadingin returned data (Extras) 61real-time data 7, 30record indexin returned data (Extras) 61record typein returned data (Extras) 61re-installing DeLogger (Extras) 17replayConnection 30control panel 30defined 30file 30site 30returned datarecord structure (Extras) 61right-click menu 36, 57RS-232 12RS-422 12RS-485 12Index 71UM-0071-A1
Sscan schedulesSee schedulesscheduleID 41in returned data (Extras) 61schedules 24, 33DT800 timetables (Extras) 33SDI-12 12sending commands (Extras) 8sensorsdefined 11smart 11, 12serial channel 12serial numberDeLogger 16, 18default (Extras) 18DT800in returned data (Extras) 61setting the DT800’s date and time 42sitereplay 30sleep mode 11smart sensorsand Serial Channel 12defined 11software flow control 20stampdate 9time 9stand-alone 8static data view 23, 68Statusdialog box 21SWFC 20switches (Extras) 37Uunload 67dialog box 67upgrade (to DeLogger Pro) 18, 49Vversion compatibility (Extras) 17views 23dynamic 23, 68static 23, 68Wwindowchart 43form 38front-most (defined) 30mimic 49program builder 31terminal 60text 60workbookform window 38spreadsheet window 68worksheetform window 38spreadsheet window 68Tterminal window 60text window 60filter data 65thermocouple 13timein returned data (Extras) 61setting 42stamp 9top-level windowSee front-most window 30transducer (defined) 11UM-0071-A172 Getting Started with DT800 <strong>dataTaker</strong>
UM-0071-A1
DATATAKER OFFICESHead OfficeAustralia — Melbourne<strong>dataTaker</strong> Pty Ltd7 Seismic CourtRowville Victoria 3178Tel: 03 9764 8600 + 613 9764 8600Fax: 03 9764 8997 +613 9764 8997Email: sales@<strong>dataTaker</strong>.com.auOfficesUnited Kingdom<strong>dataTaker</strong> LtdSheprethCambridgeshireSG8 6GBTel: +44 (0) 1763 264780Fax: +44 (0) 1763 262410email: sales@<strong>dataTaker</strong>.co.ukUnited States of America<strong>dataTaker</strong>, Inc.22961 Triton Way Suite ELaguna Hills CA 92653-1230Tel: 1-800-9-LOGGERTel: 949 452 0750 +1 949 452 0750Fax: 949 452 1170 +1 949 452 1170Email: sales@<strong>dataTaker</strong>.comWorldwide Dealer Networkwww.<strong>dataTaker</strong>.comYour Local DealerUM-0071-A1www.<strong>dataTaker</strong>.com