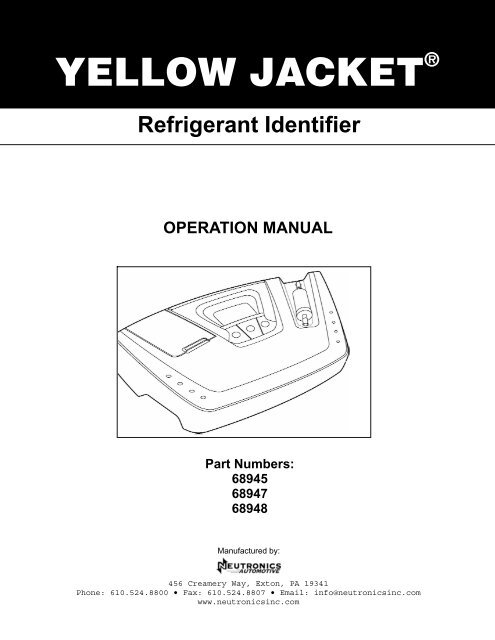
68945 Refrigerant Gas Analyzer Manual - Yellow Jacket
68945 Refrigerant Gas Analyzer Manual - Yellow Jacket
68945 Refrigerant Gas Analyzer Manual - Yellow Jacket

Create successful ePaper yourself
Turn your PDF publications into a flip-book with our unique Google optimized e-Paper software.
For Your Safety:PLEASE READ THIS MANUAL IN ITS ENTIRETY BEFOREATTEMPTING INSTALLATION OR OPERATION! Attempting tooperate the Ultima ID without fully understanding itsfeatures and functions may result in unsafe conditions• Always use protective eye wear and observe proper safetyprocedures when working with pressurized gases.Read and understand the entire manual BEFORE attempting to operate the instrument.Identifier Warnings• <strong>Refrigerant</strong> Blend Warning: As of January 2004, there are twelve(12) EPA SNAP “acceptable for use” refrigerants that are availableand legal for use as R12 substitutes. The Ultima ID will notidentify any of the substitutes as pure R12 or pure R134a. Eachof the twelve blends has been tested in the factory laboratory andit has been confirmed that the substitutes will not “fool” theinstrument. Should one of the blends be encountered, theinstrument will fail the refrigerant and provide a readout ofanalysis in terms of percentage by weight concentrations of R12,R134a, R22 and hydrocarbons only. Due to cross sensitivity issuesof the blends on the sensing device, the resultant reading willnot be correct in the analyzed concentrations. However, theUltima ID will never identify any of the blends as pure R12 orpure R134a.• Sample Filter Warning: Replace the sample filter of theinstrument AS SOON AS RED SPOTS OR DISCOLORATION BEGIN TO APPEARON THE OUTSIDE DIAMETER OF THE WHITE ELEMENT. Failure to properlymaintain and replace the sample filter will result in severedamage.• Sample Input Warning: The instrument requires connection of thesupplied sample hose to the LOW SIDE OR VAPOR port of refrigerantstorage cylinders or vehicle air conditioning systems. DO NOTattempt to introduce liquid or samples heavily laden with oil intothe instrument. DO NOT connect the sample hose to the HIGH SIDEor LIQUID port!• Liquid or oil laden samples will cause severe damage to theinstrument that will not be covered under warranty repairs.• Battery ChargerWarning: When charging the battery with the 1000mAcharger, the charger will become warm. If the charger becomeshot, unplug the charger immediately! When charging multiplebattery packs, allow the charger to cool between each battery.
WELCOMEThank you for purchasing the ULTIMA ID<strong>Refrigerant</strong> Identifier.The Ultima ID is the most advanced refrigerant identifier ever designedfor determining the purity of gaseous automotive refrigerants. It hasmany features to offer the user, which will be described in this manual.We recommend that all personnel who use this instrument read this manualto become more familiar with its proper operation.For further information regarding the application, operation or spareparts, please contact the Neutronics Inc. Customer Service Department. Ifyou have questions or comments, we would like to hear from you.Neutronics Inc.456 Creamery WayExton, PA 19341Tel: 610) 524-8800Toll Free: (800) 378-2287 (US only)Fax: (610) 524-8807EMAIL: info@neutronicsinc.comVisit us at www.neutronicsinc.comCopyright ©2004 Neutronics Inc.This work is protected under Title 17 of the US Code and is the sole property ofNeutronics Inc. No part of this document may be copied or otherwise reproduced, orstored in any electronic information retrieval system, except as specifically permittedunder US copyright law, without the prior written consent of Neutronics Inc.
1 INTRODUCTIONAND OVERVIEW1.1 GeneralContamination of refrigerants either in storage cylinders or vehicleair conditioning systems can lead to component corrosion, elevatedhead pressures and system failures when utilized by unsuspectingtechnicians. The ability of the technician to determine refrigeranttype and purity is severely hampered by the presence of air whenattempting to utilize temperature-pressure relations. Thedevelopment of various substitute refrigerants further complicatesthe ability of a technician to identify refrigerant purity basedupon temperature-pressure relationships. The substitute refrigerantblends can also introduce a flammability hazard to the technicianand the ultimate end user of the vehicle air conditioning system.The Neutronics Ultima ID <strong>Refrigerant</strong> Identifier will provide a fast,easy and accurate means to determine refrigerant purity inrefrigerant storage cylinders or directly in vehicle airconditioning systems. The instrument utilizes non-dispersiveinfrared (NDIR) technology to determine the weight concentrations ofrefrigerant types R12, R134a, R22, as well as, hydrocarbons and air.<strong>Refrigerant</strong> purity is automatically determined for refrigerants R12and R134a by the instrument to eliminate human error. Purerefrigerant is defined as a refrigerant mixture that contains 98%,by weight, or greater of either R12 or R134a.The instrument is supplied complete with a R12 and R134a samplehose, a R134a adapter fitting to permit sampling of ACME portedcylinders, a 12 VDC power cord and all required plumbing housedwithin a rugged, portable, storage case.
Sample gas is admitted into the instrument through the suppliedsample hose and presented to the sensing device. The instrumentprovides the user with direct percent by weight concentrations ofR12, R134a, R22 and hydrocarbons. If the sample is determined to bepure R134a, the instrument will provide a direct readout of theweight percentage of air within the sample. Note that theinstrument does not consider air to be a contaminate since it can beremoved by most refrigerant recycling equipment. Since air is notconsidered to be a contaminate, it is possible to read 100% R134aplus 5% air. The instrument only considers the weights of therefrigerant and contaminates in the total mixture for R134a as aircontamination in R12 systems causes only minor performancedegradation.The instrument interfaces with the user with an LCD graphic display,status indicator lamps, push button communication switches and analarm horn. Alarm indications are provided to alert of instrumentfault conditions or contaminated refrigerant presence. Directpercent by weight concentrations of the sample refrigerant isprovided on the display as well as user directions and prompts. Anoptional on-board printer (Model RI-2004DXP) is available to printon-the-spot customer confidence receipts.The Neutronics Ultima ID <strong>Refrigerant</strong> Identifier will provide therefrigerant technician with absolute knowledge of refrigerantpurity and protection against refrigerant contamination andpotential flammability.1.2 FeaturesThe Ultima ID <strong>Refrigerant</strong> Identifier is the most advanced instrumentever manufactured for determining the purity of gaseous refrigerantsfor the automotive market.Features Include:• Advanced ergonomic design• Fender friendly resting surface• Large graphic display with on-screen instructions• Ultra fast 60 second test time• Blend-ID software to identify the presence of popular SNAPApproved Blend <strong>Refrigerant</strong>s• Built in printer option for instant customer confidence receipt• Internal, rechargeable battery option for cordless operation inany location• Hard shell carry/storage case
1.3.3 R12 Sample HoseIdentifier EndService End(1/4 SAE Flare Nut)The 6-foot (1.8 meter) R12 Sample Hose is constructed of a nyloninner tube and a polyurethane outer tube. The inner tube willhandle all of the refrigerant transfer and will provide containmentup to 300psig. The outer tube will provide protection of the innertube from abrasion, nicking, cutting, etc. The hose is providedwith an instrument inlet port mating connector on one end and a ¼”SAE female flare coupling nut on the service end.1.3.4 R134a Tank Adapter Fitting½” Acme Thread(Threads onto Cylinder Stub)R134a Low Side Stub(Fits into R134a Low SideCoupler)O-Ring Seal(Internal)The R134a Tank Adapter Fitting will provide the user with an adapterto allow connection of the R134a sample hose service end to a R134acylinder ACME port.1.3.5 Vehicle Power CableThe Ultima ID is powered from a vehicles 12VDC battery. The UltimaID power cable is a 6-foot cable that has an instrument matingconnector on one end and vehicle battery connection clips on theother end. This harness is utilized to connect power from thevehicle battery to operate the instrument. Note: The vehicle powercable can be used with the optional battery pack installed in theunit. The vehicle power cable will not charge the battery.
1.3.6 Control PanelThe Control Panel serves as the main user interface. The ControlPanel features three soft key buttons that change their function asthe instrument changes modes. The current function for each buttonis displayed by the soft key label at the bottom of the graphicdisplay. Red and Green LED’s at the top of the Control Panel areused for visual Pass/Fail indications.Green LEDRed LEDSoft KeyButtonsGraphicDisplayPowerOn/Off1.3.7 Back Panel ConnectionsThe connections located on the back panel are illustrated below.CAUTION: The sample outlet port should never be obstructed.Keep the sample outlet port free and clear at all times.Sample InletSample OutletBattery Charge Port12VDC Power Input(Battery Clips)
1.3.8 Hard Shell Storage/Carrying CaseThe hard shell storage/carrying case is custom fit to the Ultima ID.It provides rugged protection for the instrument as well asconvenient storage for all components. The enclosure is generalpurpose and is not watertight.
R2 ULTIMAID OPERATION2.1 First Use2.1.1 Battery Installation (Optional)The Ultima ID has, as an option, an internal rechargeable battery.If your Ultima ID is equipped with the optional rechargeablebattery, you must first install and charge the battery prior to use.NOTE: The Ultima ID can be operated with or without the batteryusing the supplied battery clips. Refer to Section 2.2 forinstructions.To install the optional battery, remove the battery cover from theback of the unit by unscrewing the two Phillips head screws as shownbelow.SAE J1771 CERTIFICATION<strong>Refrigerant</strong> Diagnostic Tool DesignCertified by Intertek Testing Services (ITS)to Meet SAE J1771 to identifyCFC-12 (R-12) or HFC-134a (R-134a)to 98% purity. Also this equipment willdetect 2% or greater of air in HFC-R134a(R-134a).For Accuracy, see <strong>Manual</strong>.LISTED 6P03Miscellaneous <strong>Refrigerant</strong> Equipment12 VDC, 1A; Design Pressure: 300 psig<strong>Refrigerant</strong> Type: R-12, R-134aDesign Pressure: 300 psigNEUTRONICS INC. MODEL No: UID456 Creamery Way, Exton, PA, 19431 USA(610) 524-8800, www.NeutronicsInc.comWARNING-TO REDUCE THE RISK OF FIRE:DO NOT USE THIS EQUIPMENT IN THE VICINITY OF SPILLEDOR OPENED CONTAINERS OF GASOLINE.Use this equipment in locations with mechanical ventilation thatprovides at leat four air changes per hour or locate the equipmentat least 18 inches above to floor.DATE CODE:Battery Cover ScrewsInside of the Ultima ID battery compartment, locate the male plug onthe left side. Slide the nylon strap around the battery. Insertthe battery module into the compartment aligning the femaleconnector of the battery module with the male plug in the batterycompartment. Replace the cover and snug the screws.
Note: Charge the battery for a minimum of 4 hours with the suppliedcharger prior to first use.To remove the battery, simply tug gently on the nylon strap, beingsure to pull straight up, until the battery is dislodged.2.2 Turning On the UnitConnect the supplied vehicle power cable to the 12VDC power inputjack on the back of the unit. Connect the battery clips to thevehicles 12VDC battery. (Note: If the optional battery module isinstalled and charged, the vehicle power cable is not required.)Press the left, soft key, power button and the splash screen shownin Figure 1 will appear for approximately three seconds followed bythe elevation screen shown in Figure 2. See section 3.1 for detailson setting the elevation. Depressing the “DONE” button will bringthe Ultima ID to the Calibration screen as shown in Figure 3.ULTIMA IDSOFTWARE VERSIONXXX XX.XXXTHE OPERATINGELEVATION HASNOT BEEN SETSELECT HELP ONTHE NEXT SCREENDONEREADY TO AIR CAL1. DISCONNECTHOSE FROMVEHICLE2. PRESS CAL TOSTARTOFF HELP CALFigure 1 Figure 2 Figure 32.3 CalibrationEach time the Ultima ID begins a new test cycle it must first selfcalibrate. The calibration takes 30 seconds (Figure 4) and bringsfresh air into the unit via an internal pump. This fresh air purgesany excess refrigerant from the unit and ensures accurate testresults. Calibration requires that the hose be disconnected fromthe vehicle or refrigerant cylinder. During calibration, the screenshown in Figure 5 will appear reminding the user to change thefilter under certain conditions. For additional details on how andwhen to change the filter, refer to Section 3, Maintenance andTroubleshooting. The calibration of the unit will expire afterapproximately five minutes of inactivity. If this occurs, thescreen shown in Figure 6 will be displayed requiring the calibrationto be initiated again.
CALIBRATINGTHIS WILL ONLYTAKE 30 SECONDS- CALIBRATING -NOTEREPLACE FILTERWHEN WHITEELEMENT BEGINSTO SHOW REDSPOTS ON OUTSIDEDIAMETERCALIBRATION TIMEHAS EXPIREDDISCONNECT HOSEFROM VEHICLE ANDPRESS CAL TORECALIBRATECALFigure 4 Figure 5 Figure 6After calibrating, the unit will display the screen shown in Figure7. Connect the hose to the vehicle, (for R134a open the valve) andselect the refrigerant type you wish to test. The Ultima ID willdisplay the screen shown in Figure 8. If you wish to change any ofthe factory default settings, refer to section 3.READY1. CONNECT HOSEOPEN VALVE2. SELECTREFRIGERANTTO TESTTESTINGRXXX SAMPLETHIS WILL ONLYTAKE 30 SECONDSR12 HELP R134AFigure 7 Figure 82.4 Viewing the Test ResultsUpon completion of the test, the Ultima ID will display a screensimilar to that shown in Figure 9 or Figure 10.PASSR134 100.0%AIR 2.8%FAILR134 95.0%HELPMOREHELPMOREFigure 9 Figure 10
If the refrigerant tested is 98% pure or better, and the air contentis less than 90%, the “PASS” screen will display and the Green LEDwill illuminate. Should the refrigerant be less than 98% pure orthe air content greater than 90%, the “FAIL” screen will display andthe Red LED will illuminate. In either case, selecting the “MORE”button will display the details in Figure 11 for “PASS” and Figure12 for “FAIL”.RESULTS………PASSR134 100.0%R12 .0%R22 .0%HC .0%AIR 2.8%EXIT PRINTRESULTS………….FAILR134 95.0%R12 5.0%R22 .0%HC .0%EXIT PRINTFigure 11 Figure 12
2.5 Blend <strong>Refrigerant</strong>sThe Ultima ID includes the “Blend ID” feature for determining thepresence of EPA S.N.A.P approved blend refrigerants. In the eventthat the Ultima ID determines that the refrigerant in the system orcylinder is possibly a S.N.A.P. blend, the results will display asfollows in Figures 13, 14, and 15. Note that pressing theadditional “MORE” button on the screen in Figure 14 will take theuser to the Blend <strong>Refrigerant</strong> screen shown in Figure 15. Note: Thisscreen will vary based on the test results.FAILR12 92.7%HELP MORERESULTS………….FAILR12 7.3%R134 92.7%R22 .0%HC .0%EXIT MORE PRINTPOSSIBLY ONE OFTHE FOLLOWINGBLENDREFRIGERANTSFREEZE 12FREE ZONE ORRB-276DONEFigure 13 Figure 14 Figure 15Pressing the “DONE” button in Figure 15 will return the user to thescreen shown in Figure 14.2.6 Printing the Test ResultsFor units equipped with the optional built-in printer module, thetest results can be printed by selecting the “PRINT” button. Afterthe print is complete, carefully tear off the printout and the unitwill return to the previous screen. Additional printouts may bemade following the same procedure. To exit the test, press the“EXIT” button. Figures 16, 17, 18 and 19, show sample printouts forvarious test results.
Neutronics, Inc.<strong>Refrigerant</strong>IdentifierNeutronics, Inc.<strong>Refrigerant</strong>IdentifierNeutronics, Inc.<strong>Refrigerant</strong>IdentifierNeutronics, Inc.<strong>Refrigerant</strong>IdentifierR134a = 100.0%R12 = 0.0%R22 = 0.0%HC = 0.0%AIR = 2.8%Tested R134a….Conclusion:R134a: PASS
3 MAINTENANCE& TROUBLESHOOTING3.1 Setting the ElevationDuring the initial power-up, the Ultima ID will indicate that theelevation has not been set. To set the elevation, press the “Help”button on the “Ready to Air Cal” screen as shown in Section 2.2,Figure 3. The screen will display several options as shown inFigure 20. Pressing the “SET” button will display the options inFigure 21.TO CHANGESETTINGS ORREPLACE PAPERROLL PRESS SETFOR OTHER HELPPRESS HELPSET HELP DONETO FEED IN ANEW PAPER ROLLPRESS FEEDPRESS SET TOADJ LCD CONTRASTOR ELEVATIONSET FEED DONEFigure 20 Figure 21Press the “SET” button shown in Figure 21 to display the screenoptions shown in Figure 22. Pressing the “ELEV” button will takeyou the elevation screen shown in Figure 23. Use the “UP” & “DOWN”buttons to adjust the unit to the elevation in your area. Press the“SAVE” button when finished to return to the help screen (Figure20).TO SET THEELEVATION PRESSELEV BUTTONTO SET THELCD CONTRASTPRESS CONTFEET 400METERS 122ELEV CONT DONEUP DOWN SAVEFigure 22 Figure 23
3.2 Setting the LCD ContrastThe Ultima ID features an adjustable LCD contrast for use in varyinglight conditions. To adjust the contrast, press the “HELP” buttonon the “Ready to Air Cal” screen as shown in Section 2.2, Figure 3.The screen will display several options as shown in Figure 17.Pressing the “SET” button will display the options in Figure 18.TO CHANGESETTINGS ORREPLACE PAPERROLL PRESS SETFOR OTHER HELPPRESS HELPSET HELP DONETO FEED IN ANEW PAPER ROLLPRESS FEEDPRESS SET TOADJ LCD CONTRASTOR ELEVATIONSET FEED DONEFigure 24 Figure 25Press the “SET” button shown in Figure 24 to display the screenoptions shown in Figure 25. Pressing the “SET” button in Figure 25will advance the display to Figure 26. Pressing the “CONT” buttonwill take you the contrast screen shown in Figure 27. Use the “UP”& “DOWN” buttons to adjust the screen contrast for best viewing.Press the “SAVE” button when finished to return to the help screen(Figure 24).TO SET THEELEVATION PRESSELEV BUTTONTO SET THELCD CONTRASTPRESS CONTADJUST CONTRASTFROM 0 TO 80SETTING 045ELEV CONT DONE3.3 Changing the Sample FilterUP DOWN SAVEFigure 26 Figure 27When inspecting the sample filter, look completely around the entireoutside diameter of the white filter element located inside of theclear plastic housing. Look for red spots or the beginnings ofdiscoloration on the white outside diameter of the element. Do notlook into the round ends of the white element for red spots ordiscoloration. The round ends of the filter may always appear red.If red spots or discolorations are discovered, the sample filterrequires replacement to prevent the influx of particulate and oilmists into the instrument.
Obtain a replacement filter, part number 6-02-6000-08-0. Remove theexisting filter from the retaining clip of the instrument by pullingstraight up and out. CAREFULLY remove the flexible, black rubbertubing connections from both ends of the existing filter. DO NOTallow the tubes to slip back into the internal portion of the case.Discard the existing filter in an environmentally friendly manner.Install the tube ends onto the barbs of the replacement filter,taking note to align the flow arrow of the filter with the flowarrow of the instrument top panel. CAREFULLY slide the tubing backinto the internal portion of the instrument and seat the new filterinto the retaining clip. Inspect the sample hoses for signs of oilentrapment. Replacement of the sample filter usually requirescleaning or replacement of the sample hoses.3.4 Cleaning the Sample HosesInspect the inside diameter of the inner tube for signs of oil buildup, dirt, obstructions, kinks, cuts, fraying, or any other signs ofwear. Oil contamination can be cleaned out of sample hoses asdirected below. Hoses that show signs of wear should be replacedimmediately to avoid dangers of rupture or bursting.Remove the hose from the instrument and flush with isopropyl alcoholuntil the oil is thoroughly cleansed from the inner tube.Warning: Flush hoses away from sparks, open flames or otherignition sources and in an area that is well ventilated.Dry the hose by blowing clean, dry nitrogen or shop air through theinner hose or by allowing the hose to air-dry for several hours.Take care to not dry the hose with shop air that is lubricated.When the hose is completely dry, re-inspect the hose for signs ofwear, as described above, and replace if wear is evident.3.5 Changing the Printer PaperUltima ID refrigerant Identifiers that are equipped with on-boardprinters use an inexpensive thermal paper for printing. The paperroll should be changed when a red stripe appears on the left side ofthe printout.To change the paper roll, press the “HELP” button on the “Ready toAir Cal” screen as shown in Section 2.2, Figure 3. The screen willdisplay several options as shown in Figure 28. Press the “SET”button to advance to the screen shown in Figure 29 and then pressthe “FEED” button.
TO CHANGESETTINGS ORREPLACE PAPERROLL PRESS SETFOR OTHER HELPPRESS HELPSET HELP DONETO FEED IN ANEW PAPER ROLLPRESS FEEDPRESS SET TOADJ LCD CONTRASTOR ELEVATIONSET FEED DONETO LOAD PAPER1. PRESS FEED2. INSERT PAPER3. PRESS STOP4. PRESS TEST TOTEST AND EXITFEED STOP TESTFigure 28 Figure 29 Figure 30Open the printer door and remove the old roll by tearing the paperas it enters the printer then pressing the “FEED” button shown inFigure 30 until the old roll exits the printer completely. Insertthe new paper roll from the underside as shown below:CorrectIncorrectPress the “FEED” button shown in Figure 30 to automatically advancethe paper through the printer. When the paper appears on the top ofthe printer, press the “STOP button. Press the “TEST” button toprint a test message and verify that the paper is installedproperly. Slide the paper through the slot in the printer door andclose the door.3.6 Low Battery WarningFor units equipped with the optional rechargeable battery, a “LowBattery Warning” will appear when the battery is nearly exhausted.Several tests may be run after the initial warning however, it isstrongly recommended that the unit be recharged or the externalbattery clips be used.3.7 Error MessagesIn the unlikely event that an “Error” message is displayed on thescreen, power off the unit, take it to a location outside of theshop environment where fresh air is available and turn the unit backon. If the “Error” message reappears, contact our servicedepartment for assistance.Neutronics Inc.
456 Creamery WayExton, PA 19341Ph: 800-378-2287 x 123 or 610-524-8800 x 123Fax: 610-524-8800
4 APPENDICES4.1 Spare Parts ListPART NUMBERDESCRIPTION4-03-5004-07-0 R134a Tank Adapter Fitting6-02-6000-09-0 R134a Sample Hose6-02-6000-02-0 R12 Sample Hose6-01-6001-08-0 Vehicle Power Cable6-02-6000-08-1 Sample Filter (5 Pack)6-02-6001-04-1 Battery Kit (Optional)6-02-6001-04-0 Spare Battery6-01-6001-10-0 Printer Upgrade (Factory Installation Only)5-03-1000-08-05-06-7000-65-0 Operating <strong>Manual</strong>Printer Paper Roll (Sold in Quantities of 10Only)4.2 Appendix B - SpecificationsSAMPLE PARAMETERS: Vapor only, oil-free, 300 psig (2 MPa)MaximumDETECTED COMPOUNDS:SENSOR TECHNOLOGY:REFRIGERANT SAMPLESIZE:POWER:OPERATIONALTEMPERATURE:SAE J1771R12, R134a, R22, Hydrocarbons, AirNon-Dispersive Infrared (NDIR)0.3 ounces (8.5 grams) per sample9 – 15 VDC, 2 Amps Maximum40-130 o FIf the refrigerant being tested isidentified as contaminated, any visualpercentages displayed of CFC-12 (R-12) orHFC-134a (R134a) outside the designcertified value is informational and maynot be accurate.
This instrument has not been designcertified for contaminate detection ofR124 or R142b.
4.3 APPENDIX E – WarrantyNEUTRONICS warrants, subject to the terms listed below, that thegoods will be free from defects in design, materials, andworkmanship for a period of (1) one year from the date that thegoods are shipped to the buyer.THE SOLE LIABILITY OF NEUTRONICS FOR ALL PURPOSES SHALL BE TO REPAIROR REPLACE, AT THE SOLE OPTION OF NEUTRONICS, DEFECTS APPEARINGWITHIN THE (1) ONE YEAR PERIOD. NEUTRONICS SHALL HAVE NO OBLIGATIONFOR REPAIR OR REPLACEMENT UNLESS NEUTRONICS HAS RECEIVED WRITTENNOTICE OF THE ALLEGED DEFECT WITHIN THE (1) ONE YEAR PERIOD AND THEDEFECTIVE GOODS ARE PROMPTLY RETURNED BY THE BUYER, AT THEIREXPENSE, TO NEUTRONICS AT: 456 CREAMERY WAY EXTON, PA 19341 USA, ANDTHE DEFECT OCCURS UNDER THE CIRCUMSTANCES OF PROPER USE INACCORDANCE WITH ALL INSTRUCTIONS AND MANUALS PROVIDED TO THE BUYER.NEUTRONICS WILL DELIVER THE REPAIRED OR NEW GOODS TO THE BUYER ATNEUTRONICS EXPENSE. IN NO EVENT WILL NEUTRONICS BE LIABLE FOR ANYLOSS OR DAMAGE DIRECTLY OR INDIRECTLY ARISING FROM THE DEFECTS ORFROM THE USE OF THE GOODS OR FROM CONSEQUENTIAL OR INCIDENTALDAMAGES, WHETHER IN CONTRACT, TORT, OR OTHERWISE, FOR PERSONALINJURY OR PROPERTY DAMAGE OR ANY FINANCIAL LOSS.Buyer shall be responsible for insuring that the goods arefunctioning properly at all times and shall not use any goods whichare not functioning properly. Buyer, therefore, agrees to indemnifyNEUTRONICS from and against all losses and claims to or by anyperson or property caused in any manner by the goods or the use ofthe goods, including any expenses and attorney’s fees in connectionwith all claims, demands, proceedings, or other expenses.Any description of the goods contained in any documents to whichthese warranty provisions relate, including any quotations orpurchase orders relating to the goods being delivered to the buyer,are for the sole purpose of identifying the goods, and any suchdescription, as well as any sample or model which may have beendisplayed to or seen by the buyer at any time, have not been madepart of the basis of the bargain and have not created or amounted toany express warranty that the goods would conform to any suchdescription or any such sample or model.NEUTRONICS DOES NOT WARRANT THAT THE GOODS ARE FREE OF THE RIGHTFULCLAIM OF ANY THIRD PERSON BY THE WAY OF INFRINGEMENT OF PATENT OROTHER PROPRIETARY INFORMATION AND DISCLAIMS ANY WARRANTY AGAINSTSUCH INFRINGEMENT.It shall be the responsibility of the buyer to read carefully andabide by all instructions provided to the buyer in the instructionmanual or elsewhere. If the buyer, or the employees of the buyer,did not abide by such instructions, then the alleged defect shallnot be deemed to have arisen under circumstances of proper use.
Appendix E – WarrantyThe terms of these warranty provisions shall apply to all productssold by Neutronics, except filters which are considered “consumableitems,” and as such are not covered by the terms of thesewarranties. No waiver, alteration or modification of the terms ofthese provisions shall be valid unless in writing and signed by anexecutive officer of NEUTRONICS.EXCEPT AS SPECIFICALLY SET FORTH AND LIMITED IN THIS PARAGRAPH,NEUTRONICS, INC. MAKES NO WARRANTIES, EXPRESSED OR IMPLIED,INCLUDING WARRANTIES AS TO MERCHANTABILITY, OR AS TO THE FITNESS OFTHE GOODS FOR ANY PARTICULAR USE OR PURPOSE, AND ANY WARRANTIES SETFORTH IN THIS PARAGRAPH ARE IN LIEU OF SUCH IMPLIED WARRANTIES OFMERCHANTABILITY AND FITNESS FOR PARTICULAR USE OR PURPOSE.