operation bxa rotating rack oven with advanced electronic ... - Hobart
operation bxa rotating rack oven with advanced electronic ... - Hobart
operation bxa rotating rack oven with advanced electronic ... - Hobart

You also want an ePaper? Increase the reach of your titles
YUMPU automatically turns print PDFs into web optimized ePapers that Google loves.
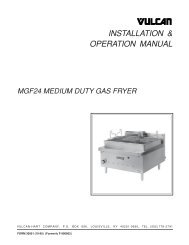
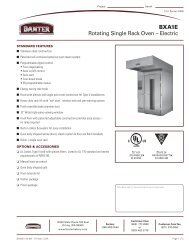
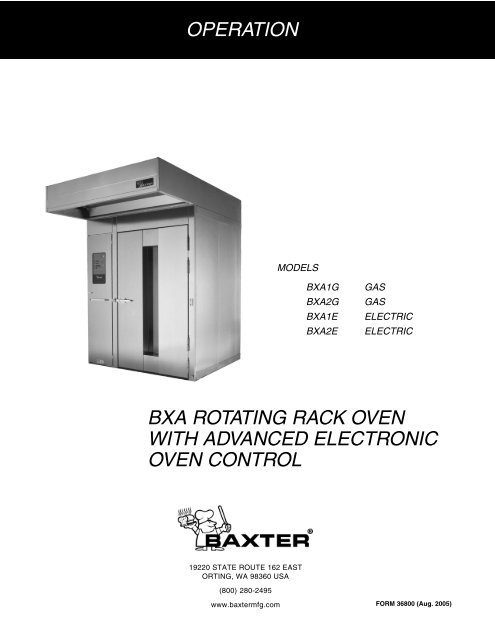
OPERATIONMODELSBXA1GBXA2GBXA1EBXA2EGASGASELECTRICELECTRICBXA ROTATING RACK OVENWITH ADVANCED ELECTRONICOVEN CONTROL19220 STATE ROUTE 162 EASTORTING, WA 98360 USA(800) 280-2495www.baxtermfg.comFORM 36800 (Aug. 2005)
IMPORTANT FOR YOUR SAFETYPOST IN A PROMINENT LOCATION THE INSTRUCTIONS TO BE FOLLOWED IN THEEVENT THE SMELL OF GAS IS DETECTED. THIS INFORMATION CAN BE OBTAINEDFROM THE LOCAL GAS SUPPLIER.IMPORTANTIN THE EVENT A GAS ODOR IS DETECTED, SHUT DOWNUNITS AT MAIN SHUTOFF VALVE AND CONTACT THE LOCALGAS COMPANY OR GAS SUPPLIER FOR SERVICE.FOR YOUR SAFETYDO NOT STORE OR USE GASOLINE OR OTHER FLAMMABLEVAPORS OR LIQUIDS IN THE VICINITY OF THIS OR ANYOTHER APPLIANCE.WARNING: IMPROPER INSTALLATION, ADJUSTMENT,ALTERATION, SERVICE OR MAINTENANCE CAN CAUSEPROPERTY DAMAGE, INJURY OR DEATH. READ THEINSTALLATION, OPERATING AND MAINTENANCEINSTRUCTIONS THOROUGHLY BEFORE INSTALLING ORSERVICING THIS EQUIPMENT.IN THE EVENT OF A POWER FAILURE, DO NOT ATTEMPT TOOPERATE THIS DEVICE.KEEP AREA AROUND OVEN CLEAR OF COMBUSTIBLES. DONOT OBSTRUCT COMBUSTION AND VENTILATION OPENINGSON THE OVEN.© BAXTER MFG., 2005– 2 –
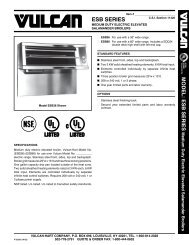
MODEL BXA RACK OVEN– 3 –
TABLE OF CONTENTSGENERAL ............................................................................................................................................ 5INSTALLATION.................................................................................................................................... 5OPERATION ........................................................................................................................................ 6BXA Advanced Controls ................................................................................................................ 6Auto On/Off Timer and Clock ................................................................................................. 8Basic Operation ....................................................................................................................... 9Cooling Oven ......................................................................................................................... 10Operational Hints................................................................................................................... 10Back-Up Control Operation (optional) ........................................................................................ 11Safety Alarm ................................................................................................................................. 11Food Service Steam Mode .......................................................................................................... 12Kosher Operation Mode (<strong>oven</strong>s equipped <strong>with</strong> Kosher Package) ............................................ 12Programming the Oven ............................................................................................................... 13Customized Operation ................................................................................................................. 17Shutdown ...................................................................................................................................... 19Restarting Oven ........................................................................................................................... 19Cleaning........................................................................................................................................ 20MAINTENANCE ................................................................................................................................. 21General ......................................................................................................................................... 21Preventive Maintenance .............................................................................................................. 21Service and Parts Information..................................................................................................... 21TROUBLESHOOTING ....................................................................................................................... 22Burners Will Not Light on Gas Oven........................................................................................... 22Alarms and Display Messages .................................................................................................... 22Other Troubleshooting Topics..................................................................................................... 22OWNER PREVENTIVE MAINTENANCE PROCEDURE................................................................. 23Introduction................................................................................................................................... 23Preventive Maintenance Procedure............................................................................................ 23– 4 –
OPERATION AND CARE OFMODEL BXA RACK OVENSAVE THESE INSTRUCTIONSGENERALThe Baxter BXA Rack Oven accommodates a roll-in <strong>rack</strong>. It is equipped <strong>with</strong> an <strong>electronic</strong> <strong>oven</strong> controlfor baking, roasting and/or steaming applications. A mechanism in the <strong>oven</strong> ceiling rotates the <strong>rack</strong>during the baking or cook cycle.Model BXA1G is rated at 180,000 Btu/hr, natural or propane gas.Model BXA2G is rated at 300,000 Btu/hr or 350,000 Btu/hr, natural or propane gas.Model BXA1E is rated at 34.2 kW.Model BXA2E is rated at 51.3 kW.Baxter Rack Ovens are produced <strong>with</strong> quality workmanship and material. Proper installation, usageand maintenance of your <strong>oven</strong> will result in many years of satisfactory performance.It is suggested that you thoroughly read this manual and carefully follow the instructions provided.INSTALLATIONThe Baxter BXA Rack Oven must be installed or moved only by authorized Bakery Systems trainedservice technicians.– 5 –
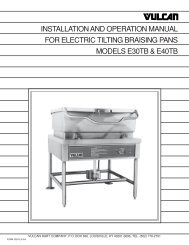
OPERATIONBXA ADVANCED CONTROLS– 6 –
Control Guide - AdvancedButton Action DisplayPOWER Press to turn the <strong>oven</strong> Control panel displays are lit when the <strong>oven</strong> is on. OvenON or OFF.defaults to Program 0. If <strong>oven</strong> is turned off and back on<strong>with</strong>in 2 minutes, the <strong>oven</strong> will come up in the last modeand <strong>oven</strong> setting.AUTO ON/OFF Press to enter current time The AUTO ON/OFF TIMER window displays the currentTIMER or time for <strong>oven</strong> to time, or the time the <strong>oven</strong> will automatically turn on orautomatically turn on or off.off, when correspondingAuto On Time or AutoOff Time button is pressed.AUTO ON TIME Press to set the desired The AUTO ON/OFF TIMER window displays the timetime of <strong>oven</strong> tothe <strong>oven</strong> will automatically turn on.automatically turn ON.AUTO OFF TIME Press to set the desired The AUTO ON/OFF TIMER window displays the timetime of <strong>oven</strong> tothe <strong>oven</strong> will automatically turn off.automatically turn OFF.TIMER ON/OFF Press to turn the automatic The indicator light beside the timer ON/OFF button istimer ON or OFF.lit when the function is enabled.SET TEMP Press to set the desired The SET TEMP window displays the set temperature.temperatureThe HEAT ON light is lit while the <strong>oven</strong> is heating. The(5-degree increments). actual temperature in the <strong>oven</strong> cavity is displayed in theOVEN TEMP window.BAKE TIMER Press to enter The BAKE TIMER window displays the amount of timethe BAKE timefor the current baking cycle. The minutes set are the(1-minute increments). left two digits and minutes remaining are the right twodigits. The windows can be set to display hours andminutes remaining. The ON light is lit when bake timeis active. See Customized Operation to configure thissetting.STEAM TIMER Press to enter the The STEAM TIMER window displays the amount ofSTEAM timetime set for the steam cycle. The ON light is lit when(5-second increments in the steam system is active.Bakery mode; 1-secondincrements in Food Servicemode).AIRFLOW Press to enter the The DELAY TIMER window displays the amount ofDELAY DELAY time time set for the circulation blower delay cycle.(1-minute increments).Press to start theBAKE TIMER.The ON light blinks when the BAKE TIMER is active.– 7 –
Control Guide - Advanced (cont)Button Action DisplayPress to stop the BAKETIMER or silence thebeeper after the BAKETIMER has timed out.The ON light is off when the BAKE TIMER is inactive.PROGRAM Press to select bake The PROGRAM window displays the number of theprogram.current program.STEP Press to select one of The corresponding indicator light will be lit (1 to 4),four baking steps.depending on which step is selected.Press to open orclose the vent.The indicator light above the VENT button is lit when thevent cycle is enabled.Auto On/Off Timer and ClockThe Auto ON/OFF Timer display shows the current time of day. To set the clock, the control must beturned on. Press and hold either arrow button to initiate clock setting, then adjust time using arrowbuttons. A few seconds after the time is adjusted, the colon in the time display will resume flashing.Timer SettingsThe <strong>oven</strong> can be set to turn itself on and off. After the AUTO ON/OFF TIMER is set, the POWER ONOFF button can be pressed to turn the <strong>oven</strong> off. This will not disrupt the AUTO ON/OFF setting.Electrical power to the <strong>oven</strong> must remain on.1. To set the <strong>oven</strong> to turn on, press and hold the AUTO ON TIME button. The previously enteredstart time will appear in the display. Use the UP and DOWN arrows to adjust the start time. Thenrelease the AUTO ON TIME button.2. To set the <strong>oven</strong> to turn off, press and hold the AUTO OFF TIME button. The previously enteredend time will appear in the display. Use the UP and DOWN arrows to adjust the end time. Thenrelease the AUTO ON TIME button.3. To enable the automatic start, press and hold the TIMER ON/OFF button until the indicator LEDto the right of the TIMER ON/OFF button is illuminated.NOTE: When using AUTO ON/OFF to preheat the <strong>oven</strong>, if the <strong>oven</strong> is not disturbed for the time setin parameter P17, it will revert to the Setback temperature stored in parameter P18 setup.Backup BatteryThe clock is backed up by a lithium battery which keeps the clock circuitry operating when all externalpower is off. If the battery becomes low or dead while the external power is off, the display will read12:00 (12 hr mode) or 0:00 (24 hr mode) and will not increment until a new time is set. The clock willoperate <strong>with</strong> a dead or missing battery, but must be set each time external power is turned on. Batteriesshould be replaced when low or dead to avoid corrosive damage to the circuitry. Contact your localBakery Systems service office.– 8 –
Oven PreheatFor best results, the <strong>oven</strong> must be preheated to bake temperature before baking begins.1. The door must be closed for <strong>oven</strong> to heat. The <strong>rack</strong> carrier will lift and rotate only during timedbake.NOTE: The <strong>rack</strong> carrier will be in the unload position from the last bake.2. Press the POWER ON OFF button to turn the <strong>oven</strong> on.3. Press the UP or DOWN arrows next to the SET TEMP window to enter the desired bakingtemperature. Actual temperature of the <strong>oven</strong> will appear in the OVEN TEMP window.4. Allow 50 minutes after the <strong>oven</strong> has reached the set temperature for the steam system to charge.5. The <strong>oven</strong> is now ready for baking <strong>operation</strong>s.Basic OperationWARNING: THE OVEN AND ITS PARTS ARE HOT. TO PREVENT BURNS, USE HOT PADS ORPROTECTIVE MITTS WHEN LOADING OR UNLOADING THE OVEN.WARNING: HOT AIR AND STEAM ARE RELEASED FROM THE OVEN INTERIOR WHEN THELOADING DOOR IS OPENED. TO AVOID BURNS, OPEN THE DOOR SLOWLY AND KEEP CLEAROF THE OPENING.1. Preheat the <strong>oven</strong>. (See Oven Preheat) for BXA Advanced Controls.2. Manually select baking settings:• Press the UP or DOWN arrows next to BAKE TIMER to enter the desired value.• Press the UP or DOWN arrows next to STEAM TIMER to enter the desired value.• Press the UP arrow next to AIRFLOW DELAY to enter the desired value.• The steam and airflow delay settings are optional and can be left at 0 if desired.3. Slowly open the door and load product.4. Close the door and press the START button. The ON light in the BAKE TIMER window blinks asthe timer counts down.5. Rack lifts from floor and rotates clockwise.6. The <strong>oven</strong> beeps after the BAKE TIMER times out. Press STOP to silence the beeper.7. Open door. Allow <strong>rack</strong> carrier to stop and lower. Remove product– 9 –
Loading Procedure1. Type B and C <strong>rack</strong> carriers are equipped <strong>with</strong> stops on both ends. For B lifts, ensure stop flap isin the up position to load the <strong>rack</strong> on the <strong>rack</strong> carrier. For C lifts, push <strong>rack</strong> stop to the left after<strong>rack</strong> is loaded.2. Roll the <strong>rack</strong> into the <strong>oven</strong> so the end b<strong>rack</strong>ets channel onto the <strong>rack</strong> carrier. When using <strong>rack</strong>sequipped <strong>with</strong> pan stops, load <strong>rack</strong>s so stops will prevent movement of trays toward user when<strong>rack</strong>s are unloaded.3. Close the loading door. The <strong>rack</strong> carrier will lift and rotate only during timed bake.Unloading ProcedureWARNING: THE OVEN AND ITS PARTS ARE HOT. TO PREVENT BURNS, USE HOT PADS ORPROTECTIVE MITTS WHEN LOADING OR UNLOADING THE OVEN.WARNING: HOT AIR AND STEAM ARE RELEASED FROM THE OVEN INTERIOR WHEN THELOADING DOOR IS OPENED. TO AVOID BURNS, OPEN THE DOOR SLOWLY AND KEEP CLEAROF THE OPENING.1. Press STOP or open the loading door to silence the beeper.2. Wait for the <strong>rack</strong> carrier to stop and lower.3. For B lifts, push the <strong>rack</strong> stop down to unload the <strong>rack</strong> from the <strong>rack</strong> carrier. For C lifts, push <strong>rack</strong>stop to the right to open.4. Roll the <strong>rack</strong> from the <strong>rack</strong> carrier.5. Close the loading door.Cooling Oven• To cool the <strong>oven</strong> more than 20 degrees below its current temperature; change SET TEMP tothe desired new temperature, open the <strong>oven</strong> door, and press VENT. The SET TEMP display willalternate between ‘COOL’ and the SET TEMP until the <strong>oven</strong> has cooled. When the <strong>oven</strong> hasreached the set temperature, the alarm will beep and the control will return to normal <strong>operation</strong>.Closing the <strong>oven</strong> door or pressing any control button during Cool-Down mode will also returnthe control to normal <strong>operation</strong>.• The VENT control can provide a means of cooling down the <strong>oven</strong>. When the <strong>oven</strong> is in the OFFmode and the door is open, press the VENT button once to start or stop the circulation fan. Ventlight will be lit. The fan will also stop when the door is closed or the <strong>oven</strong> is put into the ON mode.• If the <strong>oven</strong> temperature is more than 20 degrees higher than the set temperature, and the baketimer is not activated, the <strong>oven</strong> will automatically open the VENT. The VENT will remain openuntil the <strong>oven</strong> temperature is <strong>with</strong>in 20 degrees of the set temperature.Operational Hints• On the initial startup, the <strong>oven</strong> temperature will default to the factory setting of 375°F (191°C)unless changed.• During a baking cycle, the START and STOP buttons control the BAKE, STEAM and AIRFLOWDELAY settings only. They have no effect on the <strong>oven</strong> heat. When the BAKE TIMER times out,the <strong>oven</strong> heat stays at the set temperature. Care should be taken not to overbake products.• To adjust the temperature during a baking cycle, press the UP or DOWN arrows in the OvenTemp section to enter the new temperature.– 10 –
• To adjust steam settings, press the corresponding arrows to enter the new values. The steamtimer cannot be adjusted during bake <strong>operation</strong>.• You can adjust the time remaining <strong>with</strong> the arrows. The set time remains unchanged unless you“0” out the remaining time.• If the door is opened at any time during the baking cycle, the TEMP, BAKE TIME, STEAM andAIRFLOW DELAY settings will pause. Close the door to resume all functions.• The AIRFLOW DELAY option minimizes airflow at the beginning of the baking cycle. The heatis off while the AIRFLOW DELAY is activated.• The <strong>oven</strong> monitors the heating system by comparing the current <strong>oven</strong> temperature to the settemperature. If a problem arises in the heating system or there is a heating system failure, bothtemperature displays will flash. If the problem continues, contact your authorized BakerySystems service agency.BACK-UP CONTROL OPERATION (OPTIONAL)If the main control panel ceases to function properly, baking can continue <strong>with</strong> the use of the Back-upControls, if equipped. The Back-up Controls are located behind the control door on rear wall of thecomponent panel.To activate the Back-up Controls, flip the toggle switch to BACK-UP position. Temperature and steamare now controlled by the thermostat dial and steam rocker switches, located on the back-up controlpanel. Set the thermostat dial to the desired temperature. Once the <strong>oven</strong> has reached temperature,steam can be injected by pressing and holding the steam rocker switch up to a maximum of 20 seconds.More than this will cool down the <strong>oven</strong> and steamer excessively. Venting the <strong>oven</strong> must be donemanually by opening the door. The <strong>rack</strong> carrier will stop and lower when door is open. Close door afterventing is complete for <strong>rack</strong> carrier to lift and resume <strong>rotating</strong>.SAFETY ALARM (STANDARD FEATURE, NO PARAMETER SETUP REQUIRED)If the temperature at the probe is in the range of 570 - 600 degrees Fahrenheit for 10 seconds, the unitwill do the following:1. Shut off all features.2. Sound an alarm.3. Flash the OVEN TEMP display (actual temperature is displayed).4. Display the letters ‘SHdn’ in the BAKE TIMER display.The <strong>oven</strong> will remain in the shutdown mode until the 120VAC power is removed from the controller.WARNING: DISCONNECT THE ELECTRICAL POWER TO THE MACHINE AND FOLLOWLOCKOUT / TAGOUT PROCEDURES. THERE MAY BE MULTIPLE CIRCUITS. BE SURE ALLCIRCUITS ARE DISCONNECTED.WARNING:OFFICE.SHUT OFF GAS. CONTACT YOUR AUTHORIZED BAKERY SYSTEMS SERVICE– 11 –
FOOD SERVICE STEAM MODEThis mode can be used to provide steam on a periodic basis throughout <strong>operation</strong>. When this modeis enabled, the STEAM TIMER controls how many seconds of steam are provided to the <strong>oven</strong>, whilea value entered in the Parameter 14 (P14) setup controls how frequently the steam is operated.To enable the Food Service Steam mode:1. Enter the parameter set up mode by pressing and holding the START button and POWER ONOFF button.2. Select Parameter 14.3. If the BAKE TIMER window displays ‘0’, it is set up for Bakery Mode (factory default). Press theUP or DOWN arrow buttons to enter FSS mode (display will change to a 3-digit number).4. Set the desired time between steam cycles using the UP or DOWN arrow buttons. The range isfrom 300 seconds (5 min.) to 990 seconds (approximately 17 min.), and increments by 10seconds at a time.5. After setting the desired cycle, press the POWER ON OFF button to save the settings.6. The STEAM TIMER will now operate in 1-second increments, up to 10 seconds, to set the durationof steaming.Examples:‘300’ is selected for P14‘3’ is entered in STEAM TIMER= steam is turned on for 3 seconds every 300 seconds (5 min.)‘990’ is selected for P14‘3’ is entered in STEAM TIMER= steam is turned on for 3 seconds every 990 seconds (17 min.)To return the <strong>oven</strong> to Bakery Mode, repeat the above process to access P14 and set the value in theBAKE TIMER window to ‘0’. The STEAM TIMER will now operate in 5-second increments.KOSHER OPERATION MODE (OVENS EQUIPPED WITH KOSHER PACKAGE)NOTE: The <strong>oven</strong> will be put into Kosher <strong>operation</strong> mode by authorized personnel at the timeof start-up.For Kosher <strong>operation</strong>s, the <strong>oven</strong> must maintain a minimum temperature in order to retain Kosherapproval. The <strong>oven</strong> control will make the minimum set temperature 200°F in order to maintain minimumtemperature requirements. Do not attempt to set the <strong>oven</strong> temperature below this point.If the <strong>oven</strong> temperature is at risk of falling below the approved range, a rapid beep alarm will sound(faster than the normal BAKE TIMER alarm). If you hear this alarm, do the following:• Check that the <strong>oven</strong> door is closed.• If the Vent mode is active, turn the Vent off.If the <strong>oven</strong> temperature falls below 150°F, the control will lock out. The display will read ‘LOC OUT’ andthe unit will not operate. Authorized personnel must be contacted to restart the <strong>oven</strong>.If the control is inadvertently turned OFF while in kosher mode, when powered ON, the control will restartin kosher mode as long as the temperature has not dropped below the minimum requirements.– 12 –
PROGRAMMING THE OVENSingle Step ProgrammingThe program menu stores up to 99 programs that can be recalled by number when needed. A programis a set of baking instructions (temperature, bake, steam and airflow delay settings) that the operatordefines for any baking <strong>operation</strong>.1. With the <strong>oven</strong> in the OFF mode, press and hold the UP arrow in the STEPS section. Whilepressing and holding the UP arrow, press the POWER ON OFF button for 3 seconds. When thebeep sounds, the <strong>oven</strong> is in program mode.2. Press the PROGRAM UP or DOWN arrows until the program number that is desired is displayed.3. Press the TEMP UP or DOWN arrows to enter the desired temperature.4. Set the Bake, Steam, Delay Airflow and Vent settings:• Press the UP or DOWN arrows next to BAKE TIMER to enter the desired time.• Press the UP or DOWN arrows next to STEAM TIMER to enter the desired time.• Press the UP arrow next to AIRFLOW DELAY to enter the desired time.NOTE: Steam and airflow delay settings are optional and can be left at 0 if desired.• Press the VENT button to vent the cavity for the entire time of the step. When step iscomplete, vent will close.5. To store the program, press the PROGRAM UP or DOWN arrows to move to the next programnumber or press the POWER ON OFF button to exit the program mode. To store additionalprogram settings, repeat steps 2 to 4.6. Record program numbers, and product associated <strong>with</strong> them, on the bake card supplied <strong>with</strong> the<strong>oven</strong>.– 13 –
Multi-Step ProgrammingAdditional programs or steps can be entered <strong>with</strong>in the original program number. Up to four individualsteps can be added by the operator, each <strong>with</strong> different bake settings.For example, Program 1 has temperature, bake, steam and delay time settings set by the operator.This is known as Step 1. After the timer times out in Step 1, the <strong>oven</strong> automatically starts theprogrammed bake settings in Step 2. The system continues <strong>with</strong> each step until all steps have beentimed out.1. With the <strong>oven</strong> in the OFF mode, press and hold the UP arrow in the STEPS section. Whilepressing and holding the UP arrow, press the POWER ON OFF button for 3 seconds. When thebeep sounds, the <strong>oven</strong> is in program mode.2. Press the PROGRAM UP or DOWN arrows until the program number that is desired is displayed.The Step 1 light is lit.3. Press the TEMP UP or DOWN arrows to enter the desired temperature.4. Set the Bake, Steam, Delay Airflow and Vent settings:• Press the UP or DOWN arrows next to BAKE TIMER to enter the desired time.• Press the UP or DOWN arrows next to STEAM TIMER to enter the desired time.• Press the UP arrow next to AIRFLOW DELAY to enter the desired time.NOTE: The steam and airflow delay settings are optional and can be left at 0 if desired.• Press the VENT button to vent the cavity for the entire time of the step. When step iscomplete, vent will close.5. Press the UP arrow in the STEPS section to advance to the next step <strong>with</strong>in the program. Theselected step light is lit. Repeat steps 3 and 4 above to set each step, if needed, in the program.6. To store all the steps in the program, press the PROGRAM UP or DOWN arrows to move to thenext program number, or press the POWER ON OFF button to exit the program mode.– 14 –
Changing the Programs1. With the <strong>oven</strong> in the OFF mode, press and hold the UP arrow in the STEPS section. Whilepressing and holding the UP arrow, press the POWER ON button for 3 seconds. When the beepsounds, the <strong>oven</strong> is in program mode.2. Press the PROGRAM UP or DOWN arrows until the program number that is desired is displayed.3. Enter the new Bake, Steam and Delay Airflow settings:• Press the UP or DOWN arrows next to BAKE TIMER to enter the desired time.• Press the UP or DOWN arrows next to STEAM TIMER to enter the desired time.• Press the UP arrow next to AIRFLOW DELAY to enter the desired time.NOTE: The steam and airflow delay settings are optional and can be left at 0 if desired.4. To change the settings in a Step, press the UP arrow in the STEPS section and make changesin each step accordingly.5. To store the program, press the PROGRAM UP or DOWN arrows to move to the next programnumber or press the POWER ON OFF button to exit the program mode.– 15 –
Using the Programs1. Press the PROGRAM UP or DOWN arrows to select the desired program number (1-99). TheTEMP, BAKE, STEAM and AIRFLOW DELAY settings are displayed.2. Confirm that the <strong>oven</strong> is at the set baking temperature.3. Slowly open the doors. Wait for the <strong>rack</strong> lifting device to come to a stop.4. Roll the <strong>rack</strong> into the <strong>oven</strong> so the end b<strong>rack</strong>ets channel onto the <strong>rack</strong> lifting carrier. (See LoadingProcedure.)5. Close and latch the door.6. Press START. A beeper will sound after the BAKE TIMER times out. Press STOP to silence thebeeper.Program Hints• The <strong>oven</strong> defaults to the Program 0 settings when first turned on. Program 0 settings are asfollows: Temp = 375°F, Bake Timer = 0, Steam Timer = 0, Delay Timer = 0, Program = 0.• Any combination of bake settings can be manually entered for one-time custom baking<strong>operation</strong>s. These settings are not saved to the program memory.• If any of the baking parameters are changed in a program before or during a bake cycle, the<strong>oven</strong> reverts to a manual program (Program 0).• The PROGRAM UP and DOWN arrows have no effect while the bake cycle is in progress.However, if the BAKE TIMER has been stopped, either by pressing the STOP button or byopening the door, then pressing the PROGRAM UP and DOWN arrows will select a newprogram and cancel the baking cycle that was in progress.• When selecting programs, the system will skip over unprogrammed numbers. For example, ifProgram 1 is displayed in the PROGRAM window and no programs are stored in 2, 3 and 4, thenthe system will skip over 2, 3 and 4. Program 5 will be the next program displayed.– 16 –
CUSTOMIZED OPERATIONThe BXA <strong>oven</strong> controls have the capability of being customized to fit your own personal needs usingthe setup mode.Before entering the setup mode, read all the instructions to make sure you are completely clear on whatto do. If you need assistance, please call your authorized Bakery Systems service office.Entering Setup ModeWith the <strong>oven</strong> in the OFF mode, press and hold the START button. While pressing and holding theSTART button, press the POWER ON OFF button for 3 seconds. The <strong>oven</strong> is now in Setup mode andP1 is displayed in the SET TEMP window.Changing Items in Setup ModeThe number in the SET TEMP window is the setup number. The BAKE TIMER window displays thesetup item (the settings that can be changed).1. To change the setup number, press the SET TEMP UP or DOWN arrows. The setup item will bedisplayed in the BAKE TIMER window.2. To make a change in the setup item being displayed, press the BAKE TIMER UP or DOWNarrows. To adjust the setting, see Setup Guide. Do not attempt to change item numbers P4, P5and P8. Consult your authorized Bakery Systems service office for help <strong>with</strong> these features.3. To exit the setup mode, press the POWER ON OFF button.– 17 –
Setup GuideSetupNumber Setup Item DisplayP1 Maximum Temperature This is the maximum temperature at which the <strong>oven</strong> can beSetpointset. Range is 50°F to 525°F (10°C to 274°C).P2 Preheat Temperature This is the default temperature setpoint when the <strong>oven</strong> isfirst turned on (Program 0). The preheat temperature cannotbe set higher than the value in P1. Range is 50°F to 525°F(10°C to 274°C).P3 Minimum Temperature This is the minimum temperature at which the <strong>oven</strong> can beSetpointset. Range is 50°F to 200°F (10°C to 93°C).P4 Temperature Offset This value permits an offset of correction between thetemperature probe and the real baking chamber temperature.Call your authorized Bakery Systems service agencyfor help <strong>with</strong> this feature.P5 Heat OFF Offset This value adjusts the temperature difference between theset point and stopping of the heating system. Call yourauthorized Bakery Systems service agency for help<strong>with</strong> this feature.P6 Heat Difference Hysteresis This value adjusts the temperature difference between the ontemperature and off temperature of the heating system. Callyour authorized Bakery Systems service agency forhelp <strong>with</strong> this feature.P7 Maximum Steam Time Time set is the maximum time (in seconds) that water issupplied during the STEAM TIMER <strong>operation</strong>.P8 Temperature Units The <strong>oven</strong> can be set to display temperature in Fahrenheit orCelsius. To ensure accurate temperature parameters, callyour authorized Bakery Systems service agency forhelp <strong>with</strong> this feature.P9 Bake Timer Mode The BAKE TIMER can be set up to display minutes set/minutes remaining or hours and minutes. Select 0 for minutesset/minutes remaining or 1 for hours and minutes. (If thisparameter is changed to hours and minutes, a label has beenprovided to place on the control panel to indicate the change.)P10 Vent Evacuate Time Time set is the time (in seconds) that the vent is 100% openat the beginning of the venting cycle. Range is 0 to 180seconds.P11 Vent Open Percentage This value is the percentage the bake chamber vent is openafter the vent evacuate time has expired. Range is 5 to 100%.P12 End of Bake Automatic This feature enables the Automatic Vent Cycle. Select 0 toVent - Enabledisable or 1 to enable this feature (see P13 for entering time).P13 End of Bake Automaitc This is the number of minutes before the end of the bakeVent Timecycle that the vent is open.– 18 –
Setup Guide (cont)SetupNumber Setup Item DisplayP14 Steam Timer Mode The STEAM TIMER can be set up to display in seconds oroperate in food service mode. Select 0 for seconds or300 to 990 for food service mode.P15 Interior Light Brightness This value is the brightness of the interior lights. The higherthe number, the brighter the lights. Range is 50 to 100.P16 Clock Operation This selects either 12 hours (AM/PM) or 24 hours real timedisplay. Press the Bake Time Up button to switch betweenthe two types of display.P17 Temperature Setback Time This selects the elapsed time from the last timed bake towhen the <strong>oven</strong> will lower the <strong>oven</strong> set temperature to thevalue set in P18. Range is 10 to 180 minutes.P18 Setback Temperature This selects the <strong>oven</strong> set temperature that the <strong>oven</strong> willchange to when the temperature setback time has beenexceeded in P17. Range is 50°F to 300°F (10°C to149°C).P19 Lights Mode Select 1 for lights on continuously (when <strong>oven</strong> is on) orselect 0 for automatic <strong>operation</strong>. Lights will turn offautomatically after 30 minutes of no user activity (dooropened or closed, no buttons pushed).SHUTDOWNNOTE: Before restarting a gas <strong>oven</strong>, power switch and gas burner valve must be off for a minimumof 5 minutes.1. Remove all remaining product.NOTE: Vent can be used to cool the <strong>oven</strong>.2. Press the POWER ON OFF button.3. Clean the baking chamber. (See Cleaning.)4. For lengthy shutdowns, disconnect the main power and shut off the gas and water supply.RESTARTING OVENNOTE: Before restarting a gas <strong>oven</strong>, power switch and gas burner valve must be off for a minimumof 5 minutes.1. Press the POWER ON OFF button to turn the <strong>oven</strong> on.2. Press the UP or DOWN arrows next to the SET TEMP window to enter the desired temperature.– 19 –
CLEANINGWARNING: DISCONNECT THE ELECTRICAL POWER TO THE MACHINE AND FOLLOWLOCKOUT / TAGOUT PROCEDURES. THERE MAY BE MULTIPLE CIRCUITS. BE SURE ALLCIRCUITS ARE DISCONNECTED.WARNING: THE RACK OVEN AND ITS PARTS ARE HOT. USE CARE WHEN OPERATING,SERVICING OR CLEANING THE RACK OVEN.WARNING: HOT AIR AND STEAM ARE RELEASED FROM THE OVEN INTERIOR WHEN THELOADING DOOR IS OPENED. TO AVOID BURNS, OPEN THE DOOR SLOWLY AND KEEP CLEAROF THE OPENING.• Allow the <strong>oven</strong> to cool.• Clean the outside of the <strong>oven</strong> daily <strong>with</strong> a clean, damp cloth.• Remove <strong>rack</strong>(s) and clean as you would any cooking utensil. Use warm, soapy water and abrush. Rinse <strong>with</strong> clear water and dry <strong>with</strong> a clean cloth.• Use care when cleaning around sensitive interior parts such as probes, sensors or the <strong>rotating</strong>mechanism.• Using a clean cloth and warm, soapy water, wash the stainless steel interior of the <strong>oven</strong>. Rinse<strong>with</strong> clear water and dry <strong>with</strong> a clean cloth.• Gently scrape heavy buildup off door glass. Residue can be removed <strong>with</strong> a glass cleaner when<strong>oven</strong> is cool.• Clean hood filters (if equipped) <strong>with</strong> soap and warm water.• Do not use <strong>oven</strong> cleaners or steel wool on stainless steel surfaces. Never spray down the <strong>oven</strong><strong>with</strong> water or steam.• Never use cleaners that contain chlorine. Chlorine corrodes stainless steel.– 20 –
MAINTENANCEWARNING: THE RACK OVEN AND ITS PARTS ARE HOT. USE CARE WHEN OPERATING,SERVICING OR CLEANING THE OVEN.WARNING: HOT AIR AND STEAM ARE RELEASED FROM THE OVEN INTERIOR WHEN THELOADING DOOR IS OPENED. TO AVOID BURNS, OPEN THE DOOR SLOWLY AND KEEP CLEAROF THE OPENING.WARNING: DISCONNECT THE ELECTRICAL POWER TO THE MACHINE AND FOLLOWLOCKOUT / TAGOUT PROCEDURES. THERE MAY BE MULTIPLE CIRCUITS. BE SURE ALLCIRCUITS ARE DISCONNECTED.On gas <strong>oven</strong>s, annually check the flue to be sure it is free of obstructions.GENERALAs NeededDaily• Inspect the area around the <strong>oven</strong>. The area must be free and clear from combustibles. Theremust be no obstructions to the air flow.• Clean Exterior (See Cleaning).Weekly• Clean the <strong>oven</strong> interior and remove loose debris (See Cleaning).• Clean the windows.• Empty grease catcher (if equipped).Monthly• Clean exhaust hood filters (if equipped) <strong>with</strong> soap and water.Bi-Monthly• Owner Preventive Maintenance Procedure.PREVENTIVE MAINTENANCEThe BXA Rack Oven should be kept on a regular preventive maintenance schedule. Ovens requirespecific preventive maintenance based on usage and environmental factors. The failure to have the<strong>oven</strong> properly maintained by following recommended preventive maintenance procedures may resultin higher repair costs, shortened equipment life, or unsafe operating conditions.The performance of routine preventive maintenance on any <strong>rack</strong> <strong>oven</strong>, which is the owner’sresponsibility, will help to ensure continued safe and reliable <strong>operation</strong>.A preventive maintenance program is your best option for continued safe and reliable <strong>oven</strong> <strong>operation</strong>.We believe that an authorized Bakery Systems service agency is your best choice for performingpreventive maintenance.SERVICE AND PARTS INFORMATIONContact your authorized Bakery Systems service office.– 21 –
TROUBLESHOOTINGBURNERS WILL NOT LIGHT ON GAS OVEN1. Check that door is shut.2. Press the OFF button to turn the <strong>oven</strong> off and wait 5 minutes.3. Make sure the gas shutoff valve is in the ON position.4. Press the ON button to turn the <strong>oven</strong> back on.If the above suggestions do not remedy the problem, contact a Bakery Systems service office.ALARMS AND DISPLAY MESSAGESAlarm or Message Cause ActionTemperature display changesbetween a number and ‘COOL’.Display is flashing <strong>with</strong> nobeeping, while <strong>oven</strong> is in a timedbake cycle and is calling for heat.Display shows ‘SHdn’.Cool Down mode is active.Temperature recovery alert.Safety Alarm has disabled<strong>oven</strong>.To return to normal mode, close <strong>oven</strong>door.Open <strong>oven</strong> door and close to reset heatcontrol. If unit does not begin heatingcontact your local Bakery service office.TURN OFF ALL POWER AND GAS TOTHE OVEN. Do not use <strong>oven</strong>. Contactyour local Bakery service office.Control beeps continuously. Rack Rotation alert. Check that <strong>rack</strong> is <strong>rotating</strong>; check forpans that may be protruding from <strong>rack</strong>. Ifproblem persists contact your localBakery service office.Controls beeps rapidly (fasterbeep than Baker Timer).Display shows ‘LOC OUT’.Temperature alert forKosher Mode.Oven in Kosher Lock-OutMode.Turn VENT off, if activated. Gas <strong>oven</strong>s:check that burner is firing. If not firing,briefly open door and close to resettemperature control.Contact your local Bakery service office.OTHER TROUBLESHOOTING TOPICSCondition Cause ActionOven circulation fan is runningbut <strong>oven</strong> is turned off.STEAM TIME cannot be setabove 10 seconds, and timeincrements by 1-second.Rack does not lift and rotate.Oven is in Cooling mode.Oven is in Food Servicemode.Bake time has not beenentered in timer and/ortimer has not beenstarted.Close <strong>oven</strong> door to cancel coolingmode. If door was not open, contactyour local Bakery service office.See Food Service Mode instructions toreturn <strong>oven</strong> to Bakery mode.Enter time in BAKE TIMER and pressSTART. If problem persists, contactyour local Bakery service office.– 22 –
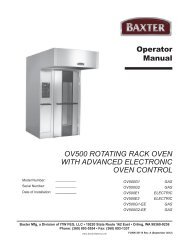
OWNER PREVENTIVE MAINTENANCE PROCEDUREINTRODUCTIONThis customer preventive maintenance (PM) section includes procedures to inspect for proper<strong>operation</strong> and cleaning of components. Owner Preventive Maintenance Procedures are written for gas<strong>oven</strong>s. They can also be used for electric <strong>oven</strong>s by omitting the steps that refer to components foundonly on gas <strong>oven</strong>s. Customer PMs should be conducted bi-monthly per OSHA Bakery Oven InspectionStandard 29 CFR 1910.263(l)(9)(ii). A convenient PM Checklist is provided at the end of this section.NOTE: This PM procedure does not discuss repair or replacement of components. Upon completionof the PM procedure you will need to contact a qualified servicer for any needed repairs.Tools Used For Inspection Procedure• Standard set of hand tools• Vacuum cleaner - shop vacPREVENTIVE MAINTENANCE PROCEDUREWARNING: DISCONNECT THE ELECTRICAL POWER TO THE MACHINE AND FOLLOWLOCKOUT / TAGOUT PROCEDURES. THERE MAY BE MULTIPLE CIRCUITS. BE SURE ALLCIRCUITS ARE DISCONNECTED.WARNING: SHUT OFF THE GAS BEFORE SERVICING THE UNIT.WARNING: CERTAIN PROCEDURES IN THIS SECTION REQUIRE ELECTRICAL TEST ORMEASUREMENTS WHILE POWER IS APPLIED TO THE MACHINE. EXERCISE EXTREME CAUTIONAT ALL TIMES. IF TEST POINTS ARE NOT EASILY ACCESSIBLE, DISCONNECT POWER ANDFOLLOW LOCKOUT / TAGOUT PROCEDURES, ATTACH TEST EQUIPMENT AND REAPPLYPOWER TO TEST.Inspect Oven Lamps1. Lamps should be on when <strong>oven</strong> is powered.2. If not, replace lamps (Fig. 1).A. Remove lens cover by turning out of lamp housing.B. Remove <strong>oven</strong> lamp by turning lamp out of lampsocket.3. Reverse the procedure to install new lamps.Fig. 1– 23 –
Clean and Vacuum Components and Control/Burner Compartment Area (Gas Only)1. Clean the control/burner compartment (Fig. 2) area of dust and/or lint accumulation.2. Vacuum the control/burner compartment floor of dust and/or lint accumulation.3. Gain access to the top of <strong>oven</strong> and clean dust that may have accumulated on top of circulationblower motor (Fig. 3) and motor cooling fan.Fig. 2Fig. 3Rack Lift and Rotation Assemblies1. Check <strong>rack</strong> lift assembly for proper <strong>operation</strong>.A. Open door. Rack lift should lower to correct height of <strong>rack</strong> and be in forward loading positionto accept <strong>rack</strong> entry.B. The <strong>oven</strong> <strong>rack</strong> should be easily rolled in and out of <strong>oven</strong> and the wheels completely off the<strong>oven</strong> floor when raised.2. Tighten all set screws (4) in carrier (Fig. 4).A. Check and tighten all set screws on carrier.Fig. 4– 24 –
Inspect Door Components1. Check loading door latch.A. Check door gasket for good condition. If door gasket needs replacement, contact your localBakery Systems office for service.B. Check loading door latch. Latch must fully extend (Fig. 5) when door is closed andcontacting door gasket. Leave about 1/8" gap for heat expansion.C. Adjust strike in or out as required by loosening one screw (Fig. 6) on each side of strike.D. Tighten screws.Fig. 6Fig. 52. Check door sweep.A. The door sweep should hit the floorapproximately 1/8" evenly across doorwidth, when door is in the closed position.B. Turn <strong>oven</strong> on.C. If air (or steam) blows out from underneaththe door, door will need to be adjusted. Ifdoor sweep needs replacement oradjustment, contact your local BakerySystems office for service.3. Check interior door release (Fig. 7) for proper<strong>operation</strong>.4. Check door switch for proper <strong>operation</strong>.A. When door switch actuator rod is in thedown position (door open), the rod shouldextend 3/8" to 7/16" from the underside ofthe header and easily slide up ramp asdoor is closed (Fig. 8). Slide ramp shouldbe positioned as shown. If not,re-form ramp as necessary.Fig. 7– 25 –Fig. 8
Inspect Air Louvers1. Check air louvers (shutters) (Fig. 9) inside <strong>oven</strong> and tighten any loose screws.2. Check <strong>oven</strong> interior, tighten or replace loose or missing panel screws. Also check floor anchors.Inspect Cavity Vent1. Check cavity vent for proper <strong>operation</strong>.A. Push VENT (Fig. 10) button on control panel to open vent and then push again to closevent.B. Visually check that vent opens (Fig. 11) and closes (Fig. 12) when button is pressed.Fig. 9Fig. 10Fig. 12Fig. 11Visually Inspect Electrical Connections1. Inspect all wiring connections for discoloration. If discoloration is visible, contact your localBakery Systems service office.– 26 –
Verify Ignition Module Safety Lockout Functions (Gas Only)1. Verify ignition module safety lockout functions.A. Turn off main gas supply to the <strong>oven</strong>.B. Open control panel door to gain access to burnercompartment area.C. Turn the <strong>oven</strong> on.D. Set the <strong>oven</strong> to call for heat and make sureconvection fan is running.E. Observe LED light through hole in control boxcover (Fig.13). After trying to light the burnerthree times, the module should lockout. (Seechart below.)F. Turn main gas supply to the <strong>oven</strong> back on.G. Set the <strong>oven</strong> to call for heat, making sureconvection fan is running and the burner hasestablished a flame.H. Turn off main gas supply to the <strong>oven</strong>.I. Observe LED light through hole in control boxcover (Fig.13). The ignition module should gointo lockout. (See chart below.)Fig. 13LED DIAGNOSTIC INDICATOR CODESLEDLED offLED illuminated'1' Flash'2' Flash'3' FlashLEDNo FaultModule FaultAir Flow FaultFlame Fault No Call for HeatIgnition Module LockoutJ. If the results have been obtained, proceed tostep 2.K. If the results have not been obtained, contact yourlocal Bakery Systems service office.2. Verify hood exhaust air pressure switch (Fig. 14)<strong>operation</strong>.A. Set <strong>oven</strong> control to call for heat and make sureconvection fan is running.B. Disconnect tubing from exhaust vent collar. Burnerflame should go out.C. Reconnect tubing. Burner should establish a flame.If not, contact your local Bakery Systems serviceoffice.Fig. 14– 27 –
3. Verify draft inducer pressure switch (Fig. 15) <strong>operation</strong>.A. Set <strong>oven</strong> control to call for heat and make sure convection fan is running.B. Disconnect tubing from draft inducer pressure switch (Fig. 15). Burner flame should goout.C. Reconnect tubing. Burner should establish a flame. If not, contact your local BakerySystems service office.Verify Operation of Steam1. Check steam system for proper <strong>operation</strong>.A. Turn the water supply on.Fig. 15B. Turn <strong>oven</strong> on and set to normal bake temperature.C. Allow to cycle three times to stabilize temperature.D. Set control to call for steam.E. Observe <strong>operation</strong>. If steam is not observed, contact your local Bakery Systems serviceoffice.After completion of the owner PM procedure, you will need to contact a qualified servicer forany needed repairs.Keep a copy of the Owner Preventive Maintenance Checklist for your records.– 28 –
COPY AS NEEDEDMODEL/SERIAL NUMBERSRECOMMENDED OWNERPREVENTIVE MAINTENANCE CHECKLISTBAKERY RACK OVENS - GASCHECK FOR PROPER OPERATION OR CLEAN.CALL FOR SERVICE AS NECESSARYInspect <strong>oven</strong> lampsClean and vacuum components and burner areasInspect <strong>rack</strong> lift and rotation assembliesInspect door componentsInspect air louversInspect cavity ventVisually inspect electrical connectionsVerify ignition module safety lockout functionsVerify <strong>operation</strong> of steam√= PROCESS COMPLETEDPM Frequency: Bi-monthlyType of Gas Natural Gas _____________Propane_____________Location:________________________________Store No._____________________________I nspector:________________________________Date Completed:_____________________________S ervice Notified for Necessary Repairs:_____________________(Date)Comments:(Inspector Signature)– 29 –
NOTES– 30 –
NOTES– 31 –
NOTESFORM 36800 (Aug. 2005)– 32 –PRINTED IN U.S.A.