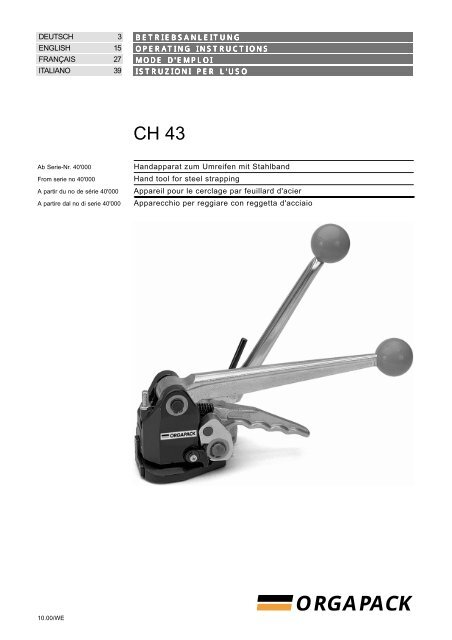
ORGAPACK - Acme Packaging
ORGAPACK - Acme Packaging ORGAPACK - Acme Packaging
- Page 6 and 7: ORGAPACK CH 435 OPERATING INSTRUCTI
- Page 8 and 9: ORGAPACK CH 436 PREVENTIVE AND CORR
- Page 10 and 11: ORGAPACK CH 436.5 REPLACING TOOTHED
- Page 12 and 13: ORGAPACK CH 43Pos. Part no Part nam
<strong>ORGAPACK</strong> CH 435 OPERATING INSTRUCTIONS5.1 OPERATING THE TOOL– Wind strap tightly round packed goods, so that thestraps lie above each other on top. Hold the strap inthe left hand so that the lower strap start (3/1) isapprox. 20 cm (8") from the hand.– Hold the tool in right hand and raise rocker leveragainst sealing lever.– Place the tool against the strap until this contactsthe stop. The lower strap start projects approx. 5 cm(2") above the tool.– Release rocker lever. The straps are clampedtightly and are fed from the tool.If the straps are not inserted correctly inthe tool, it is not possible to perform thetensioning operation.1Fig. 3– Hold the sealing lever (4/1) in the left hand and withthe right hand move the tensioning lever (4/2) backwardsand forwards until the required strap tensionis obtained.21Fig. 410.00/WE19
<strong>ORGAPACK</strong> CH 43Releasing strap tensionIn order to release the strap again during thetensioning process:– Press black tension pawl (5/2) against tensioninglever (5/1).– Draw back tensioning lever firmly to disengage thetension pawls and release the strap tension.12Fig. 5– When the strap tension is reached, move sealinglever (6/1) to the stop. The right hand remains onthe tensioning lever to resist the opposing force.The strap is sealed and cut.1Fig. 6– Return sealing lever to initial position.– Raise the rocker lever against the sealing lever.– Swivel the tool away from the strapping to the rightat the rear.Fig. 7Check of sealTo obtain the maximum seal efficiency, the notches(Fig. 8) have to be cut (interlock) properly into the straps(check regulary). If these notches are not correctely cut,replace die and die plate (see chapter 6.6).1 mm (.039")20Fig. 810.00/WE
<strong>ORGAPACK</strong> CH 436 PREVENTIVE AND CORRECTIVE MAINENANCE6.1 CLEANING AND LUBRICATING546In the event of severe soiling it is recommendedto clean the tool regularly (daily). Thefollowing parts in particular should be kept clean:– Punching tools (9/3)– Tension wheel (9/1)– Toothed plate (9/2)This is best performed by blowing out with compressedair (wear goggles).Fig. 9321Apply a few drops of normal machine oil weekly to:– Eccentric unit (9/6) on sealing lever– Pressure roll (9/5)– Bore (9/4) in housingThis will considerably prolong the service life of thetool and the force required for sealing is also substantiallyreduced.6.2 SETTING THE CUTTING DEPTHThe setting of the cutting depth must correspondto the thickness of the relevant strap.If set incorrectly, the sealing strength can be reduced.21– Release locknut 10/1).– Set adjusting screw (10/2) with screwdriver.Turning adjusting screw clockwise increases cuttingdepth.Turning adjusting screw anticlockwise decreasescutting depth.Set cutting depth so that the lower strap is nottouched during cutting.– Tighten locknut.Fig. 1010.00/WE21
<strong>ORGAPACK</strong> CH 436.3 SETTING CLEARANCE BETWEEN TENSIONWHEEL AND TOOTHED PLATEThe tension wheel and toothed plate must nottouch (damage the teeth). If the spacing istoo great, the strap slips through before the finaltension is reached.1– Remove set screw (11/1) with socket-headspanner.– Set the set screw underneath with a screwdriver sothat the clearance between tension wheel andtoothed plate is between 0.15 (.006") and 0.2 mm(.008"). Turning clockwise increases the clearance,turning counter clockwise reduces the clearance.– Screw in and tighten set screw (11/1).– Check clearance, reset if necessary.Fig. 116.4 REPLACING TENSION WHEELIf the tension wheel spins before the requiredstrap tension is reached, the wheel must bereplaced (precondition: clearance set correctly, seechapter 6.3).12Removal– Release cylinder screw (12/14) and remove strapguide pawl (12/12) with hub (12/13).– Release set screw (12/2) and remove shaft (12/1).– Remove compression spring (12/10) and rocker(12/5).– Remove retaining ring (12/9), disk (12/8) and link(12/11).– Press pawls (12/4) and draw out tension lever shaft(12/3). Remove disk (12/7) and tension wheel (12/6)and replace tension wheel.Installation– Install the parts in revers order.Fig. 1214121311981076534Before inserting the tension lever shaft (12/3)check that the compression springs of thepawls (12/4) are positioned correctly. Press pawls andinsert tension lever shaft. Clamp pawls with tensionlever shaft and insert tension wheel with disk. The 45°chamfer of the tension wheel must be outside.– Secure all screws with Loctite 243.– Set clearance between tension wheel and toothedplate (see chapter 6.3).2210.00/WE
<strong>ORGAPACK</strong> CH 436.5 REPLACING TOOTHED PLATEIf the lower strap is no longer held duringtensioning, the teeth of the toothed plate areworn. The toothed plate must be replaced.1Removal– Remove rocker (13/1) (see chapter 6.4).– Remove cylinder screw (13/2) and safety wire(13/3).– Push out toothed plate (13/5) and shim (13/4) frombelow. Replace toothed plate.– Clean bore in base-plate.Fig. 135432Installation– Install the parts in reverse order.Insert shim (13/4) so that the rounded side ison top. Secure cylinder screw (13/2) withLoctite 243 and tighten slightly.– Set clearance between tension wheel and toothedplate (see chapter 6.3).6.6 REPLACING DIE, DIE PLATE AND KNIFEFig. 14918762534If the seal is no longer properly notched (sealdoes not grip, cut not clean), the die, the dieplate and the knife must be checked and replaced ifnecessary.Removal– Remove cylinder screw (14/5).– Set sealing lever to initial position and removeretaining ring (14/4).– Draw die support (14/2) from housing.– Remove countersunk screw (14/3) and press die(14/6) from die support. Clean die support.– Tilt sealing lever to rear and draw sealing block(14/9) carefully from housing.– Release two cylinder screws (14/7) and remove dieplate (14/8).– Remove knife (14/1). Clean and grease sealingblock.– Replace die, die plate and knife.Installation– Install the parts in reverse order.– Secure all screws with Loctite 243.– Set cutting depth after assembly (see chapter 6.2).– Set clearance between tension wheel and toothedplate (see chapter 6.3).10.00/WE23
<strong>ORGAPACK</strong> CH 437 PARTS LIST 1178.300.000/11When ordering please indicate part number and quantity Explosion drawing see page 26* Recommended spare partsPos. Part no Part name Quantity*1 1173.700.156 Housing, incl. pos. 2 12 1935.514.150 Radial-slide bearing, ø 14/16 x 15 234 1173.740.001 Strap stop front 13 mm ( 1 / 2”) 14 1173.750.001 Strap stop front16, 19 mm ( 5 / 8”, 3 / 4”) 15 1173.740.006 Strap stop rear 13 mm ( 1 / 2”) 15 1173.750.006 Strap stop rear 16 mm ( 5 / 8”) 15 1173.760.006 Strap stop rear 19 mm ( 3 / 4”) 167 1911.905.122 Counter sunk screw, M 5 x 12 18 1911.005.168 Cylinder screw, M 5 x 16 19* 10 1820.040.080 Tooth plate 111 1820.020.181 Shim 112 1830.000.287 Safety wire 11314 1910.008.309 Set screw, M 8 x 30 115 1916.008.055 Nut, M 8/0.5 d 116 1910.805.058 Cylinder screw, M 5 x 5 117 1831.031.001 Rocker complete, 1incl. pos. 18, 19, 30, 5318 1933.820.160 Needle bushing, ø 20/26 x 16 119 1933.716.120 Needle bushing, ø 16/22 x 12 120 1173.700.008 Tension shaft 1* 21 1821.040.003 Tension wheel 122 1923.316.042 Key, ø 16 x 4 123 1820.050.076 Pawl short 124 1820.050.077 Pawl long 125 1820.010.010 Compression spring 226 1820.030.322 Bolt 127 1173.700.011 Cover plate 128 1820.030.325 Shaft 129 1820.010.159 Compression spring 130 1921.404.181 Spiral pin, ø 4 x 18 231 1910.505.102 Set screw, M 5 x 10 1323334 1820.080.015 Tension lever complete,incl. Pos. 37 1353637 1820.080.051 Knob, violet 238* 39 1820.050.078 Tension pawl 12440 1820.010.061 Compression spring 141 1820.030.074 Bolt 142 1920.209.102 External retaining ring, ø 9 243 1820.040.060 Blocking wheel 144 1830.000.062 Key 145 1917.401.165 Spacer, ø 16/28 x 0.5 2Pos. Part no Part name Quantity46 1920.216.102 External retaining ring, ø 16 24748 1173.740.004 Strap guide pawl 13 mm ( 1 / 2”) 148 1173.750.004 Strap guide pawl 16 mm ( 5 / 8”) 148 1173.760.004 Strap guide pawl 19 mm ( 3 / 4”) 148 1831.042.001 Strap guide pawl 20 mm ( 3 / 4”) 149 1173.700.013 Link 150 1820.020.198 Hub 1515253 1921.603.161 Spiral pin, ø 3 x 16 15455 1911.005.128 Cylinder screw, M 5 x 12 156 1173.700.005 Die cylinder 157 1173.700.007 Pressure roll, incl. pos. 58 1* 58 1935.514.200 Radial-slide bearing, ø 14/16 x 20 1* 59 1173.700.012 Carrier 160 1820.030.324 Shaft 1* 61 1173.700.151 Knife "D", incl. pos. 62 162 1921.403.121 Spiral pin, ø 3 x 12 163 1820.030.348 Stud bolt 1* 64 1821.202.002 Die plate 13 mm ( 1 / 2”) 1* 64 1821.202.003 Die plate 16 mm, 19 mm ( 5 / 8”, 3 / 4”) 165 1910.803.088 Cylinder screw, M 3 x 8 3666768 1821.081.002 Sealing lever complete,incl. Pos. 37 16970717273 1820.030.431 Shaft 1747576777879 1920.214.102 External retaining ring, ø 14 280 1917.401.145 Spacer, ø 14/26 x 0,5 28182 1910.406.052 Set screw, M 6 x 5 18384 1921.306.160 Cylindric pin, ø 6 m6 x 16 18586 1173.740.007 Die support 13 mm ( 1 / 2”) 186 1173.760.003 Die support 16, 19 mm ( 5 / 8”, 3 / 4”) 1* 87 1173.700.147 Die 13 mm ( 1 / 2”) 1* 87 1173.700.148 Die 16, 19 mm ( 5 / 8”, 3 / 4”) 188 1173.700.153 Back up hook 13 mm ( 1 / 2”) 188 1173.700.154 Back up hook 16, 19 mm ( 5 / 8”, 3 / 4”) 110.00/WE
<strong>ORGAPACK</strong> CH 43Pos. Part no Part name Quantity89 1911.005.108 Cylinder screw, M 5 x 10 190 1173.700.015 Cover plate 191 1925.210.042 Spring washer, ø 8/4.2 x 0.4 (2 x 14) 292 1173.500.073 Ejector 2* 93 1173.700.017 Cutting wire 19495 1912.503.087 Pan head screw, M 3 x 8 196 1911.703.127 Counter sunk screw, M 3 x 12 197 1920.352.202 Internal retaining ring, ø 52 198 1821.027.003 Stop screw 199 1921.604.121 Spiral pin, ø 4 x 12 3100 1922.103.121 Ridged pin, ø 3 x 12 1101102 1820.090.066 Name plate 110.00/WE25
43446837**4241462295*9937**34209092792 x 148015148210119848*3030253940314217871009391847*2127*16*121027327 24807923262918281945468652153496596*59575845 485055*9789*99885663*619962606465** LOCTITE 222 ** LOCTITE 480CH 43 1178.300.000/6 15.04.00 Ba/ja26 10.00/WE


