Innotek IUC-5100 Manual - Dog Fence
Innotek IUC-5100 Manual - Dog Fence
Innotek IUC-5100 Manual - Dog Fence

Create successful ePaper yourself
Turn your PDF publications into a flip-book with our unique Google optimized e-Paper software.
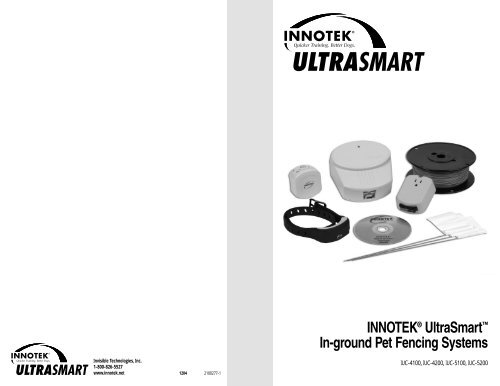
INNOTEK ® UltraSmart In-ground Pet Fencing SystemsInvisible Technologies, Inc.1-800-826-5527www.innotek.net 1204 2100277-1<strong>IUC</strong>-4100, <strong>IUC</strong>-4200, <strong>IUC</strong>-<strong>5100</strong>, <strong>IUC</strong>-5200
About Your INNOTEK ® UltraSmart In-Ground Pet Fencing SystemDiscover what a difference an in-ground fencing system can make. You’ll discoverthe ease and convenience of keeping your dog safe in your yard without the structureand expense of traditional fencing.Lightning Protection is an important part of your system.This module is connected between the loop wire and thetransmitter. Without lightning protection, a lightning strikewithin 1-2 miles of your installation can surge throughloop wire or AC power and may damage your transmitter.Lightning protection is included in <strong>IUC</strong>-4200, <strong>IUC</strong>-<strong>5100</strong>,and <strong>IUC</strong>-5200, and many other INNOTEK ® fencing systems.Lightning protection module is also available as aseparate purchase; call us at 1-800-826-5527.Quick Start GuideStep 1 Design Your <strong>Fence</strong>INNOTEK ® UltraSmart In-ground Pet Fencing SystemsFollow Page Numbers For Detailed InstructionsHave the local utility companies mark your underground lines; inmost communities this is a free service. On a sheet of paper, sketchyour house and yard. Draw a line around your property that representsthe containment area for your dog, avoiding undergroundutility lines. Where it is not possible to avoid utility lines, run yourwire perpendicular to the underground lines.<strong>IUC</strong>-4100, <strong>IUC</strong>-4200, <strong>IUC</strong>-<strong>5100</strong>, <strong>IUC</strong>-5200Boundary Wire90˚10’Page 510’Buried CableCollar Charging Station plugs into any 110v AC walloutlet. The collar fits in the cradle and charges the collarin just 2-3 hours. It’s an attractive unit designed foruse in your home.Boundary Wire is burial grade and rugged for virtuallyany ground conditions. You’ll lay the wire about 3-inches deep. Twisting the boundary wire creates areasin your yard that the dog can safely pass over. PretwistedFasTrak is included in <strong>IUC</strong>-4200, <strong>IUC</strong>-<strong>5100</strong>,<strong>IUC</strong>-5200 and many other <strong>Innotek</strong> fencing systems.The Wall-mount transmitter controls the fencing field.Mount it indoors, with field wires passing through the walland buried in the ground. You set controls to adjust thesize of the fencing field, strength of correction, and more.Step 2 Install the Wall-mount transmitterLocate the transmitter indoors on an exterior wall near an AC poweroutlet; inside a garage or basement is ideal. The containment twistedwire will need to run from the transmitter and pass through a windowor small drilled hole to the outdoors.Step 3 Lay Out the <strong>Fence</strong> WirePage 6ABOUT ZONESYour dog’s collar will also work with the Zones system, indoor avoidance to keep your dogs awayfrom things in your home. See page 9.Run the containment wire around the property as outlined in your plan. Usegradual rounded corners with wide radiuses. Avoid sharp (90°) angles.Page 6The UltraSmart Collar has been designed by professionalsto offer optimal training stimulation in a sleek,low profile design. The collar is packed with featuresincluding PerfectFit , an indication that the collar is fittedproperly to your dog.Step 4 Final ConnectionsSplice each end of your pet fencing loop wires to the twisted wire.Youmust use the supplied waterproof splices. Connect the lead ends ofthe twisted wire to the wall mount transmitter. Plug in the AC Adapterand connect it to the transmitter. Turn the transmitter ON. The transmitter’sgreen light should illuminate, indicating a successful continuousloop.Boundary WireSpliceTo wall-mount transmitterPage 7You MUST chargecollar for 3 hours priorto first use.Important: Never leave the collar on the dogfor more than 12 consecutive hours.See “Important Advice”, page 3.1
Quick Start Guide (continued)Step 5 Charge CollarStep 6 Test Your <strong>Fence</strong>Step 7 Bury <strong>Fence</strong> WireStep 8 Train Your <strong>Dog</strong>Choose a location close to a door that you and your dog use regularlyand plug in the wall charger. Position the collar in the charging cradle.The collar fits in the cradle with the collar light to your left andwith the contacts that touch your dog’s skin facing down.The collar’slight glows red while charging, green when charging is complete.1. Field WidthAdjustment ControlWatch the training DVD and follow the training steps outlined in the separateTraining and Troubleshooting Guide. Your dog may show good initial response tothe training; be sure to follow the training procedure for several weeks.The conveniencethat your new fence offers plus the added safety for your dog and familyare well worth the time invested.<strong>IUC</strong>-4100, <strong>IUC</strong>-4200, <strong>IUC</strong>-<strong>5100</strong>, <strong>IUC</strong>-5200collar lightSet the FIELD WIDTH ADJUSTMENT knobinside the transmitter to the 9 o'clock position.Hold the supplied test light across theskin contacts and walk the dog’s collar upto the fence wire. Listen for the warning tonePage 8and look for the test light to illuminate. You should receive a signal 8 to 12 feet from the wire. To increasefield width, rotate the adjustment knob clockwise.Test the collar in different places around the fenced areato verify the range is consistent.Dig a trench about 3-inches deep, using astraight-edged spade or gas-powerededger. Digging the trench at an angle helpskeep the wire in the ground where youplace it. Place training flags at edge ofPage 9selected boundary field where the warning tone is first heard, NOT at the wire.Page 8Inside Fencing FieldIMPORTANT ADVICE1. Read the complete manual and follow all directions. Ifyou have any questions, please call 1-800-826-5527.2. This device is intended for use only on dogs.Never attemptto use it for any purpose not described in this manual.3. Keep out of the reach of children.4. Never perform set-up procedures while the collar is onyour dog.5. Any collar worn for extended periods can cause a conditionsimilar to bedsores, known as PressureNecrosis. To reduce the possibility, you must do thefollowing:• Never leave the collar on the dog for more than 12consecutive hours per day.• Check the fit to prevent excessive pressure; youshould be able to insert one finger between the collarstrap and your dog’s skin.• Examine the dog’s neck daily for any signs of arash or a sore.• Wash the dog’s neck area and the probes of the collarweekly with a damp cloth.• If the condition persists beyond 24 hours, see yourveterinarian.6. Metal tags and collars should be removed as they mayinterfere with proper operation.7. Do not attempt to dismantle or repair any componentsof this system; doing so will void the warranty in full.The computerized circuitry should be serviced only byan authorized expert.8. Realize that because dogs have unique temperament,there is no way of knowing how your dog will react tothe introduction of a pet fencing system. For the safetyof your dog, a long lead should be used during initialtraining so you have control of the situation.9. If you have reason to believe that your dog may posea danger to others, harm itself, or react adversely tothe collar, do not rely solely on this product to containyour dog. If your dog shows signs of growling,snarling or biting while using the collar, stop immediately.Aggression in dogs has many causes. We recommendthat you consult a knowledgeable professionaldog trainer or animal behaviorist with experiencewith aggressive dogs if your dog has shown anyof these characteristics.10. Occasionally, a dog cannot be trained to respond to apet fencing collar. Sometimes even a properly traineddog may disobey a command. Therefore, InvisibleTechnologies, its distributors, and dealers cannotguarantee that the system will in all cases keep thecustomer’s animal from disobeying commands.WE CARE. CALL US FIRST.1-800-826-5527LIMITED LIFETIME WARRANTYInvisible Technologies warrants to the original retail purchaser,that INNOTEK ® brand products will be free from defects inmaterial and workmanship, under normal use, for a period ofone year from the date of the original retail purchase. ThisLimited Warranty excludes: accidental damage due to dogchews; lightning damage where an INNOTEK ® lightning protectioncomponent is not in use (in-ground pet fencing systems);or neglect, alteration and misuse.Invisible Technologies offers several product exchangeoptions during the warranty period. If service is required, call1-800-826-5527 to discuss the service plan that bestserves your needs. Costs are dependent on the processingtime and the desired shipping options. Please do not returnthis product to your retailer.After one year from date of original retail purchase, we willrepair, replace or upgrade your product at a fixed ratebased on the component.Invisible Technologies, Inc., shall not be liable or responsiblefor any incidental or consequential damages resultingfrom the use of the product or caused by any defect, failureor malfunction of the product, whether a claim is basedupon warranty, contract, negligence or otherwise.FREE Professional Training SupportAdditional behavior or training issues?Looking for the best way to get a well-behaved dog?Call our FREE Professional Training Support hotline at1-800-364-336262 3
For your dog’s safety, we recommend keeping the pet fencingwire at least 10-feet from the street. Keep in mind thatyou will want to place the wire where there is room for an 8-12 foot pet fencing field from the buried wire.Step 2Install the Wall-mount transmitterFront and Back Yard Loop. The most common installation.The wire is placed just inside the property line to forma square or rectangle.pet fencing signal cancelledin this areaCustomized Loops. You can create off limit areas, such aspools and gardens by encircling the area with wire. Runtwisted wire from the fence loop to the encircled area, andsplice the ends together.splicessplicesWork carefully.A nick in the wire can diminish signal strengthand create a weak area where your dog can escape.Use twisted wire to run between the transmitter and theinterior loops, such as around pools and gardens. This willallow your dog to safely pass around these areas.(Reference Custom Loop illustration.)1. Select a Location – Select an indoor, dry location tohang the wall-mount transmitter. You will need a standard110v AC grounded outlet within 5 feet to power the transmitter.Most people find an inside exterior wall of a garageor basement works well. You will need easy access to runthe pet fencing wire outside.2. Install the Mounting Plate – The mounting plate isattached to the back of the transmitter. Remove by lightlydepressing the top tab and sliding the transmitter housingup the plate. Use the mounting plate as your template andmark holes with pencil. Fasten plate with supplied screwsand wall anchors if necessary.3. Install Battery Backup Batteries – (Optional, but recommended)In the event your power goes out, your systemcan run for up to 40 hours on 8 AA batteries (not included).Install batteries and set BATTERY BACKUP MONITORswitch to the ON position. If you choose not to use the batterybackup system, set the BATTERY BACKUP MONITORswitch to OFF.4. Provide for wire access to outside – You will need toget the wire from the transmitter to outside where the petfencing loop will run. This can be done through a windowor you can drill a 1/4-inch hole at the base of the wall topass the wire through. After final installation and testing iscomplete, caulk the hole to prevent damage from moistureor insects.With the transmitter installed and the hole drilled for thewire, you can position the boundary wire that will form yourfence. DO NOT bury the wire until you are sure that the systemis functioning properly.Step 31. Amount of wireYour system includes 500 feet of boundary wire. The <strong>IUC</strong>-4200, <strong>IUC</strong>-<strong>5100</strong> and <strong>IUC</strong>-5200 include an additional 100feet of pre-twisted wire. For larger areas, boundary kitswith wire and splices, aswell as convenient pretwistedwire are availablefrom your retailer or call 1-800-826-5527. The chartbelow offers some examplesof wire coverage area.Lay Out the <strong>Fence</strong> WireAcres Linear FT Needed1 8502 12003 15004 17005 19006Front and Back Yard LoopHourglass Loop. Allows your dog to be contained in eitherthe front or back yard but not around the side of the house.When the wire runs parallel to itself as it goes toward theside of the house be sure the wires don't come within 6-feet of one another to avoid canceling the signal.Hourglass LoopDouble Loop. Confines your dog to the backyard only. Thewire needs to run around the backyard, using the house asa natural barrier and doubling back to the transmitter tofinish the complete loop. When doubling back, make surethat there is at least 6-feet between the lines to avoid cancelingthe signal.6 ft.spliceDouble LoopsplicespliceCustomized Loopssplices2. Rounding CornersUse gradual turns at the corners with a minimum of 2.5-footradius.This will produce a more consistent pet fencing field.3. Placing the wireThe wire must make a continuous loop from the transmitterand back again. The signal passes from one transmitterterminal around the loop and back to the transmitteragain. Keep in the mind that you will want an 8 to 12-footpet fencing signal field from your wire, so don't run thewire too close to the house and make passageways toonarrow for your dog to pass.4. Twisted WireTwisted wire cancels the radio signal coming from yourtransmitter. This enables your dog to cross over the wire inthe safe part of the yard. Where there is single wire, thefence is active and your dog will be unable to pass. Your kitmay have come with FasTrak pre-twisted wire or you canpurchase it as a separate kit by calling 1-800-826-5527.You can twist your own wire by cutting two equal lengthsof wire supplied and twisting them together. Anchor oneend of the wires to something secure and insert the otherend in a power drill. Pull wire taut. The drill enables you totwist the wire quickly. You will need at least 12 twists perfoot to effectively cancel the radio signal.IMPORTANT TIPSDO NOT run wire within 10 feet or parallel to cable TV,phone or electrical lines. The signals can couple together,causing inadvertent collar activation in the house and safeparts of the yard.The wire must form one continuous loop from the transmitter.7Step 4Final Connections1. Splicing to the boundary wire – Pull the twisted wire tothe perimeter location of the two ends of your boundary wireloop. Splice the ends ofthe twisted wire to theends of the boundarywire with the suppliedwaterproof splices asshown. Use only waterproof splices supplied with this system.Additional splices are available by calling 1-800-826-5527, or at www.innotek.net. Use of wire nuts alone, electricaltape or solder will not provide a waterproof and secureconnection for your system to function properly long-term.To use the gel-filled capsule splice, strip 5/8-inch of insulationfrom the wire ends. Insert ends of wire into nut andtwist to secure. Insert the wire nut as deeply as possible intothe waterproof gel and snap the lid shut. Tie a knot in thewires as shown in Quick Step #4 to avoid having the wirespull free during installation.Only two wires can go into one splice.2. Bring outside wire to transmitter – From the outside,push the twisted pair of wires through the hole in the wall.Strip about 1/2-inch of insulation from the two ends. Insertends into loop wire spring-loaded terminals marked on thetransmitter. (If using Lightning Protection, see alternatewiring described on page 8).3. Plug transmitter in – Use supplied power adapter andplug adapter into the jack provided on the transmitter. Plugthe power adapter into a 110v wall outlet. Set transmitterpower switch to the ON position. The green light should illuminateon your transmitter indicating a properly installedboundary loop. If the light does not come on, refer to theTraining and Troubleshooting Guide.Place the power cord wire under the wire retention tab ofthe housing.
BOOSTPressing the Bbutton sends a continuous signal to thecollar, raising the stimulation by 2 levels. For example, if thestimulation level is set at Level 3, a touch of the Bcontrolwill correct at Level 5 . Some trainers like instant access toa higher setting for circumstances with high distractions.ToneThe t button sounds a tone in the collar. No stimulation isdelivered when this button is pressed. The tone continuesfor as long as the button is held down. There is no stimulationdelivered by the collar when pressing the tone button.Tones can help strengthen a dog’s response to training.Tones can be used as a warning tone prior to pressing thestimulation button; or can be a reward tone when presentedwith a praise, play, or food for good behavior.The use of training tone is optional. Its use varies betweenpopular training methods. Whether the tone will meanreward or warning to your dog is up to the training methodyou choose. Remember: the one training tone CANNOT beboth a warning and a reward.To learn more about tone training, consult your veterinarianor a qualified canine training professional.Compliance with US FCC and EuropeanTelecommunications RegulationsThis INNOTEK ® Remote Training System is designed tomeet worldwide requirements for telecommunicationscompliance. This system contains both receiver and transmitterdevices. In the US, each transmitter device complieswith Part 95 and/or Part 15 of the FCC rules; each receiverdevice complies with Part 15 of the FCC rules.Each device complies with Part 15 of the FCC Rules.Operation is subject to the following two conditions: (1) thisdevice may not cause harmful interference, and (2) thisdevice must accept any interference received, includinginterference that may cause undesired operation. Eachdevice may display indications as to where this system iscompliant worldwide. Note that in some countries, the useof this INNOTEK ® Remote Training System may be limiteddue to national frequency planning requirements, and theuser is always responsible for respecting national and localrules before operating.U.S. Patent No. 6,184,790; 6,459,378; 6,327,999,6,807,720; D417,835. Other patents pending.FREE Professional Training SupportAdditional behavior or training issues? Looking forthe best way to get a well-behaved dog? Just callour FREE Professional Training Support hotline at1-800-364-3362We care. Call us first.LIMITED LIFETIME WARRANTYInvisible Technologies , Inc., warrants to the originalretail purchaser, that INNOTEK ® brand products will befree from defects in material and workmanship, undernormal use, for a period of one year from the date ofthe original retail purchase. This Limited Warrantyexcludes: accidental damage due to dog chews; lightningdamage where an INNOTEK ® lightning protectioncomponent is not in use (in-ground pet fencing systems);or neglect, alteration and misuse.Invisible Technologies offers several productexchange options during the warranty period. Ifservice is required, call 1-800-826-5527 to discussthe service plan that best serves your needs. Costsare dependent on the processing time and thedesired shipping options. Please do not return thisproduct to your retailer.After one year from date of original retail purchase,we will repair, replace or upgrade your product at afixed rate based on the component.Invisible Technologies , Inc., shall not be liable orresponsible for any incidental or consequential damagesresulting from the use of the product or causedby any defect, failure or malfunction of the product,whether a claim is based upon warranty, contract,negligence or otherwise.INNOTEK, and the INNOTEK logo are registered trademarksof Invisible Technologies, Inc. UltraSmart and theUltraSmart logo, Contain ‘N’ Train, ZONES and Instant Pet-Proofing Barriers are trademarks of Invisible Technologies,Inc. All other product and service names are the propertyof their respective owners. Patents pending.© 2004, Invisible Technologies, Inc.All rights reservedTraining Notes:Invisible Technologies, Inc.1-800-826-5527www.innotek.net