You also want an ePaper? Increase the reach of your titles
YUMPU automatically turns print PDFs into web optimized ePapers that Google loves.
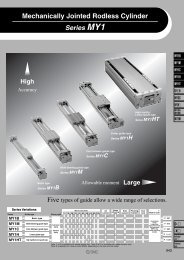
<strong>Clean</strong> <strong>Rodless</strong> <strong>Cylinder</strong>Series CYPø15, ø32CY3BCY3RCY1SCY1LCY1HCY1FCYPMagnetically coupled rodless cylinder for transfer in clean environments.1249D--XIndividual-XTechnicaldata
A magnetically coupled rodless cylinder that canbe used for transfer in clean environmentsLow particle generation: 1/20 High cleanliness is achieved with non-contactconstruction of the cylinder tube exterior and astainless steel linear guide (specially treated). Particle generation has been reduced to 1/20compared to series 12-CY3B (previous <strong>SMC</strong>product) even without vacuum suction.Particle concentration (particles/m 3 )10 510 4Class M3.5[Class100]10 310 210 1(compared to previous series)Class M1.5[Class1]Class M2.5[Class10]10 0 0.01 0.1 1 10Particle diameter (μm)Note 1) This chart indicates the level of cleanliness inside the measurement chamber.Note 2) The vertical axis shows the number of particles per unit volume (1 m 3 ) of air whichare no smaller than the particle size shown on the horizontal axis.Note 3) The gray lines show the upper concentration limit of the cleanliness class basedon Fed.Std.209E-1992.Note 4) The plots indicate the 95% upper reliability limit value for time series data up to500 thousand operation cycles. (<strong>Cylinder</strong>: CYP32-200, Workpiece weight: 5 kg,Average speed: 200 mm/s)Note 5) The data above provide a guide for selection but is not guaranteed.Piping port variations provide a highdegree of freedomPiping port positions can be selected to accommodate the installation.Nila b cLd Operating direction eRfSh g←Left Right→Non-contact constructionStainless steel linearguide (specially treated)The specially treated linear guideachieves low particulate generation,high linearity and high precision.There is no particulate generation from sliding, because theconstruction avoids contact between the cylinder tube’sexterior surface and the slide table’s interior surface.Slide table<strong>Cylinder</strong> tubeNo contactLong stroke(Max. 700 mm)Special cylinder tubeA special cylinder tube is employed usingextruded aluminum material. Even longstrokes are not subject to deflection becauseof direct attachment to the cylinder body, andnon-contact construction is achieved throughcombination with a linear guide.Shock-freeA sine cushion is used at the end of the stroke.Smooth acceleration and deceleration are possibleat 5 m/s 2 or less.Sine cushionStroke adjustment screwHigh<strong>Clean</strong> environment levelLowLightSeries12-SeriesCYP Series VariationsStandard productsLoad weightStroke adjustmentThe stroke adjustment screwallows fine control of the stroke(±1 mm on each side)HeavyCY3BCY3RCY1SCY1LCY1HCY1FCYPNote) Plugs are installed in ports other than those indicated for the model.ModelNilLRPiping port position a b c d e fOperating direction Right Left Right Left Right LeftSg hRight LeftSeries<strong>Clean</strong> room rodlessCYP12-CY3BGuide typeLinear guideBasic typeBore size (mm)6 10 15 20 25 32 40 50 63D-1250<strong>Clean</strong>ed, assembled and doublepackaged in a clean room12-CY3RDirect mount type∗ For details about series 12-, refer to the catalog, “<strong>SMC</strong> Pneumatic <strong>Clean</strong> Series.”1251-XIndividual-XTechnicaldata
Series CYPModel Selection 2Selection CalculationThe selection calculation finds the load factors (αn) of the items below, where the total (Σαn) does not exceed 1.Σ αn = α1 + α2 + α3 ≤ 1Item1. Max. load mass2. Static moment3. Dynamic momentLoad factor αnα1 = m/mmaxα2 = M/Mmaxα3 = Me/MemaxNoteReview mmmax is the maximum load massReview M1, M2, M3Mmax is the allowable momentReview Me1, Me3Memax is the allowable momentCalculation ExampleVamOperating Conditions<strong>Cylinder</strong>: CYP32Mounting: Horizontal wall mountingMaximum speed: U = 300 [mm/s]Load mass: m = 1 [kg] (excluding mass of arm section)L1 = 50 [mm]L2 = 50 [mm]L1L21. Maximumload mass2. Static momentItem Load factor αn NoteL2Guide shaft mounting surfaceBL1L1mm x gMα1 = m/mmax= 1/5= 0.20M2 = m ⋅ g ⋅ (L1 + B) ⋅ 10 –3= 1 ⋅ 9.8 ⋅ (50 + 48) ⋅ 10 –3= 0.96 [N⋅m]α2 = M2/M2 max= 0.96/4= 0.24Review m.Review M2.Since M1 & M3 are not generated,review is unnecessary.CY3BCY3RCY1SCY1LCY1HCY1FCYP3. Dynamic momentMe3WWeMe1L2AGuide central axisWe = 5 x 10 –3 m ⋅ g ⋅ U= 5 x 10 –3 ⋅ 1 ⋅ 9.8 ⋅ 300= 14.7 [N]Me3 = 1/3 ⋅ We (L2 + A) ⋅ 10 –3= 1/3 ⋅ 14.7 ⋅ (50 + 27) ⋅ 10 –3= 0.38 [N⋅m]α3 = Me3/Me3 max= 0.38/3= 0.13Review Me3.WeWL1BGuide shaftmounting surfaceMe1 = 1/3 ⋅ We ⋅ (L1 + B) ⋅ 10 –3= 1/3 ⋅ 14.7 ⋅ (50 + 48) ⋅ 10 –3= 0.48 [N⋅m]α4 = Me1 /Me1 max= 0.48/3= 0.16Review Me1.D--XΣαn = α1 + α2 + α3 + α4= 0.20 + 0.24 + 0.13 + 0.16= 0.73Σαn = 0.73 ≤ 1 Therefore it can be used.1253Individual-XTechnicaldata
Series CYPModel Selection 3Table Deflection Note)Caution on Design (2)Table deflection due topitch moment loadLFATable deflection due toroll moment loadAFTable deflection due toyaw moment loadLFGuide central axisM1 = F x LLGuide central axisM2 = F x LAM3 = F x LNote) Displacement of Section A when force acts on Section FCYP15 (M1) CYP15 (M2) CYP15 (M3)0.050.050.05Deflection (mm)0.040.030.020.01Deflection (mm)0.040.030.020.01Deflection (mm)0.040.030.020.010 0.1 0.2 0.30 0.1 0.2 0.300.1 0.2 0.3Moment (N⋅m) Moment (N⋅m) Moment (N⋅m)CYP32 (M1) CYP32 (M2) CYP32 (M3)0.050.050.05Deflection (mm)0.040.030.020.01Deflection (mm)0.040.030.020.01Deflection (mm)0.040.030.020.0100.5 1 1.5 200.5 1 1.5 200.5 1 1.5 2Moment (N⋅m) Moment (N⋅m) Moment (N⋅m)Note) Extend lines in the graphs to indicate amount of deflection when moments larger than the above are applied.Vertical OperationWhen using in vertical operation, prevention ofworkpiece dropping due to breaking of themagnetic coupling should be considered. Theallowable load mass and maximum operatingpressure should be as shown in the tablebelow.When the cylinder is mounted vertically orsideling, a slider may move downwards due tothe self-weight or workpiece mass. If anaccurate stopping position is required at thestroke end or the middle of stroke, use anexternal stopper to secure the accuratepositioning.ModelCYP15CYP32Allowableload massmv (kg)15Maximumoperating pressurePv (MPa)0.3Intermediate StopThe cushion effect (smooth start-up, soft stop) exists only before the stroke end in the stroke rangesindicated in the table below.The cushion effect (smooth start-up, soft stop) cannot be obtained in an intermediate stop or returnfrom an intermediate stop using an external stopper, etc.When using an intermediate stop considering the above information, implement measures to preventparticulate generation and set the operating pressure to no more than 0.3 MPa.Cushion StrokeModelCYP15CYP32Stroke(mm)25301254
<strong>Clean</strong> <strong>Rodless</strong> <strong>Cylinder</strong>Series CYPø15, ø32How to OrderCYP 15200Y7BW<strong>Clean</strong> room rodless cylinder1532Bore size15 mm32 mmStandard strokeBore size (mm) Standard stroke (mm)100, 150, 200, 250, 300, 35015, 32400, 450, 500, 600, 700Note 1) Please consult with <strong>SMC</strong> if the maximumstroke is exceeded.Note 2) Intermediate strokes are available as aspecial order.Number of auto switchesNil 2 pcs.S 1 pc.n “n” pcs.Auto switchNil Without auto switch (Built-in magnet)For the applicable auto switch model, referto the table below.Piping port locationNilLRSabcdefghPiping Port LocaitionOperating direction: RightOperating direction: LeftOperating direction: RightOperating direction: LeftOperating direction: RightOperating direction: LeftOperating direction: RightOperating direction: LeftNilL R Sa b c d Operating direction e f h g←Left Right→CY3BCY3RCY1SCY1LCY1HCY1FCYPNote) Plugs are installed in ports other than those indicated for the model.Applicable Auto SwitchTypeSolid stateswitchReed switchSpecialfunction—Diagnosticindication(2-colorindication)—ElectricalentryGrommetGrommet∗ Lead wire length symbols: 0.5 m ········· Nil (Example) Y7BW3 m ········· L Y7BWL5 m ········· Z Y7BWZ∗∗ Auto switches marked with a “” symbol are produced upon receipt of order.IndicatorLoad voltage Auto switch model Lead wire length (mm) ∗Wiring(Output)Electrical entry directionlightDC AC0.5 3 5Perpendicular In-line (Nil) (L) (Z)3-wire (NPN)Y69A Y59A5 V, 12 V3-wire (PNP)Y7PV Y7PYes2-wire12 VY69B Y59B24 V—3-wire (NPN)Y7NWV Y7NW5 V, 12 V3-wire (PNP)Y7PWV Y7PW2-wire12 VY7BWV Y7BW3-wire — 5 V — — Z76Yes12 V 100 V — Z732-wire 24 VNo5 V, 12 V 100 V or less — Z80• Refer to pages 1328 and 1329 for the details of auto switches with a pre-wired connector.• Normally closed (NC = b contact) solid state auto switches (D-Y7G/Y7H types) are also available. Refer to page 1292 for details.∗ Auto switches are shipped together, (but not assembled).Pre-wiredconnectorApplicable loadIC circuit—IC circuit—IC circuit—IC circuitRelay,PLC—Relay,PLC1255D--XIndividual-XTechnicaldata
Series CYPSpecificationsFluid Note 1)Bore size (mm)15 32Air/Inert gasActionProof pressureOperating pressure rangeAmbient and fluid temperaturePiston speed (Max.) Note 2)LubricationStroke adjustmentCushionDouble acting0.5MPa0.05 to 0.3MPa–10 to 60°C50 to 300mm/sNot required (Non-lube)±1mm on each side (±2mm total)Sine cushion (Air cushion)Port sizeMagnet holding force (N)M5 x 0.859Rc (PT) 1/8268Note 1) Air is recommended for the operating environmental atmosphere and operating fluid. Whenusing other fluids and inert gas, contact <strong>SMC</strong> for the product service life since it may vary.Note 2) The piston speed above indicates the maximum speed. It takes approx. 0.5 seconds for a singleside and approx. 1 second for both sides for a sliding table to move through the cushion strokestarting from the stroke end.Mass(kg)ModelCYP15CYP321001.24.21501.44.62001.65.0Standard stroke (mm)250 300 350 400 4501.7 1.9 2.0 2.2 2.45.5 5.9 6.3 6.7 7.15002.57.56002.88.37003.29.1Theoretical OutputBore size(mm)1532Piston area(mm)176804(N)Operating pressure (MPa)0.118800.2351610.3532411256
ConstructionCYP15CYP32Component PartsNo.12345678910111213141516171819202122Description Material NoteMagnet A—Piston side yokeRolled steel plate Zinc chromatedPistonPiston sealWear ring AWear ringShaftCushion ringMagnet BExternal slider side yokeHold spacerSlide tableInsertion guide plateRound head Phillips screwMagnetSide plate ASide plate BHexagon socket head cap screwPlate APlate BCushion sealInner coverBrass/Aluminum alloyø15: Electroless nickelplated, ø32: ChromatedNBRSpecial resinSpecial resinStainless steelStainless steel/Brass ø15: Electroless nickel plated—Rolled steel Electroless nickel platedAluminum alloy Electroless nickel platedAluminum alloy Electroless nickel platedStainless steelCarbon steel Nickel plated—Aluminum alloy Electroless nickel platedAluminum alloy Electroless nickel platedChrome molybdenum steel Nickel platedAluminum alloy Clear hard anodizedAluminum alloy Clear hard anodizedNBRAluminum alloy Clear hard anodizedNo.2324252627282930313233343536373839404142434445Description Material Note<strong>Cylinder</strong> tube gasketO-ringO-ringSteel ballBumperHexagon socket head set screwHexagon socket head cap screwRound head Phillips screwHexagon socket head plugLinear guideHexagon socket head cap screwBody<strong>Cylinder</strong> tubeTube attaching bracketHexagon socket head cap screwHexagon socket head cap screwTop coverCushion seal holderBumperO-ringType C retaining ring for axisO-ringRetaining plateNBRNBRNBRCarbon steelPolyurethaneChrome molybdenum steel Nickel platedChrome molybdenum steel Nickel platedStainless steel Nickel platedChrome molybdenum steel Nickel platedStainless steelChrome molybdenum steel Nickel platedAluminum alloy Clear hard anodizedAluminum alloy Hard anodizedAluminum alloy Clear hard anodizedChrome molybdenum steel Nickel platedChrome molybdenum steel Nickel platedAluminum alloy Clear hard anodizedAluminum alloy ChromatedUrethaneCYP32 onlyNBRCarbon tool steelNBRAluminum alloy CYP15 only
Series CYPDimensionsT YKFLPAøEDepth ED4 x MMThreaddepth M4 x øLDT4 x Counterbore dia øBCounterbore depth CZZPBQWGuide central axisANE depth EKQ + StrokeZ + StrokeGStroke adjustment screw Note 3)(inner cover)ALWAPlug[P (port c)]P (port a)P (port b)Auto switchmounting grooveOperating direction0.5 Note 2) 0.5 Note 2)Left RightPlug[P (port e)]Plug[P (port g)]Plug[P (port h)]HIHHPHGHTHSHAHBHLHBHAHTHGHIInner cover Note 3)holding screwWBWARWPlug[P (port d)]TATB4 x JDepth JKTATBPlug[P (port f)]WBWAR(mm)ModelCYP15CYP32A812B9.514C5.48.6E4H96H9+0.0300+0.0300ED9.513EK46F12.525G6.58.5H4575HA19.539HB8.519HG8.519HI2339HL38.664.9HP4473.5HS2749.5HT19.539JM6 x 1M10 x 1.5JK1012K2120L6790ModelCYP15CYP32LD5.69.2LW69115MMM4 x 0.7M6 x 1M68N4.57.5PM5 x 0.8Rc (PT) 1/8PA2550PB60100Q105138QW4887R4579.5T2329TA1317TB1822W69115WA3246WB1727Y2.53.5Z ZZ118 16.5155 29Note 1) These dimension drawings indicate the case of piping port location “Nil”.Note 2) These dimensions indicate the protruding portion of the bumper.Note 3) Refer to “Specific Product Precautions” [Cushion Effect (Sine Cushion) and Stroke Adjustment] on page 1261.ModelPiping port locationOperating directionNila bRight LeftL R Sc d eRight Left Rightf g hLeft Right Left1258
<strong>Clean</strong> <strong>Rodless</strong> <strong>Cylinder</strong> Series CYPProper Auto Switch Mounting Position Detection(Detedtion at stroke end)A<strong>SMC</strong>Proper Auto Switch Mounting Position<strong>Cylinder</strong> modelAuto switchmodelD-Z7D-Z80AD-Y7WD-Y7WVD-Y5D-Y6D-Y7PD-Y7PVD-Z7D-Z80CYP1524.593.5CYP3233122Note) Adjust the auto switch after confirming the operating conditions in the actual setting.BBD-Y7WD-Y7WVD-Y5D-Y6D-Y7PD-Y7PVOperating Range<strong>Cylinder</strong> modelAuto switchmodelD-Z7D-Z80D-Y7WD-Y7WVD-Y5D-Y6D-Y7PD-Y7PVCYP156.52.5CYP329.53Note) Operating ranges are standards includinghysteresis, and are not guaranteed. (variations onthe order of ±30%)Large variations may occur depending on thesurrounding environment.Mounting of Auto SwitchWhen mounting auto switches, they should beinserted into the cylinder's auto switchinstallation groove from the direction shownin the drawing on the right. After settingin the mounting position, use a flathead watchmaker’s screwdriverto tighten the auto switchmounting screw which isincluded.CY3BCY3RCY1SCY1LCY1HCY1FCYPAuto switchAuto switch mounting screw(included with auto switch)Watchmaker’sscrewdriverNote) When tightening the auto switch mounting screw (included with the auto switch), use a watchmaker’sscrewdriver with a handle about 5 to 6 mm in diameter. The tightening torque should beapproximately 0.05 to 0.1 N⋅m.D--XIndividual-X1259Technicaldata
Series CYPSpecific Product Precautions 1Be sure to read before handing.Refer to front matters 54 and 55 for Safety Instructions and pages 3 to 11 for Actuatorand Auto Switch Precautions.CautionCautionHandling1. Open the inner package of the double packagedclean series inside a clean room or other cleanenvironment.2. Perform parts replacement and disassembly work ina clean room after exhausting compressed air in thepiping outside the clean room.Mounting1. Take care to avoid striking the cylinder tube withother objects or handling it in a way that couldcause deformation.The cylinder tube and slider units have a non-contactconstruction. For this reason, even a slight deformation orslippage of position can cause malfunction and loss ofdurability, as well as a danger of degrading the particulategeneration characteristics.2. Do not scratch or gouge the linear guide by strikingit with other objects.Since the linear guide is specially treated for maximumsuppression of particulate generation due to sliding, even aslight scratch can cause malfunction and loss of durability, aswell as a danger of degrading the particulate generationcharacteristics.3. Since the slide table is supported by precisionbearings, do not apply strong impacts or excessivemoment when mounting workpieces.The slide table may contact with the cylinder tube.4. Be sure to operate the cylinder with the plates onboth sides secured.Avoid applications in which the slide table or only one plate issecured.5. When changing the ports to be used, be sure thatunused ports are securely sealed.Take sufficient care in sealing unused ports, because if portsare not properly sealed air can leak from the ports andparticulate generation characteristics can be degraded.6. Do not loosen the bolts that fix the block of thelinear guide and slide table.The slide table may contact with the cylinder tube.7. It is recommended to place the load's center ofgravity on the cylinder linear guide.The linear guide position is off-set from the cylinder centeraxis, so it is recommended to place the load’s center of gravityon the linear guide.CautionOperation1. The maximum operating pressure for the cleanrodless cylinder is 0.3 MPa.If the maximum operating pressure of 0.3 MPa for the cleanrodless cylinder is exceeded, the magnetic coupling can bebroken, causing a danger of malfunction or degradation ofparticulate generation characteristics, etc.2. The product can be used with a direct load appliedwithin the allowable range, but careful alignment isnecessary when connecting to a load having anexternal guide mechanism.Since alignment variations increase as the stroke gets longer,use a connection method which can absorb these variationsand consider measures to control particulate generation.3. When used for vertical operation, use cautionregarding possible dropping due to separation ofthe magnetic coupling.When used for vertical operation, use caution as there is apossibility of dropping due to separation of the magneticcoupling if a load (pressure) greater than the allowable value isapplied.4. Do not operate with the magnetic coupling out ofposition.If the magnetic coupling is out of position, push the externalslider by hand (or the piston slider with air pressure) back tothe proper position at the stroke end.5. Do not supply lubrication, as this is a non-lubeproduct.The interior of the cylinder is lubricated at the factory, andlubrication with turbine oil, etc., will not satisfy the product'sspecifications.1260
Series CYPSpecific Product Precautions 2Be sure to read before handing.Refer to front matters 54 and 55 for Safety Instructions and pages 3 to 11 for Actuatorand Auto Switch Precautions.Speed AdjustmentCaution1. A throttle valve for clean room use is recommendedfor speed adjustment. (Please consult with <strong>SMC</strong>regarding equipment and methods to be used.)Speed adjustment can also be performed with a meter-in ormeter-out type speed controller for clean room use, but it maynot be possible to obtain smooth starting and stoppingoperation.Throttle Valves and Dual Speed Controllers for RecommendedSpeed Adjustment of CYP <strong>Cylinder</strong>sSeriesModelThrottle valveCYP15CYP32Metal body Elbow type 10-AS1200-M5-X216 10-AS2200-01-X214piping type In-line type 10-AS1000-M5-X214 10-AS2000-01-X209Resin bodywithOne-touchfittingWith cleanOne-touchfittingElbow type(throttle valve)Universal type(throttle valve)In-line type(throttle valve)Dual type(speed controller)Elbow type/Brass(throttle valve)Elbow type/Stainless steel 304(throttle valve)10-AS1201F-M5-04-X214 10-AS2201F-01-04-X21410-AS1201F-M5-06-X214 10-AS2201F-01-06-X21410-AS2201F-01-08-X21410-AS1301F-M5-04-X214 10-AS2301F-01-04-X21410-AS1301F-M5-06-X214 10-AS2301F-01-06-X21410-AS2301F-01-08-X21410-AS1001F-04-X214 10-AS2001F-04-X21410-AS1001F-06-X214 10-AS2001F-06-X21410-ASD230F-M5-04 10-ASD330F-01-0610-ASD230F-M5-06 10-ASD330F-01-08AS1201FPQ-M5-04-X214 AS2201FPQ-01-04-X214AS1201FPQ-M5-06-X214 AS2201FPQ-01-06-X214—AS2201FPQ-01-08-X214AS1201FPG-M5-04-X214 AS2201FPG-01-04-X214AS1201FPG-M5-06-X214 AS2201FPG-01-06-X214—AS2201FPG-01-08-X214Note 1) Refer to Back Page 10 (How to Use <strong>Clean</strong> Series) for the selection of themetal body piping type and the cylinders with a resin-body one-touchfitting.Note 2) Refer to the Pneumatic <strong>Clean</strong> Series (fittings for air line equipment) forthe fittings used for the metal body piping type.2. In the case of vertical mounting, a system with areduced pressure supply circuit installed on thedown side is recommended. (This is effectiveagainst upward starting delays and for conservationof air.)Cushion Effect (Sine Cushion) and Stroke AdjustmentCaution1. A sine cushion (smooth start, soft stop) function isincluded in the standard specifications.Due to the nature of a sine cushion, adjustment of the cushioneffect is not possible. There is no cushion needle adjustmentas in the case of conventional cushion mechanisms.2. The stroke end adjustment is a mechanism to adaptthe slide table’s stroke end position to a mechanicalstopper on other equipment, etc.(Adjustment range: Total of both sides ±2 mm) Toensure safety, perform adjustment after shutting offthe drive air, releasing the residual pressure andimplementing drop prevention measures, etc.1) Loosen the inner cover holding screw with a hexagonwrench. (When adjusting strokes, be sure to adjust afterloosening set screws. If rotating stroke adjustment screwswithout loosening them, hexagon holes for adjustmentscrews may deform and stroke adjustment cannot beperformed.)2) To match the position with a mechanical stopper on otherequipment, etc., rotate the stroke adjustment screws of theinner cover with a hexagon wrench and move the innercover back and forth in the axial direction. Approximately 1mm of adjustment is possible with one rotation. (Strokeadjustment screw rotational direction: Left rotation →+stroke, Right rotation → –stroke)3) The maximum adjustment on one side is ±1 mm. A totaladjustment of approximately ±2 mm is possible using bothsides.4) After adjusting the set stroke, tighten the inner cover holdingscrew with a hexagon wrench.Inner Cover Holding Screw Tightening Torque [N·m]and Hexagon WrenchModelCYP15CYP32Screw sizeM3 x 0.5M6 x 1Inner cover holding screwTighteningtorque0.32.45PlateHexagon wrench(Nominal size)1.53Stroke adjustment screwHexagon wrench(Nominal size)2.54CY3BCY3RCY1SCY1LCY1HCY1FCYPStroke adjustment screw(inner cover)Hexagonwrench–directionHexagonwrench+directionInner coverholding screwD--XIndividual-X1261Technicaldata
Series CYPSpecific Product Precautions 3Be sure to read before handing.Refer to front matters 54 and 55 for Safety Instructions and pages 3 to 11 for Actuatorand Auto Switch Precautions.CautionMaintenance1. Never disassemble the cylinder tube or linear guide,etc.If disassembled, the slide table may touch the outside surfaceof the cylinder tube resulting in a degradation of particulategeneration characteristics.2. <strong>Cylinder</strong> maintenance should be performed roughlyat the operating cycle of 500 thousand or operatingdistance of 400 km.Particulate Generation CharacteristicsCaution1. In order to maintain the particulate generationgrade, use operation of 500 thousand cycles ortravel distance of about 400 km as a standard.(Graph (1) below)If operation is continued beyond the recommended values,lubrication failure of the linear guide and loss of particulategeneration characteristics may occur.Graph (1)Total operation cycles (10,000)1005040302010100 200 300 400 500 700 1000Stroke (mm)Graph (2)Particle concentration (particles/m 3 )10 510 4Class M3.5[Class100]10 310 210 1Class M1.5[Class1]Class M2.5[Class10]10 00.01 0.1 1 10Particle diameter (μm)Note 1) This chart indicates the level of cleanliness inside themeasurement chamber.Note 2) The vertical axis shows the number of particles per unitvolume (1 m 3 ) of air which are no smaller than theparticle size shown on the horizontal axis.Note 3) The gray lines show the upper concentration limit of thecleanliness class based on Fed. Std. 209E-1992.Note 4) The plots indicate the 95% upper reliability limit value fortime series data up to 500 thousand operation cycles.(<strong>Cylinder</strong>: CYP32-200, Workpiece weight: 5 kg, Averagespeed: 200 mm/s)Note 5) The data above provides a guide for selection but is notguaranteed.2. When the amount of grease at the linear guide isinsufficient depending on the operating conditions,regular application of grease is recommended.In such cases, the amount of dust may temporarily increase.After operating the cylinder for a short period of time,increased dust gradually decreases.1262