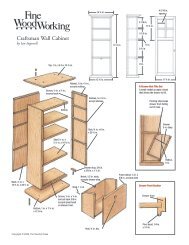
Building Doors & Drawers - The Taunton Press
Building Doors & Drawers - The Taunton Press
Building Doors & Drawers - The Taunton Press

Create successful ePaper yourself
Turn your PDF publications into a flip-book with our unique Google optimized e-Paper software.
WENJOY THIS SELECTION FROM<strong>Building</strong> <strong>Doors</strong> & <strong>Drawers</strong>ANDY RAE<strong>Building</strong>A Complete Guide to Design and ConstructionDovetailed <strong>Drawers</strong> • Utility <strong>Drawers</strong> • Cabinet <strong>Doors</strong> • Full-Size <strong>Doors</strong> • HardwareTo purchase <strong>Building</strong> <strong>Doors</strong> & <strong>Drawers</strong>,make your selection now:• ebook versionBUY NOW!• traditional versionBUY NOW!
7Fitting andFinishing <strong>Doors</strong>m Fitting <strong>Doors</strong>m Hinging <strong>Doors</strong>m Handles and Pullsm <strong>Doors</strong>topsm Catches and Latches135
to enter the case while providing an even-lookinggap all around. For most inset doors, a gap of1⁄16 in. or less is sufficient. You may think there’slittle room for error with this method, but the fittingprocess isn’t difficult if you follow the correctsteps. <strong>The</strong> key is to make adjustments using a handplane, which lets you remove material in tiny, controllableamounts.1. Start by placing two shims, equal in thicknessto the desired reveal, onto the bottom of the caseopening, then offer the door up to the case. If thedoor won’t fit into the opening at all, remove somematerial off one of the stiles, either by making arip cut on the tablesaw or with a few swipes froma hand plane. At this point, the top of the doorshouldn’t enter the case. A2. With the door sitting on the shims, check thegap along the hinge stile. Chances are the gap istapered, which means either the door or the caseisn’t perfectly square. Note the amount of taperand, at the bench, use a plane to remove the sameamount of taper, but from the appropriate area onthe bottom of the door—not its side. B Keep testfittingthe door as you plane.BPlane the bottom. Hand-plane the bottom of the dooruntil it is parallel to the bottom of the opening while thehinge stile is pressed against the side of the opening.3. When the hinge side and bottom gaps are consistent,trim the top of the door to create a gap ofabout 1 ⁄32 in. If the top and bottom edges of theopening are parallel, you can trim the door on thetablesaw, registering its bottom edge against therip fence. C Otherwise, use a handplane to cut theworksmartSmall squares of plastic laminate, cut on thetablesaw or chopsaw, make great shims for fittingdoors. Countertop laminate, which is slightly lessthan 1 ⁄16 in. thick, is perfect for most door reveals.CCut down the height. Place the bottom edge of the dooragainst the rip fence and trim about 1 ⁄32 in. from the top.Fitting <strong>Doors</strong>137
appropriate taper. Make sure the gap is consistentalong its length and equal to the gap at the bottomwhile holding the hinge stile tight against the opening.DDCheck again. Inspect the gap at the top ofthe door while holding the hinge stile tightagainst the case.4. At this point, the gaps on the sides of the doorshould need to be widened to allow for hinging.However, if you’ve started with too narrow a doorand the gap is 1 ⁄16 in. or more, skip this step and goto the next.To create clearance for the hinges, begin by rippingenough from the hinge stile to create a combinedside gap of about 1 ⁄16 in. You can do this onthe tablesaw or with a handplane, taking relativelyaggressive cuts. EClearance for hinges.Take aggressive cuts witha plane to remove about1⁄16 in. of wood on the hingestile.E138<strong>Building</strong> <strong>Doors</strong>
5. After installing the hinges (see “Hinging <strong>Doors</strong>”on p. 141), check the reveal along the non-hingedstile. Typically, the gap will still be too small at thispoint, and may exhibit a small amount of taper. FTo provide clearance, remove the door from thecase and plane a slight back-bevel onto the nonhingedstile, at the same time removing any taperand producing a consistent gap. G6. Once again, hang the door on its hinges andcheck the reveals. <strong>The</strong> fitted door should have aconsistent gap of 1 ⁄16 in. or less all the way aroundthe cabinet opening. HFStill too tight.With the door hingedto the case, check theopposite edge, notingthe amount of gap andtaper.GPlane a back-bevel. A hand-planed back-bevel of just adegree or two allows a door to close easily without its inneredge smacking the edge of the opening.HGood all around. A well-fitted door should have consistent,even reveals on all four sides.Fitting <strong>Doors</strong>139
Pre-Hinging Face FramesIf your cabinet includes face frames, you may choose to fit thedoors to the frames before attaching the frames to the case. Thissimplifies door installation because the fitting and hinging canbe comfortably done with the parts flat on a bench. However, beaware that your success depends upon stout frames made withmortise-and-tenon joinery or other strong connections that areable to resist racking.<strong>Doors</strong> before case. Oncabinets with face frames,it’s possible to fit and hingethe doors before attachingthe frame to the case, lettingyou work more comfortablyon a flat surface.140<strong>Building</strong> <strong>Doors</strong>
AKnife the outline. Use a sharp knife to scribe the hingeoutline into the work.BNo-fuss depth. Set the correct hinge mortise depth byholding a leaf up to the bit and adjusting the router untilthe tip of the cutter is level with the leaf.CTrim inside the lines. Feeding the router freehand,cut just inside the scribe lines. One hand low on the basesteadies the router as you cut.1. Position the hinge for the correct setback, thenhold it firmly and use a sharp knife to incise its outlinesinto the case or door. A2. Chuck a small straight bit into a small router (atrim router is ideal), and set the cutting depth equalto the thickness of one leaf, or a bit more if yourleaves are extra-thin. B3. Holding the router freehand, rout as close toyour scribed lines as you dare. You should be ableto get within 1 ⁄16 in. or less of the lines, since you’reremoving very little wood and there won’t be muchpull on the router. To create a uniform mortisedepth, keep the router steady without tipping it. CChisel to the shoulder lines by hand, first choppingthe ends of the mortise, and then carefully paringthe back edge. Take small cuts up to the line, thenmake a final cut with the tip of the chisel directly inyour scribed line. D5. Drill pilot holes for one of the screws in eachleaf on both the case and door. Install the hinge inthe door, then install the hinged door to the case.144<strong>Building</strong> <strong>Doors</strong>
DCut on the line. Define the shoulders of the mortiseby chiseling the ends first and then the back shoulder.Carefully pare close to the line, and then make a finalchopping cut right on the line.ETight and flush. A well-fitted, high-quality extrudedhinge sits level with the surface of the door and case, andfits snugly at the shoulders of the mortises.Check the fit. If you need to make adjustments, usethe same procedure as when installing a surfacemounthinge, driving only one set of screws beforecommitting all of them. Once you’re happy with thefit, install the remaining screws. ECup hingesAlso known as Euro hinges, cup hinges are bigpieces of relatively unattractive gear. However,they’re only visible inside the case, so they are oftenused even in high-end projects. Still, I prefer otherless obtrusive hinges, such as butt hinges or knifehinges for my best work. Cup hinges are a sensiblechoice for kitchen cabinets, where you have manydoors to hang, and where no one is going to be toofussy about the interiors. <strong>The</strong> big advantages tocup hinges is that they are easy to install and canbe simply and precisely adjusted afterward. <strong>The</strong>reare many styles to choose from, including overlay,half-overlay, and inset. You can buy cup hinges thatattach directly to a face frame or inside the case.You’ll need a 35mm cup-hinge bit (a 1 3 ⁄8 in.Forstner bit will work in a pinch) and a drill pressto drill the hinge holes in the door. Alternatively,there are commercial jigs that work with 35mmbits chucked into a handheld drill.Hinging <strong>Doors</strong>145
Holes for hinges. Use thedrill press to bore the hingeholes to the proper depth.Work against a fence thathas a rabbet at the bottomto provide chip clearance.ABSquare and center. Align the hinge square to the edgeof the door, then use a self-centering bit to drill pilot holesthrough the hinge and into the back of the door.1. Clamp a fence to the drill press table to alignthe edge of the door relative to the bit. (Check themanufacturer’s instructions for the correct setback.)Set the depth stop for the correct depth, which istypically 1 ⁄2 in. Mark centerlines on the door stile,then hold the door firmly by hand and drill on yourmark. A2. At the bench, use a square to align the hinge tothe edge of the door, and drill pilot holes for thescrews using a self-centering bit. B Drive the screwsthrough the hinge to secure it to the door.3. Hang the door by holding it in place and markingwhere the hinge’s baseplate contacts the case.Remove the baseplate from the hinge, and installit with screws to the case. If you’re using casemountedhinges on a case with a face frame, simplynail and glue support blocks to the case side tobring the baseplate flush to the case opening. C4. Once the door is hung, you can adjust the hingeprecisely to fit the door to the case. In a matter ofmoments a door can be adjusted three ways: forwardand rearward, side to side, and up and down.A Phillips-style screwdriver will work for this,146<strong>Building</strong> <strong>Doors</strong>
Block it flush. When a faceframe extends past a case sideor divider, add blocks of wood tothe case to bring the hinge’s baseplate flush to the frame.ACbut it’s best to use a specialty screwdriver madeexpressly for the screws that come with the hinge(one brand is called Posi-drive), which ensures apositive grip and avoids stripping the screws.Continuous hingesOften referred to as a piano hinge, a continuoushinge is one of the strongest you can use. In effecta long butt hinge with an uninterrupted pin andnumerous mounting screws, it works very well forlarge or extra-heavy doors. Small continuous hingescan be surface-mounted to the case and door.Larger hinges, with leaves 5 ⁄8 in. or wider, requireRabbet it right. Close the hinge with theleaves parallel, and check that your rabbetdepth equals the thickness of one leaf plus thediameter of the barrel’s pin.setting into the door to avoid a large, unsightlyreveal between the case and door.1. Instead of mortising, you cut a rabbet the fulllength of the door and install the hinge to fit. Todetermine the correct rabbet depth, close the hingeso that the leaves parallel, then measure the thicknessof one leaf plus the diameter of the barrel’s pin.Mill the rabbet to that depth. A I typically cut therabbet on the tablesaw using a dado blade, but youcould use a router equipped with a straight bit andan edge guide instead.worksmartContinuous hingescan easily be cutto custom lengthswith a hacksaw.Close the hinge,clamp it in a vise,and mark thecutline so it fallson one of thejoint lines on thebarrel. Smooth anyrough edges with afine file.Hinging <strong>Doors</strong>147
One-sided mortise.Install one leaf intothe rabbet in the dooredge, then surfacemountthe oppositeleaf to the case.2. Drill pilot holes for the screws and mount thehinge to the door by securing one leaf into the rabbet.Hang the door by surface-mounting the oppositeleaf onto the case. BBarrel hingesBarrel hinges, which are mortised into the edge ofthe door and case, are a good choice when you don’twant to see any hardware, inside or outside thecase. <strong>The</strong>y’re also great for bi-fold doors, which arehinged together in pairs (see p. 106). One variety,commonly called a Soss hinge, requires makingmultiple stepped mortises for installation, and offerslittle if any adjustment should your door need sometweaking after installation. A straight barrel hingeis much easier to install, though layout must be precisesince, like a Soss hinge, very little adjustmentis allowed. <strong>The</strong> following installation procedureBStrong but fussy.This Soss hinge willsupport heavy doorsand is quite elegant tolook at, but installationrequires making multistepmortises.ASide by side. After clamping two doors together with theirends flush, and striking a line square across both edges,use a spade bit to drill a hole for the hinge, stopping whenthe tape sweeps the shavings from the surface.148<strong>Building</strong> <strong>Doors</strong>
applies to paired doors, but the basic approach canalso be used to install a single door.1. Clamp a pair of doors together with their endsflush, and lay out the hinge location by striking aline square across the edge of the doors. For theseparticular barrel hinges, known as Italian hinges,I use a 7 ⁄16-in. spade bit whose edges I had groundand filed in order to reduce the hole diameter for abetter fit. Use a piece of tape wrapped around thebit to flag the correct depth, and drill as squarely aspossible into the edge of the door. AExpand it to fit.Install the hinge soeach barrel is levelwith the surface of thedoor, and then tightenthem in their holesby turning a screw ineach barrel.2. Install the hinge into both door edges, tappingeach barrel in flush to the surface and then tighteningthe hinge screw to expand the hinge in the hole. BBKnife hingesConsidered by many to be the Rolls-Royce of doorhinges, knife hinges add a unique touch of eleganceto any box or cabinet, providing silky-smoothaction and emanating a jewelry-like presence. <strong>The</strong>reare two styles: straight hinges for overlay doors,and offset hinges for inset doors. I prefer two-parthinges because the leaves, or blades, separate, makingfor easier installation.Two Styles of Knife HingesStraightUse for overlay doorsworksmartWhen choosing offset knife hinges, be sure tospecify right-hand hinges for doors that are hingedon the right side of the case, and left-hand hingesfor left-swinging doors.OffsetUse for inset doorsWasherHinging <strong>Doors</strong>149
APosition it with a bit. Pull the knife hinge blade inward against a drill bitthat’s half the diameter of the blade pin hole. <strong>The</strong>n scribe around the bladewith a sharp knife.1. Cut the hinge mortises in the case before assembly.You can use the same layout and routing procedureas when installing a butt hinge, as describedpreviously in this chapter.2. When fitting the door, the key is to create topand bottom reveals that equal the thickness of thehinge washer. If you get slightly out of whack andtrim the door a tad too small, you can shim underthe blades with slips of veneer or sheets of paper cutto fit. To lay out a straight hinge on a door, begin byselecting a drill bit that’s slightly larger than onehalfof the pin’s diameter, and tape it to the edge ofthe door. Slip the hinge blade onto the bit, pullingit toward the center of the door, then scribe aroundthe hinge with a knife. A Cut the mortise as you didthe case mortise.3. Screw the pin blades into their case mortise,press each mating blade onto its pin, then slide thedoor between the blades. As with butt hinges, beginby installing a single screw for each hinge, thencheck the fit of the door. Make any adjustments byBSmooth and shiny. A nicely fitted knife hinge sits flushin its mortises in the door and case, and looks like customjewelry from the outside.lengthening one or both of the door mortises witha chisel, then drive the final screws. BHandles and Pulls<strong>The</strong> finishing touch on any door is its pull. Youcan choose from a plethora of commercially availablehandles and pulls in a variety of styles andmaterials including metal, wood, and even stone.Alternatively, many woodworkers prefer to maketheir own pulls, which is a great way to personalizeyour work.Like the turned drawer pull in Chapter 3 (seep. 61), you can use the same approach for doorpulls, turning them to include a tenon that extendsthrough the stock and is wedged from behind. Oryou can carve pulls in any shape you wish, then cuta round-ended tenon and let it protrude throughthe door at the back, wedging it like you would aturned tenon.150<strong>Building</strong> <strong>Doors</strong>
Burl pullsOne of the simplest methods for attaching pulls isto screw them on from behind. To jazz up the frontof a door, consider using burled wood, which displaysoutrageous figure that’s perfect for such smallthings as pulls.1. Using a bandsaw or tablesaw, slice the burl to acomfortable thickness of about 1 ⁄2 in. Cut a gentlemiter at each end, and then sand the sawn surfacessmooth.2. Drill screw clearance holes through the door,countersinking them on the back side. <strong>The</strong>n spreadglue on the back of the pulls, and screw them to thedoor from behind.ARough but refined. <strong>The</strong>se paired pulls were sawn side by side from a single piece ofmaple burl, allowing their natural contours to complement each other.Angle one end. Atthe top of the mortise,chisel an inward slopeto accommodate theswing of the pull thatfits inside.3. A pair of burl handles work well together, especiallyif they’re sawn in sequence from the sameburl. A Be sure to sand down any sharp points orother protrusions common to burled wood so thehandles are comfortable to the touch.Sliding door pullsWhen you have one door that slides behindanother, you need a way to grasp the edge of theconcealed door. This pivoting pull provides theperfect solution.1. Before assembling the door, cut a square-endedmortise into the edge of the appropriate door stile.<strong>The</strong>n chisel a slight, undercut angle at the top endof the mortise using a mortising chisel. A An angleof about 10 degrees is sufficient.2. Mill the pull stock so it slips easily into the mortise,and shape it to fit on the bandsaw. B Be sure tocut a long miter at the back of the pull so it clearsthe rear of the mortise when pivoting during use.A3. Slip the pull into the mortise and drill throughboth the pull and door stile to accept a 1 ⁄8-in.-dia.pin. C152<strong>Building</strong> <strong>Doors</strong>
BShaped for action. Mill a piece of wood to the length of the mortise andslightly wider than its depth, then shape it on the bandsaw with a long miter atthe back of the top and a hooked area on the bottom.CDrill for a pin. Slip the finished pull into the mortisewith its outside edge parallel with the stile, and drillthrough both for a 1 ⁄8-in.-dia. pin.DDrill for a plug. Use a Forstner bit to drill a shallow holein the face of the pull, supporting the angled end of the pullwith an angled scrap.EShaped like a button. Glue in a long-grain plug (theauthor used cherry to contrast with the maple pull), andcarve it to a button shape with a chisel.4. Drill into the face of the pull near its top edge toaccept a wood plug. Support the pull with a scrappiece cut to a complementary angle. D Glue a pluginto the hole using a contrasting wood, and carve itinto a domed-shape button using a bench chisel. Eworksmart<strong>The</strong> strongest material to use for small pinsis bamboo, which has great tensile strength.Luckily, bamboo is readily available at your localsupermarket where it’s sold as skewers forgrilling, typically in diameters of 1 ⁄8 in.Handles and Pulls153
Push, then pull.Pushing on the dowelbutton extends thelower part of the pullfor finger access.FG5. Install the pull into the mortise, glue the pin inplace, then install the door. When the door is slidbehind another, the contrasting button providesa clue as to where to place a finger. F Push onthe button, and the pull pivots outward for fingeraccess. GworksmartTo prevent a door from banging against the case orclattering in use, you can apply the same cushionedbumpers that soften the closing of drawers, as shownon p. 66.<strong>Doors</strong>topsAll doors need some kind of a closing stop to preventthem from swinging inward beyond the planeof the case, and stressing the hinges. Sometimes asimple approach is all that’s needed to stop a door.Polish up a small strip of good-looking wood andnail it to the case behind the door, perhaps at thetop and the bottom. Voila! Instant doorstop.With overlay or half-overlay doors, the case itselfserves as the stop. With inset doors on cabinetswith face frames, you can inset the top and bottomcase pieces so their front edges are partially exposedwithin the frame opening to act as doorstops. Besure to conceal any raw plywood edges with edgebandingbefore assembling the case (see the drawingon the facing page). However, when that’s notfeasible due to your cabinet design, there are otheroptions for stopping doors.154<strong>Building</strong> <strong>Doors</strong>
Built-In Door StopsUpper face-frame rail,typically 1 1 ⁄2 in. wide<strong>Doors</strong>top, typically1 ⁄4 in. to 3 ⁄8 in. wideTopCabinet side1 in. to 1 1 ⁄8 in., typicalDooropeningLocate dadoes in cabinetsides so top and bottomextend into case opening.Lower face-frame railApply edge banding to topand bottom before assembly.BottomMagnet doorstopsYou can make a great doorstop using rare earthmagnets, which keep a door closed in the rightposition by magnetic attraction. Commonly availablefrom many woodworking mail order catalogs,rare earth magnets come in various diameters.Generally, a pair of 3 ⁄8-in.-dia. magnets is sufficientto pull a standard cabinet door closed. Mortise oneof the magnets into a shallow hole in the case, andanother in the top edge of the door, with a Forstnerbit, making sure the two holes are aligned with eachother. Epoxy the magnets into the holes, orientingtheir polarity for attraction. Otherwise, your doorwill never close.Magnetic attraction. Gluing a magnet into the edge ofthe door, with a corresponding magnet in the case, offersplenty of pull to keep a door secure.<strong>Doors</strong>tops155
Soft-closing stopsIf you’re using self-closing hinges, there’s a niftypiece of hardware that’s worth investigating. This“soft-closing mechanism” is a piston-like cylinderthat slowly retracts as the spring action of thehinges presses the door against it, causing the doorto close softly and silently.One type, which is available on cup hinges only,is incorporated into the hinge itself. Another varietyis a separate piece of hardware that you install nearthe non-hinged side of the door, as I’ll discuss here.ASoft action. Blum’s Blumotion soft-closing mechanism consists of a piston insidea plastic sleeve that’s housed in a metal enclosure.BDouble door device. For paired doors, install two closersonto a single block of wood, aligning the front of each devicewith the front of the block.CReady to close. Glue and nail the block to the undersideof the case, centered over the doors and flush with theback of the case rail.156<strong>Building</strong> <strong>Doors</strong>
1. <strong>The</strong> closing mechanism comes in three parts,and should be assembled before installation. <strong>The</strong>plastic piston fits into a plastic sleeve, which in turnfits into a metal housing. A2. For double-door cabinets with overhanging faceframes, screw two closers side by side onto a spacerblock whose thickness equals the frame overhang. B3. Glue and screw the block to the underside ofthe case top, so that the face of the metal housing isflush with the back of the door. C When the doorsare closed, the plastic pistons retract slowly until thedoor rests flush with the case.Wooden flipper stopsOne of the slickest types of shop-made stops is theflipper catch made famous by furniture maker JamesKrenov and his teaching staff at the College of theRedwoods in Fort Bragg, Calif. This particularcatch, designed for paired, rabbeted doors that nesttogether, features spring-loaded “flipper” catchesthat sit in shallow mortises cut in the underside ofthe case top, and exert gentle pressure on the top ofeach door to keep it closed. One of the two woodencatches incorporates a carved node that serves as abackstop for the captured door, which is closed first.<strong>The</strong> same approach works for a single door ifyou follow the procedure for making a flipper witha node for a captured door, as described on p. 158.<strong>Press</strong> the doors closed.A pair of flipper stopscreates friction againstthe tops of a nesting pairof doors when they’reclosed. <strong>The</strong> protruding nodeon the left-hand flipperserves as a backstop forthe captured door.<strong>Doors</strong>tops157
Looking inside. Turningthe case upside down andremoving the right-handflipper reveals shallowmating holes in the casemortise and flipper toaccommodate a smallspring. <strong>The</strong> flipper rockson the central screw.ABRamped at the bottom. Inset a pillow-shaped slip of woodinto a shallow case mortise beneath the doors to maintaindoor lift and a consistent reveal.1. For the first-opening door, shape a rectangularflipper to include a pillow-like raised pad at its forwardend. Cut a shallow mortise in the undersideof the case top to accept the flipper, making themortise slightly deeper than the thickness of theflipper body. Drill and countersink a screw hole inthe center of the flipper’s exposed face. Drill a flatbottomedhole into the forward section of the innerface and a corresponding hole in the case mortise toaccept a small spring. A2. For the captured door, make a similar flipper andmortise in the same fashion, but this time shape theflipper to include a raised node that will stop thedoor flush with the case.3. Install the flippers into their mortises, and drivein the screws just to the point where each flipperpresses firmly against the top of the door when it’sclosed.4. To complete the stop system, inlay a smallstrip of wood into the case bottom, straddling theunderside of both doors. <strong>The</strong> strip, which should beproud of the case by the desired amount of reveal,acts as a pressure bar to keep the doors pressedfirmly against the flippers above while maintainingan even reveal at the bottom. B158<strong>Building</strong> <strong>Doors</strong>
worksmartWhen making a stopped groove as part of a threedoorconfiguration, I typically mill the groove inthe left-hand section of the track, which favors themajority of us right-handers in the world. (No slightintended to my lefty friends.)AStop at the top. Cut the door groove an inch or so longerthan necessary, position the door, then fill the excess spacewith a wood stop block.Sliding doorstopsFor pairs of doors that slide on wooden tracks,the case sides serve as stops. But for three or moredoors, you’ll need to stop at least one of the extradoors in the middle, which can be done by simplymilling a stopped groove in the track. However, itcan be difficult to calculate the precise length of thestopped groove before installing the track. Instead,it’s easier and more accurate to mill the groove aninch or two longer than needed, and then, afterattaching the track to the case, install a woodenfiller block at the end of the groove to halt the doorexactly where you want.1. To calculate the size of the stop for the uppertrack, place the door in its grooves and position itprecisely where it needs to stop. <strong>The</strong>n measure theexcess space in the track groove and cut a block ofwood to fit. A2. Fit a stop block for the bottom track in the samemanner. You can trim each block so it sits flushwith the top of the track, or size it so it sits about1⁄8 in. proud to accentuate it. B For durability, orientboth blocks so the door bumps against end-grain,not face-grain. A couple of pins or brads are allthat’s necessary to hold the blocks in the tracks.BShow ’em off. Size sliding doorstops so they sit slightlyproud of the track for visual effect.<strong>Doors</strong>tops159
Catches and LatchesTo keep a door closed, install self-closing hinges,which are available in many styles and whichemploy springs that push the door closed. <strong>Doors</strong>with free-swinging hinges, on the other hand, needa catch mechanism.Spring-loaded catchesCaught by a ball. This bullet catch, which consists of aspring-loaded tip captured in a metal sleeve, is pressed into ahole drilled at the top of the door. A metal strike inside the caseengages the ball when the door is closed.A bullet catch is one of the simplest types of doorcatches. It consists of two parts: a bullet-shaped,spring-loaded tip that projects from a small cylindermounted in the edge of a door, and a striker platethat’s mounted on the case. Most doors fare wellwith a single catch, though you can install one inthe top and one in the bottom edge of a door forextra purchase. Installing a bullet catch is a simplematter of drilling a hole in the edge of the door,Catch ’n’ latch. Ball-and-latch catches will keep a pair ofheavy doors closed. <strong>The</strong> ball housing screwed to the undersideof the case accepts a mating tongue plate that’s screwed to theback of the door.Slide it to lock. This sliding bolt catch is mortised into theback of the door stile, and engages a small hole drilled intothe case.160<strong>Building</strong> <strong>Doors</strong>
pressing the cylinder part into the hole, and thentacking the metal strike to the case.Somewhat similar in style is the ball-and-latchcatch, a two-piece mechanism consisting of atongue plate that attaches to the back of the door,and a mating housing that attaches to the case. <strong>The</strong>housing contains a pair of spring-loaded balls thatpinch the tongue in place to hold the door closed.This mechanism provides much stronger closurethan a bullet catch, and the spring tension againstthe balls can be adjusted somewhat. <strong>The</strong> downsidesare that the tongue can be fussy to locate properly,and the latching action is noisier than other catches.However, ball-and-latch catches are a good choicefor doors that need strong closure, such as heavydoors or doors subject to stress, such as those foundon boats or other moving objects.Sliding and spinning latchesFor overlapping paired doors, you typically need toemploy a latch mechanism to secure the trappeddoor. <strong>The</strong>re are several styles of latches for thispurpose. One of the most elegant solutions is thesliding bolt latch, which is mortised into the backof the door. You drill a corresponding hole in thecase to receive the bolt. To latch the first-openingdoor, a half-mortise lock is appropriate, especiallyfor period pieces. Installation is the same as whenusing mortise locks on drawers (see p. 68).A more rustic approach to securing both doorsinvolves installing a sliding bolt or latch on onedoor, and then screwing a pivoting shop-madelatch to the face of the same door. To secure thesecond door, simply rotate the latch so it straddlesboth doors. Down and dirty perhaps, but it gets thejob done in a humble and straightforward manner.Locked to another. Half-mortise locks work very wellon paired rabbeted doors to keep the first-opening doorsecured to the captured door.Turn it to open. A hand-carved latch is attached with asingle screw that allows it to pivot vertically to open a door.Catches and Latches161
WWe hope you’ve enjoyedthis free download.<strong>The</strong>re’s so much more inthe complete book.Purchase it today!ANDY RAE<strong>Building</strong>A Complete Guide to Design and ConstructionDovetailed <strong>Drawers</strong> • Utility <strong>Drawers</strong> • Cabinet <strong>Doors</strong> • Full-Size <strong>Doors</strong> • Hardware• ebook versionBUY NOW!• traditional versionBUY NOW!