Document Capture - Manual til den klassiske klient ... - Continia
Document Capture - Manual til den klassiske klient ... - Continia
Document Capture - Manual til den klassiske klient ... - Continia

You also want an ePaper? Increase the reach of your titles
YUMPU automatically turns print PDFs into web optimized ePapers that Google loves.
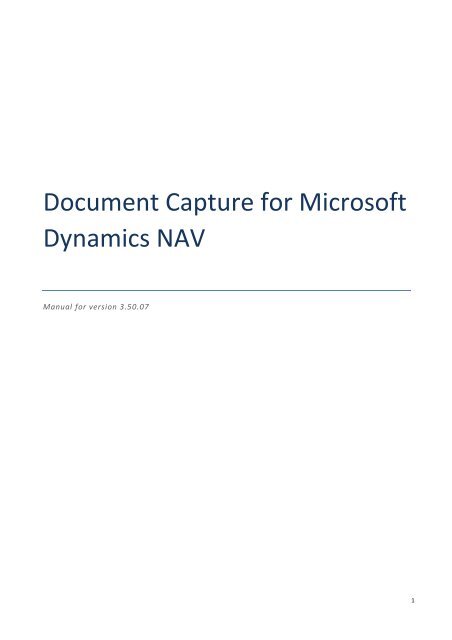
<strong>Document</strong> <strong>Capture</strong> for Microsoft<br />
Dynamics NAV<br />
<strong>Manual</strong> for version 3.50.07<br />
1
TABLE OF CONTENTS<br />
INTRODUCTION ...................................................................................................................................................................................................... 4<br />
SETUP ..................................................................................................................................................................................................................... 5<br />
INTRODUCTION .................................................................................................................................................................................................. 5<br />
GENERAL SETUP ................................................................................................................................................................................................. 6<br />
DOCUMENT CATEGORY .................................................................................................................................................................................... 13<br />
DRAG-AND-DROP ............................................................................................................................................................................................. 17<br />
TABLE FILTER FIELD .......................................................................................................................................................................................... 18<br />
SOURCE EXCLUSION ......................................................................................................................................................................................... 19<br />
IDENTIFICATION FIELD...................................................................................................................................................................................... 20<br />
CONNECTION ENDPOINT.................................................................................................................................................................................. 21<br />
TEMPLATE ........................................................................................................................................................................................................ 22<br />
SEARCH TEXT .................................................................................................................................................................................................... 29<br />
APPROVAL FLOW.............................................................................................................................................................................................. 30<br />
TEMPLATE FIELD............................................................................................................................................................................................... 31<br />
TABLE FILTER FIELD .......................................................................................................................................................................................... 39<br />
REMINDER E-MAIL SETUP ................................................................................................................................................................................ 40<br />
APPROVAL SHARING ........................................................................................................................................................................................ 41<br />
SCANNING & OCR PROCESSING ........................................................................................................................................................................... 42<br />
INTRODUCTION ................................................................................................................................................................................................ 42<br />
SCANNING ........................................................................................................................................................................................................ 43<br />
IMPORTING OCR FILE ....................................................................................................................................................................................... 44<br />
REGISTERING DOCUMENT ................................................................................................................................................................................... 45<br />
INTRODUCTION ................................................................................................................................................................................................ 45<br />
REGISTERING PURCHASE DOCUMENT.............................................................................................................................................................. 47<br />
MATCHING INVOICE TO PURCHASE RECEIPT ................................................................................................................................................... 51<br />
RECOGNIZE PURCHASE DOCUMENT LINE ........................................................................................................................................................ 53<br />
RECOGNIZE NUMBER ON DOCUMENT LINE ..................................................................................................................................................... 55<br />
APPROVAL WORKFLOW ....................................................................................................................................................................................... 56<br />
INTRODUCTION ................................................................................................................................................................................................ 56<br />
2
SENDING PURCHASE DOCUMENT FOR APPROVAL........................................................................................................................................... 57<br />
APPROVAL FLOW CODE .................................................................................................................................................................................... 59<br />
ALLOCATION ..................................................................................................................................................................................................... 60<br />
STATUS E-MAIL TO APPROVER ......................................................................................................................................................................... 61<br />
APPROVING APPROVAL REQUEST ENTRY ......................................................................................................................................................... 62<br />
ARCHIVE & DOCUMENT SEARCH ......................................................................................................................................................................... 63<br />
INTRODUCTION ................................................................................................................................................................................................ 63<br />
DOCUMENT SEARCH ........................................................................................................................................................................................ 65<br />
3
INTRODUCTION<br />
<strong>Document</strong> <strong>Capture</strong> is an add-on for Microsoft Dynamics NAV that enables you to import, recognize, register and archive documents.<br />
By using an advance template engine and document analysis, you can extract and register information from imported documents with<br />
<strong>Document</strong> <strong>Capture</strong>. For example, with a purchase invoice document you can create a purchase invoice or update a purchase order in Dynamics<br />
NAV. Afterwards, you can at any time access the imported document.<br />
<strong>Document</strong> <strong>Capture</strong> also uses an extended version of the existing approval workflow in Dynamics NAV, enhanced with extra functions and<br />
options that allows you to view and approve purchase documents electronically without the need to have the physical document at hand. At<br />
the same time, information regarding the approver of a purchase document is stored.<br />
This manual introduces the basic configurations for <strong>Document</strong> <strong>Capture</strong> to import, recognize, register and archive documents. The approval<br />
workflow and other processes associated with the electronic approval of purchase document are also included.<br />
Read the installation manual when you implement <strong>Document</strong> <strong>Capture</strong>, to understand the technical components used in <strong>Document</strong> <strong>Capture</strong>.<br />
4
SETUP<br />
INTRODUCTION<br />
When implementing <strong>Document</strong> <strong>Capture</strong> you should import the default setup file to assign the default configurations to <strong>Document</strong> <strong>Capture</strong>. As<br />
default, <strong>Document</strong> <strong>Capture</strong> processes purchase documents as well as documents registered as interaction log entries on contacts.<br />
5
GENERAL SETUP<br />
The general configurations for <strong>Document</strong> <strong>Capture</strong> are located on:<br />
<br />
Departments – Administration – Application Setup – <strong>Document</strong> <strong>Capture</strong> – Setup.<br />
You can use the default configurations for <strong>Document</strong> <strong>Capture</strong> by importing the default setup file. You need to customize the default<br />
configurations to ensure that they are applicable to the local installation. In addition, you can assign a default e-mail template for the status e-<br />
mail for approvals on:<br />
<br />
<strong>Document</strong> <strong>Capture</strong> Setup Card – Home tab – Import Template.<br />
Field name<br />
Description<br />
Company Code<br />
Unique code to separate companies in Dynamics NAV to import documents with <strong>Document</strong> <strong>Capture</strong>.<br />
Scanned File Path for OCR<br />
Directory path where scanned documents for OCR processing are stored.<br />
PDF File Path for OCR<br />
Directory path where PDF documents for OCR processing are stored. Ensure the directory path is the same<br />
in the configuration file for the <strong>Document</strong> <strong>Capture</strong> service by running Export Configurations Files.<br />
File Path for OCR-processed files<br />
Directory path where OCR processed documents are stored. This path indicates the location of the directory<br />
containing documents ready for import. Ensure the directory path is the same in the configuration file for<br />
the <strong>Document</strong> <strong>Capture</strong> service by running Export Configurations Files.<br />
TIFF File Path<br />
Directory path where the TIFF file of a document is stored when you import a document.<br />
PDF File Path<br />
Directory path where the PDF file of a document is stored when you import a document.<br />
E-mail File Path<br />
Directory path where the e-mail file of a document is stored when you import a document.<br />
6
Miscellaneous File Path<br />
Directory path where a document imported by using the Drag-and-Drop functionality is stored.<br />
Disk File Directory Structure<br />
Directory structure for storing the TIFF and PDF files of a document. If you change this setting, <strong>Document</strong><br />
<strong>Capture</strong> moves the existing files to the new structure. You can choose the following options:<br />
<br />
One Directory<br />
<strong>Document</strong> <strong>Capture</strong> stores all document files of a document category in a company in a single directory.<br />
<br />
Year\Month<br />
<strong>Document</strong> <strong>Capture</strong> creates directories and stores document files according to year and month determined<br />
on the date when the document is imported.<br />
<br />
Year\Month\Day<br />
<strong>Document</strong> <strong>Capture</strong> creates directories and stores document files according to year, month and day<br />
determined on the date when the document is imported.<br />
Include Company Code<br />
Include Company code in the directory paths to separate company directories from each other.<br />
Use TIFF-Form for Approval<br />
Use an enhanced page for purchase documents to show purchase documents in <strong>Document</strong> <strong>Capture</strong> instead<br />
of the default Dynamics NAV page.<br />
Fill-out LCY<br />
Assign a LCY (Local Currency Code) to the purchase documents created. Disable this field if LCY does not<br />
exist as a currency in Dynamics NAV and instead left blanked.<br />
Approval Administrator Role ID<br />
Role of the administrators of the approval workflow. By default, Dynamics NAV only allows a single<br />
administrator for the approval workflow. <strong>Document</strong> <strong>Capture</strong> provides the option to have several by using a<br />
role instead.<br />
SMTP require Secure SSL/TLS<br />
Enable if SMTP needs a secure SSL/TLS. You can provide additional information regarding e-mail connections<br />
on the SMTP Mail Setup accessed on<br />
<br />
<strong>Document</strong> <strong>Capture</strong> Setup Card – Home tab – SMTP Setup.<br />
Sender E-mail<br />
Sender e-mail address when sending status e-mails to approvers.<br />
Sender Name<br />
Sender name when sending status e-mails to approvers.<br />
Error E-mail<br />
E-mail address to receive e-mail if an error occurs when sending e-mail to approvers.<br />
7
Field name<br />
Description<br />
<strong>Document</strong> Nos.<br />
Number series for assigning numbers to documents.<br />
Template Nos.<br />
Number series for assigning numbers to templates.<br />
Purch. Allocation Nos.<br />
Number series for assigning numbers to purchase allocations.<br />
Barcode Nos.<br />
Number series for assigning numbers to barcodes.<br />
Field name<br />
Description<br />
Approval E-mail Subject<br />
Subject when sending status e-mails to approvers.<br />
Recreate Approval Hierarchy on<br />
Forward<br />
When you forward a purchase document, <strong>Document</strong> <strong>Capture</strong> recreates the approval hierarchy based on<br />
the assigned purchaser or approver.<br />
8
Always Req. Full Amt. Approval<br />
Require full amount approval from each approver before releasing the purchase document, or proceeds to<br />
the next approver. This hinders approvers from approving only parts, or no parts, of the total amount.<br />
<strong>Document</strong> <strong>Capture</strong> checks the complete approval of both amount excl. VAT and amount incl. VAT.<br />
Check Dimensions on Approval<br />
Check the dimensions specified on the purchase document line of the chosen G/L account, item, fixed asset<br />
or item (Charge) are valid. <strong>Document</strong> <strong>Capture</strong> checks the dimensions during approval instead of when<br />
posting the document.<br />
Archive <strong>Document</strong> on Approval<br />
Every time a purchase document is approved the document is stored with the default purchase archiving<br />
functionality in Dynamics NAV.<br />
Auto. Post Purch. Allocation<br />
Automatically create and post purchase allocations for purchase document before sent for approval.<br />
Purch. Alloc. Amounts<br />
Chooses the amounts when creating purchase allocations. You can choose the following options:<br />
<br />
Use Lines or Imported Amounts<br />
<strong>Document</strong> <strong>Capture</strong> uses the purchase lines to retrieves the allocated amount. If no purchase lines exist,<br />
the imported amounts are used.<br />
<br />
Always use Imported Amounts<br />
<strong>Document</strong> <strong>Capture</strong> uses the imported amounts to retrieves the allocated amount.<br />
Purch. Alloc. G/L Account No.<br />
G/L account to post purchase allocations when allocating imported amounts.<br />
Purch. Alloc. G/L Account Type<br />
Chooses the cost account when creating purchase allocations. You can choose the following options:<br />
<br />
Use Posting Setup<br />
The combination of the business posting group and the product posting group on each document line<br />
determines the cost account for the purchase allocation. The posting setup of the purchase allocation<br />
account specifies the cost account.<br />
<br />
Use Source Account<br />
If the type on the <strong>Document</strong> lines is G/L account, <strong>Document</strong> <strong>Capture</strong> assigns the G/L account as purchase<br />
allocation account. When the type on the document lines are different from G/L account, The posting setup<br />
of the purchase allocation account specifies the cost account.<br />
Purch. Alloc. Source Code<br />
Source code assigned on purchase allocation entries.<br />
Server Name<br />
<strong>Document</strong> <strong>Capture</strong> needs the server name when the client for approval is equal to RoleTailored.<br />
Server Port<br />
<strong>Document</strong> <strong>Capture</strong> needs the server port when the client for approval is equal to RoleTailored.<br />
Server Instance<br />
<strong>Document</strong> <strong>Capture</strong> needs the server instance when the client for approval is equal to RoleTailored.<br />
9
Approval NAV Client<br />
Chooses the client when generating the link to Dynamics NAV in approval e-mails sent to approvers.<br />
Although, if the approvers are web users a link to the web approval is sent. You can choose the following<br />
options:<br />
<br />
Classic<br />
Use the Classic client to approve documents<br />
<br />
RoleTailored<br />
Use the RoleTailored client to approve documents.<br />
Field name<br />
Description<br />
Enable Web Approval<br />
Enable web approval for <strong>Document</strong> <strong>Capture</strong>.<br />
Web Site Url<br />
URL address for web approval page linked in the e-mails sent to approvers.<br />
No. of Shortcut Items<br />
Number of elements shown on shortcut lists such as G/L account, dimensions, jobs etc.<br />
Default Language Code<br />
Language code for approval comments when forwarding purchase document.<br />
Maintain User Specific Doc.<br />
Search<br />
Enable maintenance of specific document searches in the web approval. Works in combination with the<br />
<strong>Document</strong> Search in the web user setup, which specify whether all or only own documents are searched.<br />
An own document is a document the user has been part of the approval flow.<br />
10
Show in Historical <strong>Document</strong>s<br />
Choose the documents to show in Historical <strong>Document</strong>s in web approval. You can choose the following<br />
options:<br />
<br />
Only Posted <strong>Document</strong>s<br />
Show only posted documents.<br />
<br />
Posted and Un-posted <strong>Document</strong>s<br />
Show posted documents and un-posted documents approved, rejected or forwarded.<br />
Default User Language Name<br />
Localization name of the default language according to personal preferences. You need to configure the<br />
web approval correctly and specify a valid web site URL.<br />
Default Time Zone<br />
Name of the default time zone according to personal preferences. You need to configure the web approval<br />
correctly and specify a valid web site URL.<br />
Default User Formatting<br />
Localization name of the default formatting according to personal preferences. You need to configure the<br />
web approval correctly and specify a valid web site URL.<br />
Hash Validation Key<br />
Hash value for encrypting and validating passwords. You need to use the same key for all database<br />
companies since the key is not editable.<br />
Show Amounts in LCY<br />
Choose when to show total amounts on documents in LCY in the web approval. You can choose the<br />
following options:<br />
<br />
Never<br />
Show total amounts with the currency of the document.<br />
<br />
Always<br />
Show total amounts both in the currency of the document and LCY, even if they are the same.<br />
<br />
If different from the Purchase Currency<br />
Show total amounts in the currency of document and LCY if they are different.<br />
Show Type<br />
View and choose the type on the lines in the Web Approval or else you can only add new lines of type G/L<br />
account in the Web Approval.<br />
Show Posting Account Name<br />
Show the account name of the G/L account, fixed asset or item on the lines in the Web Approval.<br />
Show FA Posting Type<br />
Show the posting type of the fixed asset on the lines in the Web Approval.<br />
Show Description 2<br />
Show the second description on the lines in the Web Approval.<br />
Show Prod. Posting Group<br />
Show the product posting group on the lines in the Web Approval.<br />
Show VAT Prod Group<br />
Show the VAT product posting group on the lines in the Web Approval.<br />
11
Show Unit of Measure<br />
Show the unit of measure on the lines in the Web Approval.<br />
Show Line Discount Pct.<br />
Show the line discount on the lines in the Web Approval.<br />
Show Job No.<br />
Show the job on the lines in the Web Approval.<br />
Show Job Task No.<br />
Show the job task on the lines in the Web Approval.<br />
Dimension & Job<br />
Placement<br />
Fields<br />
Choose where to show job, job task and web dimensions on the lines in the Web Approval. You can choose<br />
the following options:<br />
<br />
Before Quantity<br />
Show the dimension fields before the quantity field on the lines.<br />
• After Amount<br />
Show the dimension fields after the amount field on the lines.<br />
Field name<br />
Description<br />
Dimension 1 Code (Header) ><br />
Dimension 8 Code (Header)<br />
Dimension to show on the header in the Web Approval.<br />
Dimension 1 Code (Lines) ><br />
Dimension 8 Code (Lines)<br />
Dimension to show on the lines in the Web Approval.<br />
12
DOCUMENT CATEGORY<br />
You can categorize documents into groups with document categories. For example, purchase documents into a group and job documents into<br />
another group. <strong>Document</strong> categories contain templates specifying fields registered when recognizing documents. For example, invoice No.,<br />
due date and amount for the purchase documents and sender, receipt date, and job No. for job documents. The default configurations contain<br />
a document category for purchase documents, as well as documents registered as interaction log entries on contacts.<br />
The document categories are located on:<br />
<br />
Departments – Administration – Application Setup – <strong>Document</strong> <strong>Capture</strong> – <strong>Document</strong> Categories.<br />
You can configure the OCR engine from a document category on how to process documents and which language the OCR engine should enable<br />
and capture. Once you have finished configuring a document category you export the configurations to the <strong>Document</strong> <strong>Capture</strong> service by<br />
exporting the configuration files on:<br />
<br />
Departments – Administration – Application Setup – <strong>Document</strong> <strong>Capture</strong> – Export Configuration Files.<br />
Field name<br />
Description<br />
Code<br />
Unique code for the document category with a length of up to 10 characters.<br />
Description<br />
Description of the document category, with a length of up to 10 characters.<br />
Source Table No.<br />
Table to which the documents of the document category belong. For example, if you want to register<br />
documents to vendor then choose the vendor table.<br />
Source Field No.<br />
Field in the source table linking the record in the source table to the document.<br />
Source Field No. (Name)<br />
Field in the source table revealing the record linked to the document.<br />
13
No. of Source Table Filter Fields<br />
Number of filters assigned to the source table, edited with the Lookup button.<br />
No. of Excluded Sources<br />
Number of excluded sources from the source table, edited with the Lookup button.<br />
No. of I<strong>den</strong>tification Fields<br />
Number of i<strong>den</strong>tification fields, edited with the Lookup button.<br />
Destination Header Table No.<br />
Table destination for fields in the document header. For example, you can choose to transfer specific<br />
document header fields to a purchase document header by choosing the corresponding table.<br />
Destination Line Table No.<br />
Table destination for fields in the document lines. For example, you can choose to transfer specific<br />
document line fields to purchase document lines by choosing the corresponding table.<br />
Scanning Allowed<br />
Allow scanning of documents to the document category.<br />
Allow Drag-and-Drop<br />
Enable Drag-and-Drop functionality to the document category.<br />
Process New Files Automatically<br />
Automatically process documents imported by linking it to a record and recognizing the document fields.<br />
Register <strong>Document</strong>s<br />
Automatically<br />
Automatically register documents after recognizing them.<br />
Register without Template<br />
Register documents without requiring a template linked to them.<br />
No. of Templates<br />
Number of templates to the document category.<br />
No. of <strong>Document</strong>s<br />
Number of open documents belonging to the document category.<br />
No. of Registered <strong>Document</strong>s<br />
Number of registered documents belonging to the document category.<br />
No. of Rejected <strong>Document</strong>s<br />
Number of rejected documents belonging to the document category.<br />
14
Field name<br />
Description<br />
Process Scanned Files<br />
Process documents scanned with the OCR engine else you disable the OCR engine to work with the<br />
document category and a configuration file is not exported.<br />
Process PDF Files<br />
Process documents stored as PDF files by the OCR engine else you disable the OCR engine to work with<br />
the document category and a configuration file is not exported.<br />
Export PDF File<br />
Choose how to treat PDF files after being OCR processed. You can choose the following options:<br />
<br />
No<br />
Does not store the PDF file of an imported document.<br />
<br />
Yes - Keep Existing Or Create New<br />
Store the PDF file of an imported document, and creates a PDF file when scanning documents.<br />
<br />
Yes - Always Create New<br />
Creates and stores a new OCR processed PDF file of an imported document, and creates a PDF file when<br />
scanning documents.<br />
You need to export the configuration files when changing this setting.<br />
PDF format<br />
Format of PDF files created when OCR processing. Read more about PDF formats at:<br />
<br />
http://en.wikipedia.org/wiki/PDF/A<br />
You need to export the configuration files when changing this setting.<br />
PDF Quality<br />
Quality of PDF files created in connection with OCR processing.<br />
You need to export the configuration files when changing this setting.<br />
15
You can configure the languages enabled in the OCR engine when processing documents. You only enable languages used in the main parts of<br />
the documents. You need to export the configuration files when changing this list.<br />
Field name<br />
Description<br />
Connection Endpoint<br />
Connection endpoint to download documents of the document category.<br />
You need to export the configuration files when changing this setting.<br />
Archive E-mails on <strong>Document</strong><br />
Archive the e-mail of the document to the e-mail file path specified on the <strong>Document</strong> <strong>Capture</strong> setup.<br />
Field name<br />
Description<br />
Reopen <strong>Document</strong><br />
Codeunit to reopen registered documents, else you cannot reopen registered document.<br />
16
DRAG-AND-DROP<br />
You can drag and drop documents onto a page with the Drag-and-Drop functionality. The field Allow Drag-and-Drop on the document category<br />
enables the functionality to the table of the document category, and you need to enhance a page with a document drop box. If several<br />
document categories have the same source table and the field Allow Drag-and-Drop enabled then you need to choose the document category<br />
when you drop a file onto an enhanced page. By default, <strong>Document</strong> <strong>Capture</strong> only provides the Drag-and-Drop functionality for the vendor and<br />
vendor list pages. With some development, you can easily enable the Drag-and-Drop functionality to other pages as well.<br />
17
TABLE FILTER FIELD<br />
You can apply filters to fields of the source table of a document category to limit the records assigned to documents. The filter shown on the<br />
image below limits the range from 10000 to 40000 of the vendor table, and then you can only use vendors within this range.<br />
Field name<br />
Description<br />
No.<br />
Field number in the source table.<br />
Field Caption<br />
Field caption in the source table.<br />
Filter<br />
Filter applied to the corresponding field.<br />
18
SOURCE EXCLUSION<br />
You can exclude records in the source table of the document category by adding them to the Source Exclusion list, and then you cannot assign<br />
the records as source ID to documents. The source exclusion shown on the image below excludes the vendor with No. 1000 when <strong>Document</strong><br />
<strong>Capture</strong> searches for a vendor of a document.<br />
Field name<br />
Description<br />
Source ID<br />
The ID of the source to excluded from the sources of the source table.<br />
Field Caption<br />
The name of the source excluded from the source table of the document category.<br />
19
IDENTIFICATION FIELD<br />
You can specify fields from the source table to search for in a document when <strong>Document</strong> <strong>Capture</strong> searches for the source ID of a document. If<br />
several records on a table contain field values found on a document then <strong>Document</strong> <strong>Capture</strong> links the record that matches the most. For<br />
example, you assign the vendor table as a source table to a document category and you assign the field Name as an i<strong>den</strong>tification field with a<br />
rating of 3. When you import a document, <strong>Document</strong> <strong>Capture</strong> finds two possible vendors to link as source ID (Company 1 Ltd. and Enterprise<br />
1 Ltd.) since both company contain the text part Ltd. found in the document. <strong>Document</strong> <strong>Capture</strong> multiplies the length of the matching field<br />
value with the rating of the i<strong>den</strong>tification field, and then sums result of all i<strong>den</strong>tification fields. Since there is only one i<strong>den</strong>tification field and<br />
the second company has a longer Name, <strong>Document</strong> <strong>Capture</strong> links the second company as the source ID. You need to assign i<strong>den</strong>tification fields<br />
that are either rare or unique, and assign higher ratings to i<strong>den</strong>tification fields that are unique, such as the VAT registration No. for vendors.<br />
<strong>Document</strong> <strong>Capture</strong> either assigns the vendor with the highest matching points as the source ID or none if the total is below 15.<br />
Field name<br />
Description<br />
Field No.<br />
Field number in the source table containing the field value searched for in the document.<br />
Field Caption<br />
Field caption in the source table containing the field value searched for in the document.<br />
Rating<br />
The number to multiply with the field value length when <strong>Document</strong> <strong>Capture</strong> finds a match.<br />
20
CONNECTION ENDPOINT<br />
You can configure a connection endpoint to a document category, specifying from which e-mail account to download documents. You need to<br />
export the configuration files when changing these settings.<br />
The document categories are located on:<br />
<br />
Departments – Administration – Application Setup – <strong>Document</strong> <strong>Capture</strong> – Connection Endpoint.<br />
Field name<br />
Description<br />
Code<br />
Unique code of the connection endpoint, with a length of up to 10 characters.<br />
Description<br />
Description of the connection endpoint, with a length of up to 30 characters.<br />
Protocol<br />
Protocol used when connecting to the connection endpoint.<br />
Server Address<br />
Server address used when connecting to the connection endpoint.<br />
Protocol Port<br />
Protocol port used when connecting to the server. The protocol port is usually 993 with an SSL connection<br />
and 143 without SSL.<br />
Username<br />
User name <strong>Document</strong> <strong>Capture</strong> uses when connecting to the connection endpoint.<br />
Password<br />
Password to <strong>Document</strong> <strong>Capture</strong> uses when connecting to the connection endpoint.<br />
Delete After Download<br />
Delete e-mails after downloading documents from the server.<br />
21
TEMPLATE<br />
You can create templates that belong to specific records of a source table, for example to a vendor. When you import a document that belongs<br />
to the record, <strong>Document</strong> <strong>Capture</strong> links it to the template. You can configure templates on how to recognize and process documents, as well as<br />
assign rules and checks to values retrieved. This helps you to ensure that <strong>Document</strong> <strong>Capture</strong> processes documents correctly before you register<br />
them. With templates, you can also instruct <strong>Document</strong> <strong>Capture</strong> how to proceed after you register a document. For example, <strong>Document</strong> <strong>Capture</strong><br />
can create a purchase invoice, purchase credit memo, or an interaction entry. When you import a document for a record that does not have a<br />
template, <strong>Document</strong> <strong>Capture</strong> ask you if you would like to create a template for it by copying the default template of the document category.<br />
There are three types of templates:<br />
<br />
<br />
<br />
I<strong>den</strong>tification templates: When you import a document the i<strong>den</strong>tification template of the document category searches and links a<br />
record in the source table to the document. You only assign a single i<strong>den</strong>tification template to a document category.<br />
Master templates: <strong>Document</strong> <strong>Capture</strong> creates source templates by creating a copy of the master template. If <strong>Document</strong> <strong>Capture</strong><br />
finds several master templates for a document category, you to choose the master template to copy.<br />
Source templates: Templates belonging to specific records of a source table, for example a vendor. <strong>Document</strong> <strong>Capture</strong> uses source<br />
templates to recognize, validate and register documents.<br />
The templates are located on:<br />
<br />
Departments – Administration – Application Setup – <strong>Document</strong> <strong>Capture</strong> – Templates.<br />
Field name<br />
Description<br />
No.<br />
Number of the template that you insert either manually or automatically with the number series<br />
configurations. You need to assign the field manually to i<strong>den</strong>tification and master templates. The field has<br />
a length of up to 20 characters.<br />
Source ID<br />
ID of the record in the source table linked to the template.<br />
Source Name<br />
Name of the record in the source table linked to the template.<br />
Description<br />
Description of the template, with a length of up to 30 characters<br />
22
Search Text<br />
Search Texts are specific text part searched for in documents. <strong>Document</strong> <strong>Capture</strong> links a template to a<br />
document if the document contains all its search texts. For example, for a vendor template a search text<br />
can be the vendors VAT registration number.<br />
No. of Search Texts<br />
Number of template search texts, edited with the Lookup button. A document needs to contain all search<br />
texts to link it to a template via search texts.<br />
Default<br />
Enable template as default template for the source ID.<br />
Language Code<br />
Language of which dates on linked documents are written in.<br />
Date Format<br />
Date format used for recognized dates on linked documents.<br />
Recognize Lines<br />
Recognize lines when processing documents<br />
First Table Line Has Captions<br />
Specifies that the first line of the captured lines is a caption line.<br />
Show <strong>Document</strong> After Register<br />
Choose how to show documents after registration. You can choose the following options:<br />
<br />
Ask<br />
<strong>Document</strong> <strong>Capture</strong> shows a message asking you if to show the newly created document.<br />
<br />
Always<br />
Show the newly created document.<br />
<br />
Never<br />
Do not show the newly created document.<br />
Interaction Template Code<br />
The interaction template used when creating interaction log entries.<br />
23
Field name<br />
Description<br />
Invoice Reg. Step 1<br />
Choose the first step after you register a purchase document as a purchase invoice. You can choose the<br />
following options:<br />
<br />
[NONE]<br />
Nothing will happen.<br />
<br />
Create Invoice<br />
Create a purchase invoice, without matching it to a purchase order. You can s<strong>til</strong>l match the purchase invoice<br />
to a purchase order afterwards.<br />
<br />
Match Order & Create Invoice<br />
Create a purchase invoice, matching it to a purchase order. <strong>Document</strong> <strong>Capture</strong> will ask if you want to create a<br />
purchase invoice with the document instead, if there is no match.<br />
<br />
Match & Update Order<br />
Match the document to a purchase order and update the purchase order with the following fields populated:<br />
<strong>Document</strong> Date, Due Date, Vendor Invoice No., Qty. to Invoice, and amounts on the lines, etc.. <strong>Document</strong><br />
<strong>Capture</strong> will ask if you want to create a purchase invoice with the document instead, if there is no match.<br />
Invoice Reg. Step 2<br />
Choose the second step after you register a purchase document as a purchase invoice. You can choose the<br />
following options:<br />
<br />
[NONE]<br />
Nothing will happen.<br />
<br />
Submit for Approval<br />
24
Submit the purchase invoice for approval.<br />
<br />
Release<br />
Release the purchase invoice.<br />
<br />
Post<br />
Post the purchase invoice.<br />
Credit Memo Reg. Step 1<br />
Choose the first step after you register a purchase document as a purchase credit memo. You can choose the<br />
following options:<br />
<br />
[NONE]<br />
Nothing will happen.<br />
<br />
Create Credit Memo<br />
Create a purchase credit memo, without matching it to a purchase return order. You can s<strong>til</strong>l match the<br />
purchase credit memo to a purchase return order afterwards.<br />
<br />
Match Return Order & Create Credit Memo<br />
Create a purchase credit memo, matching it to a purchase return order. <strong>Document</strong> <strong>Capture</strong> will ask if you want<br />
to create a purchase credit memo with the document instead, if there is no match.<br />
<br />
Match & Update Return Order<br />
Match the document to a return order and update the return order with the following fields populated:<br />
<strong>Document</strong> Date, Due Date, Vendor Cr. Memo No., Qty. to Invoice, and amounts on the lines, etc.. <strong>Document</strong><br />
<strong>Capture</strong> will ask if you want to create a purchase credit memo with the document instead, if there is no match.<br />
Credit Memo Reg. Step 2<br />
Choose the second step after you register a purchase document as a purchase credit memo. You can choose<br />
the following options:<br />
<br />
[NONE]<br />
Nothing will happen.<br />
<br />
Submit for Approval<br />
Submit the purchase credit memo for approval.<br />
<br />
Release<br />
Release the purchase credit memo.<br />
<br />
Post<br />
Post the purchase credit memo.<br />
Prices Including VAT<br />
Create purchase documents with prices including VAT.<br />
Allow Register w/o Amounts<br />
Register documents with no amounts assigned. You can use this field when the G/L account of the documents<br />
is unknown, then you can s<strong>til</strong>l send the purchase document for approval without purchase lines and let the<br />
approvers enter the correct G/L accounts and dimensions.<br />
25
Always Use Vend. Purch. Code<br />
<strong>Document</strong> <strong>Capture</strong> chooses the purchaser from the vendor of a purchase document, even if the document<br />
contains another.<br />
Validate VAT Calculation<br />
Validate the VAT calculation when registering a purchase document. <strong>Document</strong> <strong>Capture</strong> checks if the amount<br />
excl. VAT and the VAT amount equals to the amount incl. VAT, and only allows you to register documents with<br />
a valid calculation.<br />
Validate Line Totals<br />
Validate the amount of all recognized lines against the field amount excl. VAT. <strong>Document</strong> <strong>Capture</strong> only allows<br />
you to register documents with a valid calculation.<br />
Approval Flow Code<br />
Approval flow code linked to the template, containing the list of approvers assigned to purchase documents.<br />
Line Total Header<br />
Formula<br />
Formula validated against the total lines amount. You can create the formula from several template fields with<br />
the data type equal to Number, which you can use from the Lookup button, and, or constant number values.<br />
You can apply operators such as * / + -<br />
Purch.<br />
Validation<br />
Amount<br />
Approval<br />
Choose the checks to apply to amount fields when approving purchase documents. You can choose the<br />
following options:<br />
<br />
<br />
<br />
<br />
Amount Excl. VAT and Amount Incl. VAT must match imported amounts<br />
Only Amount Incl. VAT must match imported amounts<br />
Only Amount Excl. VAT must match imported amounts<br />
No match required<br />
Auto Match<br />
Match purchase document to purchase orders.<br />
Allowed Variance Amount<br />
Amount difference allowed when automatically matching to purchase orders and purchase return orders.<br />
<strong>Document</strong> <strong>Capture</strong> accepts an automatic match, even if there is a discrepancy between the amount on the<br />
document and a purchase order or a purchase return order.<br />
Variance Posting Account<br />
G/L account used by <strong>Document</strong> <strong>Capture</strong> to post any allowed amount differences.<br />
Auto Approve within Variance<br />
Automatically approve a purchase document if it matches with a purchase order or a purchase return order<br />
within the allowed amount difference.<br />
Match Order No.<br />
Choose whether to match on order No. when matching with a purchase receipt. You can choose the following<br />
options:<br />
<br />
No<br />
<strong>Document</strong> <strong>Capture</strong> does not match on order No.<br />
<br />
Yes – always<br />
<strong>Document</strong> <strong>Capture</strong> always matches on order No.<br />
<br />
Yes - if present<br />
<strong>Document</strong> <strong>Capture</strong> matches on order No., and if there is none then it does not match.<br />
26
Match Account No<br />
Choose whether to match on account No. when matching with a purchase receipt. You need to map the<br />
vendor’s item to an internal account No. You can choose the following options:<br />
<br />
No<br />
<strong>Document</strong> <strong>Capture</strong> does not match on account No.<br />
<br />
Yes – always<br />
<strong>Document</strong> <strong>Capture</strong> always matches on account No.<br />
<br />
Yes - if present<br />
<strong>Document</strong> <strong>Capture</strong> matches on account No., and if there is none then it does not match.<br />
Match Quantity<br />
Choose whether to match on quantity when matching with a purchase receipt. You can choose the following<br />
options:<br />
<br />
No<br />
<strong>Document</strong> <strong>Capture</strong> does not match on quantity.<br />
<br />
Yes – always<br />
<strong>Document</strong> <strong>Capture</strong> always matches on quantity.<br />
<br />
Yes - if present<br />
<strong>Document</strong> <strong>Capture</strong> matches on quantity, and if there is none then it does not match.<br />
Match Unit Cost<br />
Choose whether to match on unit cost when matching with a purchase receipt. You can choose the following<br />
options:<br />
<br />
No<br />
<strong>Document</strong> <strong>Capture</strong> does not match on unit cost.<br />
<br />
Yes – always<br />
<strong>Document</strong> <strong>Capture</strong> always matches on unit cost.<br />
<br />
Yes - if present<br />
<strong>Document</strong> <strong>Capture</strong> matches on unit cost, and if there is none then it does not match.<br />
27
Field name<br />
Description<br />
Codeunit ID: Line <strong>Capture</strong><br />
Choose the Codeunit to run when capturing lines and recognizing fields of a document. By default, you can<br />
choose between two Codeunits for purchase documents:<br />
<br />
6085582: Generic Line <strong>Capture</strong><br />
<strong>Document</strong> capture searches for a caption line in a document and registers all lines below.<br />
<br />
6085716: Purch. Doc. - Line <strong>Capture</strong><br />
<strong>Document</strong> capture searches for a caption line in a document and registers all lines below with a unit price.<br />
Codeunit ID: After <strong>Capture</strong><br />
Codeunit to run after capturing lines and recognizing fields of a document but before showing the captured<br />
values.<br />
Codeunit ID: Line Validation<br />
Codeunit to run to validate template field values of captured lines and recognized fields of a document.<br />
Codeunit ID: Doc. Validation<br />
Codeunit to run to check if a document is valid for registration.<br />
Codeunit ID: Register<br />
Codeunit to run when registering a document automatically.<br />
Codeunit ID: Register (Yes/No)<br />
Codeunit to run when registering a document manually.<br />
Codeunit ID: After Step 1<br />
Codeunit to run after performing the first registration step.<br />
Codeunit ID: After Step 2<br />
Codeunit to run after performing the second registration step.<br />
Codeunit ID: Transl. (Doc)<br />
Codeunit to run to show template translations of a <strong>Document</strong>.<br />
Codeunit ID: Transl. (Templ.)<br />
Codeunit to run to show template translations of a template.<br />
Codeunit ID: Show Match<br />
Codeunit to run when showing manually matched lines of a document.<br />
28
SEARCH TEXT<br />
You can link documents to a template by adding text parts to search for in the document on the search texts list. <strong>Document</strong> <strong>Capture</strong> only<br />
assigns the same source ID of a template to a document if it finds all search texts are of the template in the document. Therefore, you only add<br />
search texts that are unique to the source ID.<br />
Field name<br />
Description<br />
Search Text<br />
The text part to search for in the document.<br />
29
APPROVAL FLOW<br />
You can assign an approval flow to a template that contains a list of approvers to approve a purchase document. When you run the function<br />
Send Approval Request then <strong>Document</strong> <strong>Capture</strong> creates invoice approval entries to all of the approvers of the approval flow. Approval flows<br />
are serial flows, meaning that all approvers belonging to an approval flow can approve their approval requests at any time.<br />
The approval flows are located on:<br />
<br />
Departments – Administration – Application Setup – <strong>Document</strong> <strong>Capture</strong> – Approval Flows.<br />
To add approvers to an approval flow choose approvers on:<br />
<br />
Approval Flows card – Home tab – Approvers.<br />
Field name<br />
Description<br />
Code<br />
Unique code of the approval flow assigned to templates and purchase documents.<br />
Description<br />
Description of the approval flow.<br />
No. of Approvers<br />
Number of approvers in the approval flow.<br />
30
TEMPLATE FIELD<br />
You can create fields to capture and rules and code on how to validate field values for documents, either as required or optional, with template<br />
fields. A required template field is a field that needs to have a value before you can register the document.<br />
The template fields are located on:<br />
<br />
Template Card – Fields section.<br />
Field name<br />
Description<br />
Type<br />
Choose the type of the template field. You can choose the following options:<br />
<br />
Header<br />
Shown on the document header.<br />
<br />
Line<br />
Shown on the document lines.<br />
Code<br />
Unique code for the template field. For example, <strong>Document</strong> <strong>Capture</strong> transfers the<br />
invoice no. of a purchase document from the value of the template field with the fixed<br />
code DOCNO. You can create custom codes with lengths of up to 20 characters.<br />
Contact your Dynamics NAV partner for further information.<br />
Sort Order<br />
Sorting order determining the position <strong>Document</strong> <strong>Capture</strong> shows the template fields<br />
on the document card and the document journal.<br />
Field Name<br />
Name that <strong>Document</strong> <strong>Capture</strong> shows for the template field on the document card and<br />
the document journal.<br />
To configure further details use the template field page located on:<br />
<br />
Template Card – Fields section – Card.<br />
31
Field name<br />
Description<br />
Field Name<br />
Name that <strong>Document</strong> <strong>Capture</strong> shows for the template field on the document card and the document journal.<br />
1. Caption First caption <strong>Document</strong> <strong>Capture</strong> searches for when trying to find the value of the template field. You can add<br />
several captions in the captions section.<br />
1. Rule First rule <strong>Document</strong> <strong>Capture</strong> uses for when checking the value found for the template field. You can add<br />
several rules in the rules section<br />
Formula<br />
Formula to calculate the field value of the template field. You can only apply formulas to field values for<br />
template fields in the document header.<br />
If you assign the data type equal to Number, you can construct the formula with other template fields with<br />
data type equal to Number, or with constant number values, and applying operators such as * / + -<br />
If you assign the data type equal to Text, you can use all template fields in the formula, regardless of their data<br />
type, and fixed letters, text parts and numbers can be directly included in the formula. <strong>Document</strong> <strong>Capture</strong><br />
does not calculate the field value and instead uses the field values of the template fields in the formula.<br />
32
Required<br />
Requires that documents have the field value assigned for you to register.<br />
Search for Value<br />
Search for the field value of the template field when you recognize fields.<br />
Fixed Value<br />
Fixed value assigned to the field value of all documents.<br />
Validation Dateformula From<br />
Validation date formula for template fields with data type equal to Date, calculated from today’s date and<br />
smaller than the date on the document.<br />
Validation Dateformula To<br />
Validation date formula for template fields with data type equal to Date, calculated from today’s date and<br />
larger than the date on the document.<br />
Insert on new Templates<br />
Insert the template field when <strong>Document</strong> <strong>Capture</strong> uses the template as a master template for source<br />
templates.<br />
Default Page Source<br />
Specifies the first page to search to capture field values in the document and if <strong>Document</strong> <strong>Capture</strong> does not<br />
find a field value on the specified page, it searches the rest of the document.<br />
Stop Lines Recognition<br />
Stop line recognition when the field value or caption is capture.<br />
Field Type<br />
Choose the field type of the template field. You can choose the following options:<br />
<br />
Text<br />
The template field is legible text.<br />
<br />
Barcode<br />
The template field is a barcode.<br />
Data Type<br />
Choose the data type of the template field. You can choose the following options:<br />
<br />
Text<br />
The field value can contains numbers, text and special characters.<br />
<br />
Number<br />
The field value only contains numbers.<br />
<br />
Date<br />
The field value only contains dates.<br />
<br />
Lookup<br />
The field value is a Lookup to the table assign as source table.<br />
Language Code<br />
Language code for the field value used when processing dates to know which language the months are written<br />
in.<br />
Date Format<br />
Date format used to recognize dates on documents.<br />
33
Source Table No.<br />
Source table for the template field when data type is equal to Lookup.<br />
Source Field No.<br />
Field to link the field value to the records in the source table when data type is equal to Lookup.<br />
No. Source Table Filters<br />
Number of filters applied to the source table of the template field, edited with the Lookup button.<br />
Destination Header Field No.<br />
Field in the destination header table of the document category to which <strong>Document</strong> <strong>Capture</strong> transfers the field<br />
value. <strong>Document</strong> <strong>Capture</strong> does not transfer the field value to the destination header table if the template field<br />
has Type equal to Line.<br />
Destination Line Field No.<br />
Field in the destination line table of the document category to which <strong>Document</strong> <strong>Capture</strong> transfers the field<br />
value.<br />
Make Absolute Number<br />
Convert negative numbers into absolute numbers.<br />
Decimal Places<br />
Number of decimal places on the field value if data type is equal to Number.<br />
Blank Zero<br />
Blank the field value if it is zero and data type is equal to Number.<br />
Mul<strong>til</strong>ine<br />
Enable if the field value appears on several lines in the document.<br />
Typical Field Width<br />
Specifies the typical field width used when recognizing fields.<br />
Auto Update Field Width<br />
Automatically update the typical field width to the actual field width when recognizing fields.<br />
Typical Field Height<br />
Specifies the typical field height used when recognizing fields.<br />
Auto Update Field Height<br />
Automatically update the typical field height to the actual field height when recognizing fields.<br />
Enable Rule Generation<br />
Automatically generate validation rules when <strong>Document</strong> <strong>Capture</strong> captures a field value. When <strong>Document</strong><br />
<strong>Capture</strong> validates the field value, it checks which rules comply with the field value and the first rule found<br />
remains in the list whilst deleting the other rules.<br />
If the Type is equal to Text and you change the field value, <strong>Document</strong> <strong>Capture</strong> generates a regular expression<br />
consisting of letters and numbers. Only the numerical part of the rule is variable, but with a fixed length. For<br />
example, the text INV1234567X1 creates the rule INV[0-9]{6}X[0-1]{1} meaning that the text needs to start<br />
with INV followed by 6 digits, then X followed by 1 digit<br />
Auto Update Caption<br />
Automatically update the caption of the template field after you use the template for the first time or when<br />
you choose a caption for a field value in the document.<br />
Caption Is Part Of Value<br />
Specifies if the caption is part of the value. For example, a caption for the payment ID is +71, but since the field<br />
value itself contains +71 the caption is part of the field value.<br />
Never use Global Captions<br />
When disabled, <strong>Document</strong> <strong>Capture</strong> searches for captions specified in the list on the template field of a<br />
document. If it does not find a caption then <strong>Document</strong> <strong>Capture</strong> searches for captions specified on the same<br />
template field in the master template.<br />
34
Field name<br />
Description<br />
Transfer Amount to Purch. Doc.<br />
You can specify whether the field value should be transferred to the purchase document as a purchase line<br />
during registration if the data type is Number. You can choose the following options:<br />
• If lines are not recognised<br />
The field value is only transferred if no document lines are recognised.<br />
• Always<br />
The field value is transferred regardless document lines are recognised or not<br />
Purch. Account Field Code<br />
Contains another template field of data type Number to retrieve the G/L account No. from when<br />
transferring the field value to a purchase line. It is not obligatory to created indepen<strong>den</strong>t template fields<br />
for specifying the G/L account No., but it can be helpful during registration if the field is used often.<br />
Subtract from Amount Field (on<br />
registration)<br />
Contains another template field of data type Number to subtract the field value from before the document<br />
is registered to assign the field value to one account and the rest of the field value of the specified template<br />
field to another account.<br />
This configuration can, for example, be used if you want to assign freight charge on a purchase invoice to<br />
one account and the rest of the invoice amount to another account, then the template field for freight<br />
amount you choose to subtract from is the template field for amount excl. VAT.<br />
Purch. Alloc. G/L Account No.<br />
Contains the G/L account No. used to post the field value if purchase allocations are used.<br />
35
Field name<br />
Description<br />
Rule<br />
Rule to validate the field value with and change the status of the document to OK. You construct rules with<br />
regular expression (http:ororen.wikipedia.orgorwikiorRegular_expression). For example, I[0-9]{10} means<br />
the field value needs to start with I followed by 10 digits from 0 to 9.<br />
Description<br />
Description of the rule, with a length of up to 200 characters.<br />
36
Field name<br />
Description<br />
Caption<br />
Caption searched for when recognizing fields on a document, with a length of up to 250 characters.<br />
37
Field name<br />
Description<br />
Translate From<br />
Part of the field value to replace, with a length of up to 250 characters. You can remove a space by assigning<br />
it to the field and then assigning an empty value to the Translate From field.<br />
Translate To<br />
Value to replace part of the field value with, with a length of up to 250 characters. You can replace a text<br />
part an empty value by not assigning a value to the field.<br />
Field name<br />
Description<br />
Lookup<br />
Codeunit to run when performing Lookup.<br />
<strong>Capture</strong> Value<br />
Codeunit to run to check for <strong>Document</strong> <strong>Capture</strong> to capture the field value.<br />
Is OK<br />
Codeunit to run when checking if the field value is valid and complies with all rules.<br />
Validate<br />
Codeunit to run when you change the field value, similar to the OnValidate-trigger.<br />
38
TABLE FILTER FIELD<br />
You can apply filters to fields of the source table of a template field with data type equal to Lookup to limit the available field values. For<br />
example, if the source table of a template field is equal to the job table then a fixed filter type can limit the range of jobs to choose for a<br />
document, whether manually or as a fixed value. Another example. If the source table of a template field is equal to the job task table then a<br />
document field filter type, and with the template field from the previous example as filter, can limit to the job tasks to choose for the document.<br />
Field name<br />
Description<br />
No.<br />
Field number in the source table of the template field.<br />
Field Caption<br />
Field caption in the source table of the template field.<br />
Filter Type<br />
Choose a type of filter to apply to the table filter field. You can choose the following options:<br />
<br />
Fixed Filter<br />
Apply the filter to the table filter field assigned in the column Filter.<br />
<br />
<strong>Document</strong> Field<br />
Apply the filter to apply to the table filter field from the field value in the document of the template field<br />
assigned in the column Filter.<br />
Filter<br />
Filter applied to the table filter field.<br />
39
REMINDER E-MAIL SETUP<br />
You can send reminder e-mails to approvers with purchase documents waiting for approval by creating reminder e-mails. By specifying levels<br />
for reminders, you can escalate the approval reminders, send copy to managers and specify different text in the reminder e-mails. <strong>Document</strong><br />
<strong>Capture</strong> sends reminder e-mails when running the Send Status E-mails to Approvers. <strong>Document</strong> <strong>Capture</strong> sends a single reminder e-mail per<br />
level for each purchase document and sends the next reminder e-mail when the purchase document reaches the due date of the next level.<br />
The reminder e-mail setup is located on:<br />
<br />
Departments – Administration – Application Setup – <strong>Document</strong> <strong>Capture</strong> – Reminder E-Mail Setup.<br />
Field name<br />
Description<br />
Level<br />
Level determining the sequence <strong>Document</strong> <strong>Capture</strong> sends reminder e-mails.<br />
Due Date Formula<br />
Date formula to calculate when <strong>Document</strong> <strong>Capture</strong> sends a reminder e-mail for the level by<br />
applying it to the first date sent to an approver.<br />
E-mail Subject<br />
Subject of the reminder e-mail.<br />
Send CC to Manager<br />
Choose a manager that should receive a copy of the reminder e-mail. You can choose the<br />
following options:<br />
<br />
Manager of Original Approver<br />
<strong>Document</strong> <strong>Capture</strong> sends a copy of the reminder e-mail to the manager of the original approver.<br />
<br />
Manager of Current Approver<br />
<strong>Document</strong> <strong>Capture</strong> sends a copy of the reminder e-mail to the manager of the original approver.<br />
Send CC to User ID<br />
User ID to receive a copy of the reminder e-mail.<br />
40
APPROVAL SHARING<br />
You can grant access to purchase documents waiting for approval to others than the assigned approver with approval sharing when an approver<br />
is out of office. For example, you can create a department called IT and share all its documents to approvers within the IT department.<br />
The approval sharing is located on:<br />
<br />
Departments – Administration – Application Setup – <strong>Document</strong> <strong>Capture</strong> – Approval Sharing.<br />
Field name<br />
Description<br />
Owner User ID<br />
User ID or group that is sharing documents.<br />
Owner User Name<br />
User name or group that is sharing documents.<br />
Shared to User ID<br />
User ID that can access documents.<br />
Shared to User Name<br />
User name that can access documents.<br />
Sharing Type<br />
Choose a type of sharing. You can choose the following options:<br />
<br />
Normal<br />
The approval administrator creates the approval sharing.<br />
<br />
Out of Office<br />
The approval administrator or the document approver creates the approval sharing and is used when out of<br />
the office for a period and is comparable with the Out-of-Office assistants in Outlook when on holiday or<br />
similar. <strong>Document</strong> <strong>Capture</strong> updates the allowed approvers for the invoice approval entries and temporary<br />
approvers can approve invoice approval requests from the approval entries page.<br />
Valid From<br />
From date of the period when the approval sharing is enabled.<br />
Valid To<br />
From date of the period when the approval sharing is disabled.<br />
Use Owners Limits &<br />
Permissions<br />
Enable the same limits and permissions for approval of the document owner to the temporary approver.<br />
Forward E-mails<br />
Forward approval e-mails to the temporary approver.<br />
41
SCANNING & OCR PROCESSING<br />
INTRODUCTION<br />
You need to import documents by scanning and processing PDF files into Dynamics NAV. You can receive the documents via e-mail by setting<br />
up a connection endpoint that <strong>Document</strong> <strong>Capture</strong> service uses to check and download documents. When you send an e-mail with documents<br />
attached as PDF files to the connection endpoint <strong>Document</strong> <strong>Capture</strong> service retrieves the files and prepare them for you to import them into<br />
Dynamics NAV.<br />
42
SCANNING<br />
You can sort documents you want to import into Dynamics NAV into the following pile options:<br />
<br />
Single page <strong>Document</strong>s (front)<br />
<strong>Document</strong>s consisting of a single page where <strong>Document</strong> <strong>Capture</strong> scans only the front of a page.<br />
<br />
Multi page <strong>Document</strong>s (front)<br />
<strong>Document</strong>s consisting of several pages where <strong>Document</strong> <strong>Capture</strong> scans only the front of a pages.<br />
<br />
Single page <strong>Document</strong>s (front and back)<br />
<strong>Document</strong>s consisting of a single page where <strong>Document</strong> <strong>Capture</strong> scans both the front and the back of a page.<br />
<br />
Multi page <strong>Document</strong>s (front and back)<br />
<strong>Document</strong>s consisting of several pages where <strong>Document</strong> <strong>Capture</strong> scans both the front and the back of a page.<br />
The scanning and OCR of <strong>Document</strong> <strong>Capture</strong> is located on:<br />
<br />
Departments – <strong>Document</strong> <strong>Capture</strong> – Scanning & OCR.<br />
You can import documents to document categories that allow scanning files ready for OCR and ready for import. In the Scanner field, you can<br />
specify an i<strong>den</strong>tified scanner and a document pile option.<br />
43
IMPORTING OCR FILE<br />
You can import documents after <strong>Document</strong> <strong>Capture</strong> has finished scanning and OCR processing PDF files, which occurs in the background and<br />
takes approximately five seconds per page.<br />
To import documents with files ready for import run Import Files located on:<br />
<br />
Departments – <strong>Document</strong> <strong>Capture</strong> – Scanning & OCR – Import Files.<br />
After you import documents into Dynamics NAV <strong>Document</strong> <strong>Capture</strong> shows a message confirming the amount of files imported.<br />
44
REGISTERING DOCUMENT<br />
INTRODUCTION<br />
You recognize and capture field value, and register documents on the document card and the document journal, where you also can view an<br />
image of the document. The Invoice below is an example of what the image looks like with a number of orange and blue boxes around captions<br />
and values.<br />
The document journal is located on:<br />
<br />
Departments – <strong>Document</strong> <strong>Capture</strong> – <strong>Document</strong> Journal – Edit Journal.<br />
The field captions is the text related to a field value and helps <strong>Document</strong> <strong>Capture</strong> to find the correct field value of a template field. For example,<br />
the field caption for the amount incl. VAT is equal to Total Amount and the field caption for the amount excl. VAT is equal to Sub Total.<br />
<strong>Document</strong> <strong>Capture</strong> i<strong>den</strong>tifies and encapsulates field captions with an orange box.<br />
The field value is the actual value you want to transfer or use somehow when you register a document, and the field value could be of different<br />
type, such as a text part, a date or a number. For example, the field value for the amount excl. VAT is equal to 4,500.00 and the field value for<br />
the amount incl. VAT is equal to 5,625.00. <strong>Document</strong> <strong>Capture</strong> i<strong>den</strong>tifies and encapsulates field values with a blue box.<br />
45
Every template field of a document has a field caption and a field value. The first time you import and recognize a document belonging to a<br />
source ID, <strong>Document</strong> <strong>Capture</strong> searches for the field captions from a range of the most frequently used terms for each template field. For<br />
example, to find the amount excl. VAT, <strong>Document</strong> <strong>Capture</strong> searches for the captions Amount excl. VAT, Net Amount, VAT Basis, Sub Total etc.,<br />
and if a caption is found then <strong>Document</strong> <strong>Capture</strong> searches for the field value either to the right or under the field caption. When you import a<br />
document belonging to a source ID that you have previously imported and recognized <strong>Document</strong> <strong>Capture</strong> searches for the field values by<br />
searching for the field captions and their positions from previously imported and recognized documents.<br />
You can manually correct field captions and field values i<strong>den</strong>tified and encapsulated by <strong>Document</strong> <strong>Capture</strong> by choosing the template field to<br />
correct and then encapsulate the correct parts on the image, with either the right button to mark field captions (orange) or the left mouse<br />
button to mark field values (blue).<br />
46
REGISTERING PURCHASE DOCUMENT<br />
You can register documents after the field values are recognized and considered as valid. The following section explains the process of<br />
registering purchase documents from the document journal in <strong>Document</strong> <strong>Capture</strong>, other type of documents may have a different process or<br />
conditions to be registered.<br />
The document journal is located on:<br />
<br />
Departments – <strong>Document</strong> <strong>Capture</strong> – <strong>Document</strong> Journal – Edit Journal.<br />
The document journal contains four sections used throughout the recognition and registration of the document:<br />
<br />
The list of documents (blue)<br />
The document journal shows each document on a separate line and when you choose a document from the list, <strong>Document</strong> <strong>Capture</strong><br />
updates the list of template fields and the document image.<br />
<br />
The list of template fields for of the enabled document (green)<br />
When you choose a document from the document list, <strong>Document</strong> <strong>Capture</strong> shows the template fields of the enabled document on the<br />
template field list.<br />
<br />
An image of the enabled document (red)<br />
From the image, you can i<strong>den</strong>tify and encapsulate field captions and field values.<br />
<br />
Comments of the enabled document (yellow)<br />
You can update the document comments by recognizing and validating the document.<br />
47
<strong>Document</strong> <strong>Capture</strong> has i<strong>den</strong>tified the source ID of the first document in the image (D000001) as the vendor 40000 (Lewis Home Furniture) from<br />
the VAT registration No. on the he image. Since it is the first time the vendor used as a source ID, you can verify that it is correct vendor<br />
recognizing the fields using the function Recognize Fields, and then you can create a source template for the vendor by choosing Yes on the<br />
confirmation message shown.<br />
<strong>Document</strong> <strong>Capture</strong> create a source template, updates the list of template fields on the document journal, and recognizes the field values on<br />
the document. <strong>Document</strong> <strong>Capture</strong> also changes the status of the document to OK if all the field values are valid. Before you can register a<br />
purchase document, you need to assign a G/L account to post the amount by choosing the Lookup of the template field G/L Account No. and<br />
then choosing a valid G/L Account.:<br />
You can choose to assign the G/L account as the default G/L account for the source template by choosing Yes on the confirmation message.<br />
<strong>Document</strong> <strong>Capture</strong> assigns the G/L account to all purchase documents of the source template.<br />
48
You can specify different G/L accounts used for different amounts retrieved from the document from by running the function Translations and<br />
then choosing Show Accounts for Amounts. From there you can also specify different dimension values for each purchase document line.<br />
When the status of the document is OK, you can register it by running the function Register, and then <strong>Document</strong> <strong>Capture</strong> searches the purchaser<br />
to assign the purchase document. If <strong>Document</strong> <strong>Capture</strong> does not find the purchaser, you need to choose an option on how to retrieve it.<br />
Option<br />
Explanation<br />
Select Purchaser from List<br />
<strong>Document</strong> <strong>Capture</strong> shows a list of all the purchasers where you can choose a purchaser. For subsequent<br />
purchase documents of this source ID, you again need to choose a purchaser manually.<br />
Use Purchaser from Vendor (XX)<br />
<strong>Document</strong> <strong>Capture</strong> retrieves the purchasers from the vendor. For subsequent purchase documents of this<br />
source ID, you again need to choose a purchaser manually.<br />
Always use Purchaser from<br />
Vendor (XX)<br />
<strong>Document</strong> <strong>Capture</strong> retrieves the purchasers from the vendor. For subsequent purchase documents of this<br />
source ID, <strong>Document</strong> <strong>Capture</strong> uses the same purchaser.<br />
Setup default Purchaser Code<br />
<strong>Document</strong> <strong>Capture</strong> shows a list of all the purchasers where you can choose a purchaser. For subsequent<br />
purchase documents of this source ID, <strong>Document</strong> <strong>Capture</strong> uses the same purchaser.<br />
When you complete the registration of a purchase document, <strong>Document</strong> <strong>Capture</strong> shows the newly created purchase document as registered.<br />
From the purchase document page of <strong>Document</strong> <strong>Capture</strong>, you can view the purchase document ant an image of the document and you can<br />
now approve or post.<br />
49
MATCHING INVOICE TO PURCHASE RECEIPT<br />
You can view the number of open orders of a vendor from the column No. of Purch. Orders on the document line on the document journal.<br />
51
You can match order lines with the purchase document with the field value of the template field Our Order No. <strong>Document</strong> <strong>Capture</strong> matches<br />
the purchase document with un-invoiced purchase receipt lines with the same order No. when you run the function Match Lines. The receipt<br />
matching page shows three main sections:<br />
<br />
<br />
<br />
<br />
All un-invoiced receipt lines (yellow)<br />
Recognized document lines, if any (green)<br />
An image of the document (red)<br />
<strong>Document</strong> <strong>Capture</strong> updates the matched amounts (blue) to reflect the current matched amount to the purchase receipt, making it<br />
easy for you to view the amount received compared to the amount invoiced.<br />
You can match purchase receipt lines to document lines with the function Perform Automatic Match. <strong>Document</strong> <strong>Capture</strong> transfer the uninvoiced<br />
quantity on the purchase receipt line to the document lines and to the column Total Matched Quantity if the purchase document only<br />
covers part of the purchase receipt.<br />
When you have finished matching the purchase document to purchase receipt lines and you register the document, <strong>Document</strong> <strong>Capture</strong> checks<br />
that the sum of the matched lines is the same as the total amount on the purchase document and creates a difference line if there is a<br />
difference. <strong>Document</strong> <strong>Capture</strong> uses the Variance Posting Account on the source template as the G/L account for the difference line.<br />
52
RECOGNIZE PURCHASE DOCUMENT LINE<br />
You can capture and recognize document lines and create purchase document lines when you register the purchase document. <strong>Document</strong><br />
<strong>Capture</strong> converts the vendor item number of the document line to a type you specify, such as a G/L account, vendor item, fixed asset or an<br />
item charge.<br />
<strong>Document</strong> <strong>Capture</strong> can only i<strong>den</strong>tify well-formatted document lines in the document image with field values placed in separate columns. Each<br />
column on the document lines has have their own template fields in the same way as on the header. For example, you can configure them as<br />
required, or apply rules for the field values to comply. When you recognize document lines, <strong>Document</strong> <strong>Capture</strong> applies several checks,<br />
configured on the template, to validate the document lines. For example, a check whether the sum of all document lines tallies with the amount<br />
excl. VAT of the document.<br />
You can recognize document lines from the document card located on:<br />
The document journal is located on:<br />
<br />
Departments – <strong>Document</strong> <strong>Capture</strong> – <strong>Document</strong> Journal – Edit Journal – Card.<br />
The document card contains five main sections:<br />
<br />
<br />
<br />
<br />
<br />
General document information (blue)<br />
The list of template header fields for of the document (green)<br />
An image of the document (red)<br />
The list of template line fields for of the document (black)<br />
Comments of the document (yellow)<br />
53
Before you can recognize document lines, <strong>Document</strong> <strong>Capture</strong> needs to know the position of the columns. You can specify the captions of the<br />
columns by choosing a template line field and then encapsulating the caption on the document image with the right button and then running<br />
the function Recognize Fields.<br />
<strong>Document</strong> <strong>Capture</strong> i<strong>den</strong>tifies and creates all lines in the list of document lines, from where you change field values before you register the<br />
document and create a purchase document. If there are discrepancies between quantity, unit cost, discount and amount in a document line,<br />
<strong>Document</strong> <strong>Capture</strong> does not change the status to OK and you need to correct the error before you can register the document. You can register<br />
the document by running the function Register on the document card. <strong>Document</strong> <strong>Capture</strong> creates a line for each of the document lines.<br />
54
RECOGNIZE NUMBER ON DOCUMENT LINE<br />
To register a document, recognized document lines need to be validated and set to OK. All field values of the column No. of document lines<br />
therefore need to be translated into an item, a G/L account, a fixed asset or a charge (Item). The process of translating the field value No.of a<br />
document line is sequentially performed accordingly:<br />
1. Translate using Translations in <strong>Document</strong> <strong>Capture</strong>: You can create vendor specific translation by running the function Translations<br />
on the Template menu button, either from the <strong>Document</strong> Card or the <strong>Document</strong> Journal, and then choosing Show Line Translations<br />
(see more below).<br />
2. Translate to an item with the Vendor Item No.: <strong>Document</strong> <strong>Capture</strong> matches the No. to the field Vendor Item No. on the item card.<br />
3. Translate using a cross reference of an item: <strong>Document</strong> <strong>Capture</strong> matches the No. to a cross reference of an item.<br />
4. Translate using a vendor item: <strong>Document</strong> <strong>Capture</strong> matches the No. to an item on the vendor card.<br />
Field name<br />
Description<br />
Field Description<br />
Description of the document line field.<br />
Translate From<br />
The document line No. to translate.<br />
Translate to Type<br />
<strong>Document</strong> <strong>Capture</strong> can create a line of different types, such as G/L account or item.<br />
Translate to No.<br />
The number of the type <strong>Document</strong> <strong>Capture</strong> assigns the created line.<br />
Translate to UOM Code<br />
The unit of measure of the type <strong>Document</strong> <strong>Capture</strong> assigns the created line.<br />
Translate to Variant<br />
The variant of the type <strong>Document</strong> <strong>Capture</strong> assigns the created line if the type is Item.<br />
Translate to (Text)<br />
The text of the variant <strong>Document</strong> <strong>Capture</strong> assigns the created line if the type is Item.<br />
Dimension 1<br />
Value for dimension 1 <strong>Document</strong> <strong>Capture</strong> assigns the created line.<br />
Dimension 2<br />
Value for dimension 2 <strong>Document</strong> <strong>Capture</strong> assigns the created line.<br />
55
APPROVAL WORKFLOW<br />
INTRODUCTION<br />
You can use the approval workflow in <strong>Document</strong> <strong>Capture</strong> that is an extended version of the standard approval workflow enhanced with a range<br />
of extra functions and options. The approval workflow allows you to view and approve purchase documents without the need to have the<br />
physical document at hand. <strong>Document</strong> <strong>Capture</strong> keeps a record of who approves a document and when, based on a hierarchal structure. The<br />
approval workflow in <strong>Document</strong> <strong>Capture</strong> is by default a serial flow, meaning that the first approver of purchase document needs to approve it<br />
before any subsequent approvers can approve.<br />
56
SENDING PURCHASE DOCUMENT FOR APPROVAL<br />
You can use the approval workflow in <strong>Document</strong> <strong>Capture</strong> by enabling an approval template with the type of document and assign a limit type<br />
for the hierarchical structure. You can configure approval templates from the approval templates page located on:<br />
<br />
Departments – Administration – Application Setup – <strong>Document</strong> <strong>Capture</strong> – Approval Templates.<br />
You also need to configure the hierarchal structure of the approvers, to ensure that an approver only approvers according to amount limits.<br />
You assign a hierarchal structure on the user setup page located on:<br />
<br />
Departments – Administration – Application Setup – <strong>Document</strong> <strong>Capture</strong> – User Setup.<br />
Field name<br />
Description<br />
User ID<br />
ID of the user in Dynamics NAV.<br />
Salespers. /Purch. Code<br />
Code of the sales person or the purchaser in Dynamics NAV.<br />
Name<br />
Name of the sales person or the purchaser in Dynamics NAV.<br />
Approver ID<br />
The ID of the superior user in the hierarchal structure of the approval workflow.<br />
57
Purchaser Amount Approval<br />
Limit<br />
The maximum amount <strong>Document</strong> <strong>Capture</strong> allows the user to approve.<br />
Unlimited Purchase Approval<br />
Unlimited amount <strong>Document</strong> <strong>Capture</strong> allows the user to approve.<br />
E-Mail<br />
The e-mail of the user used by <strong>Document</strong> <strong>Capture</strong> to send approval notifications.<br />
Web User<br />
If you have enabled web approval then the user can also approve through the web.<br />
Shared to this user<br />
Number of users granting this user approval permission through approval sharing.<br />
Shared to other users<br />
Number of users this user is granting approval permission through approval sharing.<br />
When you register a document and create a purchase document you can send it for approval either automatically, by configuring the template<br />
of the document, or manually, by running the function Send Approval Request located on the purchase document card. <strong>Document</strong> <strong>Capture</strong><br />
creates an approval request entry for the assigned purchaser and superiors according to the approval amount limit and updates the status of<br />
the purchase document to Pending Approval.<br />
58
APPROVAL FLOW CODE<br />
An approval flow code defines a list of approvers that are required to approve a purchase document. When you define an approval flow you<br />
can specify the approvers, and the order, that are required to approve a purchase document. You can specify the approval flow code either on<br />
the purchase document or on a document template. Any document registered with this template will automatically have the approval flow<br />
code specified on the document template. You can create and configure approval flows from the approval flow page located on:<br />
<br />
Departments – Administration – Application Setup – <strong>Document</strong> <strong>Capture</strong> – Approval Flows.<br />
Field name<br />
Description<br />
Code<br />
Code of the approval flow.<br />
Description<br />
Description of the approval flow.<br />
No. of Approvers<br />
The number of approvers that the approval flow contains.<br />
59
ALLOCATION<br />
When you send a purchase document for approval <strong>Document</strong> <strong>Capture</strong> can create and post purchase allocation entries to the G/L account<br />
assigned to the field Purch. Allow. G/L Account No. on the <strong>Document</strong> <strong>Capture</strong> setup. You can view the purchase allocation entries from the<br />
vendor page. Purchase allocation entries affects the VAT account and Dynamics NAV deducts VAT amounts even if you have not posted the<br />
purchase document, but when you post the purchase document Dynamics NAV reverses the purchase allocation entries. You can enable<br />
<strong>Document</strong> <strong>Capture</strong> to create purchase allocations account by enabling the field Auto. Post Purch. Allocations on the <strong>Document</strong> <strong>Capture</strong> setup.<br />
You can view the purchase allocation amount from the purchase document card or the vendor page, where you also can view the underlying<br />
purchase allocation entries.<br />
By default, when you reverse purchase allocation entries the reversing entries are posted on the same date as the entries they are reversing.<br />
Dynamics NAV uses the posting date of the purchase document if the posting period is closed.<br />
60
STATUS E-MAIL TO APPROVER<br />
You can send reminder e-mails to approvers when Dynamics NAV assigns approval request entries to them. If you assign five purchase<br />
documents to the same approver, you can configure <strong>Document</strong> <strong>Capture</strong> to either send a reminder e-mail for each approval request to the e-<br />
mail of the approver or group the reminders into a single e-mail. <strong>Document</strong> <strong>Capture</strong> sends reminder e-mails via an SMTP server and are<br />
therefore not visible from the Sent Items in the e-mail client.<br />
You can send reminder e-mails to approvers by using the function Send Status E-mail to Approvers located on:<br />
<br />
Departments – <strong>Document</strong> <strong>Capture</strong> – Send Status E-mail to Approvers.<br />
61
APPROVING APPROVAL REQUEST ENTRY<br />
Approvers can approve approval request entries from the purchase document page or the approval entries page.<br />
Approvers can approve approval request entries from the approval entries page located on:<br />
<br />
Departments – <strong>Document</strong> <strong>Capture</strong> – Approval Entries.<br />
From the list of Approval Entries, it is possible to directly approve, reject or forward the <strong>Document</strong>. From here it is possible to have the PDF file<br />
shown, or the purchase document by choosing Show > <strong>Document</strong>.<br />
The approval entries page contains five main sections:<br />
<br />
<br />
<br />
<br />
<br />
The approval request entries (blue)<br />
Approval comments (green)<br />
The purchase lines of each approval request entry (yellow)<br />
An image of the purchase document (red)<br />
A section with functions (black)<br />
o Approve – You can use this function to approve the approval request entry.<br />
o Reject – To reject an approval request entry you need to assign an approval comment. <strong>Document</strong> <strong>Capture</strong> changes the<br />
status of the purchase document to Open and you need to correct the issue and send it again for approval.<br />
o Forward – The approval request entry is forwarded to the approver you choose from the confirmation message.<br />
o On Hold – You put the approval request on hold.<br />
62
ARCHIVE & DOCUMENT SEARCH<br />
INTRODUCTION<br />
<strong>Document</strong> <strong>Capture</strong> archives all imported documents and you can find them in several ways, even after you register or post the documents. For<br />
example, you can find documents of posted purchase invoices running the function Navigate located on:<br />
<br />
Departments – <strong>Document</strong> <strong>Capture</strong> – Posted Invoices.<br />
You can access the document of the purchase document and the PDF file from the page Navigate.<br />
63
DOCUMENT SEARCH<br />
You can perform free search texts on all imported documents and it is not restricted to the information transferred when you register or post<br />
the purchase document. <strong>Document</strong> <strong>Capture</strong> searches through all the text parts contained in documents when you perform a document search.<br />
The document search is located on:<br />
<br />
Departments – <strong>Document</strong> <strong>Capture</strong> – <strong>Document</strong> Search.<br />
You can view the document with the function Show <strong>Document</strong> and view the PDF file with Show PDF file.<br />
65