Filling Out the I-765 Step-by Step Instructions - International Center
Filling Out the I-765 Step-by Step Instructions - International Center
Filling Out the I-765 Step-by Step Instructions - International Center

Create successful ePaper yourself
Turn your PDF publications into a flip-book with our unique Google optimized e-Paper software.
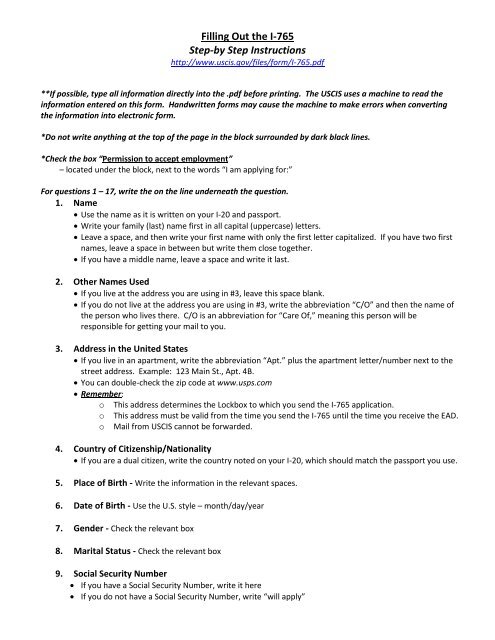
<strong>Filling</strong> <strong>Out</strong> <strong>the</strong> I-<strong>765</strong><br />
<strong>Step</strong>-<strong>by</strong> <strong>Step</strong> <strong>Instructions</strong><br />
http://www.uscis.gov/files/form/I-<strong>765</strong>.pdf<br />
**If possible, type all information directly into <strong>the</strong> .pdf before printing. The USCIS uses a machine to read <strong>the</strong><br />
information entered on this form. Handwritten forms may cause <strong>the</strong> machine to make errors when converting<br />
<strong>the</strong> information into electronic form.<br />
*Do not write anything at <strong>the</strong> top of <strong>the</strong> page in <strong>the</strong> block surrounded <strong>by</strong> dark black lines.<br />
*Check <strong>the</strong> box “Permission to accept employment”<br />
– located under <strong>the</strong> block, next to <strong>the</strong> words “I am applying for:”<br />
For questions 1 – 17, write <strong>the</strong> on <strong>the</strong> line underneath <strong>the</strong> question.<br />
1. Name<br />
Use <strong>the</strong> name as it is written on your I-20 and passport.<br />
Write your family (last) name first in all capital (uppercase) letters.<br />
Leave a space, and <strong>the</strong>n write your first name with only <strong>the</strong> first letter capitalized. If you have two first<br />
names, leave a space in between but write <strong>the</strong>m close toge<strong>the</strong>r.<br />
If you have a middle name, leave a space and write it last.<br />
2. O<strong>the</strong>r Names Used<br />
If you live at <strong>the</strong> address you are using in #3, leave this space blank.<br />
If you do not live at <strong>the</strong> address you are using in #3, write <strong>the</strong> abbreviation “C/O” and <strong>the</strong>n <strong>the</strong> name of<br />
<strong>the</strong> person who lives <strong>the</strong>re. C/O is an abbreviation for “Care Of,” meaning this person will be<br />
responsible for getting your mail to you.<br />
3. Address in <strong>the</strong> United States<br />
If you live in an apartment, write <strong>the</strong> abbreviation “Apt.” plus <strong>the</strong> apartment letter/number next to <strong>the</strong><br />
street address. Example: 123 Main St., Apt. 4B.<br />
You can double-check <strong>the</strong> zip code at www.usps.com<br />
Remember:<br />
o This address determines <strong>the</strong> Lockbox to which you send <strong>the</strong> I-<strong>765</strong> application.<br />
o This address must be valid from <strong>the</strong> time you send <strong>the</strong> I-<strong>765</strong> until <strong>the</strong> time you receive <strong>the</strong> EAD.<br />
o Mail from USCIS cannot be forwarded.<br />
4. Country of Citizenship/Nationality<br />
If you are a dual citizen, write <strong>the</strong> country noted on your I-20, which should match <strong>the</strong> passport you use.<br />
5. Place of Birth - Write <strong>the</strong> information in <strong>the</strong> relevant spaces.<br />
6. Date of Birth - Use <strong>the</strong> U.S. style – month/day/year<br />
7. Gender - Check <strong>the</strong> relevant box<br />
8. Marital Status - Check <strong>the</strong> relevant box<br />
9. Social Security Number<br />
If you have a Social Security Number, write it here<br />
If you do not have a Social Security Number, write “will apply”
10. Alien Registration Number (A-Number) or I-94 Number (if any)<br />
On <strong>the</strong> left, write your I-94 card number. The number will be an 11-digit number in <strong>the</strong> top left-hand<br />
corner of <strong>the</strong> card. (If <strong>the</strong> typed number is crossed out, use <strong>the</strong> handwritten number.)<br />
To <strong>the</strong> right of where you wrote <strong>the</strong> I-94 card number, write your SEVIS ID number. This is <strong>the</strong> number<br />
in <strong>the</strong> upper right-hand corner of your I-20 that starts with N000.<br />
11. Have you ever before applied for employment authorization from USCIS?<br />
If you have never applied for an EAD before, mark “No” and move on to question #12.<br />
If you have applied for an EAD in <strong>the</strong> past, mark “Yes” finish <strong>the</strong> questions at <strong>the</strong> top of <strong>the</strong> next column<br />
o Which USCIS Office? -write <strong>the</strong> USCIS office that adjudicated <strong>the</strong> I-<strong>765</strong> application<br />
o<br />
o<br />
Date(s) -Write <strong>the</strong> start and end date of <strong>the</strong> EAD card, using U.S. date style (mm/dd/yyyy)<br />
Results (Granted or Denied - attach all documentation)<br />
• If your EAD was granted, attach a copy of <strong>the</strong> previous EAD. If this EAD is for a<br />
previous OPT, write <strong>the</strong> degree level on <strong>the</strong> copy (e.g. bachelor’s, master’s, doctoral)<br />
• If your EAD was denied, attach a copy of <strong>the</strong> denial notice<br />
12. Date of Last Entry into <strong>the</strong> U.S. (mm/dd/yyyy)<br />
If you got a new I-94 card <strong>the</strong> last time you entered <strong>the</strong> U.S., use <strong>the</strong> date on this most recent I-94 card.<br />
If you did not get a new I-94 card <strong>the</strong> last time you entered <strong>the</strong> U.S. because you used automatic visa<br />
revalidation, write <strong>the</strong> date you entered <strong>the</strong> U.S., not <strong>the</strong> date on your I-94 card.<br />
13. Place of Last Entry into <strong>the</strong> U.S.<br />
If you got a new I-94 card <strong>the</strong> last time you entered <strong>the</strong> U.S., write <strong>the</strong> city where <strong>the</strong> border officer<br />
inspected your immigration documents and gave you <strong>the</strong> new card.<br />
If you did not get a new I-94 card <strong>the</strong> last time you entered <strong>the</strong> U.S. because you came in from Canada,<br />
you must remember <strong>the</strong> city on <strong>the</strong> U.S. side of <strong>the</strong> border where you entered and write that city.<br />
14. Manner of Last Entry (Visitor, Student, etc.)<br />
If you were an F-1 student <strong>the</strong> last time you came into <strong>the</strong> U.S., write “F-1 student”<br />
If you were not an F-1 student <strong>the</strong> last time you came into <strong>the</strong> U.S. because you entered in ano<strong>the</strong>r<br />
status and <strong>the</strong>n applied for Change of Status to F-1, write your status at <strong>the</strong> time of your last entry.<br />
15. Current Immigration Status (Visitor, Student, etc.)<br />
Write “F-1 Student”<br />
16. Eligibility Category<br />
If your OPT begins after your I-20 completion date, use (c)(3)(B) for Post-Completion OPT<br />
If your OPT begins and ends before your I-20 completion date, use (c)(3)(A) for Pre-Completion OPT<br />
17. Employer’s E-Verify Number<br />
Don’t write anything here. This section is only for people applying for <strong>the</strong> 17-month extension of OPT.<br />
Read <strong>the</strong> Certification paragraph and sign your name between <strong>the</strong> lines (your signature cannot touch <strong>the</strong><br />
lines). This signature will appear on your EAD card and should be similar to <strong>the</strong> signature on your I-20.<br />
Write your current telephone number. We do not expect USCIS to call you, so don’t worry if it changes.<br />
Write <strong>the</strong> date (mm/dd/yyyy). The date must be within 30 days of <strong>the</strong> day USCIS receives your application.<br />
Do not write anything below <strong>the</strong> dark line at <strong>the</strong> bottom of <strong>the</strong> page.