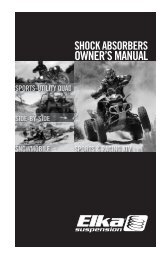
MOTORCYCLE SERIES OWNER's MANUAL - Elka Suspension Inc.
MOTORCYCLE SERIES OWNER's MANUAL - Elka Suspension Inc.
MOTORCYCLE SERIES OWNER's MANUAL - Elka Suspension Inc.

Create successful ePaper yourself
Turn your PDF publications into a flip-book with our unique Google optimized e-Paper software.
<strong>MOTORCYCLE</strong> <strong>SERIES</strong><br />
OWNER’S <strong>MANUAL</strong>
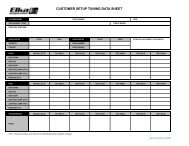
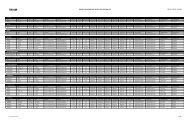
Adjustments Logbook<br />
Use the following space to log the adjustments made to your shock absorber.<br />
DATE TRACK HIGH SPEED COMP LOW SPEED COMP REBOUND PRELOAD RIDE HEIGHT
INTRODUCTION 1<br />
Welcome to <strong>Elka</strong> <strong>Suspension</strong> !<br />
Thank you for choosing <strong>Elka</strong> <strong>Suspension</strong> for<br />
your shock absorber needs. <strong>Elka</strong> <strong>Suspension</strong><br />
is a leader in the design and manufacturing<br />
of high-performance shock absorbers. All our<br />
products are handcrafted from the highest<br />
quality materials available, specifically for<br />
each rider, accor-ding to his/her weight,<br />
bike geometry and type of riding.<br />
Our experienced team is able to advise and<br />
assist you to find the exact set-up to meet<br />
your personal needs. This owner’s manual is<br />
your complete guide to install, adjust and finetune<br />
your shocks for optimum suspension<br />
performance. It also offers important information<br />
about the maintenance of your shocks. Carefully<br />
read this manual before installing your shocks.<br />
TABLE OF CONTENTS<br />
A) Safety Warnings . . . . . . . . . . . . . . . . . . . . . . . . . . . . . . . . . . . . . . . . . . . . . . . . . . . . . . . . . . . . . . . . . . . . 2<br />
B) Warranty & Return Policies. . . . . . . . . . . . . . . . . . . . . . . . . . . . . . . . . . . . . . . . . . . . . . . . . . . . . . . . . . . 3<br />
C) <strong>Suspension</strong> Basics . . . . . . . . . . . . . . . . . . . . . . . . . . . . . . . . . . . . . . . . . . . . . . . . . . . . . . . . . . . . . . . . . . .<br />
- C.1 <strong>Suspension</strong> Terminology . . . . . . . . . . . . . . . . . . . . . . . . . . . . . . . . . . . . . . . . . . . . . . . . . . . . 4<br />
- C.2 <strong>Suspension</strong> Terminology . . . . . . . . . . . . . . . . . . . . . . . . . . . . . . . . . . . . . . . . . . . . . . . . . . . . 5<br />
- C.3 Shock Absorber Components . . . . . . . . . . . . . . . . . . . . . . . . . . . . . . . . . . . . . . . . . . . . . . . . 6<br />
D) Installation. . . . . . . . . . . . . . . . . . . . . . . . . . . . . . . . . . . . . . . . . . . . . . . . . . . . . . . . . . . . . . . . . . . . . . . . . .<br />
- D.1 Mounting . . . . . . . . . . . . . . . . . . . . . . . . . . . . . . . . . . . . . . . . . . . . . . . . . . . . . . . . . . . . . . . . 7<br />
E) Adjustments & Fine-tuning. . . . . . . . . . . . . . . . . . . . . . . . . . . . . . . . . . . . . . . . . . . . . . . . . . . . . . . . . . . . .<br />
- E.1 <strong>Suspension</strong> Definitions, Settings and Rules-of-Thumb. . . . . . . . . . . . . . . . . . . . . . . . . . 8-9<br />
- E.2 Checking and Setting Sag . . . . . . . . . . . . . . . . . . . . . . . . . . . . . . . . . . . . . . . . . . . . . . . . . 10<br />
- E.3 Adjusting the Ride Height. . . . . . . . . . . . . . . . . . . . . . . . . . . . . . . . . . . . . . . . . . . . . . . . . . 10<br />
- E.4 Preload Adjustment. . . . . . . . . . . . . . . . . . . . . . . . . . . . . . . . . . . . . . . . . . . . . . . . . . . . . . . 11<br />
- E.5 Compression Adjustment . . . . . . . . . . . . . . . . . . . . . . . . . . . . . . . . . . . . . . . . . . . . . . . . . . 12<br />
- E.6 High- and Low-Speed Compression Adjustment. . . . . . . . . . . . . . . . . . . . . . . . . . . . . . . . 13<br />
- E.7 Rebound Adjustment . . . . . . . . . . . . . . . . . . . . . . . . . . . . . . . . . . . . . . . . . . . . . . . . . . . . . 14<br />
F) Maintenance . . . . . . . . . . . . . . . . . . . . . . . . . . . . . . . . . . . . . . . . . . . . . . . . . . . . . . . . . . . . . . . . . . . 15-16<br />
H) Service Work Order Form . . . . . . . . . . . . . . . . . . . . . . . . . . . . . . . . . . . . . . . . . . . . . . . . . . . . . . . . . . . 17<br />
1585-M, De Coulomb, Boucherville, Quebec, Canada J4B 8J7<br />
Phone: +1 (450) 655-4855 • 1-800-557-0552 Fax: +1 (450) 655-2821<br />
moto@elkasuspension.com www.elkasuspension.com
2<br />
>SAFETY<br />
WARNINGS<br />
A) Read First For Your Safety:<br />
WARNING !<br />
Shock absorbers are an important part of your motorcycle, and<br />
this owner's manual explains how to install your suspension system<br />
properly. If you are uncomfortable installing your shock absorbers<br />
or are unsure of the method, have a qualified mechanic install<br />
them for you. Improperly installed shocks might cause serious<br />
harm to you and may severely damage your motorcycle. Never<br />
take any chances with your safety.<br />
CAUTION !<br />
Before installing your shock absorbers, carefully read this owner's<br />
manual to learn the correct installation procedures and avoid the<br />
consequences of an incorrect installation.<br />
Riding a motorcycle can be dangerous. Always wear appropriate<br />
protective equipment and follow your region’s regulations.<br />
<strong>Elka</strong> <strong>Suspension</strong> is constantly introducing new products and<br />
improving existing ones. For this reason, <strong>Elka</strong> <strong>Suspension</strong><br />
reserves the rights to modify products and add accessories<br />
with no obligations to make such changes to earlier models.<br />
When your shock absorbers require an oil change or other internal<br />
maintenance, your <strong>Elka</strong> <strong>Suspension</strong> Service Centre is best qualified<br />
to provide the necessary service or repairs.<br />
<strong>Elka</strong> <strong>Suspension</strong> shock absorbers are manufactured exclusively for<br />
the motorcycle that they were ordered for. Switching units between<br />
different vehicles may not only decrease performance but might<br />
also cause damage to the motorcycle and seriously harm the rider.<br />
Always call <strong>Elka</strong> <strong>Suspension</strong> to verify compatibi-lity before<br />
switching units from one vehicle to another.<br />
1585-M, De Coulomb, Boucherville, Quebec, Canada J4B 8J7<br />
Phone: +1 (450) 655-4855 • 1-800-557-0552 Fax: +1 (450) 655-2821<br />
moto@elkasuspension.com www.elkasuspension.com
Warranty & Return Policies 3<br />
B) <strong>Elka</strong> <strong>Suspension</strong> Warranty<br />
All <strong>Elka</strong> <strong>Suspension</strong> products are guaranteed<br />
against any manufacturing defects for a period<br />
of one (1) year from the purchase date.<br />
This warranty does not cover damages resulting<br />
from any of the following situations:<br />
- Abuse of the product<br />
- Racing accidents<br />
- Improper installation<br />
- Improper reservoir hose routing<br />
- Disassembly or modifications<br />
- Unauthorized oil changes<br />
- Damage occuring during transportation<br />
(the purchase of full insurance coverage for<br />
shipping is recommended)<br />
The shipping box should contain the following:<br />
- Shock absorber(s) and spring(s)<br />
- Owner’s Manual<br />
- <strong>Elka</strong> Preload tool (to adjust the preload ring)<br />
- One 3mm Allen key (for preload ring stopper)<br />
- Reservoir mounting assembly (for remote<br />
reservoir models)<br />
All <strong>Elka</strong> <strong>Suspension</strong> shock absorbers are ready<br />
for installation. Fine-tuning might be necessary.<br />
A copy of the original invoice is necessary for<br />
any claim or service shipment.<br />
<strong>Elka</strong> <strong>Suspension</strong> <strong>Inc</strong>. reserves the right to make<br />
the final decision in all matters pertaining to its<br />
warranty.<br />
WARNING !<br />
Because <strong>Elka</strong> <strong>Suspension</strong> products are designed for use in racing<br />
and extreme driving conditions, <strong>Elka</strong> <strong>Suspension</strong> cannot guarantee<br />
any of its suspension products, other than from manufacturing<br />
defects, because we have no control over how our products are<br />
used after installation. In addition, the purchaser assumes full<br />
responsibility to the extent legally permitted for the risks of personal<br />
injury and/or damage to the purchaser's vehicle or to any<br />
third party that may be involved in an incident with the purchaser.<br />
RETURN PROCEDURES<br />
IMPORTANT:<br />
Always keep your invoice as proof of purchase and send a copy with all service or<br />
warranty returns. Always mention that your shocks are sent for warranty repair on all<br />
shipping papers.<br />
1) Call our service department at +1 (450) 655-4855 or 1-800-557-0552 (North America) to get<br />
an RGA Number. Our representative will assist you for further steps.<br />
2) Fill out the Service Work Order form on the last page of this manual.<br />
3) Carefully package your shock(s) to avoid damage during transportation. <strong>Inc</strong>lude a copy of your<br />
invoice, a brief description of the problem and a return address for shipping and/or invoicing.<br />
Provide a phone number to reach you in case our technicians have questions about the problem.<br />
Place your completed Service Work Order form on top in your package. Ship your shock(s).<br />
4) Wait for a confirmation call that will let you know an approximate turnaround time after we<br />
receive your shocks.<br />
1585-M, De Coulomb, Boucherville, Quebec, Canada J4B 8J7<br />
Phone: +1 (450) 655-4855 • 1-800-557-0552 Fax: +1 (450) 655-2821<br />
moto@elkasuspension.com www.elkasuspension.com
4<br />
>SUSPENSION<br />
BASICS<br />
C) <strong>Suspension</strong> Basics<br />
C.1 SUSPENSION TERMINOLOGY<br />
SUSPENSION<br />
Compression:The stage where the shock<br />
compresses under an impact.<br />
Emulsion:The oil in the shock has microscopic<br />
air bubbles in it. When the oil is heated from<br />
passing through the valving holes, the air<br />
expands and creates foam and air pockets,<br />
called emulsion. When a shock gets emulsion<br />
inside, it has a sticky feel (stiction), becomes<br />
very soft and can even lose all damping.<br />
<strong>Elka</strong> <strong>Suspension</strong> shocks go through a careful<br />
bleeding process to avoid emulsion.<br />
Frame Clearance:The space needed to avoid<br />
contact between the frame and the ground.<br />
High-Speed Compression:The damping circuit<br />
that controls the shock’s resistance against highvelocity<br />
impacts.<br />
Low-Speed Compression:The damping circuit<br />
that controls the shock’s resistance against<br />
low-velocity compression.<br />
Negative Travel:The difference between the<br />
height of the vehicle at rest with rider sitting<br />
on it and the height of the vehicle when the<br />
motorcycle is lifted without the wheels leaving<br />
the ground. This distance is a portion of the<br />
total suspension travel that is used to keep the<br />
wheels on the ground when the suspension<br />
extends.<br />
Preload:The force applied to the main springs by<br />
screwing in the preload ring to achieve proper<br />
sag, mesured in millimeters from shock head to<br />
preload collar.<br />
Rebound:The damping circuit that controls the<br />
shock’s resistance when returning to its initial<br />
state after being compressed by an impact.<br />
More rebound damping returns the shock slower<br />
but increases the chances of “packing”. Less<br />
preload damping returns the shock faster and<br />
provides a bouncy ride.<br />
Ride Height:The height of the vehicle when<br />
properly sagged with the rider seated. It can be<br />
adjusted to suit the rider’s personal preference.<br />
Sag:The portion of the shock’s travel used when<br />
the rider is seated. Proper sag ensures enough<br />
negative travel to keep the wheels on the ground<br />
and preserve traction.<br />
Static Sag:Same as the sag but without the rider<br />
on the vehicle. The static sag prevents topping<br />
out and provides a more confortable ride.<br />
Stroke:The total amount of travel allowed by the<br />
shock, mesured at the shock’s shaft. Not to be<br />
confused with the total travel of the vehicle.<br />
The same shock stroke can provide different<br />
wheel travel depending on the geometry of the<br />
suspension.<br />
Travel:The distance between the suspension fully<br />
compressed and fully extended. Can be mesured<br />
at the wheels (wheel travel) or at the shock shaft<br />
(stroke).<br />
1585-M, De Coulomb, Boucherville, Quebec, Canada J4B 8J7<br />
Phone: +1 (450) 655-4855 • 1-800-557-0552 Fax: +1 (450) 655-2821<br />
moto@elkasuspension.com www.elkasuspension.com
SUSPENSION BASICS 5<br />
C) <strong>Suspension</strong> Basics (continued)<br />
C.2 SUSPENSION TERMINOLOGY<br />
SHOCK PARTS<br />
Banjo Bolt:On remote reservoir models, the<br />
banjo-shaped bolt used to attach the hose to the<br />
reservoir and shock. The banjo shape allows for<br />
instal-lation around 360 degrees. Loosening or<br />
trying to move this bolt may cause oil leakage<br />
and a loss in pressure.<br />
Bridge:The metallic part that links the reservoir<br />
to the shock’s body on piggyback models. Bridge<br />
shape varies between different bike models to<br />
allow frame clearance.<br />
Bumper:The rubber (microcellular foam) part that<br />
prevents damaging the shock when bottoming.<br />
It’s an integral part of the suspension system as<br />
it controls the ending of the shock’s stroke. A<br />
low quality bumper will be harsh on the rider<br />
and will not allow full travel.<br />
Eyelets:The ends of the shock where the bolting<br />
shaft comes through, running on spherical<br />
bearings to allow movement but no torsional<br />
resistance.<br />
Fork:On some models, the lower mounting<br />
bracket that replaces the eyelet.<br />
Piggyback:A shock model with directly attached<br />
reservoir using a bridge or one-piece head.<br />
Remote Reservoir:A shock model with the<br />
reservoir attached to the head by a hose to<br />
allow remote location.<br />
Spring Cup (Spring Ring):The slotted ring that<br />
retains the springs in place. The slot allows the<br />
spring cup to slide out for easy spring removal.<br />
Spring Rate:The force required to compress the<br />
spring 1 inch from initial state. For example, a<br />
5.4 kg/mm spring will require a 5.4 kg force to<br />
compress 1 millimeter, a 10.8 kg force to compress<br />
2 millimeters, a 54 kg force to compress<br />
10 millimeters...<br />
To convert into pounds/inch, multiply by a factor<br />
of 56. Ex: 5.4 x 56 = 302,4 lbs/in.<br />
Set Screw:The tiny Allen screw that prevents<br />
the preload ring from loosening. Must be<br />
untightened prior to adjusting the preload ring<br />
and tightened back after the adjustment.<br />
Valving:A combination of holes, shims and<br />
checkballs that controls the hydraulic flow to<br />
create the damping effect. The valving’s<br />
“recipe” is the main factor for the feel of the<br />
suspension.<br />
Wheel Travel:The total amount of displacement<br />
allowed for the wheel from full extension to full<br />
compression.<br />
1585-M, De Coulomb, Boucherville, Quebec, Canada J4B 8J7<br />
Phone: +1 (450) 655-4855 • 1-800-557-0552 Fax: +1 (450) 655-2821<br />
moto@elkasuspension.com www.elkasuspension.com
6<br />
>SUSPENSION<br />
BASICS<br />
C) <strong>Suspension</strong> Basics (continued)<br />
C.3 SHOCK ABSORBER COMPONENTS<br />
Low-Speed Compression<br />
Adjustment Knob (Gold)<br />
High-Speed Compression<br />
Adjustment Knob (Black)<br />
Nitrogen Purge Valve<br />
Shock Head<br />
Top Eyelet (behind the reservoir)<br />
Bridge<br />
Preload Ring<br />
Set Screw<br />
Reservoir<br />
(piggyback version shown, also<br />
available in remote version)<br />
Shock Body<br />
Banjo Bolt<br />
Spring<br />
Seal Head<br />
Hose<br />
Shaft<br />
Bumper<br />
Spring Clip<br />
Rebound Adjustment<br />
(regular shown, low-profile screw<br />
adjuster available)<br />
Ride height Adjuster<br />
Compression<br />
Adjustment Knob<br />
Fork or eyelet<br />
Remote<br />
Reservoir<br />
1585-M, De Coulomb, Boucherville, Quebec, Canada J4B 8J7<br />
Phone: +1 (450) 655-4855 • 1-800-557-0552 Fax: +1 (450) 655-2821<br />
moto@elkasuspension.com www.elkasuspension.com
INSTALLATION PROCEDURES 7<br />
D) Installation<br />
D.1 MOUNTING<br />
<strong>Elka</strong> <strong>Suspension</strong> recommends the following method for installing your shock absorbers:<br />
1. Set your motorcycle on a bench or use a jack to take the vehicle's weight off the wheels.<br />
2. Remove the existing shock absorbers (refer to the vehicle’s owner manual if needed).<br />
3. Place the reservoir(s) in position and route the hose according to the provided reservoir installation<br />
sheet specific to your vehicle model (if applicable).<br />
4. Install your new <strong>Elka</strong> <strong>Suspension</strong> shock absorbers on your motorcycle.<br />
5. Tighten the nuts on the upper bolts in accordance with the information and specifications provided<br />
by the manufacturer and refer to the vehicle’s owner manual if needed.<br />
6. Tighten the nuts on the lower bolts in accordance with the information and specifications provided<br />
by the manufacturer and refer to the vehicle’s owner manual if needed.<br />
7. Attach the rubber mounts and tighten the collars on the reservoirs to a pressure of 6 inchpounds<br />
using a torque wrench.<br />
WARNING !<br />
IMPORTANT NOTES ABOUT SHOCK ABSORBER POSITIONING<br />
• The reservoir on piggy-back models must be positioned towards the top.<br />
(See photo below)<br />
• For remote reservoirs connected by hoses, refer to the reservoir installation<br />
sheet specific to your vehicle model included with the kit.<br />
Piggyback Model<br />
Remote Reservoir Model<br />
1585-M, De Coulomb, Boucherville, Quebec, Canada J4B 8J7<br />
Phone: +1 (450) 655-4855 • 1-800-557-0552 Fax: +1 (450) 655-2821<br />
moto@elkasuspension.com www.elkasuspension.com
8<br />
>ADJUSTMENTS<br />
E) Adjusting the shock<br />
E.1 SUSPENSION DEFINITIONS, SETTINGS AND RULES-OF-THUMB<br />
RIDE “FEEL”<br />
As a basic rule, your suspension should make full use of its travel under normal riding conditions- i.e.<br />
the softer the better, until the suspension wallows or bottoms out, when more stiffness is called for.<br />
Given this principle, here are some simple explanations of how to get the most possible enjoyment<br />
and efficiency from your <strong>Elka</strong> shock absorber.<br />
Preload and sag have a major influence on the “feel” of your motorcycle, the smoothness of the ride<br />
and reaction to hitting bumps. You may make small changes to the factory settings (Read the information<br />
below first!) to see what feels better for you, making sure those original settings and your<br />
changes are written down so that you may return to original settings at any time.<br />
To preserve comfort and ride quality when you change your riding style drastically (Load, speed,<br />
surface), you should adjust preload and sag to optimise efficiency for the new conditions. See the<br />
following paragraphs for guidelines regarding such changes.<br />
PRELOAD<br />
Spring preload is the compression applied to the shock’s spring when at rest, using the top ring and<br />
Hydraulic Preload Adjuster if you have one on your shock. Preload is used to optimise suspension<br />
travel when riding with varying loads and riding style. Preload is also used to adjust the firmness of<br />
the suspension.<br />
SAG<br />
<strong>Suspension</strong> sag represents the change in vertical height at both end, between the fully extended<br />
suspensions and when you are sitting on the bike in riding position. As a rule, sag for a street bike<br />
should be set between 30 and 35mm (1 3/16 to 1 3/8 in.), and between 30 and 60mm (1 3/16 and<br />
2 3/8 in) for a dual purpose machine. The great variation for dual-purpose machines is due to the<br />
great variation in usage, from 100% street to 100% off-road with every combination in between.<br />
Please advise <strong>Elka</strong> at order time if you plan on extreme riding on your dual purpose machine, and we<br />
will set the sag accordingly. Sag is a critical measurement, and is normally adjusted by changing the<br />
spring preload, within certain limits. The paragraph on setting sag will address this issue in detail.<br />
FACTORY SETTINGS FOR SAG AND PRELOAD<br />
The preload / sag of your <strong>Elka</strong> shock is factory-set based on your type of riding and weight, as well as<br />
using basic knowledge such as the original factory settings and spring tension.<br />
There may be some instances where the <strong>Elka</strong> factory settings are not ideal. You may call us to<br />
discuss possible changes before venturing too far from the original settings.<br />
1585-M, De Coulomb, Boucherville, Quebec, Canada J4B 8J7<br />
Phone: +1 (450) 655-4855 • 1-800-557-0552 Fax: +1 (450) 655-2821<br />
moto@elkasuspension.com www.elkasuspension.com
ADJUSTMENTS 9<br />
E) Adjusting the shock<br />
E.1 SUSPENSION DEFINITIONS, SETTINGS AND RULES-OF-THUMB<br />
ADJUSTING YOU SHOCK FOR DIFFERENT RIDING CONDITIONS<br />
Your first objective when setting up your suspension for daily use is to achieve a comfortable,<br />
steady and safe ride for the majority of your riding time. The <strong>Elka</strong> factory settings for spring rate,<br />
preload, sag and dampening have been selected to achieve this goal.<br />
Things change when you change your riding however! For example, if you use your bike for<br />
commuting, and decide to attend an occasional Track Day, you may decide to stiffen the<br />
dampening by a few clicks. As you pick up speed on the track, you may also need to increase the<br />
preload to avoid bottoming when cornering of hitting bumps. For your first track day, we<br />
recommend that you check your sag settings without changes, to start out with the softest possible<br />
suspension, which means you will make full use of your suspension. You may then start to stiffen<br />
things up gradually as your riding skill and corner speeds build up.<br />
Another example of drastic changes in riding conditions is when you leave for a tour and add a<br />
passenger and luggage. Here again, you may need to stiffen up the suspension to optimise<br />
suspension performance. Experienced rider know that adding a few clicks to the dampening and<br />
adding one or two turns of rear preload works when riding two up, and make such changes<br />
automatically when a passenger comes aboard.<br />
In all instances, avoid having the suspension hit bottom – a sure sign that you must stiffen up your<br />
suspension.<br />
HORSES FOR COURSES – SUSPENSION SET UP FOR OFF- AND ON-ROAD<br />
<strong>Elka</strong> <strong>Suspension</strong> builds shocks according to the type of machine and its uses, as do the original<br />
manufacturers.<br />
For bikes such as the BMW GS or Suzuki V-Strom models intended for both on and off road riding,<br />
the suspension is relatively soft, with longer travel and appropriate dampening. For purely street<br />
machines intended for smoother surfaces (Smooth roads, tracks), total suspension travel is shorter,<br />
and the spring and dampening are correspondingly stiffer.<br />
SPRING STIFFNESS<br />
When building your shock, <strong>Elka</strong> chose a spring tension based on a weight table for your particular<br />
bike make and model, and for nominal street use. Dual purpose and hybrid bikes were assumed to<br />
be carrying some luggage and an occasional passenger, as well being ridden off road occasionally.<br />
This assumption is validated using information from the buyer at order time.<br />
1585-M, De Coulomb, Boucherville, Quebec, Canada J4B 8J7<br />
Phone: +1 (450) 655-4855 • 1-800-557-0552 Fax: +1 (450) 655-2821<br />
moto@elkasuspension.com www.elkasuspension.com
10<br />
>ADJUSTMENTS<br />
E) Adjusting the shock<br />
E.2 CHECKING AND SETTING SAG<br />
The sag for your shock was set at the factory, based on your weight and riding conditions. You<br />
may wish to validate the number or try different sag settings, so that a standard measurement<br />
method is required. Remember, you are measuring by how much the front and the rear suspensions<br />
droop between full extension and when you are on the machine. You must measure the front<br />
and the rear separately.<br />
MEASURING REAR SAG<br />
1. Place the bike on a flat, level surface.<br />
2. Have the rider sit on the bike in riding position, wearing his riding gear and his feet on the<br />
pegs, with someone holding the motorcycle upright. Have the rider bounce lightly a few times<br />
on the pegs and seat, then let the shock settle down<br />
3. With the rider still on the motorcycle, measure the distance from the ground or the swingarm to<br />
a fixed spot on the tail.<br />
4. Have the rider dismount and then lift the motorcycle to allow the rear suspension to extend<br />
fully while keeping the rear wheel in contact with the ground<br />
5. Measure the distance between the same reference points as before. The difference between<br />
the two figures is the rear sag.<br />
6. To increase sag, decrease the preload on the spring (refer to page 11 for procedure).<br />
7. To decrease sag, increase the preload on the spring (refer to page 11 for procedure).<br />
Please contact <strong>Elka</strong> if you cannot achieve the correct sag figures on your shock. Also ensure that the<br />
front sag and dampening are equivalent to the rear settings.<br />
E.3 ADJUSTING THE RIDE HEIGHT<br />
<strong>Elka</strong> <strong>Suspension</strong> shock absorbers make it possible<br />
to adjust the ride height. To extend the rear shock,<br />
loosen the jam nut on the shock with a 24mm<br />
spanner. To measure the extended lenght, measure<br />
the lenght of the thread you can see on the eyelet<br />
when the nut is locked.<br />
WARNING<br />
Do not extend the shock<br />
more than 10mm from the<br />
minimal height.<br />
1585-M, De Coulomb, Boucherville, Quebec, Canada J4B 8J7<br />
Phone: +1 (450) 655-4855 • 1-800-557-0552 Fax: +1 (450) 655-2821<br />
moto@elkasuspension.com www.elkasuspension.com
ADJUSTMENTS 11<br />
E) Adjusting the shock<br />
E.4 PRELOAD ADJUSTMENT<br />
A preload adjustment ring is located under the head of the shock (see page 8 for details). This<br />
ring is used to increase or decrease the initial tension on the spring.<br />
INCREASING THE PRELOAD<br />
To increase the preload on your spring, you need to turn the preload ring clockwise.<br />
• First, you might need to remove the seat to access the preload ring<br />
• Then loosen the set-screw on the preload ring using the provided 3mm Allen key.<br />
• Finally, turn the preload ring clockwise using the provided preload tool.<br />
• When the adjustment is complete, tighten back the set-screw to lock the preload ring.<br />
<strong>Inc</strong>reasing the preload will rise the vehicle and increase frame clearance. This will result in a<br />
more responsive ride. Be careful not to apply too much preload. This can cause “coil binding”,<br />
which is when the coils of the spring rub against each other under compression. This can<br />
damage the spring, the shock and can be dangerous for the rider.<br />
REDUCING THE PRELOAD<br />
To reduce the preload on your spring, you need to turn the preload ring counterclockwise.<br />
• First, you will need to remove the seat to access the preload ring.<br />
• Then loosen the set-screw on the preload ring using the provided 3mm Allen key.<br />
• Finally, turn the preload ring counterclockwise using the provided preload tool.<br />
• When the adjustment is complete, tighten back the set-screw to lock the preload ring.<br />
Reducing the preload will lower the vehicle and decrease frame clearance. This will result in a<br />
smoother ride but the bike might come in contact with the ground more often. The preload<br />
should always be enough to keep the spring strongly in place.<br />
WARNING<br />
• If more than 15 mm of preload is needed to achieve proper sag, it is<br />
recommended to change to a higher spring rate.<br />
- If sag is not enough without any preload applied to the spring, it is<br />
recommended to change to a lighter spring rate.<br />
Be careful when adjusting the preload after the engine has been running.<br />
The exhaust pipe and shock body can be hot and may cause severe injuries.<br />
Be careful and use gloves or proper protection equipment.<br />
1585-M, De Coulomb, Boucherville, Quebec, Canada J4B 8J7<br />
Phone: +1 (450) 655-4855 • 1-800-557-0552 Fax: +1 (450) 655-2821<br />
moto@elkasuspension.com www.elkasuspension.com
12<br />
>ADJUSTMENTS<br />
E) Adjusting the shock (continued)<br />
E.5 COMPRESSION ADJUSTMENT<br />
The black knob located on the remote reservoir is the compression adjustment. This adjustment<br />
controls the hydraulic resistance to high-speed impacts. A harder compression damping will offer<br />
more resistance to impacts but will provide a stiffer rider. A softer compression damping will<br />
provide a smoother ride but less resistance on impacts.<br />
If the compression adjustment is correct, the wheels can achieve maximum travel and traction.<br />
When the compression damping is too hard, the ride will be stiff and will not be able to absorb<br />
average to major impacts. It is preferable to start with a softer damping and add compression to<br />
you liking. This will prevent the rider from getting tired prematurely and will increase comfort and<br />
performance.<br />
INCREASING THE COMPRESSION DAMPING<br />
To increase the compression damping (stiffen), you need to turn the knob clockwise. There is a<br />
sticker on the knob indicating S and H (soft, hard). Turn towards the H.<br />
You should start in the middle of the adjustment. There are 30 clicks of compression adjustment.<br />
To adjust properly, turn the knob one click at a time and take a test ride. The adjustment is more<br />
sensitive towards the H than the S.<br />
REDUCING THE COMPRESSION DAMPING<br />
To reduce the compression damping (soften), you need to turn the knob counterclockwise. There<br />
is a sticker on the knob indicating S and H (soft, hard). Turn towards the S.<br />
WARNING !<br />
IMPORTANT NOTES ABOUT COMPRESSION ADJUSTMENT<br />
It is not possible to check the compression adjustment by only compressing the<br />
suspension on the vehicle manually. You must ride the bike to assess the setting.<br />
The feeling might be right when bouncing on the seat but it could be very different<br />
on the track.<br />
Never compensate for a lack of spring strenght by boosting the compression or<br />
leaving the knob all the way towards the H setting. If your suspension is too soft with<br />
the adjustment above 25 clicks in, you should replace your spring with a higher rate.<br />
If the knob appears to be blocked, do not force it.<br />
If necessary, contact <strong>Elka</strong>’s Service Department for advice or repairs.<br />
1585-M, De Coulomb, Boucherville, Quebec, Canada J4B 8J7<br />
Phone: +1 (450) 655-4855 • 1-800-557-0552 Fax: +1 (450) 655-2821<br />
moto@elkasuspension.com www.elkasuspension.com
ADJUSTMENTS 13<br />
E) Adjusting the shock (continued)<br />
E.6 HIGH- & LOW-SPEED COMPRESSION ADJUSTMENT<br />
The dual compression knobs located on the reservoir control the high- and low-speed damping<br />
of the shock absorber. Functioning independently, the small gold-coloured knob controls the<br />
low-speed setting (when the shaft’s movement is normal to slower like on g-outs, over small<br />
undulations, when cornering and accelerating, etc.) and the large black knob controls the<br />
high-speed setting (when the shaft’s movement is faster upon bigger impacts)<br />
When the compression is adjusted correctly, the wheels achieve maximum travel. If the setting is<br />
too hard, the wheels will be stiff and the vehicle will not be able to absorb average to severe<br />
shocks and the rider will take it.<br />
ADJUSTING THE LOW-SPEED COMPRESSION DAMPING<br />
Use the small GOLD compression adjustment knob to adjust the low-speed compression damping.<br />
To increase the compression damping (stiffen), you need to turn the knob clockwise.<br />
There is a sticker on the shock’s head indicating S and H (soft, hard). Turn towards the H.<br />
You should start in the middle of the adjustment. There are about 35 clicks of low-speed<br />
compression adjustment. To adjust properly, turn the knob one click at a time and take a test<br />
ride. The adjustment is more sensitive towards the H than the S.<br />
ADJUSTING THE HIGH-SPEED COMPRESSION DAMPING<br />
Use the larger BLACK compression adjustment knob to adjust the high-speed compression<br />
damping. To increase the compression damping (stiffen), you need to turn the knob clockwise.<br />
There is a sticker on the shock’s head indicating S and H (soft, hard). Turn towards the H.<br />
You should start in the middle of the adjustment. There are about 20 clicks of high-speed<br />
compression adjustment. To adjust properly, turn the knob one click at a time and take a test<br />
ride. The adjustment is more sensitive towards the H than the S.<br />
WARNING !<br />
IMPORTANT NOTES ABOUT HIGH- & LOW-SPEED COMPRESSION ADJUSTMENT<br />
It is not possible to check the compression adjustment by only compressing the suspension on the<br />
vehicle manually. You must ride the bike over jumps and bumps to assess the setting. The feeling<br />
might be right when bouncing on the seat but it could be very different on the track.<br />
If the knob appears to be blocked, do not force it. If necessary, contact <strong>Elka</strong>’s Service Department<br />
for advice or repairs.<br />
Riding speed and compression speed are different. A small obstacle hit when riding at high speed<br />
will make the shock’s shaft move very fast and will be managed by the high-speed compression<br />
damping circuit (black knob).<br />
When the high-speed knob (large black knob) is turned, the small gold-coloured knob follows its<br />
movement without going out of adjustment and vice versa.<br />
1585-M, De Coulomb, Boucherville, Quebec, Canada J4B 8J7<br />
Phone: +1 (450) 655-4855 • 1-800-557-0552 Fax: +1 (450) 655-2821<br />
moto@elkasuspension.com www.elkasuspension.com
14<br />
>ADJUSTMENTS<br />
E) Adjusting the shock (continued)<br />
E.7 REBOUND ADJUSTMENT<br />
The rebound adjustment is located on the gold anodized lower shock mount. This adustment<br />
controls the speed the shock will return to its initial extended state after being compressed from<br />
an impact.<br />
If the rebound adjustment is correct, the rear wheel should keep maximum traction by tracking<br />
the ground without catapulting the rider off the bike.<br />
INCREASING THE REBOUND DAMPING (SLOWER RETURN)<br />
Turn the adjuster clockwise. There is about 50 clicks of rebound adjustment. You should start in<br />
the full fast position of the adjustment. To adjust properly, turn the adjuster one click at a time<br />
and take a test ride. The adjustment is more sensitive towards the Slower side than the Faster<br />
side.<br />
When the rebound setting gets too slow, the shock absorber will not have time to resume to its<br />
initial position when a series of close bumps is encountered. In this case, the bike will run out of<br />
travel (packing) and may give the impression of a too soft compression adjustment.<br />
REDUCING THE REBOUND DAMPING (FASTER RETURN)<br />
Turn the adjuster counterclockwise. There is about 50 clicks of rebound adjustment. To adjust<br />
properly, turn the adjuster one click at a time and take a test ride. The adjustment is more sensitive<br />
towards the Slower side than the Faster side.<br />
When the rebound adjustment is too fast, the rear end of the bike will kick and move from side<br />
to side after hitting a series of close bumps and the rider will feel catapulted by the bike.<br />
Twisting Knob<br />
Fork Models<br />
Twisting Knob<br />
Eyelet Models<br />
WARNING !<br />
IMPORTANT NOTES ABOUT REBOUND ADJUSTMENT<br />
<strong>Elka</strong> is one of the few manufacturers that offers a rebound adjustment that does not affect<br />
the compression setting.<br />
If the knob appears to be blocked, do not force it. If necessary, contact <strong>Elka</strong>’s Service<br />
Department for advice or repairs.<br />
1585-M, De Coulomb, Boucherville, Quebec, Canada J4B 8J7<br />
Phone: +1 (450) 655-4855 • 1-800-557-0552 Fax: +1 (450) 655-2821<br />
moto@elkasuspension.com www.elkasuspension.com
MAINTENANCE 15<br />
F) Maintenance<br />
F.1 GENERAL MAINTENANCE<br />
A well-maintained shock absorber will last longer and perform better. For cleaning, use a gentle<br />
detergent and pay particular attention to areas where debris can become lodged.<br />
Do not use any abrasive cleaning products.<br />
Maintenance frequency may vary depending on the number of hours the vehicle is driven and<br />
the conditions under which it is ridden. Heat, violent impacts, dust, mud and adjustment settings<br />
are all factors that need to be taken into consideration in determining the frequency of basic<br />
maintenance and oil changes.<br />
<strong>Elka</strong> <strong>Suspension</strong> recommends sending your shock absorbers to <strong>Elka</strong> <strong>Suspension</strong>'s service department<br />
for quality service, or else dealing with a <strong>Elka</strong>-certified suspension specialist for all maintenance<br />
requirements and oil changes.<br />
CLEANING PROCEDURES<br />
WARNING !<br />
IMPORTANT NOTES ABOUT CLEANING THE SEAL HEAD<br />
Do not use compressed air when cleaning the seal head as this can damage the seals.<br />
Clean the threads under<br />
the preload ring using a<br />
soft brush.<br />
Clean around the rebound<br />
adjustment knob so that no<br />
foreign particles damage the<br />
adjustment mechanism.<br />
Remove the compression adjustment<br />
knob by unscrewing the Allen type<br />
setscrew and pulling on the knob<br />
carefully then clean delicately.<br />
Use compressed air to clean beneath<br />
the bottom out bumper.<br />
1585-M, De Coulomb, Boucherville, Quebec, Canada J4B 8J7<br />
Phone: +1 (450) 655-4855 • 1-800-557-0552 Fax: +1 (450) 655-2821<br />
moto@elkasuspension.com www.elkasuspension.com
16<br />
>MAINTENANCE<br />
F) Maintenance (continued)<br />
F.2 MAINTENANCE SCHEDULE<br />
<strong>Elka</strong> <strong>Suspension</strong> recommends that you inspect your shock absorbers before and after each use in<br />
order to detect any problems. We also suggest that you entrust <strong>Elka</strong> <strong>Suspension</strong> with all your<br />
maintenance and repair needs.<br />
MAINTENANCE SCHEDULE<br />
After each use End of each season Annually<br />
Clean under the bottom-out bumper Yes Yes Yes<br />
Clean shock absorber exterior Yes Yes Yes<br />
Check hoses for leaks or loosening Inspect Inspect Inspect<br />
Check shaft for damage or rust Inspect Inspect Inspect<br />
Check seal head for leaks or loosening Inspect Inspect/Replace Replace<br />
Check nuts for loosening Inspect Inspect Inspect<br />
Check spherical bearings Inspect Inspect Inspect<br />
Check spring Inspect Inspect Inspect<br />
Change oil, piston and wearband, clean Replace Replace<br />
interior parts, check nitrogen pressure (each 6 months or each year, depending on usage)<br />
MAINTENANCE LOGBOOK<br />
Use the following space to log the maintenance made to your shock absorbers.<br />
DATE MAINTENANCE OPERATION<br />
1585-M, De Coulomb, Boucherville, Quebec, Canada J4B 8J7<br />
Phone: +1 (450) 655-4855 • 1-800-557-0552 Fax: +1 (450) 655-2821<br />
moto@elkasuspension.com www.elkasuspension.com
Service Work Order<br />
Motorcycle Series<br />
READ FIRST: SHIPPING INSTRUCTIONS<br />
1) Call our Service Department at +1 (450) 655-4855 or 1-800-557-0552 (North America) to get a RGA Number.<br />
Our representatives will assist you with further procedures.<br />
2) Fill out this Service Work Order form completely and put it in your package. An incomplete form will cause additional delay.<br />
3) Clean your shocks thoroughly. Use gentle detergent and pay attention to areas where debris can become lodged.<br />
4) Wrap each shock individually before placing them in a box to avoid damage during shipping.<br />
ANY DAMAGE OCCURING DURING SHIPPING IS YOUR RESPONSABILITY. Full shipping insurance is recommended.<br />
5) Send your package to the address below through following our representatives’ recommendations.<br />
It is very important to mention that your shocks are sent to be repaired under warranty to allow customs clearance.<br />
6) Turn-around time is usually between 7 to 10 days from the moment we receive your package.<br />
CLIENT & BILLING INFORMATION<br />
YOUR RGA NUMBER:<br />
Name or Company: _________________________________________________________________________________________________________________________________<br />
Address: _____________________________________________________________________________________________________________________________________________<br />
City: ____________________________________________________ State: __________________________ Zip Code / Postal Code: ____________________<br />
Phone: _________________________________________________ Fax: _____________________________ Reference Number (if any): _________________<br />
Payment method: ❏ Visa ❏ MasterCard ❏ American Express Card #: _____________________________ Exp. Date: ________________<br />
Bike Make & Model: _____________________________________________ Year: ____________________________ Riding Style: ❏ Racing ❏ Track Days<br />
Rider level: ❏ Pro ❏ A ❏ B ❏ C ❏ Expert ❏ Intermediate ❏ Beginner Rider Weight: ___________________<br />
RETURN SHIPPING INFORMATION<br />
Same as billing information (check here): ❏<br />
Name or Company: _________________________________________________________________________________________________________________________________<br />
Address: _____________________________________________________________________________________________________________________________________________<br />
City: ____________________________________________________ State: __________________________ Zip Code / Postal Code: ____________________<br />
DESCRIPTION OF THE PROBLEM(S)<br />
_________________________________________________________________________________________________________________________________________________________<br />
_________________________________________________________________________________________________________________________________________________________<br />
_________________________________________________________________________________________________________________________________________________________<br />
_________________________________________________________________________________________________________________________________________________________<br />
SHIP TO:<br />
ELKA SUSPENSION, SERVICE DEPARTMENT<br />
1585-M, De Coulomb, Boucherville, Quebec, Canada J4B 8J7<br />
Phone: +1 (450) 655-4855 • 1-800-557-0552 Fax: +1 (450) 655-2821<br />
moto@elkasuspension.com www.elkasuspension.com<br />
Rev. D - 05/18/07
1585-M, De Coulomb, Boucherville, Quebec, Canada J4B 8J7<br />
Phone: +1 (450) 655-4855 • 1-800-557-0552 Fax: +1 (450) 655-2821<br />
moto@elkasuspension.com www.elkasuspension.com<br />
PR-ROADMANU<br />
Rev. 11/07/08<br />
Printed in Canada