LTR20071000, Rev. B 5/30/07 - Cal Spas
LTR20071000, Rev. B 5/30/07 - Cal Spas
LTR20071000, Rev. B 5/30/07 - Cal Spas

Create successful ePaper yourself
Turn your PDF publications into a flip-book with our unique Google optimized e-Paper software.
<strong>LTR20<strong>07</strong>1000</strong>, <strong>Rev</strong>. B<br />
5/<strong>30</strong>/<strong>07</strong>
This manual applies to the following spa models:<br />
Aqua Avalon Classic 22 Classic 36 Classic 51 Victory Extreme<br />
SQ63 A515 CA22 CA36 CA51 VX510R<br />
SQ88 A526 CBA22 CBA36 CBA51 VX515B<br />
SQ92 A534 CD22 CD36 CD51 VX520J<br />
SQ100 A726B CM22 CE36 CE51 VX520K<br />
SQ800 A726L CP22 CM36 CM51 VX520O<br />
SQ900 A734B CR22 CN36 CN51 VX520R<br />
A734L CT22 CP36 CP51 VX620A<br />
A744B CR36 CR51 VX726P<br />
A744L CT36 CT51 VX726T<br />
A826B<br />
VX748P<br />
A826L<br />
VX834B<br />
A834B<br />
VX834L<br />
A834L<br />
VX848B<br />
A844B<br />
VX848L<br />
A844L<br />
A857B<br />
A857L<br />
Galaxy Home Journey Signature Ultimate Fitness<br />
GX49 H901 J501 S702 Fitness 2400<br />
H902 J502 S703 Fitness 2500<br />
H903 J503 S704 Fitness 4700<br />
H904 J504 S705<br />
H905 J505 S706<br />
H9<strong>07</strong> J506 S7<strong>07</strong><br />
H908 J5<strong>07</strong> S708<br />
J508<br />
S709<br />
Copyright 2006-20<strong>07</strong> <strong>Cal</strong>ifornia Acrylic Industries, Inc. All rights reserved. Duplication without<br />
written consent is strictly prohibited.<br />
<strong>Cal</strong> <strong>Spas</strong>, Adjustable Therapy System, ATS, Bio-Clean, <strong>Cal</strong> Balance, <strong>Cal</strong><br />
Entertainment System, <strong>Cal</strong> Zone Quest 1000 and <strong>Cal</strong> Zone Quest 2000, <strong>Cal</strong> Sweep,<br />
<strong>Cal</strong> Select, Fitness Spa Series, Spa <strong>Cal</strong>, and XL Heat Exchanger are registered<br />
trademarks.<br />
Due to continuous improvement programs, all models, operation, and/or specifications are<br />
subject to change without prior notice.<br />
<strong>LTR20<strong>07</strong>1000</strong>, <strong>Rev</strong>. B<br />
5/<strong>30</strong>/<strong>07</strong><br />
CONTACT INFORMATION<br />
For customer service, please contact<br />
your authorized dealer immediately. If<br />
you need additional information and/<br />
or assistance, please contact:<br />
C.A.I. Customer Service Department<br />
1462 East Ninth Street<br />
Pomona, CA 91766.<br />
Toll Free: 1-800-CAL-SPAS<br />
Fax: 1-909-629-3890
Read This First!<br />
Important Safety Instructions .............. 2<br />
Basic Spa Information .................... 3<br />
Preparing for Your New Portable Spa<br />
Planning the Best Location. ............... 4<br />
Preparing a Good Foundation ............. 4<br />
Electrical Set-up Before Delivery of Your Spa. 5<br />
120 Volt Electrical Installation Guidelines .... 5<br />
240 Volt Electrical Installation. ............. 6<br />
Gas Heater Hook-up ..................... 8<br />
Filling and Powering Up Your Portable Spa .. 8<br />
Operating Your Spa<br />
5900, 6000, and 6100 Electronic Control<br />
Operation .............................. 9<br />
6200 and 6<strong>30</strong>0 Electronic Control Operation .12<br />
7000, 9000, and 9800 Electronic Control<br />
Operation ............................. 15<br />
Auxiliary Control Operation .............. 19<br />
Wireless Spa Monitor ................... 19<br />
Adjustable Jets ........................ 20<br />
Diverter Knobs ......................... 20<br />
Air Venturis. ........................... 20<br />
Adjustable Therapy System ............ 20<br />
Multi-Colored Spa Light Operation ........ 21<br />
Spa Cover ............................. 21<br />
Aromatherapy. ......................... 21<br />
Waterfalls ............................. 21<br />
Removing and Reseating the Pillows ...... 22<br />
Draining Your Portable Spa. .............. 22<br />
Winterizing (Cold Climate Draining). ....... 23<br />
Table of Contents<br />
Water Quality Maintenance<br />
<strong>Cal</strong> <strong>Spas</strong> Clear Water Plan ............... 24<br />
Alternative Sanitation Options ............ 24<br />
Before You Begin ....................... 24<br />
Chemical Safety ........................ 25<br />
Chemical Descriptions .................. 26<br />
Traditional Chemical Start Up. ............ 28<br />
Bromine Clear Water Plan ................ 28<br />
Chlorine Clear Water Plan ................ 29<br />
Ozonator Clear Water Plan ............... 29<br />
Bromine Generator Clear Water Plan. ...... <strong>30</strong><br />
<strong>Cal</strong> Inline Sanitation System Clear Water Plan3 1<br />
Maintenance ........................... 33<br />
Cleaning and Maintenance<br />
Cleaning and Replacing the Filter ......... 34<br />
Cleaning the Cover, Shell and Pillows ...... 34<br />
Using the <strong>Cal</strong> Entertainment System<br />
Operating the CD Player ................. 37<br />
Wired Remote Control ................... 37<br />
Raising and Lowering the 20” TV. ......... 38<br />
Playing a Movie ........................ 38<br />
Using the Universal Remote Control ....... 38<br />
Programming the Universal Remote Control .39<br />
Appendix<br />
Replacement Parts. ..................... 40<br />
Keeping Fit with your <strong>Cal</strong> Spa ............ 51<br />
<strong>Cal</strong> <strong>Spas</strong> Chemicals ................... 53<br />
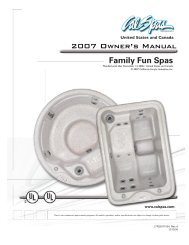
20<strong>07</strong> Warranty Information ............... 56<br />
20<strong>07</strong> Portable Spa Owner’s Manual Page 1<br />
<strong>LTR20<strong>07</strong>1000</strong>, <strong>Rev</strong>. B
Read This First!<br />
Read This First!<br />
Important Safety Instructions<br />
When installing and using this electrical equipment,<br />
always follow basic safety precautions. Following these<br />
instructions will help make your first spa session a<br />
pleasurable one.<br />
READ AND FOLLOW ALL INSTRUCTIONS<br />
All 120V spas require a DEDICATED 20 AMP GFCI<br />
SERVICE. Do not use extension cords.<br />
NOTE: A licensed electrician may be required to<br />
upgrade your standard receptacle and/or circuit<br />
breaker.<br />
All 240V spas require a DEDICATED 50 AMP GFCI<br />
SERVICE WITH FOUR #6 AWG COPPER WIRES.<br />
DANGER -- RISK OF ACCIDENTAL DROWNING:<br />
Do not allow children to be in or around a spa unless<br />
a responsible adult supervises them. Keep the spa<br />
cover on and locked when not in use. See instructions<br />
enclosed with your cover for locking procedures.<br />
DANGER -- RISK OF INJURY: The suction fittings<br />
in this spa are sized to match the specific water flow<br />
created by the pump. Should the need arise to replace<br />
the suction fittings, or the pump, be sure the flow rates<br />
are compatible.<br />
DANGER -- RISK OF INJURY: Never operate the<br />
spa if the suction fitting or filter baskets are broken or<br />
missing.<br />
DANGER -- RISK OF INJURY: Never replace a suction<br />
fitting with one that is rated less than the flow rate<br />
marked on the original suction fitting.<br />
DANGER -- RISK OF ELECTRIC SHOCK: Install the<br />
spa at least 5 feet (1.5 meters) from all metal surfaces.<br />
As an alternative, a spa may be installed within 5 feet<br />
of metal surfaces if each metal surface is permanently<br />
bonded by a minimum #8 AWG solid copper conductor<br />
to the outside of the spa’s control box.<br />
DANGER -- RISK OF ELECTRIC SHOCK: Do not<br />
permit any external electrical appliances, such as<br />
lights, telephones, radios, televisions, and etc., within 5<br />
feet (1.5 meters) of the spa. Never attempt to operate<br />
any electrical device from inside the spa. This does not<br />
apply to lights, stereos and televisions that are built in<br />
to the spa as factory options from <strong>Cal</strong> <strong>Spas</strong>.<br />
WARNING -- RISK OF INJURY<br />
• The spa water should never exceed 104˚F (40˚C).<br />
Water temperatures between 100˚F (38˚C) and<br />
104˚F (40˚C) are considered safe for a healthy<br />
adult. Lower water temperatures are recommended<br />
for young children and when spa use exceeds 10<br />
minutes.<br />
• High water temperatures have a high potential for<br />
causing fetal damage during pregnancy. Women<br />
who are pregnant, or who think they are pregnant,<br />
should always check with their physician prior to<br />
spa usage.<br />
• The use of alcohol, drugs or medication before or<br />
during spa use may lead to unconsciousness, with<br />
the possibility of drowning.<br />
• Persons suffering from obesity, a medical history<br />
of heart disease, low or high blood pressure,<br />
circulatory system problems or diabetes should<br />
consult a physician before using the spa.<br />
• Persons using medications should consult a<br />
physician before using the spa since some<br />
medications may induce drowsiness while<br />
others may affect heart rate, blood pressure and<br />
circulation.<br />
Hyperthermia Danger<br />
Prolonged exposure to hot air or water can induce<br />
hyperthermia. Hyperthermia occurs when the internal<br />
temperature of the body reaches a level 3˚F to 6˚F<br />
above the normal body temperature of 98.6˚F (or 2˚C to<br />
4˚C above 37˚C). While hyperthermia has many health<br />
benefits, it is important not to allow your body’s core<br />
temperature to rise above 103˚F (39.5˚C). Symptoms<br />
of excessive hyperthermia include dizziness, lethargy,<br />
drowsiness and fainting. The effects of excessive<br />
hyperthermia may include:<br />
• Failure to perceive heat<br />
• Failure to recognize the need to exit spa or hot tub<br />
• Unawareness of impending hazard<br />
• Fetal damage in pregnant women<br />
• Physical inability to exit the spa<br />
• Unconsciousness<br />
WARNING: The use of alcohol, drugs, or medication<br />
can greatly increase the risk of fatal hyperthermia.<br />
Page 2<br />
20<strong>07</strong> Portable Spa Owner’s Manual<br />
<strong>LTR20<strong>07</strong>1000</strong>, <strong>Rev</strong>. B
Basic Spa Information<br />
The following operating and maintenance instructions<br />
are very important and must be followed carefully. With<br />
the proper care and maintenance, your <strong>Cal</strong> Spa will<br />
provide you with years of satisfaction and performance.<br />
Do not be afraid to push buttons or turn knobs to<br />
learn about your new <strong>Cal</strong> Spa, as it is built with quality<br />
materials and excellent craftsmanship.<br />
Your new <strong>Cal</strong> Spa has been engineered with a highpowered<br />
water pump that pushes water through<br />
various therapy jets, which will relax even the tightest<br />
muscles. In addition to the water pressure, you can add<br />
air into the spa water with air venturi handles located<br />
seat-side that increase the intensity of your massage.<br />
The filtering of this spa is very important. It will<br />
minimize cleaning time and the amount of chemicals<br />
needed to keep your spa water balanced. The two daily<br />
pre-programmed filter cycles of two hours in duration<br />
can be increased to six hour cycles if the need arises.<br />
This can be accomplished through the topside control<br />
panel.<br />
IMPORTANT: Keep the spa covered when not in use!<br />
• Covered spas use less electricity while maintaining<br />
a set temperature.<br />
• Covering your spa will protect your spa’s finish<br />
from the sun’s ultraviolet rays.<br />
• You are required to keep the spa covered to<br />
maintain warranty coverage.<br />
• Covering your spa helps prevent children from<br />
drowning in the spa.<br />
Your new <strong>Cal</strong> Spa comes equipped with an electric<br />
heater. Following the directions listed below will ensure<br />
the most efficient operation:<br />
NOTE: This method is only for spa usage under two<br />
hours a week.<br />
Read This First!<br />
• Keep the spa’s operating temperature 5˚F below<br />
the desired usage temperature when not in use.<br />
One or two hours before use, set the temperature<br />
to the desired temperature.<br />
• If the spa usage exceeds two hours a week, the set<br />
temperature should remain at the desired usage<br />
temperature.<br />
• The air venturis should be used sparingly. When<br />
open, water temperature drops quite rapidly and<br />
can also dissipate chemicals.<br />
Allowing the water temperature to lower more than<br />
10˚F below the desired usage temperature and<br />
reheating it prior to usage will cause the heater to<br />
operate longer than it normally would maintaining the<br />
desired temperature. Doing this will increase your<br />
operating cost and makes your heater work more than<br />
necessary.<br />
The filter needs to be cleaned or changed on a regular<br />
basis. This process takes only a few minutes and<br />
the result is increased water clarity and equipment<br />
longevity.<br />
Water level is very important to the operation of your<br />
spa. If the water level is too low or too high, your spa<br />
will not operate properly. The water level should be to<br />
the middle of the skimmer area when the spa is not<br />
being used.<br />
We recommend that your spa water be changed every<br />
4 to 6 months. You may find the need to change your<br />
spa water more frequently with heavy use. When<br />
empty, your spa should be cleaned with a non-abrasive<br />
cleaner, such as <strong>Cal</strong> <strong>Spas</strong> All Surface Cleaner, and<br />
then rinsed thoroughly.<br />
See the section “Cleaning and Maintaining Your Spa”<br />
for instructions on draining your spa.<br />
When filling your spa, always fill through the skimmer<br />
filter canister. Use only regular tap water.<br />
WARNING: DO NOT USE SOFT WATER.<br />
20<strong>07</strong> Portable Spa Owner’s Manual Page 3<br />
<strong>LTR20<strong>07</strong>1000</strong>, <strong>Rev</strong>. B
Preparing for Your New Portable Spa<br />
Preparing for Your New Portable Spa<br />
Most cities and counties require permits for exterior construction and electrical circuits. In addition, some<br />
communities have codes requiring residential barriers such as fencing and/or self-closing gates on property to<br />
prevent unsupervised access to the property by children. Your dealer can provide information on which permits<br />
may be required and how to obtain them prior to the delivery of your <strong>Cal</strong> Spa.<br />
Planning the Best Location<br />
Here are some of the things that you will need to<br />
consider when determining where to place your new<br />
spa.<br />
Safety First<br />
Do not place your spa within 10 feet (3 m) of overhead<br />
power lines.<br />
Consider How You Will Use Your Spa<br />
How you intend to use your spa will help you determine<br />
where you should position it. For example, will you use<br />
your spa for recreational or therapeutic purposes? If<br />
your spa is mainly used for family recreation, be sure<br />
to leave plenty of room around it for activity. If you will<br />
use it for relaxation and therapy, you’ll probably want to<br />
create a specific mood around it.<br />
Plan for Your Environment<br />
If you live in a region where it snows in the winter or<br />
rains frequently, place the spa near a house entry. By<br />
doing this, you will have a place to change clothes and<br />
not be uncomfortable.<br />
Consider Your Privacy<br />
In a cold-weather climate, bare trees won’t provide<br />
much privacy. Think of your spa’s surroundings during<br />
all seasons to determine your best privacy options.<br />
Consider the view of your neighbors as well when you<br />
plan the location of your spa.<br />
Provide A View With Your Spa<br />
Think about the direction you will be facing when sitting<br />
in your spa. Do you have a special landscaped area in<br />
your yard that you find enjoyable? Perhaps there is an<br />
area that catches a soothing breeze during the day or a<br />
lovely sunset in the evening.<br />
Keep Your Spa Clean<br />
In planning your spa’s location, consider a location<br />
where the path to and from the house can be kept<br />
clean and free of debris.<br />
Prevent dirt and contaminants from being tracked into<br />
your spa by placing a foot mat at the spa’s entrance<br />
where the bathers can clean their feet before entering<br />
your spa.<br />
Allow For Service Access<br />
Many people choose to install a decorative structure<br />
around their spa. If you are installing your spa with any<br />
type of structure on the outside, such as a gazebo,<br />
remember to allow access for service. It is always best<br />
to design special installations so that the spa can still<br />
be moved, or lifted off the ground.<br />
Preparing a Good Foundation<br />
Your spa needs a solid and level foundation. The area<br />
that it sits on must be able to support the weight of the<br />
spa and the occupants who use it. If the foundation<br />
is inadequate, it may shift or settle after the spa is in<br />
place, causing stress that could damage your spa shell<br />
or finish.<br />
Damage caused by inadequate or improper foundation<br />
support is not covered by the warranty. It is the<br />
responsibility of the spa owner to provide a proper<br />
foundation for the spa. We strongly recommended that<br />
you have a qualified, licensed contractor prepare the<br />
foundation for your spa.<br />
Place the spa on a level foundation (preferably a 4”<br />
concrete slab). If you are installing the spa indoors,<br />
pay close attention to the flooring beneath it. Choose<br />
flooring that will not be damaged or stained.<br />
If you are installing your spa on an elevated wood<br />
deck or other structure, consult a structural engineer<br />
or a contractor to ensure the structure will support the<br />
weight of 150 pounds per square foot.<br />
Your <strong>Cal</strong> <strong>Spas</strong> retailer can help you with your<br />
foundation and more. Your retailer has a wealth of<br />
information and experience about how to get the most<br />
out of your spa and can provide you with a full line of<br />
accessories that are designed to compliment your spa<br />
and increase your enjoyment.<br />
Page 4<br />
20<strong>07</strong> Portable Spa Owner’s Manual<br />
<strong>LTR20<strong>07</strong>1000</strong>, <strong>Rev</strong>. B
Electrical Set-up Before<br />
Delivery of Your Spa<br />
When installed in the United States, the electrical wiring<br />
of this spa must meet the requirements of National<br />
Electric Code, ANSI/NFPA 70-1999 and any applicable<br />
state or local codes. The electrical circuit must be<br />
installed by an electrical contractor and approved by a<br />
local building / electrical inspector.<br />
All 240V spas must be permanently connected (hard<br />
wired) to the power supply. 120V spas may use a<br />
GFCI cord, plugged into a dedicated grounded outlet.<br />
Supplying power to a spa that is not in accordance with<br />
these instructions will void both the independent testing<br />
agency listing and the manufacturer’s warranty.<br />
The power supplied to the spa must be on a dedicated<br />
GFCI protected circuit with no other appliances or lights<br />
sharing the power.<br />
To determine the current, voltage, and wire size<br />
required for the spa configuration to be connected,<br />
refer to the following:<br />
• Wire size must comply with NEC and/or local<br />
codes.<br />
• Wire size is determined by length of run from<br />
breaker box to spa and maximum current draw.<br />
• We recommend copper wire with THHN insulation.<br />
• All wiring must be copper to ensure adequate<br />
connections. Do not use aluminum wire.<br />
• When NEC requires the use of wires larger than<br />
#6 (10mm²), install a junction box near the spa and<br />
use #6 (10mm²) wire between the junction box and<br />
the spa.<br />
IMPORTANT: A clearly labeled emergency shutoff<br />
or control switch for the purpose of disconnecting<br />
all electrical power to the spa including the motors,<br />
recirculation system and jet system shall be installed at<br />
a point readily accessible to the users and not less than<br />
5 feet (1.5 m) away, adjacent to, and within sight of the<br />
spa. (NEC 680.41)<br />
The electrical circuit for the spa must include a suitable<br />
GFCI as required by NEC 680.31.<br />
Preparing for Your New Portable Spa<br />
120 Volt Electrical Installation<br />
Guidelines<br />
Always follow applicable local, state and federal codes<br />
and guidelines.<br />
• Use only a dedicated electrical line with a 20-amp<br />
breaker.<br />
• Cord-and-plug connections may not use a cord<br />
longer than 15 feet (4.6 m) and must be plugged<br />
into a dedicated 20-amp GFCI connection (NEC<br />
680.42(A)(2)). Do not use extension cords!<br />
• Always use a weatherproof-covered receptacle.<br />
• Receptacle shall be located not less than 5 feet<br />
(1.5 m) from and not exceeding 10 feet (3.0 m)<br />
from the inside wall of the spa. (NEC 680.43(A))<br />
• Do not bury the power cord.<br />
• If your cord becomes damaged, replace it before<br />
next usage.<br />
All 120V spas must have a GFCI. This can be<br />
either a 20-amp GFCI receptacle or a 20-amp GFCI<br />
cord and plug kit as shown below (CKIT110 - P/N<br />
ELE09700086).<br />
Test the GFCI plug prior to first use and periodically<br />
when the spa is powered. To test the GFCI plug<br />
version, follow these instructions. (Spa should already<br />
be plugged in and operational.)<br />
1.<br />
2.<br />
Press the TEST button on the GFCI. The GFCI will<br />
trip and the spa will stop operating.<br />
Press the RESET button on the GFCI. The GFCI<br />
will reset and the spa will turn back on.<br />
The spa is now safe to use.<br />
If the GFCI trips while the spa is in use, press the<br />
RESET button. If the GFCI does not reset, unplug the<br />
spa and call your local <strong>Cal</strong> <strong>Spas</strong> dealer for service. DO<br />
NOT USE THE SPA!<br />
20<strong>07</strong> Portable Spa Owner’s Manual Page 5<br />
<strong>LTR20<strong>07</strong>1000</strong>, <strong>Rev</strong>. B
Preparing for Your New Portable Spa<br />
240 Volt Electrical Installation<br />
All 240V spas must be permanently connected (hard<br />
wired) to the power supply. These instructions describe<br />
the only acceptable electrical wiring procedure. <strong>Spas</strong><br />
wired in any other way will void your warranty and may<br />
result in serious injury.<br />
These are the only acceptable electrical wiring<br />
procedures. <strong>Spas</strong> wired in any other way will void your<br />
warranty. See the wiring diagrams on the following<br />
pages<br />
When installed in the United States, the electrical<br />
wiring of this spa must meet the requirements of<br />
National Electric Code, ANSI/NFPA 70-2005 and any<br />
applicable local, state, and federal codes. The electrical<br />
circuit must be installed by an electrical contractor and<br />
approved by a local building / electrical inspector.<br />
GFCI and Wiring Requirements<br />
The power supplied to the spa must be on a dedicated<br />
GFCI protected circuit as required by NEC 680.31 with<br />
no other appliances or lights sharing the power.<br />
All 240V spas require one 50 amp GFCI with four<br />
#8 AWG copper wires. Ultimate Fitness spas with<br />
the optional 5.5kW auxiliary heater require a second<br />
dedicated electrical service with one <strong>30</strong> amp GFCI and<br />
three #8 AWG copper wires.<br />
Use copper wire with THHN insulation. Do not use<br />
aluminum wire. When NEC requires the use of wires<br />
larger than #6 AWG, install a junction box near the spa<br />
and use #6 AWG wire between the junction box and the<br />
spa.<br />
Wire runs over 85 feet must increase wire gauge to<br />
the next lower number. For example: A normal 50 amp<br />
GFCI with four # 6 AWG Copper wires run over 85 feet<br />
would require you to go to four # 4 AWG copper wires.<br />
Testing the GFCI Breaker<br />
Test the GFCI breaker prior to first use and periodically<br />
when the spa is powered. To test the GFCI breaker<br />
follow these instructions (spa should be operating):<br />
1.<br />
2.<br />
Press the TEST button on the GFCI. The GFCI will<br />
trip and the spa will shut off.<br />
Reset the GFCI breaker by switching the breaker<br />
to the full OFF position, wait a moment, then turn<br />
the breaker back on. The spa should have power<br />
again.<br />
Page 6<br />
20<strong>07</strong> Portable Spa Owner’s Manual<br />
<strong>LTR20<strong>07</strong>1000</strong>, <strong>Rev</strong>. B
GFCI Hook-Up<br />
Preparing for Your New Portable Spa<br />
20<strong>07</strong> Portable Spa Owner’s Manual Page 7<br />
<strong>LTR20<strong>07</strong>1000</strong>, <strong>Rev</strong>. B
Preparing for Your New Portable Spa<br />
Gas Heater Hook-up<br />
Ultimate Fitness Series spa owners may buy and install<br />
a separate gas heater and pump for use with their spa.<br />
This option may be purchased separately from your<br />
local distributor.<br />
Spa owners are responsible for ensuring installation of<br />
their gas heater conforms to local, state, and federal<br />
regulations. The electrical and gas installation must<br />
be performed by contractors and approved by a local<br />
building / electrical inspector. Failure to do so may void<br />
your warranty.<br />
All Ultimate Fitness Series spas are plumbed with two<br />
capped lines running from the front to the back of the<br />
spa that can be attached to an external gas heater.<br />
Customers are responsible for creating openings in the<br />
rear panel to accommodate the lines and wiring. The<br />
gas heater should be located not less than 10 feet and<br />
no more than 25 feet away from the spa.<br />
Filling and Powering Up Your<br />
Portable Spa<br />
7.<br />
Once the water is at the correct level and air is<br />
bled, turn on the power at the GFCI breaker.<br />
(Ensure that the 120V spas are connected to the<br />
proper electrical outlet.)<br />
Depending on the model, when the power is turned on<br />
to the spa, the controls will perform a diagnostic check<br />
for approximately five minutes. When the diagnostic<br />
is complete, the spa will automatically operate at<br />
filter speed and continue heating until the spa water<br />
temperature reaches the default temperature of 100˚F.<br />
8.<br />
9.<br />
If no water is flowing when the pump is running<br />
there could be an air pocket at the suction side of<br />
the pump. Shut off power to the spa and loosen<br />
the pump union on the suction side of the pump to<br />
bleed the air. When air is bled, turn power back on.<br />
Re-install the filter and the filter basket into the<br />
skimmer/filter canister.<br />
The spa is now ready for use.<br />
NOTE: Never run the spa with the gate valves closed<br />
or without water circulating for long periods of time. Be<br />
careful not to over-tighten the plumbing fittings.<br />
Never fill your spa with soft water. Soft water makes<br />
it impossible to maintain the proper water chemistry<br />
and may cause the water to foam, which will ultimately<br />
harm the finish of the spa and void your warranty.<br />
1.<br />
2.<br />
3.<br />
4.<br />
5.<br />
6.<br />
Once the spa has been placed on an approved<br />
surface and has been correctly wired by a licensed<br />
electrician, inspect all plumbing connections in the<br />
equipment area of your spa. Ensure that these<br />
connections are secure and that they did not<br />
loosen during shipment.<br />
If equipped, open all gate valves in the equipment<br />
area. Before operating the spa, these valves must<br />
be in the up or “open” position.<br />
Remove the filter basket and cartridge from<br />
skimmer/filter canister.<br />
Place a garden hose in the skimmer/filter canister<br />
and fill your spa with regular tap water to the proper<br />
water level (halfway up the skimmer area).<br />
(For owners of the automatic bromine generator)<br />
Make sure the dial on the face of the bromine<br />
generator unit is turned to the “OFF” position.<br />
Open the air relief valve (located next to the two<br />
filters, if equipped) after the air bubbles stop<br />
coming out of it. Close the valve hand-tight.<br />
Page 8<br />
20<strong>07</strong> Portable Spa Owner’s Manual<br />
<strong>LTR20<strong>07</strong>1000</strong>, <strong>Rev</strong>. B
Operating Your Spa<br />
5900, 6000, and 6100<br />
Electronic Control<br />
Operation<br />
Initial Start up<br />
When first powered up, it will automatically<br />
revert to Priming mode. Pr on the topside<br />
display will indicate this. Priming mode will be active<br />
for less than five minutes at which time the heater<br />
will be activated and the water temperature will be<br />
maintained in Standard mode. The spa will heat to<br />
100°F (37°C) at start up until the set temperature is<br />
changed as described below.<br />
Temperature Adjustment<br />
(Range 80°F to 104°F, 26°C to 40°C)<br />
The 5900, 6000 and 6100 electronic control panel<br />
displays the actual water temperature in degrees<br />
Fahrenheit. The displayed temperature will only be<br />
current after the pump has been running for at least<br />
two minutes.<br />
To display the temperature that the spa is set to:<br />
• Press the Temp button. The temperature setting<br />
will flash.<br />
• While the display is flashing, each time you press<br />
Temp button, the set temperature will change up or<br />
down one degree.<br />
• If the desired temperature is opposite of the<br />
direction each press of the button is making,<br />
release button, allow display to stop flashing and<br />
then press Temp button to change temperature the<br />
other direction.<br />
Standard, Economy and Sleep Heating<br />
Modes<br />
Your new spa is equipped with a heating feature that<br />
gives you complete control of the heating system.<br />
When the spa is powered up, it will automatically start<br />
in standard heating mode.<br />
• St will light briefly on the main display. In this<br />
mode, the heating system will automatically<br />
maintain the set spa temperature. In the economyheating<br />
mode, the heating system will only activate<br />
during filtration times.<br />
Operating Your Spa<br />
• Ec will display solid if temperature is not current<br />
and will alternate with spa temperature if measured<br />
temperature is current.<br />
• Economy mode will heat the water to the set<br />
temperature while Sleep mode, indicated by a<br />
SL on the main display, will also only activate<br />
the heater during the filtering cycles but will only<br />
heat the water to within 20°F (10°C) of the set<br />
temperature. Like Economy mode, SL will display<br />
solid when temperature is not current and will<br />
alternate with actual temperature when it is current.<br />
NOTE: Displayed temperature will only be current after<br />
the pump has been running for at least two minutes.<br />
Switching Modes<br />
• Press Temp button followed by the Light button.<br />
• Press the same sequence to switch to the next<br />
mode.<br />
Jets<br />
Press the Jets button:<br />
• Once to activate low speed pump.<br />
• Twice to activate high speed.<br />
• Three times to return to turn pump off.<br />
Light<br />
Press the Light button to turn on the light. Press it<br />
once again to turn the light off. All optional lighting such<br />
as the control panel light and cabinet perimeter lighting<br />
is controlled by the Light button and will turn on and off<br />
with the spa light.<br />
Pump 2 (6100 controls only)<br />
Press the Option button to turn on the Pump 2 on.<br />
Press it once again to turn off the Pump 2 off.<br />
20<strong>07</strong> Portable Spa Owner’s Manual Page 9<br />
<strong>LTR20<strong>07</strong>1000</strong>, <strong>Rev</strong>. B
Operating Your Spa<br />
Automatic Time outs<br />
These features will automatically turn themselves off<br />
during periods of continuous use:<br />
• Low speed pump<br />
• High speed pumps<br />
• Optional circulation pump<br />
• Optional turbo<br />
• Spa light<br />
Setting Filtration Cycles<br />
After 4 hours<br />
After 15 minutes<br />
After 15 minutes<br />
After 15 minutes<br />
After 15 minutes<br />
Your spa is programmed to filter twice a day. The<br />
first cycle will begin 6 minutes after the spa is turned<br />
on and the second cycle 12 hours later. The factory<br />
has programmed the cycle to last for 2 hours but this<br />
can be switched to 4, 6, or 8 hours depending on your<br />
requirements. To set filtration time, turn off the power<br />
to the spa at the time of day you would like one of the<br />
filtration cycles to begin then turn back on after <strong>30</strong><br />
seconds. When power has been restored, press the<br />
“Temp” button then the “Jets” button. Press “Temp”<br />
button again to change the filtering cycle duration.<br />
When desired duration is selected press the “Jets”<br />
button to exit.<br />
At the beginning of each filtering cycle the Turbo<br />
system will run for approximately <strong>30</strong> seconds. The<br />
low speed pump will run for the duration of the filtering<br />
cycle and if an Ozone system is installed it will be<br />
activated. During filtering, “FC” will appear on the main<br />
display.<br />
Diagnostic Messages<br />
Message<br />
Meaning<br />
-- Spa temperature is unknown. After pump has been running for 2 minutes temperature will be<br />
displayed.<br />
HH<br />
OH<br />
IC<br />
SA or Sb<br />
Sn<br />
HL<br />
LF<br />
Overheat protection (spa is shutdown) DO NOT ENTER THE WATER! One sensor has detected<br />
118˚F (48˚C) at the heater. Remove the spa cover and allow spa to cool below 1<strong>07</strong>˚F (42˚C).<br />
Press any button on the topside display to reset spa. If spa will not reset after spa has cooled,<br />
turn off power for approximately <strong>30</strong> seconds and then turn power back on. If display message is<br />
repeated then shut the power off to the spa and call your dealer or service organization.<br />
Overheat protection (spa is shutdown) DO NOT ENTER THE WATER! If the spa has reached<br />
110˚F (43˚C), remove the spa cover to cool the water. At 1<strong>07</strong>˚F (42˚C), the spa should reset itself.<br />
If the spa does not reset, then shut the power off to the spa, wait <strong>30</strong> seconds and restore power<br />
to spa. If display message is repeated then shut the power off to the spa and call your dealer or<br />
service organization.<br />
A possible ice condition exists within the spa. No action is required, the pump will automatically<br />
activate.<br />
Spa is shut down. Spa has detected that one of the sensors is not operating properly. One<br />
of these may display briefly during overheat then disappear when overheat situation has been<br />
resolved. <strong>Cal</strong>l your dealer or service organization if message does not go away.<br />
Sensor (Spa is shut down). The high limit or water temperature sensors are not working correctly.<br />
<strong>Cal</strong>l your dealer or service organization.<br />
A difference in readings between temperature sensors has been detected indicating a possible<br />
water flow problem. Make sure spa is filled to proper level and that pumps are primed (water is<br />
flowing). Also check to make sure filter cartridges are clean. If message does not reset, call your<br />
dealer or service organization.<br />
This will display on the 5th occurrence of the “HL” message in 24 hours indicating a persistent<br />
flow problem. The heater will be shut down but other functions will continue to operate. Follow<br />
“HL” message actions then press any button to reset.<br />
Page 10<br />
20<strong>07</strong> Portable Spa Owner’s Manual<br />
<strong>LTR20<strong>07</strong>1000</strong>, <strong>Rev</strong>. B
Operating Your Spa<br />
dr Insufficient water flow through the heater has been detected. Spa will be shut down for 15<br />
minutes. Check water level and fill spa if water level is low. Make sure pumps are primed (water<br />
is flowing) and filter cartridges are clean. Press any button to reset or wait 15 minutes and spa<br />
will automatically reset. If message does not reset, call your dealer or service organization.<br />
dY<br />
Sf<br />
ST<br />
Ec<br />
SL<br />
Insufficient water level detected in heater. This will display on the 3rd occurrence of “dr”<br />
message. Follow directions for “dr” message and press any button to reset spa. Spa will not<br />
automatically reset when “dY” is displayed.<br />
Safety Suction System (Spa is shut down). The display will show “Sf” as soon as the vacuum<br />
switch closes. All functions will turn off and the system will be disabled until a panel button is<br />
pressed.<br />
Indicates heater is in standard mode<br />
Indicates heater is in economy mode<br />
Indicates heater is in sleep mode<br />
20<strong>07</strong> Portable Spa Owner’s Manual Page 11<br />
<strong>LTR20<strong>07</strong>1000</strong>, <strong>Rev</strong>. B
Operating Your Spa<br />
6200 and 6<strong>30</strong>0 Electronic<br />
Control Operation<br />
Initial Start up<br />
When first powered up, it will<br />
automatically revert to Priming mode. A<br />
Pr on the topside display will indicate<br />
this. Priming mode will be active for<br />
less than five minutes at which time<br />
the heater will be activated and the<br />
water temperature will be maintained<br />
in Standard mode. The spa will heat<br />
to 100°F (37°C) at start up until the set<br />
temperature is changed as described below.<br />
Temperature Adjustment<br />
(Range 80°F to 104°F, 26°C to 40°C)<br />
The 6200 and 6<strong>30</strong>0 electronic control panels display<br />
the actual water temperature in degrees Fahrenheit.<br />
The displayed temperature will only be current after the<br />
pump has been running for at least two minutes.<br />
To display the temperature that the spa is set to:<br />
• Press the Temp button. The temperature setting<br />
will flash.<br />
• While the display is flashing, each time you press<br />
Temp button, the set temperature will change up or<br />
down one degree.<br />
• If the desired temperature is opposite of the<br />
direction each press of the button is making,<br />
release button, allow display to stop flashing and<br />
then press Temp button to change temperature the<br />
other direction.<br />
Standard, Economy and Sleep Heating<br />
Modes<br />
Your new spa is equipped with a heating feature that<br />
gives you complete control of the heating system.<br />
When the spa is powered up, it will automatically start<br />
in standard heating mode.<br />
• St will light briefly on the main display. In this<br />
mode, the heating system will automatically<br />
maintain the set spa temperature. In the economyheating<br />
mode, the heating system will only activate<br />
during filtration times.<br />
• Ec will display solid if temperature is not current<br />
and will alternate with spa temperature if measured<br />
temperature is current.<br />
• Economy mode will heat the water to the set<br />
temperature while Sleep mode, indicated by a<br />
SL on the main display, will also only activate<br />
the heater during the filtering cycles but will only<br />
heat the water to within 20°F (10°C) of the set<br />
temperature. Like Economy mode, SL will display<br />
solid when temperature is not current and will<br />
alternate with actual temperature when it is current.<br />
NOTE: Displayed temperature will only be current after<br />
the pump has been running for at least 2 minutes.<br />
Switching Modes<br />
• Press Temp button followed by the Light button.<br />
• Press the same sequence to switch to the next<br />
mode.<br />
Jets<br />
Press the Jets button:<br />
• Once to activate low speed pump.<br />
• Twice to activate high speed.<br />
• Three times to return to turn pump off.<br />
Light<br />
Press the Light button to turn on the light. Press it<br />
once again to turn the light off. All optional lighting such<br />
as the control panel light and cabinet perimeter lighting<br />
is controlled by the Light button and will turn on and off<br />
with the spa light.<br />
Option<br />
Press the Option button to turn on the pump 2 on.<br />
Press it once again to turn off the pump 2 off (6200<br />
Controls only).<br />
Page 12<br />
20<strong>07</strong> Portable Spa Owner’s Manual<br />
<strong>LTR20<strong>07</strong>1000</strong>, <strong>Rev</strong>. B
Operating Your Spa<br />
6<strong>30</strong>0 Controls - Pump 2 and Pump 3<br />
Sequence<br />
• Press Option button once to activate high speed<br />
pump 2.<br />
• Press Option button twice to activate high speed<br />
pump 3 and high speed pump 2<br />
• Press 3 times to activate pump 3 hi speed only<br />
• Press 4 times to turn pumps off<br />
Note: A separate simplex button will be use for Turbo or<br />
air blower operation in 6200 / 6<strong>30</strong>0 Controls.<br />
Automatic Time outs<br />
These features will automatically turn themselves off<br />
during periods of continuous use:<br />
• Low speed pump<br />
• High speed pumps<br />
• Optional circulation pump<br />
After 4 hours<br />
After 15 minutes<br />
After 15 minutes<br />
Setting Filtration Cycles<br />
Your spa is programmed to filter twice a day. The<br />
first cycle will begin 6 minutes after the spa is turned<br />
on and the second cycle 12 hours later. The factory<br />
has programmed the cycle to last for 2 hours but this<br />
can be switched to 4, 6, or 8 hours depending on your<br />
requirements. To set filtration time, turn off the power<br />
to the spa at the time of day you would like one of the<br />
filtration cycles to begin then turn back on after <strong>30</strong><br />
seconds. When power has been restored, press the<br />
Temp button then the Jets button. Press Temp button<br />
again to change the filtering cycle duration. When<br />
desired duration is selected press the Jets button to<br />
exit.<br />
At the beginning of each filtering cycle the Turbo<br />
system will run for approximately <strong>30</strong> seconds. The<br />
low speed pump will run for the duration of the filtering<br />
cycle and if an Ozone system is installed it will be<br />
activated. During filtering, “FC” will appear on the main<br />
display.<br />
•<br />
•<br />
Optional turbo<br />
Spa light<br />
After 15 minutes<br />
After 15 minutes<br />
Diagnostic Messages<br />
Message<br />
Meaning<br />
-- Spa temperature is unknown. After pump has been running for 2 minutes temperature will be<br />
displayed.<br />
HH<br />
OH<br />
IC<br />
SA or Sb<br />
Sn<br />
Overheat protection (spa is shutdown) DO NOT ENTER THE WATER! One sensor has<br />
detected 118˚F (48˚C) at the heater. Remove the spa cover and allow spa to cool below<br />
1<strong>07</strong>˚F (42˚C). Press any button on the topside display to reset spa. If spa will not reset after<br />
spa has cooled, turn off power for approximately <strong>30</strong> seconds and then turn power back on. If<br />
display message is repeated then shut the power off to the spa and call your dealer or service<br />
organization.<br />
Overheat protection (spa is shutdown) DO NOT ENTER THE WATER! If the spa has reached<br />
110˚F (43˚C), remove the spa cover to cool the water. At 1<strong>07</strong>˚F (42˚C), the spa should reset<br />
itself. If the spa does not reset, then shut the power off to the spa, wait <strong>30</strong> seconds and<br />
restore power to spa. If display message is repeated then shut the power off to the spa and<br />
call your dealer or service organization.<br />
A possible ice condition exists within the spa. No action is required, the pump will<br />
automatically activate.<br />
Spa is shut down. Spa has detected that one of the sensors is not operating properly. One<br />
of these may display briefly during overheat then disappear when overheat situation has been<br />
resolved. <strong>Cal</strong>l your dealer or service organization if message does not go away.<br />
Sensor (Spa is shut down). The high limit or water temperature sensors are not working<br />
correctly. <strong>Cal</strong>l your dealer or service organization.<br />
20<strong>07</strong> Portable Spa Owner’s Manual Page 13<br />
<strong>LTR20<strong>07</strong>1000</strong>, <strong>Rev</strong>. B
Operating Your Spa<br />
HL<br />
LF<br />
A difference in readings between temperature sensors has been detected indicating a possible<br />
water flow problem. Make sure spa is filled to proper level and that pumps are primed (water<br />
is flowing). Also check to make sure filter cartridges are clean. If message does not reset, call<br />
your dealer or service organization.<br />
This will display on the 5th occurrence of the “HL” message in 24 hours indicating a persistent<br />
flow problem. The heater will be shut down but other functions will continue to operate. Follow<br />
“HL” message actions then press any button to reset.<br />
dr Insufficient water flow through the heater has been detected. Spa will be shut down for 15<br />
minutes. Check water level and fill spa if water level is low. Make sure pumps are primed<br />
(water is flowing) and filter cartridges are clean. Press any button to reset or wait 15 minutes<br />
and spa will automatically reset. If message does not reset, call your dealer or service<br />
organization.<br />
dY<br />
Sf<br />
ST<br />
Ec<br />
SL<br />
Insufficient water level detected in heater. This will display on the 3rd occurrence of “dr”<br />
message. Follow directions for “dr” message and press any button to reset spa. Spa will not<br />
automatically reset when “dY” is displayed.<br />
Safety Suction System (Spa is shut down). The display will show “Sf” as soon as the vacuum<br />
switch closes. All functions will turn off and the system will be disabled until a panel button is<br />
pressed.<br />
Indicates heater is in standard mode<br />
Indicates heater is in economy mode<br />
Indicates heater is in sleep mode<br />
Page 14<br />
20<strong>07</strong> Portable Spa Owner’s Manual<br />
<strong>LTR20<strong>07</strong>1000</strong>, <strong>Rev</strong>. B
7000, 9000, and 9800 Electronic<br />
Control Operation<br />
When first powered up, the 7000 and<br />
9800 electronic system will perform a<br />
self-diagnostic check and then it will<br />
automatically heat to and maintain a<br />
temperature of 100°F (37.5°C) until you<br />
change the set temperature as listed in<br />
the “Temperature Adjustment” section<br />
below.<br />
These instructions will describe features<br />
and options that your particular spa may<br />
not be equipped with.<br />
Initial Start-up<br />
When your spa is first powered up, it<br />
displays some configuration codes and<br />
then goes into priming mode (Pr will<br />
appear on the display panel). This mode<br />
lasts up to four minutes and then the spa<br />
begins to heat to its pre -programmed<br />
temperature of 100°F.<br />
Temperature Adjustment<br />
(Range 80°F to 104°F, 26°C to 40°C)<br />
The start-up temperature is set at 100°F (37.5°C). The<br />
last measured temperature is constantly displayed<br />
on the control panel. Note that the last measured spa<br />
temperature is displayed. The displayed temperature<br />
will be updated when the pump has been running for at<br />
least two minutes.<br />
Press the “UP” or “DOWN” buttons once to display the<br />
set temperature. Each time either button is pressed<br />
again, the set temperature will increase or decrease<br />
depending on which button is pressed. After three<br />
seconds, the control panel will automatically display the<br />
last measured spa temperature.<br />
Time<br />
When time hasn’t been programmed, the “TIME” icon<br />
flashes. To set the time, press the “TIME” button and<br />
then the “MODE/PROG” button. Use the “UP” and<br />
“DOWN” buttons to adjust time. See the next page for<br />
more detailed instructions.<br />
Standard, Economy, Sleep, and Standby<br />
Modes<br />
Mode/Prog: This button is used to switch between<br />
standard, economy, and sleep modes.<br />
1.<br />
2.<br />
3.<br />
Operating Your Spa<br />
7000 control panel<br />
9000 and 9800 control panel<br />
Press “MODE/PROG” to enter mode programming.<br />
Press the “DOWN” button to cycle through to the<br />
desired mode.<br />
Press “MODE/PROG” to confirm selection.<br />
Standard Mode: This is programmed to maintain<br />
the desired temperature. Note that the last measured<br />
spa temperature displayed is current only when the<br />
pump has been running for at least two minutes. The<br />
“STAND” icon will display until the mode is changed.<br />
Economy Mode: Economy mode heats the spa to the<br />
set temperature only during filter cycles. The “ECON”<br />
icon will display until the mode is changed. Pressing<br />
the “JETS 1” button while in economy mode puts the<br />
spa in standard-in-economy mode, which operates the<br />
same as standard mode but reverts back to economy<br />
mode automatically after one hour. During this time,<br />
pressing the “MODE/PROG” button will revert to<br />
economy mode immediately.<br />
Sleep Mode: Sleep mode heats the spa to within<br />
20°F (6.7°C) of the set temperature only during filter<br />
cycles. The “SLEEP” icon will display until the mode is<br />
changed.<br />
Standby Mode: Pressing “Warm” or “Cool” then “JETS<br />
2” will turn off all spa functions temporarily. This is<br />
helpful when changing a filter. Pressing any button<br />
resets the spa.<br />
20<strong>07</strong> Portable Spa Owner’s Manual Page 15<br />
<strong>LTR20<strong>07</strong>1000</strong>, <strong>Rev</strong>. B
Operating Your Spa<br />
Jets 1<br />
Press the “JETS 1” button once to turn pump 1 on or off<br />
and to shift between low and high speeds if equipped.<br />
If left running, the low speed turns off after two hours<br />
and the high speed turns off after 15 minutes. On<br />
non-circulation systems, the low speed of pump 1 runs<br />
when the blower or any other pump is on. It may also<br />
activate for at least two minutes every <strong>30</strong> minutes to<br />
detect the spa temperature and then to heat to the set<br />
temperature if needed, depending upon the mode.<br />
When the low speed turns on automatically, it cannot<br />
be deactivated from the panel; however, the high speed<br />
may be started.<br />
Jets 2<br />
(Optional with the 7000 controller) Press the “JETS<br />
2” button once to turn pump 2 on or off and to shift<br />
between low and high speeds if it is a two-speed pump.<br />
If left running, the pump will turn off after 15 minutes.<br />
Option<br />
This is an optional feature. Press the “OPTION” button<br />
to turn the optional equipment on and off. If left on, the<br />
equipment will automatically turn off after 15 minutes.<br />
Light<br />
Press the “LIGHT” button to turn the spa light on and<br />
off and to shift between dim and bright settings if your<br />
light is dimmable. On dim, the control panel will show<br />
the center circle plus one quarter of the light beams.<br />
Half of the light beams will show on medium brightness,<br />
and all of the light beams will show on bright.<br />
Invert<br />
Press the “INVERT” button to change the numbers in<br />
the display to read upside down. Another press returns<br />
the display to the right-side-up position. This enables<br />
you to read the display while you are in the spa.<br />
Locking the Panel<br />
To lock the panel:<br />
• Press “TIME”, “JETS 1”, and the “UP” button within<br />
three seconds. When locked, the panel will display<br />
“LOCK”. All buttons are frozen except the “TIME”<br />
button.<br />
To unlock the panel:<br />
• Press “TIME”, “JETS 1” then the “DOWN” button<br />
within three seconds.<br />
Setting the Temperature Lock<br />
To activate the temperature lock:<br />
Page 16<br />
• Press the “UP” or “DOWN” button, “TIME”, “JETS<br />
1”, then the “UP” button within three seconds. The<br />
panel will display “TEMP LOCK” when the set<br />
temperature is locked.<br />
To unlock the set temperature:<br />
• Press the “UP” or “DOWN” button, “TIME”, “JETS<br />
1”, and then the “DOWN” button.<br />
Circulation Pump<br />
This is an optional feature. The circulation pump will<br />
come on when the system is checking temperature,<br />
during filter cycles, during freeze conditions, or when<br />
another pump is on.<br />
Preset Filter Cycles<br />
There are two filter cycles per day. The start and end<br />
times of each cycle are programmable. To program,<br />
set the time as instructed above, then press “MODE/<br />
PROG” to advance to the next setting (or to exit after<br />
the last setting). The default filter cycles are as follows:<br />
• The first filter cycle is automatically activated at<br />
8:00 AM and operates the pump until 10:00 AM.<br />
The “FILTER 1” indicator icon will light when filter 1<br />
is running.<br />
• The second filter cycle is automatically activated<br />
at 8:00 PM and operates the pump until 10:00 PM.<br />
The “FILTER 2” indicator icon will light when filter 2<br />
is running.<br />
The pump and the ozone generator will run during<br />
filtration. At the start of each filter cycle, the blower will<br />
run on highest speed for <strong>30</strong> seconds to clean out the<br />
air channels. The lowest speed of pump 2 and pump 3<br />
will run for five minutes. In the event of power loss or<br />
shut down, the time of day will need to be reset for filter<br />
cycles to run according to your desired programming.<br />
Clean-up Cycle<br />
When the pump or blower is turned on by a button<br />
press, a clean-up cycle begins <strong>30</strong> minutes after the<br />
pump or blower is turned off or times out. The pump<br />
and the ozone generator will run for one hour.<br />
Ozone<br />
This is an optional feature. On most systems, the<br />
ozone generator (if installed) runs during filter cycles<br />
(except when pump 1 is operating at high speed on a<br />
non-circ system) and during clean-up cycles. On some<br />
systems, the ozone generator operates whenever<br />
the pump runs. If your system is configured with the<br />
optional ozone disable feature, the ozone generator will<br />
turn off for one hour any time a function button (“JETS<br />
1”, “JETS 2”, “OPTION” etc.) is pressed.<br />
20<strong>07</strong> Portable Spa Owner’s Manual<br />
<strong>LTR20<strong>07</strong>1000</strong>, <strong>Rev</strong>. B
Operating Your Spa<br />
Freeze Protection<br />
If the temperature sensors detect a drop to 44°F<br />
within the heater, the pump automatically activates<br />
to provide freeze protection. The equipment stays on<br />
until four minutes after the sensors detect that the<br />
spa temperature has risen to 45°F or higher. In colder<br />
climates, an optional additional freeze sensor may<br />
be added to protect against freeze conditions that<br />
may not be sensed by the standard sensors. Auxiliary<br />
freeze sensor protection acts similarly except with the<br />
temperature thresholds determined by the switch and<br />
without a four-minute delay in turnoff.<br />
Periodic Reminder Messages<br />
Press the “Mode” button to reset a displayed reminder.<br />
Message Frequency Action Required<br />
rPH Every 7 days Test and adjust chemical levels per manufacturer’s instructions.<br />
rSA Every 7 days Test and adjust chemical levels per manufacturer’s instructions.<br />
rCL Every <strong>30</strong> days Remove, clean, and reinstall filter per manufacturer’s instructions.<br />
rtg Every <strong>30</strong> days Test and reset GFCI per manufacturer’s instructions. Drain and refill spa<br />
per manufacturer’s instructions.<br />
rdr Every 90 days Drain and refill spa per manufacturer’s instructions.<br />
rCO Every 180 days Clean and condition spa cover<br />
rCH Every 365 days Install New Bio-Clean Filter<br />
Message Meaning Action Required<br />
OHH<br />
OHS<br />
ICE<br />
Sna<br />
Snb<br />
No message on display. Power<br />
has been cut off to the spa.<br />
“Overheat” - The spa has shut<br />
down. One of the sensors has<br />
detected 118°F at the heater.<br />
“Overheat” - The spa has shut<br />
down. One of the sensors has<br />
detected that the spa water is<br />
110°F.<br />
“Ice” - Potential freeze condition<br />
detected.<br />
Spa is shut down. The sensor that<br />
is plugged into the Sensor “B” jack<br />
is not working.<br />
Spa is shut down. The sensor that<br />
is plugged into the Sensor “A” jack<br />
is not working.<br />
The control panel will be disabled until power returns. Spa<br />
settings and time of day will be preserved for <strong>30</strong> days with<br />
a battery back-up; settings only are preserved until the next<br />
power-up on 7000 systems.<br />
DO NOT ENTER THE WATER. Remove the spa cover and<br />
allow water to cool. Once the heater has cooled, reset by<br />
pushing any button. If spa does not reset, shut off the power<br />
to the spa and call your dealer or service organization.<br />
DO NOT ENTER THE WATER. Remove the spa cover and<br />
allow water to cool. At 1<strong>07</strong>°F, the spa should automatically<br />
reset. If spa does not reset, shut off the power to the spa and<br />
call your dealer or service organization.<br />
No action required. The pumps and the blower will<br />
automatically activate regardless of spa status.<br />
If the problem persists, contact your dealer or service<br />
organization. (May appear temporarily in an overheat<br />
situation and disappear when the heater cools.)<br />
If the problem persists, contact your dealer or service<br />
organization. (May appear temporarily in an overheat<br />
situation and disappear when the heater cools.)<br />
20<strong>07</strong> Portable Spa Owner’s Manual Page 17<br />
<strong>LTR20<strong>07</strong>1000</strong>, <strong>Rev</strong>. B
Operating Your Spa<br />
Message Meaning Action Required<br />
Sns<br />
HFL<br />
LF<br />
dr<br />
dry<br />
Pr<br />
Sensors are out of balance.<br />
If this is alternating with the<br />
temperature, it may just be<br />
a temporary condition. If the<br />
display shows only this message<br />
(periodically blinking), the spa is<br />
shut down.<br />
A substantial difference between<br />
the temperature sensors was<br />
detected. This could indicate a<br />
flow problem.<br />
Persistent low flow problems.<br />
(Displays on the fifth occurrence<br />
of the “HFL” message within 24<br />
hours.) Heater is shut down, but<br />
other spa functions continue to<br />
run normally.<br />
Inadequate water detected in<br />
heater.<br />
Inadequate water detected<br />
in heater. (Displays on third<br />
occurrence of “dr” message.) Spa<br />
is shut down.<br />
When your spa is first actuated, it<br />
will go into Priming mode.<br />
If the problem persists, contact your dealer or service<br />
organization.<br />
If the water level is okay, make sure the pumps have been<br />
primed. If problem persists, contact your dealer or service<br />
organization.<br />
Follow action required for “HFL” message. Heating capacity<br />
of the spa will not reset automatically; you may press any<br />
button to reset.<br />
Check water level in spa. Refill if necessary. If the water level<br />
is okay, make sure the pumps have been primed. Press any<br />
button to reset.<br />
Follow action required for “dr” message. Spa will not<br />
automatically reset; you may press any button to reset.<br />
The Priming mode will last for up to four minutes and<br />
then the spa will begin to heat and maintain the water<br />
temperature in the Standard mode.<br />
--F or --C Temperature unknown After the pump has been running for two minutes, the<br />
temperature will be displayed.<br />
- - - - - - Economy or Sleep mode.<br />
Temperature not displayed.<br />
In Economy or Sleep mode, the pump may be off for hours<br />
outside a filter cycle. If you wish to see the current spa<br />
temperature, either switch to Standard mode or turn Jets1 on<br />
for at least two minutes.<br />
BUF Internal problem detected. Repair required. Contact your dealer or service organization.<br />
Stby<br />
Pressing a button combination<br />
on the user panel has activated<br />
standby Mode.<br />
Press any button to leave Standby Mode and return to<br />
normal operation.<br />
SF Safety Suction. Spa is shut down. The display will show “SF” when a<br />
vacuum switch closes. All functions will turn off and the<br />
system will be disabled until a panel button is pressed.<br />
ST<br />
Ec<br />
Indicates heater is in standard<br />
mode<br />
Indicates heater is in economy<br />
mode<br />
None<br />
None<br />
SL Indicates heater is in sleep mode None<br />
Page 18<br />
20<strong>07</strong> Portable Spa Owner’s Manual<br />
<strong>LTR20<strong>07</strong>1000</strong>, <strong>Rev</strong>. B
Auxiliary Control Operation<br />
Operating Your Spa<br />
The auxiliary control option is available with the 9000<br />
and 9800 controls only. It is a small panel with four<br />
buttons that control certain spa functions, such as<br />
primary or additional jets, TV, or lights. It conveniently<br />
puts the control of several spa functions at your<br />
fingertips without having to get up.<br />
For operation, see the previous section, “7000, 9000,<br />
and 9800 Electric Control Operation”.<br />
Auxiliary Panel Configuration<br />
Standard configuration<br />
Auxiliary panel in Infinity Series<br />
Spa models with automatic TV<br />
Spa models with 3-pump system<br />
Functions<br />
JETS 1, JETS 2, LIGHT, OPTION<br />
JETS 3, JETS 4, JETS 5, OPTION<br />
JETS 1, JETS 2, TV, OPTION<br />
JETS 1, JETS 2, JETS 3, OPTION<br />
Wireless Spa Monitor<br />
The wireless spa monitor allows you to monitor and change your spa’s activity from a distance. The table below<br />
describes each button’s function.<br />
Light<br />
Operates spa light and LED mood lighting<br />
Temp<br />
Display or adjust the set temperature control<br />
Jet 1 Turn on or off jet 1<br />
Mode<br />
Switch between standard, economy, and sleep modes<br />
20<strong>07</strong> Portable Spa Owner’s Manual Page 19<br />
<strong>LTR20<strong>07</strong>1000</strong>, <strong>Rev</strong>. B
Operating Your Spa<br />
Adjustable Jets<br />
Almost all of the jets in your spa are adjustable.<br />
Rotating the face of an adjustable jet to the left<br />
(counter-clockwise) will decrease the amount of water<br />
flow through the jet. Rotating the face of an adjustable<br />
jet to the right (clockwise) will increase the amount of<br />
water flow through the jet. (See example shown below.)<br />
Neck jets adjust in the opposite directions (counterclockwise<br />
to increase, clockwise to decrease).<br />
Diverter Knobs<br />
Diverter knobs are 1” and<br />
2” knobs located around the<br />
top of your spa. They allow<br />
you to divert water through<br />
jets from one side of the<br />
spa to the other, or in most<br />
cases from floor jets to wall<br />
jets. This is accomplished<br />
by rotating the diverter knob<br />
to the left (counterclockwise), decreasing the amount<br />
of water flow through a section of jets. To increase the<br />
amount of water flow through the other section of jets,<br />
rotate the handle to the right (clockwise).<br />
Air Venturis<br />
Air venturis are the 1” knobs<br />
located around the top of<br />
your spa. They can also be<br />
distinguished from diverter<br />
knobs by the arrows and the<br />
words “OFF”, “ON” and “AIR”<br />
marked on them. Each one<br />
will let you add a mixture<br />
of air with the jet pressure.<br />
This is accomplished by<br />
rotating the air venturi knob<br />
to the left (counter-clockwise) to increase the amount<br />
of airflow through the jets. To decrease the amount of<br />
airflow through the jets, rotate the handle to the right<br />
(clockwise).<br />
Adjustable Therapy System<br />
Pump On/Off<br />
This button allows the<br />
user to turn on and off the<br />
ATS seat pump. Press<br />
this button once to turn<br />
the pump on. Once on,<br />
the green LED light on the<br />
control panel will illuminate,<br />
indicating that the system<br />
is operational. To turn<br />
off the pump, press the<br />
“PUMP ON/OFF” button<br />
a second time. Note: The<br />
pump must be on prior to operating any other features<br />
of this system.<br />
Page 20<br />
20<strong>07</strong> Portable Spa Owner’s Manual<br />
<strong>LTR20<strong>07</strong>1000</strong>, <strong>Rev</strong>. B
Pulse Mode<br />
This button allows the user to turn the ATS massage<br />
control on and off. Press the pulse button once to turn<br />
on the massage control. Once pressed, the orange<br />
LED in position number 1will light, indicating the<br />
number one pulse mode. Each press of either the up or<br />
down button will move the orange LED up or down to<br />
the next pulse mode.<br />
Note: Allow one second between each button press.<br />
Pressing the button quickly may cause improper<br />
operation. To turn the pulse mode off and return to<br />
normal pump operation, press the “PULSE MODE”<br />
button a second time.<br />
Up<br />
This button allows the user to cycle up from one<br />
through seven massage modes one at a time. Each<br />
mode offers a different pulsating massage. Some<br />
modes are faster than others, so just cycle through<br />
them to find the massage you like best.<br />
Down<br />
This button allows the user to cycle down through all<br />
seven massage modes, one at a time.<br />
Time Reset Mode<br />
Pulse mode will normally run for 15 minutes then<br />
automatically shut off. For another 15-minute session,<br />
press the “PUMP ON/OFF” button and the “PULSE<br />
MODE” button. A green LED will blink and the pump<br />
will run on high-speed mode as part of a 15-minute<br />
cool down period. After that, the pump will stop<br />
automatically and the green LED light on the panel<br />
will continue to blink for one minute then shut off<br />
automatically. After the second 15-minute session, the<br />
system will run through a cool down cycle for up to<br />
two hours. In this cool down mode, the user will only<br />
be able to operate the pump (by again pressing the<br />
“PUMP ON/OFF” button). However, the massage mode<br />
will remain off until the cool down mode is completed.<br />
Pulse Mode System<br />
Pulse mode system will shut off for two hours unless<br />
reset by the following procedure. During this time the<br />
pump will run at a maximum speed.<br />
• In the off position, press the “PULSE MODE”<br />
button once.<br />
• The green power light will flash to indicate reset.<br />
Multi-Colored Spa Light<br />
Operation<br />
Operating Your Spa<br />
Operating the Multi-Colored Spa Light<br />
1.<br />
2.<br />
3.<br />
Turn the spa light on by pressing the “LIGHT”<br />
button on the topside control panel.<br />
To filter through the different color choices, press<br />
the button on and off. Each time you press the<br />
button, you advance to the next color.<br />
To turn the spa light off when not in use, press the<br />
“LIGHT” button.<br />
Spa Cover<br />
Important! Keep the spa covered when not in use!<br />
• Covered spas will use less electricity in maintaining<br />
your set temperature.<br />
• Covering your spa will protect your spa’s finish<br />
from the sun’s ultraviolet rays.<br />
• You are required to keep the spa covered to<br />
maintain warranty coverage.<br />
• Covering your spa helps prevent children from<br />
drowning in the spa.<br />
See the manual enclosed with your cover for<br />
instructions on mounting the locks and how to lock and<br />
unlock the cover.<br />
In addition, while the spa cover is rigid, it is not<br />
designed to support any weight. Therefore, as a safety<br />
precaution and to preserve the life of your cover, you<br />
must not sit, stand, or lie on it; nor should you place<br />
objects of any kind on top of it.<br />
Aromatherapy<br />
This optional accessory is very easy to use. Unscrew<br />
the cap on the aromatherapy chamber and drop in a<br />
bag of scented aromatherapy beads and replace the<br />
cap.<br />
Waterfalls<br />
Some spa series include optional waterfalls. When the<br />
booster pump is on, turn the knob near the waterfall.<br />
Water will immediately start flowing through it.<br />
20<strong>07</strong> Portable Spa Owner’s Manual Page 21<br />
<strong>LTR20<strong>07</strong>1000</strong>, <strong>Rev</strong>. B
Operating Your Spa<br />
Removing and Reseating the Pillows<br />
You can remove the pillows for cleaning and maintenance quickly and easily. This method works for all types of<br />
pillows.<br />
Grab the lower edge of the pillow with both hands firmly and pull up. As you do this, the pillow inserts will pop out<br />
of the holes.<br />
Reseat the pillows by aligning the pillow inserts with the holes and striking the pillow hard enough to insert the<br />
pegs back into the holes.<br />
Draining Your Portable Spa<br />
Your spa should be drained every four to six months,<br />
and refilled with fresh tap water. The following is the<br />
recommended method for draining your spa.<br />
1.<br />
2.<br />
Turn off the power at the breaker.<br />
Remove all filters.<br />
If your drain valve is mounted on the side of the spa<br />
cabinet as shown at right, proceed to step 5.<br />
If your drain valve is located inside the spa cabinet:<br />
3.<br />
Using a Phillips screwdriver, remove the screws to<br />
the access panel and open it.<br />
Page 22<br />
20<strong>07</strong> Portable Spa Owner’s Manual<br />
<strong>LTR20<strong>07</strong>1000</strong>, <strong>Rev</strong>. B
Operating Your Spa<br />
4.<br />
Locate hose ending with the 3/4 inch hose-bib<br />
fixture.<br />
7.<br />
Twist the hose-bib fixture counterclockwise and pull<br />
to open the drain.<br />
5.<br />
Hook up the female end of a garden hose to the<br />
drain fitting.<br />
8.<br />
Let spa drain completely, then remove garden<br />
hose.<br />
6.<br />
Place the other end of the garden hose where you<br />
would like the water to drain to.<br />
9.<br />
Twist the hose-bib fixture clockwise to close it.<br />
Winterizing (Cold Climate<br />
Draining)<br />
In many areas of the country, the temperature drops<br />
below 32˚F (0°C). We recommend that you always<br />
have your spa full of water and running at normal spa<br />
temperatures (80˚F to 100˚F, 26.7°C to 37.8°C). This<br />
will help reduce the risk of freezing in your spa and<br />
your spa’s equipment.<br />
Warning: If you find the need to drain your spa,<br />
please be aware of the potential of freezing in<br />
your spas equipment and plumbing. Even if the<br />
directions below are followed perfectly, there is<br />
no guarantee that your spa will not suffer freeze<br />
damage.<br />
Freeze damage is not covered by your warranty.<br />
1.<br />
2.<br />
3.<br />
4.<br />
5.<br />
6.<br />
Open all filter covers.<br />
Remove the filter baskets and filters.<br />
Drain your spa completely as described in the<br />
instructions above.<br />
Remove drain plugs from the front of the pumps.<br />
Disconnect the unions from both sides of the pump.<br />
Use a wet/dry vacuum to blow any remaining water<br />
out of the jets and equipment area.<br />
Cover your spa with a good spa cover and an allweather<br />
tarp to ensure that neither rain nor snow enters<br />
the spa.<br />
20<strong>07</strong> Portable Spa Owner’s Manual Page 23<br />
<strong>LTR20<strong>07</strong>1000</strong>, <strong>Rev</strong>. B
Water Quality Maintenance<br />
Water Quality Maintenance<br />
<strong>Cal</strong> <strong>Spas</strong> Clear Water Plan<br />
Great spa water is easily achieved when the right<br />
chemicals and / or systems are used and the <strong>Cal</strong> <strong>Spas</strong><br />
“Clear Water Plan” is implemented. The key to clean,<br />
clear, and safe water is to fully understand how spa<br />
water reacts to users, system operation and chemical<br />
use. The “Clear Water Plan” will help give you that<br />
understanding.<br />
The first thing to understand about taking care of your<br />
spa water is that preventive actions are much easier to<br />
do than correcting water quality issues. For this reason,<br />
we offer the “Clear Water Plan” as a simple, easy to<br />
follow guide to clean, safe spa water.<br />
Follow the Right Plan<br />
You will need to decide which chemical plan or<br />
alternative sanitation option works best for your spa<br />
water. Consult your <strong>Cal</strong> <strong>Spas</strong> dealer for the right<br />
decision with regards to your lifestyle and spa usage.<br />
Whichever plan you decide on, follow it completely and<br />
don’t take shortcuts. These plans will provide you with<br />
clean, safe, clear spa water with a minimum of effort.<br />
Traditional Chemical Options<br />
Choose from either Bromine tablets or Chlorinating<br />
granules as your sanitizer of choice. Both work well<br />
when the appropriate “Clear Water Plan” is followed.<br />
Make sure you follow all instructions and use only <strong>Cal</strong><br />
<strong>Spas</strong> brand chemicals.<br />
Alternative Sanitation Options<br />
<strong>Cal</strong> Zone Quest 2000 / <strong>30</strong>00 Ozonator<br />
This system automatically generates ozone gas and<br />
injects it into the spa water. Ozone gas is far superior<br />
to chemical bromine or chlorine in sanitizing spa water.<br />
Saves replacement chemical cost and guards against<br />
forgetting to add chemicals.<br />
<strong>Cal</strong> Clarity Automatic Bromine Generator<br />
This system automatically generates and releases<br />
free bromine into the spa water. No more need to add<br />
chemical bromine tablets or chlorine granules. Saves<br />
replacement chemical cost and circumvents the need<br />
to add chemicals on a regular basis.<br />
<strong>Cal</strong> Inline Sanitation System<br />
This system incorporates minerals that work<br />
continuously with low levels of Bromine to sanitize<br />
the spa while creating water that feels soft and is<br />
crystal clear. Uses pre-filled cartridges that save on<br />
measurement hassle and works for weeks without<br />
replacing.<br />
Before You Begin<br />
Before you begin a “Clear Water Plan”, you should<br />
understand that chemicals or systems alone will not<br />
take care of your spa water. Other factors such as<br />
Filtration and Bather Load also play an important part.<br />
Filtration<br />
The filter is the part of your spa that removes the<br />
debris from the water. Even though <strong>Cal</strong> <strong>Spas</strong> uses the<br />
advanced Bio Clean filter cartridge that protects itself<br />
from bacterial growth, the filter still needs to be cleaned<br />
on a regular basis to maximize your spa’s filtering<br />
performance and heating efficiency.<br />
In addition to spraying off the filter weekly to remove<br />
surface debris, your filter should be deep cleaned<br />
periodically to dissolve scale and other contaminants<br />
that get lodged deep within the filter fibers and impede<br />
the filtration process. Even if the filter looks clean, the<br />
contaminants can clog the fibers and prevent water<br />
from flowing through the filter resulting in the most<br />
common spa problem—no heat, caused by a dirty filter.<br />
Filter Cleaning<br />
• Place the dirty filter into a bucket of water deep<br />
enough to cover the filter. Add 8oz of <strong>Cal</strong> <strong>Spas</strong><br />
“Liquid Filter Cleaner” to the bucket of water.<br />
Note: It is a good idea to keep a spare filter to be deep<br />
cleaned while the regular filter is in the spa. This way,<br />
you can rotate the filters and both will last longer.<br />
• Soak the filter for a minimum of 24 hours.<br />
• Remove the filter and spray clean with a water<br />
hose. Spray each pleat carefully.<br />
• Allow filter to dry completely (a minimum of 2 days<br />
drying time is recommended).<br />
• Reinstall filter as described in the “Clear Water<br />
Plan”.<br />
Page 24<br />
20<strong>07</strong> Portable Spa Owner’s Manual<br />
<strong>LTR20<strong>07</strong>1000</strong>, <strong>Rev</strong>. B
Filtration Cycles<br />
The filtration cycle of your spa is the process that<br />
allows the water to flow through the filter. Your spa<br />
will filter automatically twice each day. The factory set<br />
default time for filtration is usually enough for normal<br />
use, however heavy bather load or frequent use may<br />
require longer filtration times or more frequent filtration<br />
cycles to keep the spa water clean. Consult your<br />
Owner’s Manual for setting your spa’s filtration times.<br />
Bather Load<br />
“Bather Load” is the term used to describe the number<br />
of people using a spa, combined with the length of<br />
usage, and the frequency of usage. All these factors<br />
have a great effect on the spa water. The higher the<br />
bather load, the more chemicals need to be added and<br />
a longer filtration time will be needed.<br />
All versions of the <strong>Cal</strong> <strong>Spas</strong> “Clear Water Plan” are<br />
designed for spas with average bather load. (3-4<br />
people, 15 minutes of usage, 3 times a week at 100<br />
degrees) If your bather load exceeds these guidelines,<br />
and you experience water quality problems, increase<br />
the amount of filtration first, (go to the next higher<br />
filtration number) then if water quality is still not<br />
adequate, consult the advise of your <strong>Cal</strong> <strong>Spas</strong> dealer<br />
for additional chemical or system recommendations. Be<br />
sure to give them your bather load information.<br />
Chemical Overview<br />
The following information is intended for use with <strong>Cal</strong><br />
<strong>Spas</strong> chemicals only. Other brands of chemicals may<br />
have similar names and/or usage descriptions but due<br />
to manufacturing differences, use of other chemicals<br />
can increase the likelihood of under or over-dosing<br />
the spa chemicals. Damage to the spa or spa’s<br />
components from improper chemicals or chemical<br />
usage is not covered under the spa’s warranty.<br />
Chemical Safety<br />
Water Quality Maintenance<br />
• Never change chemical brands or types without<br />
completely draining, flushing and thoroughly<br />
cleaning the spa and cover first.<br />
• Always protect your eyes while introducing<br />
chemicals into the spa. Wear protective eyeglasses<br />
to prevent powdered chemicals from blowing into<br />
the eyes or liquid chemicals from splashing into the<br />
eyes.<br />
• In the event of overdosing a sanitizing chemical<br />
(chorine or bromine), immediately turn off the<br />
power to the spa and drain water to a safe and<br />
approved area. Refill with fresh water and proceed<br />
with the “Clear Water Plan” start up.<br />
Physical Chemical Hazards<br />
• Do not allow chemicals to come in contact with<br />
skin, eyes or clothing.<br />
• Always wear rubber gloves, protective eye wear<br />
and clothing to reduce the risk of chemical contact<br />
and irritation.<br />
• Remove and wash clothing that may have been<br />
exposed to chemical contact prior to wearing them<br />
again.<br />
• Inhaling or ingesting chemicals will cause serious<br />
injury, sickness, or even death.<br />
• Do not mix chemicals. Mixing chemicals together<br />
can cause dangerous chemical reactions including<br />
the release of toxic gas, fire and explosions.<br />
Chemical Storage<br />
Chemicals must be stored completely out of the reach<br />
of children in an area that is well vented, cool, and dry.<br />
Failure to provide a proper area for chemical storage<br />
may result in serious injury, sickness, fire explosion<br />
and even death. Do not store your chemicals inside the<br />
equipment area of your spa.<br />
• Failure to follow chemical directions may result in<br />
serious injury, sickness, or even death.<br />
• Read and follow all printed instructions listed on<br />
bottles, packages and in your owner’s manual.<br />
• Do not exceed chemical dosages as recommended<br />
in the “Clear Water Plan”, or on chemical bottles<br />
and packages. (Most chemical instructions are<br />
figured for a 500 gallon spa however, most spas<br />
hold less than 500 gallons, consult your Owner’s<br />
Manual for the approximate gallons of your spa)<br />
• Never mix chemicals together.<br />
20<strong>07</strong> Portable Spa Owner’s Manual Page 25<br />
<strong>LTR20<strong>07</strong>1000</strong>, <strong>Rev</strong>. B
Water Quality Maintenance<br />
Chemical Descriptions<br />
The following descriptions and recommendations are intended for use with <strong>Cal</strong> <strong>Spas</strong> chemicals only. Many of<br />
these chemicals will be used with alternative sanitation systems as well.<br />
Test Strips -- Bromine<br />
Provides accurate spa water testing for<br />
Bromine, pH, and total Alkalinity.<br />
For use with bromine “Clear Water Plan”.<br />
Chlorinating Granules<br />
Quick acting sanitizer / disinfectant for spa<br />
water.<br />
For use with chlorine “Clear Water Plan”.<br />
Test Strips -- Sodium Bromide<br />
Provides accurate spa water testing for<br />
Sodium Bromide.<br />
For use with <strong>Cal</strong> Clarity Automatic<br />
Bromine Generator “Clear Water Plan”.<br />
Oxidizer Shock<br />
Destroys ammonia, organic<br />
contaminants, and odor causing wastes<br />
in spa water.<br />
Use with any “Clear Water Plan”.<br />
Test Strips – Chlorine<br />
Provides accurate spa water testing for<br />
Bromine, pH, and total Alkalinity.<br />
For use with chlorine “Clear Water Plan”.<br />
Iron Out<br />
Helps prevent metals in water from<br />
staining spa.<br />
Use during start up.<br />
Use with any “Clear Water Plan”<br />
Go Brom<br />
Establishes a bromide reserve in spa water.<br />
Use during start up.<br />
For use with bromine “Clear Water Plan”.<br />
Stain And Scale Defense<br />
Helps prevent minerals from damaging<br />
spa components.<br />
Use with any “Clear Water Plan”.<br />
Brominating Tablets<br />
Long lasting sanitizer / disinfectant for spa<br />
water.<br />
Add to bromine floater.<br />
Ph / Alkalinity Up<br />
Raises pH and alkalinity levels in spa<br />
water.<br />
Use with any “Clear Water Plan”.<br />
For use with bromine “Clear Water Plan”.<br />
Page 26<br />
20<strong>07</strong> Portable Spa Owner’s Manual<br />
<strong>LTR20<strong>07</strong>1000</strong>, <strong>Rev</strong>. B
Water Quality Maintenance<br />
Ph / Alkalinity Down<br />
Raises pH and alkalinity levels in spa<br />
water.<br />
Use with any “Clear Water Plan”<br />
Filter Cartridge Cleaner<br />
Deep cleans filter cartridge. Dissolves scale<br />
and removes imbedded organic contaminants<br />
from filter cartridge fibers.<br />
Use with any “Clear Water Plan”<br />
Enzyme Formula<br />
Liquid Hardness Increaser<br />
Helps reduce foaming and corrosion by<br />
increasing hardness levels in spa water.<br />
Use with any “Clear Water Plan”.<br />
Biodegrades body oils, suntan lotions,<br />
and organic contaminants in spa water.<br />
Do not on same day as adding Chlorine<br />
Granules.<br />
Use with any “Clear Water Plan”.<br />
Spa Brite<br />
Helps to quickly clear up cloudy spa<br />
water.<br />
Use with any “Clear Water Plan”.<br />
Multi-Purpose Cleaner<br />
Special formula designed to clean spa<br />
surfaces without leaving foam-causing<br />
residue.<br />
Use with any “Clear Water Plan”.<br />
Vinyl And Leather Cleaner<br />
Foam Gone<br />
Quickly breaks up existing foam on spa water.<br />
Use with any “Clear Water Plan”<br />
Specifically designed to clean and protect<br />
spa covers and pillows from chemical and<br />
ultraviolet damage. Use with any “Clear<br />
Water Plan”.<br />
Fast Sheen<br />
Water based, reactive, silicone polish that<br />
seals, shines, and protects spa acrylic<br />
surfaces.<br />
Use with any “Clear Water Plan”.<br />
<strong>Cal</strong> Balance Magnetic Water Stabilizer<br />
Promotes clean water naturally by<br />
organizing water molecules into<br />
appositive charge. Helps coagulate<br />
debris for improved filtration, and also<br />
traps calcium and scale into a<br />
suspension that gives spa water a soft, silky feel. Use<br />
with any “Clear Water Plan”.<br />
20<strong>07</strong> Portable Spa Owner’s Manual Page 27<br />
<strong>LTR20<strong>07</strong>1000</strong>, <strong>Rev</strong>. B
Water Quality Maintenance<br />
Traditional Chemical Start Up<br />
Prior to filling a spa for the first time, or after a routine<br />
draining, you will want to follow this start-up plan to<br />
extend water life and performance. If you are following<br />
either the Bromine or Chlorine “Clear Water Plans”,<br />
you will notice that both start-up processes are the<br />
same with the exception of Step 7. As with all chemical<br />
dosages listed in these “Clear Water Plans”, start-up<br />
dosages are intended for 500-gallon spas. Please<br />
adjust the chemical dosages to the capacity of your<br />
particular spa.<br />
Start Up<br />
1.<br />
2.<br />
3.<br />
4.<br />
5.<br />
6.<br />
7.<br />
8.<br />
9.<br />
Clean surface of spa with <strong>Cal</strong> <strong>Spas</strong> “Multi-Purpose<br />
Cleaner”.<br />
Apply a protective coat of <strong>Cal</strong> <strong>Spas</strong> “Fast Sheen” to<br />
the acrylic surface.<br />
Fill spa to proper water level with normal tap water<br />
(Do not use soft water)<br />
Use test strip and balance the spa water:<br />
Adjust total alkalinity (acceptable range is 80-<br />
120ppm),<br />
Then adjust pH if necessary. (between 7.2 to 7.8)<br />
Pour in 16 oz of <strong>Cal</strong> <strong>Spas</strong> “Metal Protector” to<br />
center of spa.<br />
Add either Bromine or Chlorine (According to your<br />
preferred plan)<br />
Bromine: Add 2 oz of <strong>Cal</strong> <strong>Spas</strong> “Go Brom” to<br />
establish a bromine base.<br />
Add 2 <strong>Cal</strong> <strong>Spas</strong> “Bromine Tablets” to<br />
Bromine Floater.<br />
Set floater opening at #2.<br />
Chlorine: Add two tablespoons of <strong>Cal</strong> <strong>Spas</strong><br />
“Chorine Granules” to the spa water.<br />
Sprinkle 2 oz of <strong>Cal</strong> <strong>Spas</strong> “Oxidizer Shock” in the<br />
center of the spa and turn on jets for 15 minutes.<br />
Leave spa uncovered during this time.<br />
10. Put cover on spa and allow to heat up to desired<br />
temperature.<br />
Bromine Clear Water Plan<br />
This plan and its chemical dosages are intended for<br />
<strong>Cal</strong> <strong>Spas</strong> chemicals only. Most chemical manufacturers<br />
use different chemical formulas and strengths. Only<br />
<strong>Cal</strong> spas chemicals are specially formulated to provide<br />
chemical balance at lower dosages. Always read and<br />
follow printed instructions on chemical bottles and<br />
packages.<br />
Day One (Monday)<br />
1.<br />
2.<br />
3.<br />
4.<br />
5.<br />
6.<br />
Test spa water using “Bromine Test Strips”.<br />
Based on the Test Strip readings:<br />
• Adjust total alkalinity first (acceptable range of<br />
80-120 ppm)<br />
• Then adjust the pH if needed. (range is<br />
between 7.2 to 7.8)<br />
• Add “Bromine Tablet(s)” if needed. (Do not add<br />
more than 2)<br />
• The recommended level of bromine is 3-5 ppm.<br />
Add 2 oz of “Stain and Scale Defense”.<br />
Remove dirty filter from the spa and rinse off. Allow<br />
to dry.<br />
Place your extra clean filter cartridge back into the<br />
spa.<br />
Vacuum debris from the bottom of your spa with<br />
the “Spa Vacuum”.<br />
Day Two (Wednesday)<br />
1.<br />
2.<br />
Test spa water using Bromine Test Strips.<br />
Based on the Test Strip reading: Adjust total<br />
alkalinity, then the pH if needed.<br />
Day Three (Friday)<br />
1.<br />
2.<br />
3.<br />
4.<br />
Test spa water using Bromine Test Strips.<br />
Based on the Test Strip reading:<br />
• Adjust total alkalinity, then the pH if needed.<br />
• Add one Bromine Tablet (if needed).<br />
Add 2 oz of Oxidizer Shock to spa. Run Spa for 15<br />
minutes with cover off.<br />
Replace cover.<br />
Page 28<br />
20<strong>07</strong> Portable Spa Owner’s Manual<br />
<strong>LTR20<strong>07</strong>1000</strong>, <strong>Rev</strong>. B
Chlorine Clear Water Plan<br />
This plan and its chemical dosages are intended for<br />
<strong>Cal</strong> <strong>Spas</strong> chemicals only. Most chemical manufacturers<br />
use different chemical formulas and strengths. Only<br />
<strong>Cal</strong> spas chemicals are specially formulated to provide<br />
chemical balance at lower dosages. Always read and<br />
follow printed instructions on chemical bottles and<br />
packages.<br />
Day One (Monday)<br />
1.<br />
2.<br />
3.<br />
4.<br />
Test spa water using “Chlorine Test Strips”.<br />
Based on the Test Strip readings:<br />
• First adjust total alkalinity (acceptable range of<br />
80-120 ppm)<br />
• Then adjust the pH if needed. (range is<br />
between 7.2 to 7.8)<br />
• Add 2 tablespoons of Chlorine Granules.<br />
• The recommended level of chlorine is 3-5 ppm.<br />
Add 2 oz of “Stain and Scale Defense”.<br />
Remove dirty filter from the spa and rinse off.<br />
5.<br />
6.<br />
Water Quality Maintenance<br />
Place your extra clean filter cartridge back into the<br />
spa.<br />
Vacuum debris from the bottom of your spa with<br />
the “Spa Vacuum”.<br />
Day Two (Wednesday)<br />
1.<br />
2.<br />
Test spa water using Chlorine Test Strips.<br />
Based on the Test Strip reading: Adjust total<br />
alkalinity, then the pH if needed.<br />
Day Three (Friday)<br />
1.<br />
2.<br />
3.<br />
4.<br />
Test spa water using Chlorine Test Strips.<br />
Based on the Test Strip reading:<br />
• Adjust total alkalinity, then the pH if needed.<br />
• Add 2 tablespoons of Chlorine Granules. (if<br />
needed)<br />
Add 2 oz of Oxidizer Shock to spa. Run spa for 15<br />
minutes with cover off.<br />
Replace cover.<br />
Ozonator Clear Water Plan<br />
This plan and its chemical dosages are intended for spas equipped with the<br />
optional <strong>Cal</strong> Zone Quest 2000 / <strong>30</strong>00 Ozonator or Del Zone Eclipse Ozonator. The<br />
chemical references are designed for <strong>Cal</strong> <strong>Spas</strong> chemicals only.<br />
Start Up<br />
1.<br />
2.<br />
3.<br />
Follow the Spa Start Up procedures for Chlorine “Clear Water Plan”.<br />
Set the spa’s filtration time for “F-4”. This activates the ozonator and produces<br />
the ozone gas. (Follow the instructions in the owner’s manual)<br />
Note: Filtration time may need to be increased with heavy bather load.<br />
Day One (Monday)<br />
1.<br />
2.<br />
3.<br />
4.<br />
Test spa water using chlorine “Test Strips”. (you will need to use a small<br />
amount of chlorine as a supplemental sanitizer)<br />
Based on the Test Strip readings:<br />
• First adjust total alkalinity (acceptable range of 80-120 ppm),<br />
• Then adjust the pH if needed. (range is between 7.2 to 7.8)<br />
• Add 1 tablespoon of Chlorine Granules.<br />
• The recommended level of Chlorine is 1-3 ppm.<br />
Add 2 oz of “Stain and Scale Defense”.<br />
Remove dirty filter from the spa and rinse off.<br />
20<strong>07</strong> Portable Spa Owner’s Manual Page 29<br />
<strong>LTR20<strong>07</strong>1000</strong>, <strong>Rev</strong>. B
Water Quality Maintenance<br />
5. Place your extra clean filter cartridge back into the<br />
spa.<br />
6. Vacuum debris from the bottom of your spa with<br />
the “Spa Vacuum”.<br />
Day Two (Friday)<br />
1. Test spa water using Chlorine Test Strips.<br />
2. Based on the Test Strip reading:<br />
3.<br />
4.<br />
• Adjust total alkalinity, then the pH if needed.<br />
• Add 1 tablespoon of Chlorine Granules. (if<br />
needed)<br />
Add 2 oz of Oxidizer Shock to spa. Run Spa for 15<br />
minutes with cover off.<br />
Replace cover.<br />
Bromine Generator Clear Water Plan<br />
This plan and its chemical dosages are intended for spas equipped with the optional <strong>Cal</strong> Clarity Automatic<br />
Bromine Generator. The chemical references are designed for <strong>Cal</strong> <strong>Spas</strong> chemicals only. Note: Following these<br />
instructions is very important to ensure proper operation of your <strong>Cal</strong> Clarity Automatic Bromine Generator.<br />
Start Up<br />
1.<br />
2.<br />
3.<br />
4.<br />
5.<br />
6.<br />
7.<br />
8.<br />
9.<br />
Clean surface of spa with <strong>Cal</strong> <strong>Spas</strong> “Multi-<br />
Purpose Cleaner”.<br />
Apply a protective coat of <strong>Cal</strong> <strong>Spas</strong> “Fast<br />
Sheen” to the acrylic surface.<br />
Fill spa to proper water level with normal<br />
tap water (Do not use soft water)<br />
Use Bromine Test Strip and balance the<br />
spa water:<br />
• Adjust total alkalinity (acceptable<br />
range is 80-120ppm),<br />
• Then adjust pH if necessary. (between<br />
7.2 to 7.8)<br />
Pour in 16 oz of <strong>Cal</strong> <strong>Spas</strong> “Metal<br />
Protector” to center of spa.<br />
Test for TDS (total dissolved solids, also<br />
known as conductivity)<br />
• The ideal range is 50 to <strong>30</strong>0ppm.<br />
• TDS / conductivity must be less than 500 to start with.<br />
Phosphate level should be below 200ppb. Remove phosphates if necessary.<br />
Determine the gallons capacity of the spa. Be accurate as this determines the amount of TRU BLU that will be<br />
added. Consult your Owner’s Manual for spa gallons.<br />
Power up the spa and make sure all the spa’s pumps are set to high speed. Turn the dial on the face of the<br />
<strong>Cal</strong> Clarity Bromine Generator to “OFF”.<br />
10. Sprinkle evenly over the surface of the spa, one 2lb bottle of TRU BLU sodium bromide per 100 US gallons<br />
(370 liters) of water. Do Not Add Too Much!<br />
11.<br />
Note: Each bottle of TRU BLU will raise TDS / conductivity amount approximately 500 ppm.<br />
12. Allow spa to run for 15 minutes so the TRU BLU can dissolve completely before proceeding to the next step.<br />
Page <strong>30</strong><br />
20<strong>07</strong> Portable Spa Owner’s Manual<br />
<strong>LTR20<strong>07</strong>1000</strong>, <strong>Rev</strong>. B
Water Quality Maintenance<br />
13. Use Sodium Bromide Test Strips (not Bromine) and<br />
adjust sodium bromide level to 7.4 to 8.2 (equates<br />
to 1700 to 2500 ppm TDS / continuity level)<br />
14. Add 2 oz of <strong>Cal</strong> <strong>Spas</strong> “Oxidizer Shock” to help burn<br />
out impurities in fill water.<br />
15. Turn the dial on the bromine generator clockwise<br />
until the LED display reads 10.<br />
16. This will initiate the build up of a bromine bank.<br />
17. Set the filtration cycle to “continuous” (F-C) for the<br />
first 24 hours.<br />
18. Put the cover on and allow the spa to heat to<br />
desired temperature.<br />
Adjusting The Proper Bromine Levels<br />
1.<br />
2.<br />
After start up, decrease the filtration cycle to F-4<br />
and monitor the bromine level until it is within the<br />
recommended range.<br />
Use bromine test strips to achieve a 3-5 ppm<br />
recommended level.<br />
Note: It can take several days for the bromine level<br />
to stabilize because the fill water that was used<br />
sometimes contains contaminants that need to be<br />
neutralized, thereby using up the initial bromine that is<br />
generated.<br />
3.<br />
4.<br />
Once the desired level has been achieved, turn the<br />
dial down until a maintenance setting is achieved.<br />
The common maintenance setting for an average<br />
bather load is #4.<br />
When changing the setting, use bromine test strips to<br />
determine when you have reached the level you want.<br />
Once A Week<br />
1.<br />
2.<br />
3.<br />
4.<br />
5.<br />
6.<br />
7.<br />
Test spa water with bromine test strip.<br />
Based on test strip readings:<br />
• First, adjust alkalinity if necessary.<br />
• Then, adjust pH if necessary.<br />
• Increase / decrease bromine production with<br />
dial if required.<br />
Remove dirty filter from the spa and rinse off.<br />
Place your clean, extra filter cartridge back into the<br />
spa.<br />
Add 2 oz of <strong>Cal</strong> <strong>Spas</strong> “Oxidizer Shock” to spa. Run<br />
spa for 15 minutes<br />
Vacuum debris from the bottom of your spa with<br />
the “Spa Vacuum”.<br />
Replace cover.<br />
<strong>Cal</strong> Inline Sanitation System Clear Water Plan<br />
This plan and its chemical dosages are intended for<br />
spas equipped with the optional <strong>Cal</strong> Inline Sanitation<br />
System. The chemical references are designed for <strong>Cal</strong><br />
<strong>Spas</strong> chemicals only. Note: Following these instructions<br />
is very important to ensure proper operation of your <strong>Cal</strong><br />
Inline Sanitation System.<br />
Start Up -- First Day<br />
1.<br />
2.<br />
3.<br />
4.<br />
Clean surface of spa with <strong>Cal</strong> <strong>Spas</strong> “Multi-Purpose<br />
Cleaner”.<br />
Apply a protective coat of <strong>Cal</strong> <strong>Spas</strong> “Fast Sheen” to<br />
the acrylic surface.<br />
Fill spa to proper water level with normal tap water<br />
(Do not use soft water)<br />
Use Bromine Test Strip and balance the spa water:<br />
a.<br />
b.<br />
First, adjust total alkalinity (acceptable range is<br />
80-120ppm),<br />
Then adjust pH if necessary. (between 7.2 to<br />
7.8)<br />
c.<br />
d.<br />
e.<br />
Pour in 16 oz of <strong>Cal</strong> <strong>Spas</strong> “Metal Protector” to<br />
center of spa.<br />
Sprinkle 1 oz of <strong>Cal</strong> <strong>Spas</strong> Chlorinating<br />
Granules over surface of water.<br />
Power up spa and allow it to heat to desired<br />
temperature.<br />
Start Up--Next Day<br />
Now that the spa has reached its normal operating<br />
temperature, it is time to add the pre-filled mineral<br />
cartridge and bromine cartridge.<br />
1.<br />
2.<br />
3.<br />
Turn the power off to the spa.<br />
Take a new <strong>Cal</strong> <strong>Spas</strong> “Mineral Cartridge” and open<br />
to #6. (Hold the top of the cartridge and turn the<br />
bottom counter clockwise)<br />
Take a new <strong>Cal</strong> <strong>Spas</strong> “Bromine Cartridge” and<br />
open to #3 (if the spa is less than 400 gallons,<br />
open to #2) Note: These settings are start up<br />
20<strong>07</strong> Portable Spa Owner’s Manual Page 31<br />
<strong>LTR20<strong>07</strong>1000</strong>, <strong>Rev</strong>. B
Water Quality Maintenance<br />
4.<br />
5.<br />
6.<br />
7.<br />
8.<br />
9.<br />
settings only. They may need to be<br />
adjusted up or down depending on<br />
your spa usage.<br />
Unscrew the <strong>Cal</strong> Inline Sanitation<br />
System Cap located on the top lip of<br />
the spa.<br />
Grasp the handle of the cartridge<br />
holder and turn counter-clockwise then<br />
pull up.<br />
Remove the cartridge holder and<br />
discard spent cartridges (if any)<br />
Snap the Bromine Cartridge into the<br />
bottom portion of the holder and the<br />
Mineral Cartridge into the top portion of<br />
the holder. (make sure the cartridges<br />
go into the correct position as overbromination<br />
will occur if they are<br />
switched).<br />
Line up the arrow on the top of the<br />
cartridge holder with the arrow on the<br />
top of the system.<br />
Lower the holder containing the<br />
cartridges down into the system until<br />
the tabs on the holder line up with the<br />
tabs on the system. Rotate the cartridge holder<br />
clockwise until it stops. (To ensure a locked<br />
position, attempt to pull the holder up. If it stays in<br />
place, the lock is secure)<br />
10. Screw cap back on. Do not over-tighten.<br />
11.<br />
Power spa back up and set to desired temperature.<br />
Once A Week<br />
1.<br />
2.<br />
3.<br />
4.<br />
Test water using Bromine Test Strips.<br />
Based on the Test Strip readings:<br />
• First, adjust total alkalinity. (acceptable range<br />
of 80-120 ppm)<br />
• Then, adjust the pH if needed. (between 7.2<br />
to7.8)<br />
• Check level of Bromine. (Maintain bromine at<br />
1-2 ppm.)<br />
• Note: adjust bromine cartridge setting up or<br />
down if needed.<br />
Add 2 oz of <strong>Cal</strong> <strong>Spas</strong> “Stain and Scale Defense”.<br />
Add 2 oz of <strong>Cal</strong> <strong>Spas</strong> “Oxidizer Shock”. Run spa<br />
for 15 minutes on High speed.<br />
5.<br />
6.<br />
7.<br />
8.<br />
Remove dirty filter from the spa and rinse off. Set<br />
aside to dry.<br />
Place your clean, extra filter cartridge back into the<br />
spa.<br />
Vacuum debris from the bottom of your spa with<br />
the “Spa Vacuum”.<br />
Replace cover.<br />
Page 32<br />
20<strong>07</strong> Portable Spa Owner’s Manual<br />
<strong>LTR20<strong>07</strong>1000</strong>, <strong>Rev</strong>. B
Maintenance<br />
Regardless of which “Clear Water Plan” you are using,<br />
you should also do the following:<br />
Every Month<br />
1.<br />
2.<br />
3.<br />
4.<br />
Deep clean your spa’s filter. (Follow “filter cleaning”<br />
instruction at beginning of “Clear Water Plan”)<br />
Check inside the equipment area for leaks,<br />
rodents, and insects.<br />
If a leak is discovered, contact your <strong>Cal</strong> <strong>Spas</strong><br />
dealer for service.<br />
If you see evidence of rodents or insects, take<br />
necessary actions to remove them and precautions<br />
to prevent them from returning.<br />
Every 3 To 4 Months<br />
1.<br />
2.<br />
Drain and clean your spa with “Multi-Purpose<br />
Cleaner”.<br />
Polish the acrylic surface with “Fast Sheen”.<br />
3.<br />
4.<br />
5.<br />
6.<br />
Water Quality Maintenance<br />
Clean and treat spa cover, pillows, and <strong>Cal</strong> Select<br />
cabinet (if equipped) with “Cover Protector”.<br />
When re-filling your spa, follow your specific “Clear<br />
Water Plan” Start Up procedures.<br />
If you are using the <strong>Cal</strong> Clarity Automatic Bromine<br />
Generator Clear Water Plan, don’t forget to add<br />
new TRU BLU sodium bromide to the water.<br />
If you use the <strong>Cal</strong> Inline Sanitation System “Clear<br />
Water Plan”, don’t forget to replace the Mineral and<br />
Bromine Cartridges.<br />
Once A Year<br />
1.<br />
2.<br />
3.<br />
Clean and treat redwood spa cabinets and<br />
gazebos with “Nu-Spa Redwood Stain Renew and<br />
Brightener”.<br />
If you use the <strong>Cal</strong> Zone Quest 2000 Ozonator, you<br />
will need to replace the ozone cartridge.<br />
Check the filter cartridge pleats. If they are frayed,<br />
replace the cartridge.<br />
20<strong>07</strong> Portable Spa Owner’s Manual Page 33<br />
<strong>LTR20<strong>07</strong>1000</strong>, <strong>Rev</strong>. B
Cleaning and Maintenance<br />
Cleaning and Maintenance<br />
Cleaning and Replacing the<br />
Filter<br />
Filtration<br />
Filtration is one of the most important steps you can<br />
take to ensure clean, clear water. Regardless of what<br />
some people may think, it is far less expensive to fix<br />
water clarity problems by filtering your spa than by<br />
using excessive amounts of chemicals, excessive<br />
filtration times, or by water replacement.<br />
<strong>Cal</strong> <strong>Spas</strong> filtration system draws contaminated water<br />
through the exclusive Bio-Clean filter removing<br />
debris from the water. It then pumps the newly cleaned<br />
water back into the spa through various jets. <strong>Spas</strong><br />
equipped with the optional Quest 2000 Ozonator will<br />
also receive ozone injection into the filtered water for<br />
further protection against contaminants during filtration<br />
cycles. Filtration also ensures that chemicals are mixed<br />
thoroughly through the water, increasing performance.<br />
Filtration starts on electronically controlled spas as<br />
soon as the pumps are primed and water flow is<br />
steady. As the flow of water goes through the filter, dirt<br />
and debris is removed and accumulated in the filter<br />
cartridge. As the filter cartridge accumulates dirt and<br />
debris, water flow is restricted and jet performance is<br />
reduced. This can cause your spa to not run or heat<br />
effectively.<br />
Clean your filter regularly and replace as needed.<br />
Filter Cleaning<br />
Your new <strong>Cal</strong> Spa has been designed for quick and<br />
easy filter maintenance. The filter cartridge should be<br />
cleaned once a week. These instructions apply to both<br />
dual and single filtration systems.<br />
1.<br />
2.<br />
3.<br />
Turn the power off at the breaker.<br />
Remove the filter by turning it counterclockwise<br />
and unscrewing the bottom threads. Then pull it up<br />
and out.<br />
Clean the filter with a garden hose as follows:<br />
a.<br />
b.<br />
c.<br />
d.<br />
Hold the filter vertically.<br />
Spray the filter cartridges with a pressure<br />
nozzle, starting from the top and spraying down<br />
each pleat.<br />
Turn the filter cartridge over and repeat Step<br />
3b.<br />
Deep clean filter cartridge every month. Use<br />
only a <strong>Cal</strong> <strong>Spas</strong>-approved filter-cleaning<br />
chemical.<br />
Exclusive Bio-Clean Filter Cartridge<br />
The filter cartridge is designed to remove dirt, sand,<br />
minerals, phosphates, bather waste and other solids<br />
from the spa. Unfortunately, some spa owners fail<br />
to include filter cleaning as part of their chemical<br />
maintenance plan. Filters accumulate debris and<br />
become prime areas for bacteria growth.<br />
The <strong>Cal</strong> <strong>Spas</strong> exclusive Bio-Clean Filter is the only<br />
antibacterial filter cartridge on the market today. Having<br />
a filter cartridge that prevents bacteria growth is added<br />
protection for those times you forget to clean the filter.<br />
We recommend that you only replace your spa’s filter<br />
cartridge with a Bio-Clean filter cartridge for ensured<br />
protection and peace of mind.<br />
Cleaning the Cover, Shell and<br />
Pillows<br />
Due to the constant punishment your spa cover and<br />
pillows receive, you should protect them by applying<br />
Vinyl and Leather Cleaner as part of your monthly<br />
Page 34<br />
20<strong>07</strong> Portable Spa Owner’s Manual<br />
<strong>LTR20<strong>07</strong>1000</strong>, <strong>Rev</strong>. B
Cleaning and Maintenance<br />
maintenance plan. <strong>Cal</strong> <strong>Spas</strong> Vinyl and Leather<br />
Cleaner is specifically designed to protect spa covers<br />
and pillows from chemical and ultraviolet light damage.<br />
It accomplishes this without leaving an oily residue<br />
behind that is normally associated with common<br />
automotive vinyl protectants.<br />
Use of Vinyl and Leather Cleaner<br />
<strong>Cal</strong> <strong>Spas</strong> Vinyl and Leather Cleaner should be used<br />
sparingly. Incorrect usage may cause water clarity<br />
issues.<br />
Spa Covers<br />
1.<br />
2.<br />
3.<br />
4.<br />
5.<br />
Remove spa cover from<br />
spa.<br />
Allow spa cover to dry<br />
completely.<br />
Spray Vinyl and Leather<br />
Cleaner to cover evenly<br />
and wipe dry.<br />
Allow spa cover to dry<br />
completely.<br />
Pillows<br />
1.<br />
2.<br />
3.<br />
4.<br />
Reinstall cover on spa.<br />
Wipe pillows dry with a soft<br />
cloth.<br />
Carefully spray Vinyl and<br />
Leather Cleaner directly<br />
onto pillow.<br />
Wipe pillows dry.<br />
Allow pillows to dry<br />
completely.<br />
specifically formulated to clean the spa without<br />
damaging its acrylic finish.<br />
The most effective solution to minimize cleaning time<br />
is prevention. When the following steps are followed,<br />
the spa’s finish will actually start to resist most of the<br />
elements that cause calcium build-up and make scum<br />
line clean up easier.<br />
Prior to Spa Start-Up and Refilling<br />
1.<br />
2.<br />
3.<br />
4.<br />
5.<br />
6.<br />
7.<br />
8.<br />
Spray <strong>Cal</strong> <strong>Spas</strong> Multi-Purpose Cleaner directly<br />
on to the spa’s finish.<br />
Wipe clean with a clean soft cloth.<br />
Repeat on heavily calcified areas.<br />
Wipe spa thoroughly with a wet sponge, rinsing<br />
often with a bucket of clean water.<br />
Allow spa to dry completely.<br />
Apply a coat of <strong>Cal</strong> <strong>Spas</strong> Fast Sheen to the spa’s<br />
entire finish with a soft towel or sponge.<br />
Allow Fast Sheen to dry until white and powdery.<br />
Buff clean with a soft cloth, rotating frequently.<br />
Periodic Maintenance<br />
1.<br />
2.<br />
3.<br />
Spray <strong>Cal</strong> <strong>Spas</strong> Multi-Purpose Cleaner directly to<br />
the spa’s finish.<br />
Wipe clean with a clean soft cloth.<br />
Wipe spa thoroughly with a wet sponge, rinsing<br />
often in a bucket of clean water.<br />
<strong>Cal</strong> <strong>Spas</strong> Multi-Purpose Cleaner should not be<br />
sprayed directly into the spa water. Incorrect usage of<br />
this product will cause water clarity issues.<br />
Fast Sheen (Spa finish protecting wax)<br />
Warning: Do not use automotive vinyl protectants on<br />
spa covers or pillows. These products are generally<br />
oil-based and will cause severe water clarity issues that<br />
are difficult to correct.<br />
All-Purpose Cleaner (Spa finish cleaning)<br />
<strong>Cal</strong> <strong>Spas</strong> All-Purpose Cleaner is an<br />
essential part of maintaining your spa’s<br />
finish. Through normal use, the spa’s<br />
finish can accumulate dirt, oil, and calcium<br />
causing a rough feel and unsightly scum<br />
lines. <strong>Cal</strong> <strong>Spas</strong> All-Purpose Cleaner is a<br />
low detergent, non-abrasive cleaner<br />
20<strong>07</strong> Portable Spa Owner’s Manual Page 35<br />
<strong>LTR20<strong>07</strong>1000</strong>, <strong>Rev</strong>. B
Cleaning and Maintenance<br />
<strong>Cal</strong> <strong>Spas</strong> Fast Sheen is an<br />
essential part of maintaining your<br />
spa’s finish. Through normal use,<br />
the spa’s finish can accumulate<br />
dirt, oil, and calcium, causing a<br />
rough feel and unsightly scum lines.<br />
<strong>Cal</strong> <strong>Spas</strong> Fast Sheen is a nonoil<br />
based wax that is specifically<br />
formulated to protect the spa’s finish<br />
from the chemicals and minerals<br />
associated with normal spa use.<br />
The most effective solution to<br />
minimize cleaning time is prevention.<br />
When the following steps are<br />
followed, the spa’s finish will actually<br />
start to resist most of the elements<br />
that cause calcium build-up and<br />
make scum line clean-up easier.<br />
Prior to Spa Start-Up and Refilling<br />
1.<br />
2.<br />
3.<br />
4.<br />
5.<br />
6.<br />
7.<br />
8.<br />
Spray <strong>Cal</strong> <strong>Spas</strong> Multi-Purpose Cleaner directly to<br />
the spa’s finish.<br />
Wipe clean with a soft cloth.<br />
Repeat on heavily calcified areas.<br />
Wipe spa thoroughly with a wet sponge, rinsing<br />
often in a bucket of clean water.<br />
Allow the spa to dry completely.<br />
Apply a coat of <strong>Cal</strong> <strong>Spas</strong> Fast Sheen to the spa’s<br />
entire finish with a soft cloth or sponge.<br />
Allow Fast Sheen to dry until white and powdery.<br />
Buff clean with a soft cloth, rotating frequently.<br />
IMPORTANT: <strong>Cal</strong> <strong>Spas</strong> Fast Sheen should not be<br />
used on spas full of water. Only apply to clean, cool,<br />
dry surfaces. Incorrect product usage may cause water<br />
clarity issues.<br />
Page 36<br />
20<strong>07</strong> Portable Spa Owner’s Manual<br />
<strong>LTR20<strong>07</strong>1000</strong>, <strong>Rev</strong>. B
Using the <strong>Cal</strong> Entertainment System<br />
Some spas may be equipped with audio/visual<br />
entertainment options. Several options are available<br />
and include marine grade CD players and DVD<br />
players. Two different TV monitors are also available.<br />
Each <strong>Cal</strong> Spa unit equipped with an audio/visual<br />
system is delivered with the manufacturer’s operating<br />
instructions. We strongly recommend that you read<br />
these instructions prior to operating the unit.<br />
The instructions contained in this manual describe<br />
only basic functions. See the manufacturer’s operating<br />
instructions for other features and functions. These<br />
instructions are delivered with the <strong>Cal</strong> <strong>Spas</strong> owner’s<br />
manual in a clear plastic bag.<br />
Observe the following precautions for your<br />
entertainment system:<br />
• Make sure that hands and CDs / DVDs are dry<br />
before coming in contact with this or any electronic<br />
option.<br />
• Always close the CD / DVD protection door.<br />
• Do not place wet CD’s or DVD’s into this unit at any<br />
time.<br />
• Water damage is not covered by <strong>Cal</strong> <strong>Spas</strong> or the<br />
manufacturer’s warranty.<br />
Although the marine grade entertainment system is<br />
encased in a plastic housing with weather seals, the<br />
system is water resistant and NOT waterproof. You<br />
must take every precaution to keep this system dry!<br />
Water damage is not covered by <strong>Cal</strong> <strong>Spas</strong> or the<br />
manufacturer’s warranty.<br />
WARNING! Although the TV monitor is water-resistant,<br />
make sure that hands are dry before coming in contact<br />
with this or any electronic option. DO NOT SPLASH<br />
WATER ON THE TV MONITOR!<br />
Operating the CD Player<br />
The manufacturer’s operating instructions are delivered<br />
with your spa. We strongly recommend that you read<br />
these instructions prior to operating this unit. Press the<br />
POWER button on the unit or the remote control to turn<br />
the system on. The system automatically starts in the<br />
mode it was in when it was last shut off.<br />
Listening to the Radio<br />
1.<br />
Press the MODE button to switch to the radio<br />
mode.<br />
2.<br />
Entertainment System<br />
Press the left and right arrows located at the far<br />
right of the panel to tune the radio to a station.<br />
Inserting a Disk<br />
For Aquatic and Poly Planar systems:<br />
1.<br />
2.<br />
3.<br />
Press the OPEN button on the unit. The faceplate<br />
will gently lower and expose the disk drive.<br />
Insert a disk in the disk drive.<br />
Flip up the faceplate.<br />
For JBL systems, simply insert a disk into the slot in the<br />
faceplate.<br />
Playing a CD<br />
You can play CDs with any of the media systems<br />
(Aquatic CD, Aquatic DVD, Poly Planar, and JBL CD<br />
player).<br />
1.<br />
2.<br />
3.<br />
Insert a disk in the disk drive as described above.<br />
The player will identify the type of disk and begin<br />
playing it.<br />
Use either the remote control or the buttons on the<br />
faceplate to start and stop the player and to jump to<br />
selections.<br />
To remove the disk, press the EJECT button.<br />
Wired Remote Control<br />
If you have an Aquatic entertainment system with the<br />
wired remote control, you can use it to adjust volume,<br />
change CD tracks, and change radio stations. If you<br />
have the optional Aquatic DVD player, you can also<br />
use the wired remote control to play, stop, pause and<br />
forward through movies.<br />
20<strong>07</strong> Portable Spa Owner’s Manual Page 37<br />
<strong>LTR20<strong>07</strong>1000</strong>, <strong>Rev</strong>. B
Entertainment System<br />
Raising and Lowering the 20” TV<br />
Press the TV button on the auxiliary control panel<br />
to raise and lower the TV monitor. Press the button<br />
once to raise the TV. Press it again to lower the TV.<br />
You can also press the OPT.1 button on the<br />
universal remote.<br />
Playing a Movie<br />
1.<br />
2.<br />
Press the OPT.1 button to raise the TV.<br />
Turn on the TV using the universal remote<br />
control.<br />
3.<br />
4.<br />
5.<br />
Insert a disk in the DVD player as described<br />
above. The player will identify the type of disk and<br />
begin playing it. Either the DVD menu will appear<br />
on the TV screen or the movie will begin playing<br />
automatically.<br />
Use the remote control to navigate the DVD menu<br />
using the fast forward and fast reverse buttons<br />
located at the lower part of the universal remote.<br />
To remove the disk, press the OPEN button on the<br />
DVD player. The faceplate will gently open. Press<br />
the small EJECT button located to the left of the disk<br />
drive slot.<br />
Using the Universal Remote Control<br />
Everything you want to do with your entertainment system can be controlled with the universal remote. All of the<br />
commands are organized into six areas.<br />
Device selection buttons<br />
Navigation and menu<br />
selection buttons<br />
Channel and volume<br />
control<br />
Spa controls<br />
Keypad<br />
CD and DVD controls<br />
Selects among six devices: TV,<br />
VCR, CD player, DVD player,<br />
stereo receiver, and satellite<br />
Selects among set-up, menu,<br />
and channel guide functions<br />
Adjusts the volume up and<br />
down and<br />
Selects among eight functions<br />
specific to the spa, such as<br />
blower, pumps and light<br />
Used to enter TV channels<br />
Use to control a CD or DVD<br />
player<br />
Page 38<br />
20<strong>07</strong> Portable Spa Owner’s Manual<br />
<strong>LTR20<strong>07</strong>1000</strong>, <strong>Rev</strong>. B
Programming the Universal Remote Control<br />
Entertainment System<br />
The <strong>Cal</strong> <strong>Spas</strong> universal remote has been preprogrammed<br />
to function with the entertainment system<br />
the spa has been configured with. However, in case<br />
you need to reprogram the remote, use the device list<br />
below for the programming code.<br />
1.<br />
2.<br />
3.<br />
4.<br />
Turn on the device (TV, CD player, DVD player)<br />
with the manufacturer’s remote control.<br />
Press the button on the remote for the device you<br />
want to program (TV, CD, DVD, etc.)<br />
Press and hold the SETUP button until the LED<br />
blinks twice.<br />
Enter the device code. If you perform this<br />
procedure correctly, the LED will blink twice. If not,<br />
repeat steps 2 and 3.<br />
Device Manufacturer Device Type Code<br />
Samsung 42” plasma TV 1312<br />
River Park 20” TV 15<strong>30</strong><br />
Aquatic CD 1867<br />
Aquatic DVD 1866<br />
Poly Planar DVD N/A<br />
JBL CD N/A<br />
20<strong>07</strong> Portable Spa Owner’s Manual Page 39<br />
<strong>LTR20<strong>07</strong>1000</strong>, <strong>Rev</strong>. B
Appendix<br />
Appendix<br />
Replacement Parts<br />
Jets<br />
FIX12500050<br />
(SS) AIR INJECTOR CAP<br />
PLU21700818<br />
OZONE INJECTOR JET<br />
PLU21703420<br />
(EPW) 2” INTERNAL CLUSTER<br />
STORM, PULSATOR (EURO)<br />
PLU21703421<br />
(CXLW) 6.5” POWER STORM JET,<br />
DIRECTIONAL<br />
PLU21703422<br />
(MJLW) 6.5”, POWER STORM JET,<br />
DIRECTIONAL<br />
PLU21703423<br />
(MJW) 5.5”, POWER STORM JET,<br />
DIRECTIONAL<br />
PLU21703424<br />
(SXW) 5.5”, POWER STORM JET,<br />
SWIRLEY<br />
PLU21703425<br />
(CXW) 5.5”. POWER STORM JET,<br />
DIRECTIONAL<br />
PLU21703426<br />
(SFW) 5.5”, POWER STORM JET,<br />
SURE-FLO<br />
Page 40<br />
20<strong>07</strong> Portable Spa Owner’s Manual<br />
<strong>LTR20<strong>07</strong>1000</strong>, <strong>Rev</strong>. B
PLU21703427<br />
(MNW) 2.5”, NECK JET, (QUAD<br />
BLASTER)<br />
PLU21703428<br />
(TW) 4.75”, POWER SWIM JET<br />
TORNADO<br />
PLU21703429<br />
Appendix<br />
(SJW) 5” ROTO POWER STORM JET<br />
WITH DARK EYEBALL<br />
PLU217034<strong>30</strong><br />
(MFLW) 4.25” STORM JET, MAXI<br />
FLOW WITH DARK EYEBALL<br />
PLU21703431<br />
(MFRW) 3.25” STORM JET, MAXI<br />
FLOW WITH DARK EYEBALL<br />
PLU21703432<br />
(MFW) 3.25”, STORM JET, MICRO<br />
FLOW W/DRK EYEBALL<br />
PLU21703433<br />
(MSRW) 3”, STORM JET, MICRO<br />
SWIRL W/DRK EYEBALL<br />
PLU21703621<br />
(EPW) 2”, INT. CLUSTER STORM,<br />
(EURO) SS W/MTL ESC<br />
PLU21703622<br />
(CXLW) 6.5” POWER STORM JET W/<br />
SS ESC DIRECTIONAL<br />
PLU21703623<br />
(SXRW) 5.5”, POWER STORM JET<br />
W/SS ESC, DIRECTIONAL<br />
PLU21703624<br />
(CXW) 5.5”, POWER STORM JET W/<br />
SS ESC, DIRECTIONAL<br />
PLU21703625<br />
MJLW 5.5”, POWER STORM JET W/<br />
SS ESC, DIRECTIONAL<br />
20<strong>07</strong> Portable Spa Owner’s Manual Page 41<br />
<strong>LTR20<strong>07</strong>1000</strong>, <strong>Rev</strong>. B
Appendix<br />
PLU21703626<br />
SFW 5.5”, STORM JET W/SS ESC,<br />
SURE-FLO<br />
PLU21703627<br />
(MFRW) 3.25”, STORM JET, MAXI<br />
FLOW W/SS ESC & DRK EYEBALL<br />
PLU21703628<br />
MNW 2.75”, NECK JET W/SS ESC,<br />
QUAD BLASTER<br />
PLU21703629<br />
TW 4.75”,, POWER SWIM JET W/SS<br />
ESC TORNADO<br />
PLU217036<strong>30</strong><br />
MFLW 4.25”, STORM JET, MAXI FLOW<br />
W/SS ESC & DRK EYEBALL<br />
PLU21703631<br />
(MFW) 3.25”, STORM JET, MICRO<br />
FLOW W/SS ESC & DRK EYEBALL<br />
PLU21703632<br />
(MSRW) 3” STORM JET, MICRO<br />
SWIRL W/SS ESC & DRK EYEBALL<br />
PLU21703643<br />
EURO DIRECTIONAL W/SS ESC<br />
Page 42<br />
20<strong>07</strong> Portable Spa Owner’s Manual<br />
<strong>LTR20<strong>07</strong>1000</strong>, <strong>Rev</strong>. B
Valves<br />
PLU21<strong>30</strong>0052<br />
DIVERTER VALVE 1” (2 WAY) SILVER,<br />
TEARDROP HANDLE (2 TONE)<br />
PLU21<strong>30</strong>0062<br />
DIVERTER VALVE 2” (2 WAY) SILVER,<br />
TEARDROP HANDLE (2 TONE)<br />
PLU21700378<br />
Appendix<br />
VENT, 1” AIR CONTROL SILVER,<br />
TEARDROP (2 TONE)<br />
PLU21700637<br />
AROMATHERAPY CHAMBER AND<br />
CAP<br />
Pillows<br />
ACC01400884<br />
QUAD BLASTER PILLOW<br />
ACC01400874<br />
NECK JET/ BLASTER PILLOW<br />
ACC01400864<br />
STD PILLOW, #965 RECTANGULAR<br />
ACC01400886<br />
PILLOW, VX<br />
ACC01400479<br />
PILLOW, FLOATING, GREY<br />
ACC01400481<br />
BOOSTER SEAT, GREY<br />
20<strong>07</strong> Portable Spa Owner’s Manual Page 43<br />
<strong>LTR20<strong>07</strong>1000</strong>, <strong>Rev</strong>. B
Appendix<br />
Drains<br />
PLU21400132<br />
MAIN DRAIN, SUPER HI FLO<br />
SUCTION 2” SILVER<br />
PLU21400155<br />
HEAT RETURN<br />
PLU21400197<br />
BOTTOM DRAIN STAR SUCTION<br />
COVER<br />
PLU21400065<br />
HI FLO SUCTION SILVER 1 1/2”-<br />
OZO18<strong>30</strong>0005<br />
BOTTOM DRAIN-FILTRATION<br />
RETURN ASSY<br />
PLU21400195<br />
BOTTOM DRAIN OZONE FITTING-<br />
PLU21400196<br />
BOTTOM DRAIN WALL FITTING-<br />
Waterfalls<br />
PLU21800618<br />
WATERFALL SILVER<br />
PLU21800611<br />
WATERFALL SILVER, 4 PORT LED<br />
PLU2180<strong>07</strong>00<br />
WATERFALL SILVER W/4” SLOT<br />
CLEAR FACE<br />
PLU2180<strong>07</strong><strong>30</strong><br />
WATERFALL SILVER W/9” SLOT<br />
CLEAR FACE<br />
PLU21800642<br />
POP-UP WATERFALL<br />
PLU21800800<br />
WATERFALL SILVER AQUA<br />
SPRING 11”<br />
Lights<br />
LIT16100153 WALLFITTING, CLEAR LENS CAP, JUMBO SPA LIGHT, 5”<br />
LIT16000151 LIGHT MINI 2-1/2 DIA<br />
LIT16100155 RED LENS INSERT, JUMBO SPA LIGHT<br />
LIT16100156 BLUE LENS INSERT, JUMBO SPA LIGHT,<br />
Page 44<br />
20<strong>07</strong> Portable Spa Owner’s Manual<br />
<strong>LTR20<strong>07</strong>1000</strong>, <strong>Rev</strong>. B
Appendix<br />
Filters<br />
FIL11100190<br />
FIL11100191<br />
FIL11100193<br />
FIL11100125<br />
FIL11703200<br />
FIL11100200<br />
FILTER CARTRIDGE, 50 SQ FT. ANTI-BACTERIAL RED<br />
FILTER CARTRIDGE, 75 SQ FT. ANTI-BACTERIAL WHITE<br />
FILTER CARTRIDGE, 35 SQ FT. ANTI-BACTERIAL WHITE<br />
FILTER CARTRIDGE CAL 75 SQ FT 10 1/16 X 15 1/6 (REMOTE EQUIPMENT)<br />
FILTER CARTRIDGE 75 SQ FT ANTI-BACTERIAL SCREW-IN<br />
FILTER CARTRIDGE, 50 SQ FT. ANTI-BACTERIAL WHITE, SCREW-IN<br />
Pumps<br />
PUM22000951 PUMP, 5.0 HP 2 SP SWITCHLESS, DBL SEAL 240V<br />
PUM22000941 PUMP 6.0 HP 2SP 145T DBL SEAL, SWITCHLESS 2” 240V<br />
PUM22000031 PUM 1.5 HP 2 SP 2” WET END 120V -<br />
PUM22000916 PUMP DUALLY, DBL SEAL SWITCHLESS 2” ULTIMA-240V<br />
PUM22000952 PUMP 1.0 HP ATS – 240V<br />
PUM22200051 PUMP, 1.5 BHP DUALLY GE-56 FRAME, DBL SEAL-120V<br />
PUM22000977 24 HOUR FILTRATION PUMP ASSEMBLY 240V<br />
PUM22100944 SPA CAL FILTRATION CIRC PUMP 240V<br />
BLO05000085 BLOWER W/CORD COMPLETE 1.5 HP 240V 3.5 AMPS<br />
PLU21100160 CHECK VALVE 1 ¼ lb.<br />
LED Lights<br />
LIT16100179<br />
LIT16100180<br />
LIT16100195<br />
LIT16100201<br />
LIT16100202<br />
LIT16100205<br />
LIT161002<strong>07</strong><br />
LIT16100208<br />
Cover Lifts<br />
ACC01600116<br />
ACC01600117<br />
Hand Rails<br />
FIX12400002<br />
FIX12400003<br />
Filter Lids<br />
FIL11<strong>30</strong>0252<br />
FIL11<strong>30</strong>0253<br />
CONTROLLER, SMALL, DAISY CHAIN,<br />
LED, QUAD , DAISY CHAIN,<br />
LED, DUAL , DAISY CHAIN<br />
LED CABLE HARNESS - 8’ LED TO LED 4 WIRE<br />
LED CABLE HARNESS (FOR SPA LIGHT) AREA, 6 FT. 5 WIRES<br />
7 LED 2” LIGHTS, (SPA LIGHT),<br />
ROUND LED LENS,<br />
ROUND LED, SILICONE GASKET,<br />
COVER LIFT KIT, BOTTOM MOUNTING<br />
COVER LIFT ADJUSTABLE(top mount)<br />
SWIVEL HAND RAIL<br />
SWIVEL HAND RAIL (BLACK)<br />
FILTER LID, DUAL<br />
FILTER LID, SINGLE<br />
20<strong>07</strong> Portable Spa Owner’s Manual Page 45<br />
<strong>LTR20<strong>07</strong>1000</strong>, <strong>Rev</strong>. B
Appendix<br />
Covers<br />
Basic Rust 2” Flat<br />
Part No. Description Series<br />
ACC01000953 SPA COVER BASIC VX515B<br />
ACC01000563 SPA COVER BASIC VX510R<br />
ACC01002500 SPA COVER BASIC VX520J<br />
ACC01002510 SPA COVER BASIC VX620A<br />
ACC01000993 SPA COVER BASIC VX520K<br />
ACC01000973 SPA COVER BASIC VX520O<br />
Basic Grey 2” Flat<br />
Part No. Description Series<br />
ACC01000954 SPA COVER BASIC VX515B<br />
ACC01000564 SPA COVER BASIC VX510R<br />
ACC01002501 SPA COVER BASIC VX520J<br />
ACC01002511 SPA COVER BASIC VX620A<br />
ACC01000994 SPA COVER BASIC VX520K<br />
ACC01000974 SPA COVER BASIC VX520O<br />
Basic Slate 2” Flat<br />
Part No. Description Series<br />
ACC01000955 SPA COVER BASIC VX515B<br />
ACC01000565 SPA COVER BASIC VX510R<br />
ACC01002502 SPA COVER BASIC VX520J<br />
ACC01002512 SPA COVER BASIC VX620A<br />
ACC01000995 SPA COVER BASIC VX520K<br />
ACC01000975 SPA COVER BASIC VX520O<br />
Basic Rust 4” x 2”<br />
Part No. Description Series<br />
ACC01000594 SPA COVER BASIC VX-620A<br />
ACC01000596 SPA COVER BASIC CP-22/36, CT-22/36, VX-P, T<br />
ACC01000598 SPA COVER BASIC C-22/36: M, A, R, BA, VX-L, B<br />
SPA COVER BASIC VX-B<br />
ACC01200406 SPA COVER BASIC VX-K<br />
SPA COVER BASIC VX-D<br />
ACC010009<strong>30</strong> SPA COVER BASIC VX-J<br />
ACC01000572 SPA COVER BASIC CD-22<br />
SPA COVER BASIC VX-R<br />
ACC01000594 SPA COVER BASIC VX-A<br />
Page 46<br />
20<strong>07</strong> Portable Spa Owner’s Manual<br />
<strong>LTR20<strong>07</strong>1000</strong>, <strong>Rev</strong>. B
Appendix<br />
Basic Grey 4” x 2”<br />
Part No. Description Series<br />
ACC01000595 SPA COVER, BASIC V-200/<strong>30</strong>0<br />
ACC01000597 SPA COVER BASIC V-400/500/700/800, CP-22/36, CT-22/36, VX-P, T<br />
ACC01000599 SPA COVER BASIC V-600/850, C-22/ 36: M, A, R, BA, VX-L, B<br />
SPA COVER BASIC VX-B<br />
SPA COVER BASIC VX-K<br />
SPA COVER BASIC VX-O<br />
SPA COVER BASIC VX-J<br />
ACC01000573 SPA COVER BASIC CD-22<br />
Basic Slate 4” x 2”<br />
Part No. Description Series<br />
ACC01000603 SPA COVER BASIC V-200/<strong>30</strong>0<br />
ACC01000604 SPA COVER BASIC V-400/500/700/800, CP-22/36, CT-22/36, VX-P, T<br />
ACC01000605 SPA COVER BASIC V-600/850, C-22/36: M, A, R, BA, VX-L, B<br />
ACC01000962 SPA COVER BASIC VX-B<br />
ACC01000965 SPA COVER BASIC VX-K<br />
ACC01000968 SPA COVER BASIC VX-O<br />
ACC01000932 SPA COVER BASIC VX-J<br />
ACC01000574 SPA COVER BASIC CD-22<br />
ACC01000955 SPA COVER BASIC VX-R<br />
ACC01000603 SPA COVER BASIC VX-A<br />
Standard Rust 5 to 3<br />
Part No. Description Series<br />
ACC01200420 SPA COVER STD Aqua Series<br />
ACC012004<strong>07</strong> SPA COVER STD Avalon 5 Series, J-502<br />
ACC01200408 SPA COVER STD J-501, H-902, J-504<br />
ACC01200560 SPA COVER STD H-901, S-702<br />
ACC01200400 SPA COVER STD S-704, S-705<br />
ACC01200410 SPA COVER STD J-503, 505, 506 S-703, 706, H-903, 704, 705, 706, 708, A-P, T<br />
ACC01200420 SPA COVER STD C- A, C, M, LBA, J-5<strong>07</strong>, J-508, S-7<strong>07</strong>, S-708, H-903, 904, 905,<br />
9<strong>07</strong>, 908, A-L, B<br />
ACC012004<strong>30</strong> SPA COVER STD CD-51<br />
ACC01200450 SPA COVER STD CN-36/51, S-709<br />
ACC01200440 SPA COVER STD CE-36/51<br />
20<strong>07</strong> Portable Spa Owner’s Manual Page 47<br />
<strong>LTR20<strong>07</strong>1000</strong>, <strong>Rev</strong>. B
Appendix<br />
Standard Grey 5 to 3<br />
Part No. Description Series<br />
ACC01200421 SPA COVER STD Aqua Series<br />
ACC012004<strong>07</strong> SPA COVER STD Avalon 5 Series, J-502<br />
ACC01200409 SPA COVER STD J-501, H-902, J-504<br />
ACC01200561 SPA COVER STD H-901, S-702<br />
ACC01200401 SPA COVER STD S-704, S-705<br />
ACC01200411 SPA COVER STD C-P, C-T, J-503, J-505, J-506, S-703, S-706, A-P, T<br />
ACC01200421 SPA COVER STD C- A, C, M, LBA, J-5<strong>07</strong>, J-508, S-7<strong>07</strong>, S-708, H-903, 904, 905,<br />
9<strong>07</strong>, 908, A-L, B<br />
ACC01200431 SPA COVER STD CD-51<br />
ACC01200451 SPA COVER STD CN-36/51, S-709<br />
ACC01200441 SPA COVER STD CE-36/51<br />
Standard Slate 5 to 3<br />
Part No. Description Series<br />
ACC01200422 SPA COVER STD Aqua Series<br />
ACC01200508 SPA COVER STD Avalon 5 Series, J-502<br />
ACC01200510 SPA COVER STD J-501, J-504, S-702<br />
ACC01200562 SPA COVER STD H-901, J-705, H-902<br />
ACC01200402 SPA COVER STD S-704<br />
ACC01200412 SPA COVER STD C-P,C-T,J-503,J-505,J-506, S-703, S-706, A-P, T<br />
ACC01200422 SPA COVER STD C- A, C, M, LBA, J-5<strong>07</strong>, J-508, S-7<strong>07</strong>, S-708, H-903, 904, 905,<br />
9<strong>07</strong>, 908, A-L, B<br />
ACC01200432 SPA COVER STD CD-51<br />
ACC01200452 SPA COVER STD CN-36/51, S-709<br />
ACC01200444 SPA COVER STD CE-36/51<br />
Deluxe Rust 5 to 3<br />
Part No. Description Series<br />
ACU02200210 SPA COVER UL C - B<br />
ACU02200220 SPA COVER UL C - K<br />
ACU02200364 SPA COVER UL J-501<br />
ACU02200320 SPA COVER UL C - O<br />
ACU02200240 SPA COVER UL C – V , S-704<br />
ACU02200250 SPA COVER UL C-P,C-T,J-503,J-505,J-506, S-703, S-706, A-P, T<br />
ACU02200260 SPA COVER UL C- A, C, M, LBA, J-5<strong>07</strong>, J-508, S-7<strong>07</strong>, S-708, H-903, 904, 905,<br />
906, 9<strong>07</strong>, 908, GX49, A-L, B<br />
ACU02200270 SPA COVER UL C - D<br />
ACU02200290 SPA COVER UL C – N, S-709<br />
ACU02200280 SPA COVER UL C - E<br />
ACU02200310 SPA COVER UL C - R<br />
ACU022003<strong>30</strong> SPA COVER UL C - A<br />
Page 48<br />
20<strong>07</strong> Portable Spa Owner’s Manual<br />
<strong>LTR20<strong>07</strong>1000</strong>, <strong>Rev</strong>. B
Deluxe Grey 5 to 3<br />
Part No. Description Series<br />
ACU02200211 SPA COVER UL C - B<br />
ACU02200221 SPA COVER UL C - K<br />
ACU02200365 SPA COVER UL J-501<br />
ACU02200321 SPA COVER UL C - O<br />
ACU02200241 SPA COVER UL C – V, S-704<br />
ACU02200251 SPA COVER UL C-P, C-T, J503, J505, J506, S703, S706<br />
Appendix<br />
ACU02200261 SPA COVER UL C- A, C, M, LBA, J-5<strong>07</strong>, J-508, S-7<strong>07</strong>, S-708, H-903, 904, 905,<br />
906, 9<strong>07</strong>, 908, GX-49<br />
ACU02200271 SPA COVER UL C - D<br />
ACU02200291 SPA COVER UL C – N, S-709<br />
ACU02200281 SPA COVER UL C - E<br />
ACU02200311 SPA COVER UL C - R<br />
ACU02200331 SPA COVER UL C - A<br />
Deluxe Slate 5 to 3<br />
Part No. Description Series<br />
ACU02200216 SPA COVER UL C - B<br />
ACU02200225 SPA COVER UL C - K<br />
ACU02200368 SPA COVER UL J-501<br />
ACU02200325 SPA COVER UL C - O<br />
ACU02200246 SPA COVER UL C – V, S-704<br />
ACU02200256 SPA COVER UL C-P,C-T,J-503,J-505,J-506, S-703, S-706<br />
ACU02200266 SPA COVER UL C- A,C,M,LBA, J-5<strong>07</strong>,J-508, S-7<strong>07</strong>, S-708, H903,904,905,906,90<br />
7,908, GX-49<br />
ACU02200275 SPA COVER UL C - D<br />
ACU02200295 SPA COVER UL C – N, S-709<br />
ACU02200285 SPA COVER UL C - E<br />
Deluxe Teal 5 to 3<br />
Part No. Description Series<br />
ACU02200212 SPA COVER UL C - B<br />
ACU02200222 SPA COVER UL C - K<br />
ACU02200369 SPA COVER UL J-501<br />
ACU02200242 SPA COVER UL C - O<br />
ACU02200252 SPA COVER UL C – V, S-704<br />
ACU02200262 SPA COVER UL C-P, C-T, J-503, J-505, J-506, S-703, S-706<br />
ACU02200272 SPA COVER UL C- A, C, M, LBA, J-5<strong>07</strong>, J-508, S-7<strong>07</strong>, S-708, H-903, 904, 905,<br />
906, 9<strong>07</strong>, 908, GX-49<br />
ACU02200292 SPA COVER UL C – D<br />
ACU02200282 SPA COVER UL C – N, S-709<br />
20<strong>07</strong> Portable Spa Owner’s Manual Page 49<br />
<strong>LTR20<strong>07</strong>1000</strong>, <strong>Rev</strong>. B
Appendix<br />
Deluxe Navy 5 to 3<br />
Part No. Description Series<br />
ACU02200213 SPA COVER UL C - B<br />
ACU02200223 SPA COVER UL C - K<br />
ACU02200370 SPA COVER UL J-501<br />
ACU02200323 SPA COVER UL C - O<br />
ACU02200243 SPA COVER UL S-704<br />
ACU02200253 SPA COVER UL C-P, C-T, J-503, J-505, J-506, S-703, S-706<br />
ACU02200263 SPA COVER UL C- A, C, M, LBA, J-5<strong>07</strong>, J-508, S-7<strong>07</strong>, S-708, H-903, 904, 905,<br />
906, 9<strong>07</strong>, 908, GX-49<br />
ACU02200273 SPA COVER UL C – D<br />
ACU02200293 SPA COVER UL C – N, S-709<br />
ACU02200283 SPA COVER UL C – E<br />
Replacement Cabinet Panels<br />
The complete selection of replacement cabinets for all model is very extensive and too lengthy for this owner’s<br />
manual. See your <strong>Cal</strong> <strong>Spas</strong> deal to order replacement panels for your spa, or call 1-800-CAL-SPAS.<br />
Page 50<br />
20<strong>07</strong> Portable Spa Owner’s Manual<br />
<strong>LTR20<strong>07</strong>1000</strong>, <strong>Rev</strong>. B
Keeping Fit with your <strong>Cal</strong> Spa<br />
The fitness series spas put the fun back into fitness.<br />
This comes with everything you need for a high<br />
powered, low impact, result achieving workout in total<br />
comfort and privacy. Plus you get a spa loaded with<br />
incredible therapeutic seating, variable jet massage<br />
and generous control options, and the most gorgeous<br />
cabinetry on the planet.<br />
The fitness equipment consists of two exercise arm<br />
bars, two exercise band cords, two exercise bands and<br />
grips, and an exercise belt. This equipment attaches<br />
quickly and easily to the exercise anchors located on<br />
the spa walls.<br />
IMPORTANT: Always consult your physician before<br />
starting any exercise activity or program. The fitness<br />
series spas feature rubber exercise bands. When<br />
stretched, these bands create a hi-tension condition.<br />
Improper use or failure to connect the exercise bands<br />
properly may cause injury. Always inspect all of the<br />
exercise equipment prior to beginning any exercise. Do<br />
not use any damaged equipment<br />
Fitness Series Exercise Program<br />
Many people have never performed resistance training<br />
and/or may not fully understand the benefits of this<br />
extremely important form of exercise for the goal<br />
of improving your health, appearance and overall<br />
confidence.<br />
Resistance training is necessary when trying to loose<br />
body fat, maintain and improve lean muscle structure<br />
and increase energy levels while improving flexibility.<br />
Appendix<br />
Hydrotherapy is a remarkable way of utilizing water and<br />
heating to promote health and wellness. The majority of<br />
people are turning back to natural methods of healing<br />
and health practices to improve their body externally,<br />
but most of all internally. Hydrotherapy provides<br />
specific benefits for increased blood circulation,<br />
detoxification, reduction of body fat, replenish minerals<br />
and nutrients in the body and relieve stress.<br />
Fitness Series Exercise Program<br />
20 to <strong>30</strong> min. session three times a week<br />
1.<br />
2.<br />
3.<br />
4.<br />
Seated Row: An all around exercise that focuses<br />
on the muscles of the upper back, shoulders and<br />
arms. Using the exercise bars in a seated position<br />
with your feet stable, abs tight and lower back<br />
stable. Palms down, arms extended with elbows<br />
slightly bent. Pull towards your chest squeezing<br />
your shoulder blades to the middle back and<br />
returning slowly to the starting position.<br />
Standing Chest Fly: An excellent upper body<br />
exercise that focuses on the muscles of the chest,<br />
shoulders and arms. Using the exercise grips,<br />
place palms sideways facing your body with your<br />
elbows slightly bent. Pull forward toward your body<br />
bringing hands together, squeezing and flexing<br />
chest muscles, then slowly returning to the starting<br />
position.<br />
Standing Chest Press: Using the exercise grips,<br />
place your palms down with your elbows bent at<br />
90 ˚. Press forward bringing your hands together,<br />
squeezing and flexing your chest muscles, then<br />
slowly return to the start position.<br />
Standing Shoulder Press: Using the exercise grips,<br />
place your palms facing away from your body with<br />
your elbows bent at 90˚. Press upward bringing<br />
20<strong>07</strong> Portable Spa Owner’s Manual Page 51<br />
<strong>LTR20<strong>07</strong>1000</strong>, <strong>Rev</strong>. B
Appendix<br />
5.<br />
6.<br />
7.<br />
your hands together in front of you, above your<br />
head and slowly return to the start position.<br />
Arm Curls: Using the exercise grips, place your<br />
hands face up with your elbows slightly bent, pull<br />
upward towards your chin squeezing and flexing<br />
your biceps then slowly return to start position.<br />
Hydro Squats: Excellent for defining and firming<br />
the buttocks, thighs and legs. From a standing<br />
position, slowly sink down into the water until your<br />
buttocks is level with your knees (90˚). Squeezing<br />
your muscles tightly like sitting in a chair with abs<br />
tight and your back straight then slowly returning to<br />
standing position.<br />
Hydro Leg Extensions: Sitting with your feet flat,<br />
knees bent (90˚) and abs tight. Lift your foot<br />
upwards straightening the leg while squeezing and<br />
flexing the thigh muscles and slowly lowering the<br />
foot to start position.<br />
Important: Consult your physician before starting any<br />
exercise activity or program. The fitness series spas<br />
feature rubber exercise bands. When stretched, these<br />
bands create a hi-tension condition. Improper use or<br />
failure to connect the exercise bands properly may<br />
result in injury. Always inspect all exercise equipment<br />
prior to beginning any exercise. Do not use any<br />
damaged equipment.<br />
Warm Water Workouts<br />
Almost any exercise that can be done on land,<br />
including walking or jogging, can be also done in water.<br />
If you have arthritis and you’re exercising in a spa<br />
you will probably focus on range-of-motion exercises<br />
that work the toe, ankle, knee, leg, hip, hand, wrist<br />
and shoulder. The size and shape of the spa will<br />
determine the specific types of exercises you can do<br />
in it. Following are some low impact exercises that can<br />
assist in improving flexibility and strength.<br />
Forward Arm Reach<br />
With both arms, reach straight in front of you. Raise<br />
your hands overhead as high as possible, keeping your<br />
elbows as straight as you can. If one arm is very weak,<br />
use your other arm to help raise it.<br />
Elbow Bend<br />
Start with your elbows as straight as possible, fingers<br />
pointing down. Bend your elbows and try to touch your<br />
thumbs to your shoulders. Keep your elbows close to<br />
your body. You do not have to touch your shoulders.<br />
Then relax your elbows and straighten your arms down<br />
at your sides.<br />
Wrist Bend<br />
Bend both of your wrists upward and then downward.<br />
You can also exercise one wrist at a time by placing<br />
your free hand, thumb out, under the exercising wrist.<br />
Hands and fingers should be relaxed.<br />
Finger Curl<br />
Curl your fingers into your palm to make a loose fist<br />
then straighten them out.<br />
Ankle Circles<br />
While seated, make large inward circles with your left<br />
foot, moving it from the ankle. Repeat circles in the<br />
opposite direction. Then repeat the exercise with your<br />
right foot.<br />
Spread Eagle<br />
While sitting on the edge of a bath seat, straighten one<br />
knee. While holding it straight, slowly move it out to the<br />
side. Hold it out for three seconds, then bring it back<br />
to the center and relax. Repeat these instructions with<br />
your other leg.<br />
Page 52<br />
20<strong>07</strong> Portable Spa Owner’s Manual<br />
<strong>LTR20<strong>07</strong>1000</strong>, <strong>Rev</strong>. B
<strong>Cal</strong> <strong>Spas</strong> Chemicals<br />
Appendix<br />
20<strong>07</strong> Portable Spa Owner’s Manual Page 53<br />
<strong>LTR20<strong>07</strong>1000</strong>, <strong>Rev</strong>. B
Page 54<br />
20<strong>07</strong> Portable Spa Owner’s Manual<br />
<strong>LTR20<strong>07</strong>1000</strong>, <strong>Rev</strong>. B
20<strong>07</strong> Portable Spa Owner’s Manual Page 55<br />
<strong>LTR20<strong>07</strong>1000</strong>, <strong>Rev</strong>. B
Appendix<br />
20<strong>07</strong> Warranty Information<br />
See your <strong>Cal</strong> <strong>Spas</strong> dealer for a copy of the applicable warranty, details, and any questions you may have<br />
regarding the warranty coverage on your spa.<br />
Warranty Specifics<br />
• Five Year Cabinet Warranty: Cabinet surface peeling, blistering, or delamination is specifically excluded from<br />
this warranty.<br />
• Five Year Freedom Seal Warranty: Leaking caused by operating pump while dry is specifically excluded from<br />
this warranty.<br />
Warranty Limitations<br />
The 20<strong>07</strong> Limited Warranty is void if the spa has been subject to negligence, alteration, misuse, abuse, repairs by<br />
non-C.A.I. authorized representatives, incorrect electrical installation, acts of God and any other cases beyond the<br />
control of C.A.I. Examples of common acts invalidating this warranty include, but are not limited to:<br />
• Use of spa in a non-residential application.<br />
• Scratches caused by normal use.<br />
• Operation of spas water temperature out of the normal operating range of 32˚F (0°C) to 118˚F (47.8°C).<br />
• Damage caused by incorrect water level (low, overflow, etc.).<br />
• Damage caused by extreme weather conditions (hot, cold, etc.).<br />
• Damage caused by dirt, sand and calcium.<br />
• Damage caused by clogged filter cartridges. See filter cleaning recommendations in this Owner’s Manual.<br />
• Damage caused by continued operation of this spa with either a known or an unknown problem.<br />
• Damage caused by tri-chlor, acids, chlorine tablets, and any other spa chemicals not authorized by C.A.I.<br />
• Damage caused by improper water chemistry. (High levels of chlorine, bromine, calcium, pH and other<br />
excessive chemical levels.)<br />
• Damage caused by direct sunlight. <strong>Spas</strong> should always be covered when not in use.<br />
• Damage caused as a result of failure to follow operating instructions as defined within this Owner’s Manual.<br />
• Damage caused by incorrect electrical installation, electrical brownout, voltage spikes, or operation of spa out<br />
of voltage range by more than ±10%.<br />
• <strong>Spas</strong> improperly installed in-ground or placed on non-approved surfaces.<br />
The Limited Warranty applies only to spas normally used for personal, family or household purposes.<br />
Warranty Exclusions<br />
Replaceable service items such as filters, light bulbs, pillows, jet inserts, spa covers, and filter covers are<br />
specifically excluded from the limited warranty.<br />
Spa covers and stereo systems are delivered with their own manufacturer’s warranty. For more info, please see<br />
their warranties in the owner’s information package that was delivered with your spa for more information.<br />
Equipment adjustments (such as pressure switch adjustments) are specifically excluded from this warranty.<br />
Page 56<br />
20<strong>07</strong> Portable Spa Owner’s Manual<br />
<strong>LTR20<strong>07</strong>1000</strong>, <strong>Rev</strong>. B
Locating the product serial number<br />
The serial number of your <strong>Cal</strong> Spa is located on a metal plate attached to<br />
the lower right front panel of the spa.You will need this number to properly<br />
register your grill or cart and activate coverage. Write this information in<br />
the space provided below.<br />
<strong>Cal</strong> Spa Model: _______________________________________________<br />
<strong>Cal</strong> Spa Serial Number: ________________________________________<br />
Date Purchased: _____________________________________________<br />
Date Installed: _______________________________________________<br />
<strong>Cal</strong> Spa Dealer’s Phone Number: _ _______________________________<br />
<strong>Cal</strong> Spa Dealer’s Address: ______________________________________<br />
CONTACT INFORMATION<br />
For customer service, please contact your authorized dealer immediately. If you need additional information and/<br />
or assistance, please contact:<br />
C.A.I. Customer Service Department<br />
1462 East Ninth Street<br />
Pomona, CA 91766.<br />
Toll Free: 1-800-CAL-SPAS<br />
Fax: 1-909-629-3890<br />
www.calspas.com