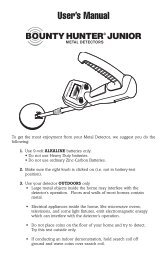
Instruction Manual - Kellyco Metal Detectors
Instruction Manual - Kellyco Metal Detectors
Instruction Manual - Kellyco Metal Detectors

You also want an ePaper? Increase the reach of your titles
YUMPU automatically turns print PDFs into web optimized ePapers that Google loves.
This exciting One-Touch metal detector is<br />
automatic and surprisingly easy to operate.<br />
Yet those who have special demands will<br />
find the GTI 2500 meticulously adaptable<br />
to any personal style of treasure hunting.<br />
Microprocessor-controlled circuitry truly<br />
makes this the deepest-seeking detector<br />
known to man.<br />
Although the GTI 2500 is built to withstand<br />
rugged treatment outdoors while<br />
giving years of trouble-free service, always<br />
remember that this detector is a precision<br />
electronic instrument. Protect it from<br />
extreme heat and cold as well as mist,<br />
rain or blowing sand. Keep it as clean as<br />
possible.<br />
CONTENTS<br />
To The Owner ...............................7<br />
Assembly ......................................9<br />
Touchpads.......................................13<br />
Display Screen.................................18<br />
TreasureVision.................................20<br />
Basic Hunting <strong>Instruction</strong>s.................23<br />
Discriminate Mode............................29<br />
Setting Discrimination (Notches)....... 34<br />
Operating Settings...........................39<br />
Search Aids.....................................45<br />
Audio Choices..................................47<br />
Battery Choices...............................48<br />
All-<strong>Metal</strong> Mode.................................49<br />
Other Special Features in<br />
the All-<strong>Metal</strong> Mode.....................52<br />
Treasure Imaging ............................57<br />
Bench Testing..................................64<br />
Field Operations...............................66<br />
Headphone Jack...............................75<br />
Searchcoils......................................76<br />
Battery Information..........................77<br />
Recommended Accessories................81<br />
Maintenance....................................82<br />
Specialized Hunting..........................83<br />
Repair Service.................................90<br />
Recommended Reading....................... 93<br />
- Garrett <strong>Metal</strong> <strong>Detectors</strong><br />
Graphic Target Imaging 2500 -
Warning................................................. 95<br />
RAM Book Order Form..................... 97<br />
Specifications................................. 99<br />
Code of Ethics................................ 101<br />
Patents...........................................103<br />
TO THE OWNER<br />
As the proud owner of a Garrett GTI 2500<br />
with TreasureVision and Graphic Target<br />
Analyzer, you join a worldwide fraternity<br />
of treasure hunters who use Garrett detectors<br />
to find coins, jewelry, relics and gold<br />
nuggets worth millions of dollars.<br />
This manual describes basic functions of<br />
the GTI 2500 and explains how its target<br />
identification and sizing, deepseeking and<br />
discrimination capabilities can find treasure.<br />
Your GTI 2500, whose microprocessor-controlled<br />
circuitry has been acclaimed<br />
and proven through countless hours of<br />
field use, is unparalleled in the simplicity<br />
of its ability to locate coins, jewelry and<br />
other metallic objects. You will be able to<br />
identify the size and depth of any target<br />
you locate.<br />
The GTI 2500 offers dedicated metal<br />
detector hobbyists added depth with a<br />
true All-<strong>Metal</strong> (Deepseeking) mode and<br />
the adjustment precision available only<br />
with computerized controls. Just touch the<br />
POWER touchpad and begin hunting imme-<br />
- Garrett <strong>Metal</strong> <strong>Detectors</strong><br />
Graphic Target Imaging 2500 -
diately without interference from ground<br />
minerals. As the world's most intelligent<br />
detector, the GTI 2500 is preset at the<br />
factory to begin operations automatically<br />
in a Coins detection mode. Of course, you<br />
can easily adjust the instrument to operate<br />
in other Discriminate modes or in the<br />
All-<strong>Metal</strong> mode.<br />
When you find a target, Garrett's revolutionary<br />
GTA display instantly directs you<br />
to the range of targets on the Target ID<br />
Guide. Press the TREASURE IMAGING pad<br />
to discover its exact location, size, depth<br />
and as well as clues to its identity. To prospect<br />
for precious metals or hunt for deeply<br />
buried caches switch to the All-<strong>Metal</strong> mode<br />
and Fast Track will ground balance the<br />
circuitry of your detector precisely and<br />
immediately.<br />
Welcome again to the Garrett treasure<br />
hunting fraternity. In becoming a part of<br />
this great tradition, you follow the route of<br />
multitudes of successful treasure hunting<br />
hobbyists. Now, find your own treasures<br />
with one of the world's most capable and<br />
universal metal detectors, yet one that is<br />
amazingly easy to operate!<br />
ASSEMBLY<br />
Your GTI 2500 is shipped complete in one<br />
carton:<br />
C<br />
A<br />
D<br />
A. Control Housing<br />
B. Upper & Lower Stems<br />
C. 9.5” PROformance Imaging Searchcoil<br />
D. Parts Envelope<br />
E. Owner’s <strong>Manual</strong> and DVD<br />
F. Warranty Registration Card<br />
Make certain all of these parts are included<br />
and are undamaged. Report any shortages<br />
or damages to your dealer immediately.<br />
Follow these assembly instructions.<br />
No tools are required. Hand pressure will<br />
be satisfactory for all tightening. Inspect<br />
contents of the clear plastic envelope.<br />
E<br />
B<br />
F<br />
- Garrett <strong>Metal</strong> <strong>Detectors</strong><br />
Graphic Target Imaging 2500 -
C<br />
A<br />
B<br />
A. One (1) nut<br />
B. One (1) threaded bolt<br />
C. Two (2) washers<br />
1. Attach the lower stem to the 9.5” imaging<br />
searchcoil. Make certain that the two<br />
rubber washers are inserted onto the<br />
lower stem (see below) before slipping the<br />
searchcoil onto it.<br />
2. Place the threaded bolt through the<br />
holes in the connector and hand-tighten<br />
using the remaining wing nut (above left).<br />
Use no tools.<br />
3. Depress buttons in the Control Housing<br />
stem and slide on the Upper Stem.<br />
4. Depress the buttons in the Lower Stem<br />
and insert it into the Upper Stem (above<br />
right). Buttons will pop into the holes, and<br />
you can achieve the desired stem length.<br />
The third set of holes from the end is most<br />
commonly used.<br />
5. As shown, wrap searchcoil cable securely<br />
around stem and connect to detector. The<br />
first cable turn goes over the top of the<br />
stem. The cable should be snug but still<br />
10 - Garrett <strong>Metal</strong> <strong>Detectors</strong> Graphic Target Imaging 2500 - 11
TOUCHPADS<br />
slightly loose (above left) so that the angle<br />
of the searchcoil can be changed easily, if<br />
required. Insert the cable connector into<br />
the connector on the control housing as<br />
shown (above right) and rotate the collar<br />
clockwise until secure (approximately four<br />
(4) turns). Hand tighten only.<br />
Your GTI 2500 is shipped with eight (8) AA<br />
batteries installed and is ready to use.<br />
Power<br />
Turns detector ON and OFF; Returns the<br />
detector to factory settings.<br />
Menu/Scroll<br />
Allows the operator to scroll through the<br />
following settings to make adjustments or<br />
turn them ON or OFF. The scrollable selections<br />
vary whether you are in Discriminate<br />
(see A) or All-<strong>Metal</strong> (see B) mode.<br />
A. If you are in the Discriminate Search<br />
Mode, your setting choices with the Menu/<br />
12 - Garrett <strong>Metal</strong> <strong>Detectors</strong> Graphic Target Imaging 2500 - 13
Scroll button are: 5 selectable Discriminate<br />
Modes (use the + or - keys to select either<br />
Coins, Jewelry, Relics, Zero or Custom<br />
mode); Sensitivity; Threshold; Frequency;<br />
Volume; Tone; Search Aids (choose either<br />
Search Image, Surface Elimination or Salt<br />
Elimination); Audio (choose either Belltone<br />
or Bi-Level); and Rechargeable (battery).<br />
B. If you are in the All-<strong>Metal</strong> Search<br />
Mode, your setting choices with the Menu/<br />
Scroll button are: <strong>Manual</strong> Ground Balance;<br />
Sensitivity; Threshold; Frequency; Volume;<br />
Tone; Search Aids (choose either Auto<br />
Track or Search Image); and Rechargeable<br />
(battery).<br />
All-<strong>Metal</strong> (Fast Track)<br />
Press and release to activate the All-<strong>Metal</strong><br />
(Deepseeking) mode; press and hold to<br />
activate Fast Track ground balancing function.<br />
Accept / Reject<br />
Functions in the Discriminate modes only;<br />
permits acceptance or rejection of specific<br />
target segments shown on the Lower Scale<br />
to establish discrimination notches.<br />
Treasure Imaging (Pinpoint)<br />
When pressed and held, activates the<br />
automatic pinpointing function in either<br />
mode with signal strength shown on Upper<br />
Scale, depth of target on Lower Scale and<br />
size and depth of target on the Imaging<br />
Grid.<br />
Operate<br />
Returns to operate (hunting) mode after<br />
any change or adjustment of controls.<br />
Discriminate (Last Mode)<br />
When hunting in a Discriminate mode,<br />
returns detector to the previous<br />
Discriminate mode (Coins, Jewelry, Relics,<br />
Zero, Custom) that was being used. When<br />
hunting in the All-<strong>Metal</strong> mode, pressing<br />
this button activates the Discriminate<br />
mode that was last being used.<br />
Backlight<br />
Press and release to switch the backlight<br />
on and off. Use the GTI 2500's backlight in<br />
low light situations to illuminate the LCD<br />
screen for improved visibility and target<br />
information.<br />
14 - Garrett <strong>Metal</strong> <strong>Detectors</strong> Graphic Target Imaging 2500 - 15
+ & -<br />
These touchpads permit precise regulation<br />
of the GTI 2500.<br />
You will note that on certain Menu adjustments<br />
each press of a touchpad causes<br />
segments on the Lower Scale to move<br />
rather rapidly either to the right (+) or to<br />
the left (-). After 20 movements on the<br />
Lower Scale, an Upper Scale segment will<br />
move. This operation is similar to that of<br />
the decimal system.<br />
The (+) and (-) touchpads enable the following<br />
regulation:<br />
• Activate (+) or turn off (-) the Search<br />
Image and the Rechargeable battery<br />
gauge in either mode.<br />
• Move cursor in the Upper Scale when discrimination<br />
is being set in the Discriminate<br />
mode.<br />
• Permit adjustments to be made that<br />
achieve precise manual ground balance in<br />
the All-<strong>Metal</strong> mode.<br />
Experiment with these touchpads yourself<br />
and experience the precise degree of<br />
regulation possible with the GTI 2500.<br />
• Permit alternation between the five<br />
Discriminate search modes.<br />
• Permit adjustment of levels of Sensitivity<br />
(Depth), Threshold, Frequency, Volume<br />
and Tone and in Discriminate and All-<strong>Metal</strong><br />
modes; Surface Elimination in Discriminate<br />
mode; and Auto Track in All-<strong>Metal</strong> mode.<br />
• Activate (+) or turn off (-) Salt<br />
Elimination, Belltone and Bi-Level target<br />
audio in Discriminate mode.<br />
16 - Garrett <strong>Metal</strong> <strong>Detectors</strong> Graphic Target Imaging 2500 - 17
Display Screen<br />
when the detector is being regulated.<br />
SEARCH will be illuminated whenever you<br />
have pressed the OPERATE touchpad and<br />
are hunting, and IMAGE when you press<br />
and hold the TREASURE IMAGING touchpad.<br />
On the second line are the detector functions<br />
that you can regulate as desired:<br />
Sensitivity, Threshold, Frequency, Volume<br />
and Tone. When one of these functions<br />
has been illuminated by use of the MENU/<br />
SCROLL touchpad, it can be regulated by<br />
pressing the (+) or (-) touchpads.<br />
The complete operating status of your<br />
detector is shown on the screen at all<br />
times. When the TREASURE IMAGING<br />
(automatic pinpointing and sizing) touchpad<br />
is pressed and held, size and depth<br />
of targets will also be shown. The mode<br />
in which you are searching will always be<br />
shown on the left side of the screen under<br />
the SEARCH MODE heading.<br />
Current status of the various Search Aids<br />
that you have selected will always be<br />
shown on the right side of the screen<br />
under the SEARCH AIDS heading.<br />
The word MENU, SEARCH or IMAGE is<br />
shown at the top of the screen in its center<br />
to indicate detector status. MENU is shown<br />
18 - Garrett <strong>Metal</strong> <strong>Detectors</strong> Graphic Target Imaging 2500 - 19
TREASURE VISION<br />
each side and the horizontal color-coded<br />
lines connecting them.<br />
These refer to the five relative sizes on<br />
the Imaging Grid. The example (page 20)<br />
shows a B-size object, with the cursor's<br />
location indicating it is probably a quarter.<br />
Coins are shown on Line B (red) since they<br />
will always be indicated as B-size targets.<br />
TreasureVision permits your GTI 2500's<br />
Display Screen to present Imaging by<br />
Garrett. Experience with TreasureVision<br />
will enable a hobbyist to identify targets to<br />
an amazingly precise degree before they<br />
are recovered.<br />
Target ID Guide<br />
This guide printed above the screen showing<br />
coin denominations, gold, silver and<br />
other typical metallic objects is designed<br />
to relate location of the Target Cursor with<br />
the Imaging Grid to help identify discoveries.<br />
Note the five letters (A,B,C,D,E) on<br />
Upper Scale<br />
Indicates target(s) discovered and their<br />
conductivity while in OPERATE mode;<br />
Indicates target strength when TREASURE<br />
IMAGING touchpad is pressed; Indicates<br />
levels of control settings while in MENU<br />
mode.<br />
Lower Scale<br />
Indicates discrimination segments (notches)<br />
for all discriminate modes; indicates<br />
depth of all targets in inches when in<br />
Treasure Imaging; indicates fine levels of<br />
control settings.<br />
Imaging Grid<br />
Five target sizes are shown on the colorcoded<br />
Imaging Grid with depth indicated<br />
20 - Garrett <strong>Metal</strong> <strong>Detectors</strong> Graphic Target Imaging 2500 - 21
in two-inch increments by the target's<br />
location on the grid. With the detector in<br />
its factory preset mode sizes and depths<br />
are shown only when the TREASURE<br />
IMAGING touchpad is pressed and held.<br />
When Search Image is being used, sizes<br />
and depths of all accepted targets will be<br />
shown as they are discovered.<br />
Size A—Solid small oval (orange): targets<br />
smaller than coins, including bits of iron<br />
or foil.<br />
Size B—Oval extending to B grid lines<br />
(red): all U.S. coins, most rings and small<br />
metal trash such as pieces of pull tabs.<br />
Size C—Oval extending to C grid lines<br />
(purple): targets larger than coins and<br />
smaller than 12-oz. cans, such as large<br />
rings, small belt buckles, jewelry and such<br />
trash targets as screwtops, bottle caps<br />
and complete pull tabs.<br />
Size D—Oval extending to D grid lines<br />
(blue): larger belt buckles, large jewelry<br />
items, 12-oz. cans and other items of<br />
similar size.<br />
Size E—Oval extending to E grid lines<br />
(green): objects larger than a 12-oz. can,<br />
such as kettles, strongbox or big metallic<br />
trash.<br />
BASIC HUNTING INSTRUCTIONS<br />
The next few pages of this Owner's <strong>Manual</strong><br />
are all that you may ever need to read<br />
about your new Garrett GTI 2500. This One-<br />
Touch detector is today's most advanced;<br />
yet, its basic automatic operation makes it<br />
as simple to operate as any detector ever<br />
manufactured. You can begin hunting with<br />
it immediately.<br />
No special instructions are needed beyond<br />
what's included in the next few pages.<br />
More importantly, you can start finding<br />
coins and other treasures right now!<br />
Here's how.<br />
To Begin<br />
1. There are no dials to turn and no controls<br />
to adjust. Just grasp the handle of<br />
your GTI 2500, and hold the searchcoil<br />
at least three feet away from any large<br />
metallic object.<br />
2. Touch and release the POWER touchpad.<br />
You are now operating in the factory-set<br />
Discriminate/Coins mode (until you opt to<br />
change this mode), and the GTI 2500 will<br />
begin detecting. The GTI screen appears<br />
22 - Garrett <strong>Metal</strong> <strong>Detectors</strong> Graphic Target Imaging 2500 - 23
as shown below. You can see that you are<br />
operating in the Discriminate/Coins detection<br />
mode with Belltone audio turned on.<br />
Scanning<br />
Swing the searchcoil back and forth in<br />
front of you in a straight line or slight arc<br />
as shown in the photograph below. Keep<br />
the searchcoil at a constant height of one<br />
or two inches above the ground while you<br />
scan at a rate of about one to three feet<br />
per second.<br />
Discovery<br />
Detection of all metal targets will be<br />
indicated by the appearance of a Target<br />
Cursor on the Upper Scale. A cursor will<br />
appear, to indicate every detected target<br />
and will remain for three seconds or until<br />
a new target is detected (whichever comes<br />
first). Desirable targets will also cause an<br />
increase in sound.<br />
3. Your GTI 2500 begins operating with<br />
all settings at factory-set levels. Any of<br />
the settings can be changed easily, but<br />
you may never want to do so. It is recommended<br />
that you use these settings the<br />
first 10 hours you hunt with your detector.<br />
24 - Garrett <strong>Metal</strong> <strong>Detectors</strong> Graphic Target Imaging 2500 - 25
familiar with your new detector by hunting<br />
for at least 10 hours in the factory preset<br />
Discriminate/Coins mode and that you<br />
read carefully the Warning section in this<br />
manual.<br />
The above illustration shows a cursor at<br />
9+, which would be a quarter if Treasure<br />
Imaging determines it to be a B-size target.<br />
Locate your target by scanning back<br />
and forth over it to determine where signals<br />
are strongest.<br />
Treasure Imaging<br />
Press and hold this touchpad to put your<br />
detector into a Pinpoint mode so that you<br />
can locate your target more precisely and<br />
also determine its relative size which will<br />
be shown on the Imaging Grid. Proper<br />
pinpointing and sizing through use of<br />
TREASURE IMAGING can be an invaluable<br />
aid to treasure hunting when used<br />
properly.<br />
To turn off your detector: Simply press and<br />
release the POWER touchpad. Operating<br />
battery power is disconnected. Charles<br />
Garrett recommends that you first become<br />
By now you are also certainly impressed<br />
with the super sensitivity, depth capabilities<br />
and the target analysis of this<br />
detector which utilizes DSP (Digital Signal<br />
Processing) to give it advanced detection<br />
capabilities found only in Garrett detectors<br />
with PowerMaster DSP. You may have<br />
encountered an occasional instance when<br />
TreasureVision seemed to present inconsistent<br />
information. This probably occurred<br />
when your detector was attempting to<br />
analyze two or more targets beneath its<br />
searchcoil or when you have not properly<br />
centered the coil over your target.<br />
This problem of analysis occurs with all<br />
detectors, but the GTI 2500 discovers<br />
vastly more targets than old-style instruments<br />
with their limited circuitry. In addition,<br />
the deepseeking power of the detector<br />
may sometimes cause it to detect and<br />
fail to identify clearly a target some dis-<br />
26 - Garrett <strong>Metal</strong> <strong>Detectors</strong><br />
Graphic Target Imaging 2500 - 27
tance away, one over which your searchcoil<br />
has not even scanned.<br />
Proper operating techniques will enable<br />
you to use the array of data presented by<br />
TreasureVision to become aware, however,<br />
of the precise nature of all these<br />
targets.<br />
You will quickly master these techniques<br />
and learn why the GTI 2500 with DSP,<br />
TreasureVision and controls based on<br />
patented microprocessor technology has<br />
more accurate discrimination and better<br />
sensitivity and effectiveness than any<br />
other detector ever manufactured.<br />
If you are ever unsure about the settings<br />
of your GTI 2500, press and hold the<br />
POWER touchpad for five seconds or until<br />
the detector "beeps" to restore factory<br />
settings.<br />
DISCRIMINATE MODE<br />
Mode Selections<br />
When you touch the POWER touchpad,<br />
your GTI 2500 is ready to hunt in a<br />
Discriminate/Coins operating mode with<br />
threshold, sensitivity (depth), tone and<br />
other controls preset at the factory, as<br />
shown in the GTI Screen's upper center as<br />
you step through the Menu. As explained<br />
in the following pages, settings can be<br />
easily changed through regulation of the<br />
(+) and (-) touchpads.<br />
In its Discriminate mode the GTI 2500<br />
functions like most other detectors and<br />
must be moving slightly for detection to<br />
occur. Microprocessor-controlled DSP circuitry<br />
of the GTI 2500, unlike that of ordinary<br />
detectors, however, adapts automatically<br />
to the speed of any movement. This<br />
means that your searches will have the<br />
same high degree of accuracy whether you<br />
are scanning rapidly to cover a large area<br />
quickly or moving slowly over a location<br />
with multiple targets. Automatic circuitry<br />
is designed to provide precise ground balance<br />
at any speed.<br />
28 - Garrett <strong>Metal</strong> <strong>Detectors</strong><br />
Graphic Target Imaging 2500 - 29
In the Discriminate mode you can press<br />
MENU and use the (+) touchpad to rotate<br />
through five different modes of detection<br />
that are available, each with a specific discrimination<br />
configuration as shown on the<br />
Lower Scale. When the name of the particular<br />
mode you select is constant, while<br />
the other four are blinking, either press<br />
the OPERATE touchpad to begin hunting<br />
or the MENU touchpad to move to another<br />
control selection.<br />
Coins<br />
Discrimination preset in the detector for<br />
this Discriminate mode that is shown<br />
above is designed to eliminate detection<br />
of lower conductivity trash targets, such<br />
as bottle caps, most pull tabs and other<br />
objects normally encountered in coin hunting.<br />
Some bent pull tabs and pieces of tabs<br />
may not be eliminated from detection.<br />
Successful treasure hunters, however, all<br />
understand that they must dig some junk<br />
occasionally. Correct operation of the GTI<br />
2500 should reduce this wasted effort.<br />
Jewelry<br />
This Discriminate detection mode, above,<br />
is specifically designed to aid in hunting<br />
for jewelry, with discrimination in the<br />
detector's circuitry set to eliminate such<br />
trash targets as lower conductivity items<br />
and bottle caps.<br />
Relics<br />
This Discriminate detection mode is specifically<br />
designed for relic hunting, with<br />
discrimination in the detector’s circuitry<br />
set to eliminate trash targets normally<br />
30 - Garrett <strong>Metal</strong> <strong>Detectors</strong><br />
Graphic Target Imaging 2500 - 31
associated with hunting for relics, while<br />
including those in the lower conductivity<br />
range - items that are generally sought by<br />
most relic hunters.<br />
Zero<br />
This mode, permits you to hunt with no<br />
discrimination and offers a method of<br />
"dual-mode" hunting. Your detector will<br />
give an audible signal to announce almost<br />
every piece of metal it scans over while<br />
cursor(s) indicate them. You can then<br />
press Last Mode to return to another of<br />
the Discriminate modes to "quick-check"<br />
a target.<br />
Custom<br />
This Discriminate mode was designed to<br />
be set by the operator. When the detector<br />
leaves the factory, Custom has been set<br />
to the Coins mode. Through use of the<br />
ACCEPT/REJECT touchpad, a hobbyist can<br />
modify this mode to his or her individual<br />
specifications. These modifications will be<br />
retained by the detector's memory when it<br />
is switched OFF.<br />
Many GTI 2500 owners will never use the<br />
Custom mode, and when hunting in the<br />
Discriminate mode will use only the preset<br />
Coins, Jewelry, Relics or Zero modes.<br />
Complete instructions for setting discrimination<br />
notches for any of these modes can<br />
be found on the following pages of this<br />
manual.<br />
Note: When the detector is turned OFF and<br />
then turned back ON again, it will begin<br />
operations in the mode in which it was<br />
previously operating unless the POWER<br />
touchpad is pressed and held for about<br />
five seconds (initializing a factory reset).<br />
Factory settings will then be restored with<br />
the detector operating in the Discriminate/<br />
Coins Mode.<br />
32 - Garrett <strong>Metal</strong> <strong>Detectors</strong><br />
Graphic Target Imaging 2500 - 33
SETTING DISCRIMINATION (Notches)<br />
Using only the discrimination of its factoryset<br />
Coins, Jewelry, Relics and Zero operating<br />
modes, the GTI 2500 will more than<br />
satisfy the discrimination requirements of<br />
almost every treasure hunter. Many will<br />
never require any other discrimination.<br />
Still, this detector offers more Custom discrimination<br />
to tailor a detection mode to<br />
any requirement by setting precise detection<br />
"notches."<br />
The Lower Scale contains Discrimination<br />
Segments. Those that are turned on (darkened)<br />
represent targets whose conductivity<br />
will cause sound to increase when they<br />
are detected in any Discriminate mode.<br />
In the Zero mode all segments are turned<br />
on, which indicates that every metal target<br />
will cause the audible sound of the GTI<br />
2500 to increase. Through use of the (+),<br />
and ACCEPT/REJECT touchpads, specific<br />
"notches" can be created by turning discrimination<br />
segments ON and OFF in any<br />
of the five Discriminate operating modes.<br />
There are two methods of setting discrimination<br />
in any Discriminate mode.<br />
First Method: While in the OPERATE<br />
mode press the (+) and (-) touchpads<br />
to position the blinking cursor above the<br />
Discrimination Segment corresponding to<br />
the particular target to be detected or<br />
ignored.<br />
If the segment is turned on (showing),<br />
that particular target will be detected. If<br />
you wish to reject that type target, press<br />
the ACCEPT/REJECT touchpad. The segment<br />
will be turned OFF and disappear,<br />
creating a "reject notch." If the Lower<br />
Scale segment is not showing, press the<br />
ACCEPT/REJECT touchpad to turn it ON,<br />
creating an "accept notch," and your GTI<br />
will sound off on targets represented by<br />
that segment.<br />
Second Method: While in the OPERATE<br />
mode, pass the searchcoil over an object<br />
to be accepted or rejected as a target or<br />
pass the particular target across the face<br />
of the coil about two inches away.<br />
Check to make certain of the location of<br />
the target cursor on the Upper Scale.<br />
34 - Garrett <strong>Metal</strong> <strong>Detectors</strong><br />
Graphic Target Imaging 2500 - 35
If the segment below is not showing, press<br />
ACCEPT/REJECT to turn it on. If it is showing,<br />
pressing this pad will turn it OFF.<br />
Remember: When you press the ACCEPT<br />
/REJECT touchpad, you cause the discrimination<br />
circuit to reject a target that is<br />
shown on corresponding segments of both<br />
the Lower and Upper Scales. This rejection<br />
will be indicated as the Lower Scale<br />
Discrimination Segment disappears.<br />
The same touchpad is used to cause<br />
the detector to accept a target. When<br />
such a desired target is being shown by<br />
the cursor but not the corresponding<br />
Discrimination Segment below, press the<br />
ACCEPT/REJECT touchpad. The segment<br />
will be turned ON and appear, indicating<br />
that your desired target will now cause an<br />
increase in sound.<br />
Note: It is important to remember that<br />
each time the GTI 2500 is turned OFF any<br />
ACCEPT/REJECT selections that you have<br />
made will be retained only in the Custom<br />
mode. ACCEPT/REJECT modifications that<br />
you might have made in the preset Coins,<br />
Jewelry, Relics and Zero modes will be<br />
lost, since these four modes return to factory-set<br />
detection settings each time the<br />
detector is turned OFF and turned back<br />
ON. Your Custom mode discrimination<br />
settings will be lost only when POWER is<br />
held for five seconds to return the detector<br />
to its factory settings.<br />
Why Use Notches?<br />
There are numerous reasons why you<br />
would want to accept or reject specific<br />
targets:<br />
You may be looking for only one item—a<br />
certain lost earring, for example. You can<br />
use the matching earring to set notches<br />
on your GTI to accept only that type of<br />
metal target. You may be hunting in an<br />
area where you are plagued with a specific<br />
type of trash. You can reject just this type<br />
of trash metal and continue to hunt with<br />
no other discrimination, detecting all other<br />
metal.<br />
You may have your own special ideas for<br />
designing a mode of detection. The Garrett<br />
GTI 2500 gives you virtually unlimited<br />
36 - Garrett <strong>Metal</strong> <strong>Detectors</strong><br />
Graphic Target Imaging 2500 - 37
opportunities to test any and all your ideas<br />
and, to try them out easily and quickly. No<br />
other metal detector permits more accurate<br />
or precise discrimination.<br />
Operating Settings<br />
Sensitivity (Depth)<br />
Factory Settings: Remember that you can<br />
return to preset factory settings at any<br />
time simply by pressing and holding the<br />
POWER touchpad for five seconds.<br />
Pressing the MENU touchpad to display<br />
SENSITIVITY on the screen (shown above<br />
with factory setting at approximately 75%<br />
as indicated on the Upper Scale). Use the<br />
(+) and (-) touchpads to adjust the depth<br />
to which your detector will operate most<br />
effectively. These changes will be shown<br />
on the Upper Scale as you make them.<br />
Although the instrument's maximum depth<br />
is usually desired, this is often not feasible<br />
because of the type of soil over which you<br />
are scanning or because of electromagnetic<br />
or power line interference. Ground<br />
mineralization and other considerations<br />
can cause static and inhibit the detector's<br />
ability to interpret target information. This<br />
38 - Garrett <strong>Metal</strong> <strong>Detectors</strong><br />
Graphic Target Imaging 2500 - 39
control option permits you to achieve a<br />
stability that permits maximum detection<br />
depth possible in relation to any conditions.<br />
Press (+) to increase detection depth.<br />
Press (-) to decrease. A single touch and<br />
release adjusts the level in a small increment.<br />
A continuous pressing results in a<br />
continuous adjustment.<br />
Threshold<br />
You can search silently or at any level of<br />
constant sound. It is recommended that<br />
you always operate the instrument at a<br />
minimum level of audible sound. You can<br />
hear the audio increase sharply whenever<br />
a desirable target is encountered.<br />
(Remember, a cursor will indicate every<br />
target.) When headphones are used, it<br />
will usually be necessary to decrease the<br />
threshold level since sound is more audible<br />
through headphones.<br />
Frequency<br />
Pressing the MENU touchpad to display<br />
THRESH on the screen (below, with factory<br />
setting indicated on Upper and Lower<br />
Scales). Use the (+) and (-) touchpads to<br />
adjust the threshold of sound that is being<br />
produced by the GTI 2500 as it scans.<br />
Multiple touches will increase or decrease<br />
the sound level. Changes can be seen on<br />
the Upper and Lower Scales.<br />
This detector is capable of operating at<br />
eight different detection frequencies or<br />
channels, which you will find valuable if<br />
you participate in competition hunting or<br />
if you enjoy hunting with others. In fact,<br />
operating your GTI 2500 at a different frequency<br />
might be necessary any time two<br />
or more detectors are being used so close<br />
40 - Garrett <strong>Metal</strong> <strong>Detectors</strong><br />
Graphic Target Imaging 2500 - 41
together that their signals interfere with<br />
one another. Outside electrical or atmospheric<br />
interference can also cause interference<br />
that results in strange sounds.<br />
Whenever you hear unusual sounds and<br />
believe that you are encountering interference,<br />
press and release the MENU touchpad<br />
until FREQ appears on the screen, as<br />
shown in the illustration above. The Upper<br />
Scale will indicate the frequency at which<br />
your detector is now operating. Use the<br />
(+) and (-) touchpads to change this frequency<br />
until you find one with little or no<br />
interference.<br />
Volume<br />
Use the (+) and (-) touchpads to adjust<br />
audio to the target sound volume that you<br />
prefer. Touching the (+) pad will make the<br />
sound louder, while touching (-) the will<br />
lower the volume.<br />
Since this adjustment controls the maximum<br />
volume of sound produced by the<br />
GTI 2500 when a target is encountered, it<br />
will not affect the threshold level you have<br />
already selected as the primary audio<br />
function of your detector.<br />
When headphones are used, it will usually<br />
be necessary to decrease volume since<br />
detection sounds are louder over headphones.<br />
Experiment to determine which<br />
volume is best for you.<br />
After pressing the MENU touchpad to<br />
display VOLUME on the screen, the factory<br />
setting for the loudness of the target<br />
sound will be indicated on the Upper Scale,<br />
as shown in the above diagram.<br />
42 - Garrett <strong>Metal</strong> <strong>Detectors</strong><br />
Graphic Target Imaging 2500 - 43
Tone<br />
After using the MENU touchpad to display<br />
TONE on the screen, the factory tone setting<br />
will be indicated on the Upper Scale,<br />
as shown above. Use the (+) and (-)<br />
touchpads to adjust the audio to preferred<br />
pitch or tone. Touching the (+) pad will<br />
raise the tone into a higher treble range,<br />
while touching (-) will lower the pitch to a<br />
bass tone. All touches will make changes<br />
indicated on the Upper Scale. Experiment<br />
to find the pitch that suits your hearing.<br />
SEARCH AIDS<br />
Search Image<br />
Use the MENU and (+) and (-) pads to<br />
display Search Image. If these words and<br />
the Imaging Grid are blinking, press (+) to<br />
turn it on. When this Search Aid is turned<br />
ON TreasureVision will constantly display<br />
the size and depth of accepted targets<br />
while you are searching. It therefore will<br />
not be necessary to use the Treasure<br />
Imaging to obtain size and depth information.<br />
You can press (-) to turn OFF the function<br />
and cause the words and the grid to<br />
blink.<br />
Surface Elimination<br />
This Search Aid is for use where quantities<br />
of metallic trash are present on the<br />
surface or at shallow depths. This function<br />
eliminates detection of objects of all<br />
sizes to the specified depth. Use the MENU<br />
touchpad to display Surface Elim on the<br />
screen to turn on. It will be turned OFF at<br />
the factory settings.<br />
44 - Garrett <strong>Metal</strong> <strong>Detectors</strong><br />
Graphic Target Imaging 2500 - 45
If you desire to use this Search Aid, press<br />
the (+) and (-) touchpads to set the<br />
desired elimination depth. This depth (to 4<br />
inches beneath the coil) will be shown on<br />
the Upper Scale and on the Imaging Grid.<br />
Salt Elimination<br />
When hunting on an ocean beach or in any<br />
area with high salt content, you may want<br />
to use this Search Aid to eliminate interference<br />
caused by wetted salt. If you wish<br />
to turn on the Salt Elimination aid, use<br />
the MENU to display Salt Elim and press<br />
(+) when the word is blinking to turn it<br />
ON. Press (-) to turn OFF the function and<br />
cause the word to blink.<br />
AUDIO CHOICES<br />
Belltone<br />
Garrett's Coin Alert Belltone, which is<br />
the factory Audio setting for the GTI, will<br />
signal the operator with a special ringing<br />
sound whenever a target of high conductivity<br />
(first nine segments from right<br />
on the Upper Scale), such as a coin, has<br />
been located. Other acceptable targets will<br />
cause an audio increase.<br />
If you wish to use the Belltone audio<br />
enhancement for target sounds, no action<br />
is necessary at factory settings. To turn<br />
off this function use MENU to display the<br />
word, press and the letters will begin<br />
blinking. Pressing (+) will turn it back on.<br />
Bi-Level<br />
Two distinctly different types of sound<br />
are produced when the Bi-Level audio<br />
enhancement is being used. Targets of<br />
higher conductivity produce a higherpitched<br />
sound. Targets of lower conductivity<br />
(the Iron/Bottle cap range on the Target<br />
ID Guide) are identified with a sound that<br />
is pitched slightly lower.<br />
46 - Garrett <strong>Metal</strong> <strong>Detectors</strong><br />
Graphic Target Imaging 2500 - 47
If you desire Bi-Level audio, use MENU to<br />
display Bi-Level and press the (+) touchpad<br />
to turn it ON. To turn off the function<br />
press and cause the letters to begin blinking.<br />
When both Belltone and Bi-Level are<br />
turned OFF, the detector searches with<br />
Standard audio.<br />
BATTERY CHOICES<br />
Battery Gauge<br />
The scale at the lower right of your GTI<br />
2500's screen will indicate accurately the<br />
condition of standard (carbon or alkaline)<br />
or rechargeable batteries.<br />
To switch from the standard batteries to<br />
the optional rechargeable batteries, use<br />
MENU to scroll to the battery icon. Pressing<br />
the (+) or (-) keys will select either standard<br />
or rechargeable batteries. The GTI<br />
2500 has dual scales to display an accurate<br />
indication of either standard (carbon<br />
or alkaline) or rechargeable (nickel metal<br />
hydride or NiCad) battery life. If you select<br />
rechargeable batteries, be sure to load the<br />
GTI 2500 with the appropriate batteries.<br />
(See section on "Battery Information" on<br />
pages 78–82.)<br />
ALL-METAL MODE<br />
After you press this touchpad, the Graphic<br />
Display will indicate that you are operating<br />
in an all metal (deepseeking) mode.<br />
Garrett's exclusive Fast Track feature can<br />
be used to ground balance your detector<br />
automatically, and Auto Track can continually<br />
work to keep it ground balanced over<br />
varying soil mineralization conditions.<br />
In this mode it will be possible for you to<br />
let the searchcoil hover almost motionless<br />
over a target while listening for signals.<br />
This is true all metal detecting, which produces<br />
the deepest-seeking signals.<br />
You will want to hunt in this mode when<br />
greatest depth is sought, such as when<br />
searching for caches or deep relics. Gold<br />
hunting (electronic prospecting) will also<br />
be carried out in this mode.<br />
48 - Garrett <strong>Metal</strong> <strong>Detectors</strong> Graphic Target Imaging 2500 - 49
You will probably prefer to use this mode<br />
when searching for nuggets or at other<br />
times when highly mineralized ground is<br />
encountered. Because the All-<strong>Metal</strong> mode<br />
permits no discrimination, your detector<br />
will give an audible signal to indicate every<br />
piece of metal it scans over.<br />
decreased by using the (-) pad.<br />
With some extreme ground conditions the<br />
detector may not be able to achieve perfect<br />
ground balance automatically, but it<br />
will always adapt itself to the best possible<br />
solution.<br />
Even though precise ground balance is<br />
adjusted automatically and continuously<br />
through Fast Track and Auto Track, it is<br />
possible to ground balance the detector<br />
manually.<br />
Fast Track ground balancing is accomplished<br />
by pressing and holding the ALL-<br />
METAL/Fast Track touchpad while "bouncing"<br />
the searchcoil from two to eight<br />
inches above the ground. When there is a<br />
minimal audio response from the ground,<br />
release the touchpad and begin hunting.<br />
When the touchpad is released, Auto Track<br />
continues to make all adjustments necessary<br />
to eliminate ground minerals from<br />
detection.<br />
The speed of the Auto Track function can<br />
be increased by using the (+) touchpad or<br />
50 - Garrett <strong>Metal</strong> <strong>Detectors</strong> Graphic Target Imaging 2500 - 51
OTHER SPECIAL FEATURES IN<br />
THE ALL-METAL MODE<br />
Because the following control functions are<br />
utilized in both the Discriminate All-<strong>Metal</strong><br />
modes, instructions for their use can be<br />
found on the preceding pages:<br />
Sensitivity (Depth)<br />
Threshold<br />
Frequency<br />
Volume<br />
Tone<br />
Search Image<br />
Battery<br />
When your GTI 2500 is operated in the<br />
All-<strong>Metal</strong> Search Mode, there are two other<br />
settings—<strong>Manual</strong> Ground Balance and Auto<br />
Track—which are described below.<br />
<strong>Manual</strong> Ground Balance<br />
This control selection will rarely be required<br />
since the detector's internal circuitry and<br />
the Auto Track automatic ground balancing<br />
function will usually be satisfactory.<br />
Under unusual conditions, if your audio<br />
signal continues to increase or decrease to<br />
any degree because of ground conditions,<br />
more precise manual ground balancing<br />
may be required. You may also want to<br />
use the <strong>Manual</strong> Ground Balance function<br />
to ground balance slightly positive<br />
to enhance gold nugget detection or balance<br />
slightly negative to reduce "hot rock"<br />
detection.<br />
Use the MENU touchpad to display MANUAL<br />
GROUND BAL on the screen. Raise and<br />
lower your searchcoil and listen closely to<br />
the audio signal. If the sound grows louder<br />
as you lower the coil, press the (-) pad<br />
several times.<br />
Lift your searchcoil again and lower it to<br />
operating height. If the sound level now<br />
decreases, you have made too great a<br />
negative adjustment. Press the (+) touchpad<br />
once or twice. Precise adjustment is<br />
possible because there are 256 steps on<br />
the manual ground balance of the GTI<br />
2500 as reflected in the movement of<br />
segments on the Upper and Lower Scales.<br />
Don't hesitate to hold either touchpad<br />
down to make large adjustments.<br />
52 - Garrett <strong>Metal</strong> <strong>Detectors</strong> Graphic Target Imaging 2500 - 53
Press the proper (+) and (-) pads until<br />
audio does not change or changes only<br />
slightly when the searchcoil is lowered<br />
to operating height. The Ground Balance<br />
value that you have set for the detector<br />
will not change as long as Auto Track<br />
remains turned OFF. Whenever Auto Track<br />
(see below) is operating, it will govern<br />
the ground balancing function of the GTI<br />
2500.<br />
When searching over extremely mineralized<br />
soil, it is recommended that you hold<br />
the searchcoil at least two inches or more<br />
above the ground. You will not lose depth,<br />
but will actually detect deeper because<br />
ground mineral influence will be greatly<br />
reduced.<br />
Auto Track<br />
This Search Aid permits the detector to<br />
maintain optimum ground balance automatically,<br />
regardless of hanging mineralization<br />
or other conditions. There are three<br />
tracking speeds: slow, medium and fast.<br />
Use slow tracking when scanning over<br />
ground with consistent mineral conditions<br />
or those that change only slightly as you<br />
move along. Increase the tracking speed<br />
as necessary to cope with varying ground<br />
mineralization. Fast tracking speed allows<br />
operation over severe ground conditions,<br />
such as heavily mineralized rock slides.<br />
To use Auto Track, scroll through All-<strong>Metal</strong><br />
menu selections until Auto Track appears<br />
on the screen. You can then use the (+)<br />
pad to increase the tracking speed which<br />
will be indicated on the Upper Scale. When<br />
all segments on this scale are lit, Auto<br />
Track is working at its maximum speed.<br />
Use the (-) touchpad to decrease tracking<br />
speed or to turn OFF Auto Track. When no<br />
segments are lit and the word is blinking,<br />
it is turned OFF.<br />
Additional Information<br />
All of the personal preference adjustments<br />
you have set in the GTI 2500 with the various<br />
operating functions will be retained<br />
by the detector when you press POWER to<br />
turn the detector OFF.<br />
These personal alterations are held in a<br />
non-volatile memory circuit and retained<br />
54 - Garrett <strong>Metal</strong> <strong>Detectors</strong> Graphic Target Imaging 2500 - 55
even when the batteries are removed. The<br />
detector must be turned OFF when batteries<br />
are being changed, as discussed in the<br />
Battery Section. Changes in discrimination<br />
settings, however, will be retained only in<br />
the Custom mode. Because ground conditions<br />
can vary from place to place, it may<br />
be necessary for you to adjust Sensitivity<br />
(Depth) occasionally.<br />
Reminder on Settings<br />
If you are ever unsure about the settings<br />
of the GTI 2500, you can instantly restore<br />
the precise factory-set levels of all settings<br />
and controls. Just press and hold down the<br />
POWER touchpad for five seconds or until<br />
a "beep" lets you know that factory settings<br />
have been restored.<br />
Treasure Imaging<br />
When you are hunting with the Search<br />
Image aid turned OFF, you will be given<br />
size and depth information only when you<br />
press and hold the TREASURE IMAGING<br />
(Pinpoint) pad. The relative size and depth<br />
of targets will then be indicated on the<br />
Imaging Grid. While this pad is being held,<br />
the 9.5” searchcoil can remain stationary<br />
over your target. Move the coil slightly to<br />
make certain that it is directly over the<br />
target. Targets must pass beneath the<br />
searchcoil, not above it.<br />
IMPORTANT: The searchcoil must be centered<br />
directly over the target to produce<br />
accurate size and depth information about<br />
that target.<br />
Please note that both size and depth<br />
indications of a target can be expected to<br />
change on the grid as the target is being<br />
centered. This is especially evident while<br />
the Search Image aid is being used. Size<br />
and depth indications of targets may then<br />
seem to change erratically, especially as<br />
the searchcoil is being scanned. For most<br />
56 - Garrett <strong>Metal</strong> <strong>Detectors</strong> Graphic Target Imaging 2500 - 57
effective normal automatic pinpointing<br />
(when Search Image is not being used),<br />
place the searchcoil on the ground near,<br />
but not over, the target in an area where<br />
there are no other targets. Press the<br />
TREASURE IMAGING touchpad and scan<br />
back and forth across the target, maintaining<br />
contact with the ground. Read<br />
the following sections to learn how size<br />
and depth indications will change as you<br />
pinpoint.<br />
Depth Reading on Lower Scale<br />
When you press and hold the TREASURE<br />
IMAGING touchpad, target depth will be<br />
indicated on the Lower Scale. Illumination<br />
of Upper Scale segments, from left to right,<br />
indicates strength of the target signal.<br />
Size/Depth on the Imaging Grid<br />
As you are locating your target precisely<br />
by moving the searchcoil while pressing<br />
and holding the TREASURE IMAGING<br />
touchpad, you will observe size and depth<br />
changing on TreasureVision's Imaging<br />
Grid. The coil must be centered directly<br />
over the target to produce accurate size<br />
and depth information. As you approach<br />
the target, therefore, its indicated depth<br />
on the Imaging Grid will become shallower<br />
and its size smaller.<br />
Thus, the correct reading on the Imaging<br />
Grid will always be the shallowest and<br />
smallest. This is achieved only when the<br />
searchcoil is positioned directly over the<br />
target.<br />
The maximum reading attained will indicate<br />
exact target location. While still pressing<br />
the TREASURE IMAGING touchpad, check<br />
the Lower Scale to determine target depth<br />
in 1" increments. The Imaging Grid will<br />
also indicate depth, but in 2" increments.<br />
Thus, depth of a target shown at 5" on the<br />
Lower Scale, for example, will be rounded<br />
to 6" on the Imaging Grid.<br />
58 - Garrett <strong>Metal</strong> <strong>Detectors</strong> Graphic Target Imaging 2500 - 59
Four typical examples:<br />
60 - Garrett <strong>Metal</strong> <strong>Detectors</strong> Graphic Target Imaging 2500 - 61
A at 6"; a Size B at 8"; a Size C at 10"; or<br />
a Size D at 12". The Cone may also appear<br />
when the target is significantly off-center<br />
from the coil.<br />
"Cone" Effect<br />
You may occasionally observe a size and<br />
depth reading like that shown above<br />
which Garrett engineers call the "Cone."<br />
Such a reading with multiple indications of<br />
size and depth indicates that the detected<br />
target is too deep and/or too small<br />
to determine an exact size and depth.<br />
It is likely, however, that the target is<br />
within the size and depth region defined<br />
by the Cone. In other words, the target<br />
shown above is likely to be either: a Size<br />
62 - Garrett <strong>Metal</strong> <strong>Detectors</strong> Graphic Target Imaging 2500 - 63
BENCH TESTING<br />
the sound to increase, which represents<br />
true non-discriminating operation.<br />
2. Press the DISCRIMINATE touchpad and<br />
use the MENU, (+) and (-) touchpads, as<br />
necessary, until Coins is no longer blinking.<br />
Then press OPERATE. Bring the same<br />
targets across the bottom of the searchcoil<br />
in this Coins/Discriminate mode and listen<br />
for the sound to increase only when certain<br />
items are scanned. Notice the specific<br />
segments in the Upper Scale that darken<br />
when various targets are scanned across<br />
the coil.<br />
This will enable you to test typical treasure<br />
and trash items and to learn about your<br />
GTI 2500 before taking it into the field or<br />
trying to set discrimination. Tests should<br />
be performed as shown with the searchcoil<br />
perpendicular to a bench, floor or other<br />
non-metallic surface and several feet away<br />
from any large metallic object:<br />
1. Select the All-<strong>Metal</strong> mode of operation.<br />
Bring various metallic targets across the<br />
bottom of the searchcoil at a distance of<br />
about two inches. Each target will cause<br />
3. Perform the same tests with the Jewelry<br />
and Relics modes, observing sounds and<br />
the appearance of the TreasureVision display.<br />
4. Experiment with the ACCEPT/REJECT<br />
touchpad as you identify various types of<br />
targets. Try to imagine how this will affect<br />
your search for coins or jewelry.<br />
Be methodical: Keep written records of<br />
results and use them when hunting in the<br />
field.<br />
64 - Garrett <strong>Metal</strong> <strong>Detectors</strong> Graphic Target Imaging 2500 - 65
FIELD OPERATIONS<br />
As you walk, scan the searchcoil from side<br />
to side in a straight line in front of you.<br />
Keep the coil level and at a constant height<br />
of one or two inches above the ground<br />
while you scan at a rate of about one to<br />
three feet per second.<br />
When scanning, do not hurry. Be methodical.<br />
Do not skip any areas. Overlap each<br />
scan sweep at least 25% of the searchcoil's<br />
width. Wear headphones for greater<br />
sound perception and concentrate on your<br />
scanning. When you are searching in the<br />
All-<strong>Metal</strong> or the Discriminate/Zero modes,<br />
detection of any metal target will be indicated<br />
by an increase in sound.<br />
Target Identification<br />
Conductivity classification of every target<br />
over which the searchcoil passes will<br />
always be indicated by a target cursor on<br />
the Upper Scale. Until you gain experience<br />
with the GTI 2500 it is recommended that<br />
you hunt with the Search Image aid turned<br />
OFF and make your initial target decisions<br />
based on the conductivity indications of<br />
the cursor as they relate to the Target<br />
ID Guide. When you decide a target is<br />
worthwhile, press and hold the TARGET<br />
IMAGING touchpad and what you have<br />
just discovered can often be determined<br />
by relating the size of your discovery as<br />
shown on the Imaging Grid with the Target<br />
ID Guide.<br />
The searchcoil must be centered over your<br />
target to produce accurate size and depth<br />
information. Always remember that as you<br />
center the target, its size and depth on the<br />
Imaging Grid will appear to grow smaller<br />
and shallower. The correct reading on the<br />
Imaging Grid will always be the shallowest<br />
and smallest that will be achieved when<br />
the coil is positioned directly over the<br />
target. Before hunting with the Search<br />
Image aid turned ON which will give you<br />
size and depth information constantly,<br />
read carefully the Target Imaging section<br />
to make certain that you understand why<br />
the sizes and depths of your targets may<br />
seem to change as the searchcoil is moved<br />
around.<br />
66 - Garrett <strong>Metal</strong> <strong>Detectors</strong> Graphic Target Imaging 2500 - 67
Highly mineralized soil can occasionally<br />
result in improper target size/depth information.<br />
Raising the coil an inch or two<br />
as you scan over such soil is sometimes<br />
helpful. Encrustation or patina may also<br />
affect conductivity of the target, resulting<br />
in improper classification.<br />
Using Search Image<br />
Experienced treasure hunters prefer to use<br />
the GTI 2500 with the Search Image aid<br />
turned ON, providing a constant display of<br />
size and depth information. Because sizes<br />
and depths of targets may seem to change<br />
erratically until the coil is scanned directly<br />
over a target, the following recommendations<br />
are offered:<br />
Always remember that you have two<br />
basic information sources concerning your<br />
target the Upper Scale Target ID cursor,<br />
which reports conductivity, and the size<br />
and depth information that is shown on<br />
the Imaging Grid. These reports should be<br />
considered independently. When a target<br />
is encountered, consider it initially based<br />
solely on its conductivity as indicated by<br />
the Upper Scale cursor which you will<br />
relate to the ID Guide above.<br />
Now watch the Imaging Grid as you continue<br />
to move the searchcoil to locate your<br />
target more precisely. Target indication on<br />
the Grid will become smaller and shallower<br />
until your coil is centered precisely over<br />
the target. If you move away from it, the<br />
indication will get deeper and larger.<br />
Always remember that the correct size and<br />
depth reading on the Imaging Grid will be<br />
the shallowest and smallest achieved when<br />
the coil is scanned directly over the target.<br />
Only then should you decide whether or<br />
not to dig the target.<br />
Recovery / Pinpointing<br />
Locating your target precisely will enable<br />
you to recover it by digging the smallest<br />
hole possible. This is accomplished first<br />
by pinpointing which also enables you to<br />
utilize another function of the GTI 2500 for<br />
measuring size and depth. Begin to locate<br />
targets by first drawing an imaginary "X"<br />
on the ground. Switch the searchcoil at<br />
the place where maximum sound occurs.<br />
You can then utilize the "magic" of the<br />
Treasure Imaging mode.<br />
68 - Garrett <strong>Metal</strong> <strong>Detectors</strong> Graphic Target Imaging 2500 - 69
Digging<br />
Since the final step in recovery usually<br />
entails digging, always make as small a<br />
hole as possible. It is quicker, requires less<br />
work and makes refilling easier. And, you<br />
should always fill your holes.<br />
Discriminate (Last Mode)<br />
Use of this touchpad can be particularly<br />
helpful while scanning because it effectively<br />
converts your GTI 2500 into an<br />
instantaneous dual-or triple-mode detector.<br />
Pressing and releasing this touchpad<br />
returns detector operations to the<br />
Discriminate mode that has just previously<br />
been used. Thus, it is easy to alternate<br />
between any two Discriminate operating<br />
modes, such as Coins and Zero or Custom.<br />
Using the ALL-METAL touchpad, as well,<br />
converts the instrument into a triple-mode<br />
detector.<br />
More On Target Audio<br />
It is important to remember that the<br />
GTI's audio causes weaker targets to<br />
be detected with shorter "beeps" than<br />
stronger targets. Surface Elimination can<br />
simplify audio detection by eliminating<br />
virtually all targets as deep as the first<br />
four inches beneath your coil, where<br />
most trash metal will be found. When a<br />
metallic object is accepted, the detector's<br />
sound will, of course, increase from your<br />
threshold level. Some rejected targets,<br />
however, may cause the audio to "break<br />
up" or sound erratic. This is generally a<br />
response to shallow trash targets and can<br />
be remedied by raising the height of your<br />
searchcoil when scanning or by using the<br />
surface elimination feature.<br />
Another indication of a reject target is an<br />
audio signal as you scan one way, and no<br />
response when scanning from the other<br />
direction. If you encounter a large target<br />
and scan too close to it, the detector will<br />
give an audible overload indication, which<br />
sounds like a buzzing alarm.<br />
Setting Sensitivity (Depth)<br />
Garrett engineers designed your GTI 2500<br />
for maximum detection depth power, but<br />
you may not always be able to search at<br />
100% depth just as you rarely can (or,<br />
even want to) operate your automobile<br />
70 - Garrett <strong>Metal</strong> <strong>Detectors</strong> Graphic Target Imaging 2500 - 71
at 100% of its speed capacity. Outside<br />
electromagnetic interference and irregular<br />
ground mineralization may sometimes<br />
require that you search at reduced detection<br />
depth.<br />
Don't worry about losing "deep targets!"<br />
You won't ever be losing anything because<br />
you'll always be able to search as deeply<br />
as ground and atmospheric conditions permit.<br />
Attempting to operate at gains above<br />
a level that permits a quiet and stable<br />
audio threshold may actually cause you<br />
to miss deep targets that you would have<br />
found had you not "pushed" the detector.<br />
Another point to remember is that when<br />
you are searching with SENSITIVITY set<br />
below the maximum under "less-thanperfect"<br />
conditions, you will always have<br />
additional detection power when you are<br />
able to use it.<br />
Test Plot Construction<br />
As you search and use your GTI 2500, you<br />
will quickly grow more proficient in its use.<br />
Building and using your own test plot will<br />
sharply increase this proficiency. Bury several<br />
items, including a nail, a piece of foil,<br />
a pull tab, a bottle cap and several coins<br />
at varying depths of 1-4" about 18" apart.<br />
Clearly mark where each article is buried.<br />
Scan over them while carefully listening<br />
to and studying the different detection<br />
signals.<br />
Remember that newly buried objects,<br />
especially coins, will be somewhat more<br />
difficult to detect than items buried for<br />
some time. This is primarily a metallurgical<br />
phenomenon. Experiment with various<br />
detection modes, and pay close attention<br />
to both audio and GTI 2500 signals as you<br />
scan. Note your detector's response at the<br />
various settings.<br />
Practice pinpointing and imaging to locate<br />
targets precisely.<br />
With Experience<br />
After you have hunted with the GTI 2500<br />
for only a short time, you will be surprised<br />
at how proficient you have become with<br />
it. Do not expect to achieve the greatest<br />
accuracy and success, however, until<br />
you have used this detector for at least<br />
100 hours or more. Don't forget to take<br />
72 - Garrett <strong>Metal</strong> <strong>Detectors</strong> Graphic Target Imaging 2500 - 73
Charles Garrett's advice to press only one<br />
touchpad and search in the factory preset<br />
Discriminate/Coins detection mode for<br />
at least 10 hours during your "learning"<br />
phase.<br />
Remember, the more you use your<br />
detector in the correct manner the more<br />
treasure you will discover.<br />
Good Hunting!<br />
HEADPHONE JACK<br />
The headphone jack is located at the rear<br />
of the battery pack under the armrest.<br />
Headphones are a valuable accessory for<br />
any metal detector to mask interference<br />
from outside noise. They permit you to<br />
hear small and deep targets that might<br />
be missed when using only audio from the<br />
detector speaker. Headphones are particularly<br />
essential when you are hunting where<br />
noise (running water, people, surf, traffic,<br />
etc.) is excessive.<br />
74 - Garrett <strong>Metal</strong> <strong>Detectors</strong> Graphic Target Imaging 2500 - 75
SEARCHCOILS<br />
Your GTI 2500 is equipped with a 9.5”<br />
PROformance imaging searchcoil suitable<br />
for searching for almost any kind of target<br />
in any terrain.<br />
A 12.5" Imaging coil is also available. You<br />
can also use conventional 4.5" and 12.5"<br />
coils or a 5x10" elliptical coil with the GTI<br />
2500. The larger coil is helpful in seeking<br />
large and deep targets, while the smaller<br />
and elliptical coils are designed for use in<br />
especially trashy locations or places where<br />
a larger searchcoil just won't fit. These<br />
optional coils do not have the imaging<br />
capability.<br />
Also available is a pinpointing depth multiplier<br />
for use when hunting for larger,<br />
deeper objects. This system allows greater<br />
penetration and the ability to ignore smaller<br />
trash items. The patented pinpointing<br />
feature allows the GTI 2500 to locate precisely<br />
the object under the forward coil.<br />
BATTERY INFORMATION<br />
The GTI 2500 is equipped with two battery<br />
packs, each holding four (4) standard AA<br />
batteries. The detector is also designed to<br />
utilize rechargeable (NiMH) batteries. It is<br />
recommended that top quality heavy duty<br />
or alkaline batteries be used. It is advisable<br />
to remove the battery packs when<br />
the detector is not in use, particularly for<br />
a period of several weeks.<br />
Although standard battery packs and<br />
optional rechargeable packs can be used<br />
interchangeably in the detector, it is recommended<br />
that both packs being used at<br />
the same time always be the same type.<br />
The GTI 2500 should search 25 to 30<br />
hours with carbon, alkaline or high capacity<br />
rechargeable batteries. These estimates<br />
are for speaker operation. Operating with<br />
headphones will extend battery life.<br />
Checking Condition<br />
Battery condition is reported continuously<br />
by the vertical row of squares on the lower<br />
right side of the screen. Five are visible<br />
76 - Garrett <strong>Metal</strong> <strong>Detectors</strong> Graphic Target Imaging 2500 - 77
when fully charged batteries are being<br />
used. You should always carry spares so<br />
that you will be ready when the battery<br />
condition squares show only one square<br />
remaining.<br />
Rechargeable Batteries<br />
When rechargeable batteries are being<br />
used, the Rechargeable battery option<br />
must be turned on for the battery level<br />
indicator to be accurate. To turn on this<br />
option press the MENU touchpad until<br />
Recharge is displayed. The option is turned<br />
off at the factory setting, and the word will<br />
be blinking. Press (+) to turn the option on<br />
and the word will become constant. Press<br />
(-) to turn it off when standard carbon or<br />
alkaline batteries are being used.<br />
Battery Replacement<br />
1. Turn OFF the GTI 2500 by pressing the<br />
POWER touchpad.<br />
2. Slide battery case back slightly from<br />
its normal position beneath the armrest.<br />
Place both thumbs on the back of the cuff<br />
with your fingers on the case. Firm pressure<br />
will disengage the case from below<br />
the armrest.<br />
Slip up the two covers on the battery panel<br />
(shown in above drawing) and remove<br />
them completely.<br />
4. Take out the two battery holders (which<br />
are not connected by wire) by tilting the<br />
pack.<br />
5. Press out the old batteries.<br />
6. Install new batteries. Carefully observe<br />
polarity of the batteries and make certain<br />
the new batteries are aligned properly.<br />
78 - Garrett <strong>Metal</strong> <strong>Detectors</strong> Graphic Target Imaging 2500 - 79
or heavy duty carbon batteries.<br />
RECOMMENDED ACCESSORIES<br />
Your Garrett GTI 2500 represents the<br />
highest quality in metal detector manufacturing.<br />
Complement it with quality accessories<br />
such as these from Garrett:<br />
7. Replace holders in detector as shown<br />
above. It is important that the "eyelets"<br />
be toward the center. If an effort is made<br />
to install holders incorrectly, closure will be<br />
difficult. If it is forced, however, damage<br />
to the detector can result. Battery packs<br />
must be replaced in their proper orientation.<br />
Headphones that will enable you to hear<br />
signals from the GTI more distinctly<br />
because they will mask other conflicting<br />
sounds from the environment.<br />
Coin Hunter Kit (pouch, probe, digger)<br />
that is all you need for recovering coins.<br />
Coil Cover to protect your 9.5" searchcoil<br />
and lengthen its lifespan.)<br />
8. Press down firmly and slide each battery<br />
cover back in place. Remember: The<br />
detector must be turned off when batteries<br />
are being changed. Caution: Use only<br />
high quality rechargeable (NiMH), alkaline<br />
80 - Garrett <strong>Metal</strong> <strong>Detectors</strong> Graphic Target Imaging 2500 - 81
MAINTENANCE<br />
Always remember that your GTI 2500<br />
is a sensitive electronic instrument. It is<br />
built to withstand rugged treatment in the<br />
outdoors. Use your Garrett detector to the<br />
fullest extent possible, and never feel that<br />
you have to baby it. Yet, always protect<br />
the detector and handle it with reasonable<br />
care.<br />
Try to avoid temperature extremes as<br />
much as possible, such as storing the<br />
detector in an automobile trunk during hot<br />
summer months or outdoors in sub-freezing<br />
weather. Keep your detector clean.<br />
Always wipe the housing and LCD after<br />
use, and wash the coil when necessary.<br />
Your 9.5” searchcoil is submersible. The<br />
control housing is not! Never submerge<br />
the control housing, and always protect<br />
it from heavy mist, rain or blowing surf.<br />
Disassemble the stem and wipe it clean<br />
after use in sandy areas. When storing<br />
longer than about one month, remove<br />
batteries from the detector and from their<br />
holders as well.<br />
SPECIALIZED HUNTING<br />
Coins<br />
Because of its unique discrimination and<br />
imaging capabilities, the GTI 2500 functions<br />
as an outstanding coin hunting detector,<br />
especially in its Discriminate/Coins<br />
mode. Deepseeking capability and the<br />
depth, size and conductivity information<br />
available from DSP circuitry combined with<br />
TreasureVision and the GTI 2500's ease of<br />
handling make this a superb instrument<br />
for finding coins.<br />
In addition, target sizing presents a second<br />
dimension in discrimination. When<br />
you discover a target whose conductivity<br />
as shown on the Upper Scale indicates that<br />
it might be a coin, check its size. If it's not<br />
a B-size target, it can't be a U. S. coin!<br />
Whether you choose to hunt for them in a<br />
park or on a beach, Garrett's factory-set<br />
Discriminate/Coins mode offers discrimination<br />
that responds ideally to conditions<br />
normally encountered. You may occasionally<br />
discover quantities of specific trash<br />
targets that are not being eliminated from<br />
82 - Garrett <strong>Metal</strong> <strong>Detectors</strong> Graphic Target Imaging 2500 - 83
detection by factory-set discrimination.<br />
You can then use the ACCEPT/REJECT<br />
touchpad to eliminate these pesky pieces<br />
of junk, no matter which Discriminate<br />
mode you are using. Just move your<br />
searchcoil across one of them, watch your<br />
Upper Scale for its response and push<br />
the ACCEPT/REJECT touchpad. The Lower<br />
Scale notch vanishes, and you'll have<br />
no more trouble from that type of trash<br />
metal. With the GTI 2500 you spend less<br />
time digging trash and more time digging<br />
coins!<br />
Custom discrimination enables you to<br />
design your own coin-hunting mode. Any<br />
Custom discrimination selections you make<br />
will be retained in the detector's memory<br />
even after the instrument has been turned<br />
OFF.<br />
Find even more coins by combining the<br />
deepseeking capabilities of the GTI 2500's<br />
All-<strong>Metal</strong> mode with the discrimination of<br />
the Discriminate/Coins mode. When you<br />
detect a deep target in the All <strong>Metal</strong> mode,<br />
examine the target ID on the display<br />
panel and/or switch to the Coins mode<br />
to double-check the target. Some hobbyists<br />
even set up a discrimination notch by<br />
blanking out all segments on the left half<br />
of the scale.<br />
For literature explaining more about coin<br />
hunting see the Recommended Reading<br />
section of this Owner's <strong>Manual</strong>. The New<br />
Successful Coin Hunting is especially recommended.<br />
An Order Blank is included in<br />
the back of this manual, or you can call<br />
Garrett direct at 1-800-527-4011 to purchase<br />
by credit card.<br />
Gold<br />
Gold and other precious metals can be<br />
found in various forms with this detector.<br />
You will most likely be searching for nuggets,<br />
but gold can also be found as lode or<br />
hard rock deposits in a vein, usually mixed<br />
with other minerals. The GTI 2500 can be<br />
used to locate placer deposits in streams<br />
or dry sand, with such gold then being<br />
recovered by panning.<br />
Gold is generally found in rock formations<br />
with a great many other conductive minerals.<br />
A high quality detector such as the GTI<br />
84 - Garrett <strong>Metal</strong> <strong>Detectors</strong> Graphic Target Imaging 2500 - 85
2500 with intricate circuitry that cancels<br />
out mineralization to permit sophisticated<br />
ground balancing can be used to find this<br />
gold or any other precious metal.<br />
It must be emphasized, however, that<br />
even the GTI 2500 or any quality detector<br />
is usually operated only in the All-<strong>Metal</strong><br />
mode and very precisely ground balanced<br />
if gold is to be found. The new Fast Track<br />
and Auto Track are quite satisfactory, even<br />
in extremely mineralized soil, but manual<br />
ground balancing is always possible.<br />
All of this is particularly important<br />
when searching for tiny gold nuggets.<br />
Furthermore, when prospecting, all signaling<br />
targets must be located and carefully<br />
inspected. It is only in this manner that<br />
you can be successful in using a metal<br />
detector to discover valuable metal nuggets<br />
and ore samples.<br />
Although some hobbyists have experienced<br />
success in using the Discriminate<br />
mode to locate nuggets, the detector<br />
responds more effectively to tiny nuggets<br />
in the All-<strong>Metal</strong> mode. Heavy ground mineralization<br />
could also limit detection depth<br />
when searching in the Discriminate mode.<br />
There is a way, however, to let the precise<br />
discrimination possible with the GTI 2500<br />
help you find gold even though discrimination<br />
usually limits the amount of small<br />
nuggets found. There are some highly<br />
productive areas, however, that contain<br />
so much iron trash that a small amount of<br />
discrimination becomes highly desirable,<br />
even necessary.<br />
Here's a suggestion: Occasionally you continually<br />
encounter one particularly troublesome<br />
trash target in an area where you're<br />
hunting for gold. The GTI 2500 offers<br />
you an easy solution. Just switch to the<br />
Discriminate/Zero mode and "notch out"<br />
that single pesky target. Then, when<br />
you encounter suspicious targets in the<br />
All-<strong>Metal</strong> mode, you can quickly and easily<br />
check them with your "notched" Zero<br />
mode. Or, you can hunt in the Zero mode<br />
itself. You may lose some depth on an<br />
occasional nugget; but, the time you save<br />
could enable you to find more nuggets that<br />
you might have missed!<br />
Hot rocks are a problem for any electronic<br />
86 - Garrett <strong>Metal</strong> <strong>Detectors</strong> Graphic Target Imaging 2500 - 87
prospector, whether veteran or weekend<br />
adventurer. A "hot rock" can be described<br />
as a concentration of non-conductive iron<br />
mineral that causes a detector to recognize<br />
it as metal when operating in the All<br />
<strong>Metal</strong> mode.<br />
When you suspect that you have a signal<br />
from a hot rock, locate the target precisely<br />
by pinpointing. Then, move your searchcoil<br />
away and press the DISCRIMINATE<br />
touchpad. You should use the Discriminate<br />
/ Zero setting which offers no discrimination.<br />
Now, scan the target again, trying<br />
to keep the exact same distance. If the<br />
sound does not change, your target is<br />
probably a hot rock. When this happens,<br />
ignore the target, switch back to the All-<br />
<strong>Metal</strong> mode and continue searching. If the<br />
signal increases at all in the Discriminate<br />
mode, you should investigate this target<br />
more closely and identify the metal causing<br />
your audio to increase.<br />
where it is known to exist.<br />
Relics<br />
Relics of all shapes and sizes can be<br />
found with a GTI 2500 when you hunt in<br />
its RELICS mode. This mode is especially<br />
designed to eliminate those nuisance targets<br />
most often encountered in relic hunting.<br />
You may also want to search in the<br />
ALL METAL or ZERO Discriminate modes,<br />
but you must be prepared to dig metallic<br />
trash since you will detect all metal targets<br />
in these modes.<br />
Hard work, patience and research are<br />
three of the keys to success in electronic<br />
prospecting. Research is important<br />
because gold must be sought in areas<br />
88 - Garrett <strong>Metal</strong> <strong>Detectors</strong> Graphic Target Imaging 2500 - 89
REPAIR SERVICE<br />
In case of difficulty, read this Owner's<br />
<strong>Manual</strong> again thoroughly to make certain<br />
your Garrett GTI 2500 is not inoperable<br />
because of wrong adjustments or improper<br />
operating methods. Your dealer may<br />
also be able to offer advice. Remember<br />
that computerized circuitry of this detector<br />
permits you to restore instantly all of its<br />
precise factory settings. Simply hold down<br />
the POWER touchpad for five (5) seconds.<br />
When your detector must be returned to<br />
the factory for service, always include a<br />
letter with the instrument that describes<br />
its problem as fully as possible. Include<br />
your name, address and a phone number<br />
where you can be contacted between 8:30<br />
a.m. and 4 p.m., Central time.<br />
Before you return your detector to the<br />
Garrett factory, make certain:<br />
You have checked batteries and connectors.<br />
(Check batteries especially closely.<br />
They are the most common cause of<br />
detector "failure.")<br />
You have checked with your dealer.<br />
You have tried to restore factory settings.<br />
You have carefully packed the detector in<br />
its original shipping carton or other suitable<br />
box. Make certain that proper insulation<br />
or packing material is used to keep<br />
all parts secure. Do not ship stems, headphones<br />
or armrests unless they are part of<br />
the problem. Be certain to return all coils,<br />
unless the problem is mechanical.<br />
Ship to:<br />
Garrett <strong>Metal</strong> <strong>Detectors</strong><br />
1881 West State Street<br />
Garland, TX 75042.<br />
You can call Garrett's Customer Service<br />
Department (972) 494-6151, Extension<br />
776, or e-mail at sales@garrett.com if you<br />
have further questions.<br />
Please allow approximately one week for<br />
Garrett technicians to examine and service<br />
your detector after receiving it, plus<br />
another week for return shipping. All<br />
90 - Garrett <strong>Metal</strong> <strong>Detectors</strong> Graphic Target Imaging 2500 - 91
equipment will be returned UPS or parcel<br />
post unless you give written authorization<br />
to ship collect by air parcel post, UPS Blue<br />
(air) or air freight.<br />
Special Notice to Foreign Customers:<br />
Customers outside the United States<br />
must contact the retail outlet where their<br />
product was purchased to arrange for<br />
repair or warranty service. To avoid excessive<br />
shipping and import charges, do not<br />
attempt to return any Garrett products to<br />
the factory in the United States without<br />
written authorization from Garrett's local<br />
agent or representative.<br />
RECOMMENDED READING<br />
Since your Garrett GTI 2500 is a truly<br />
universal detector, all of the RAM books<br />
will be pertinent to its use. Of particular<br />
interest, however, will be the revised version<br />
of Garrett's popular Modern <strong>Metal</strong><br />
<strong>Detectors</strong>, a basic text that will help you<br />
to understand all types of metal detection<br />
equipment and how to use them.<br />
A special section of the revised edition is<br />
devoted to the use of One-Touch computerized<br />
detectors.<br />
For beginners, however, the new edition<br />
of Treasure Hunting for Fun and Profit will<br />
prove especially interesting and helpful.<br />
Where can you hunt? How about ghost<br />
towns and deserted structures? You will<br />
read about them in Charles Garrett's<br />
Ghost Town Treasures.<br />
Bob Marx's Buried Treasures You Can Find<br />
locates thousands of sites where treasure<br />
is know to have existed. This fine<br />
92 - Garrett <strong>Metal</strong> <strong>Detectors</strong> Graphic Target Imaging 2500 - 93
ook also includes much good information<br />
about One-Touch detectors such as the<br />
GTI 2500.<br />
You will also be interested in The New<br />
Successful Coin Hunting, filled with "how<br />
to" tips and success stories about coin<br />
hunting.<br />
Since the GTI 2500 is such an excellent<br />
detector for hunting for gold nuggets and<br />
ore veins, you will be interested in Find<br />
Gold with a <strong>Metal</strong> Detector. All hobbyists<br />
are urged to familiarize themselves with<br />
this most interesting and exciting aspect<br />
of metal detecting.<br />
WARNING!<br />
Any metal detector may discover underground<br />
power lines, explosives or other<br />
items which when struck could cause personal<br />
injury. When searching for treasure<br />
with your Garrett GTI 2500, observe these<br />
precautions:<br />
• Do not hunt in an area where you believe<br />
there may be shallowly buried underground<br />
electric lines or pipes.<br />
• Do not hunt in a military zone where<br />
bombs or other explosives may be buried.<br />
• Avoid striking any line known to be or<br />
suspected to be carrying electrical power.<br />
• Do not disturb any pipeline, particularly<br />
if it could be carrying flammable gas or<br />
liquid.<br />
• Use reasonable caution in digging toward<br />
any target, particularly in areas where you<br />
are uncertain of underground conditions.<br />
94 - Garrett <strong>Metal</strong> <strong>Detectors</strong> Graphic Target Imaging 2500 - 95
• Audio Frequency: 275 to 710 Hz<br />
• Batteries: Eight (8) AA<br />
• Battery Life: (Approximate)<br />
Alkaline: 35 hrs.<br />
Carbon Zinc: 25 hrs.<br />
Rechargeable: 25–35 hrs.<br />
• Humidity: 0 to 95% Non-condensing<br />
Temperatures:<br />
Operating: 0 to 130ºF.<br />
Storage: -20 to 150ºF.<br />
• Construction: Aluminum and high<br />
strength glass-filled nylon with handlemounted<br />
control/display panel.<br />
• Weight: (With 9.5 searchcoil) 4 lbs., 8<br />
ozs.<br />
CODE OF ETHICS<br />
Filling holes and obeying no trespassing<br />
signs are but two requirements of a dedicated<br />
metal detector hobbyist. A sincere<br />
request that Charles Garrett makes to<br />
every user of one of his detectors is that<br />
each place searched be left in a better<br />
condition than it was found. Thousands of<br />
individuals and organizations have adopted<br />
this formal <strong>Metal</strong> Detector Operators<br />
Code of Ethics:<br />
• I will respect private and public property,<br />
all historical and archaeological sites and<br />
will do no metal detecting on these lands<br />
without proper permission.<br />
• I will keep informed on and obey all laws,<br />
regulations and rules governing federal,<br />
state and local public lands.<br />
• I will aid law enforcement officials whenever<br />
possible.<br />
• I will cause no willful damage to property<br />
of any kind, including fences, signs and<br />
100 - Garrett <strong>Metal</strong> <strong>Detectors</strong> Graphic Target Imaging 2500 - 101
uildings and will always fill holes I dig.<br />
• I will not destroy property, buildings<br />
or the remains of ghost towns and other<br />
deserted structures.<br />
• I will not leave litter or uncovered items<br />
lying around. I will carry all trash and dug<br />
targets with me when I leave each search<br />
area.<br />
• I will observe the Golden Rule, using<br />
good outdoor manners and conducting<br />
myself at all times in a manner which will<br />
add to the stature and public image of<br />
all people engaged in the field of metal<br />
detection.<br />
Patent Protection<br />
Garrett's high tech instruments are protected<br />
by one or more of the following<br />
United States Patents and other<br />
Patents Pending: 4,398,104, 4,423,377,<br />
4,303,879, 4,334,191, 3,662,225,<br />
4,162,969, 4,334,192, 4,488,115,<br />
4,700,139, 4,709,213<br />
Design 274,704 and 297,221<br />
G. B. Design 2,011,852<br />
Australia Design<br />
111,674.<br />
Other patents pending.<br />
All Garrett detectors are manufactured<br />
in the United States of America.<br />
©2008 Garrett <strong>Metal</strong> <strong>Detectors</strong><br />
All rights reserved.<br />
102 - Garrett <strong>Metal</strong> <strong>Detectors</strong> Graphic Target Imaging 2500 - 103
105 - Garrett <strong>Metal</strong> <strong>Detectors</strong>