Pneumatic Planishing Hammer Instructions - Auto Body Toolmart
Pneumatic Planishing Hammer Instructions - Auto Body Toolmart
Pneumatic Planishing Hammer Instructions - Auto Body Toolmart

Create successful ePaper yourself
Turn your PDF publications into a flip-book with our unique Google optimized e-Paper software.
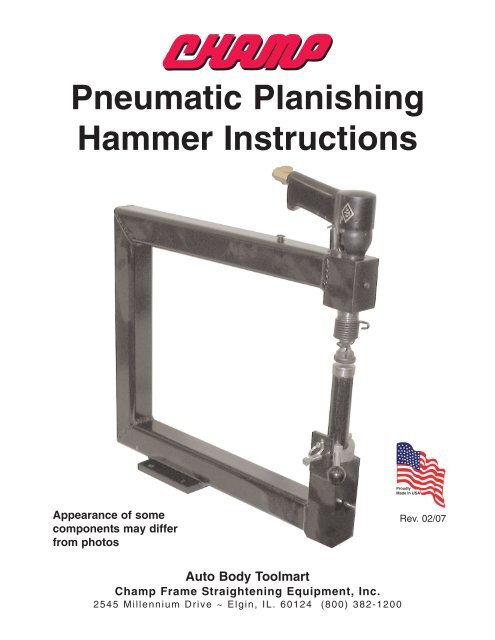
<strong>Pneumatic</strong> <strong>Planishing</strong><br />
<strong>Hammer</strong> <strong>Instructions</strong><br />
Appearance of some<br />
components may differ<br />
from photos<br />
Rev. 02/07<br />
<strong>Auto</strong> <strong>Body</strong> <strong>Toolmart</strong><br />
Champ Frame Straightening Equipment, Inc.<br />
2545 Millennium Drive ~ Elgin, IL. 60124 (800) 382-1200
FEATURES AND DESCRIPTION<br />
• Constructed from sturdy 2” steel tubing<br />
• 22” throat depth<br />
• 4-position anvil height adjusts in 0.080” increments<br />
• 3 anvil heads included from flat to high crown<br />
• Plug on top allowed frame to be filled with sand for quieter<br />
running<br />
• Uses standard 4x pneumatic aircraft rivet gun<br />
• 8-1/2’ hose to foot pedal control<br />
• Portable and easy to set up<br />
A <strong>Planishing</strong> <strong>Hammer</strong>, like most metal working tools,<br />
becomes easier to use with operator experience. For<br />
this reason, it is suggested to practice on clean scrap<br />
metal before working on your project. Please read and<br />
understand the entire instruction book before<br />
operating your <strong>Planishing</strong> <strong>Hammer</strong>.<br />
ASSEMBLY INSTRUCTION<br />
1) Carefully unpack <strong>Planishing</strong> <strong>Hammer</strong> kit and check your parts<br />
• <strong>Hammer</strong> head<br />
• Head spring<br />
• Air <strong>Hammer</strong><br />
• Pedal<br />
• Three anvils are<br />
included with the kit:<br />
flat, medium and high<br />
crown<br />
• Frame pull plug<br />
• Support shaft<br />
• Spring<br />
• Anvil height adjuster<br />
screw<br />
• Stepped anvil height<br />
adjuster<br />
• Securing pin
2) The frame can be filled with sand for quieter<br />
operation. Use a funnel to pour sand through the<br />
hole in the top of the frame as indicated in the<br />
picture. Use plastic pull plug to plug the hole.<br />
3) Securely mount the <strong>Planishing</strong> <strong>Hammer</strong> Frame<br />
at a comfortable height to work with.<br />
4) Insert Air <strong>Hammer</strong> into the top mounting block. You<br />
may have to open the set screw on the side enough<br />
to allow the hammer to drop into position. Set the<br />
spring in the socket on the top of the frame so the<br />
the hammers trigger is pushed up at all times while<br />
the hammer is mounted against the frame. Tighten<br />
the set screw to hold the assembly in place.<br />
5) Thread the hammer spring onto the hammer until it<br />
is flush with the bottom of the mount.<br />
6) Insert <strong>Hammer</strong> Head into the Air <strong>Hammer</strong> and push<br />
upwards until the clip at the bottom end of the<br />
spring snaps into place, securing the head.<br />
7) Set the Anvil height adjuster on the bottom<br />
mounting block and align the holes. Open the set<br />
screw on the side so that the support shaft can be<br />
fed through the bottom using the set screw as an<br />
alignment guide.<br />
8) Set the desired Anvil Head on the support shaft<br />
before securing the shaft in place.<br />
9) Feed the Securing Pin through the frame and the<br />
support shaft to keep it from rotating.<br />
10) Use the long set screw to hold the height adjuster<br />
in place while the unit is in operation.
11) Your <strong>Pneumatic</strong> <strong>Planishing</strong> <strong>Hammer</strong> is now ready for use. Please read and follow the<br />
operating instructions.<br />
PLEASE OBSERVE THE FOLLOWING SAFETY PRECAUTIONS:<br />
• Always wear OSHA approved eye and ear protection while operating<br />
the <strong>Planishing</strong> <strong>Hammer</strong>. The <strong>Hammer</strong> generates a substantial<br />
amount of noise and users should wear effective hearing protection<br />
to prevent hearing loss. Effective eye protection is necessary<br />
because oils, grease and other fluids can be projected at a high<br />
velocity while the unit is in operation.<br />
• Make sure that the frame is securely mounted to the work surface.<br />
• Wear gloves while handling sheet metal to prevent cuts and scrapes<br />
to the hands.<br />
• Do Not leave <strong>Planishing</strong> <strong>Hammer</strong> unattended while attached to air<br />
compressor supply.<br />
OPERATING INSTRUCTIONS<br />
(1) Connect air supply to the foot pedal<br />
(2) The speed and pressure of the hammering can be adjusted with the<br />
line pressure adjustment at the base of the air hammer. Turning the<br />
control counter-clockwise increases hammering. Practice will<br />
demonstrate how varying the pressure affects performance of the<br />
tool.<br />
(3) Lower pressure/softer hammering is good for smoothing while high<br />
pressure is good for rough shaping.<br />
NOTE: The more metal is shaped, the harder it becomes.