You also want an ePaper? Increase the reach of your titles
YUMPU automatically turns print PDFs into web optimized ePapers that Google loves.
English<br />
<strong>Formula</strong> 6/<strong>8R</strong>
<strong>Formula</strong> 8r<br />
1<br />
2<br />
3<br />
4<br />
5<br />
6<br />
11<br />
10<br />
9<br />
8<br />
7<br />
14<br />
Pantone White<br />
13<br />
Fomular_ <strong>Doro</strong>_ Artwork_ TAM/SPK_FORMUL<br />
12
English<br />
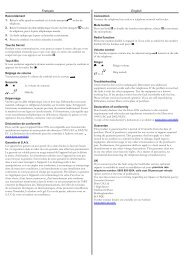
1. Up / missed call<br />
2. Left menu button/OK<br />
3. Talk button<br />
4. Down/Redial<br />
5. Speaker phone<br />
6. * and keypad lock<br />
7. # and ring signal On / Off<br />
8. Phone book<br />
9. R Recall button (PBX features)<br />
10. End call and on / off button<br />
11. Right menu button/Back/Internal call<br />
Only for <strong>Formula</strong> 8r:<br />
12. Paging<br />
13. Answer machine functions. Detailed in<br />
Answer machine section.<br />
14. Message indication/display
English<br />
Installation<br />
This device is intended for the analogue telephone network lines in AT, BE, BG, CH, CY, CZ, DE,<br />
DK, EE, ES, FI, FR, GB, GR, HU, IE, IS, IT, LV, LT, LU, MT, NL, NO, PL, PT, RO, SI, SK, SE.<br />
Connection<br />
1. Connect mains adapter and phone cable to wall sockets.<br />
2. Insert batteries (1.2V NiMH AAA) in accordance with the markings.<br />
3. Place the handset into base unit with the keypad facing outwards to charge (24 hours the<br />
first time).<br />
4. Press (left menu button).<br />
5. Scroll {/} to HS SETTINGS.<br />
6. Press OK (left menu button).<br />
7. Scroll to LANGUAGE. Press OK.<br />
8. Scroll to ENGLISH. Press OK.<br />
9. Press L or several times to exit the menu screens.<br />
Note!<br />
Use the telephone line cord supplied, an existing line cord from a previous phone may not<br />
be compatible.<br />
The mains socket outlet must be located near the equipment and easily accessible.<br />
If the <strong>Formula</strong> 8r base unit’s display is showing -- the answer machine is disconnected, or<br />
time/date is not set.<br />
Date/Time<br />
1. Press (left menu button).<br />
2. Scroll {/} to HS SETTINGS. Press OK.<br />
3. Scroll to HS DISPLAY. Press OK.<br />
4. Scroll to TIME. Press OK.<br />
5. Scroll to DATE & TIME. Press OK.<br />
6. Scroll to SET TIME. Press OK.<br />
7. Enter time of day (HH-MM). Press OK.<br />
8. Scroll to SET DATE. Press OK.<br />
9. Enter date (DD MM YY). Press OK.<br />
10. Press L or several times to exit the menu screens.<br />
The format of date/time can also be adjusted in this menu in the same way as other settings.<br />
1
English<br />
Battery<br />
When the batteries are relatively new (less than 6 months) and fully-charged (10 hours) they<br />
will last for approx 100 hours standby time or approx 10 hours call time. Full battery capacity<br />
will not be reached until the batteries have been charged 4–5 times. It is not possible to<br />
overcharge or damage the batteries by charging them for ”too long”. It may take up to 5<br />
minutes charging before display illuminates, if batteries are totally empty.<br />
Warning!<br />
Risk of explosion if battery is replaced by an incorrect type. Use only original batteries.<br />
The guarantee does not cover any damage caused by using the wrong batteries.<br />
Note!<br />
When the battery is low or when there is too great a distance to the base unit the<br />
telephone will be unable to connect to a line. Do not place the base unit close to other<br />
electrical equipment, in direct sunlight or other strong heat sources! This is to minimize the<br />
risk of any interference. It is normal for the device to become warm during charging and this is<br />
not dangerous.<br />
Dispose of used batteries according to the instructions.<br />
Battery LED<br />
When the batteries are running low, will flash and a warning tone will be heard when a call<br />
is in progress.<br />
Please note that the complete battery indicator in the display will flash as long as the handset is<br />
charging, and when the battery is fully charged only the inner segment will flash.<br />
2
English<br />
Range<br />
The telephone’s range depends on whether or not the radio waves carrying the call are<br />
restricted by obstacles in their path, and is usually between 50 and 300 metres. Coverage can<br />
be improved by turning one’s head so that the handset is aligned with the base unit. Sound<br />
quality declines as the limit is reached until the call is finally interrupted.<br />
The 6 symbol is shown when the phone is within range and goes out/flashes when it is out of<br />
range.<br />
Eco Functionality<br />
We have introduced the ECO FUNCTIONALITY label to help customers identify products within<br />
our assortment having a lower impact on the enviornment. Products carrying this label feature:<br />
• Reduced power consumption in both operational and standby modes.<br />
• Adaptive transmission power depending on range on base unit.<br />
3
English<br />
Operation<br />
Making a call<br />
1. Enter the required number. Delete if necessary with right menu button C.<br />
2. Press q to make the call. Press L to end the call.<br />
Note!<br />
To switch between handset/speaker press . In speaker mode, you cannot both speak at<br />
once – you must take it in turns to talk.<br />
When batteries are really low the speaker phone and backlight will not work in order to<br />
save the batteries.<br />
Receiving a call<br />
1. Wait for the handset to ring.<br />
2. Press q to answer. Press L to end the call.<br />
Volume control<br />
The volume may be adjusted during a call with {/}.<br />
Redial<br />
Press r. Scroll among the 10 most recently dialled numbers with {/}. Press q.<br />
Mute button<br />
The microphone can be switched on / off during a call with C (right menu button).<br />
Paging<br />
The handset will ring when J (on the base unit) is pressed. The signal will stop automatically<br />
after a while or if the L button on the handset or the J button on the base unit are<br />
pressed.<br />
Temporary silent mode<br />
When someone calls, you can press C (right menu button) to turn off the handset ring signal.<br />
Softkeys<br />
Note the top two keys just under the menu are “softkeys”. Their function is shown in the Display<br />
directly above them.<br />
4
English<br />
Phonebook<br />
You can save 50 numbers/names. If you subscribe to a caller ID service, the name allocated to<br />
the caller in the phonebook will be shown for incoming calls. It is possible to choose between<br />
various ringers for the numbers saved in the Phonebook (only functions if you subscribe to a<br />
caller ID service).<br />
Save name/number in handset<br />
1. Press b. Press .<br />
2. Scroll to ADD. Press OK.<br />
3. Press equivalent digit key several times for desired name. Press OK.<br />
4. Enter the telephone number, including the area code. Delete if necessary with right menu<br />
button C. Press OK.<br />
5. Scroll to required ringer. Press OK.<br />
Managing the phonebook<br />
1. Press b. Scroll between entries with {/}. You can quick search the phonebook by<br />
pressing the corresponding number key for the first letter.<br />
2. Press q to make a call or press for various options.<br />
Edit number<br />
1. Press (left menu button).<br />
2. Scroll {/} to PHONEBOOK, press OK.<br />
3. Scroll to the name you choose to edit, press .<br />
4. Scroll to EDIT, press OK.<br />
5. Check name is correct, press OK.<br />
6. Number will appear with cursor flashing at the end of the number<br />
7. Press C to backspace/delete number<br />
8. Re-enter correct number, press OK.<br />
9. Select melody, press OK.<br />
Delete number<br />
1. Press (left menu button).<br />
2. Scroll {/} to PHONEBOOK, press OK.<br />
3. Scroll to the name you choose to delete, press .<br />
4. Scroll to DELETE, press OK.<br />
5
English<br />
Incoming numbers/Caller ID<br />
The display shows you who is calling and the 20 most recent missed calls. NEW CALLS will<br />
be shown in standby mode and � in the list indicates a missed call. This function requires a<br />
subscription from your service provider!<br />
Retrieving and dialling<br />
1. Press {. Scroll to the desired entry with }.<br />
2. Press q to call or press for various options<br />
( = back).<br />
Deleting new calls/number log<br />
1. Scroll { to new call number, press (left menu button)<br />
2. Scroll } to DELETE or if more than one number, scroll to DELETE ALL, press OK.<br />
3. CONFIRM will be displayed on screen, press OK.<br />
Caller identification messages<br />
In addition to number display, the following messages will be shown occasionally:<br />
OUT OF AREA Unknown number, e.g. international call.<br />
WITHHELD Information about the number is blocked. Number cannot be shown.<br />
a MSG indication from your network operator*<br />
*To remove the message indicator: Press { and then hold down 4.<br />
6
English<br />
Settings<br />
Functions<br />
1. Press . Scroll to HS SETTINGS. Press OK.<br />
2. Scroll to desired function e.g. LANGUAGE. Press OK.<br />
3. Scroll to desired setting. Press OK.<br />
ALARM When the alarm is activated will be shown in standby mode. When<br />
the alarm goes off, a signal will be heard for 45 seconds. The signal can<br />
be turned off with any button. If SNOOZE is activated the alarm will go<br />
off again approx. 7 minutes later. Turn the alarm off permanently via<br />
the menu or by holding L down for a few seconds. The volume is<br />
determined by the set ringer level.<br />
RING SETUP The handset’s ringer signal.<br />
INT/EXT=internal/external.<br />
Note!<br />
Melodies 2,3,4... will continue for up to 8 seconds if the call is answered in another<br />
phone. Set melody 1 if you want to avoid this.<br />
TONE SETUP Any of the following warning tones can be disabled: KEYTONE,<br />
LOW BATTERY and RANGE.<br />
LANGUAGE The language of the display texts.<br />
RENAME HS The text shown in standby mode.<br />
HS DISPLAY Show name or time in standby mode.<br />
AUTO ANSWER The call is answered when the handset is lifted from the base.<br />
DATE & TIME Setting the date/time. The format of date/time can also be adjusted.<br />
7
System settings<br />
System PIN is 0000 on delivery.<br />
English<br />
1. Press . Scroll to BS SETTINGS. Press OK.<br />
2. Scroll to desired function. Press OK.<br />
3. Enter the desired setting. Press OK.<br />
BS RINGER/ The base unit’s ringer signal can be adjusted. Only applies to <strong>Formula</strong> 8r.<br />
RING VOLUME<br />
DELETE HS To de-register a handset.<br />
WARNING: A deregistered handset can no longer be used with the system!<br />
FLASH TIME Recall time.<br />
LONG=New Zealand. MEDIUM=France/Portugal. SHORT=others incl. UK/AUS.<br />
CHANGE PIN The code (e.g. 0000) can be changed.<br />
Expanded system (Two or more handsets e.g duo, trio...)<br />
The call number for internal calls will be shown in the display in standby mode. The base unit<br />
should be positioned centrally so that the coverage area is roughly equal for all handsets.<br />
Intercom / internal call<br />
1. Press (right menu button).<br />
2. If using more than 2 handsets: Enter call number 1-5 for the desired handset or press<br />
9 for all.<br />
A tone will be heard if an external call comes in while an internal call is in progress. End the<br />
internal call with L and then answer the external call with q.<br />
Transferring calls/Conference between handsets<br />
1. When an external call is connected;<br />
2. Press . Scroll to INTERCOM. Press OK.<br />
3. If using more than 2 handsets: Enter call number 1-5 for the desired handset or<br />
press 9 for all.<br />
4. To transfer: press L,<br />
For conference: hold * pressed down.<br />
8
English<br />
Register a new handset<br />
All handsets included in the package are already registered to the base unit. Only for separate<br />
handsets/service measures. You can register up to 5 handsets to one base unit.<br />
Note!<br />
This model is GAP (Generic Access Profile) compatible, which means that the handset<br />
and the base unit can both be used with most other GAP compatible units irrespective<br />
of manufacturer. However the GAP protocol cannot guarantee that all functions may be<br />
accessed. Extra handsets will not be available as accessories.<br />
1. Hold down J on the base for around 6 seconds.<br />
2. Press . Scroll to Registration. Press OK.<br />
3. Enter the base unit’s PIN code (e.g. 0000). Press OK.<br />
4. If the registration is successful the unit will return to standby mode within one minute.<br />
Answer machine (only <strong>Formula</strong> 8r)<br />
When the answer machine is switched on calls are answered after a set number of rings, your<br />
outgoing message is heard and the caller can leave a message. Total memory capacity is up<br />
to 30 minutes depending on the set sound quality. Most functions can be accessed from both<br />
base unit and handset.<br />
Switching the answer machine on/off<br />
Press 1 (on the base unit) to switch the answer machine on/off. If the base unit’s display is<br />
flashing/showing -- the answer machine is disconnected, or time/date is not set.<br />
On/Off from the handset<br />
1. Press . Scroll to ANS. MACHINE. Press OK.<br />
2. Scroll to TAM ON/OFF. Press OK.<br />
3. Scroll to desired setting. Press OK.<br />
If the handset’s display shows with a steady light the answer machine is switched on. If<br />
there are new messages, the indicator will flash whether the answer machine is off or on.<br />
Note!<br />
Even when answer machine is OFF it will still answer after 10 rings,<br />
please see Remote activation.<br />
9
English<br />
Outgoing message<br />
The outgoing message (max 3 min) is heard by incoming calls. There are two separate outgoing<br />
messages, one for Answer only (callers cannot leave a message) and one for normal answering<br />
function. Please also select desired answer function. See TAM Settings.<br />
1. Press . Scroll to ANS. MACHINE. Press OK.<br />
2. Scroll to TAM SETTINGS. Press OK.<br />
3. Scroll to OGM SETTINGS. Press OK.<br />
4. Scroll to ANSWER & REC/ANSWER ONLY. Press OK.<br />
5. Scroll to Record MESS. Press OK.<br />
6. After the long beep you can record your message (speaking 20 cm from the keypad).<br />
Press OK.<br />
7. The message will be played back to you. Repeat the above to change.<br />
Note!<br />
A pre-recorded message is used until you make your own recording, and that message can<br />
also be restored if required. To restore this, press C (right menu button) during playback<br />
of outgoing message.<br />
Screening<br />
Incoming messages will be heard on the loudspeaker of the base unit as they are received.<br />
If nothing can be heard, check that the volume is turned up and that the function has been<br />
activated – see separate description Answer machine settings. You can also press OK on the<br />
handset while recording is in progress. The call can be intercepted by pressing q or lifting<br />
the receiver of another telephone connected to the same line.<br />
Use of answer machine (base unit)<br />
The numbers on the base unit will flash when there are new messages.<br />
9 Start playback<br />
� Stop playback<br />
88 / 99 Prev msg/Skip forward<br />
X Delete current message<br />
+ / - To increase/decrease the volume<br />
Delete all old messages<br />
After playback: Hold down X until you hear a beep.<br />
10
English<br />
Use of answer machine (handset)<br />
New messages are indicated by flashing in the display in standby mode. Playback always<br />
starts with new messages.<br />
1. Press . Scroll to ANS. MACHINE. Press OK.<br />
2. Scroll to MSG PLAYBACK. Press OK.<br />
3. During playback the following commands are available (see table below).<br />
4. End by pressing L.<br />
2 ( X ) Delete during playback<br />
4 ( 88 ) Previous message<br />
5 ( � ) Stop<br />
6 ( 99 ) Skip to next message<br />
Speaker Off/On<br />
}/{ Volume control<br />
Delete all old messages<br />
1. Press . Scroll to ANS. MACHINE. Press OK.<br />
2. Scroll to Delete all. Press OK.<br />
3. Confirm by pressing OK.<br />
Personal message (Memo)<br />
1. Press . Scroll to ANS. MACHINE. Press OK.<br />
2. Scroll to MEMO. Press OK.<br />
3. After the long beep you can record your message (speaking approx. 20 cm from the<br />
keypad).<br />
4. Press OK. The message will be played back to you.<br />
5. Memos are played back in the same way as ordinary incoming messages.<br />
11
English<br />
Out of memory<br />
The memory has room for up to 59 messages (including the outgoing message) max. 30<br />
minutes depending on the compression you set. When TAM FULL is shown or the base unit<br />
flashes FF, no new messages can be recorded until the old ones have been played back and<br />
deleted. In that case, the telephone answer machine responds with the outgoing message for<br />
Answer Only.<br />
Note!<br />
Remember to delete messages regularly!<br />
Answer machine settings<br />
1. Press . Scroll to ANS. MACHINE. Press OK.<br />
2. Scroll to TAM SETTINGS. Press OK.<br />
3. Scroll to desired function. Press OK.<br />
4. Scroll to desired setting. Press OK.<br />
ANSWER MODE Choose between ANSWER & REC and ANSWER ONLY (caller cannot<br />
leave message).<br />
TAM LANGUAGE Select language for pre-recorded outgoing message. To activate this,<br />
press C (right menu button) during playback of outgoing message.<br />
OGM SETTINGS Record/listen to outgoing msg.<br />
ANSWER DELAY Select after how many rings (2,4,6,8, time saver*) the call will be<br />
answered.<br />
RECORD TIME Select maximum recording time for each msg.<br />
REMOTE ACC. Select remote access off/on.<br />
COMPRESSION Higher compression gives longer recording time but reduced sound<br />
quality, LOW = best sound quality but about half memory capacity.<br />
BS SCREENING Enable/disable the function in base unit which is described in chapter<br />
Screening.<br />
CHANGE PIN Change remote access code (0000).<br />
Note!<br />
The Time Saver function answers calls after six ring signals, until the first new message<br />
has been registered - then the answer machine switches to answering after approximately<br />
two signals. This is useful when using remote access; if you call up the answer machine<br />
and there is no reply after four rings that means there are no messages recorded and you<br />
can hang up before you are charged for the call.<br />
12
English<br />
Remote activation<br />
The answer machine can be activated via the remote access functions.<br />
1. Call the answer machine. It will answer after approximately 10 rings.<br />
2. Press * when the outgoing message is played.<br />
3. Enter the PIN code, see Answer machine Settings. One beep confirms correct code.<br />
4. Press 7.<br />
5. Replace the handset.<br />
Remote access<br />
The unit can be remotely accessed using an ordinary tone dialling telephone.<br />
1. Call the answer machine.<br />
2. Press * when the outgoing message is played.<br />
3. Enter the PIN code, see TAM Settings. One beep confirms correct code.<br />
4. Select a remote access command (see table below).<br />
5. Replace the handset.<br />
2 Erase single msg during playback<br />
4 Skip to previous message<br />
5 Playback of messages<br />
6 Skip to next message<br />
7 Turn on the answer machine<br />
8 Stop<br />
9 Turn off the answer machine<br />
13
English<br />
Troubleshooting<br />
Check that the telephone cord is undamaged and properly plugged in. Disconnect any<br />
additional equipment, extension cords and other phones. If the problem is resolved, the fault is<br />
with some other equipment.<br />
Test the equipment on a known working line (e.g. at a neighbour’s house). If the equipment<br />
works there the fault is probably with your telephone line. Please report this to your network<br />
operator.<br />
No number shown when ringing<br />
• This function requires a Caller ID subscription from your service provider.<br />
Warning tone/Not possible to make calls<br />
• The batteries may be running low (charge the handset).<br />
• The hand unit may be nearly out of range. Move closer to a base unit.<br />
Telephone does not work<br />
• Check that the adapter/phone cord is connected correctly.<br />
• Check that you have selected Tone Dial, see System Settings.<br />
• Check the charge status of the handset batteries.<br />
• Connect another functioning telephone to the network wall socket.<br />
The telephone continues to ring<br />
• Some of the telephone’s ringers do not follow the line signal, which means that the<br />
signal may continue for up to 8 seconds after answering a call.<br />
The answer machine does not respond to remote access<br />
• Check that you are using a tone dial telephone.<br />
• Try holding the buttons down longer, approximately 1 second per digit.<br />
The answer machine is not answering<br />
• Memory may be full. Listen to/delete your messages.<br />
• Check that the adapter/phone cord is connected correctly.<br />
• Check that the answer machine function is turned on.<br />
If the telephone still does not work, please contact the place of purchase for service. Don’t<br />
forget the receipt or a copy of the invoice.<br />
14
English<br />
Warranty and other information<br />
Specific Absorption Rate (SAR)<br />
This device meets applicable international safety requirements for exposure to radio waves. The max. limit<br />
according to WHO is 2W/kg (per 10g tissue).This telephone measures 0,04 W/kg (per 10g tissue). Close to<br />
the base, i.e. within 20% of the maximum range, the SAR value is reduced to around 0,02 W/kg (per 10g<br />
tissue).<br />
Declaration of conformity<br />
<strong>Doro</strong> hereby declares that the products <strong>Doro</strong> <strong>Formula</strong> 6/8r conform to the essential requirements and other<br />
regulations contained in the directives 1999/5/EC (R&TTE), 2002/95/EC (ROHS). A copy of the manufacturer’s<br />
declaration is available at www.doro.com/dofc<br />
Guarantee<br />
This product is guaranteed for a period of 24 months from the date of purchase. If you experience any<br />
problems please contact the place of purchase. Proof of purchase is required for any service or support<br />
needed during the guarantee period. This guarantee will not apply to a fault caused by an accident or a<br />
similar incident or damage, liquid ingress, negligence, abnormal usage, non-maintenance or any other<br />
circumstances on the user’s part. Furthermore, this guarantee will not apply to any fault caused by a<br />
thunderstorm or any other voltage fluctuations. As a matter of precaution, we recommend disconnecting<br />
the device during a thunderstorm. Batteries are consumables and are not included in any guarantee. This<br />
guarantee does not apply if other batteries than DORO original batteries have been used.<br />
15
<strong>Doro</strong> <strong>Formula</strong> 6<br />
<strong>Doro</strong> <strong>Formula</strong> 6 Duo<br />
<strong>Doro</strong> <strong>Formula</strong> 6 Trio<br />
<strong>Doro</strong> <strong>Formula</strong> 6 Quad<br />
<strong>Doro</strong> <strong>Formula</strong> 8r<br />
<strong>Doro</strong> <strong>Formula</strong> 8r Duo<br />
<strong>Doro</strong> <strong>Formula</strong> 8r Trio<br />
<strong>Doro</strong> <strong>Formula</strong> 8r Quad<br />
English<br />
Version 1.2