GEFORCE® GTX 550 Ti GRAPHICS CARD
GEFORCE® GTX 550 Ti GRAPHICS CARD
GEFORCE® GTX 550 Ti GRAPHICS CARD

Create successful ePaper yourself
Turn your PDF publications into a flip-book with our unique Google optimized e-Paper software.
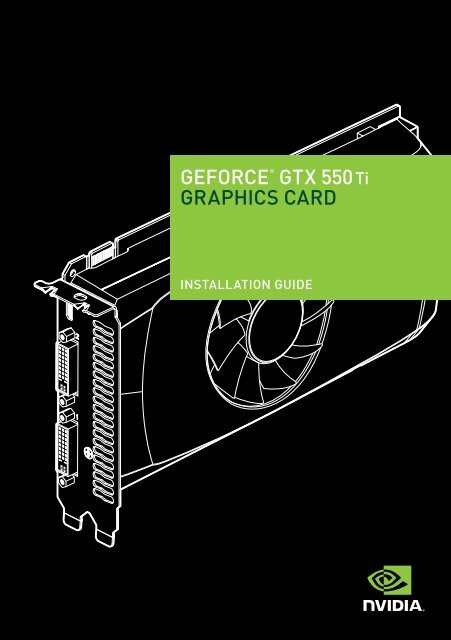
®<br />
GEFORCE <strong>GTX</strong> <strong>550</strong> <strong>Ti</strong><br />
<strong>GRAPHICS</strong> <strong>CARD</strong><br />
INSTALLATION GUIDE
GEFORCE <strong>GTX</strong> <strong>550</strong> TI INSTALLATION GUIDE<br />
NVIDIA GeForce <strong>GTX</strong> <strong>550</strong> <strong>Ti</strong>
TAbLE OF CONTENTS<br />
TAbLE OF CONTENTS<br />
Introduction 1<br />
About This Guide 1<br />
Minimum System Requirements 2<br />
Unpacking 3<br />
Equipment 3<br />
Hardware Installation 5<br />
Safety Instructions 5<br />
before You begin 6<br />
Installing the GeForce Graphics Card 6<br />
Driver Installation 11<br />
Configuring SLI 15<br />
Accessing the NVIDIA Control Panel 15<br />
Enabling SLI 16<br />
Configuring HDMI 17<br />
Enabling Audio Over HDMI 17<br />
Features 19<br />
Compliances 23
TAbLE OF CONTENTS
INTRODUCTION<br />
01<br />
INTRODUCTION<br />
Thank you for choosing the NVIDIA ®<br />
GeForce ® <strong>GTX</strong> <strong>550</strong> <strong>Ti</strong> graphics card.<br />
built from the ground up for DirectX 11<br />
tessellation, the GeForce <strong>GTX</strong> <strong>550</strong> <strong>Ti</strong> delivers<br />
revolutionary geometry performance for<br />
the ultimate next generation DX11 gaming<br />
experience.<br />
With full support for NVIDIA 3D Vision the<br />
GeForce <strong>GTX</strong> <strong>550</strong> <strong>Ti</strong> provides the graphics<br />
horsepower and video bandwidth needed to<br />
experience games and high definition blu-ray<br />
movies in eye-popping stereoscopic 3D.<br />
About This Guide<br />
This installation guide discusses the installation and operation of<br />
the NVIDIA GeForce <strong>GTX</strong> <strong>550</strong> <strong>Ti</strong> graphic solution.<br />
Note: It is important to register your product in order to<br />
receive online and phone support. Consult the registration<br />
card included in the retail packaging for more information on<br />
registering your product.<br />
1
2<br />
01<br />
INTRODUCTION<br />
Minimum System Requirements<br />
> Motherboard<br />
PCI Express ® or PCI Express 2.0-compliant motherboard<br />
with one dual-width x16 graphics slot. For a 2-way SLI<br />
configuration, you need an SLI-ready motherboard with one<br />
dual-width x16 graphics slot for each graphics card.<br />
> System Power Supply<br />
Minimum 400W or greater system power supply (with a<br />
minimum 12V current rating of 24A) with one 6-pin PCI Express<br />
supplementary power connector for each graphics card.<br />
For power supply recommendations for SLI configurations, visit<br />
www.slizone.com and check the Certified Products section.<br />
> Operating System<br />
z Microsoft Windows 7, 32-bit or 64-bit<br />
z Microsoft Windows Vista, 32-bit or 64-bit<br />
z Microsoft Windows XP, 32-bit or 64-bit<br />
z Linux, 32-bit or 64-bit<br />
z FreebSD x86<br />
> System Memory<br />
2 Gb system memory (4 Gb recommended)<br />
> CD-ROM/DVD-ROM drive or internet connection for driver<br />
installation<br />
> 200 MB of available hard disk space
UNPACkING<br />
02<br />
UNPACkING<br />
Prior to unpacking your new NVIDIA<br />
GeForce <strong>GTX</strong> <strong>550</strong> <strong>Ti</strong> graphics card, it is important<br />
to make sure you meet all the system requirements<br />
listed on page 2 for a smooth installation.<br />
be sure to inspect each piece of equipment<br />
shipped in the packing box. If anything is missing<br />
or damaged, contact your reseller.<br />
Equipment<br />
The following equipment and documentation are included in the<br />
GeForce <strong>GTX</strong> <strong>550</strong> <strong>Ti</strong> graphics card box.<br />
NVIDIA Driver Installation CD<br />
Contains:<br />
• Windows 7, XP, and Vista (32/64-bit) drivers for<br />
the GeForce graphics card. For other operating<br />
systems and to keep your drivers current, visit<br />
www.nvidia.com/drivers and download the<br />
latest drivers<br />
• Digital version of this Manual, the NVIDIA Control<br />
Panel User Guide, and Driver<br />
Quick Start Guide<br />
Fast and easy steps to install the GeForce<br />
graphics card(s).<br />
3
4<br />
UNPACkING<br />
02 WELCOME<br />
SLI<br />
connector<br />
Mini-HDMI<br />
connector<br />
DVI<br />
connector<br />
DVI<br />
connector<br />
Registration Card<br />
Register to gain priority access to online and<br />
phone support.<br />
4-to-6 Pin Adapter (Optional)<br />
Use the 4-to-6 pin adapter to convert two 4-pin power<br />
supply connectors to one 6-pin connector.<br />
DVI-to-VGA Adapter (Optional)<br />
Use to connect a VGA monitor to the DVI connector or a<br />
DVI monitor to the VGA connector.<br />
Mini-HDMI-to-HDMI Adapter (Optional)<br />
Use to connect the mini-HDMI connector on the card to<br />
a regular size HDMI connector.<br />
GeForce <strong>GTX</strong> <strong>550</strong> <strong>Ti</strong> Graphics Card<br />
Power connector
HARDWARE INSTALLATION<br />
03<br />
HARDWARE INSTALLATION<br />
Installing the NVIDIA GeForce <strong>GTX</strong> <strong>550</strong> <strong>Ti</strong><br />
graphics card hardware involves opening up your<br />
computer. Follow all of the safety instructions<br />
provided here to ensure that there is no damage<br />
to you, your computer, or the graphics board.<br />
Safety Instructions<br />
To reduce the risk of fire, electric shock, or injury, always follow basic<br />
safety precautions.<br />
Note: All hardware must be installed prior to installation of<br />
the drivers.<br />
> Remove power from your computer by disconnecting the AC main<br />
source before installation.<br />
> Do not operate this product near water or when your hands or<br />
body are wet.<br />
> Do not place this product on soft surfaces that could block the<br />
ventilation slots and cause overheating.<br />
> Do not place this product near a heating register or radiator.<br />
> Place this product securely on a stable surface. Serious damage<br />
to this product may result if it falls.<br />
> Do not allow anything to rest on the power cord. Do not place<br />
this product where a person can step or trip on the power cord.<br />
5
6<br />
03<br />
HARDWARE INSTALLATION<br />
Before You Begin<br />
The GeForce <strong>GTX</strong> <strong>550</strong> <strong>Ti</strong> graphics card is a PCI Express 2.0 ×16 graphics<br />
card. Your computer may already have a graphics card installed in the<br />
PCI Express slot. If so, you will need to remove that graphics card and<br />
replace it with the GeForce <strong>GTX</strong> <strong>550</strong> <strong>Ti</strong> graphics card.<br />
If you do not have a graphics card, this means that your motherboard<br />
has on-board graphics (there is a graphics chip installed on your<br />
motherboard or integrated in the motherboard chipset). If this is the<br />
case, there is no action that needs to be taken before installing your<br />
new graphics card.<br />
Installing the GeForce Graphics Card<br />
because there are so many different computer systems on the<br />
market, the procedure to install the GeForce <strong>GTX</strong> <strong>550</strong> <strong>Ti</strong> graphics<br />
card can vary from system to system. Use the following<br />
instructions as a guideline and consult the documentation for<br />
your computer system for any further information on your<br />
individual system.<br />
Note: It is important that all power to the computer be<br />
disconnected before you install the graphics card.<br />
Discharge your body’s static electricity by touching a grounded<br />
surface before touching the graphics card. A grounded surface is the<br />
computer chassis, or some other surface you know to be grounded.<br />
Use the following procedure to install the GeForce <strong>GTX</strong> <strong>550</strong> <strong>Ti</strong><br />
graphics card into your computer system.<br />
1 Turn off your computer and monitor and disconnect the power cord.<br />
Depending on your computer system, you may need to disconnect the<br />
cable going to the back of your system. Mark the cables so you can<br />
make sure you reconnect them properly.<br />
2 Open your computer by removing the cover/side panel. Refer to<br />
your computer documentation from the original manufacturer<br />
for assistance.
HARDWARE INSTALLATION 7<br />
3 Remove any existing graphics card (if there is one). Save hardware<br />
(such as screws and brackets) to use when installing the NVIDIA<br />
graphics card.<br />
! Attention: If your system has been running for a period of<br />
time prior to opening the panels, it is very important that you<br />
wait until the graphics card in your system has cooled before<br />
taking the card out of the system. Graphics cards get very hot<br />
when they have been operating for any length of time.<br />
4 Remove the slot cover if you do not have a graphics card installed.
8<br />
03<br />
HARDWARE INSTALLATION<br />
5 Plug the graphics card into the Primary PCI Express x16 slot on your<br />
motherboard. This is often the slot closest to the CPU but may be the<br />
second or third slot. Look for the slot labeled ×16. It will likely be the<br />
only PCI Express slot with a retention lever on the end of the slot or<br />
the one closest to the CPU.<br />
Note: It is recommended that you install the graphics card<br />
into the primary PCI Express x16 slot. If you install the graphics<br />
card into the secondary slot, your system may not recognize the<br />
graphics card and there will be nothing displayed on the monitor.<br />
Also note that on some motherboard SbIOS, the physical<br />
location of the primary slot can be configured when there are<br />
more than one PCI Express x16 slots.<br />
If you are installing an additional GeForce <strong>GTX</strong> <strong>550</strong> <strong>Ti</strong> graphics cards<br />
for an SLI configuration, continue with step 6 (2-way SLI) .<br />
Note: All of the graphics cards in an SLI configuration must<br />
be identical.
HARDWARE INSTALLATION 9<br />
6 Two GeForce graphic cards (2-way SLI):<br />
a) Install the second GeForce card into the outer most PCI Express<br />
x16 slot on the motherboard.<br />
b) Connect the two cards together using the dual SLI bridge<br />
connector that came with your SLI-ready motherboard.<br />
SLI<br />
7 Connect one 6-pin PCI Express auxiliary power connectors coming<br />
from the computer power supply to the connectors on the top edge of<br />
on the top edge of the GeForce <strong>GTX</strong> <strong>550</strong> <strong>Ti</strong> graphics card.<br />
If your power supply needs an additional 6-pin power<br />
connector, you can use the included 4-to-6 pin<br />
adapter. Make sure to connect each 4-pin connector<br />
to a separate PSU cable.<br />
From power supply
10<br />
HARDWARE INSTALLATION<br />
8 Reinstall the cover on your computer and reconnect any cables<br />
that you removed earlier in the installation.<br />
9 Connect your computer monitor(s) to the GeForce graphics card<br />
using the mini-HDMI and DVI connectors. The GeForce <strong>GTX</strong> graphics<br />
card can be connected to PC monitors that support DVI, VGA, and<br />
HDMI inputs.<br />
A single GeForce <strong>GTX</strong> <strong>550</strong> <strong>Ti</strong> graphics card can support up to two<br />
displays per card in a multi-monitor configuration.<br />
2<br />
DVI connector for digital displays.<br />
Using a DVI-to-VGA adapter, you can<br />
connect a VGA display.<br />
Mini-HDMI (High-Definition Multimedia Interface)<br />
Connector supports output of both video and audio<br />
from the PC to a high-definition television. Mini-HDMI<br />
is a smaller footprint version of the standard HDMI<br />
connector. A cable or adapter is needed to connect<br />
from the mini-HDMI connector to a display with a<br />
standard HDMI plug.<br />
1<br />
10 Reconnect your power cord to the PC.
DRIVER INSTALLATION<br />
04<br />
DRIVER INSTALLATION<br />
With the hardware installed, it is now time to<br />
install the graphics driver. NVIDIA recommends<br />
downloading and installing the most recent<br />
drivers available at:<br />
http://www.nvidia.com/drivers.<br />
Use the following procedure to load<br />
the graphics drivers.<br />
1 Power up your system.<br />
2 Insert the driver installation CD or double click on the GeForce driver<br />
executable file you downloaded from www.nvidia.com/drivers. The<br />
NVIDIA Setup program takes over and installs the drivers.<br />
11
12<br />
04<br />
DRIVER INSTALLATION<br />
3 Select the Express Installation option and then click NEXT when the<br />
Install Options window displays.<br />
Note: It may take several minutes for the installation to take<br />
place. Your screen may go blank for a few seconds one or<br />
more times during installation. This is normal. The Install<br />
in progess… screen will let you know when the installation<br />
is complete.
DRIVER INSTALLATION 13<br />
4 Click RESTART NOW once the install has finished.<br />
Note: Please visit www.nvidia.com/support to access our<br />
24x7x365 online support system, where you can submit<br />
questions directly to our tech support staff. Questions may<br />
only be submitted in English. GeForce customers purchasing<br />
NVIDIA-branded products also have access to toll free<br />
technical support at 1-800-797-6530 from 8:00AM-5:00PM<br />
Pacific <strong>Ti</strong>me, M-F. The technical support line is accessible<br />
from the U.S. and Canada only.
14<br />
04<br />
DRIVER INSTALLATION
CONFIGURING SLI<br />
05<br />
CONFIGURING SLI<br />
SLI is a revolutionary technology developed<br />
by NVIDIA that allows you to connect identical<br />
GeForce graphics cards together to deliver<br />
increased performance.<br />
You can enable SLI by either clicking on the SLI capable system balloon<br />
in the system tray or by going to the NVIDIA Control Panel.<br />
Accessing the NVIDIA Control Panel<br />
1 To access the NVIDIA Control Panel, you can right-click the Windows<br />
desktop and select NVIDIA Control Panel from the menu. Other ways<br />
to access the NVIDIA Control Panel depends on the operating system.<br />
> Windows 7<br />
Go to Start Control Panel Hardware and Sound and select<br />
the NVIDIA Control Panel icon.<br />
> Windows XP<br />
Go to Start Control Panel and select the NVIDIA Control<br />
Panel icon.<br />
15
16<br />
04<br />
CONFIGURING SLI<br />
> Windows Vista<br />
z Classic view<br />
Go to Start Control Panel and select the NVIDIA Control<br />
Panel icon.<br />
z Control Panel Home view<br />
Go to Start Control Panel Additional Options and select<br />
the NVIDIA Control Panel icon.<br />
Enabling SLI<br />
2 Once you have the NVIDIA Control Panel open, click on<br />
Set SLI and PhysX configuration in the left task pane.<br />
3 Select from the following multi-GPU configurations:<br />
> Disable SLI<br />
Select this mode when you want to drive displays on each GPU.<br />
> Maximize 3D performance<br />
Select this mode when you want your graphics cards to work together<br />
to increase your rendering performance and image quality.<br />
4 Click Apply, then Yes on the Applications Shutdown Required window.
CONFIGURING HDMI<br />
05<br />
CONFIGURING HDMI<br />
Connecting your HDTV via HDMI allows you to<br />
output both digital audio and video from your<br />
graphics card to an HDTV.<br />
Enabling Audio Over HDMI<br />
If you are connecting to your display over HDMI, you may need to set<br />
the HDMI output to be your default audio device.<br />
In Windows 7, select Start Control Panel Sound.<br />
On the Playback tab, select your HDMI display and select<br />
Set Default.<br />
Congratulations! Your GeForce graphics card(s) is now ready to use!<br />
For detailed instructions on using the NVIDIA Control Panel, consult<br />
the Control Panel User’s Guide found on your Driver Installation CD.<br />
You can also download the latest Control Panel User’s Guide at<br />
www.nvidia.com/drivers (select your driver, then click on<br />
Documentation to download the User’s Guide).<br />
17
18<br />
05<br />
CONFIGURING HDMI
FEATURES<br />
06<br />
FEATURES<br />
> Microsoft ® DirectX ® 11 Support: DirectX 11 GPU with Shader<br />
Model 5.0 support designed for ultra high performance in the new<br />
API’s key graphics feature, GPU-accelerated tessellation.<br />
> NVIDIA ® 3D Vision Ready 1 : GeForce GPU support for NVIDIA 3D<br />
Vision, bringing a fully immersive stereoscopic 3D experience to<br />
the PC. A combination of high-tech wireless glasses and advanced<br />
software, 3D Vision transforms hundreds of PC games into full<br />
stereoscopic 3D. In addition, you can watch 3D movies and 3D<br />
digital photographs in eye popping, in crystal-clear quality.<br />
> NVIDIA ® Surround Ready 2 : Expand your games across three<br />
displays for the ultimate widescreen gaming experience with the<br />
power of NVIDIA SLI technology.<br />
> NVIDIA SLI ® Technology 3 : Industry leading NVIDIA SLI technology<br />
offers amazing performance scaling for the world’s premier<br />
gaming solution.<br />
> NVIDIA PhysX ® Technology: GeForce GPU support for NVIDIA<br />
PhysX technology, enabling a totally new class of physical gaming<br />
interaction for a more dynamic and realistic experience with<br />
GeForce.<br />
> NVIDIA CUDA Technology: CUDA technology unlocks the power<br />
of the GPU’s processor cores to accelerate the most demanding<br />
tasks such as video transcoding, physics simulation, ray tracing,<br />
and more, delivering incredible performance improvements over<br />
traditional CPUs.<br />
> 32x Anti-aliasing Technology: Lightning fast, high-quality antialiasing<br />
at up to 32x sample rates obliterates jagged edges.<br />
> NVIDIA PureVideo ® HD Technology 4 : The combination of high-<br />
19
20<br />
06<br />
FEATURES<br />
definition video decode acceleration and post-processing that<br />
delivers unprecedented picture clarity, smooth video, accurate<br />
color, and precise image scaling for movies and video.<br />
z Hardware Decode Acceleration: Provides ultra-smooth<br />
playback of H.264, VC-1, WMV, DivX, MPEG-2 and MPEG-4 HD<br />
and SD movies without the need for a dual or quad-core CPU.<br />
z Dual-stream Hardware Acceleration: Supports picture-inpicture<br />
content for the ultimate interactive blu-ray and HD<br />
DVD movie experience.<br />
z Dynamic Contrast Enhancement & Color Stretch: Dynamically<br />
provides post-processing and optimization of High Definition<br />
movies for spectacular picture clarity.<br />
z Dual-link HDCP Capable 5 : Designed to meet the output<br />
protection management (HDCP) and security specifications of<br />
the blu-ray Disc format, allowing the playback of encrypted<br />
movie content on PCs when connected to HDCP-compliant<br />
displays<br />
z Enhanced Error Resilience: Correct errors or losses in<br />
broadcast content to ensure crisp, high quality playback.<br />
z Advanced Spatial-Temporal De-Interlacing: Sharpens HD and<br />
standard definition interlaced content on progressive displays,<br />
delivering a crisp, clear picture that rivals high-end hometheater<br />
systems.<br />
z High-Quality Scaling: Enlarges lower resolution movies and<br />
videos to HDTV resolutions, while maintaining a clear, clean<br />
image. Also provides downscaling of videos, including highdefinition,<br />
while preserving image detail.<br />
z Inverse Telecine (3:2 & 2:2 Pulldown Correction): Recovers<br />
original film images from films-converted-to-video (DVDs,<br />
1080i HD content), providing more accurate movie playback<br />
and superior picture quality.<br />
z bad Edit Correction: When videos are edited, the edits can<br />
disrupt the normal 3:2 or 2:2 pulldown cadence. PureVideo<br />
uses advanced processing techniques to detect poor edits,<br />
recover the original content, and display perfect picture detail<br />
frame after frame for smooth, natural looking video.<br />
z Noise Reduction: Improves movie image quality by removing<br />
unwanted artifacts.<br />
z Edge Enhancement: Sharpens movie images by providing<br />
higher contrast around lines and objects.
FEATURES 21<br />
> PCI Express 2.0 Support : Designed for the new PCI Express 2.0<br />
bus architecture offering the highest data transfer speeds for<br />
the most bandwidth-hungry games and 3D applications, while<br />
maintaining backwards compatibility with existing PCI Express<br />
motherboards for the broadest support.<br />
> Dual-link DVI Support: Able to drive industry’s largest and highest<br />
resolution flat-panel displays up to 2560x1600 and with support<br />
for High-bandwidth Digital Content Protection (HDCP).<br />
> HDMI 1.4a Support 6 : Support for HDMI 1.4a including GPU<br />
accelerated blu-ray 3D support, x.v.Color, HDMI Deep Color, and<br />
7.1 digital surround sound.<br />
1. NVIDIA 3D Vision requires 3D Vision glasses and a 3D Vision-Ready monitor.<br />
See www.nvidia.com/3dvision for more information.<br />
2. NVIDIA Surround requires two or more graphics cards in NVIDIA SLI<br />
configuration. See www.nvidia.com/surround for more information.<br />
3. A GeForce <strong>GTX</strong> <strong>550</strong> <strong>Ti</strong> GPU must be paired with another GeForce <strong>GTX</strong> <strong>550</strong> <strong>Ti</strong> GPU<br />
(graphics card manufacturer can be different) with the same frame buffer size.<br />
SLI requires sufficient system cooling and a compatible power supply. Visit<br />
www.slizone.com for more information and a listing of SLI-Certified components.<br />
4. Supported video software is required to experience certain features.<br />
Visit www.nvidia.com for more details.<br />
5. Requires other HDCP-compatible components<br />
6. blu-ray 3D playback requires the purchase of a compatible software player from<br />
CyberLink, ArcSoft, Corel, or Sonic. Upgrade your GPU to full 3D capability with<br />
NVIDIA 3DTV Play software, enabling 3D gaming, picture viewing and 3D web<br />
video streaming. See www.nvidia com/3dtv for more details.
22<br />
06<br />
FEATURES
COMPLIANCES<br />
07<br />
COMPLIANCES<br />
> Australian Communications Authority (C-<strong>Ti</strong>ck), Class b<br />
> bureau of Standards, Metrology, and Inspection (bSMI), Class b<br />
> Conformité Européenne (CE), Class b<br />
> Federal Communications Commission (FCC) - Class b<br />
> Industry Canada (ICES-003), Class b<br />
> korean Communications Commission (kCC), Class b<br />
> Underwriters Laboratories (UL, cUL)<br />
> Voluntary Control Council for Interference (VCCI), Class b<br />
> ISO9247-307 VDT Ergonomics<br />
23
24<br />
07<br />
COMPLIANCES
COMPLIANCES 25<br />
Notice<br />
ALL NVIDIA DESIGN SPECIFICATIONS, REFERENCE bOARDS, FILES, DRAWINGS,<br />
DIAGNOSTICS, LISTS, AND OTHER DOCUMENTS (TOGETHER AND SEPARATELY,<br />
“MATERIALS”) ARE bEING PROVIDED “AS IS.” NVIDIA MAkES NO WARRANTIES,<br />
EXPRESSED, IMPLIED, STATUTORY, OR OTHERWISE WITH RESPECT TO THE<br />
MATERIALS, AND EXPRESSLY DISCLAIMS ALL IMPLIED WARRANTIES OF NON-<br />
INFRINGEMENT, MERCHANTAbILITY, AND FITNESS FOR A PARTICULAR PURPOSE.<br />
Information furnished is believed to be accurate and reliable. However, NVIDIA<br />
Corporation assumes no responsibility for the consequences of use of such<br />
information or for any infringement of patents or other rights of third parties that<br />
may result from its use. No license is granted by implication or otherwise under<br />
any patent or patent rights of NVIDIA Corporation. Specifications mentioned in this<br />
publication are subject to change without notice. This publication supersedes and<br />
replaces all information previously supplied. NVIDIA Corporation products are not<br />
authorized for use as critical components in life support devices or systems without<br />
express written approval of NVIDIA Corporation.<br />
FCC<br />
This equipment has been tested and found to comply with the limits for a Class<br />
b digital device, pursuant to Part 15 of the FCC Rules. These limits are designed<br />
to provide reasonable protection against harmful interference in a residential<br />
installation. This equipment generates, uses, and can radiate radio frequency<br />
energy and, if not installed and used in accordance with the instructions, may cause<br />
harmful interference to radio communications. However, there is no guarantee that<br />
interference will not occur in a particular installation.<br />
If this equipment does cause harmful interference to radio or television reception,<br />
which can be determined by turning the equipment off and on, the user is encouraged<br />
to try to correct the interference by one or more of the following measures:<br />
> Reorient or relocate the receiving antenna.<br />
> Increase the separation between the equipment and receiver.<br />
> Connect the equipment into an outlet on a circuit different from that to which<br />
the receiver is connected.<br />
> Consult the dealer or an experienced radio/TV technician for help.<br />
Trademarks<br />
NVIDIA, the NVIDIA logo, CUDA, GeForce, GigaThread, Lumenex, PureVideo, and<br />
PhysX Technology are trademarks or registered trademarks of NVIDIA Corporation.<br />
Other company product names may be trademarks of the respective companies with<br />
which they are associated.<br />
Copyright<br />
© 2011 NVIDIA Corporation. All rights reserved.
www.nvidia.com