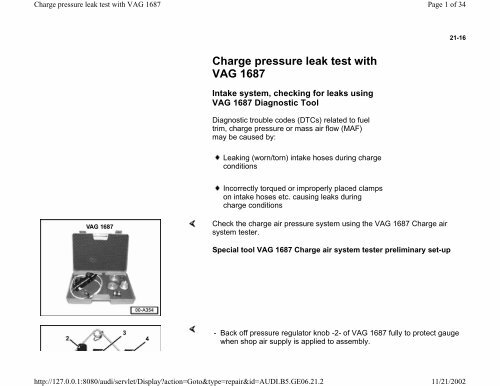
Charge pressure leak test with VAG 1687 - DJ Sures
Charge pressure leak test with VAG 1687 - DJ Sures
Charge pressure leak test with VAG 1687 - DJ Sures

You also want an ePaper? Increase the reach of your titles
YUMPU automatically turns print PDFs into web optimized ePapers that Google loves.
<strong>Charge</strong> <strong>pressure</strong> <strong>leak</strong> <strong>test</strong> <strong>with</strong> <strong>VAG</strong> <strong>1687</strong><br />
<strong>Charge</strong> <strong>pressure</strong> <strong>leak</strong> <strong>test</strong> <strong>with</strong><br />
<strong>VAG</strong> <strong>1687</strong><br />
Intake system, checking for <strong>leak</strong>s using<br />
<strong>VAG</strong> <strong>1687</strong> Diagnostic Tool<br />
Diagnostic trouble codes (DTCs) related to fuel<br />
trim, charge <strong>pressure</strong> or mass air flow (MAF)<br />
may be caused by:<br />
Leaking (worn/torn) intake hoses during charge<br />
conditions<br />
Incorrectly torqued or improperly placed clamps<br />
on intake hoses etc. causing <strong>leak</strong>s during<br />
charge conditions<br />
http://127.0.0.1:8080/audi/servlet/Display?action=Goto&type=repair&id=AUDI.B5.GE06.21.2<br />
Page 1 of 34<br />
Check the charge air <strong>pressure</strong> system using the <strong>VAG</strong> <strong>1687</strong> <strong>Charge</strong> air<br />
system <strong>test</strong>er.<br />
Special tool <strong>VAG</strong> <strong>1687</strong> <strong>Charge</strong> air system <strong>test</strong>er preliminary set-up<br />
- Back off <strong>pressure</strong> regulator knob -2- of <strong>VAG</strong> <strong>1687</strong> fully to protect gauge<br />
when shop air supply is applied to assembly.<br />
21-16<br />
11/21/2002
<strong>Charge</strong> <strong>pressure</strong> <strong>leak</strong> <strong>test</strong> <strong>with</strong> <strong>VAG</strong> <strong>1687</strong><br />
- Close valve -3- before gauge.<br />
- Close valve -4- after gauge.<br />
http://127.0.0.1:8080/audi/servlet/Display?action=Goto&type=repair&id=AUDI.B5.GE06.21.2<br />
The shop air supply line will later be attached to the inlet of <strong>VAG</strong> <strong>1687</strong>.<br />
- Remove female fitting from <strong>test</strong>er (arrow) and install an appropriate<br />
"male" air fitting that will connect to your shop air supply line (<br />
WARNING!).<br />
Page 2 of 34<br />
11/21/2002
<strong>Charge</strong> <strong>pressure</strong> <strong>leak</strong> <strong>test</strong> <strong>with</strong> <strong>VAG</strong> <strong>1687</strong><br />
WARNING!<br />
Use only approved air fittings to adapt shop<br />
air supply line to <strong>VAG</strong> <strong>1687</strong> <strong>test</strong>er.<br />
Special tool <strong>VAG</strong> <strong>1687</strong>/1 <strong>pressure</strong> adapter,<br />
installing (1.8L Turbo)<br />
- Separate intake hose from Mass Air Flow (MAF)<br />
sensor assembly.<br />
http://127.0.0.1:8080/audi/servlet/Display?action=Goto&type=repair&id=AUDI.B5.GE06.21.2<br />
- Insert <strong>VAG</strong> <strong>1687</strong>/1 <strong>pressure</strong> adapter in intake hose -black arrow- using<br />
existing clamp (as shown).<br />
- Remove crankcase ventilation tube from intake hose at -white arrow-.<br />
Special tool <strong>VAG</strong> <strong>1687</strong>/1 <strong>pressure</strong> adapter, installing (2.7L BiTurbo)<br />
- Remove upper air cleaner housing and hoses to intake manifold as<br />
necessary<br />
Repair Manual, Maintenance; Air cleaner housing, cleaning; Air cleaner<br />
element, replacing<br />
- Insert <strong>VAG</strong> <strong>1687</strong>/1 <strong>pressure</strong> adapter in intake hose -white arrow- using<br />
existing clamp (as shown).<br />
- Disconnect engine crankcase ventilation hose from intake manifold -<br />
black arrow-.<br />
- Plug intake manifold fitting (for crankcase ventilation hose) <strong>with</strong><br />
appropriate hose and metal plug using clamps supplied <strong>with</strong> <strong>VAG</strong><br />
Page 3 of 34<br />
21-17<br />
11/21/2002
<strong>Charge</strong> <strong>pressure</strong> <strong>leak</strong> <strong>test</strong> <strong>with</strong> <strong>VAG</strong> <strong>1687</strong><br />
<strong>1687</strong>/1 special tool kit.<br />
http://127.0.0.1:8080/audi/servlet/Display?action=Goto&type=repair&id=AUDI.B5.GE06.21.2<br />
Page 4 of 34<br />
11/21/2002
<strong>Charge</strong> <strong>pressure</strong> <strong>leak</strong> <strong>test</strong> <strong>with</strong> <strong>VAG</strong> <strong>1687</strong><br />
Note:<br />
To help find small <strong>leak</strong>s, BEFORE pressurizing<br />
the system fill system <strong>with</strong> smoke using special<br />
tool KLI9210 and adapter KLI9210/50 as<br />
described on Page 21-18 .<br />
An ultrasonic detector may also be used to<br />
detect extremely small <strong>leak</strong>s where smoke may<br />
not be visible.<br />
Special tool KLI9210 (Evaporative system<br />
<strong>leak</strong> detector), connecting to 1.8L Turbo<br />
- Install optional fitting LKI9210/50 on hose of<br />
special tool KLI9210.<br />
http://127.0.0.1:8080/audi/servlet/Display?action=Goto&type=repair&id=AUDI.B5.GE06.21.2<br />
- Connect KLI9210 to <strong>VAG</strong> <strong>1687</strong>/1 adapter (KLI9210 is shown attached<br />
to <strong>VAG</strong> <strong>1687</strong>/1 at arrow on 1.8L Turbo).<br />
Special tool KLI9210 (Evaporative system <strong>leak</strong> detector), connecting<br />
to 2.7L BiTurbo<br />
- Install optional fitting LKI9210/50 on hose of special tool KLI9210.<br />
Page 5 of 34<br />
- Connect KLI9210 to <strong>VAG</strong> <strong>1687</strong>/1 adapter (KLI9210 is shown attached<br />
21-18<br />
11/21/2002
<strong>Charge</strong> <strong>pressure</strong> <strong>leak</strong> <strong>test</strong> <strong>with</strong> <strong>VAG</strong> <strong>1687</strong><br />
to <strong>VAG</strong> <strong>1687</strong>/1 at arrow on 2.7L BiTurbo).<br />
http://127.0.0.1:8080/audi/servlet/Display?action=Goto&type=repair&id=AUDI.B5.GE06.21.2<br />
Page 6 of 34<br />
11/21/2002
<strong>Charge</strong> <strong>pressure</strong> <strong>leak</strong> <strong>test</strong> <strong>with</strong> <strong>VAG</strong> <strong>1687</strong><br />
Special tool LKI9210 (Evaporative system<br />
<strong>leak</strong> detector), preliminary set-up<br />
- Connect smoke generator leads to vehicle<br />
battery.<br />
- Turn valve to <strong>test</strong> -black arrow-.<br />
- Press smoke generator button to fill system <strong>with</strong> smoke (see<br />
instructions printed on <strong>test</strong>er).<br />
With system filled <strong>with</strong> smoke:<br />
- Remove smoke generator hose and connect <strong>VAG</strong><strong>1687</strong> quickly to<br />
prevent smoke from <strong>leak</strong>ing out Page 21-19 .<br />
Special tool <strong>VAG</strong> <strong>1687</strong>, connecting to <strong>pressure</strong> adapter <strong>VAG</strong> <strong>1687</strong>/1<br />
(1.8L Turbo)<br />
For illustrations purposes <strong>VAG</strong> is shown lying in the engine compartment.<br />
In practice the tool should be hung from the hood.<br />
- Connect <strong>VAG</strong> <strong>1687</strong> quickly to prevent smoke from <strong>leak</strong>ing out.<br />
<strong>VAG</strong> <strong>1687</strong> is shown connected to <strong>VAG</strong> <strong>1687</strong>/1 -black arrow-<br />
Shop air supply will be connected to <strong>VAG</strong> <strong>1687</strong> -at white arrow-<br />
- Perform <strong>pressure</strong> <strong>test</strong> Page 21-21 .<br />
http://127.0.0.1:8080/audi/servlet/Display?action=Goto&type=repair&id=AUDI.B5.GE06.21.2<br />
Page 7 of 34<br />
21-19<br />
11/21/2002
<strong>Charge</strong> <strong>pressure</strong> <strong>leak</strong> <strong>test</strong> <strong>with</strong> <strong>VAG</strong> <strong>1687</strong><br />
Special tool <strong>VAG</strong> <strong>1687</strong>, connecting to<br />
<strong>pressure</strong> adapter <strong>VAG</strong> <strong>1687</strong>/1 (2.7L BiTurbo)<br />
For illustrations purposes <strong>VAG</strong> is shown lying in<br />
the engine compartment. In practice the tool<br />
should be hung from the hood.<br />
- Connect <strong>VAG</strong> <strong>1687</strong> quickly to prevent smoke<br />
from <strong>leak</strong>ing out.<br />
<strong>VAG</strong> <strong>1687</strong> is shown connected to <strong>VAG</strong> <strong>1687</strong>/1 -black arrow-<br />
Shop air supply will be connected to <strong>VAG</strong> <strong>1687</strong> -at white arrow-<br />
- Perform <strong>pressure</strong> <strong>test</strong> Page 21-21 .<br />
http://127.0.0.1:8080/audi/servlet/Display?action=Goto&type=repair&id=AUDI.B5.GE06.21.2<br />
Page 8 of 34<br />
21-20<br />
11/21/2002
<strong>Charge</strong> <strong>pressure</strong> <strong>leak</strong> <strong>test</strong> <strong>with</strong> <strong>VAG</strong> <strong>1687</strong><br />
Performing <strong>pressure</strong> <strong>test</strong>:<br />
- With outlet hose -1- of <strong>VAG</strong> <strong>1687</strong> connected to air <strong>pressure</strong> adapter:<br />
- Attach shop air supply line to previously installed male fitting Page<br />
21-16 .<br />
- Open valve -3- between regulator valve and gauge.<br />
- Adjust <strong>test</strong> <strong>pressure</strong> up to 0.5 bar ( CAUTION below) by turning<br />
regulator valve -2-.<br />
CAUTION!<br />
DO NOT pressurize the system above 0.5 bar!<br />
Doing so may force oil into the intake system which can damage<br />
the engine.<br />
- Slowly open outlet valve -4- (after gauge) to <strong>test</strong> hose connections.<br />
- Observe <strong>pressure</strong> gauge for a drop in <strong>pressure</strong>.<br />
http://127.0.0.1:8080/audi/servlet/Display?action=Goto&type=repair&id=AUDI.B5.GE06.21.2<br />
Page 9 of 34<br />
21-21<br />
11/21/2002
<strong>Charge</strong> <strong>pressure</strong> <strong>leak</strong> <strong>test</strong> <strong>with</strong> <strong>VAG</strong> <strong>1687</strong><br />
Note:<br />
Some <strong>pressure</strong> will be lost past the throttle plate.<br />
- Readjust <strong>test</strong> <strong>pressure</strong> to 0.5 bar ( CAUTION<br />
above) by turning regulator valve -2-.<br />
- Listen for any very large intake <strong>leak</strong>s.<br />
If smoke generator was used to fill the system<br />
<strong>with</strong> smoke:<br />
- Inspect intake system connections for smoke at<br />
<strong>leak</strong>s.<br />
Note:<br />
An ultrasonic detector may also be used to<br />
detect extremely small <strong>leak</strong>s where smoke may<br />
not be visible.<br />
- Repair any <strong>leak</strong>s found.<br />
- Remove <strong>test</strong>er.<br />
- Remove plug from crankcase ventilation hose.<br />
- Remove air <strong>pressure</strong> adapter.<br />
http://127.0.0.1:8080/audi/servlet/Display?action=Goto&type=repair&id=AUDI.B5.GE06.21.2<br />
Page 10 of 34<br />
21-22<br />
11/21/2002
<strong>Charge</strong> <strong>pressure</strong> <strong>leak</strong> <strong>test</strong> <strong>with</strong> <strong>VAG</strong> <strong>1687</strong><br />
With VAS 5051 diagnostic tool connected:<br />
- Erase DTC memory.<br />
If smoke generator was not used to fill the<br />
system <strong>with</strong> smoke:<br />
- Apply soapy water solution or equivalent to<br />
intake system connections.<br />
http://127.0.0.1:8080/audi/servlet/Display?action=Goto&type=repair&id=AUDI.B5.GE06.21.2<br />
Page 11 of 34<br />
11/21/2002
<strong>Charge</strong> <strong>pressure</strong> <strong>leak</strong> <strong>test</strong> <strong>with</strong> <strong>VAG</strong> <strong>1687</strong><br />
Note:<br />
An ultrasonic detector may also be used to<br />
detect extremely small <strong>leak</strong>s.<br />
- Inspect intake system connections for <strong>leak</strong>s.<br />
- Repair any <strong>leak</strong>s found.<br />
- Remove <strong>test</strong>er.<br />
- Remove plug from crankcase ventilation hose.<br />
- Remove air <strong>pressure</strong> adapter.<br />
With VAS 5051 diagnostic tool connected:<br />
- Erase DTC memory.<br />
http://127.0.0.1:8080/audi/servlet/Display?action=Goto&type=repair&id=AUDI.B5.GE06.21.2<br />
Page 12 of 34<br />
21-23<br />
11/21/2002
<strong>Charge</strong> <strong>pressure</strong> <strong>leak</strong> <strong>test</strong> <strong>with</strong> <strong>VAG</strong> <strong>1687</strong><br />
Mechanical air recirculation valve,<br />
checking<br />
Note:<br />
The mechanical air recirculation valve is<br />
upstream of the exhaust turbocharger. It is<br />
opened via vacuum by the recirculating valve<br />
for turbocharger -N249- under conditions of<br />
overrun, idling and partial load. This reduces<br />
the charge <strong>pressure</strong> upstream of the throttle<br />
valve. A high turbocharger speed is thus<br />
maintained.<br />
Check the air recirculation valve if the engine is<br />
not producing full power, or jerking when the<br />
throttle is opened and closed.<br />
Special tools and equipment<br />
Hand vacuum pump <strong>VAG</strong> 1390<br />
http://127.0.0.1:8080/audi/servlet/Display?action=Goto&type=repair&id=AUDI.B5.GE06.21.2<br />
Page 13 of 34<br />
21-24<br />
11/21/2002
<strong>Charge</strong> <strong>pressure</strong> <strong>leak</strong> <strong>test</strong> <strong>with</strong> <strong>VAG</strong> <strong>1687</strong><br />
Test sequence<br />
- Attach vacuum pump <strong>VAG</strong> 1390 to air recirculation valve.<br />
- Actuate hand vacuum pump.<br />
Air recirculation valve should open -arrow-<br />
- Operate air vent valve on vacuum pump after about 30 seconds.<br />
Air recirculation valve should close -arrow-<br />
http://127.0.0.1:8080/audi/servlet/Display?action=Goto&type=repair&id=AUDI.B5.GE06.21.2<br />
Page 14 of 34<br />
If the air recirculation valve does not open and close as specified, or if the<br />
valve plate does not seal properly when the valve is closed:<br />
- Replace air recirculation valve and attach hose connections <strong>with</strong> hose<br />
clamps.<br />
21-25<br />
11/21/2002
<strong>Charge</strong> <strong>pressure</strong> <strong>leak</strong> <strong>test</strong> <strong>with</strong> <strong>VAG</strong> <strong>1687</strong><br />
Recirculating valve for turbocharger -<br />
N249-, checking<br />
Special tools and equipment<br />
<strong>VAG</strong> 1526 A<br />
<strong>VAG</strong> 1527 B<br />
<strong>VAG</strong> 1594 A<br />
<strong>VAG</strong> 1598/31<br />
http://127.0.0.1:8080/audi/servlet/Display?action=Goto&type=repair&id=AUDI.B5.GE06.21.2<br />
- or<br />
VAS 5051 <strong>with</strong> VAS 5051/1<br />
<strong>VAG</strong> 1551 <strong>with</strong> <strong>VAG</strong> 1551/3 A<br />
Page 15 of 34<br />
21-26<br />
11/21/2002
<strong>Charge</strong> <strong>pressure</strong> <strong>leak</strong> <strong>test</strong> <strong>with</strong> <strong>VAG</strong> <strong>1687</strong><br />
Test requirements:<br />
Vehicle diagnostic, <strong>test</strong>ing and information<br />
system VAS 5051 or <strong>VAG</strong> 1551 Scan Tool<br />
connected.<br />
Test sequence<br />
Note:<br />
The recirculating valve for turbocharger -N249-<br />
and the wiring connections are monitored by the<br />
engine control module.<br />
- Read Diagnostic Trouble Code (DTC) memory<br />
of engine control module.<br />
If a DTC relating to the recirculating valve for<br />
turbocharger -N249- is displayed:<br />
- Remove hoses of recirculating valve for turbocharger -N249- (-1-). The<br />
electrical connector remains plugged in.<br />
Note:<br />
Location: below intake line<br />
The illustration shows bottom view of removed intake line.<br />
http://127.0.0.1:8080/audi/servlet/Display?action=Goto&type=repair&id=AUDI.B5.GE06.21.2<br />
Page 16 of 34<br />
21-27<br />
11/21/2002
<strong>Charge</strong> <strong>pressure</strong> <strong>leak</strong> <strong>test</strong> <strong>with</strong> <strong>VAG</strong> <strong>1687</strong><br />
Output Diagnostic Test Mode<br />
Recircul. valve for turbocharger -N249-<br />
- Connect auxiliary hose to valve connector marked <strong>with</strong> an arrow.<br />
- Initiate output Diagnostic Test Mode (DTM) and activate recirculating<br />
valve for turbocharger -N249-.<br />
Display:<br />
The valve should click ...<br />
... and must open and close (check by blowing into the auxiliary<br />
hose).<br />
If the injector does not click:<br />
- Check internal resistance of valve.<br />
If valve does not open or close properly:<br />
- Replace recirculation valve for turbocharger -N249-.<br />
http://127.0.0.1:8080/audi/servlet/Display?action=Goto&type=repair&id=AUDI.B5.GE06.21.2<br />
Page 17 of 34<br />
21-28<br />
11/21/2002
<strong>Charge</strong> <strong>pressure</strong> <strong>leak</strong> <strong>test</strong> <strong>with</strong> <strong>VAG</strong> <strong>1687</strong><br />
Checking internal resistance<br />
- Disconnect connector from recirculation valve for turbocharger -N249-<br />
(-1-).<br />
- Connect multimeter to injector to measure resistance.<br />
Specified value: 27 to 30<br />
If specified value is not attained:<br />
- Replace recirculating valve for turbocharger -N249-.<br />
If specified value is attained:<br />
- Check power supply.<br />
http://127.0.0.1:8080/audi/servlet/Display?action=Goto&type=repair&id=AUDI.B5.GE06.21.2<br />
Page 18 of 34<br />
21-29<br />
11/21/2002
<strong>Charge</strong> <strong>pressure</strong> <strong>leak</strong> <strong>test</strong> <strong>with</strong> <strong>VAG</strong> <strong>1687</strong><br />
Checking power supply<br />
Note:<br />
The power supply for the recirculating valve is via<br />
the fuel pump relay.<br />
Test requirements:<br />
Fuse for recirculating valve OK.<br />
Electrical Wiring Diagrams, Troubleshooting &<br />
Component Locations binder<br />
Fuel pump relay OK.<br />
Repair Manual, 1.8 Liter 4-Cyl. 5V Turbo Fuel<br />
Injection & Ignition, Engine Code(s): AWM,<br />
Repair Group 24<br />
- Disconnect wiring connector from valve.<br />
- Connect voltage <strong>test</strong>er <strong>VAG</strong> 1527 B as follows:<br />
Connector Measure to<br />
http://127.0.0.1:8080/audi/servlet/Display?action=Goto&type=repair&id=AUDI.B5.GE06.21.2<br />
Page 19 of 34<br />
21-30<br />
11/21/2002
<strong>Charge</strong> <strong>pressure</strong> <strong>leak</strong> <strong>test</strong> <strong>with</strong> <strong>VAG</strong> <strong>1687</strong><br />
contact<br />
1 Engine Ground<br />
- Operate starter briefly.<br />
The LED must light up.<br />
http://127.0.0.1:8080/audi/servlet/Display?action=Goto&type=repair&id=AUDI.B5.GE06.21.2<br />
Page 20 of 34<br />
11/21/2002
<strong>Charge</strong> <strong>pressure</strong> <strong>leak</strong> <strong>test</strong> <strong>with</strong> <strong>VAG</strong> <strong>1687</strong><br />
If the LED does not light up:<br />
- Check wiring from contact 1 on connector via<br />
fuse to fuel pump relay for an open circuit:<br />
Electrical Wiring Diagrams, Troubleshooting &<br />
Component Locations binder<br />
- Repair open circuit, if necessary.<br />
If the LED lights up:<br />
- Check actuation.<br />
Checking actuation<br />
- Connect voltage <strong>test</strong>er <strong>VAG</strong> 1527 B to contacts 1 (positive) and 2 of<br />
connector.<br />
- Initiate output Diagnostic Test Mode (DTM) and activate recirculatiing<br />
valve for turbocharger -N249-.<br />
The LED must flash.<br />
http://127.0.0.1:8080/audi/servlet/Display?action=Goto&type=repair&id=AUDI.B5.GE06.21.2<br />
Page 21 of 34<br />
21-31<br />
11/21/2002
<strong>Charge</strong> <strong>pressure</strong> <strong>leak</strong> <strong>test</strong> <strong>with</strong> <strong>VAG</strong> <strong>1687</strong><br />
If the LED lamp does not flash or if it lights up<br />
continuously:<br />
- Connect <strong>VAG</strong> 1598/31 <strong>test</strong> box to wiring<br />
harness leading to engine control module;<br />
engine control module should not be connected:<br />
Repair Manual, 1.8 Liter 4-Cyl. 5V Turbo Fuel<br />
Injection & Ignition, Engine Code(s): AWM,<br />
Repair Group 24<br />
- Check for open circuit and short to positive or Ground in following<br />
wiring connection:<br />
Connector<br />
Contact<br />
If the wiring is OK:<br />
Test box <strong>VAG</strong> 1598/31<br />
2 105<br />
- Repair any open/short circuit as necessary.<br />
- Replace engine control module.<br />
http://127.0.0.1:8080/audi/servlet/Display?action=Goto&type=repair&id=AUDI.B5.GE06.21.2<br />
Page 22 of 34<br />
21-32<br />
11/21/2002
<strong>Charge</strong> <strong>pressure</strong> <strong>leak</strong> <strong>test</strong> <strong>with</strong> <strong>VAG</strong> <strong>1687</strong><br />
Wastegate Bypass Regulator valve -N75-,<br />
checking<br />
Special tools and equipment<br />
<strong>VAG</strong> 1526 A<br />
<strong>VAG</strong> 1527 B<br />
<strong>VAG</strong> 1594 A<br />
<strong>VAG</strong> 1598/31<br />
http://127.0.0.1:8080/audi/servlet/Display?action=Goto&type=repair&id=AUDI.B5.GE06.21.2<br />
- or<br />
VAS 5051 <strong>with</strong> VAS 5051/1<br />
<strong>VAG</strong> 1551 <strong>with</strong> <strong>VAG</strong> 1551/3 A<br />
Page 23 of 34<br />
21-33<br />
11/21/2002
<strong>Charge</strong> <strong>pressure</strong> <strong>leak</strong> <strong>test</strong> <strong>with</strong> <strong>VAG</strong> <strong>1687</strong><br />
Test requirements:<br />
Vehicle diagnostic, <strong>test</strong>ing and information<br />
system VAS 5051 or <strong>VAG</strong> 1551 Scan Tool<br />
connected.<br />
Test sequence<br />
Note:<br />
The Wastegate Bypass Regulator valve -N75-<br />
and the wiring connections are monitored by the<br />
engine control module.<br />
- Read Diagnostic Trouble Code (DTC) memory<br />
of engine control module.<br />
If a DTC relating to the Wastegate Bypass<br />
Regulator valve -N75 is displayed:<br />
- Disconnect hoses from valve but leave electrical<br />
connector attached.<br />
http://127.0.0.1:8080/audi/servlet/Display?action=Goto&type=repair&id=AUDI.B5.GE06.21.2<br />
- Connect auxiliary hose to valve connector marked <strong>with</strong> an arrow.<br />
- Initiate output Diagnostic Test Mode (DTM) and actuate Wastegate<br />
Bypass Regulator valve -N75-.<br />
Page 24 of 34<br />
21-34<br />
11/21/2002
<strong>Charge</strong> <strong>pressure</strong> <strong>leak</strong> <strong>test</strong> <strong>with</strong> <strong>VAG</strong> <strong>1687</strong><br />
Output Diagnostic Test Mode<br />
-N75- wastegate bypass regulator valve<br />
Display<br />
The valve must click ...<br />
... and must open and close (check by blowing into the auxiliary<br />
hose).<br />
If the injector does not click:<br />
- Check internal resistance of valve.<br />
If valve does not open or close properly:<br />
- Replace Wastegate Bypass Regulator valve -N75-.<br />
Checking internal resistance<br />
- Disconnect connector from valve.<br />
- Connect multimeter to injector to measure resistance.<br />
Specified value: 25 to 35<br />
If specified value is not attained:<br />
- Replace Wastegate Bypass Regulator valve -N75-.<br />
If specified value is attained:<br />
- Check power supply.<br />
http://127.0.0.1:8080/audi/servlet/Display?action=Goto&type=repair&id=AUDI.B5.GE06.21.2<br />
Page 25 of 34<br />
21-35<br />
11/21/2002
<strong>Charge</strong> <strong>pressure</strong> <strong>leak</strong> <strong>test</strong> <strong>with</strong> <strong>VAG</strong> <strong>1687</strong><br />
Checking power supply<br />
Test requirements:<br />
Fuse for wastegate bypass regulator valve<br />
OK<br />
Electrical Wiring Diagrams, Troubleshooting &<br />
Component Locations binder<br />
Fuel pump relay OK.<br />
Repair Manual, 1.8 Liter 4-Cyl. 5V Turbo Fuel<br />
Injection & Ignition, Engine Code(s): AWM,<br />
Repair Group 24<br />
- Connect voltage <strong>test</strong>er <strong>VAG</strong> 1527 B as follows:<br />
Connector<br />
contact<br />
Measure to<br />
1 Engine Ground<br />
- Operate starter briefly.<br />
LED must light up.<br />
http://127.0.0.1:8080/audi/servlet/Display?action=Goto&type=repair&id=AUDI.B5.GE06.21.2<br />
Page 26 of 34<br />
21-36<br />
11/21/2002
<strong>Charge</strong> <strong>pressure</strong> <strong>leak</strong> <strong>test</strong> <strong>with</strong> <strong>VAG</strong> <strong>1687</strong><br />
Output Diagnostic Test Mode Display<br />
If the LED does not light up:<br />
- Check wiring from contact 1 on connector via<br />
fuse to fuel pump relay for open circuit:<br />
Electrical Wiring Diagrams, Troubleshooting &<br />
Component Locations binder<br />
- Repair open circuit, if necessary<br />
If the LED lights up:<br />
- Check actuation.<br />
Checking actuation<br />
http://127.0.0.1:8080/audi/servlet/Display?action=Goto&type=repair&id=AUDI.B5.GE06.21.2<br />
- Connect voltage <strong>test</strong>er <strong>VAG</strong> 1527 B to contacts 1 (positive) and 2 of<br />
connector.<br />
- Initiate output Diagnostic Test Mode (DTM) and actuate Wastegate<br />
Bypass Regulator valve -N75-.<br />
Page 27 of 34<br />
21-37<br />
11/21/2002
<strong>Charge</strong> <strong>pressure</strong> <strong>leak</strong> <strong>test</strong> <strong>with</strong> <strong>VAG</strong> <strong>1687</strong><br />
-N75- wastegate bypass regulator valve<br />
LED must flash.<br />
http://127.0.0.1:8080/audi/servlet/Display?action=Goto&type=repair&id=AUDI.B5.GE06.21.2<br />
Page 28 of 34<br />
11/21/2002
<strong>Charge</strong> <strong>pressure</strong> <strong>leak</strong> <strong>test</strong> <strong>with</strong> <strong>VAG</strong> <strong>1687</strong><br />
If the LED lamp does not flash or if it lights up<br />
continuously:<br />
- Connect <strong>VAG</strong> 1598/31 <strong>test</strong> box to wiring<br />
harness leading to engine control module;<br />
engine control module should not be connected:<br />
Repair Manual, 1.8 Liter 4-Cyl. 5V Turbo Fuel<br />
Injection & Ignition, Engine Code(s): AWM,<br />
Repair Group 24<br />
- Check for open circuit and short to positive or Ground in following<br />
wiring connection:<br />
Connector<br />
Contact<br />
If the wiring is OK:<br />
Test box <strong>VAG</strong> 1598/31<br />
2 104<br />
- Repair any open/short circuit as necessary.<br />
- Replace engine control module.<br />
http://127.0.0.1:8080/audi/servlet/Display?action=Goto&type=repair&id=AUDI.B5.GE06.21.2<br />
Page 29 of 34<br />
21-38<br />
11/21/2002
<strong>Charge</strong> <strong>pressure</strong> <strong>leak</strong> <strong>test</strong> <strong>with</strong> <strong>VAG</strong> <strong>1687</strong><br />
<strong>Charge</strong> Air Pressure sensor -G31-,<br />
checking<br />
Special tools and equipment<br />
<strong>VAG</strong> 1526 A<br />
<strong>VAG</strong> 1594 A<br />
<strong>VAG</strong> 1598/31<br />
http://127.0.0.1:8080/audi/servlet/Display?action=Goto&type=repair&id=AUDI.B5.GE06.21.2<br />
- or<br />
VAS 5051 <strong>with</strong> VAS 5051/1<br />
<strong>VAG</strong> 1551 <strong>with</strong> <strong>VAG</strong> 1551/3 A<br />
Page 30 of 34<br />
21-39<br />
11/21/2002
<strong>Charge</strong> <strong>pressure</strong> <strong>leak</strong> <strong>test</strong> <strong>with</strong> <strong>VAG</strong> <strong>1687</strong><br />
Test requirements:<br />
Vehicle diagnostic, <strong>test</strong>ing and information<br />
system VAS 5051 or <strong>VAG</strong> 1551Scan Tool<br />
connected.<br />
Test sequence<br />
Note:<br />
The <strong>Charge</strong> Air Pressure sensor -G31- and the<br />
wiring connections are monitored by the engine<br />
control module.<br />
- Read Diagnostic Trouble Code (DTC) memory<br />
of engine control module.<br />
If a DTC relating to the <strong>Charge</strong> Air Pressure<br />
sensor -G31- is displayed:<br />
Checking power supply<br />
- Disconnect connector -arrow- on charge <strong>pressure</strong> sender.<br />
http://127.0.0.1:8080/audi/servlet/Display?action=Goto&type=repair&id=AUDI.B5.GE06.21.2<br />
Page 31 of 34<br />
21-40<br />
11/21/2002
<strong>Charge</strong> <strong>pressure</strong> <strong>leak</strong> <strong>test</strong> <strong>with</strong> <strong>VAG</strong> <strong>1687</strong><br />
- Connect multimeter between contacts 1 and 3 of connector to measure<br />
voltage.<br />
- Switch ignition on.<br />
Specified value: approx. 5 V<br />
If specified value is not attained:<br />
http://127.0.0.1:8080/audi/servlet/Display?action=Goto&type=repair&id=AUDI.B5.GE06.21.2<br />
- Connect <strong>VAG</strong> 1598/31 <strong>test</strong> box to wiring harness leading to engine<br />
control module; engine control module must also be connected.<br />
Repair Manual, 1.8 Liter 4-Cyl. 5V Turbo Fuel Injection & Ignition,<br />
Engine Code(s): AWM, Repair Group 24<br />
Page 32 of 34<br />
21-41<br />
11/21/2002
<strong>Charge</strong> <strong>pressure</strong> <strong>leak</strong> <strong>test</strong> <strong>with</strong> <strong>VAG</strong> <strong>1687</strong><br />
- Check for open circuit and short to positive or Ground in following<br />
wiring connections:<br />
Connector<br />
contact<br />
1 108<br />
3 98<br />
If specified value is attained:<br />
Checking signal wire<br />
Test box <strong>VAG</strong> 1598/31<br />
- Repair any open/short circuit as necessary.<br />
- Attach connector from charge air <strong>pressure</strong> sensor.<br />
- Attach multimeter for voltage <strong>test</strong> to socket 101 and socket 108 of <strong>test</strong><br />
box.<br />
- Start engine and run at idling speed.<br />
Specified value: approx. 1.90 V<br />
- Bring engine to speed by spontaneous acceleration.<br />
Specified value: 2.00...3.00 V<br />
http://127.0.0.1:8080/audi/servlet/Display?action=Goto&type=repair&id=AUDI.B5.GE06.21.2<br />
Page 33 of 34<br />
21-42<br />
11/21/2002
<strong>Charge</strong> <strong>pressure</strong> <strong>leak</strong> <strong>test</strong> <strong>with</strong> <strong>VAG</strong> <strong>1687</strong><br />
If specified values are not attained:<br />
- Check for open circuit and short to positive or Ground in following<br />
wiring connection:<br />
Connector<br />
contact<br />
4 101<br />
If the wiring is OK:<br />
Test box <strong>VAG</strong> 1598/31<br />
- Repair any open/short circuit as necessary.<br />
- Replace <strong>Charge</strong> Air Pressure sensor -G31-.<br />
http://127.0.0.1:8080/audi/servlet/Display?action=Goto&type=repair&id=AUDI.B5.GE06.21.2<br />
Page 34 of 34<br />
21-43<br />
11/21/2002