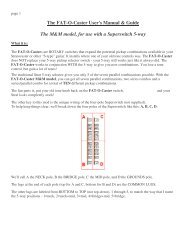
The Memphis Mods: The FAT-Cat - Deaf Eddie
The Memphis Mods: The FAT-Cat - Deaf Eddie
The Memphis Mods: The FAT-Cat - Deaf Eddie

Create successful ePaper yourself
Turn your PDF publications into a flip-book with our unique Google optimized e-Paper software.
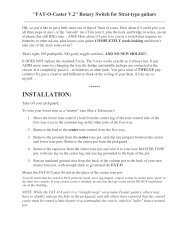
<strong>FAT</strong>-O-Caster Rotary Switch for Strat-type guitars<br />
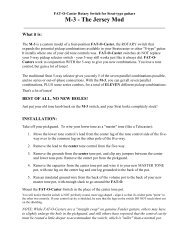
<strong>The</strong> <strong>Memphis</strong> <strong>Mods</strong>: <strong>The</strong> <strong>FAT</strong>-<strong>Cat</strong><br />
Suggested by Tom “Tomcat” Whisenhunt<br />
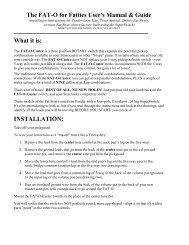
What it is:<br />
<strong>The</strong> <strong>FAT</strong>-<strong>Cat</strong> is a custom model of the <strong>FAT</strong>-O-Caster, the ROTARY switch that expand the<br />
potential pickup combinations available in your Stratocaster or other "S-type" guitar. It installs<br />
where one of your old tone controls was. <strong>FAT</strong>-O-Caster switches do NOT replace your 5-way<br />
pickup selector switch - your 5-way still works just like it always did. <strong>FAT</strong>-O-Casters work in<br />
conjunction WITH the 5-way to give you new combinations. You lose a tone control, but gain a lot<br />
of tones!<br />
<strong>The</strong> traditional Strat 5-way selector gives you only 5 of the seven parallel combinations possible,<br />
and no series connections. With the <strong>FAT</strong>-<strong>Cat</strong>, you can get all seven possible parallel combinations,<br />
PLUS some series combos, for a total of ELEVEN different pickup combinations. Yes, this one<br />
goes to eleven!<br />
That's a lot of tones!<br />
BEST OF ALL, NO NEW HOLES!<br />
Just put your old tone knob back on the <strong>FAT</strong>-<strong>Cat</strong> switch, and your Strat looks completely stock!<br />
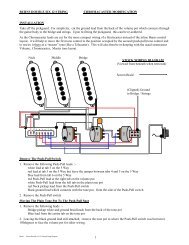
Your stock Strat is wired like this:<br />
Look at your guitar and identify all the leads you see here. Ready? Go…
INSTALLATION:<br />
Remove the center tone control:<br />
Take off your pickguard. Wire your lower tone as a "master" tone (like a Telecaster):<br />
1. Move the lower tone control’s lead from the center lug of the tone control side of the five-way<br />
over to the common lug on the other pole of the five-way. Do NOT remove the jumper between<br />
the common lugs. If this is a “new build,” be sure that you add that jumper.<br />
2. Remove the lead to the center tone control from the five-way.<br />
3. Remove the grounds from the center tone pot, and clip any jumpers between the center and<br />
lower tone pots. Remove the center pot from the pickguard.<br />
4. Remove the capacitor from the center tone pot and wire it to your new MASTER TONE pot,<br />
with one leg on the center lug and one leg grounded to the back of the pot.<br />
5. Run an insulated ground wire from the back of the volume pot to the back of your new master<br />
tone pot, with enough slack to go around the <strong>FAT</strong>-O.<br />
Mount the <strong>FAT</strong>-O-Caster Switch in the place of the center tone pot.<br />
DO NOT OVERTIGHTEN THE MOUNTING NUT!<br />
You will notice that the switch is NOT perfectly round, more egg-shaped - align it so that it's<br />
widest parts "point" to the other two controls. If your control cavity is shielded, be sure that the<br />
lugs on the switch DO NOT touch/short out on the shielding.<br />
NOTE: While <strong>FAT</strong>-O-Casters are a "straight swap" on genuine Fender guitars, others may have to<br />
slightly enlarge the hole in the pickguard, and still others have reported that the control cavity must<br />
be routed a little deeper to accommodate the switch, which is "deeper" than a normal pot.
Connecting your pickups to the <strong>FAT</strong>-<strong>Cat</strong> Switch:<br />
Unsolder the bridge pup’s negative (aka “ground”) lead from where it is currently in your guitar<br />
(typically on the back of the volume pot) and solder it to the center lug on the <strong>FAT</strong>-O with the<br />
STRING TIED THROUGH IT (cut the string off!).<br />
Unsolder the mid pup’s negative (aka “ground”) lead from where it is currently in your guitar<br />
(typically on the back of the volume pot) and solder it to the next center lug on the <strong>FAT</strong>-O,<br />
CLOCKWISE.<br />
NOTE: Sometimes there is not enough wire on the ground lead to make it to the <strong>FAT</strong>-O, so just add on a little "tail" to<br />
the lead to get there. Be sure you insulate the solder joint on this "tail" to prevent contact with the pots or any other<br />
grounded surface in the control cavity – black electrical tape will do…<br />
Three-wire pups? MOST COMMONLY, two of the three leads are twisted together and soldered to ground. You will<br />
have to determine which wire of the two that goes to ground is actually the coil’s “-“ lead, and which is the<br />
ground/shield drain. <strong>The</strong> easiest way to do this is to unsolder them from ground and separate them. With a multimeter<br />
set in the 20k ohm range, touch one probe to the pickup’s “+” lead, and then try the other probe on each of the other<br />
leads. <strong>The</strong> pickup’s “-“ lead should show you the impedance reading for the pickup – typically between 6k and 8k for<br />
a Strat. <strong>The</strong> ground/shield lead will show “open” – no resistance, no continuity. Solder the ground/shield lead back to<br />
ground, and solder the pup’s “-“ lead to the switch as instructed above.<br />
Wiring the <strong>FAT</strong>-O’s pre-wired leads:<br />
<strong>The</strong> RED lead is soldered to the 5-way switch. It goes on the lug that would be the bridge lug of<br />
the second pole of the selector switch (the side used to connect the tone pots - see drawing).<br />
<strong>The</strong> GREEN lead is added to the middle pup’s lug on the 5-way<br />
<strong>The</strong> BLACK lead is added to the neck pup’s lug on the 5-way.<br />
<strong>The</strong> bare wire is soldered to (any) ground.<br />
Put your pickguard back on, and you're ready to rip!
Wuzzit do?<br />
Well, for starters, you now can select from 11 different pickup combinations!<br />
Yes, some of the tones are repeated - but that's what makes this thing so darn easy to use…<br />
So, WHAT are the new tones, and WHERE are they?<br />
I like to count the settings this way: the <strong>FAT</strong>-O-Caster switch has “notches” we'll call 1, 2, 3 and 4,<br />
numbered as you turn the switch COUNTER-CLOCKWISE. So, if it was a tone control on “10”,<br />
you would be at notch 1. As you turn the control “down,” like from ten to, say, seven, you go<br />
through the notches 1 through 4. Remember that even though you have the <strong>FAT</strong>-<strong>Cat</strong> installed, the<br />
5-way still controls the pickups – think of it as having FOUR different selectable bridge pups!<br />
Here's what to expect from the 5-way at each <strong>FAT</strong>-<strong>Cat</strong> notch:<br />
Notch 1 (“tone knob” on “10”) is just normal Strat tones.<br />
El Stock-O…<br />
NOTE: As a reference for the rest of these instructions:<br />
Throws on the 5-way: 1=neck, 2=middle and neck, 3=middle, 4=middle and bridge, 5=bridge<br />
Notch 2 (“tone knob” on “9”) is the "NECK on with BRIDGE" setting –<br />
the neck pup is ALSO routed to the bridge end of the 5-way switch.<br />
<strong>The</strong> combos are all wired parallel.<br />
As you throw the 5-way in this setting, you get (from 1 to 5):<br />
1 = neck<br />
2 = neck and middle<br />
3 = middle<br />
4 = bridge, middle, and neck<br />
5 = bridge and neck<br />
<strong>The</strong>re now, isn't that what you've always said you wanted your Strat to be able to do?<br />
Notch 3 (“tone knob” on “8”) is the “SERIES with Neck" setting.<br />
In 1, and 2 it's neck only.<br />
In 3, you have mid in series with neck<br />
In 4, you have (mid parallel to bridge) in series with the neck<br />
In 5, you get bridge in series with neck<br />
Notch 4 (“tone knob” on “7”) is the "All Three SERIES" setting.<br />
In 1 and 2, it's neck only.<br />
In 3 and 4, you get mid in series with neck.<br />
In 5, you get the all three pups in series - YIKES!
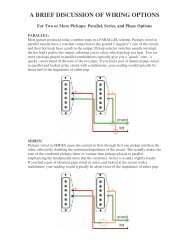
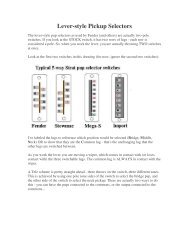
A few other common 5-ways:<br />
Import “in-line” style:<br />
<strong>The</strong> “non-CRL” from Stewmac and others:<br />
<strong>The</strong> Mega–S switch’s lugs are in a completely different configuration: